Assembly Instructions (Recommended, you can do in any order you wish)
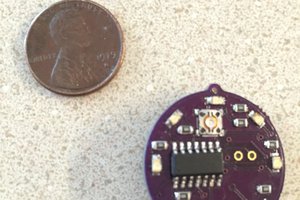
Front: Has a white sawblade
Back: Has outlines of parts and a robot that says AW YEA
- Insert the brass pin through the front of the board, solder from the back of the board.
- Set the battery holder over the area that says BAT1, matching the outline on the board with the shape of the part.
- Use a third hand, a pair of pliers, or something to hold the battery holder in place.
- Solder one of the sides to the large square pad. After soldering one side, solder the other side.
- The center square pad under the battery holder does not need solder. It fits very tight and the battery makes good contact without doing that.
- Place the switch in the holes labelled S1.
- You will put this on the back of the board and solder from the front. It is tricky to flip the board upside down and keep the switch in. You can use long pliers instead of your fingers. You can also hold the switch in with one finger, and slide the board off your finger and onto the edge of your work surface.
- Solder all 3 pins of the switch from the back.
- Next is the LED, which has a long pin and a short pin.
- Note the plastic part of the LED has a flat on one side by the short pin - this is your negative pin, and will go in the round hole from the LED in the center of the board.
- Insert the LED from the front and flip the board over. Bend the pins apart so the LED is "locked" in place and can't fall out while you solder it.
- Use a third hand or something heavy to keep the badge in place.
- Solder the two pins.
- Clip the pins just above where you soldered. Hold on to the top of them so they don't go flying!
- Insert the battery + side up and watch it light up!
- Poke the pin through whatever garment you want to attach it to and attach the pinback to cover the pokey end!

 evgeny.zislis
 Steph
Steph
 Nick Sayer
 MaBe42