Bernhard "HotKey" Slawik
-
CP/M encore!
08/24/2023 at 16:49 • 0 commentsDuring the summer break I have completely re-written CP/M for VTech Genius Leader computers!
The procedure is now simpler (better documentation, better Python based build system, better emulation options) and compatibility is much improved (ZORK1-3 and BBCBASIC work perfectly)
So check it out at my VGLDK Github at https://github.com/hotkeymuc/vgldk/tree/master/examples/cpm
A great next step now would be to create a combined ROM+RAM cartridge for a low entry barrier for any enthusiastic VTech fan. Or... maybe even a Tindie campaign for a complete self-contained "VTech CP/M Cartridge"...? What do you think?

CP/M running on a Genius Leader 4000 (MAME emulation) -
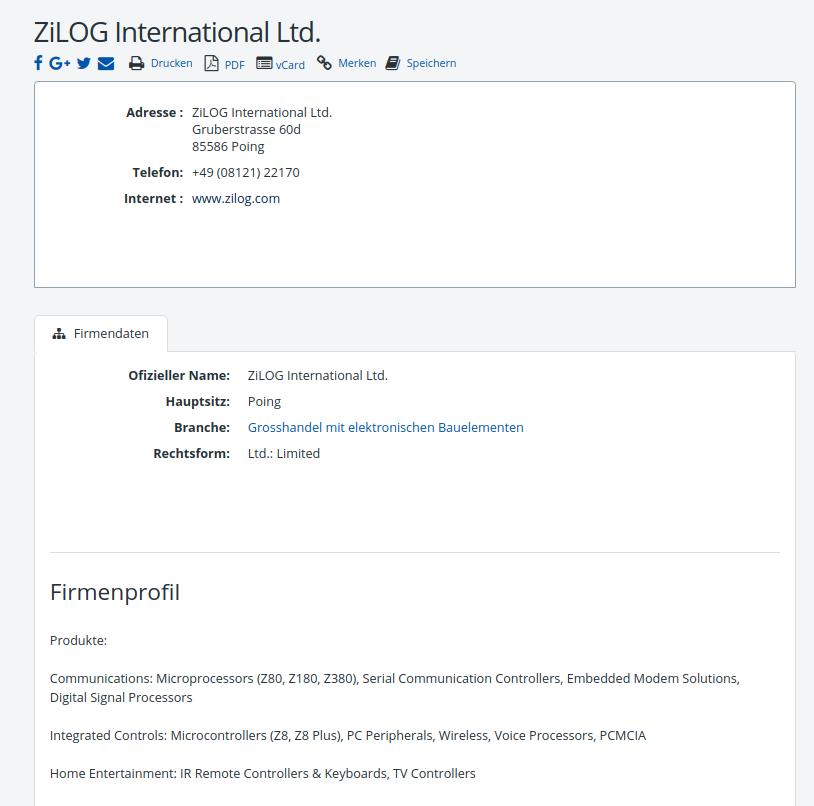
Factoid: Guess where ZiLOG is located...
10/08/2020 at 17:43 • 0 commentsWhile skimming through the local business register I stumbled upon the entry "ZiLOG International Ltd."...
![]()
ZiLOG —the Californian company that created the Z80 processor used in all the VTechs— is now part of Littelfuse and IXYS which in turn is c/o AVNET (big electronics distributor) which is literally around the corner of my house!
But so far I seem to be the only Z80 nerd around here (that I know of).
🌈 *The more you know!* 🌠
-
But does it run Doom?
09/30/2020 at 22:43 • 0 commentswell... sort of... ;-)

Crappy Raycaster Demo running on an emulated GL6000SL ...and if you don't have a graphical LCD:

Raycaster in 20x4 text mode There is also no game logic whatsoever, tho. Just a proof of concept.
Check it out at https://github.com/hotkeymuc/vgldk/tree/master/examples/raycast
-
ParallelBuddy: DIY periphery add-on for everyone!
09/06/2020 at 21:31 • 3 commentsI've been using the past months to get a new focus for the project.
Hardware hacking is fine and dandy, but the practical use for the "average Joe/Jane" is quite limited. After all, manufacturing PCBs, sourcing 74-series logic and debugging everything is not for the faint of heart.
So I came up with a new goal: Lowering the entry bar for anyone trying to run own code on an old V-Tech computer. That means: allowing unmodified C programs to just work on the VTech without hassle. Just "make" to compile, "make emu" to simulate and "make burn" to burn a finished EEPROM.
There is no easy way of sticking your own EEPROM into the computer, yet. For now you have to "sacrifice" a working cartridge and properly attach your own EEPROM to it. But it's very doable.

Custom EEPROM attached to a stock ROM cartridge using a piece of proto board and a ZIF socket After having done this, you should be able to simply compile, test, burn and run your code on a 2000, 4000 or 6000 series V-Tech computer. This is already working fine using the latest version of the VGLDK.
So far, so good. But then what?
It would be soooo nice to have just a little bit more periphery to play with, like "real files", network, LEDs etc.
Following the same direction as my older "BusFicker" cartridge, I thought of the simplest way to extend the periphery by using just an Arduino. This time, instead of doctoring around with the Z80 bus, I re-visited my "Software Serial" code, completely re-wrote it in C and optimized the crap out of it. Not only is the new "Software UART" smaller than its assembly predecessor (C optimization ftw), it can even handle serial speeds of up to 19200 baud now!
Throw in an Arduino, an SD card and some wires and —voilá— say hello to the Parallel Buddy!

Just connect 3 wires from the printer port to an Arduino for a world of endless possibilities! What can it do? Well, I'm glad you asked☺In theory it can do whatever an Arduino can do. But to keep things neat and extendable, I opted to create the concept of file systems and mounts inside the VGLDK. So with the usual "fopen()" syntax, you can now access files baked into your ROM as well as accessing any remote file system mounted on the ParallelBuddy Arduino (the Arduino sketch actually uses the same source code for its own local file system).
So: Connect the Arduino, fire up the "monitor" ROM, "cd" into the ParallelBuddy mount, and from there into the SD card or anything else you decide to put in. Your monitor can simply "cat" or "run" files directly from there! "fopen()" doesn't know the difference! ☺

Running a program from an SD card connected to an Arduino. There are actually 4 different file system drivers in action to allow this. I also added a rudimentary Ethernet file system through the use of a standard Ethernet shield. Just fopen("/pb/eth/google.com") and you're golden!
Be warned that the ParallelBuddy code is quite big, so you'll have to disable some other functionality to make the monitor program fit a standard 8KB / 64 Kb EEPROM. The makefile will warn you if you run out of space.
Oh, uploading files from a computer to the monitor still works as before: After power-up the ParallelBuddy Arduino sketch will stay in "bootloader mode" for some seconds, simply passing all data between the VTech and your computer, before switching over to "ParallelBuddy mode". So you can also use the Arduino as a USB-serial converter.
So: Head over to the VGLDK GitHub and give it a try! You'll find the Arduino sketch "VTechParallelBuddy.zip" inside the "tools" folder.
Cheeeeeers!
-
Prestige!
05/16/2020 at 21:35 • 1 commentThe other day, I decided to do something "completely different" for a change. So I went to my wall of VTech Genius Notebooks and grabbed a random one from the pile that had the same cartridge port as the 4000, but a larger screen.
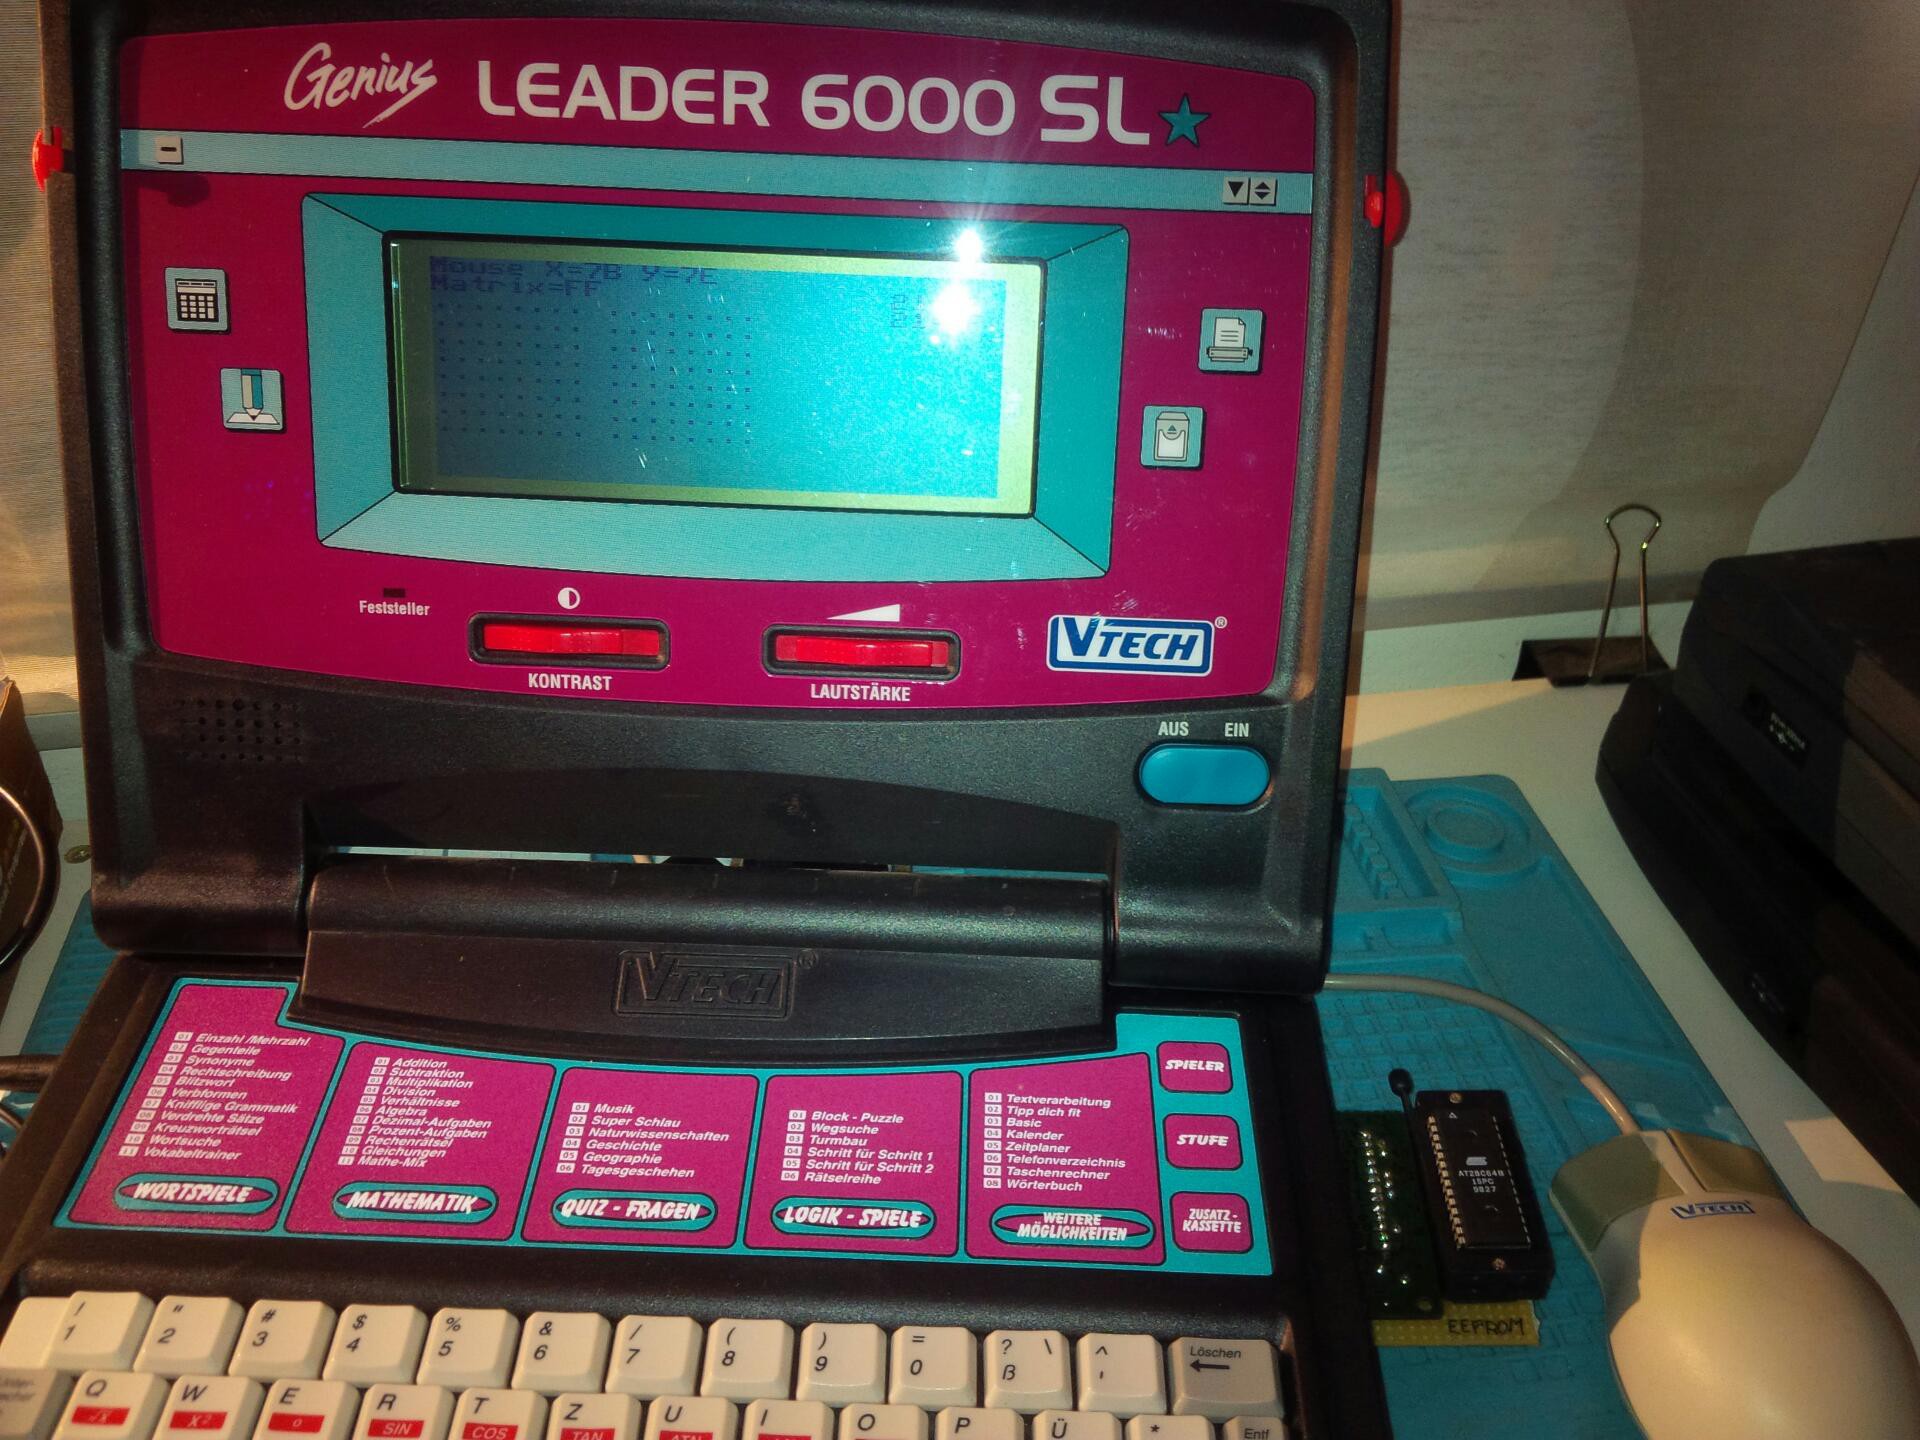
My pick: the Genius Leader 6000SL aka. Genius PreComputer Prestige.
This time around I wanted to cheat a bit, since I didn't want to spend another 2 years analyzing it (as I did with the 1000/2000/4000 series). Instead of building a debugging cartridge and finding all the memory and port mappings myself, I just searched for some emulation source. And I found a driver in the trusty old MAME repository (src/mame/drivers/prestige.cpp). It is missing some functions (printer port, sound), but the basic stuff is there.
First thing that sparked my interest: The machine seemed to use a DMA based LCD (240x100, graphical), so there is no need for weird LCD initialization code and software frame buffer stuff. It's as simple as poking bitmap data into memory at 0xE000-0xEBB8 and it gets drawn on the screen automagically!
The keyboard is also pretty straight forward (matrix at ports 0x40, 0x41, 0x42) and didn't take much effort to get working. And even the mouse (yes, it has an external mouse!) is directly mapped to ports 0x04 and 0x05 for the X and Y positions. Nice!
I must say, I am quite impressed about how much easier it is to work with the 6000 compared to the 1000/2000 and 4000 series. It took just one day to write my first "Hello World" from scratch (including custom font rendering). I would call that an "instant gratification" :-)
![]()
The bank switching / memory mapping in the Prestige is also quite nice: It allows for the cartridge to be mapped to lower memory at address 0x0000. This means that a CP/M style system could run on that machine without any hardware modifications (i.e. no "Chip Select hack" needed)!
So maybe I'll just give it a try and create a Plug & Play CP/M cartridge for that machine!
Stay healthy!
Update: I have updated the VGLDK Github repository to allow compilation against the new "gl6000sl" target. Cheers!
-
VGLDK
01/24/2020 at 22:46 • 0 commentsJust a little status update:
With CP/M working as a proof-of-concept, an important personal milestone has been reached.
While doing so, a lot of new interesting ideas came up. That's why I am now spending a little time incorporating all the development so far into a VTech Genius LEADER Development Kit - the VGLDK.
Even though I would very much appreciate it, if the VGL support for the Z88DK would improve, I feel like it is a little bit too over-engineered and complicated for the rather "simple things" I try to accomplish. Those being: Enabling everyone to develop software for the system quickly and hassle free.
So I created a Github repo at https://github.com/hotkeymuc/vgldk and started filling it with some initial content. My current focus lies on smooth portability between the 1000, 2000 and 4000 series. (Series 3000, 5000, 6000, 7000 and 8000 may follow eventually.) Additionally, the build process must allow compiling programs for use in a cartridge ROM, as system replacement ROMs, and also for runtime-linking (e.g. when using CP/M or some sort of DOS). I might also migrate the VGL CP/M project right into the VGLDK.
-
"You are standing in an open field..."
12/02/2019 at 22:22 • 3 commentsI had the feeling that I was going around in circles: Adjusting some assembly code, compiling, burning an EEPROM, inserting it, bootstrapping the RAM cartridge for CP/M, switching from ROM to RAM, booting CP/M, loading a .COM-file over serial, running it, ... and crashing.
This became very tiresome quickly, as you can imagine.
"Emulation to the rescue!", I thought. So I took a deep dive into the MAME source code and patched the PC2000 emulator: I changed the memory banks to be write enabled to simulate the RAM-switching hardware mod needed for running CP/M. I also added a debug port that allows sending and receiving data to/from MAME via stdin/stdout.
That worked like a breeze. Now it's only one click to compile and pack the CP/M ROM, fire up MAME, load CP/M and open a data channel between the emulated CP/M machine and a python "host" script. This really speeds up the process of loading and altering code for debugging. I also added a TRAP function to BDOS, which allows stopping the program flow at a desired address, dumping registers+stack, and continuing with the execution.
Having these tools at hand, I quickly identified a bank-switching bug and an error when reading records from files.
I crossed my fingers, uploaded "ZORK1" to the emulated CP/M and gave it a try...
...it opened the "ZORK1.DAT" file...
...read some records...
...then some more...
...and even more...
...and more...
...until finally:

ZORK - On a VTech Genius Leader 4000 running CP/M inside MAME Yeeeeha! I've never felt better, standing in an open field on a cold night like this :-D
Don't get too excited, yet, because I immediately ran into the next 2-3 bugs with the keyboard handler. So it is not really playable at the moment. But this has been a really big milestone.Update: It's usable!
A little fix in memory layout here, a change in keyboard layout there and...

ZORK on a toy computer, anyone? Christmas may come! :-)
-
>RUN
11/15/2019 at 12:07 • 3 commentsYesterday night I pulled out my oscilloscope and tweaked the timings used by the software serial implementation. I noticed some bits getting lost and tracked it down to the "edge delay" used to sync up with the start bit.
Now data transmission is much more reliable than before. Nonetheless, it is recommended to employ a protocol with checksums and re-transmit to ensure binary proof data transmission.
So, what should we do with it?
Maybe... allow the CP/M BDOS to load files via serial from a computer?
>python bdos_companion.py /dev/ttyUSB0 ZORK1.COM
Ready.
...and then on the Genius Leader 4000:
32K VGL CP/M 0.0.4
2019-11-14 by HotKey

>SERIALLOAD
LOADING...
OK

>RUN

ZORK starts up! I think we need to implement proper virtual disk access next! Oooooooohhhhh!
I think we're on-track to playing ZORK during the holidays! :-)
-
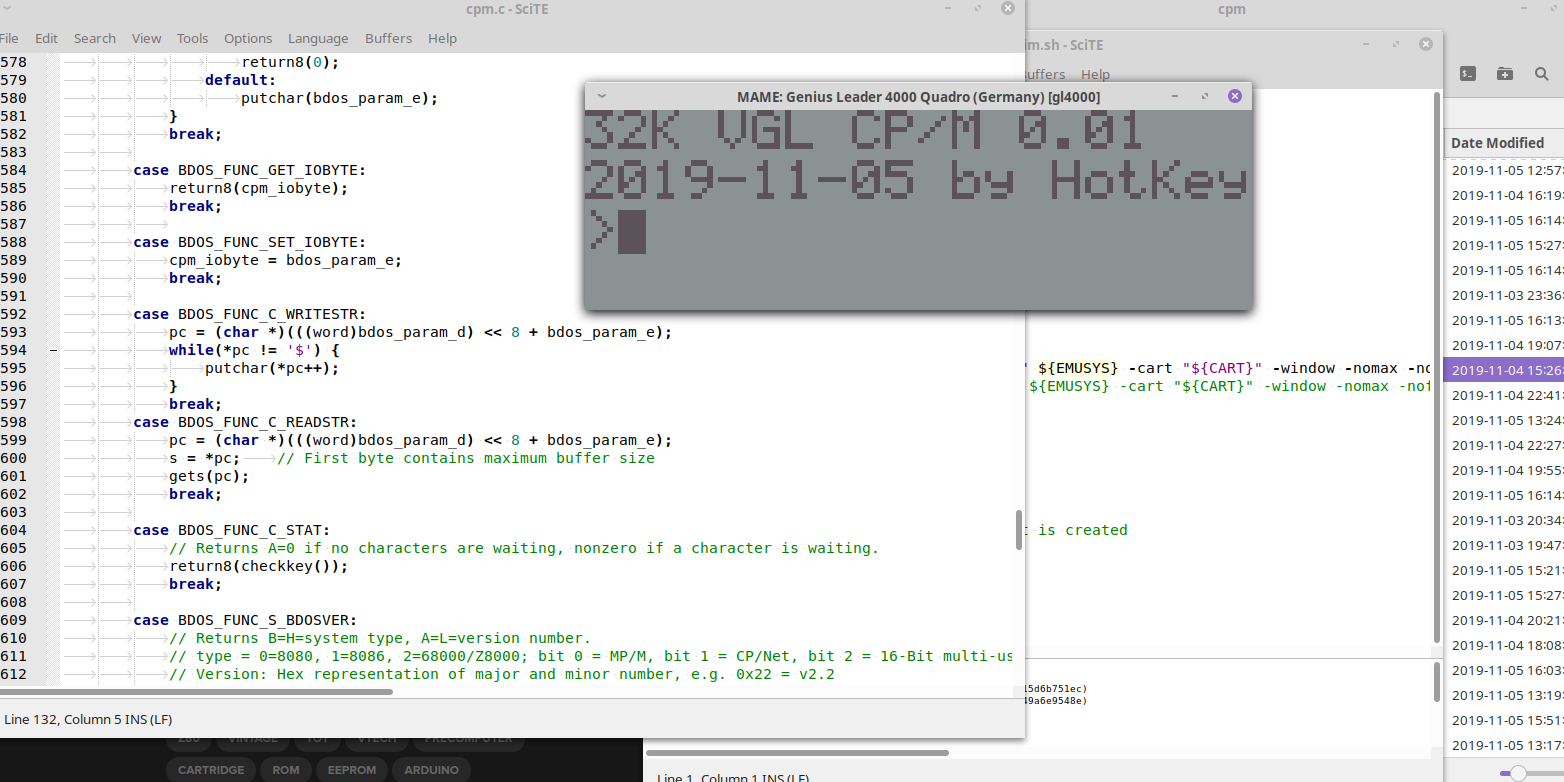
CP/M on V-Tech Genius Leader 4000: It... works!!!
11/05/2019 at 15:26 • 0 commentsThis is worth another project log...
![]()
Since I got "boot from RAM" working yesterday, I eagerly started implementing the basic BIOS/BDOS functions of CP/M 2.2. No disk access, yet, but just the standard console input/output and housekeeping functions.
Fortunately, CP/M is well documented and there aren't actually that many functions that need to be implemented for a basic system.
So, I fixed my broken LCD DDRAM mapping and optimized the keyboard handler a little and added the most important CP/M BDOS functions.
Then I took a small .COM file (SYSGEN), placed it into RAM and jumped to it...

Houston, we have a code execution! I was greeted by the program banner! It works!
That was really unexpectedly simple! The next 1-2 weeks will be used to implement a simple file system and all the necessary open/close/read/write functions, so we all can play ZORK before the year is over! :-)
Stay tuned!
-
CP/M on VGL: Issues and Solutions (Updated!)
11/04/2019 at 10:46 • 1 commentMost of the inner workings of the V-Tech Genius Leader / PreComputer have been discovered. Even some lesser known functionality, which is hidden inside a proprietary silicon, is understood. Especially, how the LCD, the keyboard matrix, printer port and most of bank switching works.
Now for the philosophical question: What should we do with it?
When talking to people, most of them agree that getting an own operating system to work is priority 1. But on which OS to focus on is not fully clear. Personally, I would prefer CP/M, since it is the Z80 operating system with the most impact and support.
There are two problems with CP/M on this "toy hardware":
- CP/M requires a disk drive. The V-Tech computers don't have one. But since we do have a cartridge port and proof-of-concept memory-mapped I/O, as well as a working serial port, getting some sort of SD card reader or serial storage medium to work should not be a big problem. In the meantime we can use bank-switched ROM/PROMS/SRAM or load software from the serial port (already working!)
- CP/M requires RAM to start at memory address 0x0000, since this is how CP/M programs interface with the BIOS/BDOS drivers. See: http://www.primrosebank.net/computers/cpm/cpm_structure.htm
The latter problem is a bit more tricky. See, on power-up the Z80 CPU jumps to address 0x0000 and starts executing the instructions located there. That's why there is a big system ROM located at that address.
Bank switching the system ROM
After thinking long and hard, I decided to leave the "non-invasive" route and add a little hardware modification to my beloved Genius Leader 4000 Quadro. I opened it up and put wires to the "Chip Select" lines of the ROM, the RAM and the cartridge port. Fortunately, these 3 lines are conveniently located on one corner of the PCB (near the cartridge port) and each go through a wire bridge. It is really simple to cut these bridges and add some wires, so they can be connected/disconnected at will:

"Chip Select break out" connector (upper right) allows disconnecting the internal ROM at will. A simple "Bus Doubler" (bottom) allows inserting two cartridges at once. You'll see why. On its own, this is not a very helpful mod :)
But now you can insert a ROM cartridge and use a different "Chip Select" pin (the new "internal ROM ~CS" instead of the default "cartridge ~CS" on Pin 35). A slight modification in your code (segment now needs to be 0x0000 instead of 0x8000) and your external ROM cartridge can now act as the internal system ROM! That means: Now we have a full 32kB of additional address space without de-soldering the internal ROM!
But be aware that the internal system ROM also contains crucial hardware initialization functions which now need to be done in our own ROM. This includes the LCD initialization sequence, resetting all the MUXes and bank switchers and -most importantly- reacting to interrupts and polling the keyboard matrix.
My current implementation works fine in the MAME gl4000 emulator, but still has some issues with the LCD (one line is not showing - using a non-standard DDRAM mapping) and the keyboard is not working reliably. This still needs some more research to get right. But enough to continue with some more experiments...
Booting from RAM
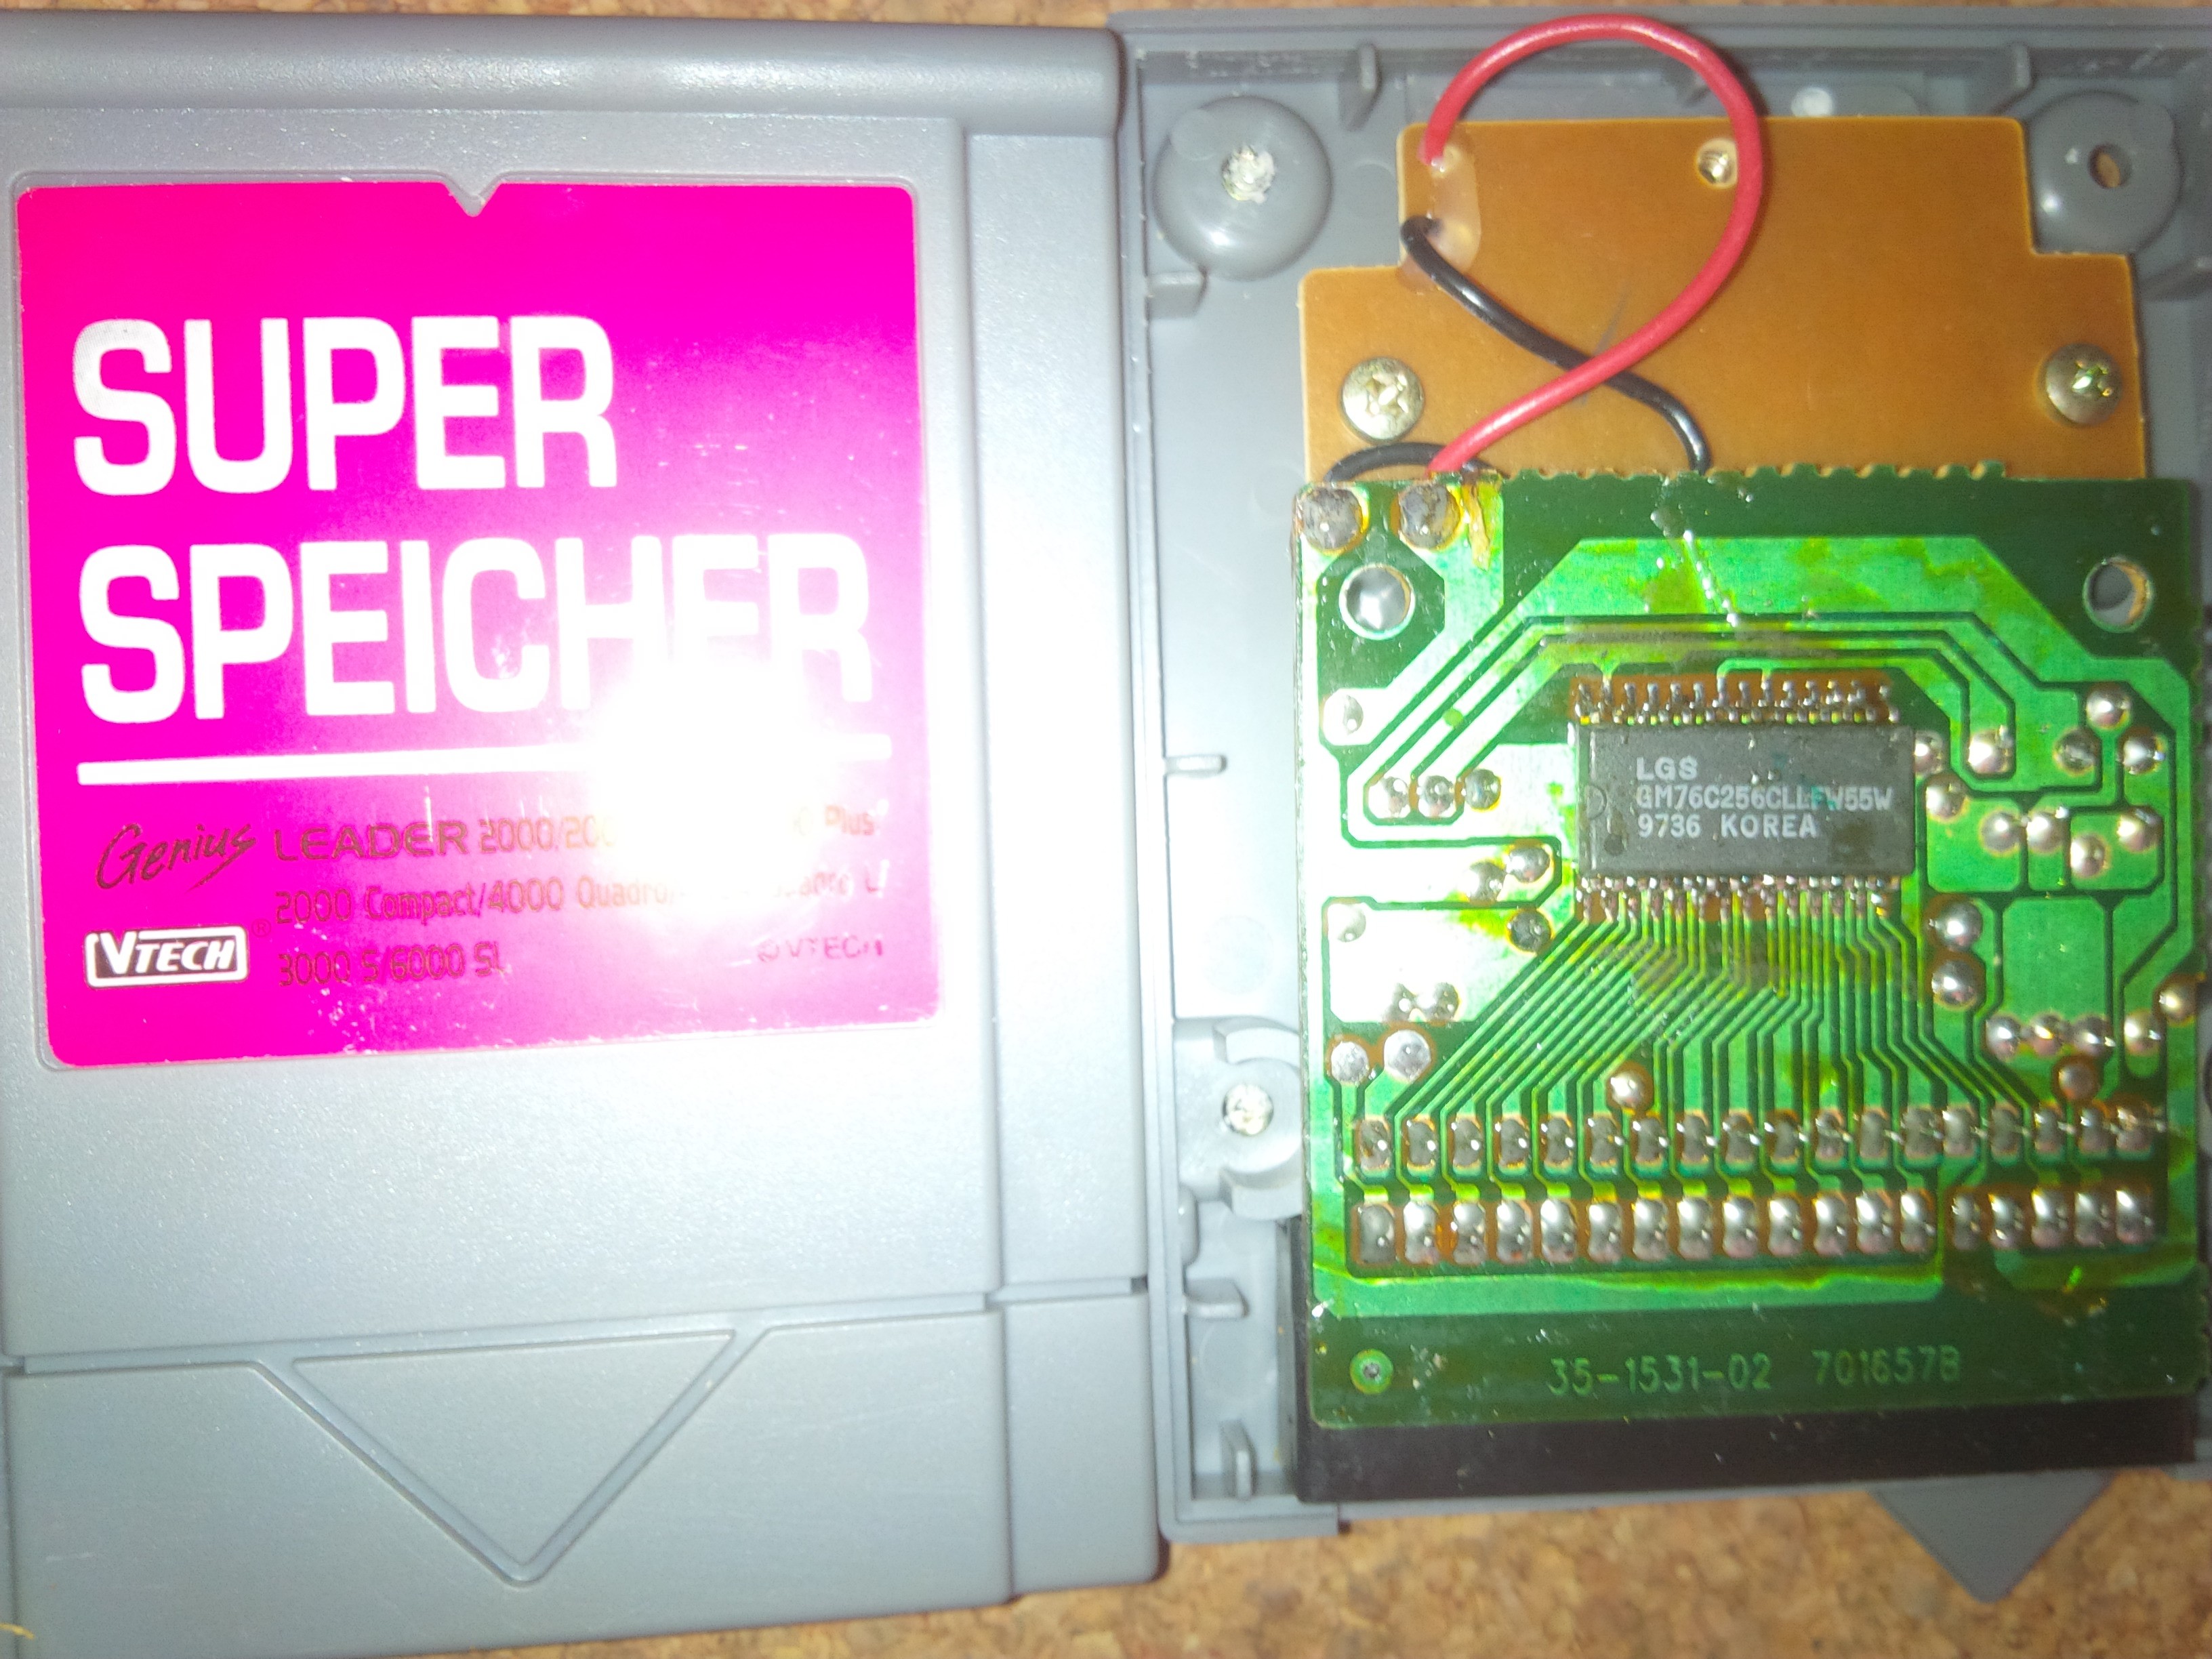
But now for the really tricky part: As I said, CP/M needs RAM to be at 0x0000. But since RAM is -usually- volatile, we can not simply solder in a SRAM IC and call it a day. It won't boot, since it is empty.
My current idea is to use the battery backed SRAM cartridge VTech Super Speicher 32KB for that. It contains a 32 kilobyte SRAM IC, as well as a coin cell battery and a few transistors (to invert signals and switch from internal to external power).
![]()
![]()
It should be possible to boot from a custom system ROM (mapped to 0x0000) while having the SRAM connected to the cartridge slot (mapped to 0x8000). Then, prepare/bootstrap the RAM contents to contain the initial jump instructions. When this is done, ROM and SRAM would "swap places" (remember, the "Super Speicher" is battery backed and won't lose its contents) and the system should now be forced to "boot from RAM".
At least that's the theory.

Bus Doubler in action: ROM at 0x0000, RAM at 0x8000 I tried it yesterday in the late, late evening. And while the initial bootstrapping of the SRAM worked, the system did not boot from SRAM once I swapped it in as "system ROM". The screen just went weird (reset loop?) It seems like there is still some interrupt or timing issue... But I won't give up just yet!
Also, creating the ROM image is not trivial, since it needs to contain code segments that are compiled for the 0x0000 segment, as well as code that is run, once it is mapped to the cartridge port at 0x8000. The current build tool chain now contains some calls to "dd" to extract and merge parts of different binary images. Stuff you shouldn't be doing on a Sunday night at 2am...
Do you have any better ideas to get CP/M running? (e.g. re-locating programs to use 0x8000 instead of 0x0000?) Let me know!
Update: It flippin' works!

Booting from RAM: YES IT CAN! I can't believe it: I just fiddled around with the initialization sequence a bit more and... HEUREKA! IT BOOTS FROM SRAM!
Of course, this is not a real CP/M system, yet. But I had to give it a name anyway, so I just went straight for it. "Aim high!", they say ;-)
So: This solves the main issue of getting CP/M up and running: Booting from address 0x0000. I am pretty sure, we will find an even more elegant solution of disabling the internal system ROM (using the "A17" and "A18" lines? Or using the software controlled CAPSLOCK LED for it?). But soldering 2 wires to well-accessible parts of the PCB is already quite easy to pull off.
And suddenly, there is the biggest question yet:
When will it play the original ZORK?
Soon, I hope! Will we master it in 2019? For the holidays? Let's find out together!
V-Tech Genius Leader / PreComputer Hacking
Turning a toy into a hardware tinkering platform