 Fred Murphy
-
1Step 1
AAAARRRRRGGGGHHH! There's a confirmed but with editing project instructions that affects reordering. I've spent hours trying to get them straight and complete. I'll update once the bug is fixed, but for now you'll have to pretend you're watching Memento...
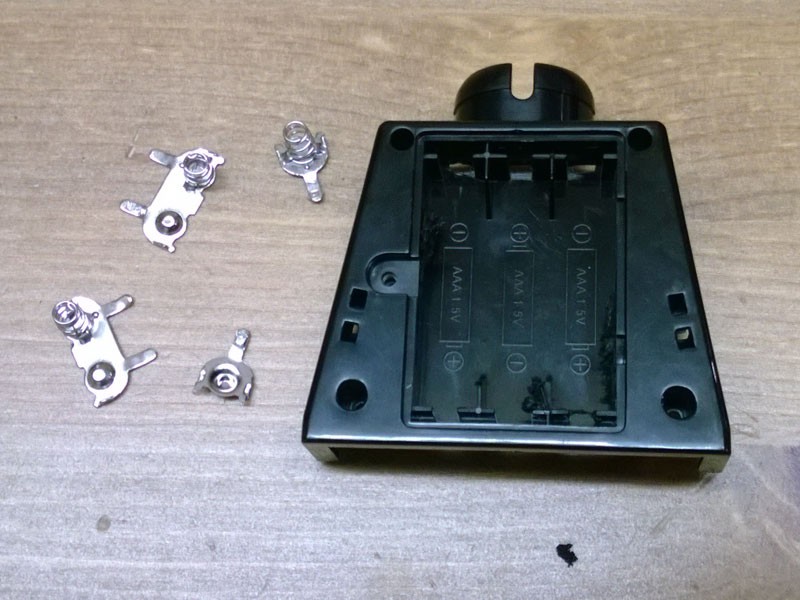
Remove the battery cover and batteries. Remove Darth Vader's head, open up his chest and get out the bone saw... Sorry - I mean Dremel. We need to make room for a servo in there, so that battery box has to go. Leave enough so the cover can still be reattached.
![]()
![]()
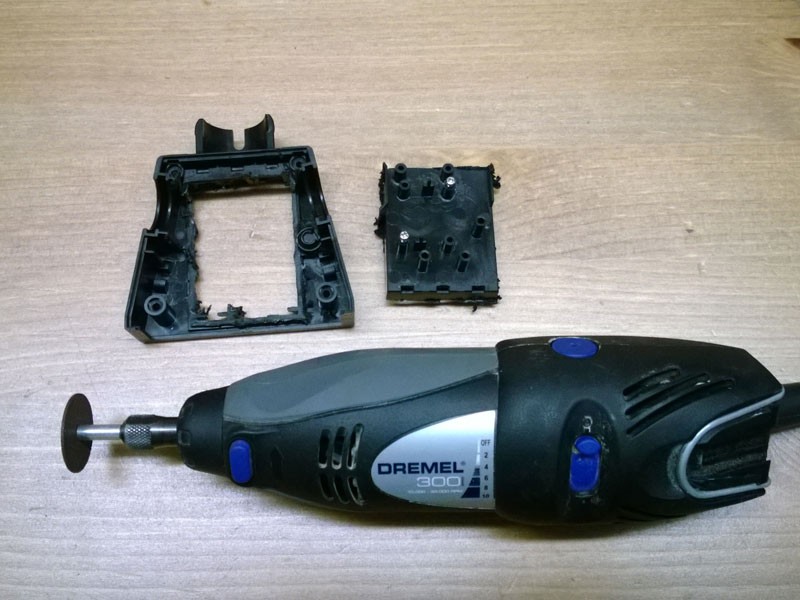
We also need to modify the front. I has a button to operate the torch. Remove the PCB containing the switch and glus the button back in place to cover the hole in his chest. Dremel away any bits that are in the way of the servo - namely the clips on the switch and the bits getting in the way of connecting the servo to his shoulder.
![]() From the outside, Darth still looks as handsome as ever. But inside, he's had some major work done.
From the outside, Darth still looks as handsome as ever. But inside, he's had some major work done. -
2Step 2
I just have to test as we go along and make sure things are working as expected. Some simple pin toggling to control the colours in the LED. (Don't forget those current limiting resistors.)
-
3Step 3
Once you have your servo in place and a nice 4-pin connector on the end of your LEDs, Darth Vader can be reassembled and you'd never know he'd changed inside.
In the photo I've also laser cut a nice plate for him to stand on. It has 2 circles of acrylic glued to it and he attaches just like Lego stuff does - a push fit. Note that he still has a white LED in each foot. I haven't connected these, but of course you could. These could flash to get your attention, etc. Just add another connector here.
![]()
-
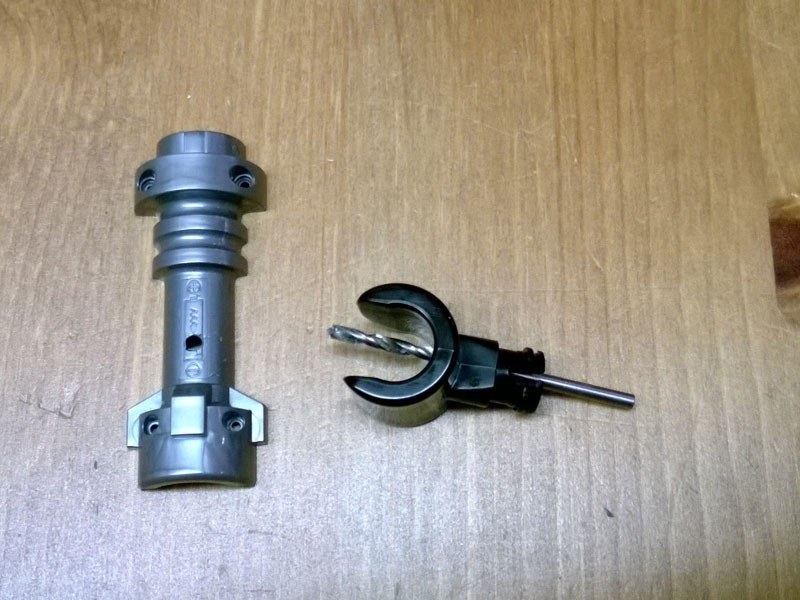
4Step 4
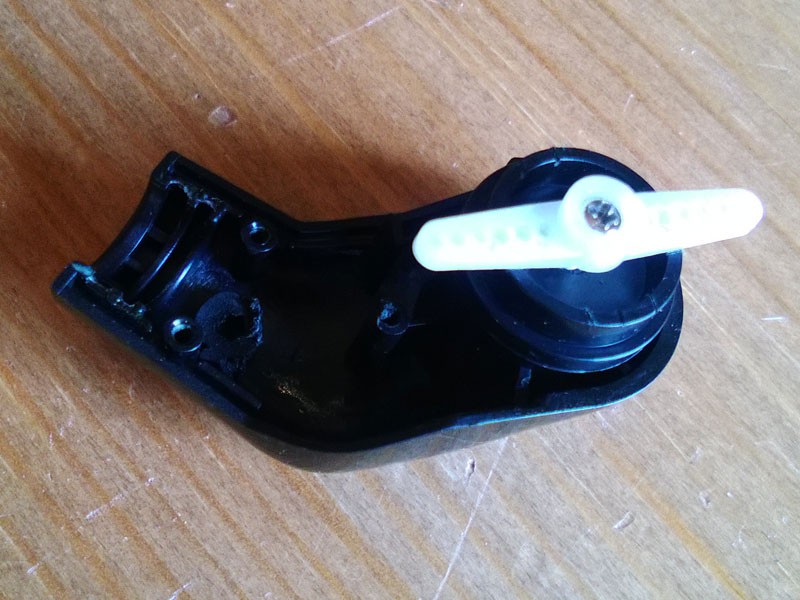
Attach the servo horn to his shoulder. The servo will go inside, but it needs purchase on his shoulder to rotate his arm.
Get the horn located centrally and carefully cut slots for it. In the pictures, the horn is screwed on, but this is just to help locate it. Later the screw will go the there way back into the servo.
![]()
Trim off the excess.
![]()
-
5Step 5
Attach the servo horn to his shoulder. The servo will go inside, but it needs purchase on his shoulder to rotate his arm.
Get the horn located centrally and carefully cut slots for it. In the pictures, the horn is screwed on, but this is just to help locate it. Later the screw will go the there way back into the servo.
![]()
Trim off the excess.
![]()
-
6Step 6
Attach the servo horn to his shoulder. The servo will go inside, but it needs purchase on his shoulder to rotate his arm.
Get the horn located centrally and carefully cut slots for it. In the pictures, the horn is screwed on, but this is just to help locate it. Later the screw will go the there way back into the servo.
![]()
Trim off the excess.
![]()
-
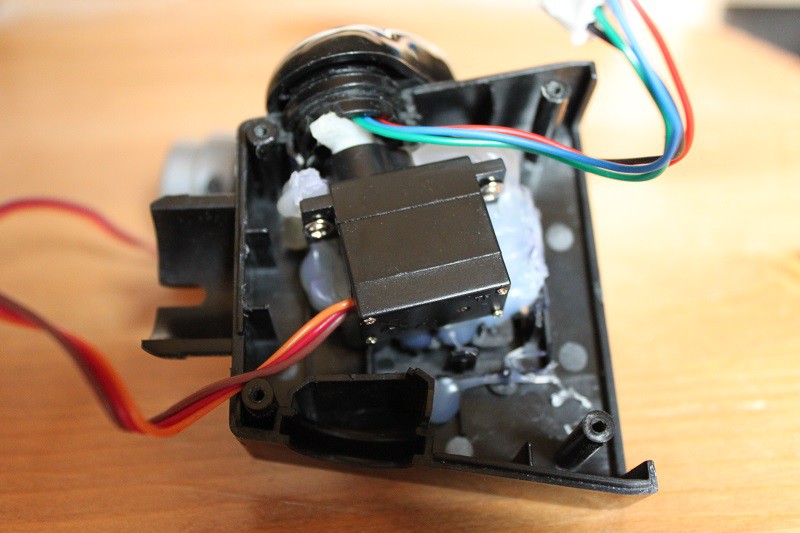
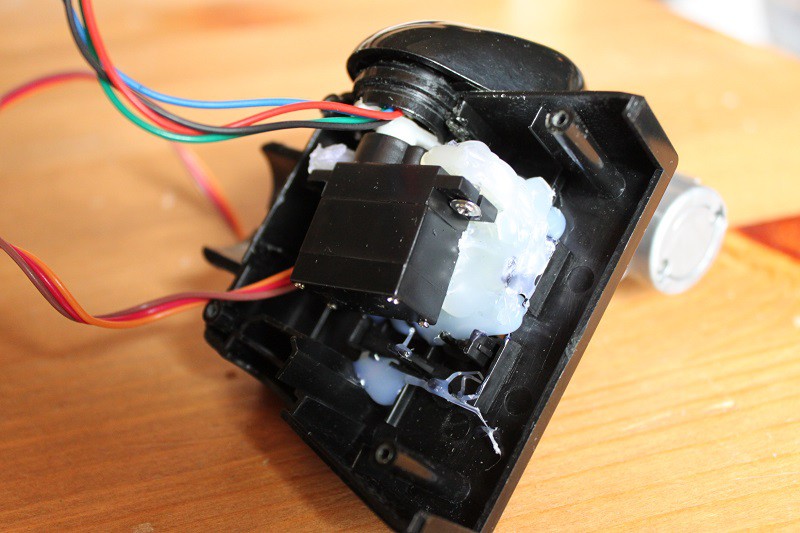
7Step 7
Fix the servo in place. I mulled over a few ways to do this and ended up creating a mounting with hot glue. Rather than permanently glue it into place, I covered the servo with tape, "glued" it into position and then removed it. The tape ensured it wasn't permanently fixed. I could then screw it into the mounting that was made of glue but could remove it whilst working on it.
Some photos probably show it better than I could describe it. The upper wire you can see is from the lightsaber that you'll get to later.
![]()
![]()
![]()
-
8Step 8
If you've follow me this far then you should have a servo that can move his arm up and down. A quick test by wiring it up to a PWM-capable microcontroller and we have this.
He's alive!
-
9Step 9
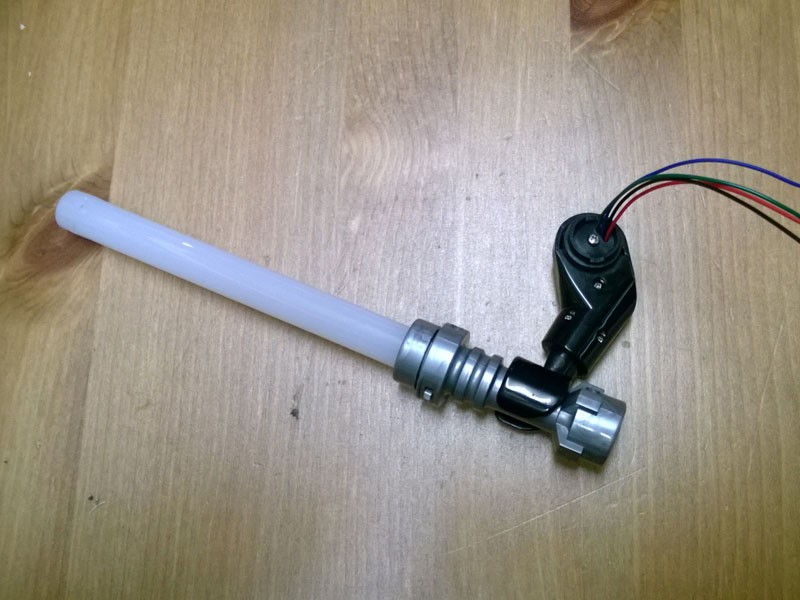
Gut the lightsaber - removing the AA battery, switch, boost converter board and red LED. There are some tiny screws holding it together, but nothing too tricky.
Replace the 5mm red LED with the RGB LED. Drill a small hole in the side of the lightsaber and right through the poor guy's hand so that you can run the wiring up his arm and into his body. A picture describes this better than words. Obviously be careful.
![]()
![]()
![]()
-
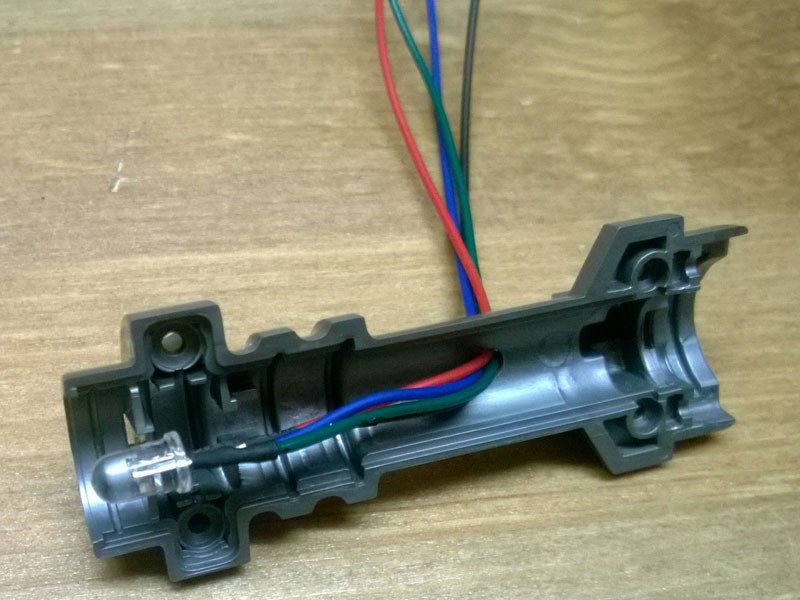
10Step 10
Continue the wiring up his arm and through his shoulder joint so that they now run right into his chest cavity. This really is starting to sound like surgery. This requires a little bit of drilling and dremeling. The most important point is to pick a place on the shoulder joint that won't get in the way of the servo you'll be adding later...
![]()
Animated Darth Vader build monitor
USB controlled Lego figure Darth Vader
 From the outside, Darth still looks as handsome as ever. But inside, he's had some major work done.
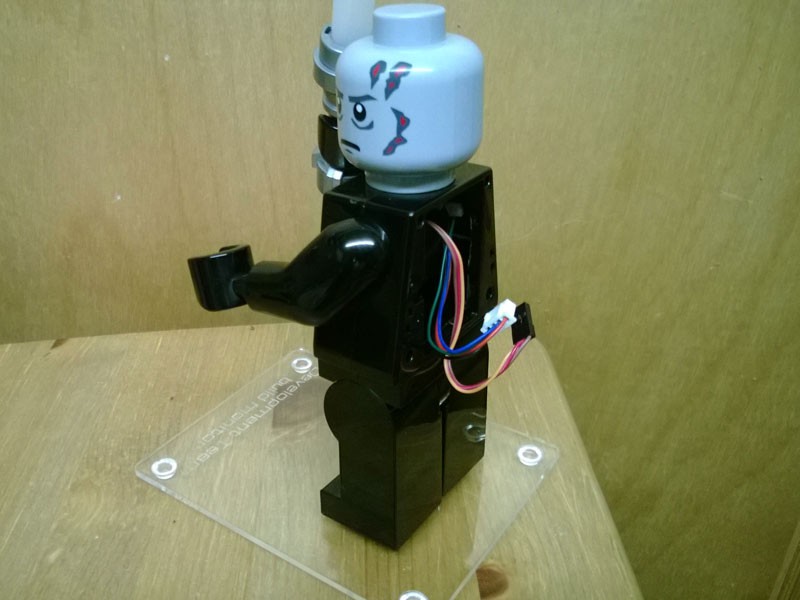


Discussions
Become a Hackaday.io Member
Create an account to leave a comment. Already have an account? Log In.