 Mr. Sarful hassan
You want to measure an analog voltage or Need to add analog inputs. Today I show you How to Interface MCP3008 with raspberry pi for measuring analog value.
≡ Why we need MCP3008:
The Raspberry Pi computer does not have a way to read analog inputs. It's a digital-only computer. Compare this to the Arduino, AVR or PIC microcontrollers that regularly have 6 or more analog inputs! Analog inputs are handy because many sensors are analog outputs, so we require a way to form the Pi analog-friendly.
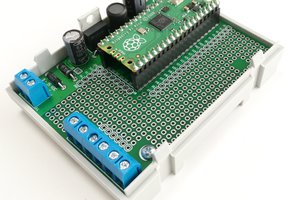
We'll do that by wiring up an MCP3008 chip to it. The MCP3008 acts like a "bridge" between digital and analog. It has 8 analog inputs and the Pi can query it utilizing 4 digital pins. That produces it a perfect addition to the Pi for joining basic sensors like photocells, FSRs or potentiometers, thermistors, etc.! Let's check the datasheet of the MCP3008 chip.

≡ Components Required :


6. Resistors

7.MCP3008
This book will help you to gain more knowledge of Raspberry pi Software and Hardware Problems and Solutions

Raspberry Pi Cookbook

≡ Circuit diagram MCP3008 raspberry Pi:
Shows the arrangement of components on the breadboard


| MCP3008 chip | Raspberry Pi |
| VDD | 3.3V |
| VREF | 3.3V |
| AGND | GND |
| CLK | SCLK |
| DOUT | MISO |
| DIN | MOSI |
| CS | GPIO Pin 22 |
≡ Code MCP3008 raspberry pi
import spidev, time

spi = spidev.SpiDev()
spi.open(0, 0)

def analog_read(channel):
    r = spi.xfer2([1, (8 + channel) << 4, 0])
    adc_out = ((r[1]&3) << 8) + r[2]
    return adc_out

while True:
    reading = analog_read(0)
    voltage = reading * 3.3 / 1024
    print("Reading=%d\tVoltage=%f" % (reading, voltage))
    time.sleep(1)
The interesting part of the program is contained within the analog_read function. This takes a parameter that ought to be between 0 and 7 and specifies which of the eight analog inputs down the lefthand side of the chip should be read. The bit control sets up an ask for the suitable channel and then sends the bits to the MCP3008, which peruses the resultant information:
Reading=0 Voltage=0.000000
Reading=126 Voltage=0.406055
The MCP3008 has 10-bit ADCs, so after you take a reading, it gives you a number between and 1023. The test program changes over this into a voltage reading by increasing the reading by the voltage range...
 Avi Gupta
 Simon
Simon