 Hulk
HulkTutorial - Reed switch
Reed switch was invented in 1936 by Walter B. Ellwood in the Bell Telephone Labs. Reed Switch consists of a pair of ferromagnetic (something as easy to magnetize as iron) flexible metal contacts typically nickel-iron alloy (as they are easy to magnetize and doesn't stay magnetized for long) separated by only a few microns, coated with a hard-wearing metal such as Rhodium or Ruthenium(Rh, Ru, Ir, or W) (to give them a long life as they switch on and off) in a hermetically sealed (airtight) glass envelope (to keep them dust and dirt free). The glass tube contains an inert gas (An inert gas is a gas that does not undergo chemical reactions under a set of given conditions) typically Nitrogen or in the case of high voltage it is just a simple vacuum. 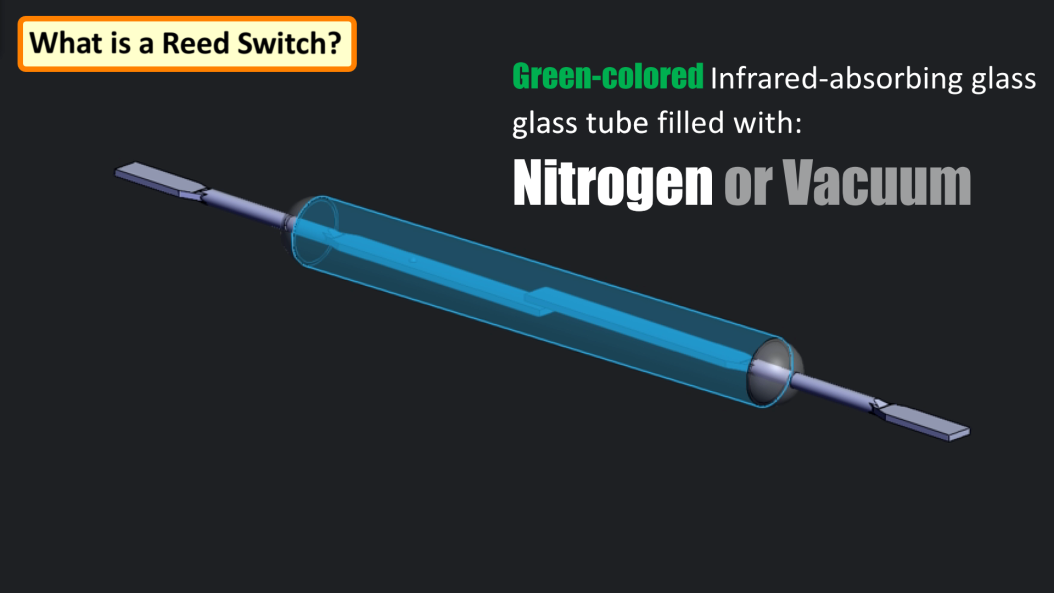
In production, a metal reed is inserted in each end of a glass tube and the end of the tube heated so that it seals around a shank portion on the reed. Green-colored Infrared-absorbing glass is frequently used, so an infrared heat source can concentrate the heat in the small sealing zone of the glass tube. The glass used is of a high electrical resistance and does not contain volatile components such as lead oxide and fluorides which can contaminate the contacts during the sealing operation. The leads of the switch must be handled carefully to prevent breaking the glass envelope. 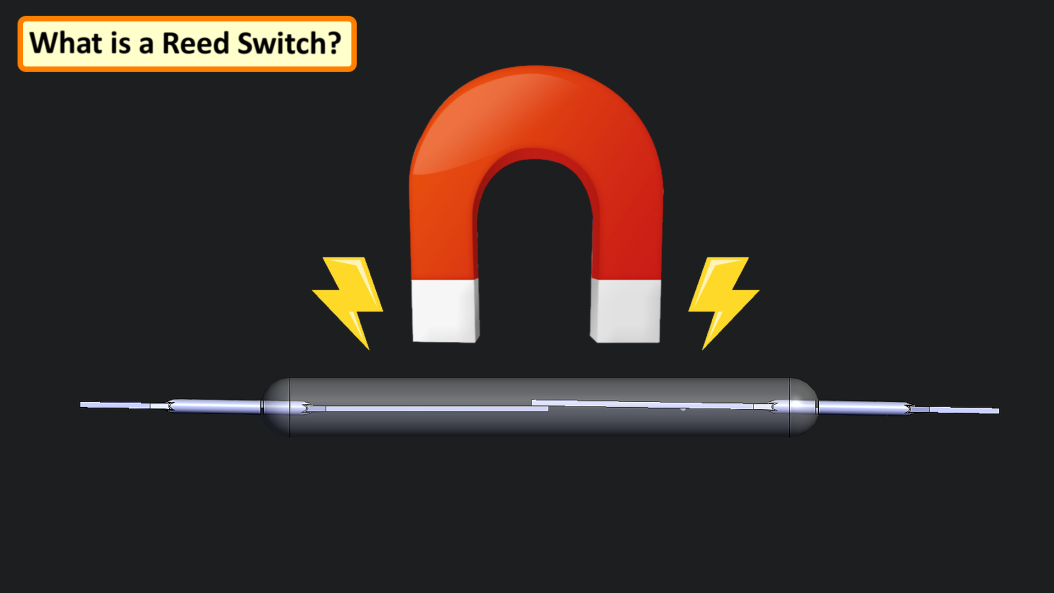
When a magnet is brought in close proximity to the contacts, an electro-mechanical force field is generated and the stiff nickle iron blades become magnetically polarized and gets attracted to each other, completing the circuit. When the magnet is removed the switch returns to its open state.
Since the contacts of the Reed Switch are sealed away from the atmosphere, they are protected against atmospheric corrosion. The hermetic sealing of a reed switch makes them suitable for use in explosive atmospheres where tiny sparks from conventional switches would constitute a hazard.
A Reed Switch has very low resistance when closed, typically as low as 50 milliohms hence a Reed Switch can be said to require zero power to operate it.
Components
------------------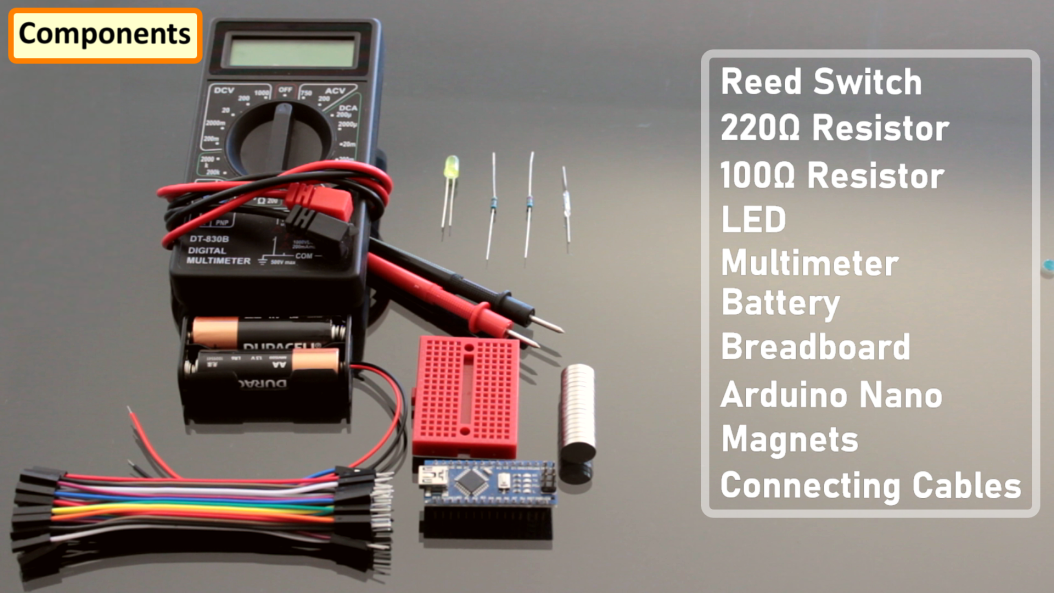
For this tutorial we need:
- Reed Switch
- 220Ω Resistor
- 100Ω Resistor
- LED
- Multi-meter
- Battery
- Breadboard
- Arduino Nano
- Magnets and
- Few Connecting Cables
Demo
--------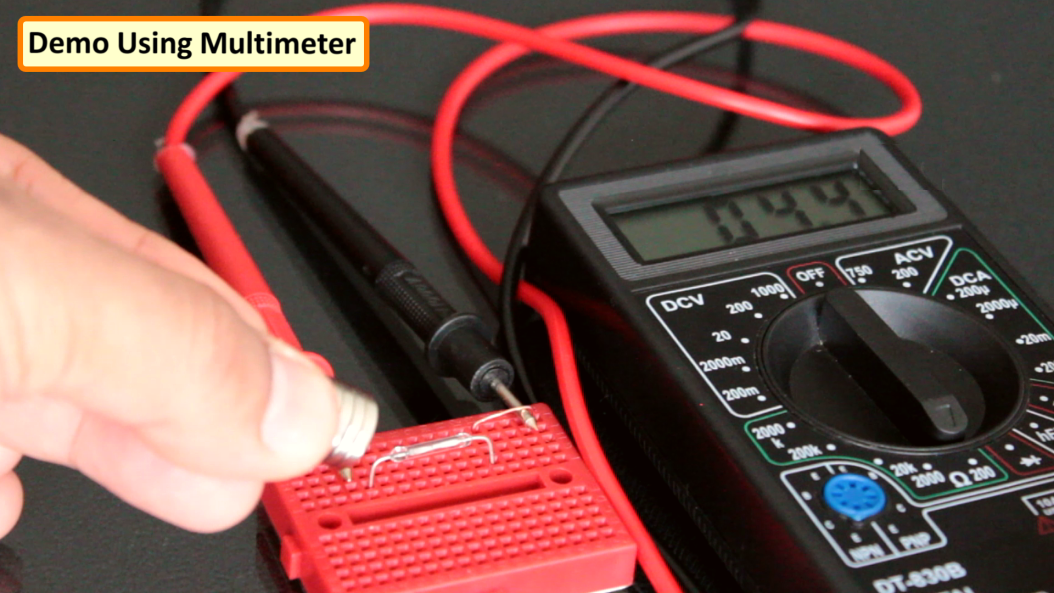 Using a multi-meter I am going to show you how a Reed Switch works. When I bring a magnet close to the switch the multi-meter shows a continuity as the contact touches each other to completing the circuit. When the magnet is removed, the switch returns to its normally open state.
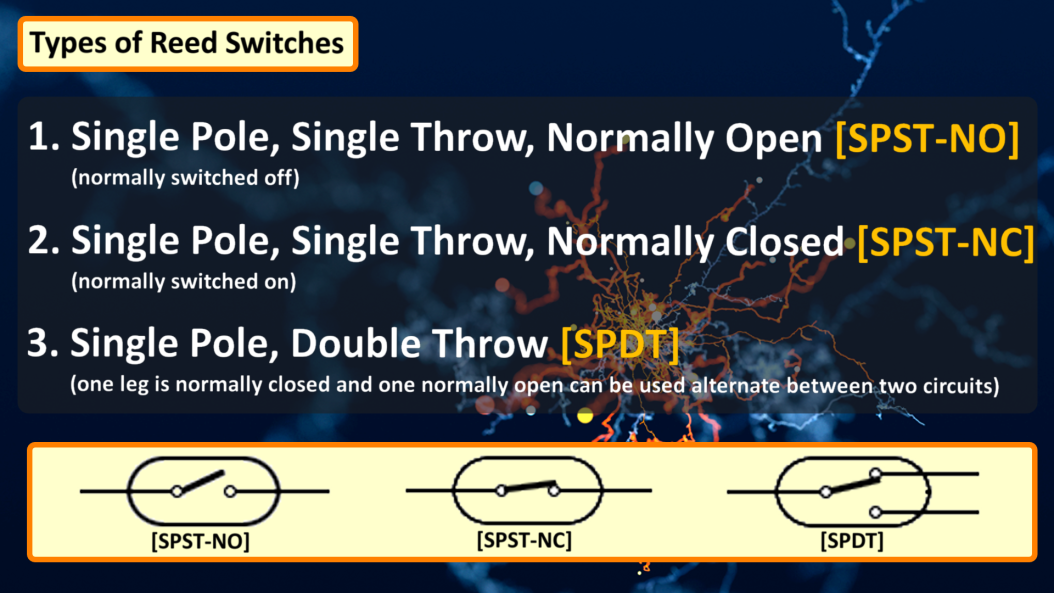
Types of Reed Switches
---------------------------------- There are 3 basic types of Reed Switches:
1. Single Pole, Single Throw, Normally Open [SPST-NO] (normally switched off)
2. Single Pole, Single Throw, Normally Closed [SPST-NC] (normally switched on)
3. Single Pole, Double Throw [SPDT] (one leg is normally closed and one normally open can be used alternate between two circuits)
Although most reed switches have two ferromagnetic contacts, some have one contact that's ferromagnetic and one that's non-magnetic, while some like the original Elwood reed switch have three. They also vary in shapes and sizes.
Connecting Without Arduino
-----------------------------------------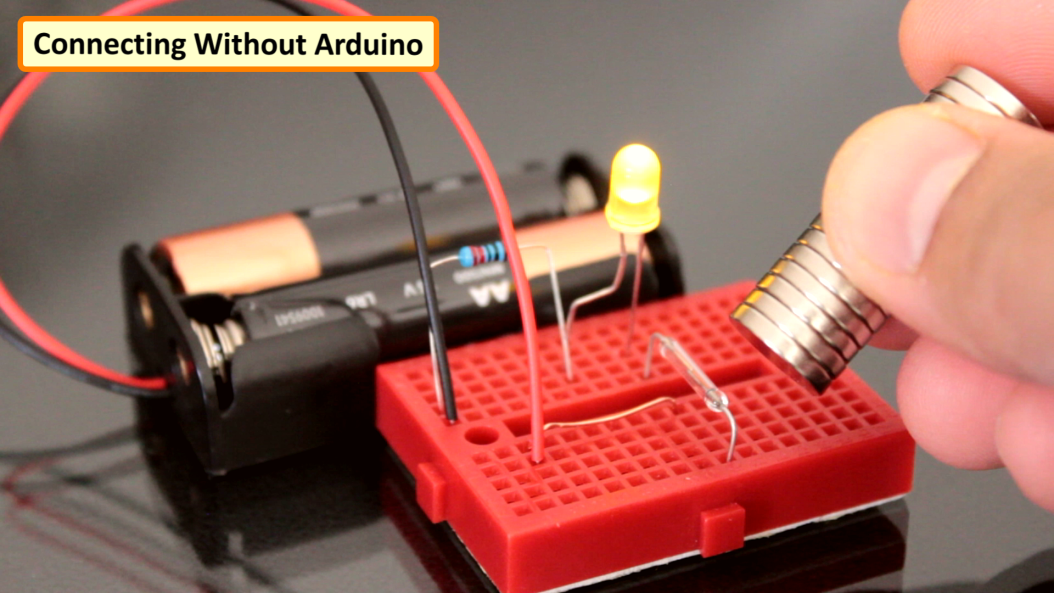

Lets first test the Reed Switch without an Arduino. Connect a LED in series with the Reed Switch to a battery. When a magnet is brought in close proximity to the contacts, the LED lights up when the nickle-iron blades inside the switch attracts each other, completing the circuit. And, when the magnet is removed the switch returns to its open state and the LED turns off.
Connecting Reed Switch to Arduino
--------------------------------------------------- Now, lets connect the Reed Switch to an Arduino. Connect the LED to the pin 12 of the Arduino. Then connect the Reed Switch to the pin number 13 and ground the other end. We also need a 100ohm pull-up resistor connected...


 MaBe42
 Josh
Josh
 Jamie
Jamie
Actually, I was supposed to present a detailed work on the Reed switch which I have just accomplished only because of this article. It is easy to get phd dissertation writing services online for help in essays. I am confident that I would be able to satisfy my teacher by giving a reliable presentation.