Arduinos are good microcontrollers for dealing with hardware (read sensors, write to effectors). TouchDesigner (TD) is a fabulous tool for making cool videos and sound animations. There are some simple examples available that show how to send/receive one or two values between these tools, but not a lot to show how to share more items. This project show how to use an arduino compatible to send multiple data items to TouchDesigner and control an animation.
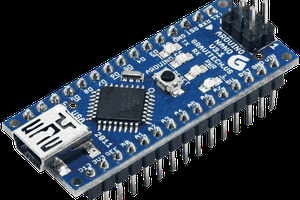
The Adafruit Circuit Playground Express (ACPE) is an excellent entry board for learning to work with Arduinos as it comes integrated with several components. This allows beginners to focus on coding and avoid avoiding the issues with wiring and mounting sensors, etc. It has on-board an 3-axis accelerometer, light sensor, two momentary and one slide switch, temperature sensor, sound sensor, 10 neopixel multicolor LEDs, 7 pads for capacitive touch, as well as I2C, SPI and other connections. It is fairly easy to have the Arduino read its connected sensors and send them to other computers via standard Serial USB connections.
TouchDesigner (TD) is a very powerful, a node based visual programming language for real time interactive multimedia content [wikipedia]. For over 20 years it has provided a base for artists to create impressive interactive installations, performances and other works. There are lots of tutorials and examples on the web. TD provides a node for reading and writing to Serial (USB) devices, and the wiki includes simple examples of how to connect with an Arduino
The available examples, however, are quite simple; reading only one or two sensors and responding to a single command. The ACPE has so many built in sensors and there isnt a lot available on how to send such to TD. It can also do a fair bit with outputs but this project is only going to focus on inputs from Arduino to TouchDesigner. Perhaps a later project will build on this for controlling lights, sounds, etc via Arduino from TD. Code (both arduino ino and .toe files for TD are available in the GitHub for this project.
Arduino Side:
Basic Arduino use is covered extensively elsewhere. Adafruit has a good tutorial introduction to their ACPE board. Lets assume you have it setup and working with your PC (or mac). Arduino programs have two primary functions setup() and loop(). For this project they are pretty simple. Setup initializes the Serial communications and then a pair of calls are made to the Adafruit CircuitPlayground library, begin() and setAccelRange(). The former sets up the library to run, and the latter tells it we are using the finer 2G resolution for accelerometers (+/-1G). The second function may be the default but it wont hurt to specify it.
void setup() {
  Serial.begin(9600);
  CircuitPlayground.begin();
  // set for small accelerations, good for tilt sensing +/- 1G
  CircuitPlayground.setAccelRange(LIS3DH_RANGE_2_G);
}
The loop() function reads the sensors and sends them to the Serial port. The code reads a number of sensors but for this round, it only sends out the 3 accelerometer values and two calculated values for Roll and Pitch. This snippet shows the start of loop() reading a four values. The code repo is more elaborate.
void loop() {
  //first we grab data from CPExpress...
  // not doing capactive touch yet
  X = CircuitPlayground.motionX();
  Y = CircuitPlayground.motionY();
  Z = CircuitPlayground.motionZ();
  leftSwitch = CircuitPlayground.leftButton();
Calculating Tilt:
The board does not provide tilt measurements directly, but under normal gravity you can derive the Roll and Pitch values from the three accelerations. Details of this are explained in a couple nice application notes, one from NXP and one from ST. You can get elaborate with it but basically it is a pair of trig expressions:
roll...Read more »
 Jerry Isdale
 ken.do
 Embedotronics
 Eric Tsai
 PixJuan