This project is sponsored by JLCPCB - Printed Circuit Board Factory.
Introduction
Every person who decides to enter the world of robotics with Arduino has great challenges.
One of these challenges is to start with some simple application and something that you can see working in practice during the learning classes.
That way, it is possible to learn in a practical way and absorb knowledge much faster.
It was for this reason that we decided to develop the ArduinoRobot Ludos.

Next, we will present the Arduino Robot Ludos and the details of its structure.
What is Arduino Ludos Robot?
It was created for the purpose of allowing you, who is a beginner or teacher, and doesn’t have an easily accessible robot, can use a simple robotic kit, with varied features and that helps you make your class more didactic and practical.
In addition, he proposes to:
- facilitate the first contacts with the robot assembly;
- allow it to be a simple and creative application.
All of this will facilitate the assembly of your first robot and allow you and your student to use its various resources with the Arduino.

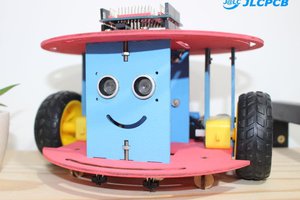
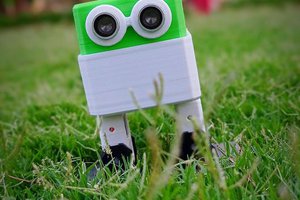
As you can see in Figure 2, the Robot Ludos has the shape of a cube. It allows you to use an Arduino or other control, boards to create your project.
In addition, it has the following components in its structure:
- 01 x Button;
- 01 x 16x2 LCD screen;
- 02 x Red LEDs;
- 01 x Ultrasonic Sensor.
In addition to these components, you can take advantage of the internal space and make use of several other modules and sensors to develop other projects.
Our goal is to allow you to build different types of projects and experiences with this kit. It has few parts, easy to assemble, and several features in a single robot.
The following is a complete view of the Ludos Robot in different views.

Now, we will develop a project with Robot Ludos. We will develop an ultrasonic ruler with the Robot Ludos. If you want to access the complete Arduino Robot Ludos documentation and download yours, visit this Arduino Robot Ludos documentation.
Developing the Ultrasonic Ruler with Robot Ludos
For this project, we will use 3 resources of the Robot Ludos: the button, the ultrasonic sensor, and the 16x2 LCD display.
Following we'll present the project that will be developed.
Develop an ultrasonic ruler with the Arduino Robot Ludos. Every time the button is pressed, the robot must calculate the distance with the ultrasonic sensor and present its value on the 16x2 LCD display.
For this project, we'll use the JLCPCB Arduino Compatible printed circuit board presented below.

You can obtain the Arduino JLCPCB compatible PCB for your projects for $2 in your first order with the link: Earn my PCBs Arduino Compatible.
Below, we present the full electronic schematic of the project.

Now, we'll show the full code of this project.
#include <LiquidCrystal_I2C.h> //Biblioteca I2C do LCD 16x2
#include <Wire.h> //Biblioteca de Comunicacao I2C
LiquidCrystal_I2C lcd(0x27,16,2); // Configurando o endereco do LCD 16x2 para 0x27

#define botao 3
#define echoPin 9
#define trigPin 8

long tempo = 0;
int distancia = 0;
bool BotaoCabeca = 0, estado = 0;

void setup()
{    pinMode(botao, INPUT);    pinMode(echoPin, INPUT);    pinMode(trigPin, OUTPUT);        Wire.begin(); //Inicializacao da Comunicacao I2C        lcd.init(); //Inicializacao do LCD        lcd.backlight();    lcd.setCursor(2,0);    lcd.print("Oi, eu sou o");    lcd.setCursor(3,1);    lcd.print("Robo Ludos!");        delay(2000);
}

void loop()
{    BotaoCabeca = digitalRead(botao);
 if(BotaoCabeca == 1 && estado == 0) { lcd.clear(); digitalWrite(trigPin, LOW); delayMicroseconds(2); digitalWrite(trigPin, HIGH); delayMicroseconds(10); digitalWrite(trigPin, LOW); tempo = pulseIn(echoPin, HIGH); distancia = tempo * (0.034/2); if(distancia <= 65) { digitalWrite(4, LOW); digitalWrite(5, LOW); } if(distancia > 65) { digitalWrite(4, HIGH);...
Read more »
 Boian Mitov
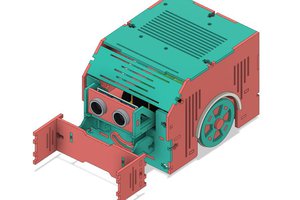
 vishal soni