Close
0%
0%

Grow Light Feather Wing

A minimalist grow light that is compatible with the Adafruit Feather Huzzah dev board.

Similar projects worth following
One of my previous projects was a hydroponic system for growing strawberries, for which I used a grow light from IKEA. But one thing I didn't consider while building it was that plants, just like humans, need breaks too. Light-dark cycles are very important for plants, and constant light exposure may actually harm them. Also, the plant's light needs vary depending on the type of plant or its growing stage. For example, red light is more important for the flowering & fruit production stage, while blue light is important for strong stems and leaves.

So I came up with this miniature grow light, which can be used with the Adafruit Feather Huzzah dev board. It can separately adjust the intensity of the blue and red lights using PWM, or it can control the daily amount of light, all of this remotely!

Since this is quite small, I think it would be ideal for growing some microgreens or herbs.

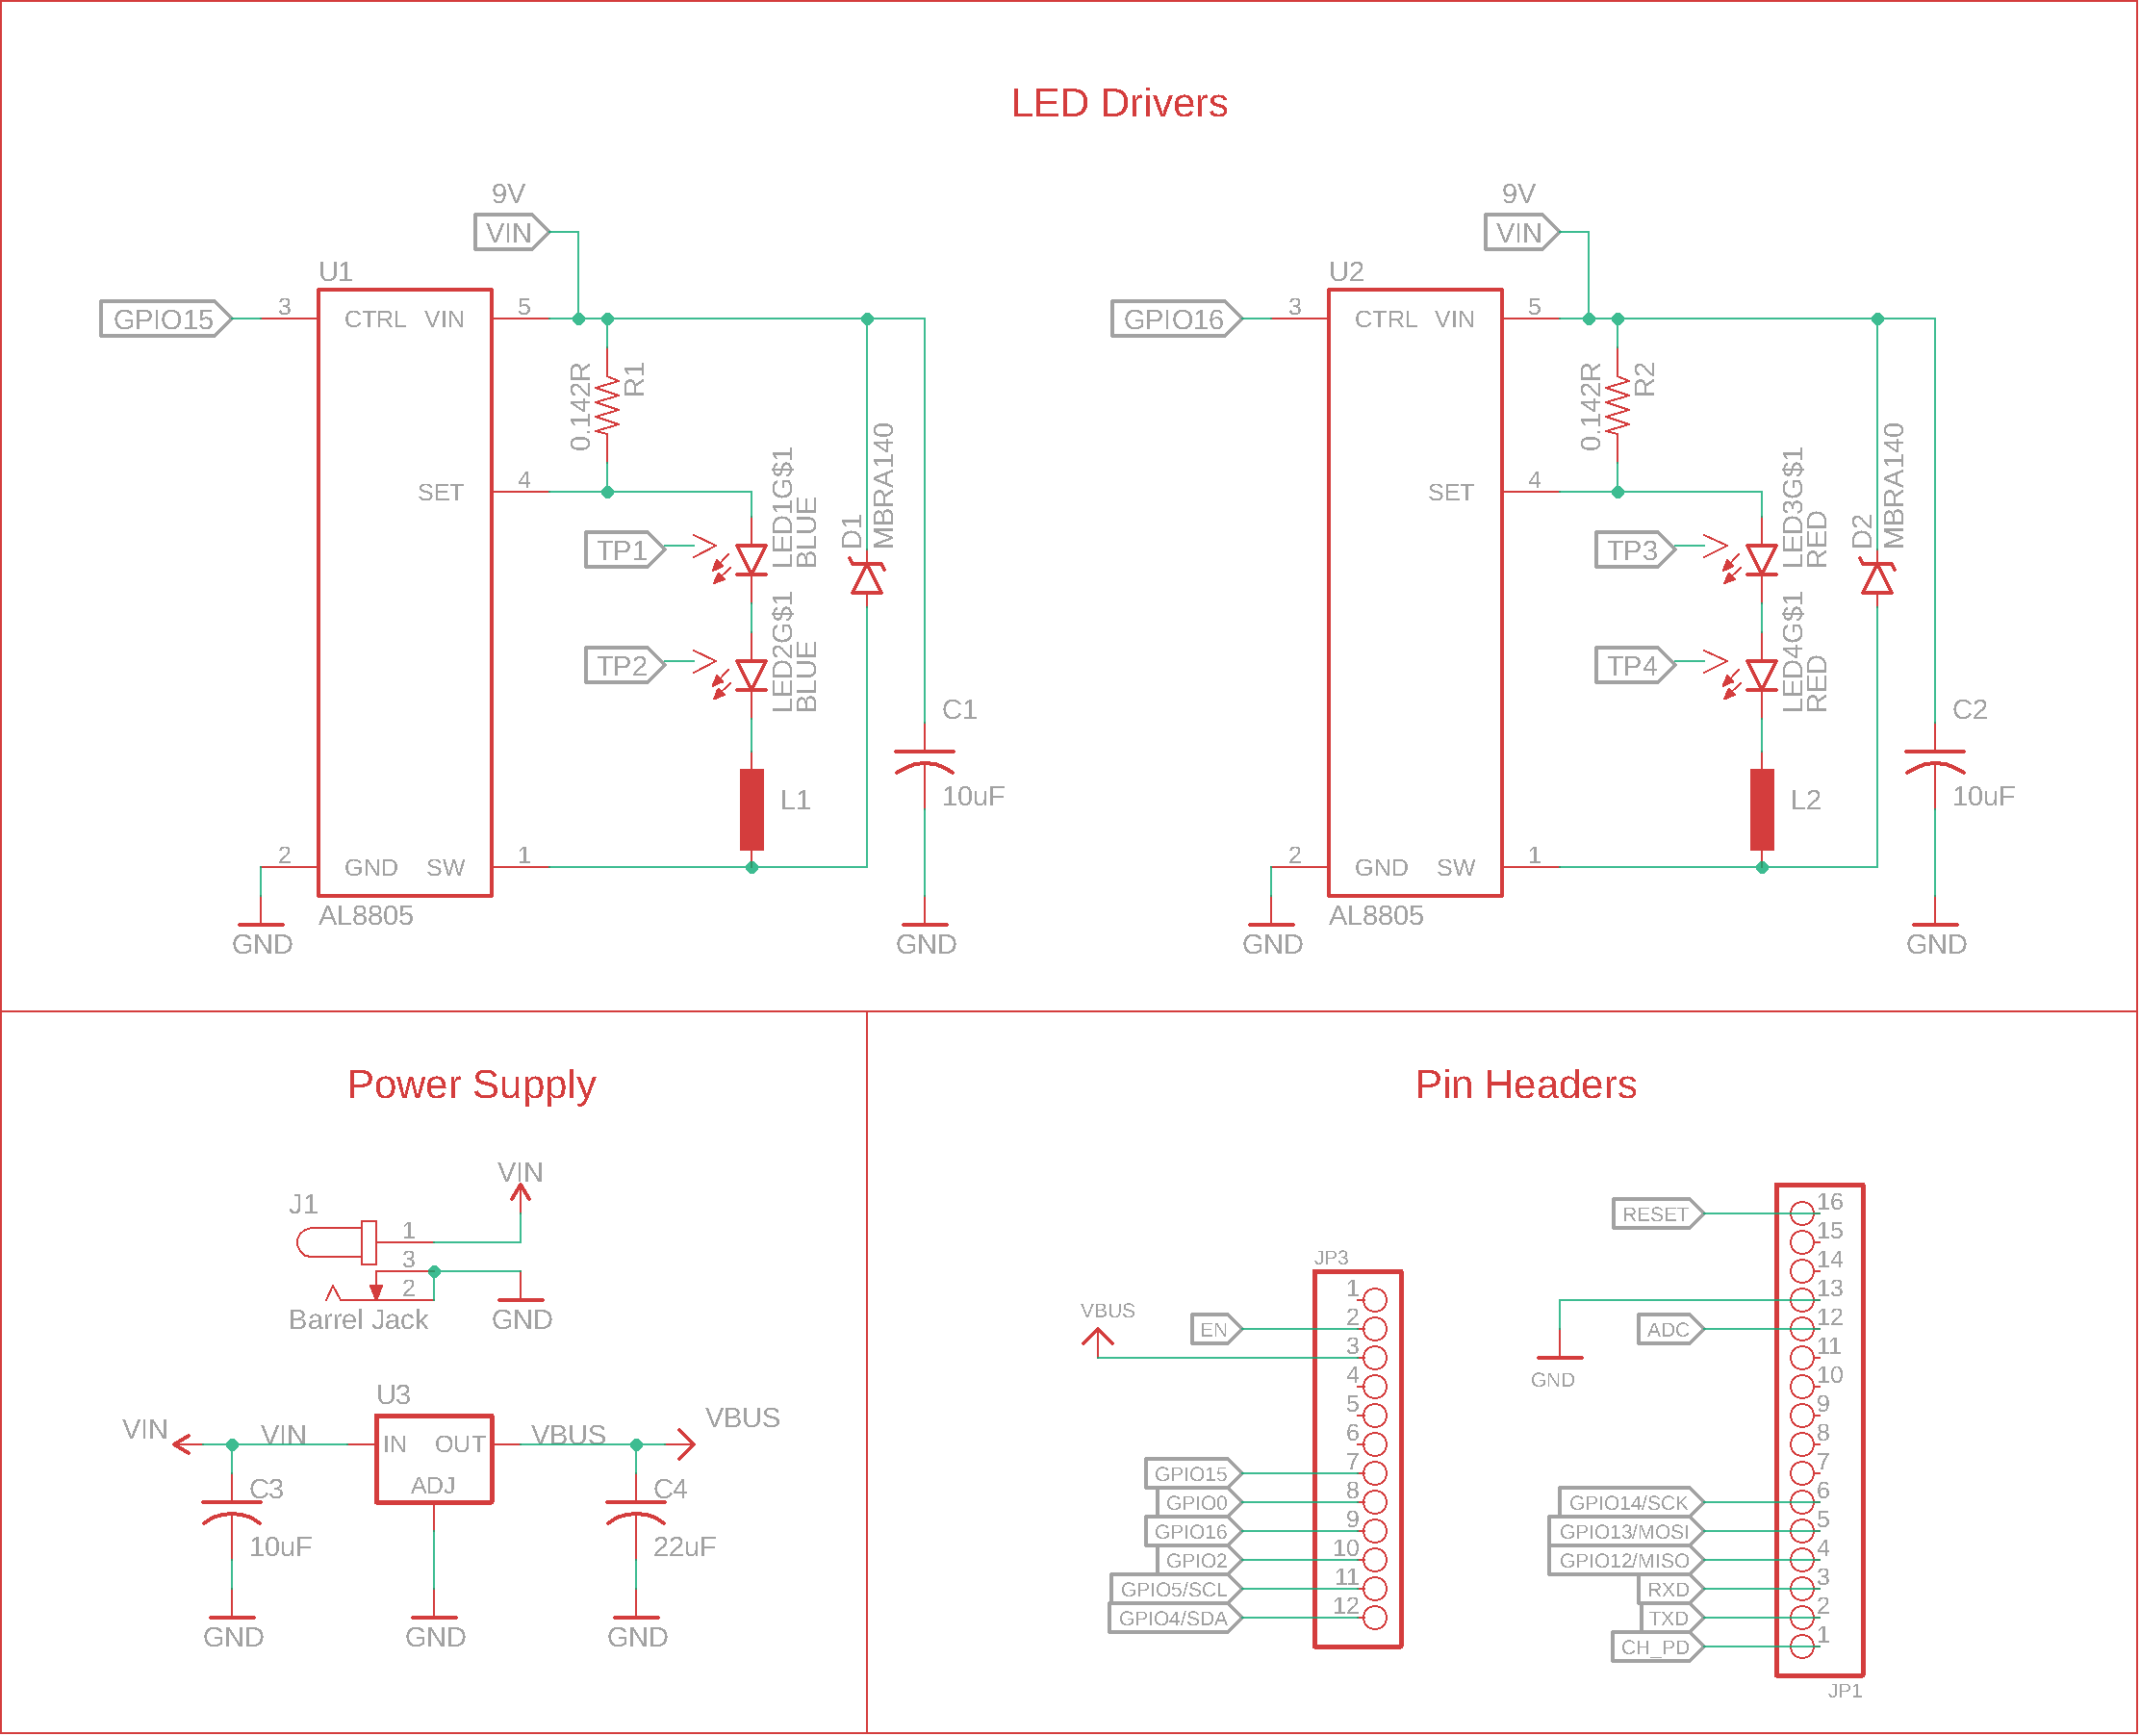
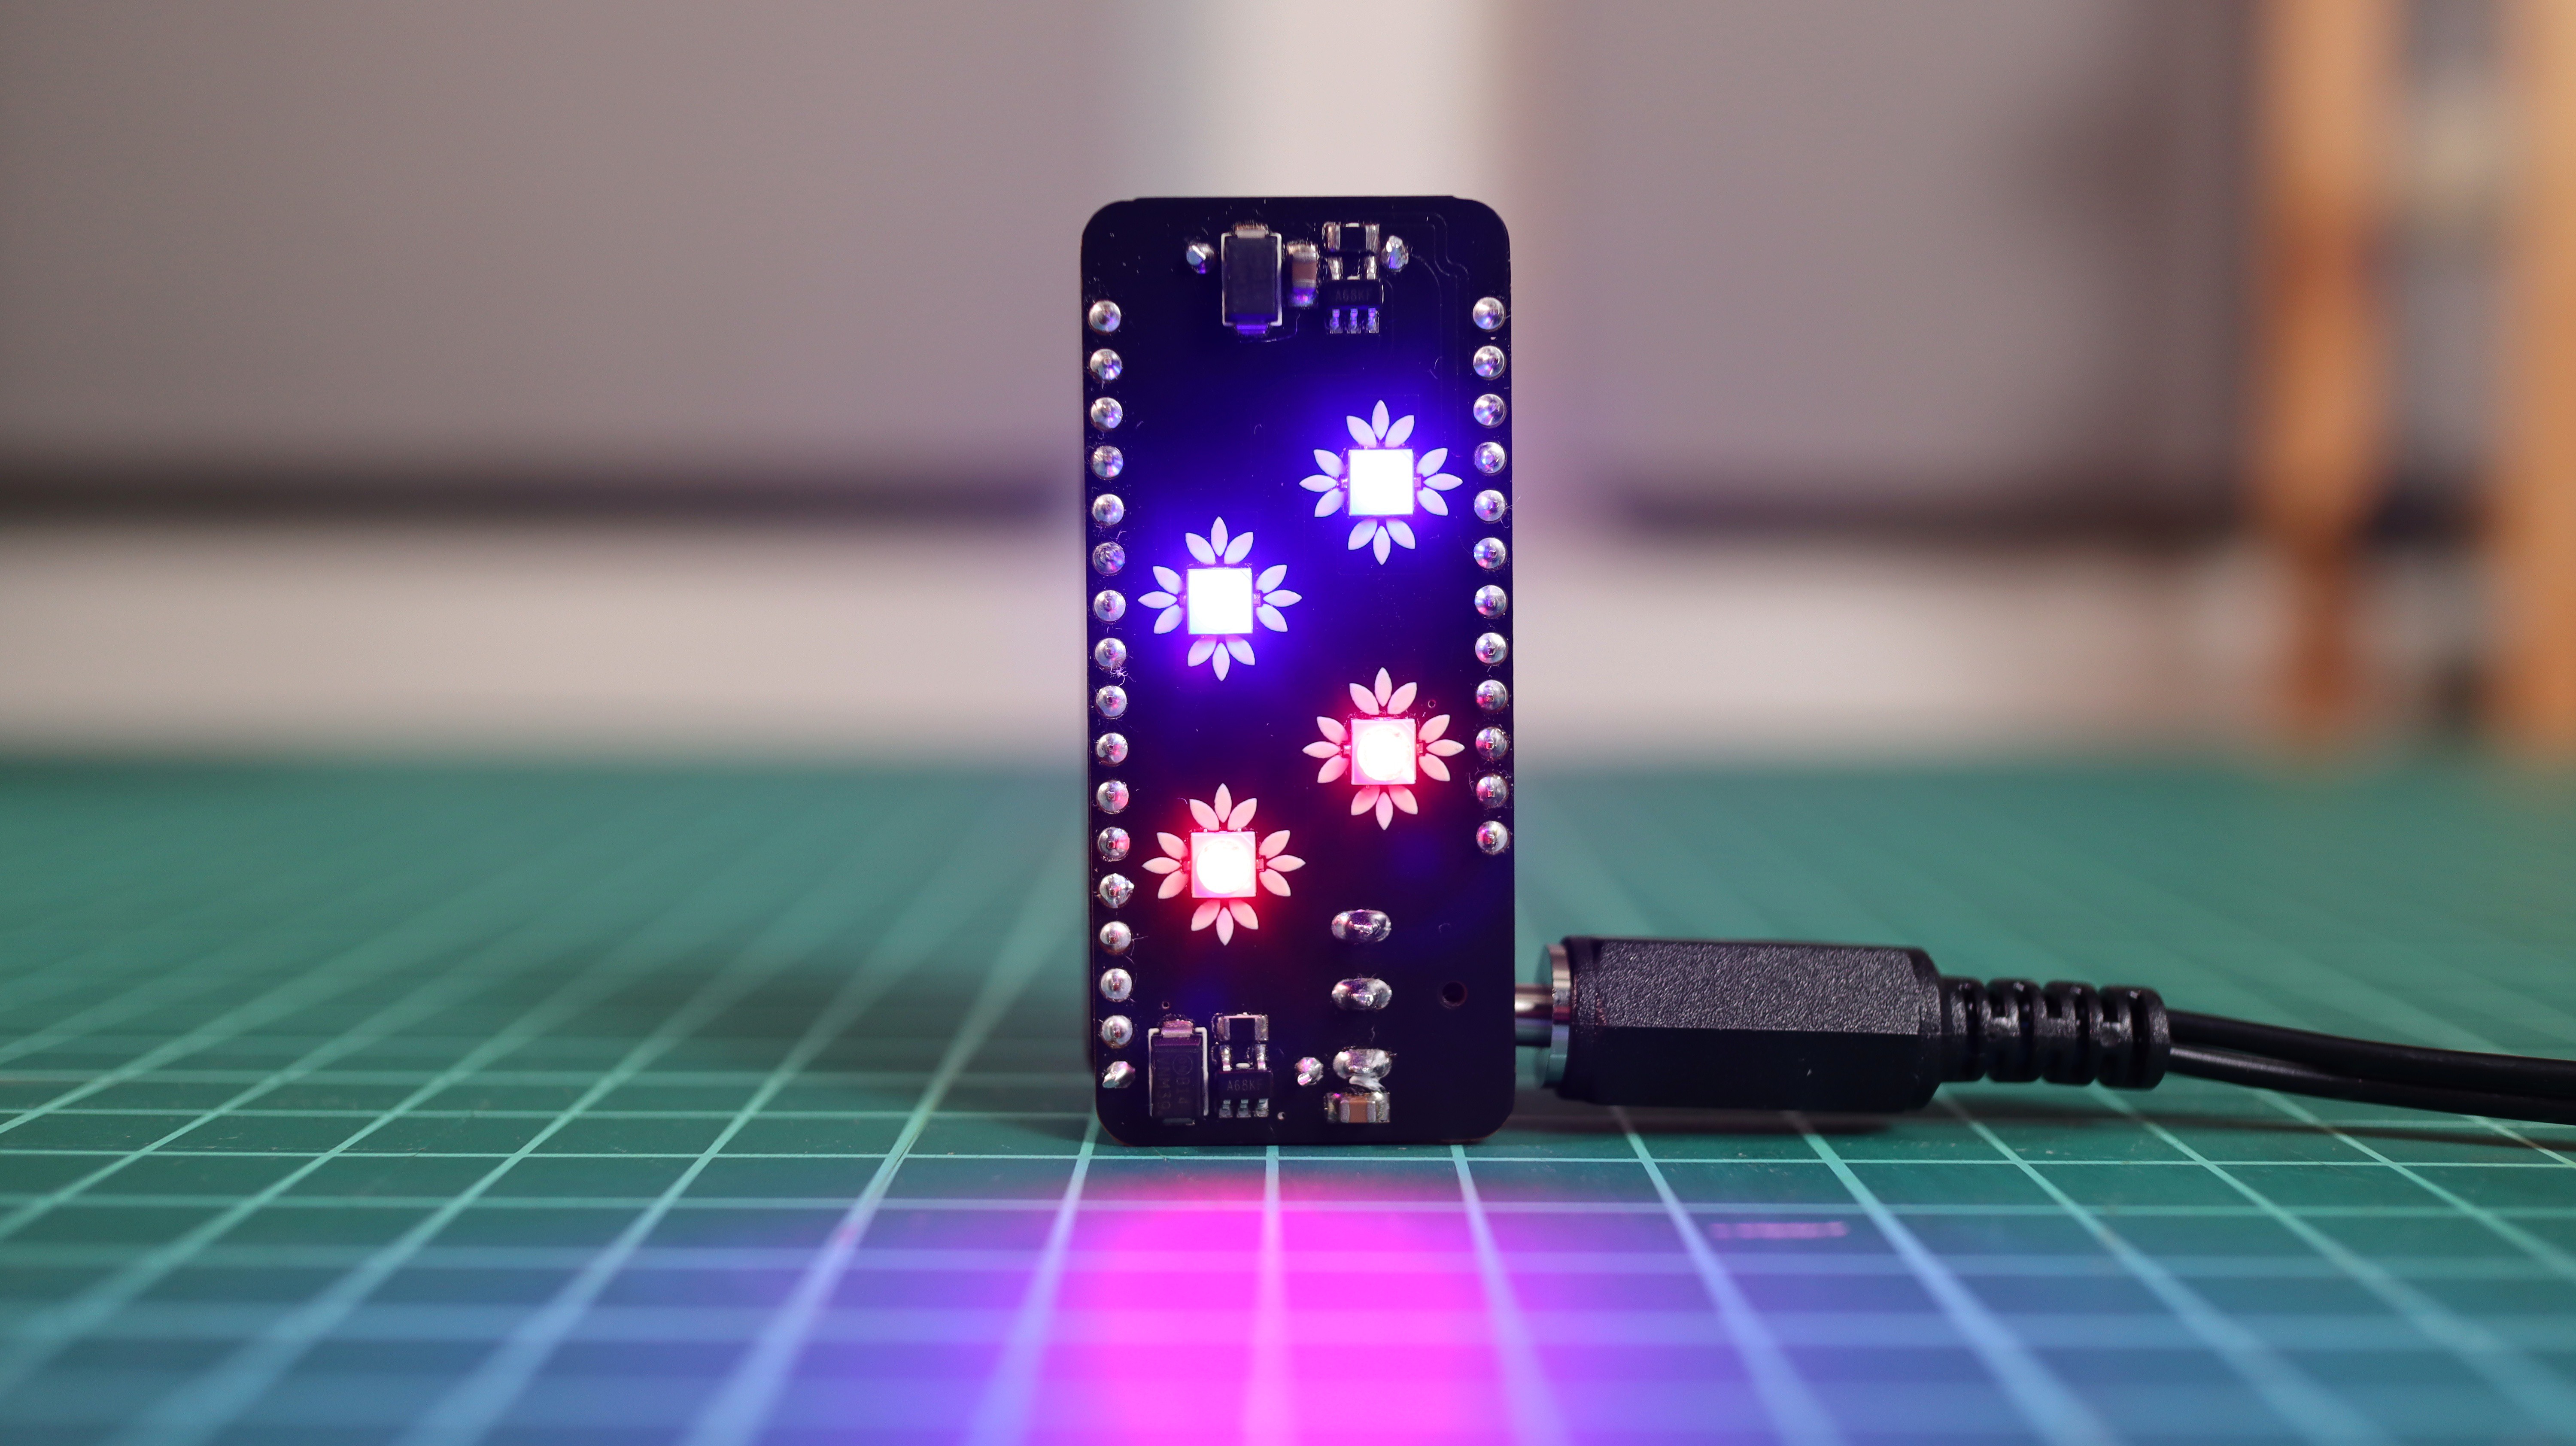
The Feather Wing powers both the LEDs and the Adafruit Feather Huzzah (there is a 5V regulator on the back), so there is no need to split the power supply for both boards. You'll need to use a 9V/12V and 2A source.

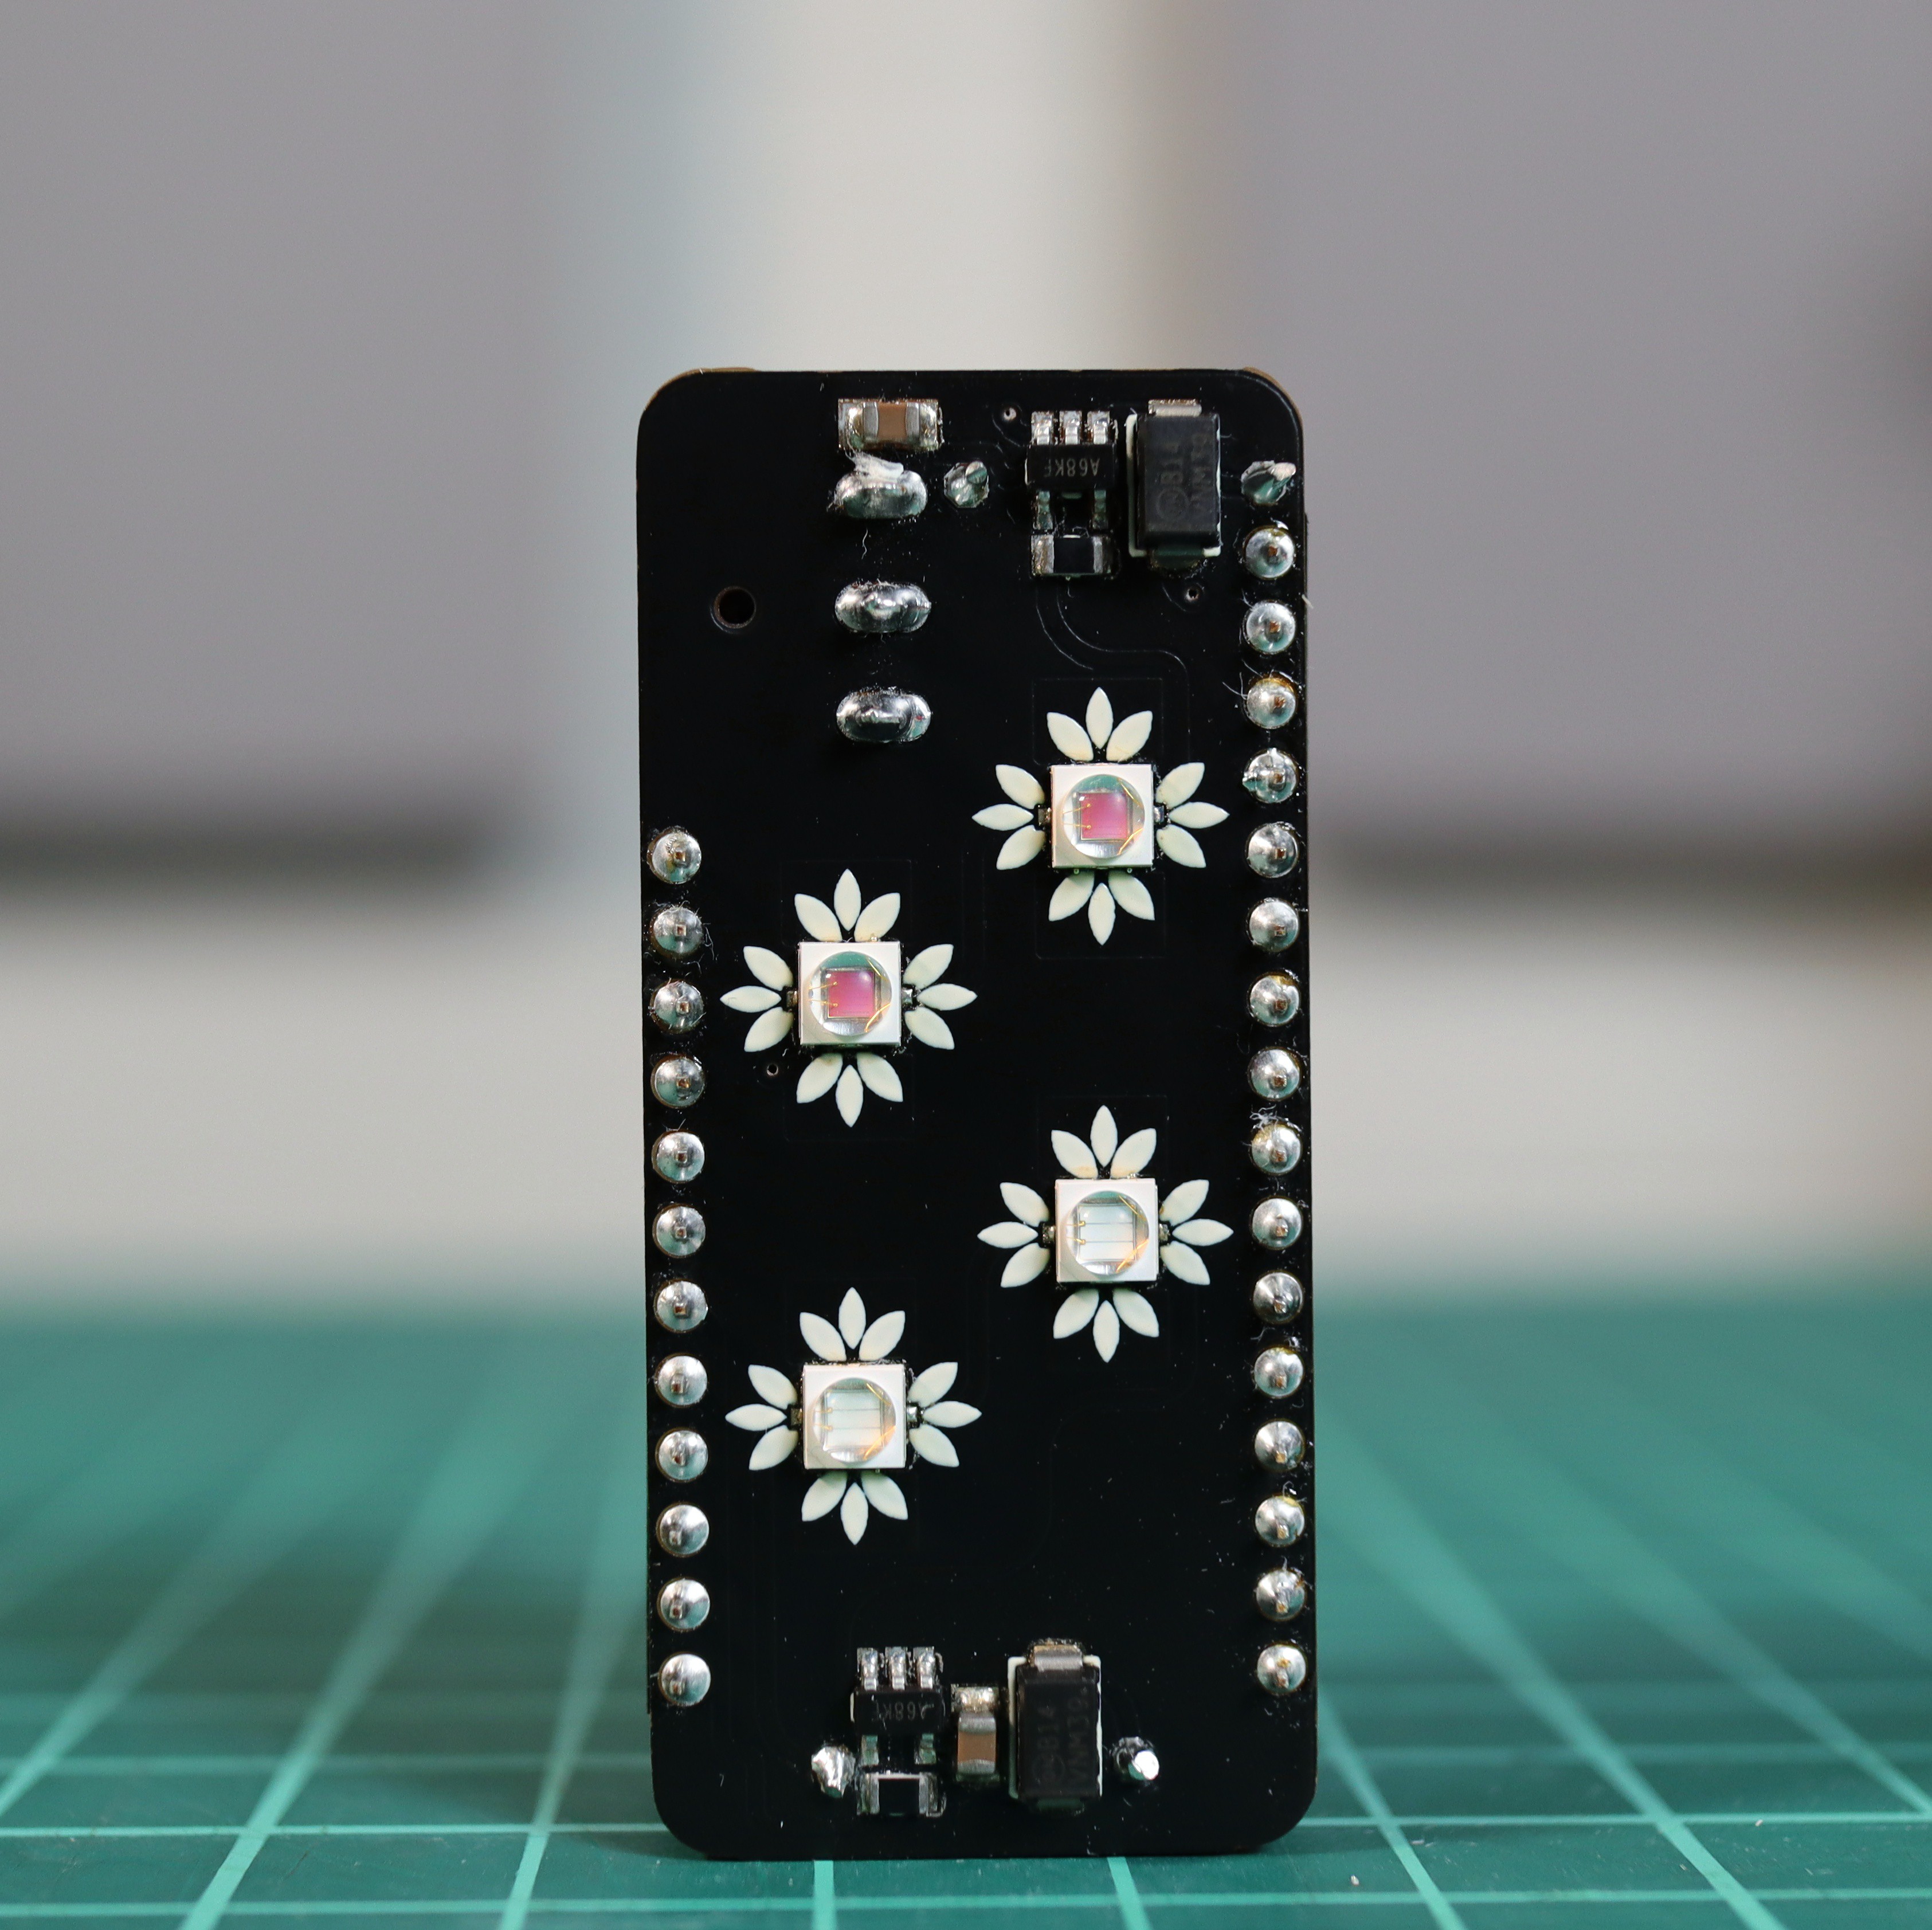
Also, the blue & red LEDs can be individually controlled through GPIOs 15 & 16 of the Feather.

View all 12 components

  • Adafruit IO

    Alexandra Covor02/22/2021 at 22:00 0 comments

    Here's the code for adjusting the light intensity for each colour through the Adafruit.io app. I've also added a timer so that the light turns off after a number of hours (which can also be adjusted from the Adafruit IO dashboard).

View project log

  • 1
    Ordering the PCBs

    I ordered the PCBs and the stencil from JLCPCB, they're super fast and the quality never disappoints!

    You can find the Eagle CAD files in the Github repository which I've linked in the project description.

  • 2
    PCB Assembly

    I soldered the top SMD components using a DIY reflow oven and then I manually soldered the rest of the components on the back: the two coils, the power jack and the 5V regulator.

  • 3
    Test & Code!

    You can power it using a 9V or a 12V, 2A power supply. The LEDs I chose are by default suuuuuper bright, they can light up an entire room :) But I dimmed them a bit using PWM on pins 15 & 16. 

    The light can be adjusted remotely through the Adafruit IO app and it can be timed to turn on/off at certain hours.

View all 3 instructions

Enjoy this project?

Share

Discussions

Similar Projects

Does this project spark your interest?

Become a member to follow this project and never miss any updates