 Michael Gardi
My Inspiration
When I was designing Think-a-Tron 2020, my plan A was to use an ESP32-CAM to read QR codes off the back of some business cards. I did have a backup plan though. I ordered a GM67 Bar Code Reader Module from AliExpress just in case.
Well the ESP32-CAM worked out great. The GM67 arrived around the time I was wrapping up Think-a-Tron 2020. Still I thought I should check it out.

This is what shipped in the box. It's a solid unit. The USB cable and wired connector for the UART port were nice bonuses.
When you plug the GM67 into a PC via the provided USB cable it attaches as a keyboard. Open any text editor and point the device at a bar or QR code and the payload strings appear in the editor. A very cool out of the box experience.
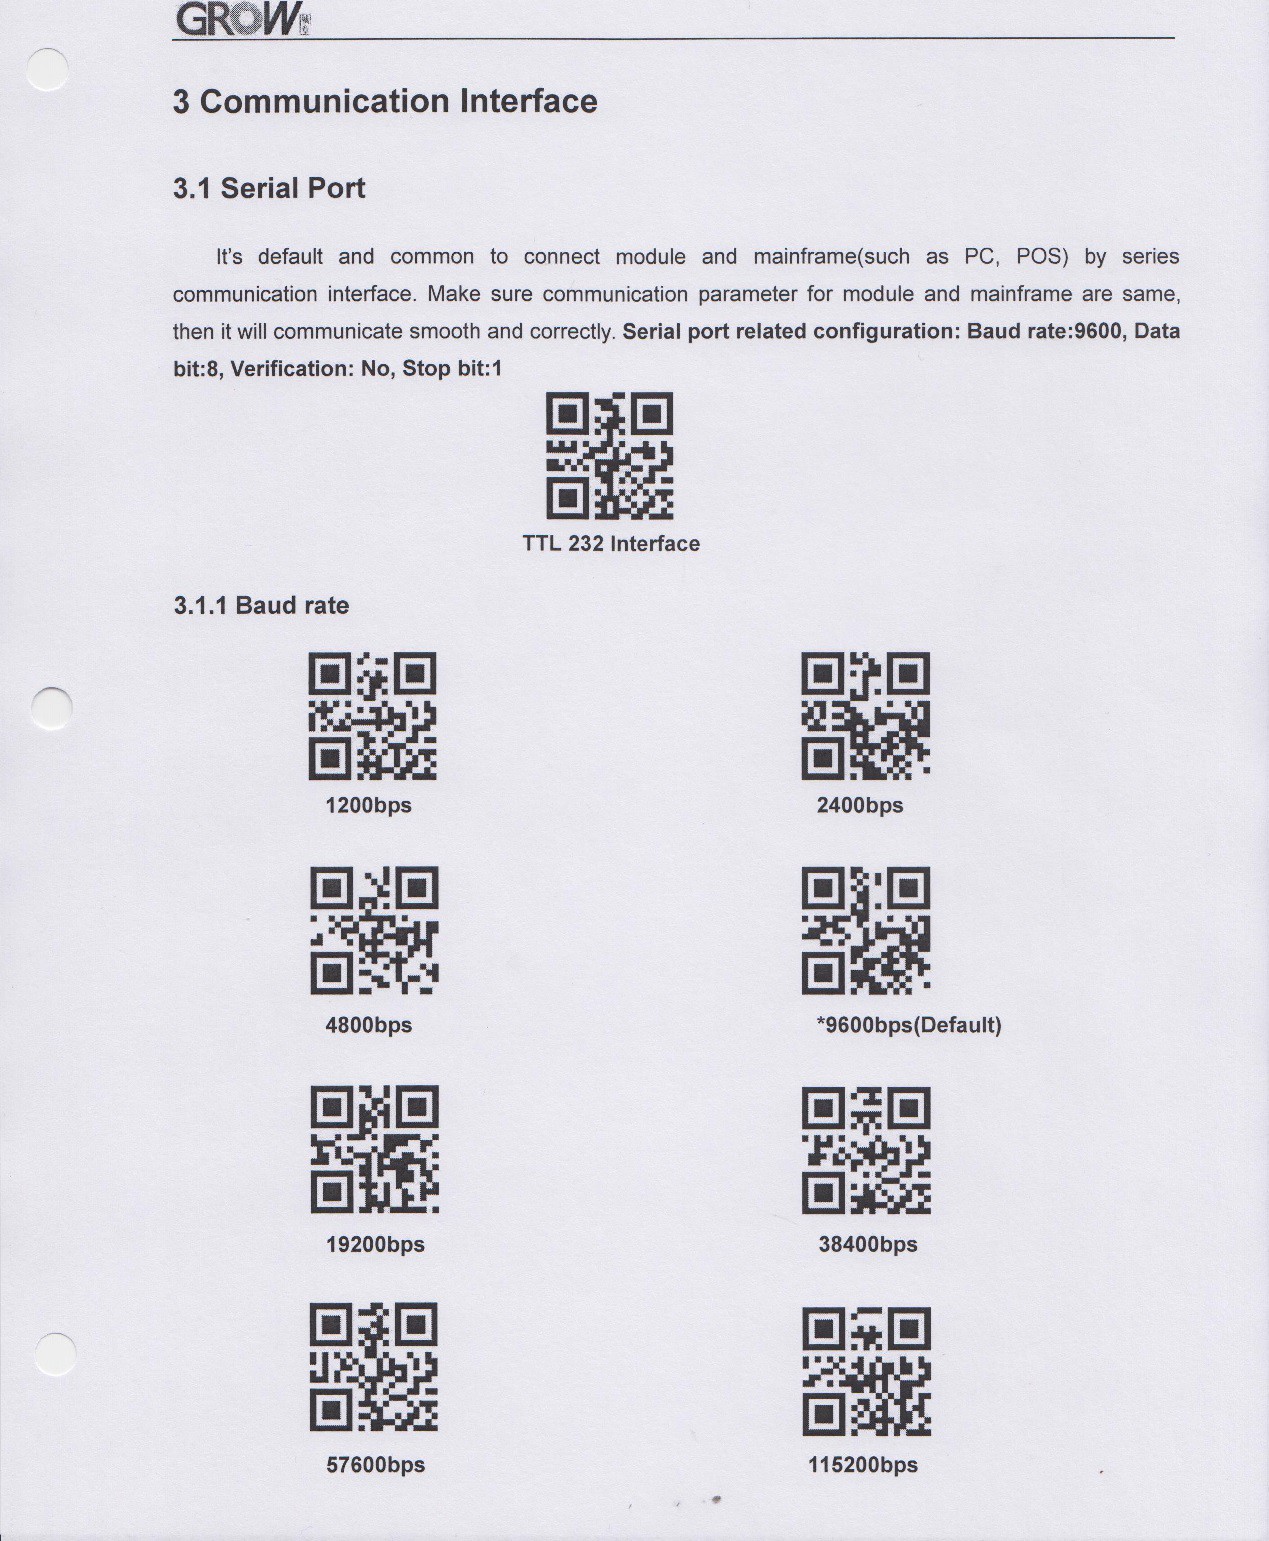
So I cracked open the manual and this is where I got my mind blown a bit. The first few pages were the expected technical specifications and interface definitions. But when I got to the configuration section all I saw were pages and pages of QR codes. The very first QR code was to reset the unit to factory defaults. There were QR codes to configure the serial port (baud, parity, stop bits, etc.) , codes to change the default behavior of the unit (manual, button trigger, continuous, etc.), codes to change the keyboard interface by country, and many more. Virtually all the configuration was done by having the unit scan a QR code. This may be old hat to some of you out there, but this was definitely new to me. Here is a sample page.
So this whole notion of using QR codes to alter the running state of the reader, got me wondering how else you might take advantage of this capability. Since I had just finished Think-a-Tron 2020 my thoughts drifted in that direction and Think-a-Tron Mini was born.
The Design
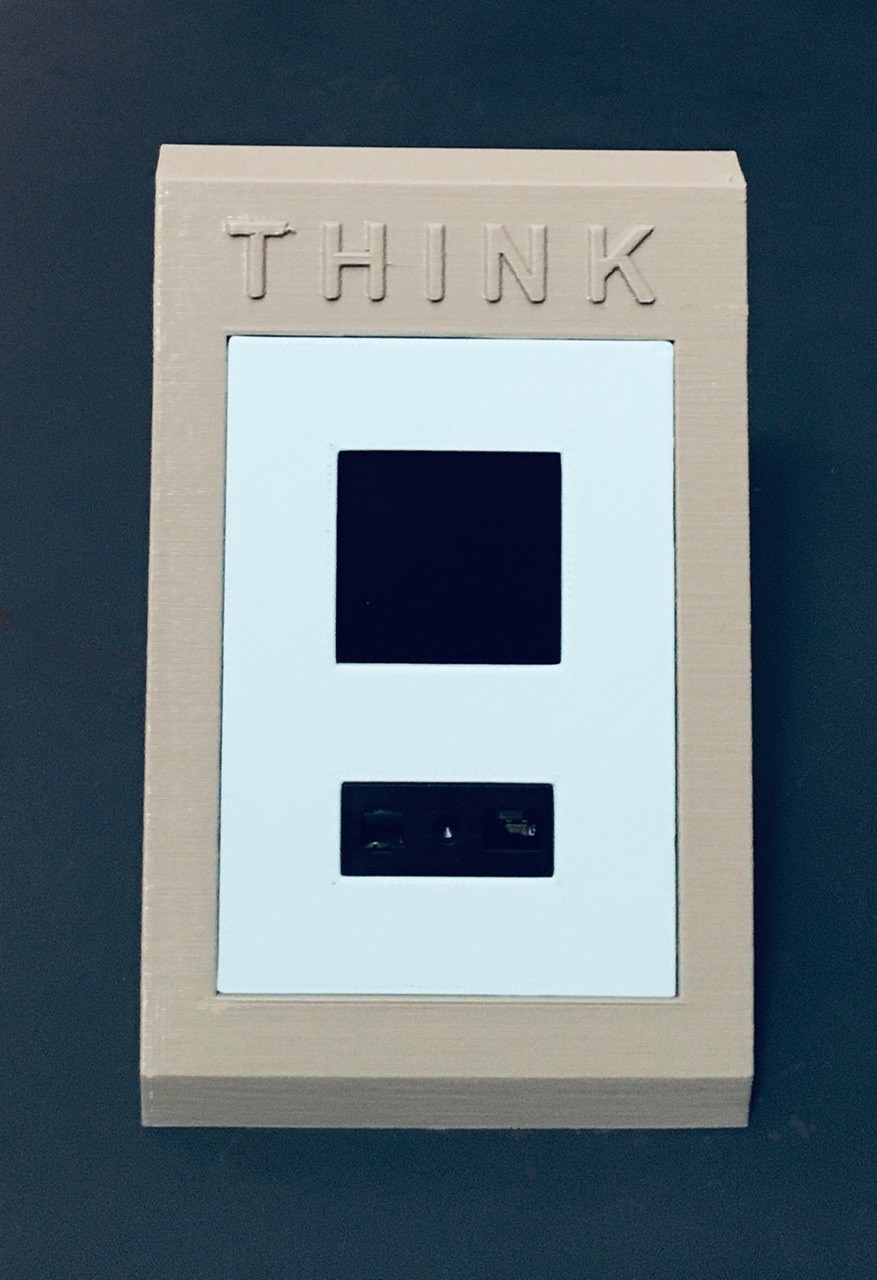
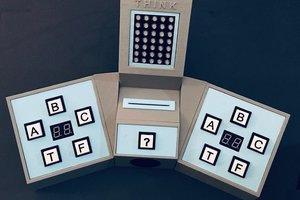
While the end result did turn out to be pretty small in size, when I first started considering the Mini name, I was also thinking about Minimal. What would a Minimal Viable Product implementation of a Think-a-Tron look like. How could I pare down Think-a-Tron 2020’s eleven buttons, two seven segment displays, and 5x7 LED display. Well if all of the buttons were replaced by cards with QR codes, and the seven segment and 5x7 LED displays were combined into a small LCD display, that would do the trick.
Also since this was a "spur-of-the-moment" kind of project I was hoping to do something with parts that I already had on hand.
Fortunately I had a Waveshare 1.5 Inch RGB OLED Module and an Arduino Nano in my parts box, and it turns out that's all I needed. Because I had all of the parts on hand I was able to pull this project together in just three days.
The Build
I designed an enclosure for the project. Here is a photo of everything required to make a Think-a-Tron Mini.
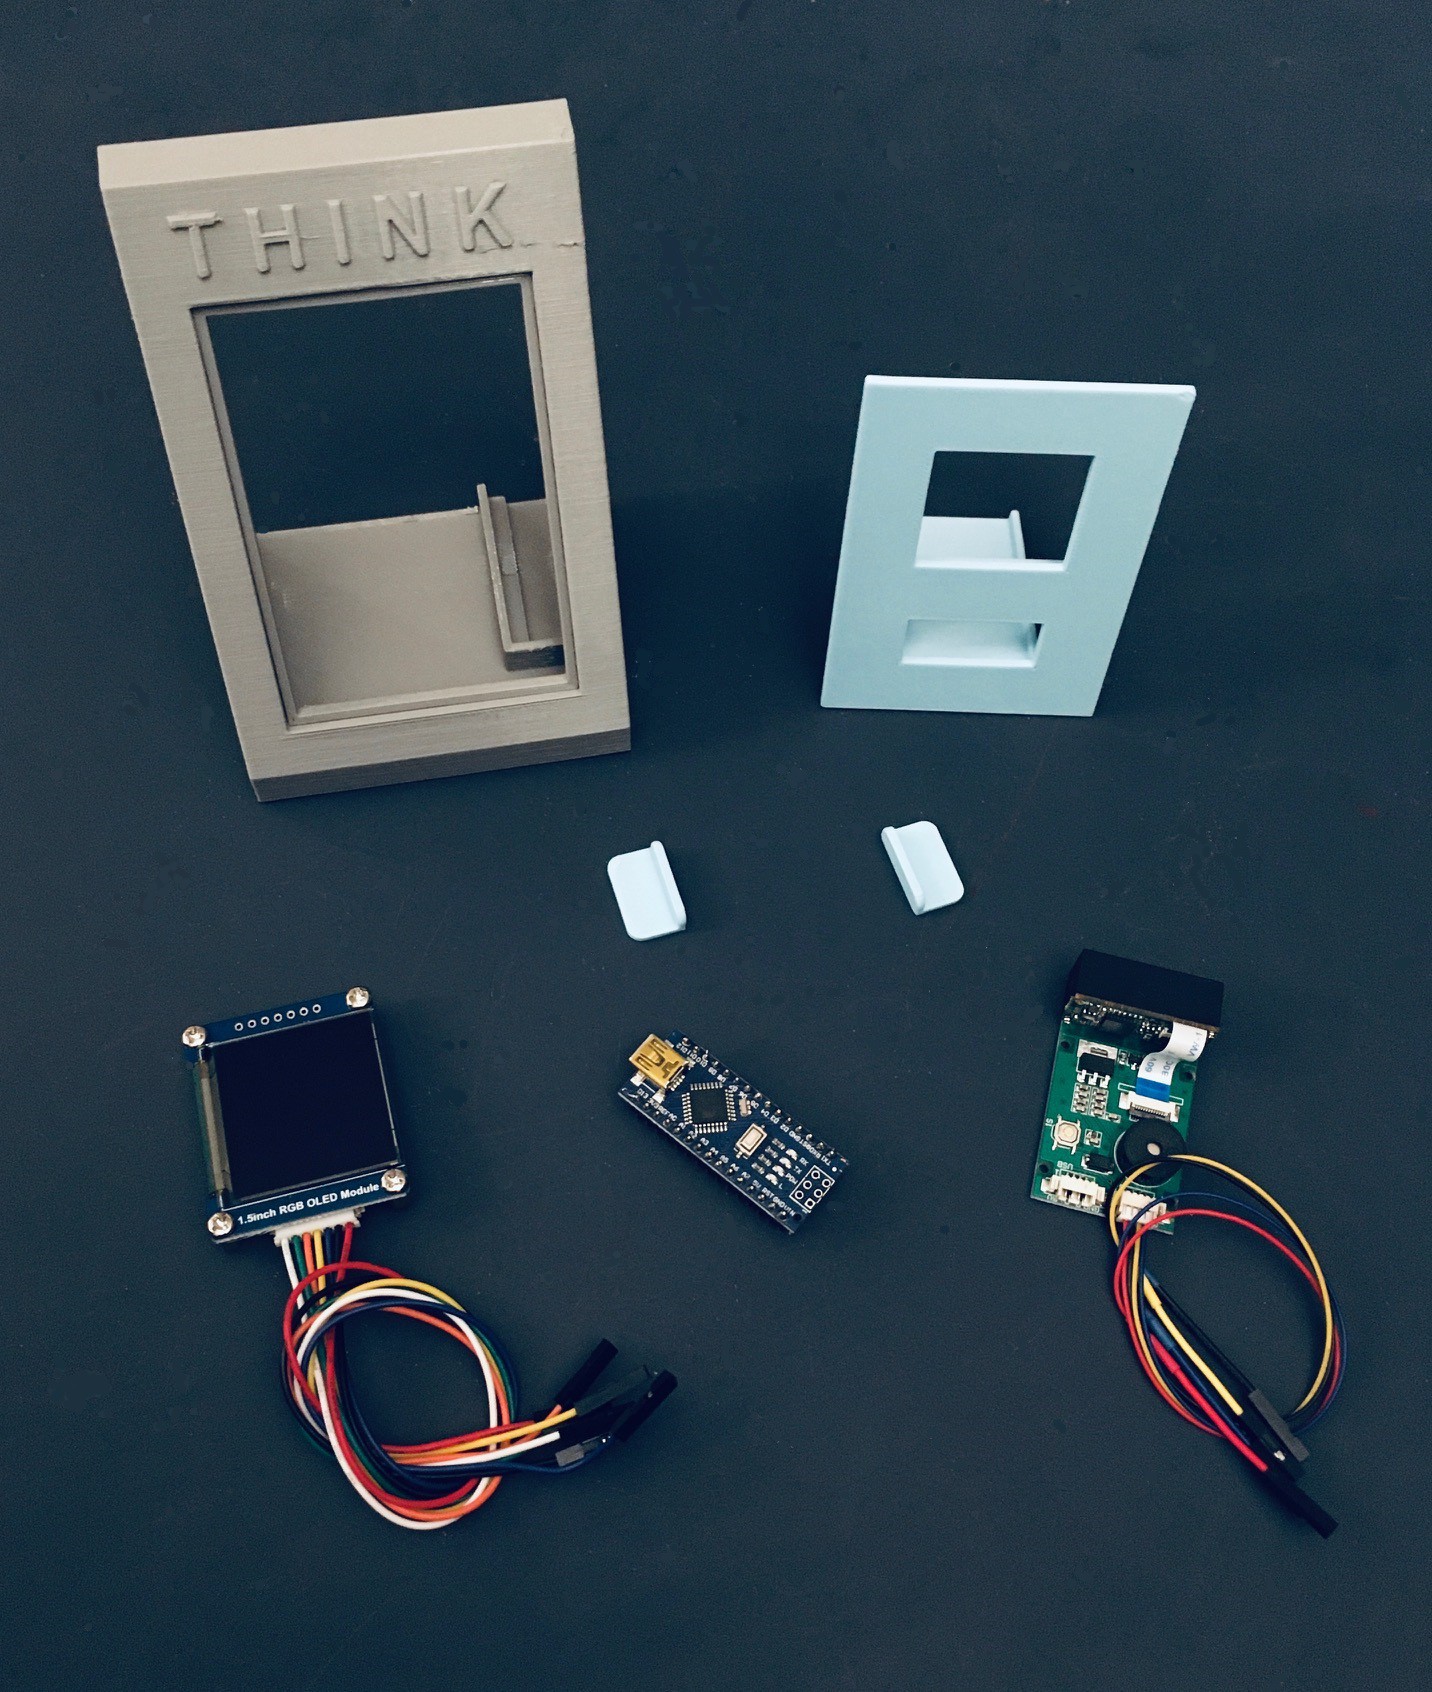
The GM67 unit and the OLED display slide into the slots provided behind the front panel. I printed some tabs to hold the display in place and used a small piece of two sided tape to secure the GM67. The front of the scanner should be flush with the front of the panel.
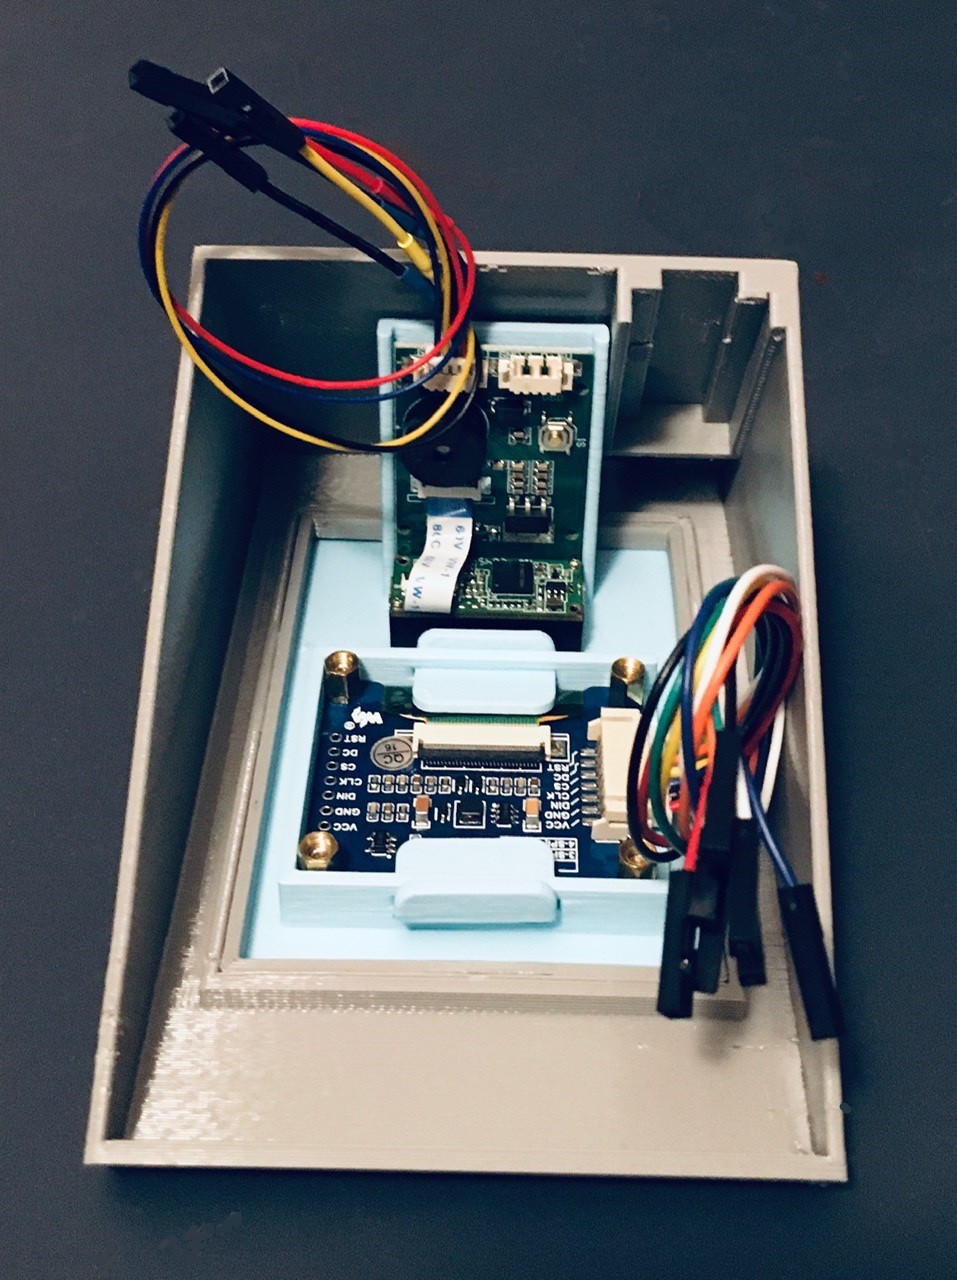
There is also a spot for the Nano to nest. I anchored it in place with two sided tape.
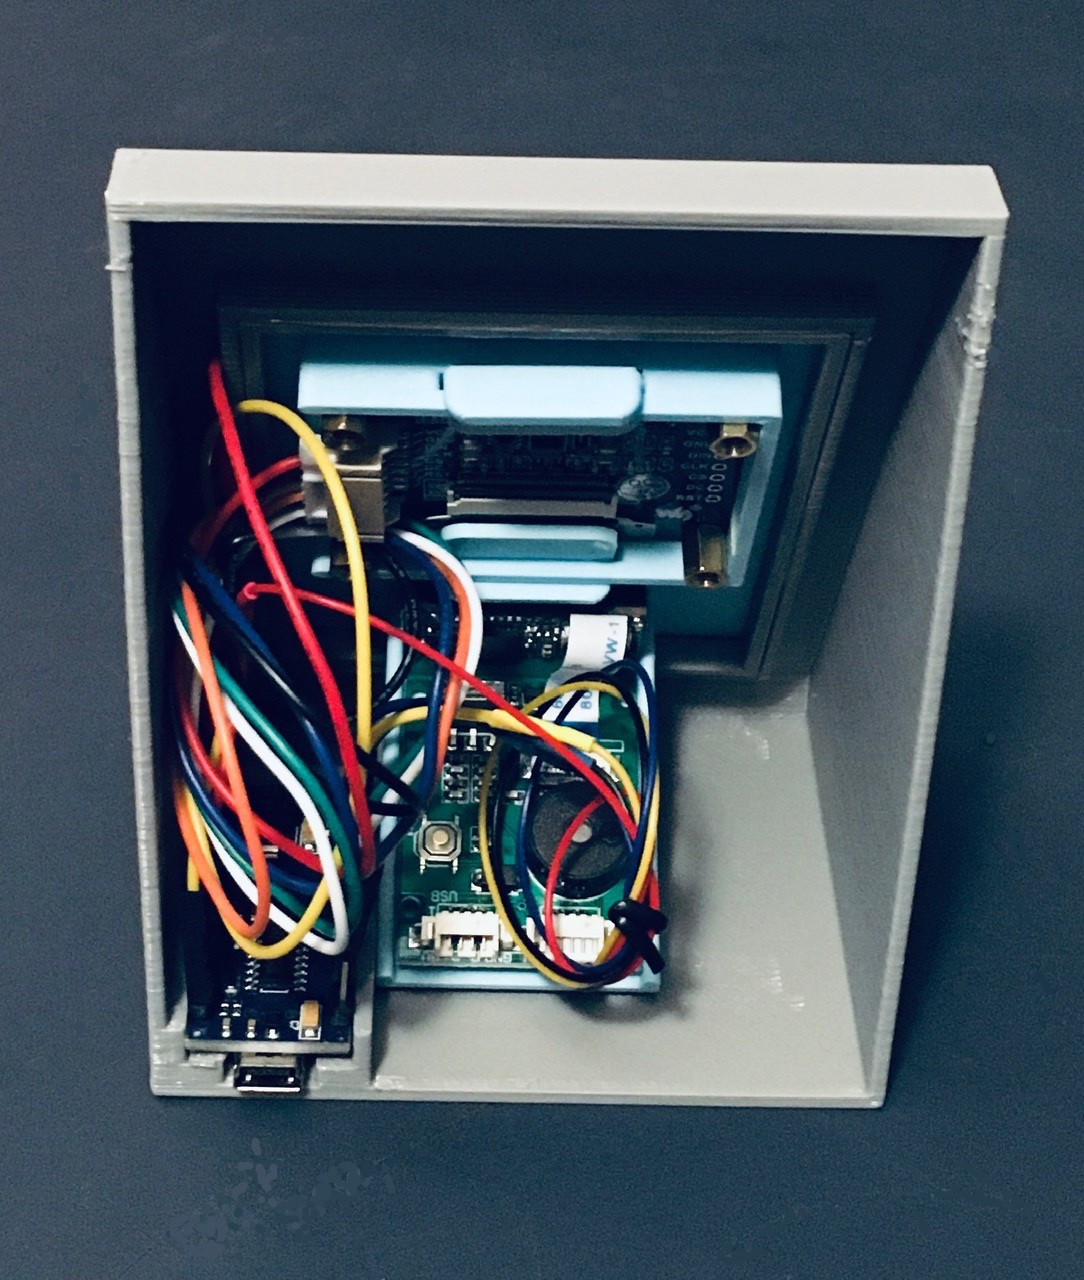
The wiring looks a bit messy but is actually pretty straight forward.
| From | To Arduino |
|---|---|
| GM67 VCC | 5V |
| GM67 TX | D2 |
| GM67 RX | D3 |
| GM67 GND | GND |
| OLED VCC | 3.3V |
| OLED GND | GND |
| OLED DIN | D11 |
| OLED CLK | D13 |
| OLED CS | D10 |
| OLED DC | D7 |
| OLED RST | D8 |
And that's it. It doesn't get much more minimalistic than this.
The only tweaks I made to the GM67's default factory settings were to:
- Change the scanning mode from continuous to one where it detects the presence of a card before scanning based on lighting changes. This seems to work pretty well.
- Disable the LED light on the front of the unit. The light was pretty bright and it's not necessary for most situations
This was done by scanning in the appropriate QR codes from the manual of course. So...
Read more »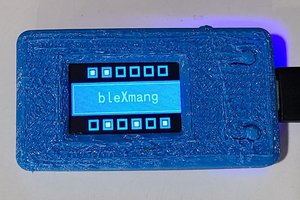
 WJCarpenter

 BDM
BDM