Monsterrhino
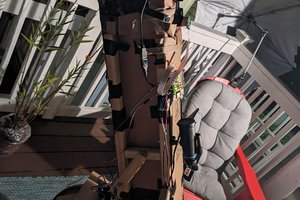
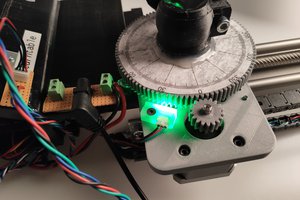
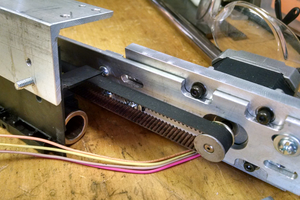
The Monsterrhino printer cart is made up of a z-y cross slide that moves a pen in z (lifting up) and y direction. The cross slide itself is mounted on a bent aluminium sheet metal part. Furthermore are 4 stepper motors mounted on the aluminum chassis acting as hubs, two of them are used to move the cart forward in x direction on the 3D printed wheels. The tires of the wheels are printed with a flexible filament (Filaflex) and the rims with ABS. The tires hold due to the convex shape of the tire and the rim. The ABS rim gives a tight fit on the shaft of the stepper motor. The stepper motors are driven by a MonsterrhinoMotion card. The MonsterrhinoMotion card is a multipurpose stepper driver card that combines power management, stepper drivers, CAN and USB interface, encoder and limit switches, and a STM32 MCU that can be simply programmed using the Arduino IDE and the associated library. The 5” touch display is driven by a MonsterrhinoControl card connected to a Raspberry Pi 4. The MonsterrhinoControl card acts also as a power supply for the Raspberry Pi, converting the 24V supply of the MonsterrhinoContorl to 5V for the RPi. The Raspberry Pi runs a Python program to convert the image into lines that are further converted to axis commands that are sent via CAN bus to the MonsterrhinoMotion card. The z-y axis use magnetic limit switches, the Monsterrhino Hall Sensor, for the simulaneous homing. The status of the machine is indicated by Monsterrhino RGB LEDs that are connected to the MonsterrhinoControl, each LED can be individually addressed and a RGB color can be set. The whole cart is powered by a 24 V LiPo battery with 18000 mAh.
0%
0%
Monsterrhino printer car
The Monsterrhino printer car is a pen plotter on wheels that can print images on almost any flat surface.
Become a Hackaday.io member
Already have an account? Log in.
Just one more thing
To make the experience fit your profile, pick a username and tell us what interests you.
Pick an awesome username
hackaday.io/
Your profile's URL: hackaday.io/username. Max 25 alphanumeric characters.
Pick a few interests
Projects that share your interests
People that share your interests
 willbaden
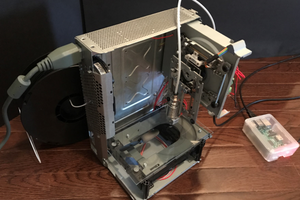
 Kernal BT