 Daphne
-
1Setup
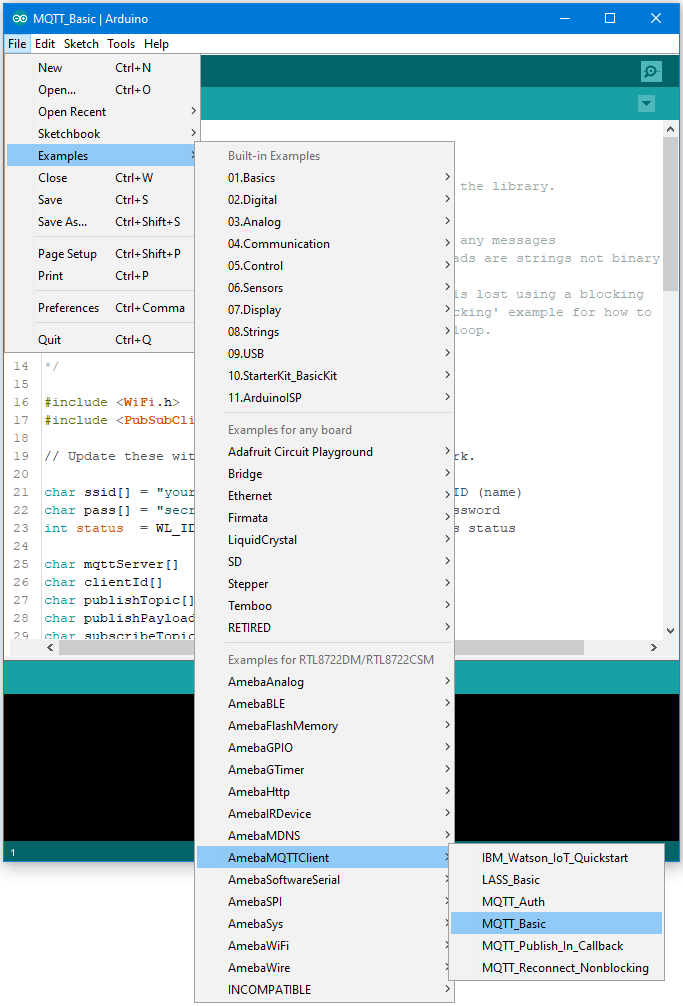
In this example, we connect Ameba to MQTT-Broker. Then send messages as publisher and receive messages from MQTT Broker as subscriber. Open the MQTT example "File" → "Examples"→ "AmebaMQTTClient" → "MQTT_Basic"
![]()
-
2Programming
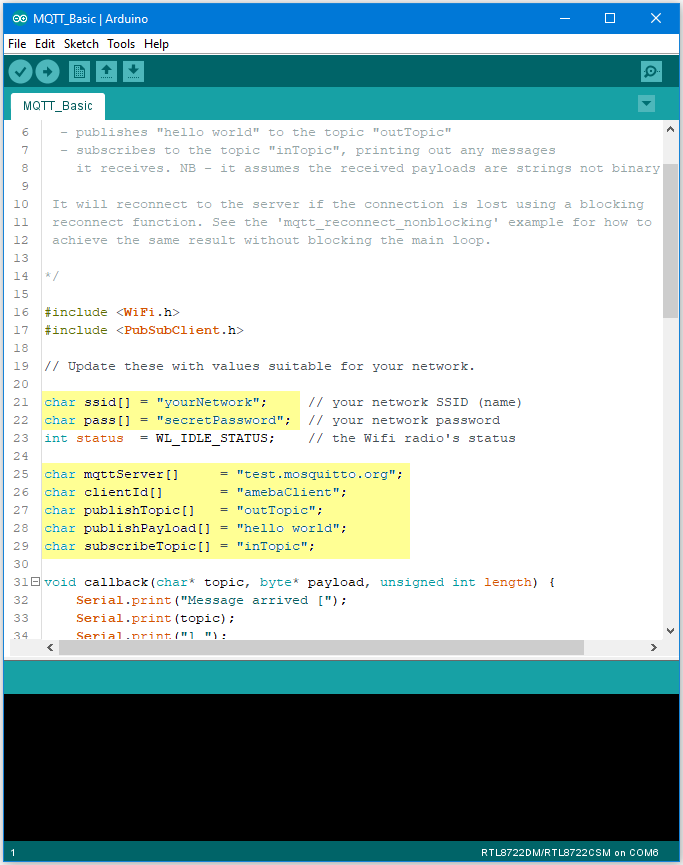
Please modify some Wi-Fi related parameters. And some information related to MQTT:
![]()
The “mqttServer” refers to the MQTT-Broker, we use the free MQTT sandbox “test.mosquitto.org” for testing. “clientId” is an identifier for MQTT-Broker to identify the connected device. “publishTopic” is the topic of the published message, we use “outTopic” in the example. The devices subscribe to “outTopic” will receive the message. “publishPayload” is the content to be published. “subscribeTopic” is to tell MQTT-broker which topic we want to subscribe to.
-
3Final Results
compile the code and upload it to Ameba. Press the reset button, then open the serial monitor
![9-4]() After Ameba is connected to MQTT server, it sends the message “hello world” to “outTopic”. To see the message, we need another MQTT client. Here we use a chrome plugin “MQTTLens” to be the MQTT client. You can find it in google webstore.
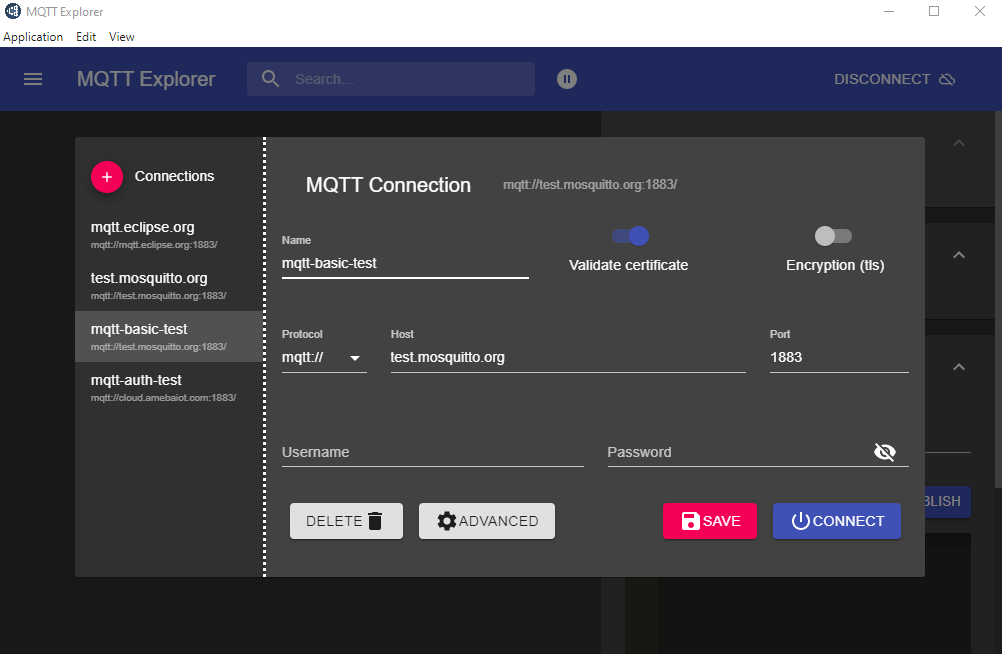
After Ameba is connected to MQTT server, it sends the message “hello world” to “outTopic”. To see the message, we need another MQTT client. Here we use a chrome plugin “MQTTLens” to be the MQTT client. You can find it in google webstore.![9-5]() Install and open the MQTTLens, click “+” next to “Connection” on the left, and fill in the required information
Install and open the MQTTLens, click “+” next to “Connection” on the left, and fill in the required information- Connection Name: Used to identify the connection, you can choose a name you like.
- Hostname: The MQTT-Broker server, here we use “iot.eclipse.org”
- Client ID: We use the default randomly generated ID.
Then click “CREATE CONNECTION”.
![9-6]() Since we have not registered the topic we want to listen to, we would not receive any messages now. Fill in “outTopic” in the “Topic” field and click “Subscribe”. Wait for Ameba to send next message (or you can press the reset button). Then you can see the “hello world” message show up.
Since we have not registered the topic we want to listen to, we would not receive any messages now. Fill in “outTopic” in the “Topic” field and click “Subscribe”. Wait for Ameba to send next message (or you can press the reset button). Then you can see the “hello world” message show up.![9-7]()
Use MQTT to upload and listen data
MQTT (Message Queuing Telemetry Tansport) is a protocol proposed by IBM and Eurotech.
 After Ameba is connected to MQTT server, it sends the message “hello world” to “outTopic”. To see the message, we need another MQTT client. Here we use a chrome plugin “MQTTLens” to be the MQTT client. You can find it in google webstore.
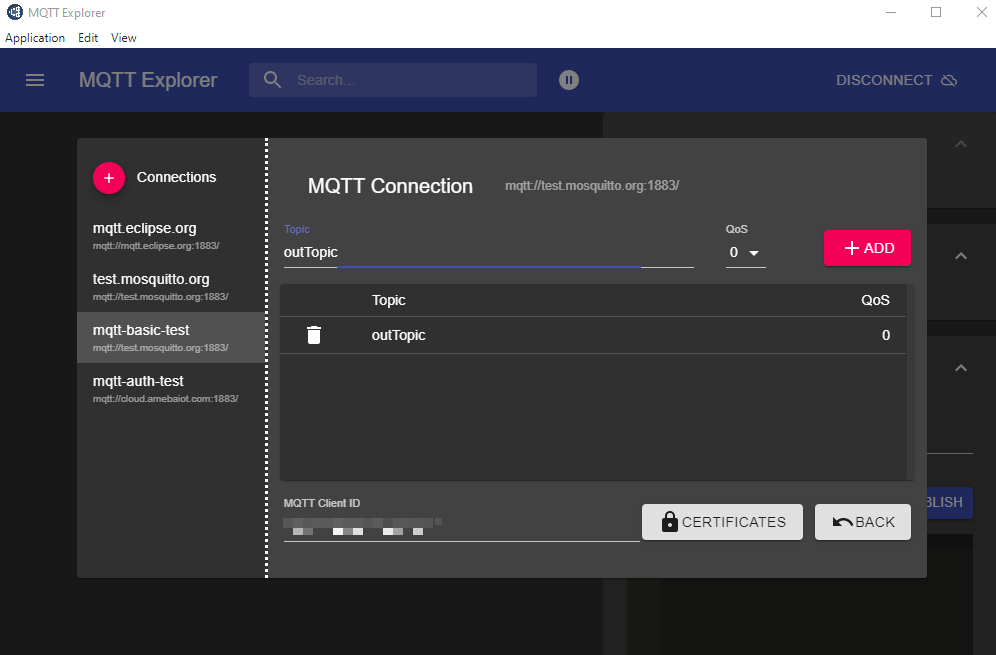 Install and open the MQTTLens, click “+” next to “Connection” on the left, and fill in the required information
 Since we have not registered the topic we want to listen to, we would not receive any messages now. Fill in “outTopic” in the “Topic” field and click “Subscribe”. Wait for Ameba to send next message (or you can press the reset button). Then you can see the “hello world” message show up.
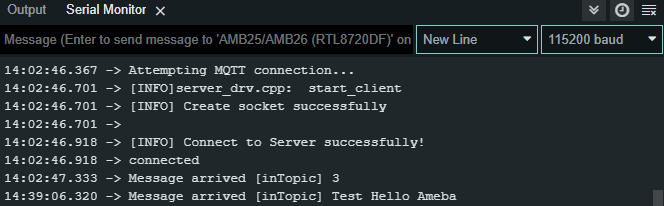
Discussions
Become a Hackaday.io Member
Create an account to leave a comment. Already have an account? Log In.