Lithium ION
There are lot of programmer boards that are compatible with Arduino. But the cheapest and smaller one I found on internet is based on WCH made CH340 ic. And I also found that USB to serial programmer in many Arduinos clone boards. Even I used them in mine own made Arduino, get it from here. Most of my projects get succeed with PCBway prototype service, check from here.
In this tutorial, you will get knowledge about programmer and how to make own programmer. These CH340 are come in a variety of packages which are named as:
CH340 family:
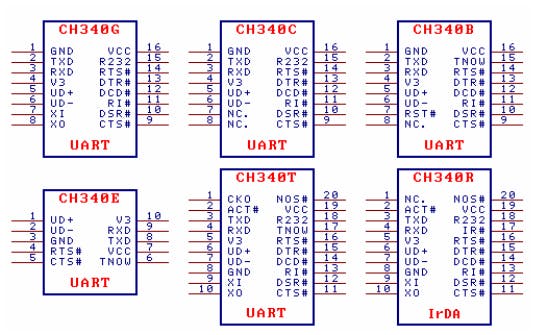
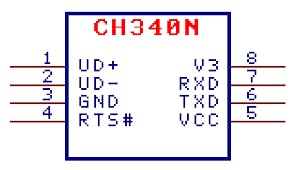
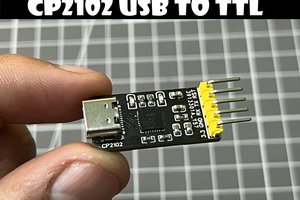
You can see the datasheet and application circuit of all of them from here. I want to make this programmer as small as possible. So, I bought CH340N ic, this one is available in 8 pin SMD package. No need of external crystal oscillator and need a very fewer external components.
These Programming chip need external drivers to be installed in the system. Download the compatible drivers of CH340 family from here.
Components required:
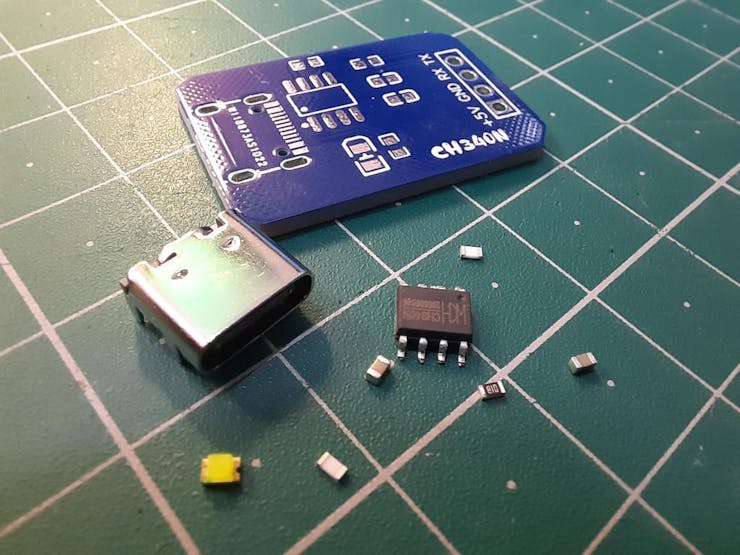
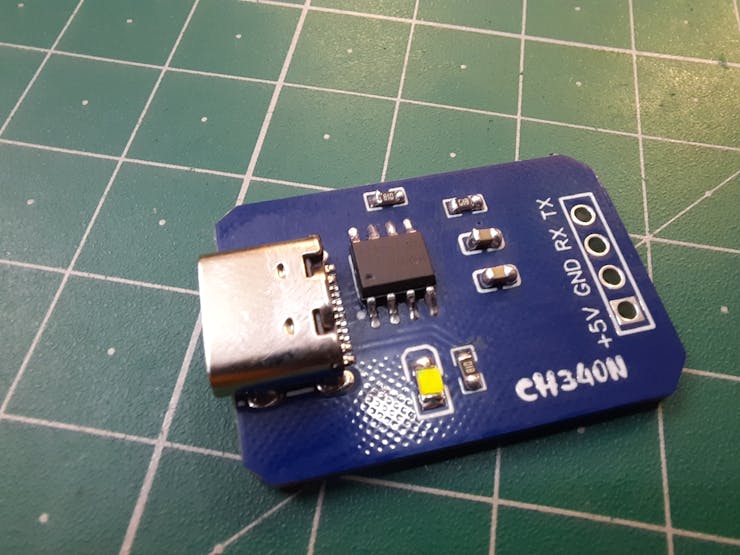
1) CH340N IC
2) 1K resistor
3) 100NF capacitors
4) 0805 led
5) USB type-C
6) Custom designed PCB
Circuit diagram:
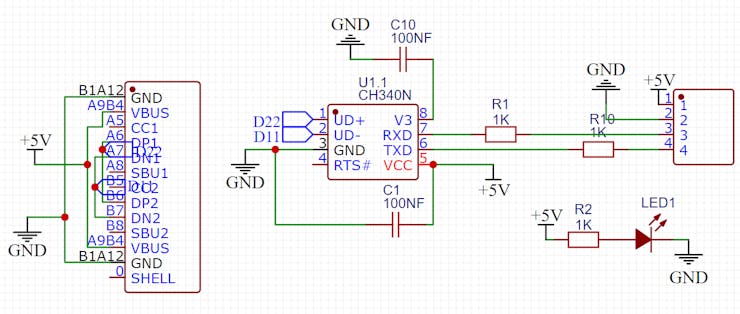
Here in the circuit 1K resistor is attached between the TX and RX pin. This pin further goes to microcontroller RX to TX and TX to RX for communication. This is USB to serial chip, so we are using TYPE-C, 100NF capacitors are used for filtration purpose. All the family of ch340 chips are compatible with 3.3 and 5volts. And CH340N has internal 8Mhz crystal, so need to give external clock. Led indicator with 1k resistor is for power indication. You can download circuit diagram and Gerber files from here.
PCB designs:
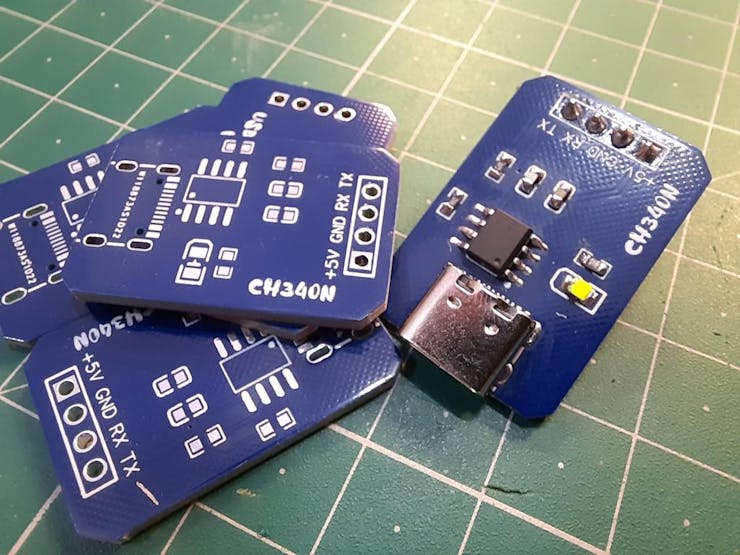
My designed PCB is followed by PCBway prototype service, giving a professional looks to my designs. PCBWAY is affordable and best PCB manufacturer. If you want to use same designs as mine then get them from here.
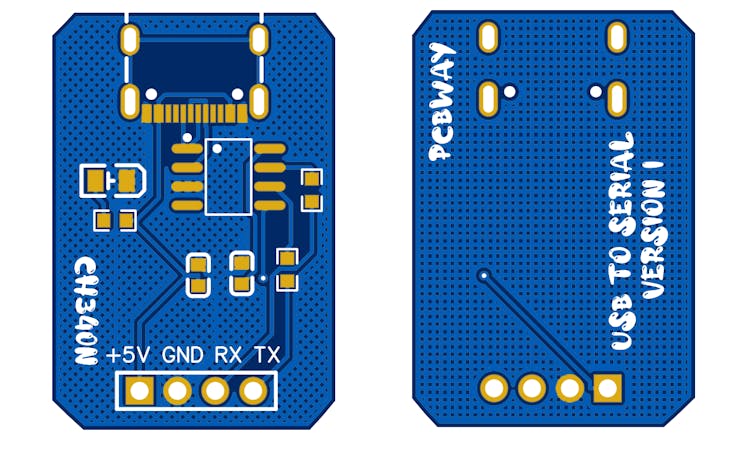
For the professional looks, I am using PCB prototype service from PCBWAY. The ordering process is too simple, Sign-up to PCBway using this link.
Then choose the PCB size and other parameters of color, surface finish and material.
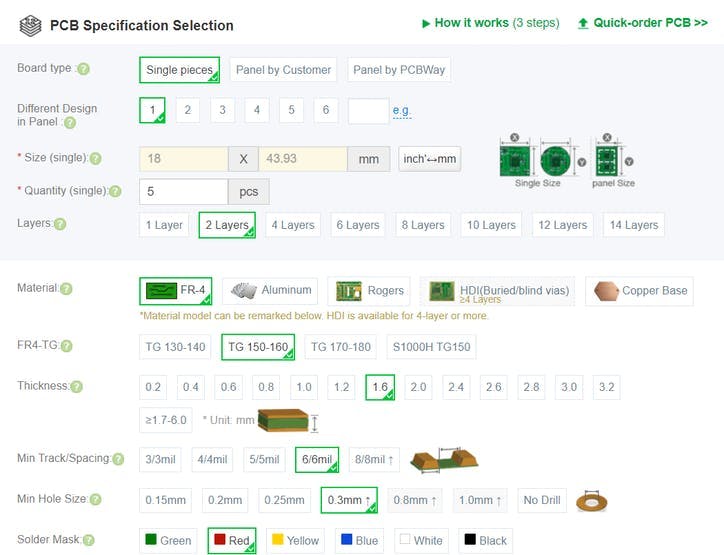
Add it to cart > Upload the Gerber files > CHECKOUT and get your package in just 7 days.
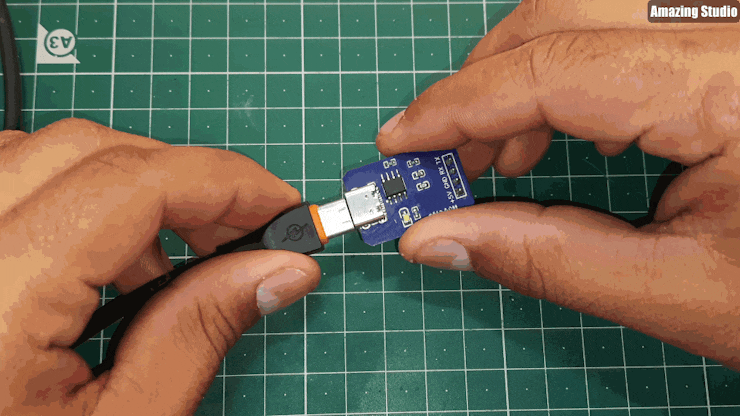
After soldering:
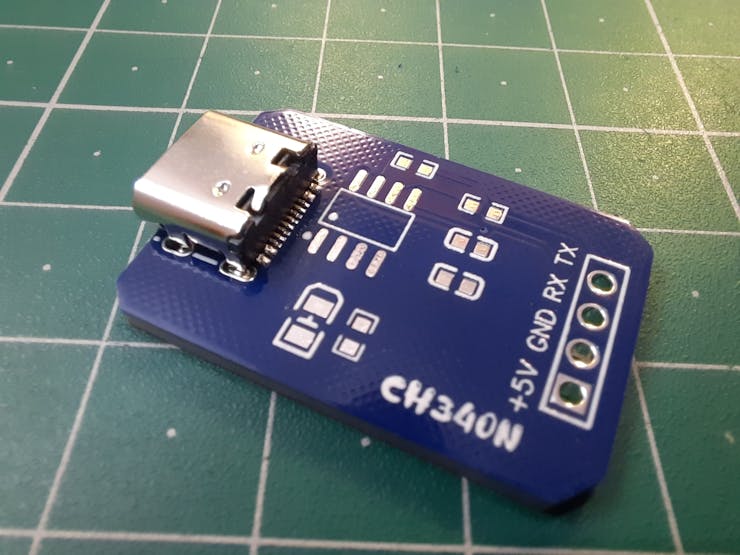
I soldered all the components, it is not too difficult just done by hand soldering. First I placed USB and soldered that on place because this one has very intense gap between the pins.
Then I soldered all other components, IC, LED, resistor and capacitors and finally headers for the breadboard and jumper compatibility.
Drivers and ports:
Your computer system will not recognize the chip if there is no proper driver installed. Ch340 need external drivers, so you can download them from here.
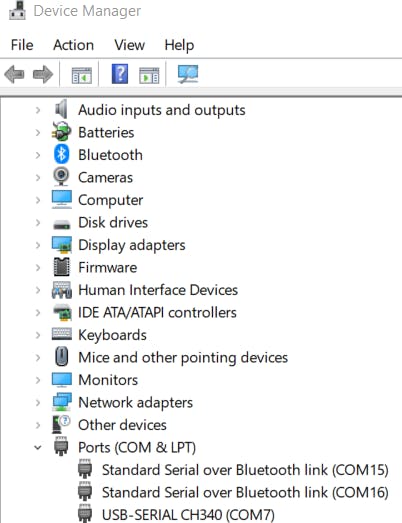
After installation make sure to check them , just go to device manager section from search option of windows. Then go to ports and find USB to serial programmer as ch340.
Working:
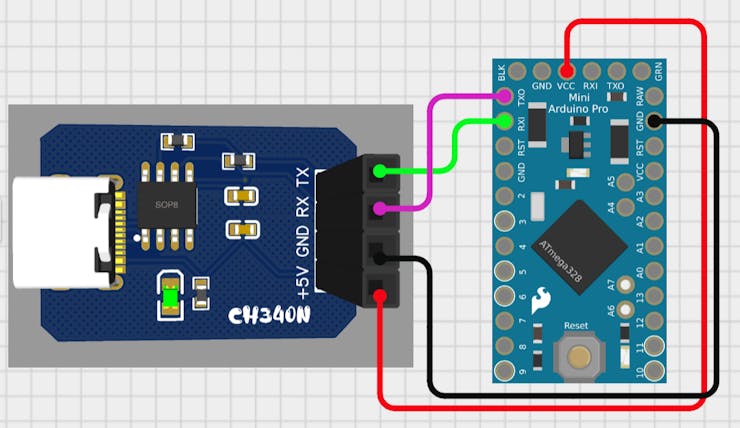
Connect your Arduino and ch340 module using this schematics here and then upload the sketch, but the problem of this IC will not ended up here. Because I am using lower variant of WCH named as CH340N. This one not have DTR pin that is required to reset the microcontroller before uploading sketch. So, you have to do it manually after compilation and before uploading.
If not then programmer will not flash the sketch inside the microcontroller and just stopped working like this. But we can use this programmer to upload sketch in other microcontroller and those 32bit ESP and pro mini also.
Conclusion:
Everything is okay in WCH chips, But a chip without reset pin may create problem for newcomers in the MCU section. All the microcontroller has different boot programs, it work with pro mini very easily but for UNO we need to do many steps manually.
In future we will improve the designs, add a chip with reset pin and small form factor. Once again a very thanks to PCBWAY to sponsor this project. Sign-up using this link...
Read more »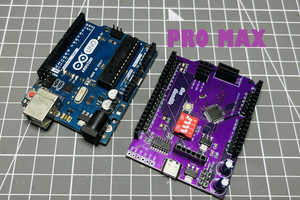
 Sagar 001
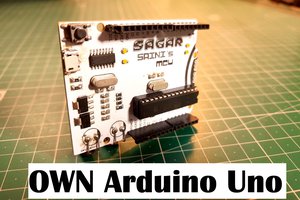
 ElectroBoy