 Mitsuru Yamada
1. PERSEUS-68
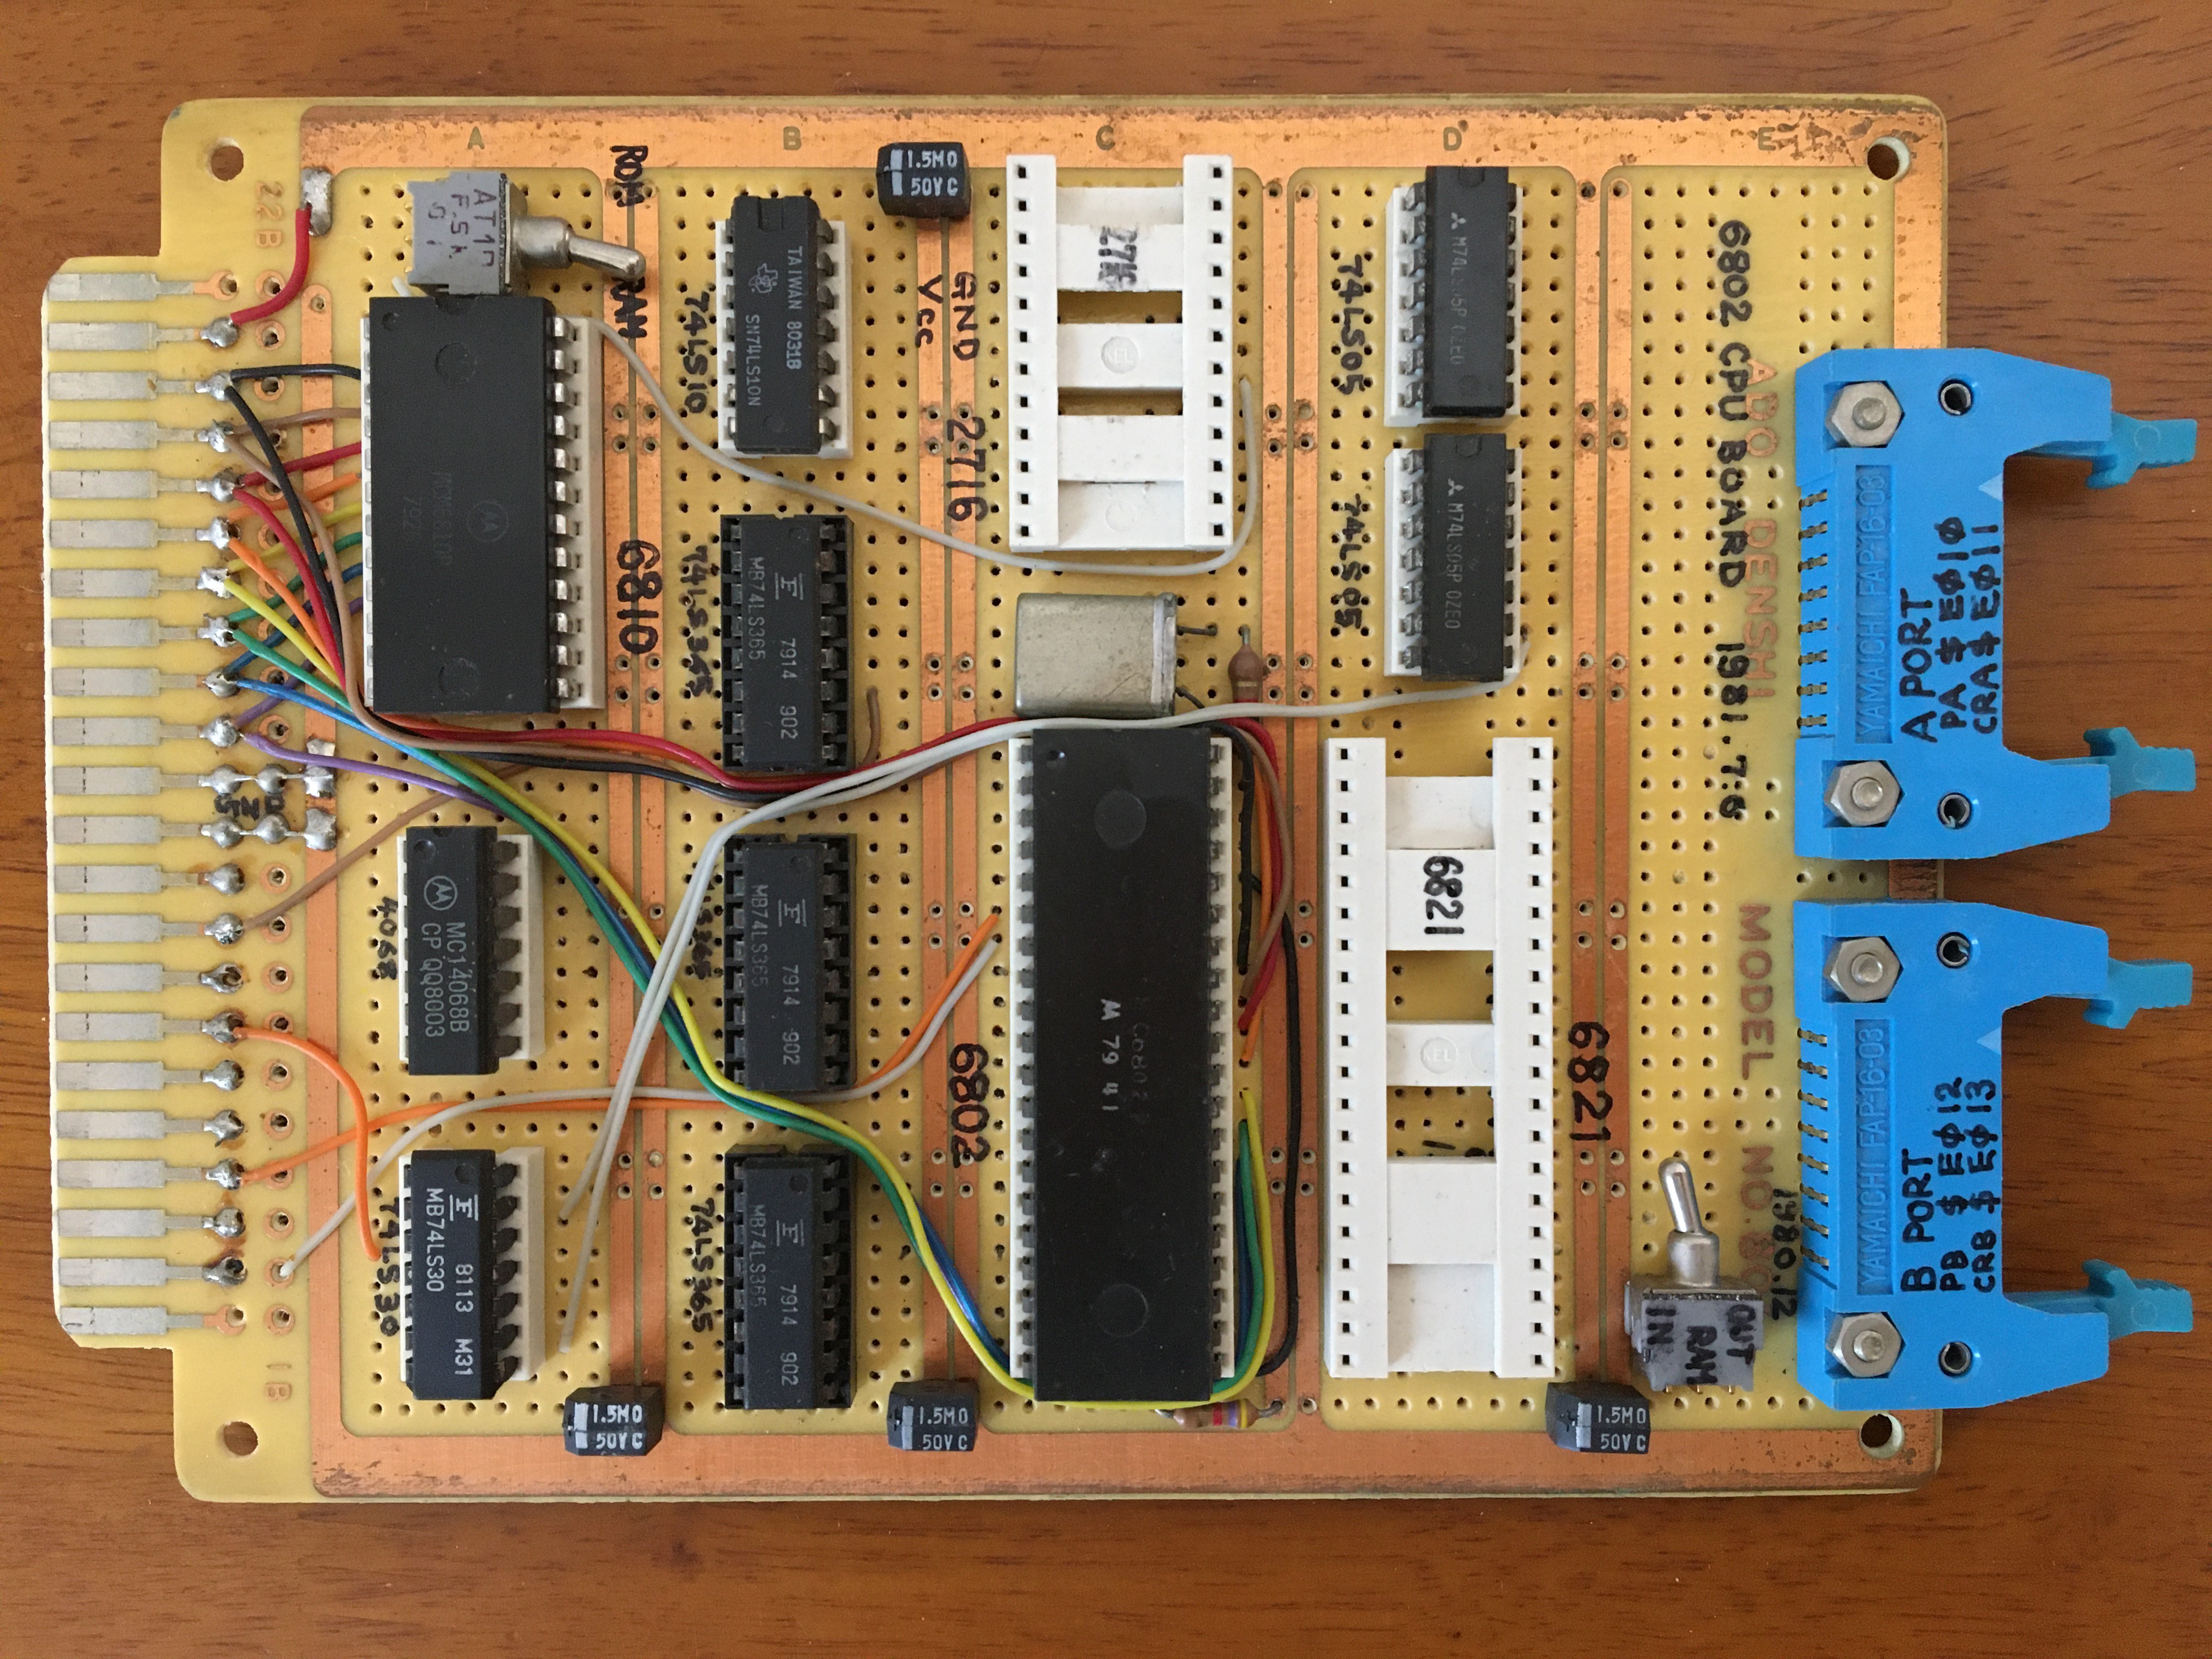
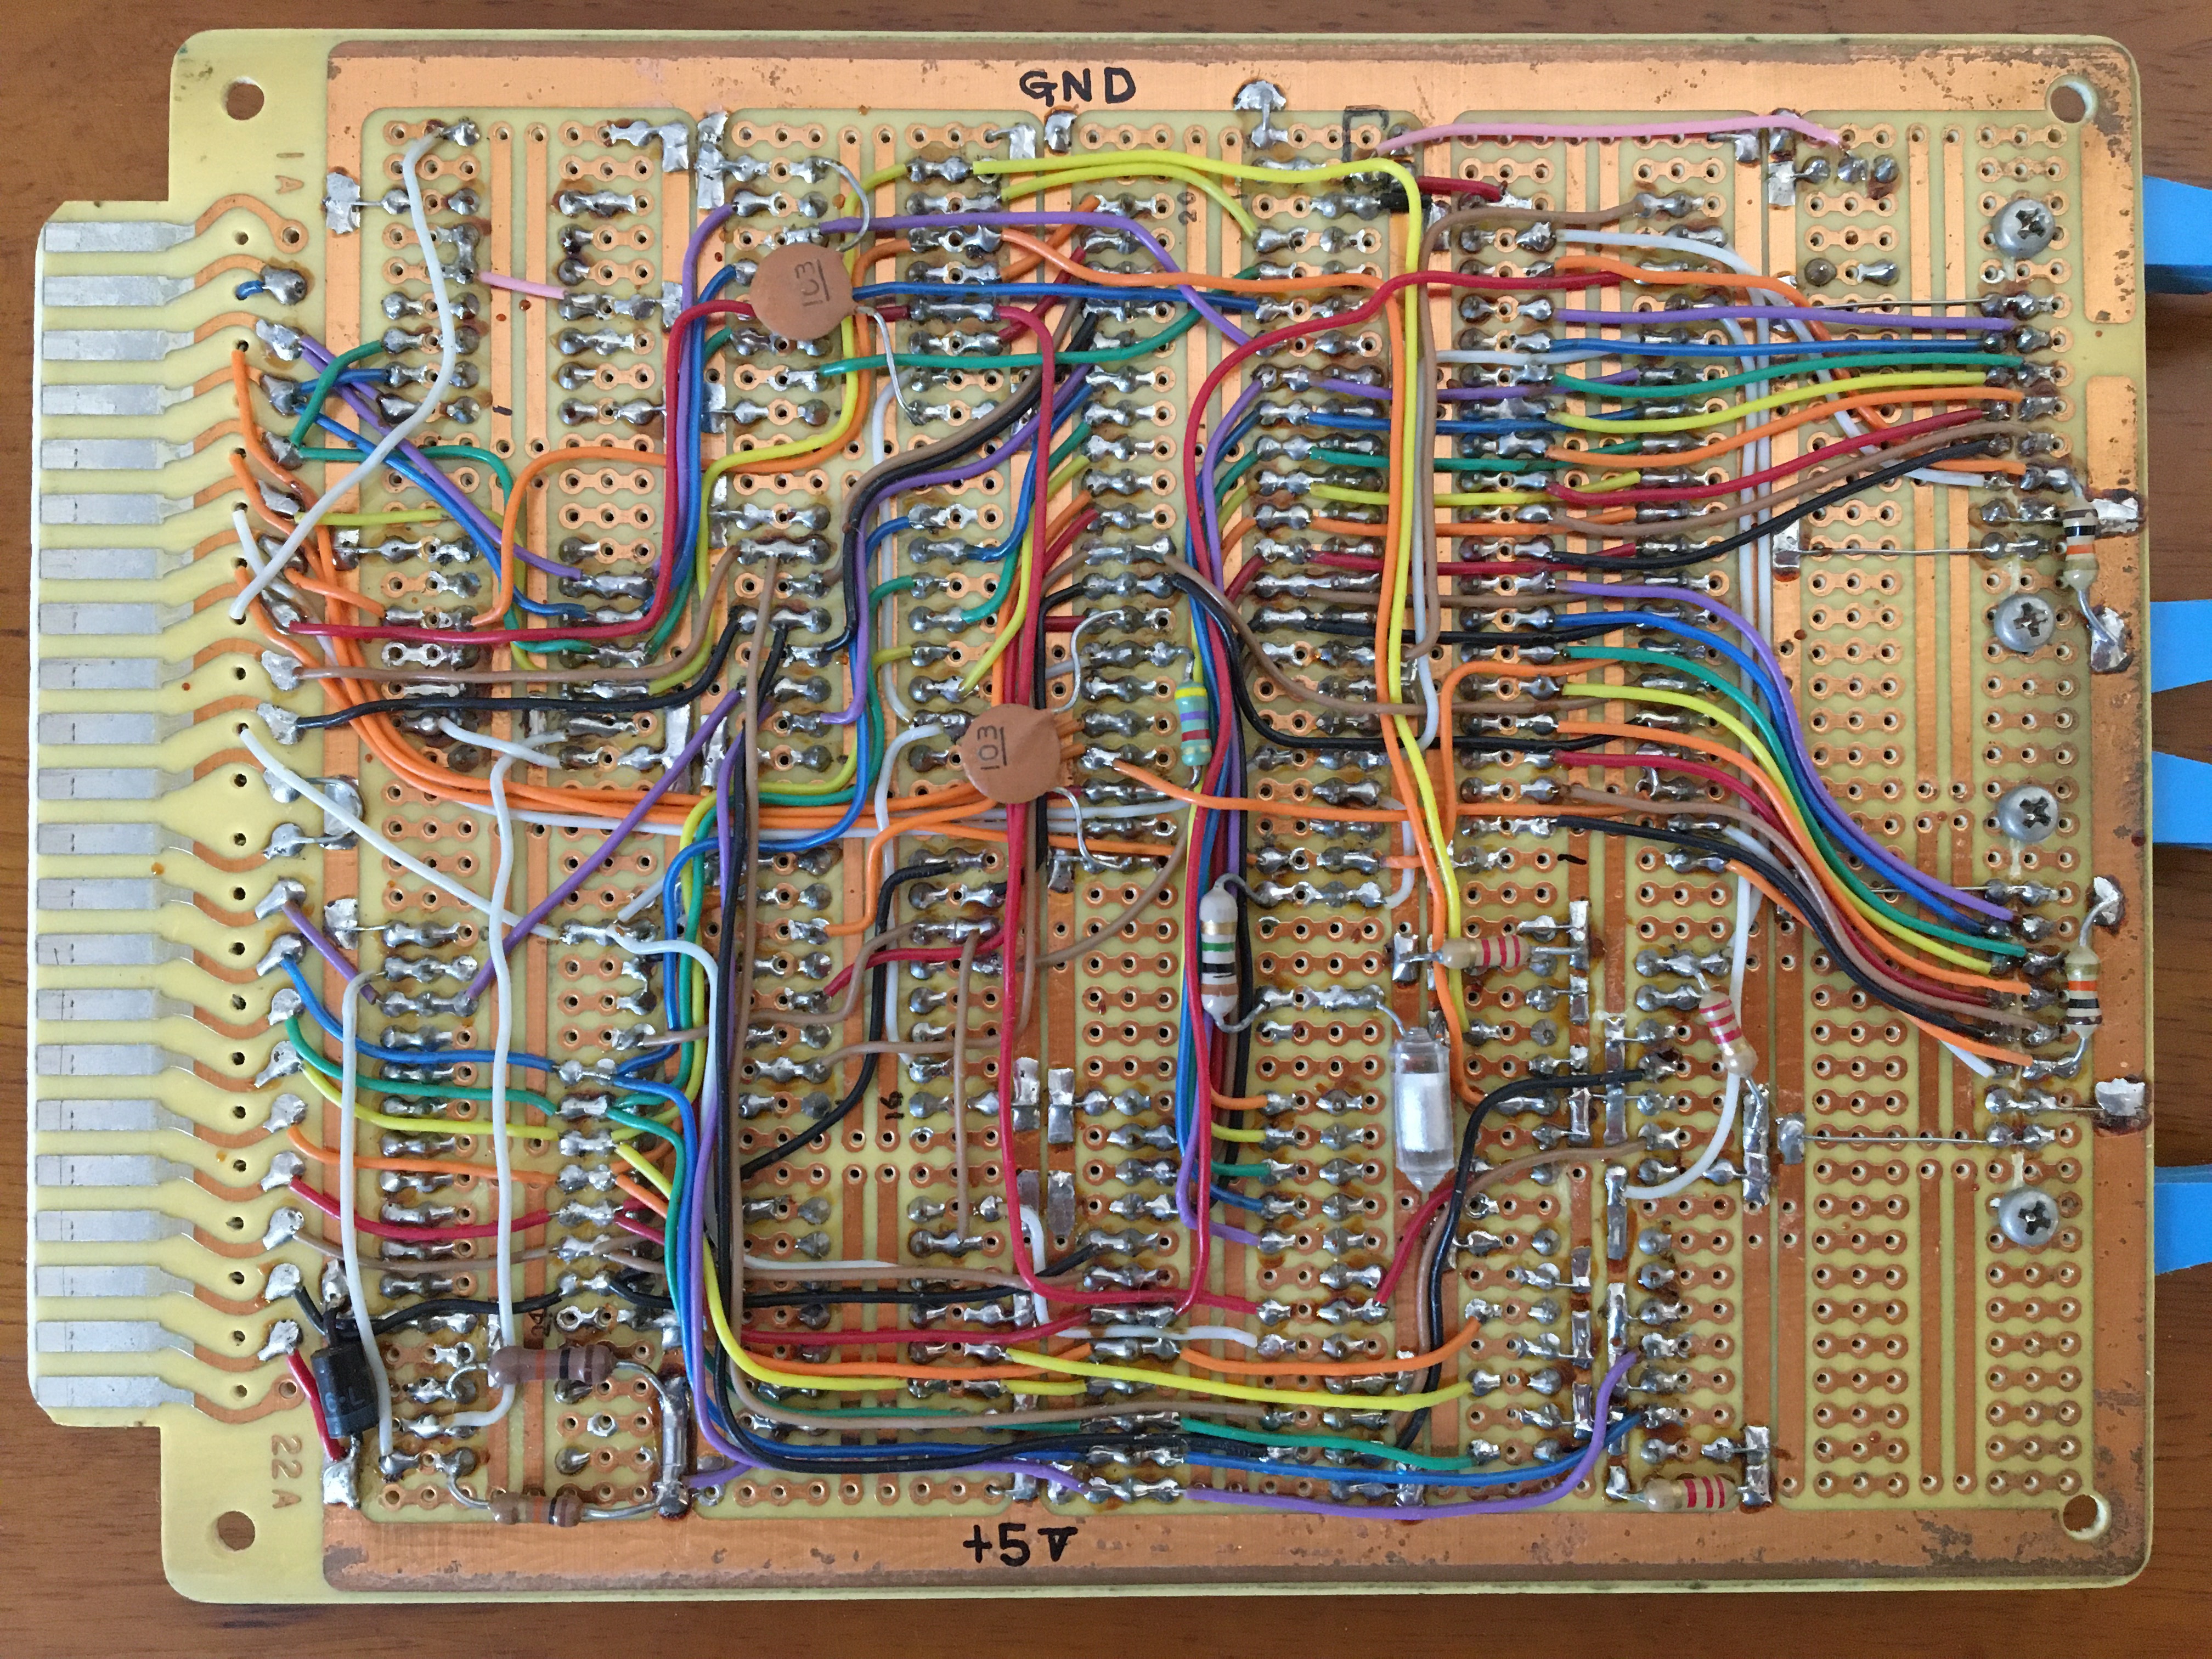
When I was 16 years old and personal computers did not yet exist in the world, I was determined to complete a computer on my own by 1980, when I would have turned 20. The computer I built in 1980 to achieve this goal was the PERSEUS-68. The appearance of this computer is shown in Fig. 1. The CPU is a Motorola MC6802 with a system clock of 1 MHz. The RAM (MC6810) with a capacity of 128 bytes mounted on the board in addition to 128-byte CPU built-in RAM. The enclosure is made of aluminum angle, and it also serves as a card rack for the printed circuit board. The board is a universal board and wiring was done by soldering.
Programming is a DMA method that stops the CPU and releases the bus. This is based on an article in the book [1]. Address and data are set in binary by toggle switches on the panel, and data is written to the RAM when the write switch is pressed. The address bus is 16 bits, of which the lower 8 bits are set on the panel and the upper 8 bits are set with the DIP switches on the board on the side of the chassis. In addition to normal program execution, single-step operation can be performed by pressing the switch.
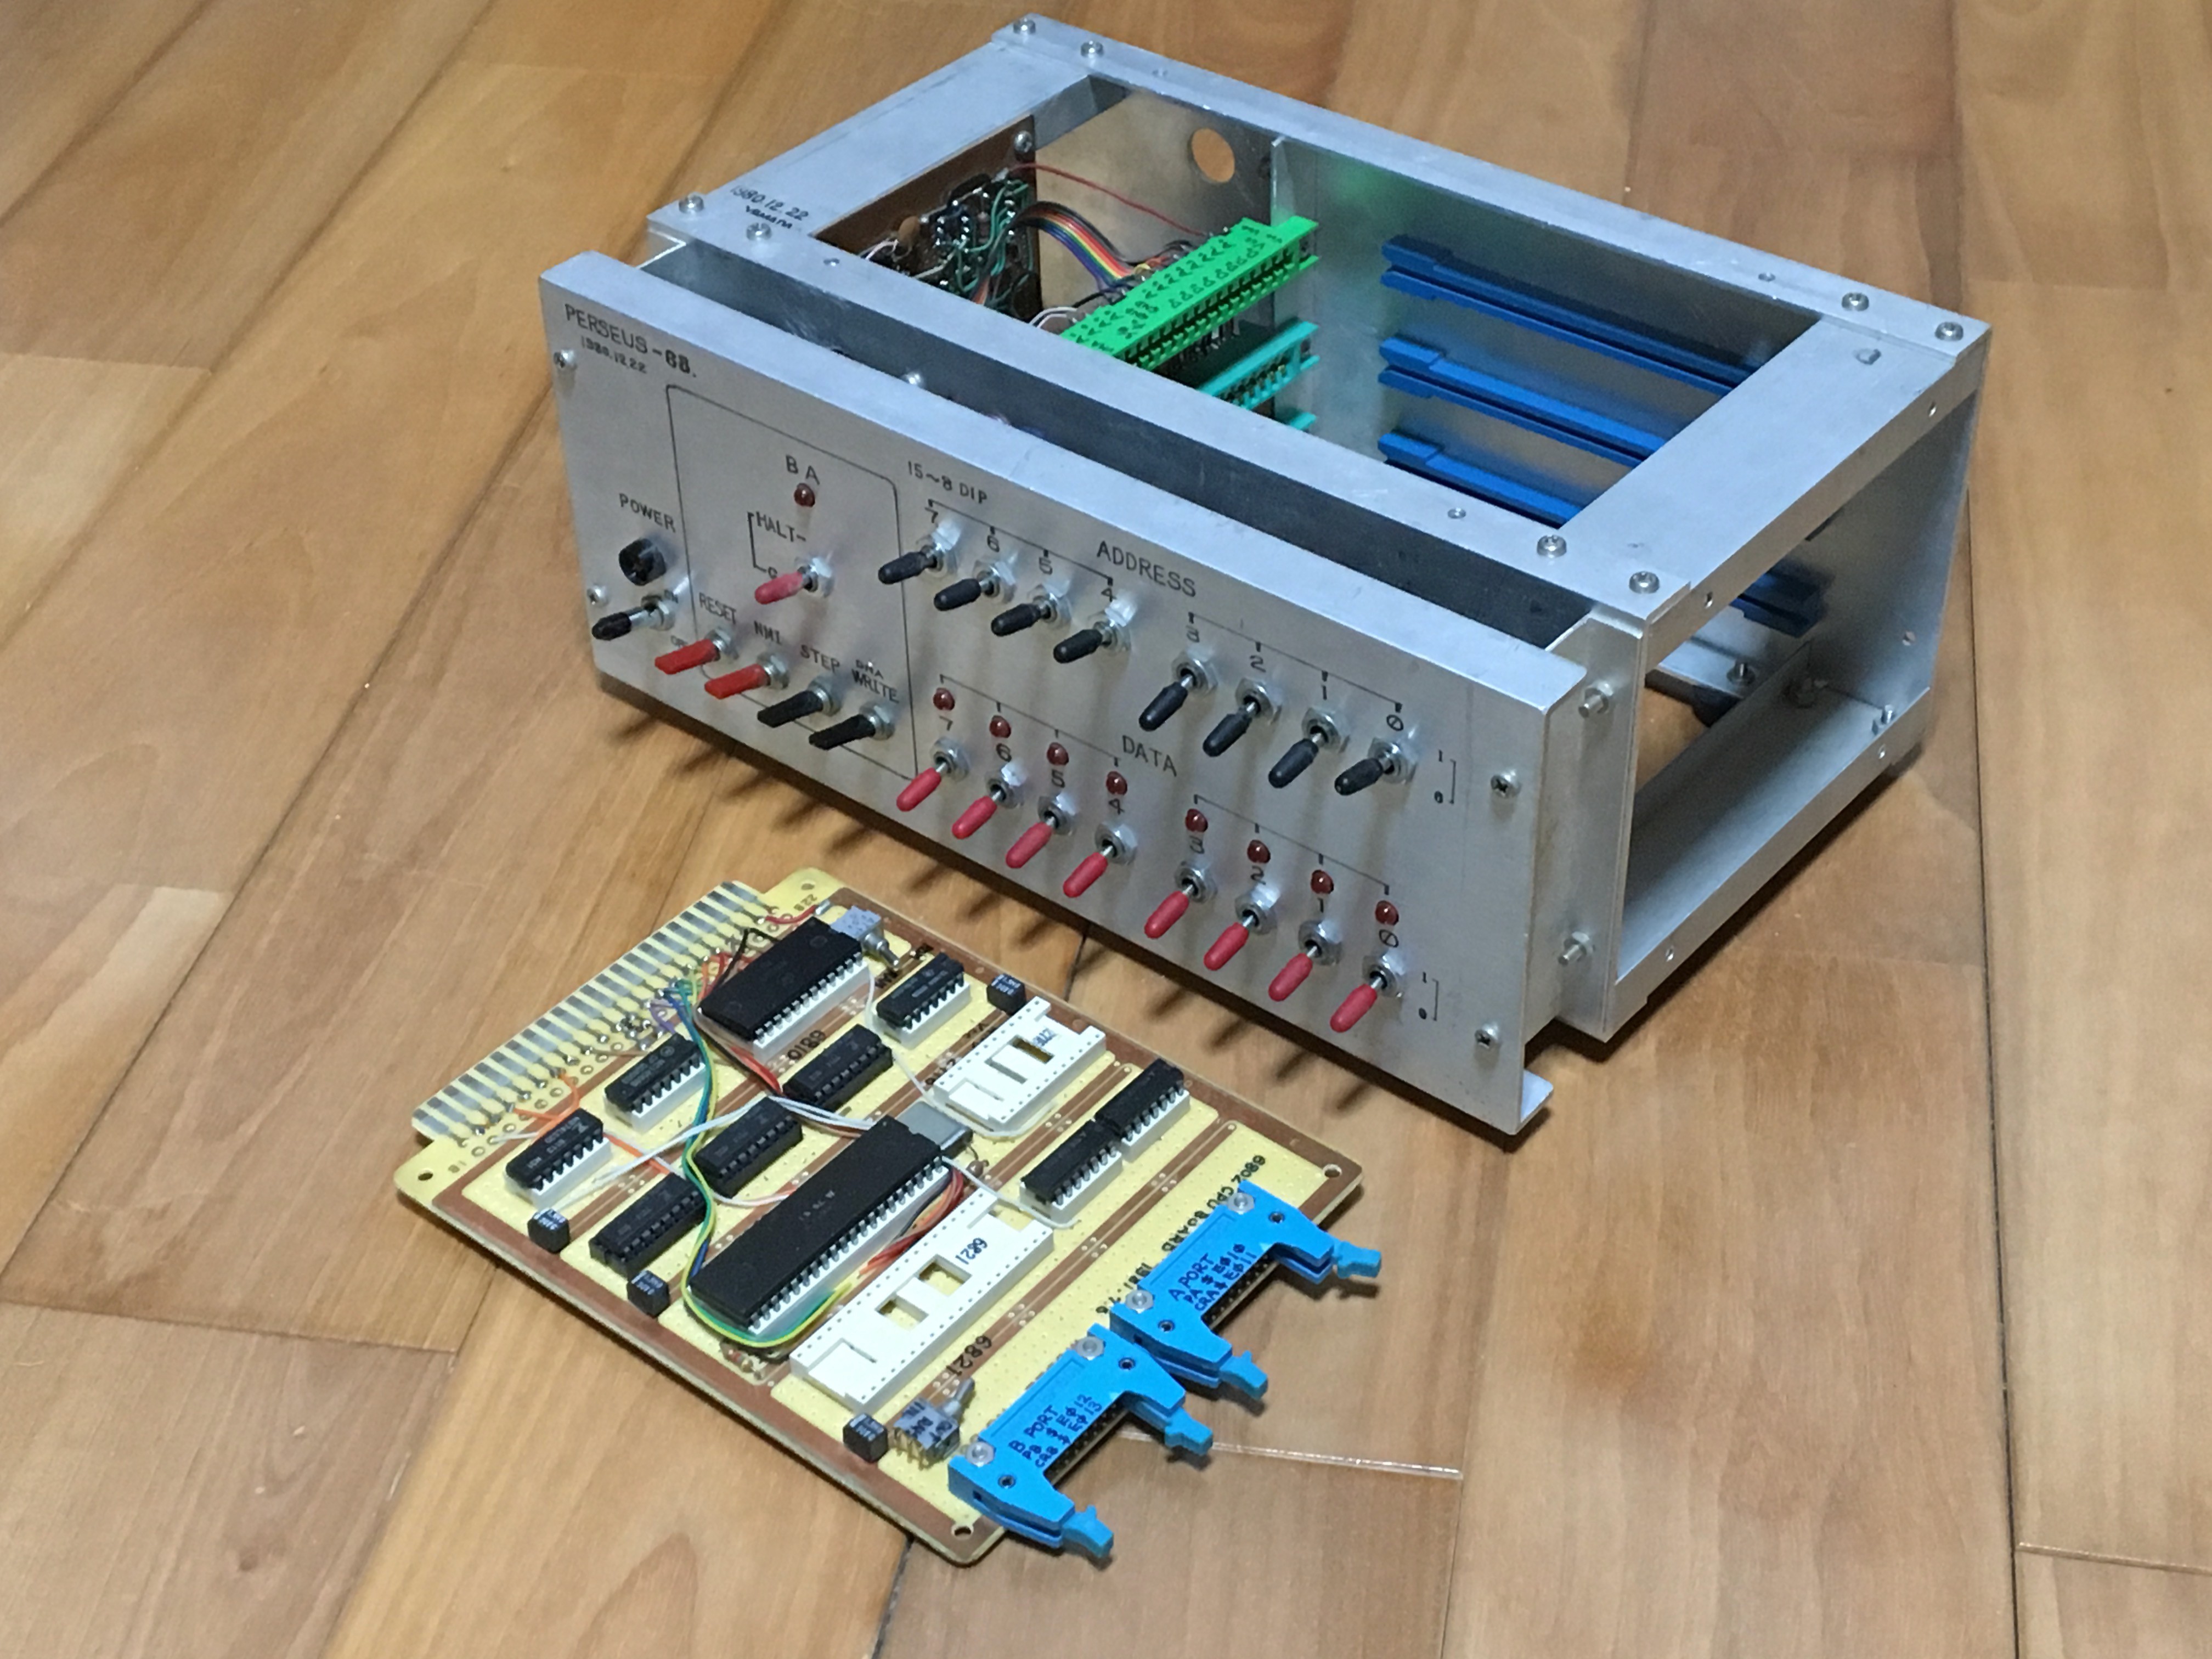
Fig. 1 PERSEUS-68
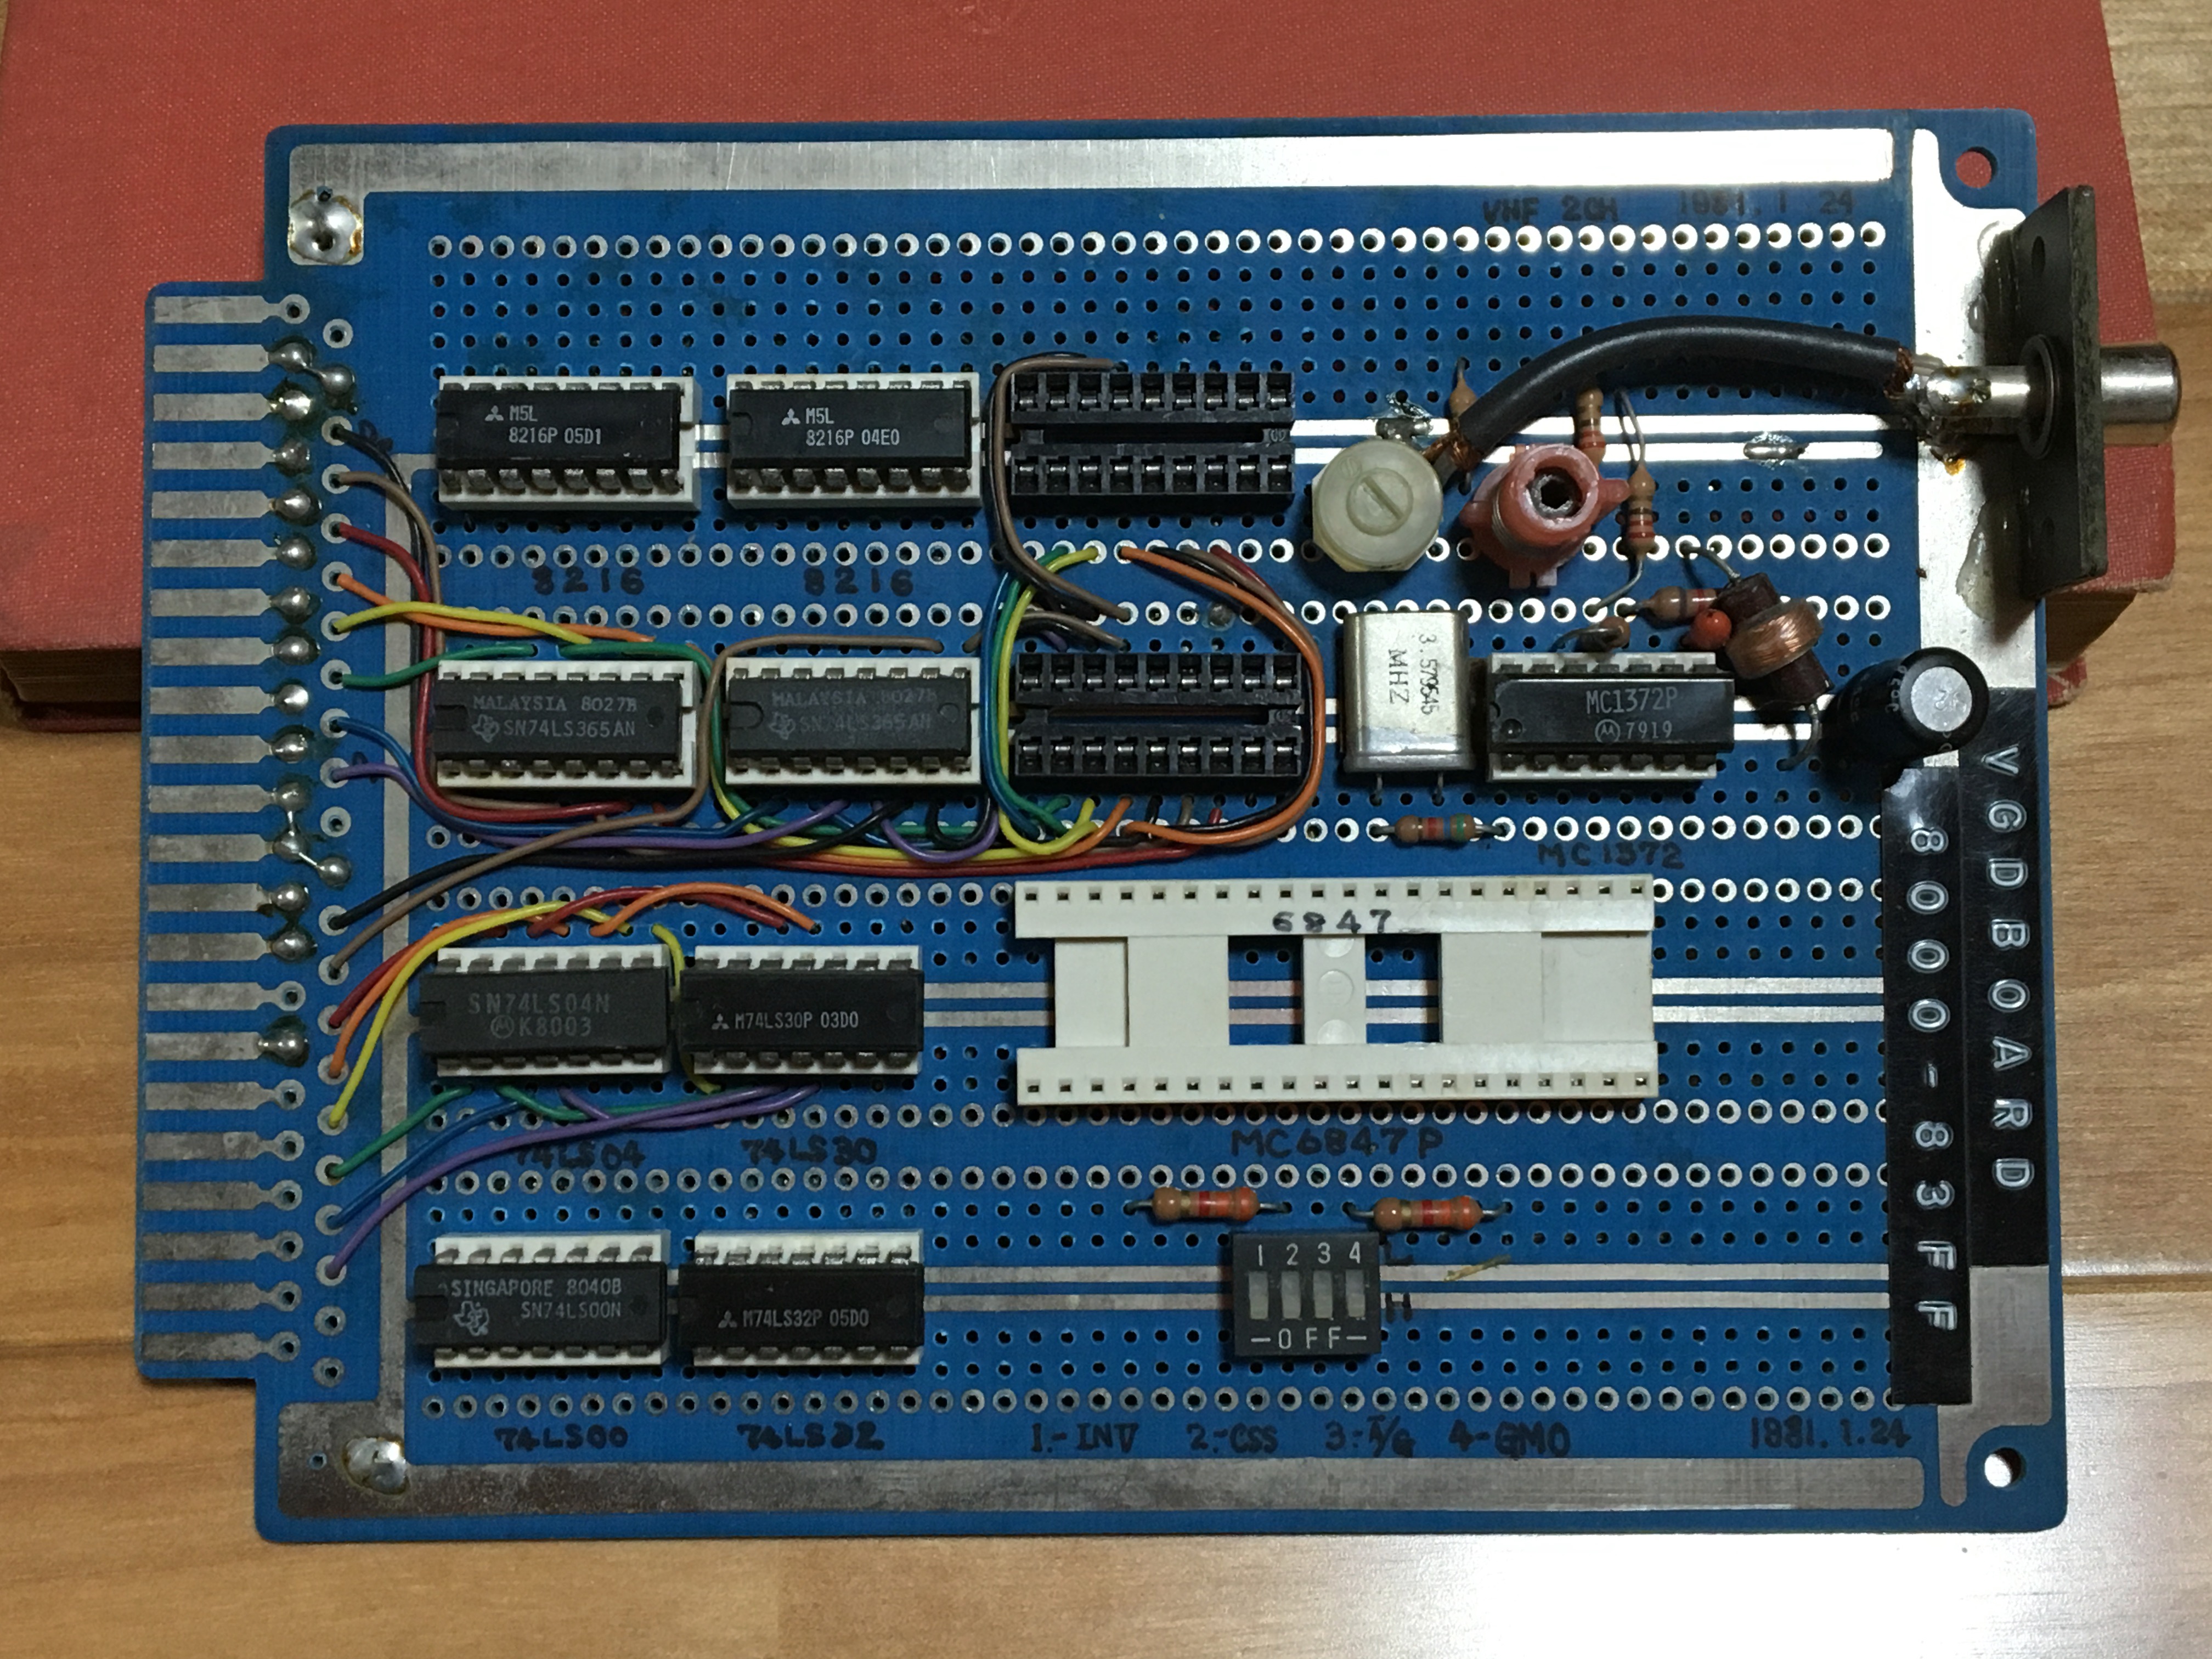
After this, I was able to complete the hardware testing of a serial interface board with expansion memory and a video interface board for character display, that I built myself to add to the card slots. However, there was an inconvenience with this computer. It did not have a function to display the execution address during single-step execution. This made it difficult to debug the program because I could not see whether the instruction execution was progressing correctly or not. Therefore, I was only able to run software on this computer, such as a machine language test program of a few dozen bytes. After PERSEUS-3 in 2007, I have installed LEDs that displays the execution address in binary when a single-step is executed.
2. PERSEUS-88
I built this PERSEUS-88 myself in 1982. Figures 2 and 3 show the appearance of this computer. The CPU was a Fujitsu MB8870 running at 1 MHz system clock. This CPU has some instruction extensions to the MC6800. Four HM6116 SRAMs were mounted to make 8kB.
This PERSEUS-88 does not have DMA programming and single-step execution capabilities. The computer was operated by using a monitor program called MIKBUG contained in the MC6846 from a serial terminal. The dump list of the floating-point BASIC interpreter for the 6800 that was published in a magazine was typed into the serial terminal and it was able to operate it. Data was saved and loaded by connecting a cassette tape recorder to the audio interface.
An EPSON MP-80 dot impact printer was connected to the parallel interface. The single character output routine of the interpreter was modified so that all characters sent to the serial terminal are also sent to the printer when the printer output flag is detected. This flag was defined in 1 bit of the other parallel port and operated ON/OFF with a red toggle switch on the panel. The board was a universal board and wiring was done by soldering.
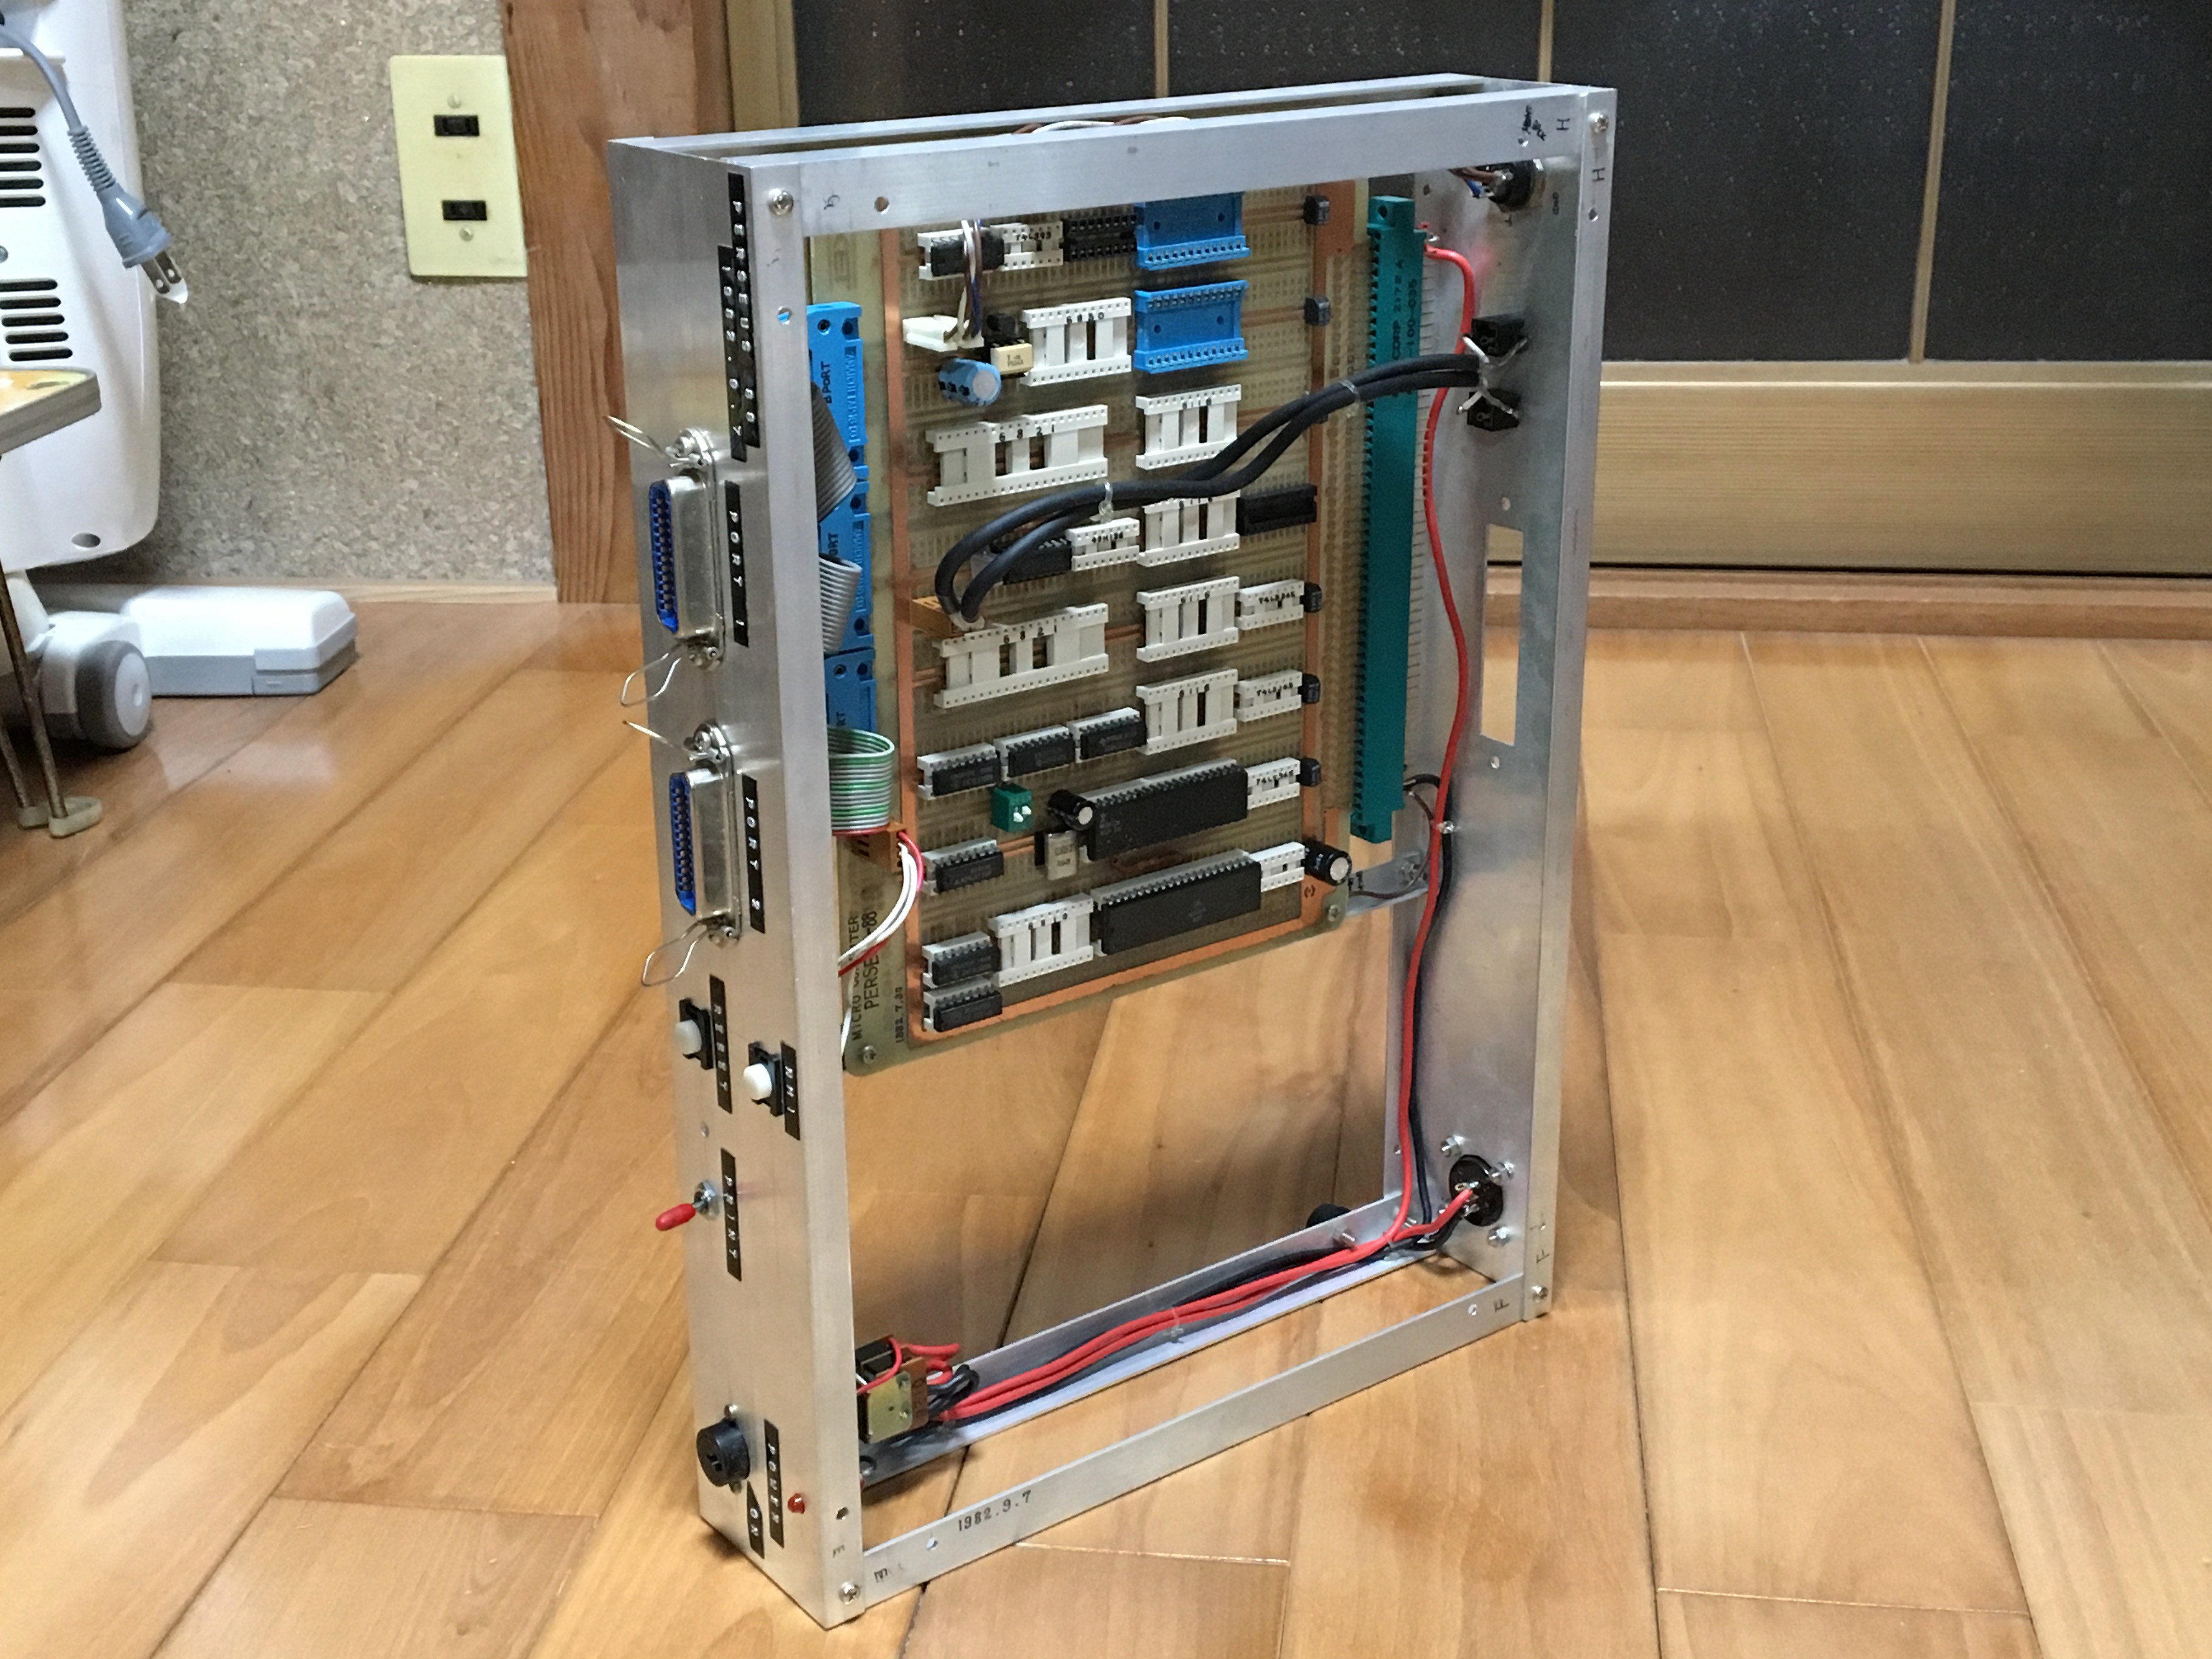
Fig. 2 PERSEUS-88
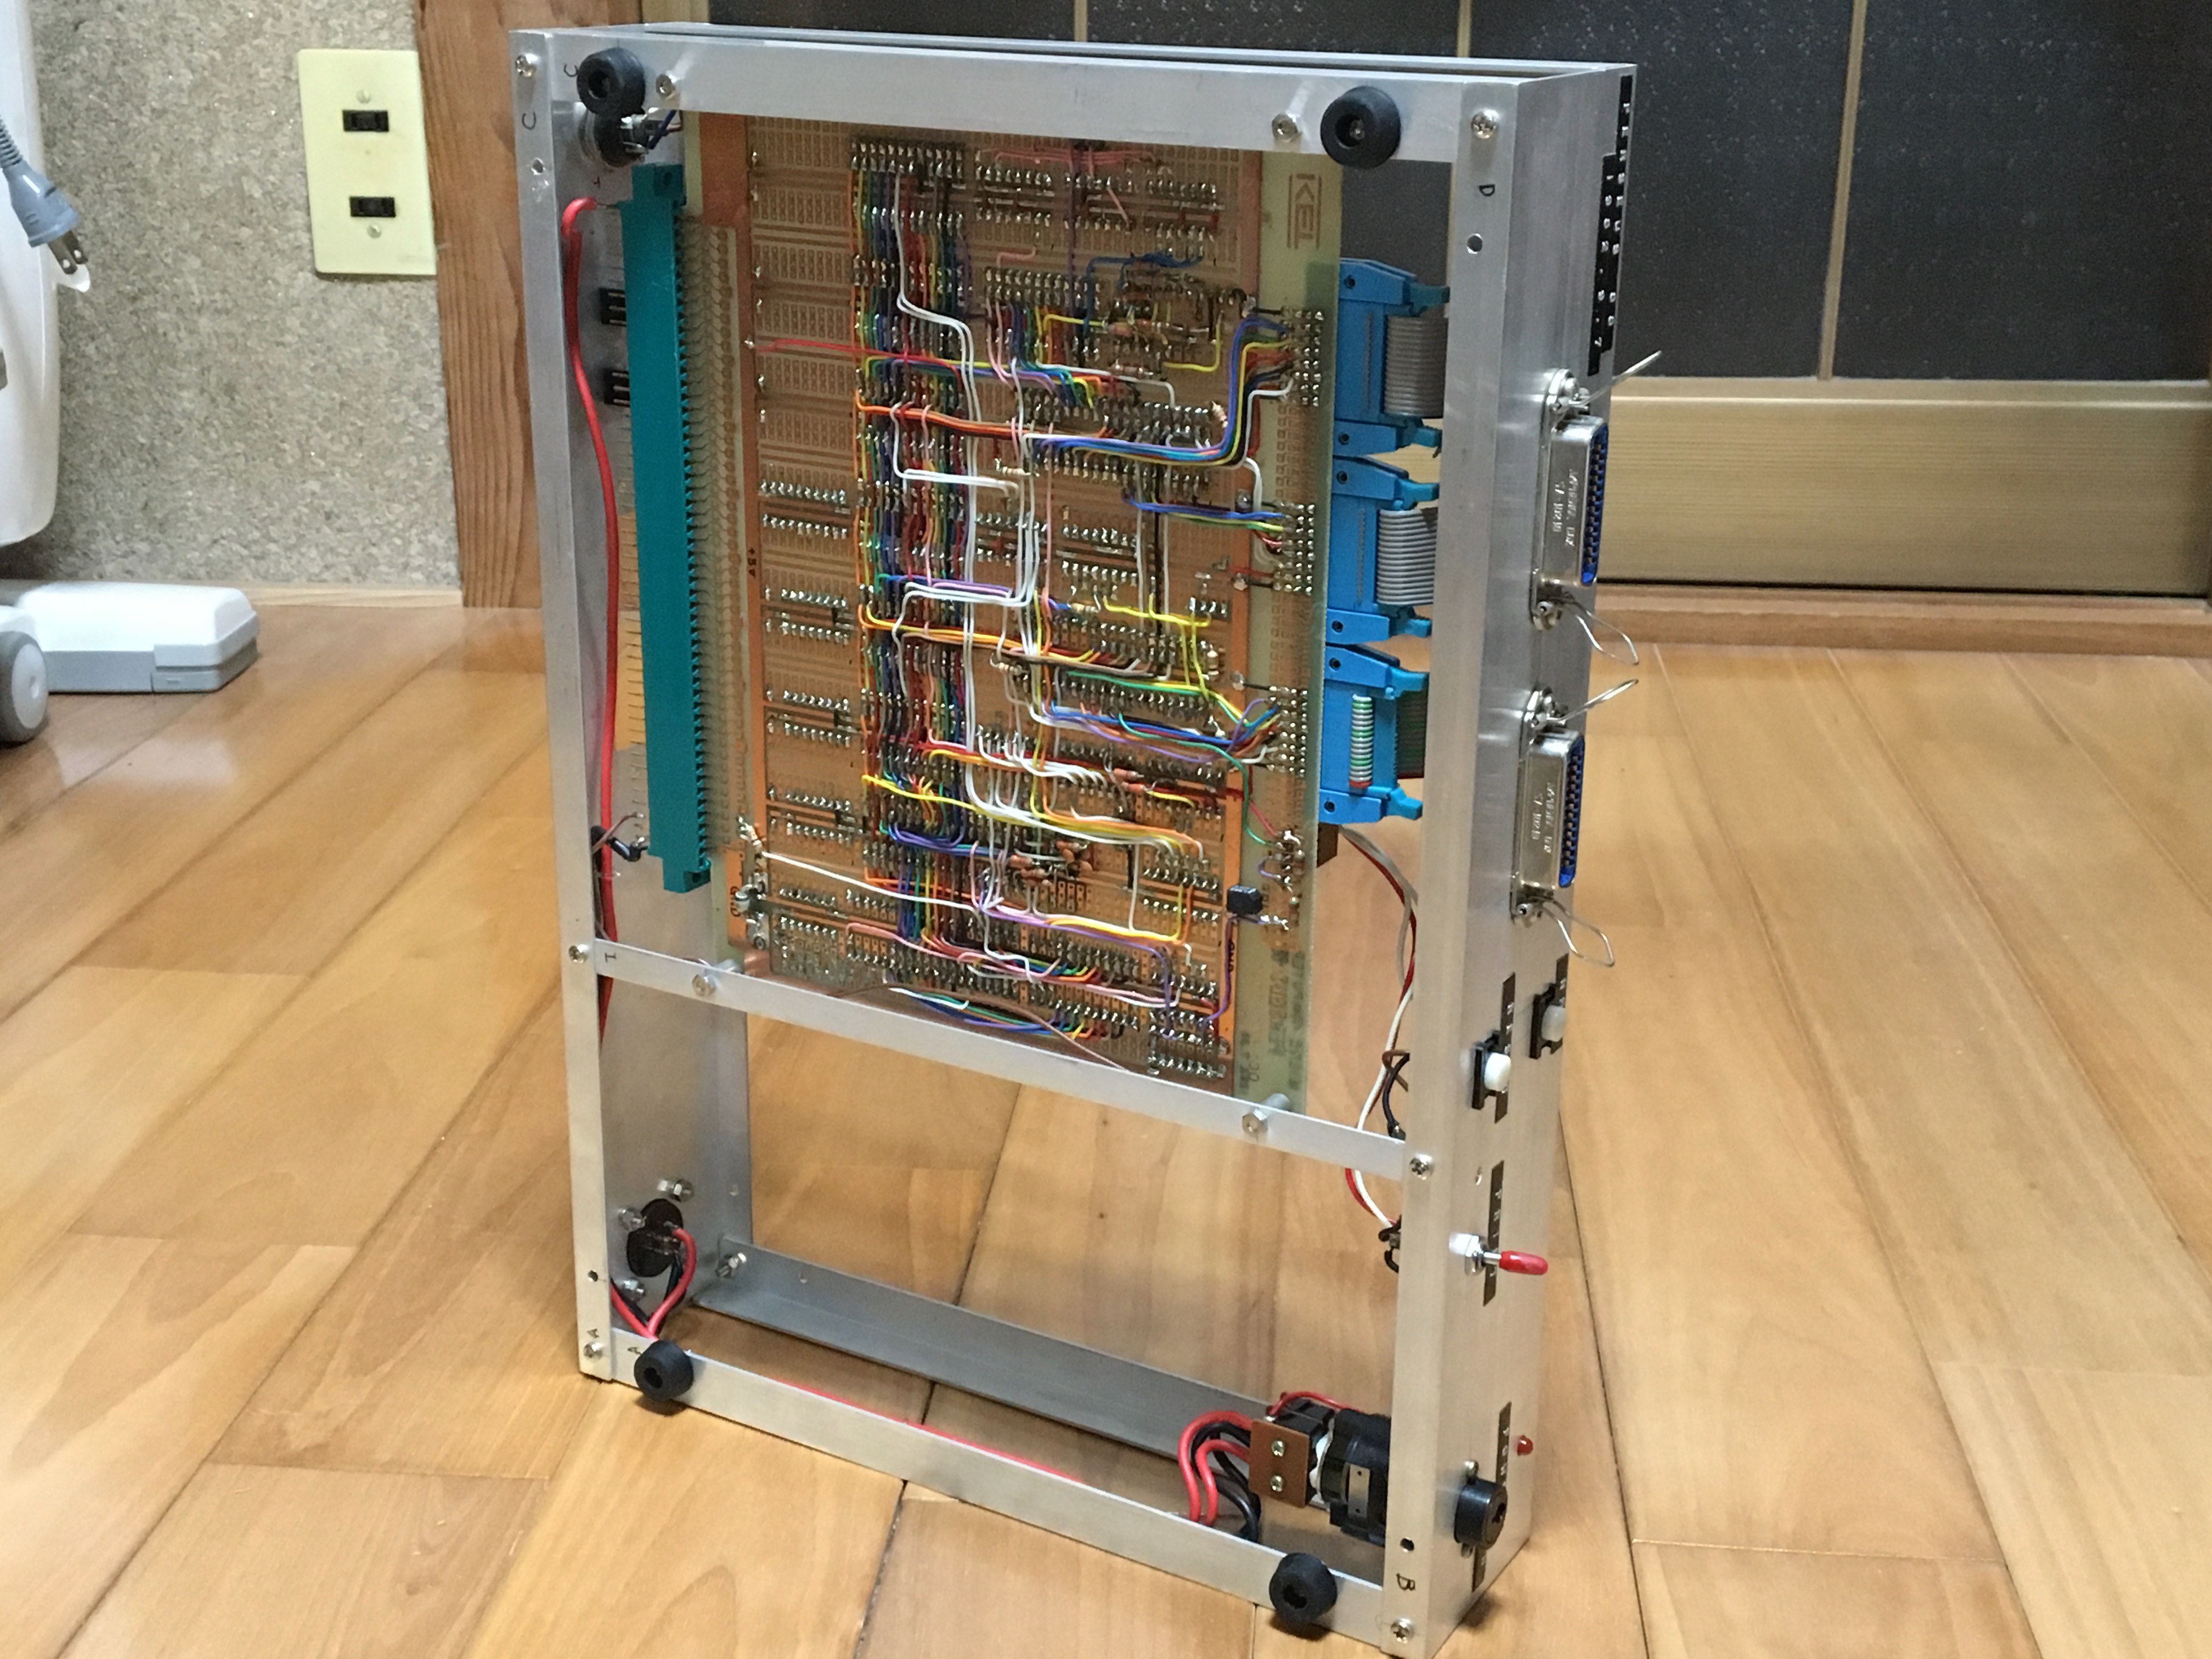
Fig. 3 Bottom view of PERSEUS-88
3. Serial terminal
In 1982, a serial terminal was also built for PERSEUS-88 operation. This serial terminal GEMINI-230 is shown in Figures 4 and 5. The keyboard was a parallel interface type sold by ALPS in Japan at the time. The control of the transmit/receive buffer memory and the generation of the video synchronization signal were performed by a commercially available dedicated LSI SFF96364. The video output could display 64x16 characters on a CRT monitor. The character generator IC was made by writing font patterns on a PROM 2716. An UART IM6402 was used for serial communication. The communication standard is the current loop method of 300 bps or 1200 bps. The enclosure was made of solid lauan board and finished with varnish. A power transformer and a DC regulator unit are also installed inside the enclosure.
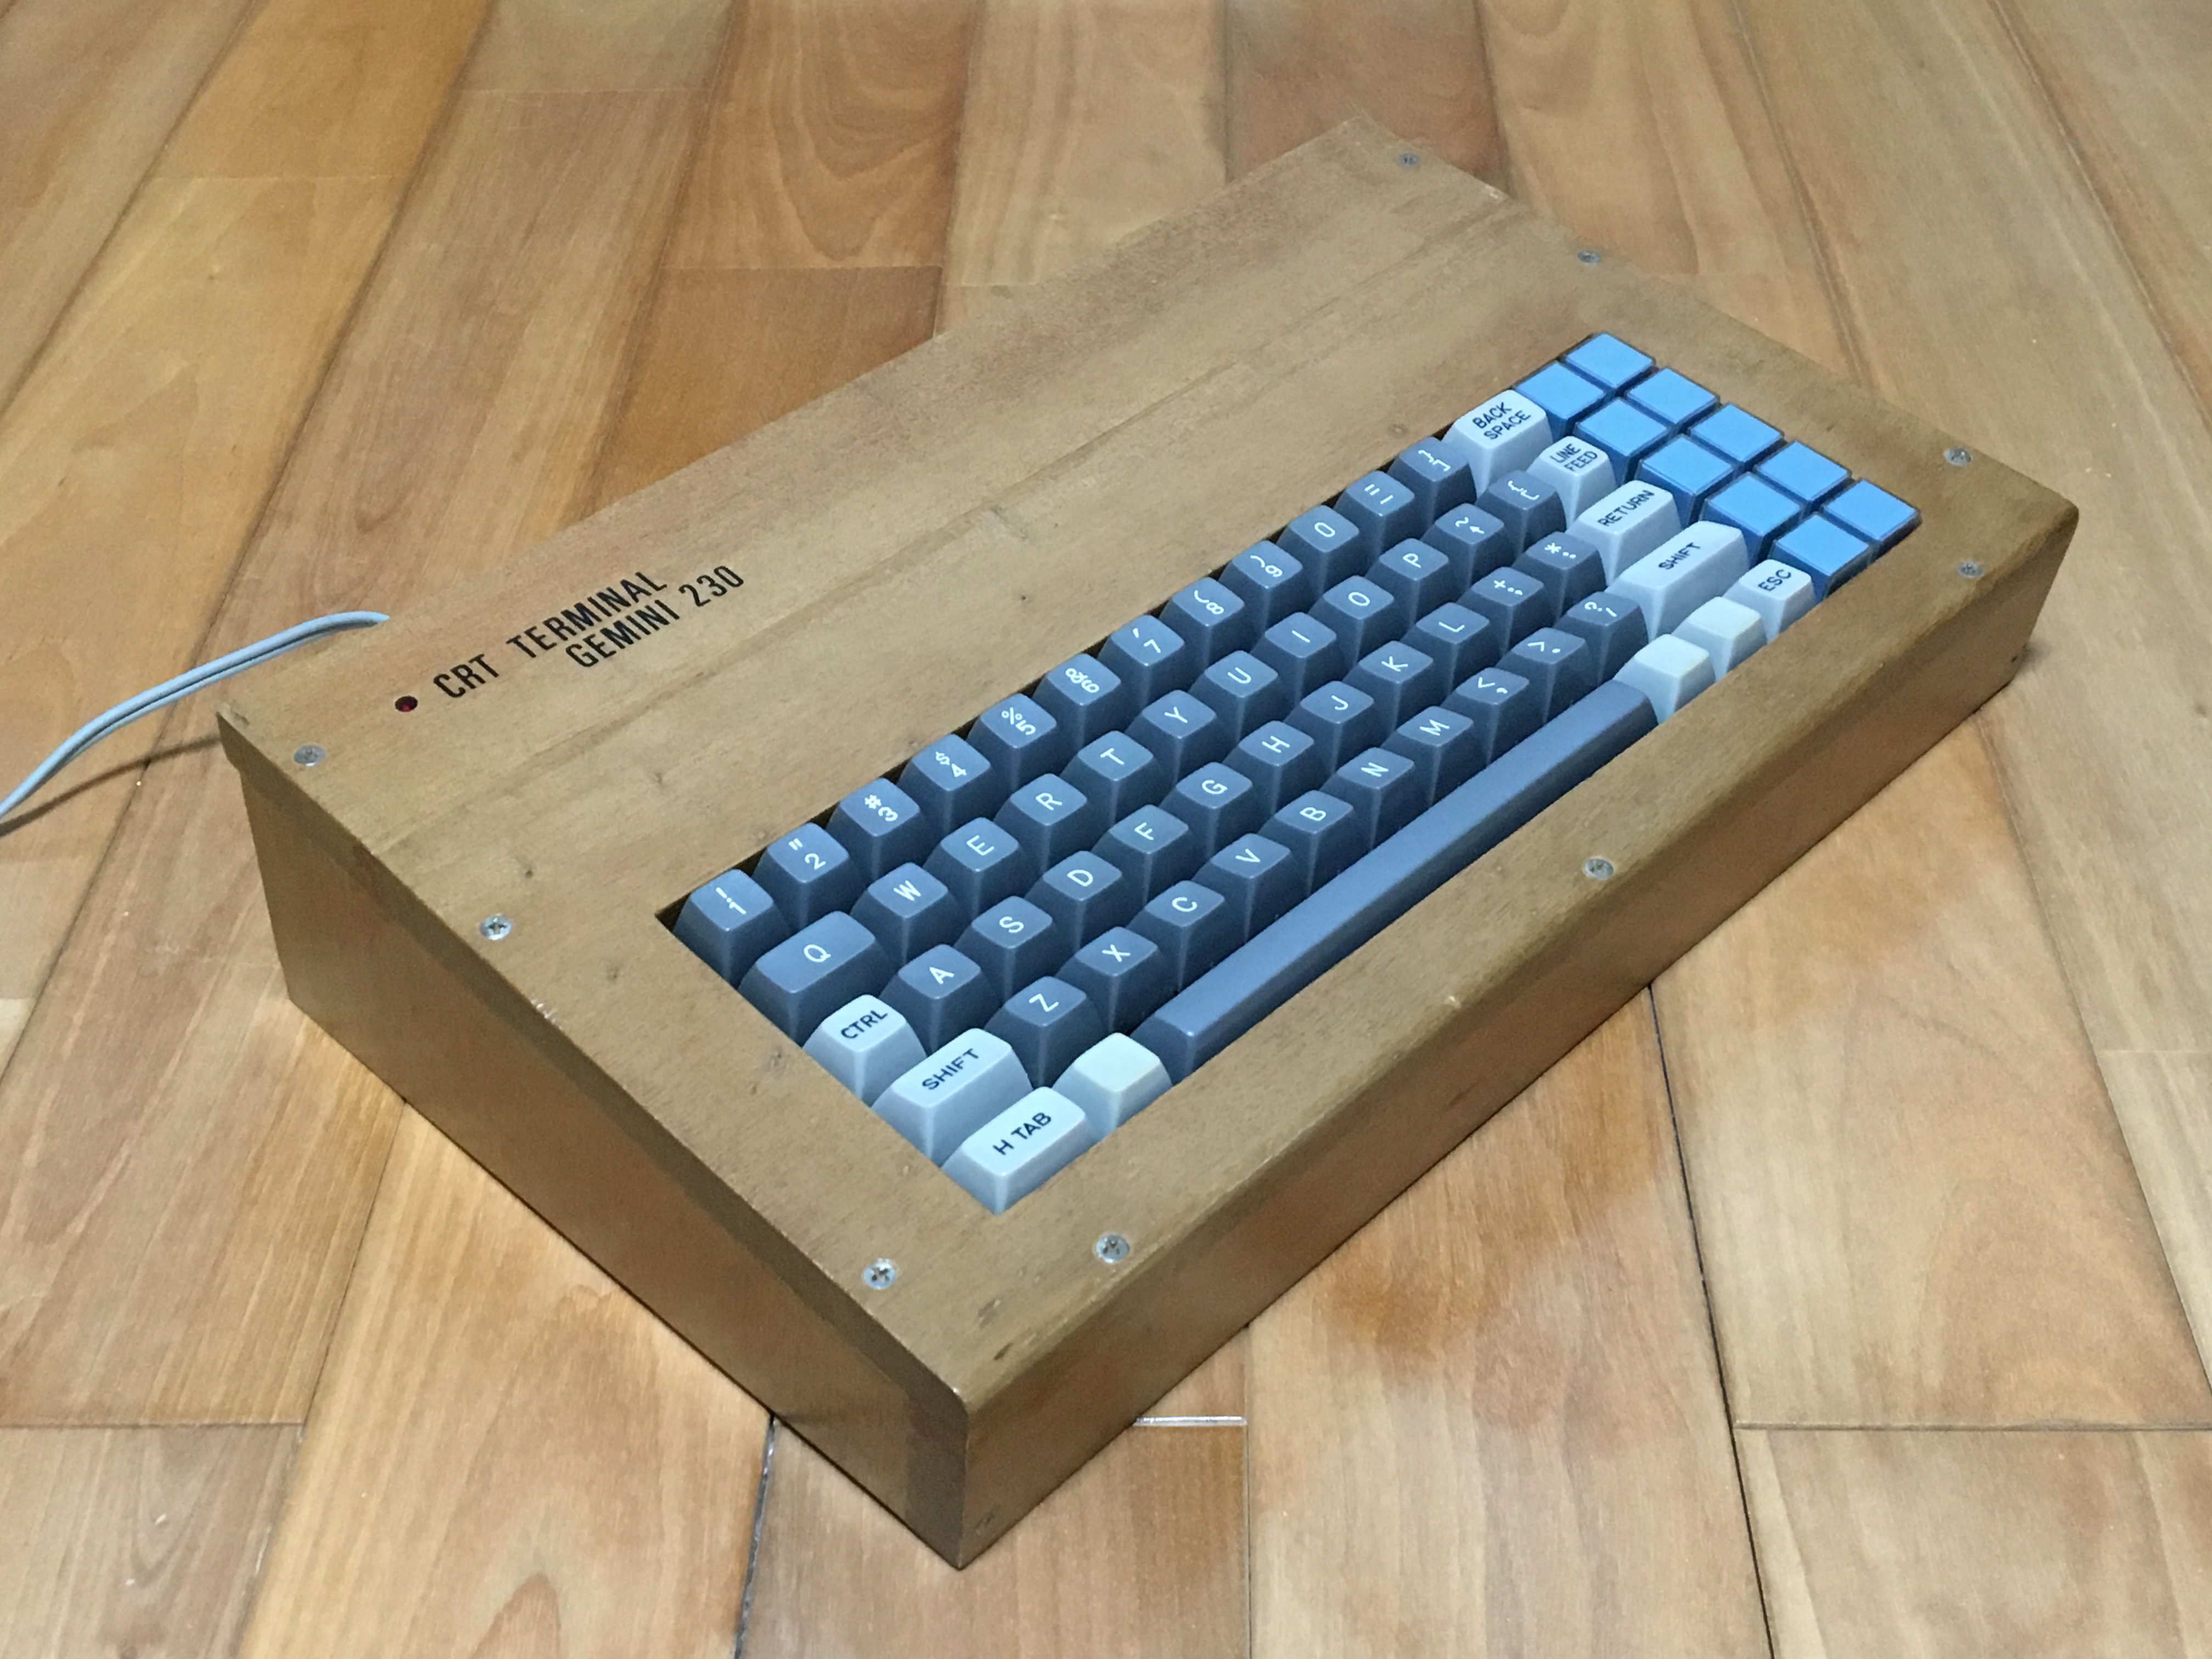
Fig. 4 Serial terminal GEMINI-230
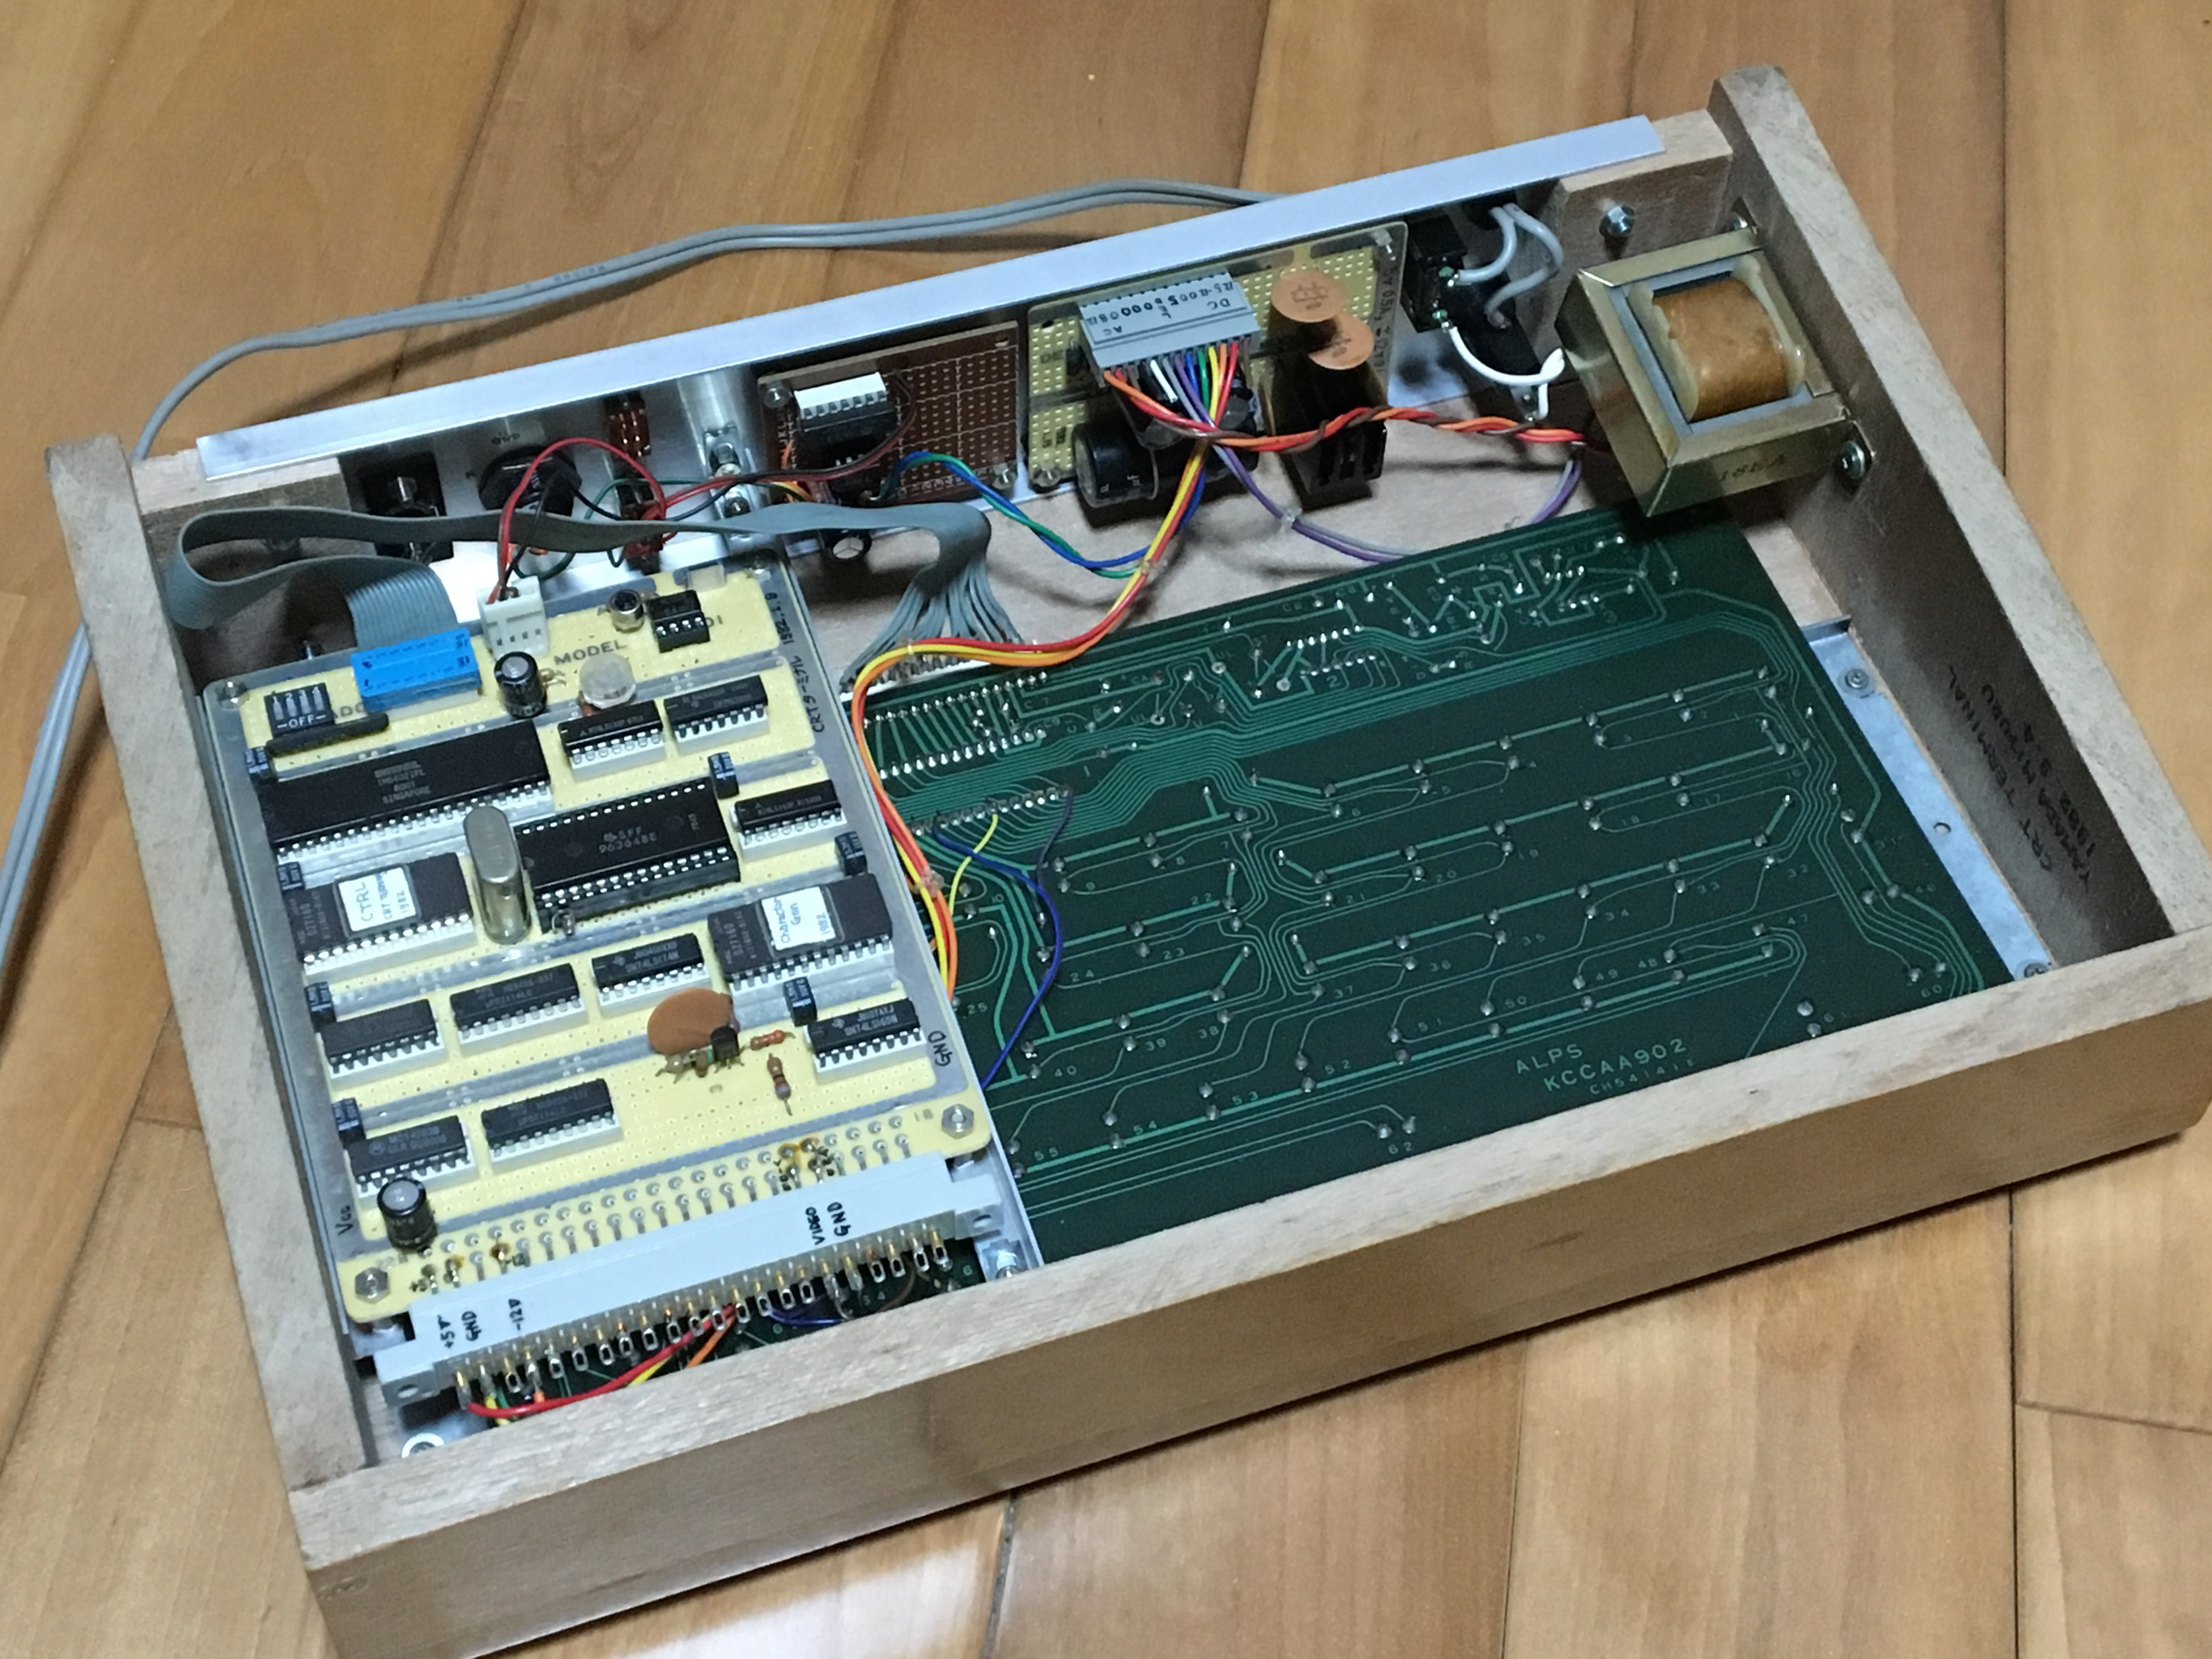
Fig. 5 Inside of the serial terminal GEMINI-230
With this serial terminal and the PERSEUS-88, the computer was able to run a floating-point BASIC interpreter, save data, and output to a printer. However, the PC-8001, an early personal computer, had already been released in Japan in 1979, and the IBM PC was introduced in the United States in 1981. I felt that the trend in the computer hobby had already changed from building your own computer to applying a commercial personal computer.
4. PERSEUS-1
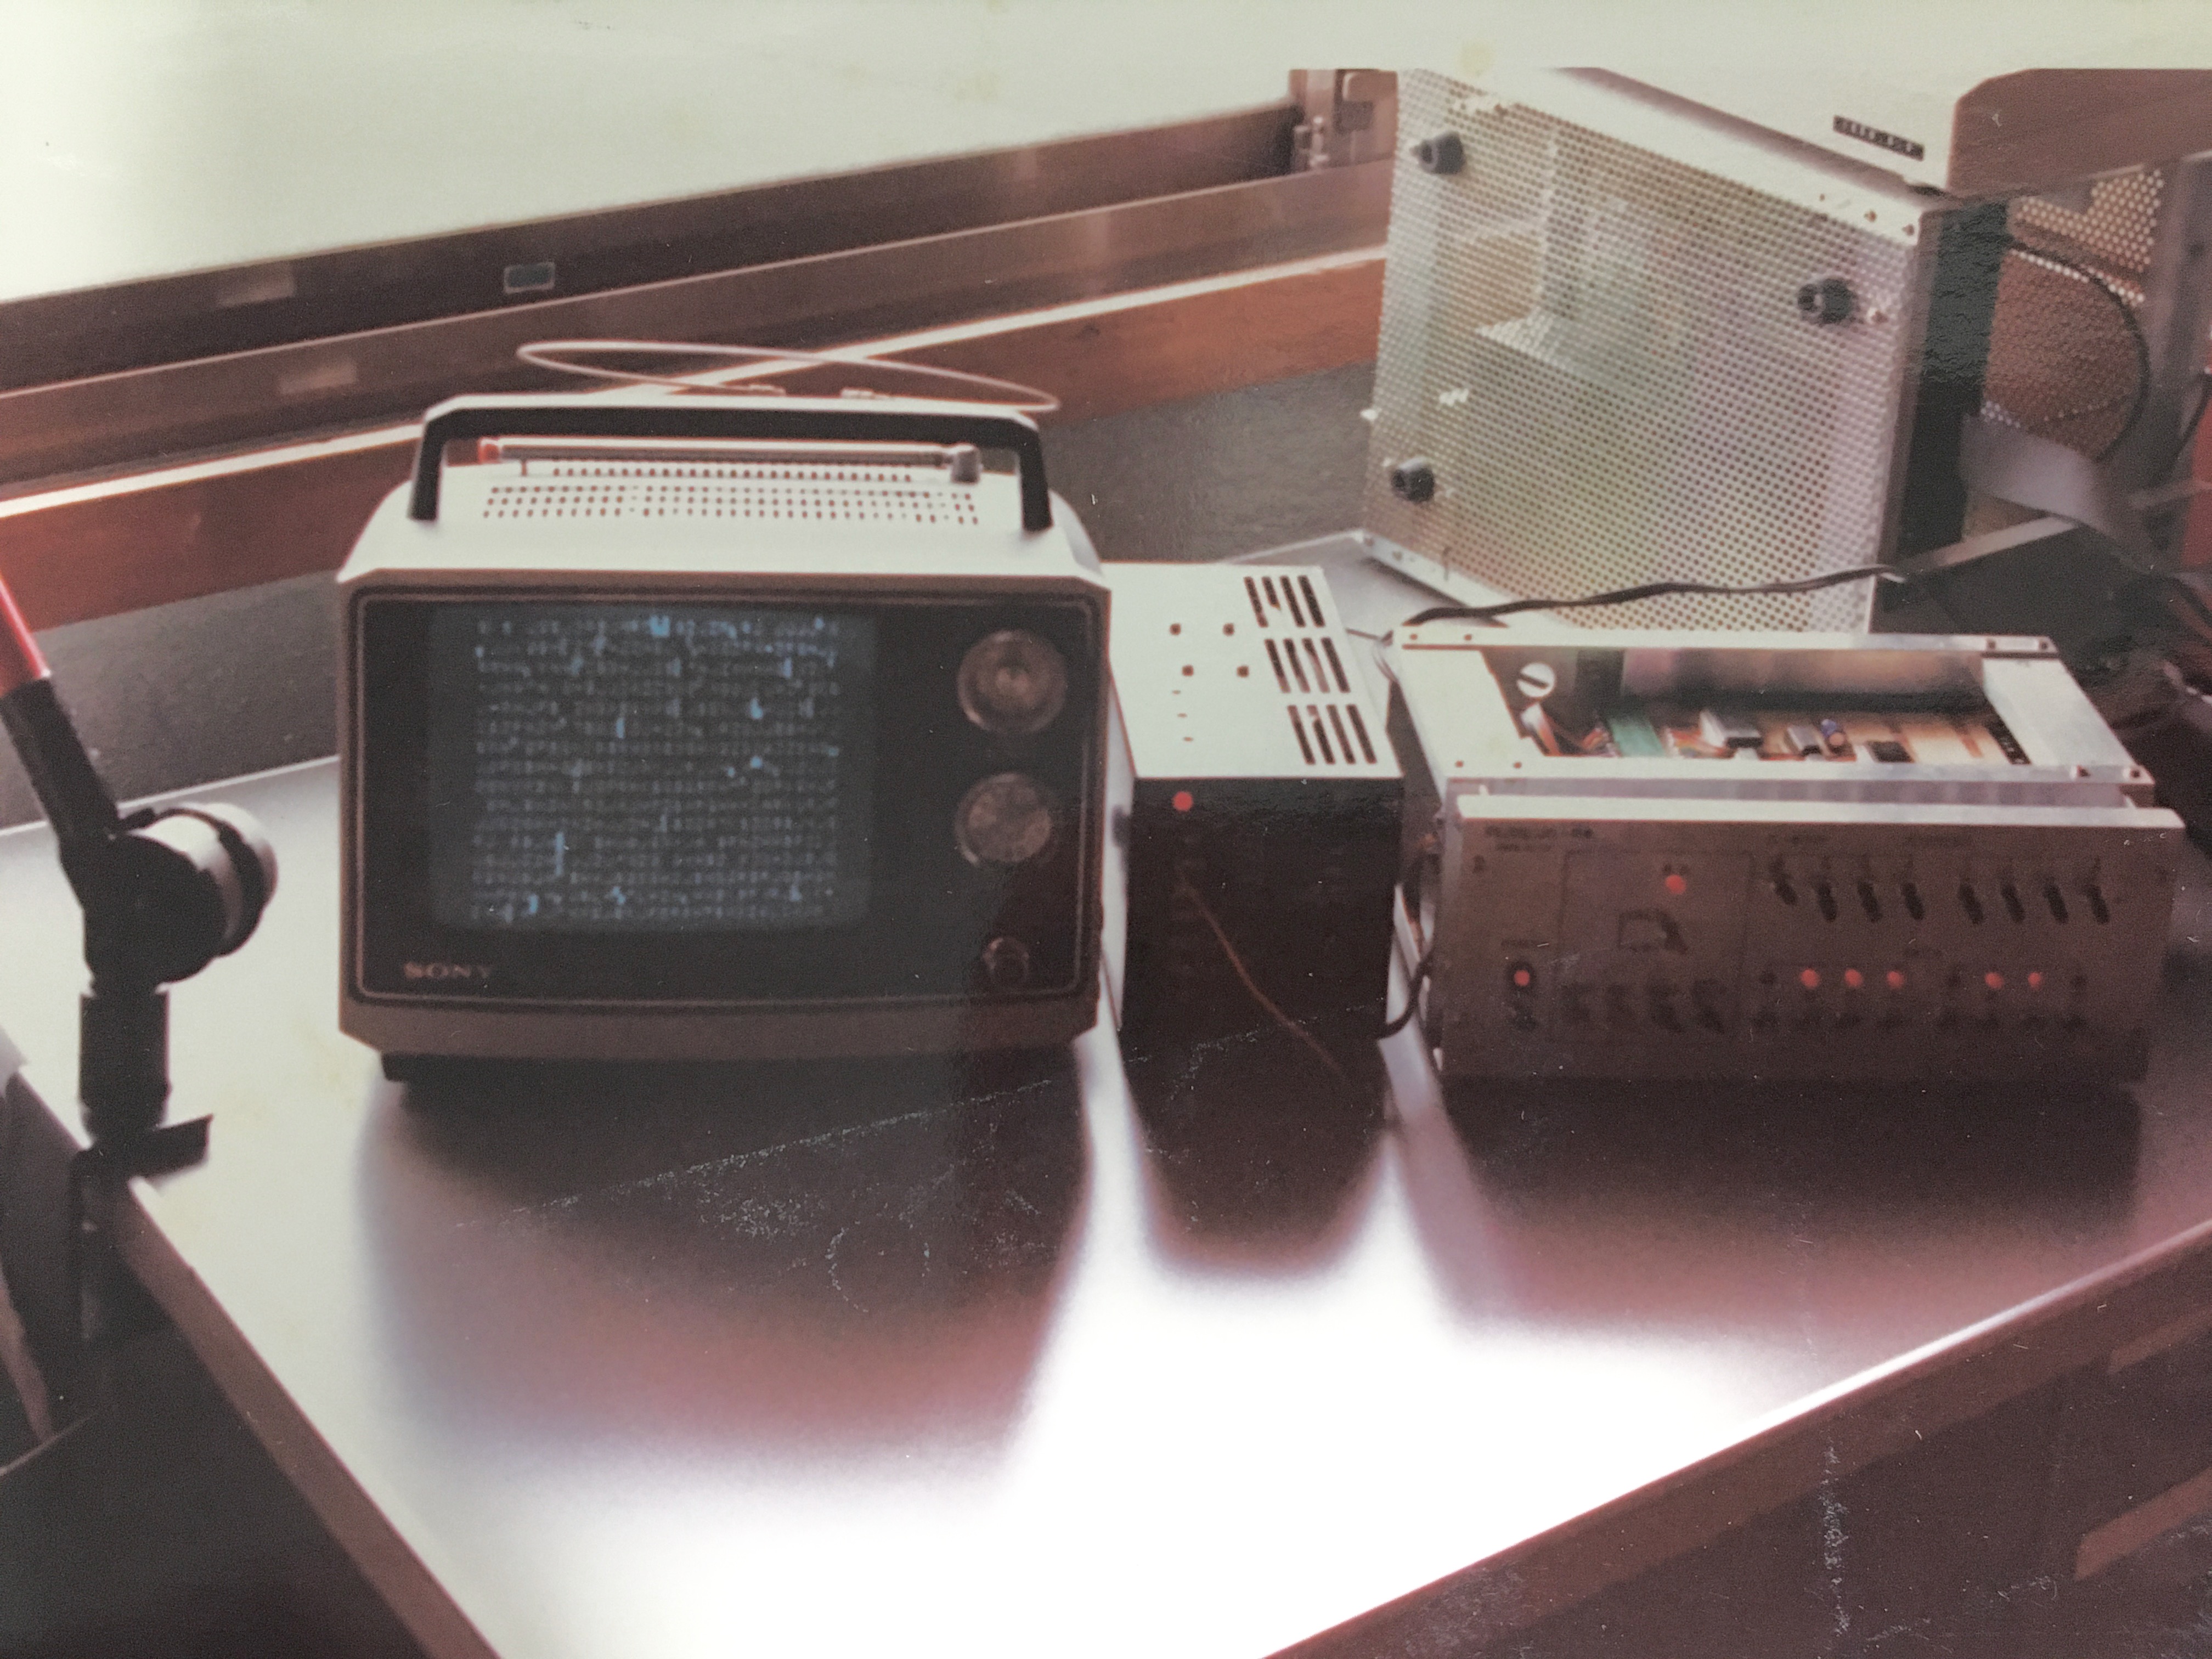
In 1984, I built an analog 16-channel potential acquisition system as shown in Fig. 6 in my university laboratory. The control computer built into the system was named PERSEUS-1. The board in the center of the enclosure in Fig. 6 is the PERSEUS-1. The left board is an analog multiplexer and AD converter, and the right board is a power supply regulator. The CPU is an R6502 with a system clock of 1 MHz. One MC6821 is mounted as a parallel interface. The serial interface is MC6850, connected to a personal computer via RS-232C. The firmware is a 0.5kB machine language program developed in assembler on APPLE II and implemented in PROM 2716. When this PERSEUS-1 receives a command from the serial interface, it acquires the specified analog data by digital conversion and outputs it to the serial interface.
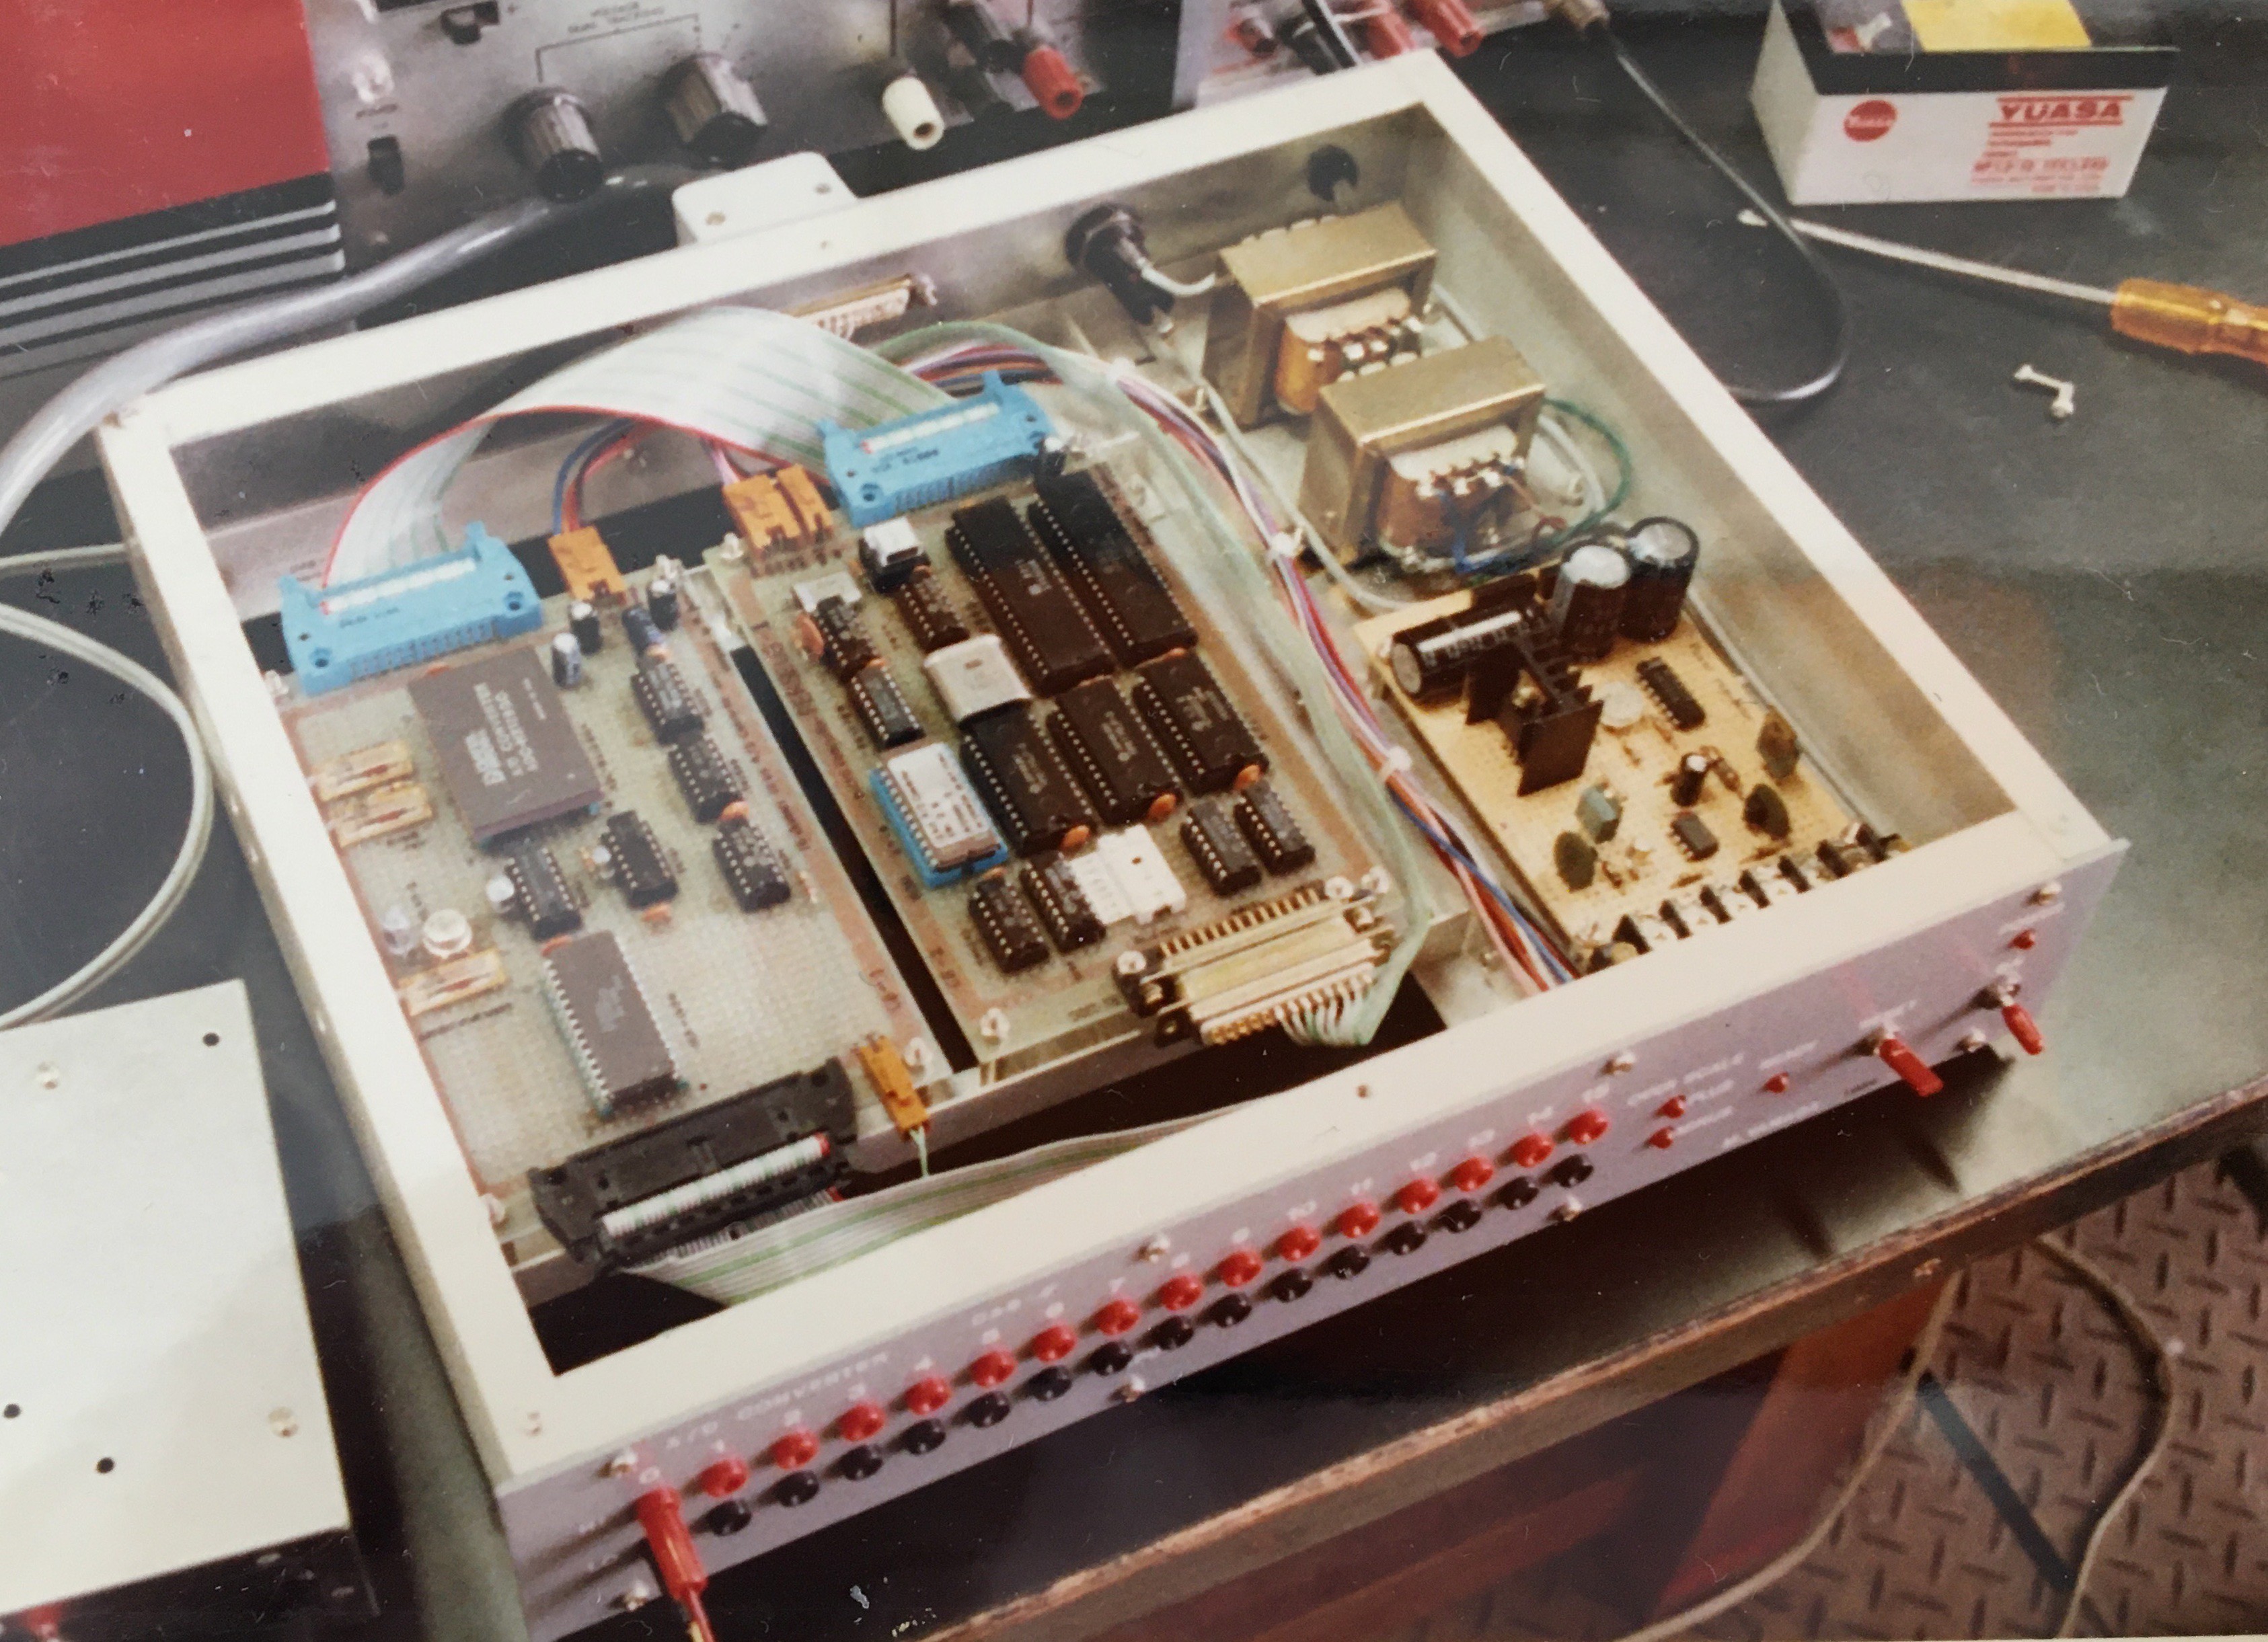
Fig. 6 Data acquisition system with built-in PERSEUS-1
5. PERSEUS-2
In 1985, I built my own low-power computer with a CMOS CPU R65C02 and a PROM 27C16 and named it PERSEUS-2. This is shown in Fig. 7. The computer was operated from an RS-232C serial terminal using the monitoring software developed with APPLE II. The CMOS-SRAM HM6116-LP3 could be backed up with a 3.6V nickel-cadmium battery for data storage. Since it was found that data could be stored for a long period of time with a very simple battery backup circuit, PERSEUS-3 and PERSEUS-8 since 2007 have also used this circuit almost exclusively. In Fig. 7, the battery mounted on the bottom of the board has been removed.
The board for this computer is a universal board with pre-installed wire lapping pins. The wire lapping was done with a manual wire lapping tool that peels off the wire coating at the same time as wrapping, but there were many continuity failures. So, I had no choice but to solder after wrapping. Since 2007, wire wrapping for the PERSEUS series has been done with a normal tool that wraps the wire with the coating pre-stripped, so there are no continuity defects.
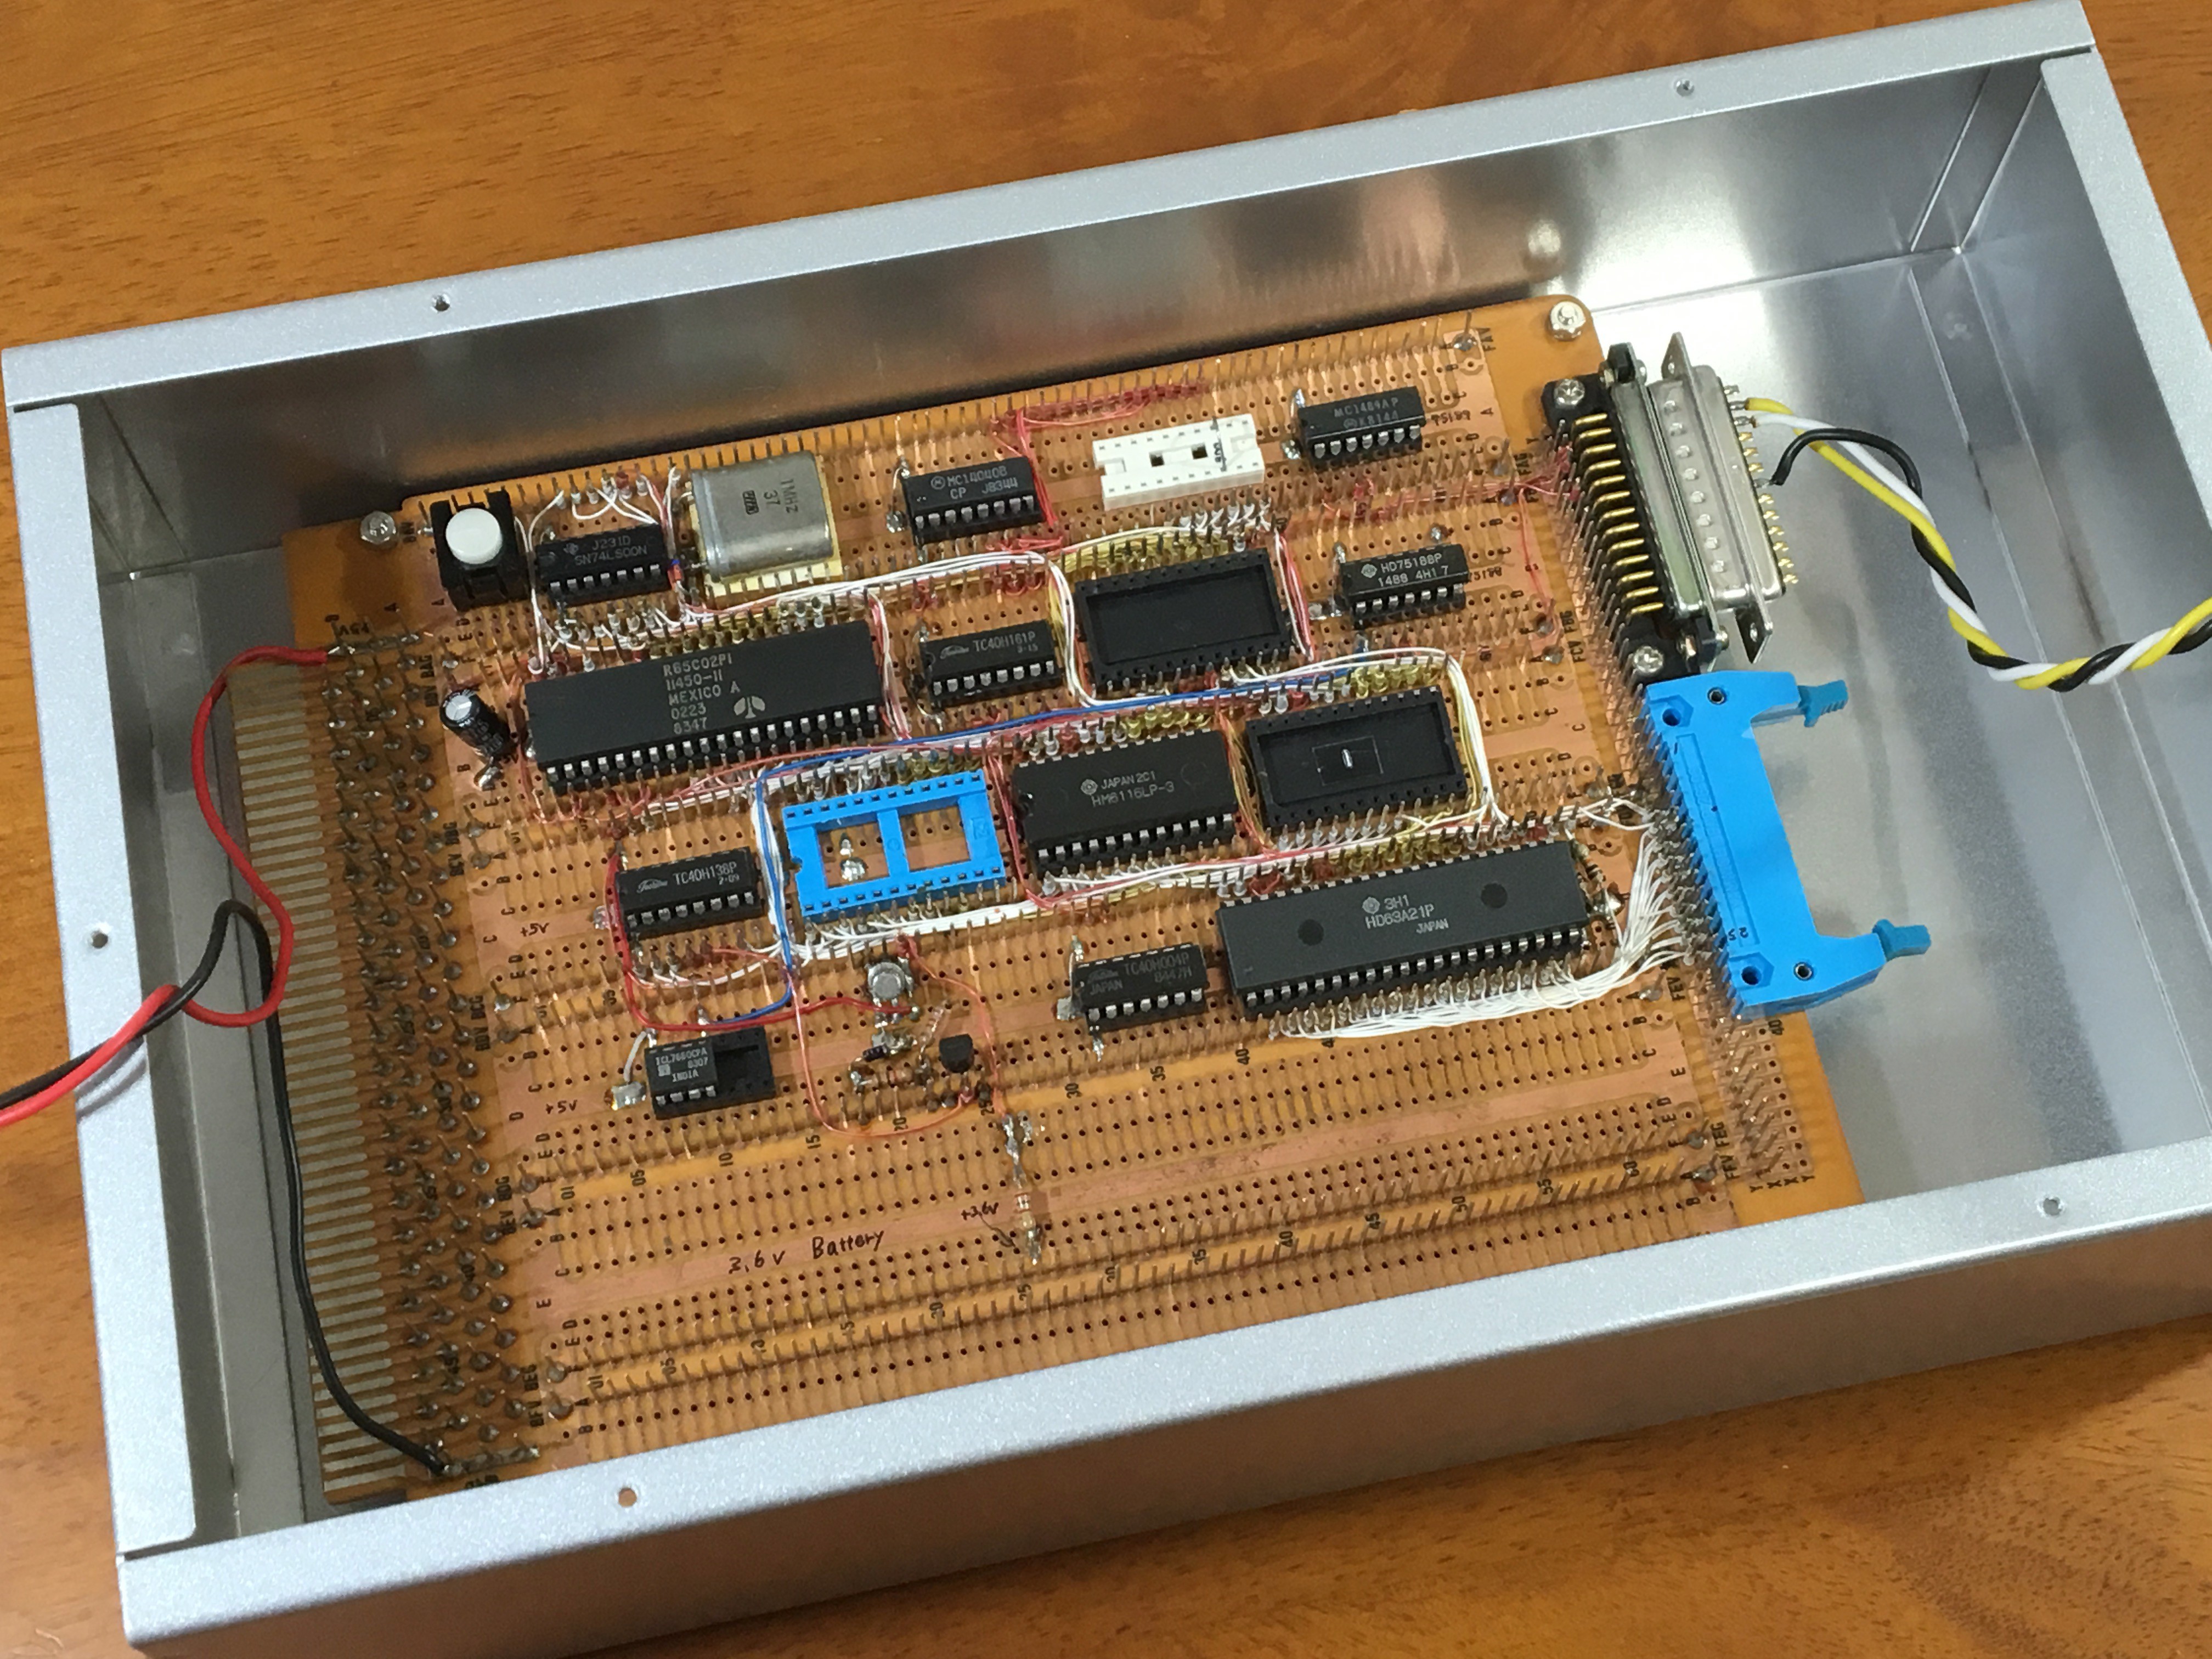
Fig.7 PERSEUS-2
6. Then to the present
In 2007, when the PERSEUS-2 was turned on for the first time in 22 years, the CPU was in a faulty state that caused execution failure after a few instructions from reset. The serial terminal had stopped outputting video signals due to a malfunction in the dedicated LSI. Since some of these problems cannot be repaired today, and even if they could be repaired, it would be inconvenient, I decided to build a new computer that would allow me to accomplish what I had left undone in the past. This is the PERSEUS-3.
My problem with building my own computer until 1985 was probably that I did not try to realize a numerical computation system that was capable of handling actual analysis. I built simple application software with an interpreter like the one in the magazine, but it did not satisfy me. I was vaguely frustrated that I could not realize the kind of arithmetic system installed in commercial PCs by myself. Between 1986 and 2006, I stayed away from building my own computers like these. During that time, however, I gradually deepened my understanding of arithmetic operations from literature on the arithmetic systems of mainframe computers in the 1970s [2] and other sources.
Therefore, in 2008, I tried to create a simple interpreter of integer type by myself with PERSEUS-3. In 2021, I created an interpreter of floating-point type including elementary functions such as sin and exp by myself with PERSEUS-8. Furthermore, I was able to achieve the point where I could try to do FFT operations in that programming environment. With this, I thought I had finally succeeded in reproducing the computer technology of the 1970s and 1980s on my own, but it had been a long road so far.
References
[1] Yoshihiko Matsumoto, Watashi dakeno maikon sekkei & seisaku, CQ Publishing Co.,Ltd. 1977
[2] Hisashi Horikoshi, Konpyu-ta no kousoku enzan houshiki, Kindaikagakusya 1980
(Kai Hwang, Computer Arithmetic: Principles, Architecture, and Design, John Wiley & Sons, Inc. 1979)
(Posting date Apr. 19, 2022)
(Latest revision Mar. 25, 2024)