You may store data from your computer and mobile devices on external hard drives over your home or workplace wireless network with network-attached storage (NAS). You may connect your current storage devices, such as external portable hard drives and USB flash drives, to your Raspberry Pi to generate safe backups of all your essential information that are available from anywhere around the globe.

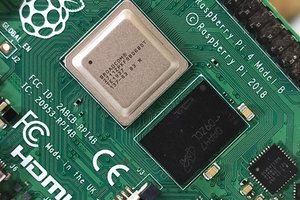
Your data will save to your external storage faster if your Raspberry Pi is faster. As a result, we recommend a Raspberry Pi 4 8GB, but any member of the Raspberry Pi 4 family would suffice.
You'll need a USB-C power source and a micro-HDMI-to-standard-HDMI cable if you're using a Raspberry Pi 4 or 400. Older versions will need a micro USB power supply as well as a normal HDMI-to-HDMI connection.
You Might Also Like:
- IdentiPi: A Compact Fingerprint HAT for Raspberry Pi Pico
- Connect your embedded devices effortlessly with ESPi - the Ethernet Board based on ESP32
- PiCoder - Pico Learning Kit with Free Live Training 100% DIY Learning kit
Power sources exist in a range of shapes and sizes, and you may discover that an unauthorized type like a phone charger is insufficient for your Raspberry Pi. We provide authentic USB-C and micro USB power supplies in a range of regional formats for convenience and dependability. If you want to utilize your own power source, a lightning bolt will appear in the upper right corner of your screen if it isn't providing enough power to the computer.
Install Raspberry Pi OS Lite on your Raspberry Pi.
To install Raspberry Pi OS Lite onto your microSD card, we'll use Raspberry Pi Imager. Raspberry Pi Imager is a free program that may be downloaded for Windows, macOS, Ubuntu for x86, and Raspberry Pi OS.
Connect your microSD card to your computer and open the Imager program.
Using an SD card adapter, connect your microSD card to your computer. A minimum storage size of 16GB is recommended.
Install the Raspberry Pi operating system on your microSD card.
Imager for Raspberry Pi:
CHOOSE YOUR OPERATING SYSTEM: Raspberry Pi OS is located under Raspberry Pi OS (other). Because we don't require the desktop environment for our project, we're employing the smaller Raspberry Pi OS Lite.
To access the advanced menu, press Ctrl-Shift-X or select the Advanced Menu button on the Raspberry Pi Imager.
Set a username and password for SSH by checking the Enable SSH box. To access your Raspberry Pi and network storage, you'll need these credentials.
To exit the advanced menu, select save.
SELECT STORAGE: Choose a microSD card.
Last but not least, choose Write.
Remove your microSD card from your computer and plug it into your Raspberry Pi after it's finished.
Options for storage
We'll use a portable USB hard disc and an internal hard drive with a SATA-to-USB converter for this lesson. If you want, you can utilize a USB flash drive. We recommend deleting all data from your hard disc because you may need to format it later.
It is preferable to utilize a powered USB hub to connect your storage to your Raspberry Pi in order to keep a steady power supply to our external hard drives.
Getting your Raspberry Pi set up
An Ethernet cable is required to connect your Raspberry Pi to your network. For the most part, this entails connecting the device to your router directly. Connect your storage to the powered USB hub, and the hub to your Raspberry Pi after everything is linked. Finally, use a USB-C power supply unit to connect your Raspberry Pi to the mains.
Getting your IP address back
You'll need the IP address of your Raspberry Pi in order to connect to it through SSH from a regular computer. A device on your network is identified by its IP address, which is a unique string of digits. The most straightforward approach to locate it is to go into your home network and see what devices are connected through Ethernet (LAN). The login information for accessing your router...
Read more »
 Brayden DeVito