 Jithin Sanal
Story
Hey, guys welcome back, In this post, I will show you how you can make your own high current motor driver shield for Arduino which can be used to drive Robots that uses more than 2 motors. Using this, you can drive up to 4 high current DC motors simultaneously and independently using your Arduino Nano.
The Story
Months before we built a 2 wheel drive robot for beginners remember?
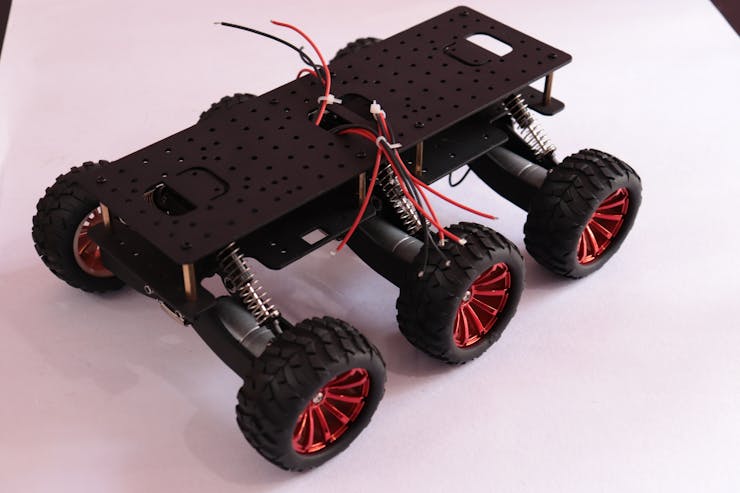
After that, I was building this 6-wheel drive RC robot with suspension as a hobby project. I used to make a lot of wheeled robots and so I already had some old PCBs I designed with Arduino Pro Mini, an HC12 wireless module, and an L293D motor driver IC.
Most of my previous robots were 2-wheeled or 4-wheeled and most of them had 2 or a maximum of 4 simple DC motors. So I didn’t have to worry about the current.
But this time it was different. It was the first time I was dealing with 6 high-speed DC motors using a single IC. These motors drew around 350 mA.
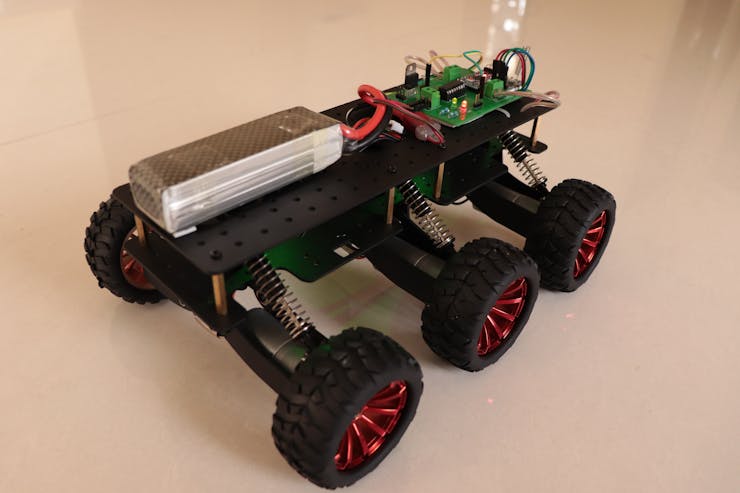
I assembled the robot, and connected all the motors on one side to the output of Motor 1 of the L293d IC; similarly, I did with the other side. The connections were perfect.
What went wrong?
The problem started when I pushed the throttle. The bot moved like a snail and the motors made a humming sound. When I touched the IC, it was scorching. Single L293D was not able to provide enough current to drive all the motors.
So what’s next?
One solution was to use separate DC motor Drivers to drive the motors separately. Or I could use another motor driver IC – L298N – The Big Brother of L293D which can handle an output current of up to 2A. But the pin-out is entirely different and so you won’t be able to mount them in the place of L293D. I could also put one on top of the other and solder them in parallel which is called piggybacking, which I will explain in a moment.
Making a High Current DC Motor Driver
I decided to make a high current DC Motor Driver Shield for Arduino Nano that will be able to drive multiple motors simultaneously and independently and at the same time provide enough current to drive all of them without generating much heat.
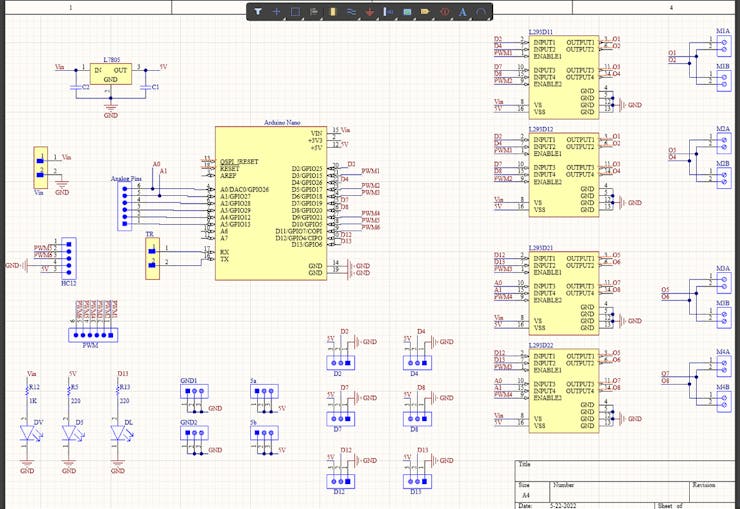
DIY DC Motor Driver Shield for Arduino Nano – The Circuit
I used an Amazing PCB designer called Altium to make my own PCBs for my projects and believe me guys, It’s very easy to create our own PCBs using Altium. If you are a DIY electronic enthusiast, this is gonna be really useful for you! Altium is an Amazing PCB Designer with so many user-friendly tools and amazing features like centralized cloud storage, and online collaboration. You can design and create your own PCBs for your hobby projects or share your ideas across your network. You can download the free trial version from the description down below and also get a 6-month full license if you are a student! Check it out!
The idea here is to connect 2 L293D motor drivers in parallel. This is called L293d piggybacking. Let me explain it in simple terms. Let’s take a closer look at the L293D motor driver IC.
A little bit about L293D Motor Driver IC
L293D is a reduced type of H Bridge circuit in the form of an IC. L293D Motor Driver IC allows DC motors to drive in either direction without changing the physical circuit. It is an IC with 8 pins on each side (16 pins altogether) which contains 2 free H Bridge circuits. which means, we can control two motors separately utilizing a Single IC.
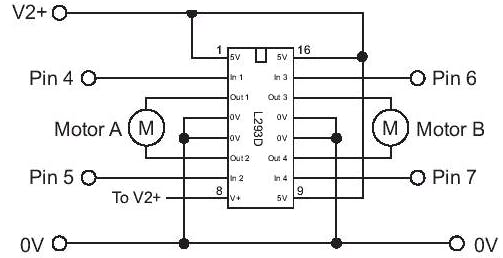
The left side of the IC deals with one H Bridge (One Motor) and the right side deals with the other. There is a pin called ‘Enable Pin’ for each H Bridge Circuits. The H bridge will work only if the Enable Pin is set to Logic 1. Due to the high current flowing through the circuit, there are 4 ground pins employed in this IC.
Limitations of L293D Motor Driver IC
Of course, L293D is the most widely used motor driver IC among hobbyists and engineers to drive DC motors in their projects. They are H Bridge circuits that can be...
Read more »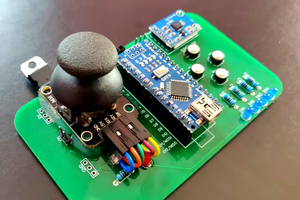
 Mrinnovative
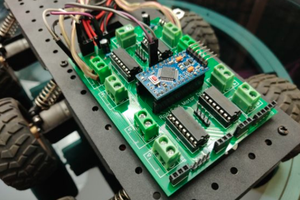

 psemportugal