 MostlyAwol
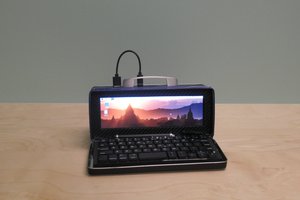
I knew I wanted to build a Cyberdeck and saw another one using an old portable CRT TV. So I started searching E-Bay looking for a TV to use. One of the first TV's I saw was this 1980 Hitachi K-1100 5" B&W portable TV. To me it just screams needing some cyberpunk treatment.
First thing to do decide if I'm keeping the B&W CRT. While the the TV does work its faint. If it was a color screen I might go through the process of fixing it but since its B&W I decided to gut the whole thing and just use the shell. In place of the CRT I did put in WaveShare's 5.5" AMOLED screen with a custom 3d printed mount. While it doesn't quite fit does look well in place of the CRT. Knowing that I couldn't use the small screen only I decided to add a 10" monitor mounted to the side of the case. The plan was to have the monitor fold down against the side of the case. While this does work with the current ball joint its not perfect and I'm looking at new type of hinges to give the look and fold I want.
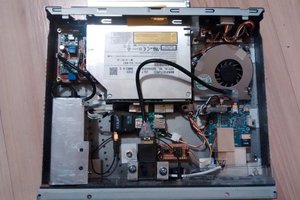
After safely shorting the CRT I removed all the parts of this little TV and was left with a nice empty shell. Thinking that popping in a Raspberry Pi would make this too easy as I had all the space in the world. I decided to go with an ITX PC build instead as I had an old PC laying around already doing nothing. I tried to get the graphics card inside as well but just ran out of room with the motherboard and cooling and power supply. I still think I might be able to squeeze in a graphics card if I were to make a custom frame to hold all the parts and use a PCI-E extension cable.
Now that I had everything I wanted to have the keyboard be a part of the build and fold up to so the whole thing can be carried by the TV's handle. I found a Bluetooth folding keyboard that fit the looks and designed 3d printed mounts that can us the TV's shell screw holes. So the keyboard folds up and then an fold up along the case itself. Seeing that I have tuning knobs to replace or glue into place. I decided to remove them and put in USB sockets in their place. Right now I only have 1 USB 3.0 to use so I pressure fit the TV's tuning dial back into place until I have an idea for the dial itself or another idea to use that space. I did keep the Volume/Power knob and used a Arduino as a interface to turn the switch into a momentary switch to turn on the computer and possible other function later in the future.
For power I am using a SilverStone Technology FX500 Flex-ATX PSU. I created a mount for it and it works but takes up too much space. In trying to save space I switched to a HDPLEX 250W passive GaN AIO(All-In-One) ATX Power Supply. The problem is the HDPLEX gets too hot then stops working correctly. I switched back to the SilverStone power supply but paired down its wires that I don't need.
 darth_llamah
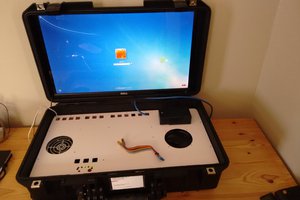
 David Brown
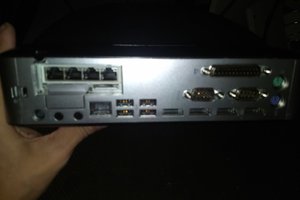
 cprossu
cool