0%
0%
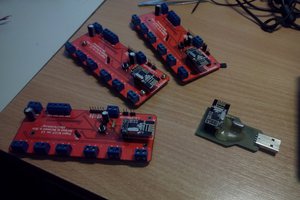
RGB macropad custom firmware
Custom firmware for the CH552 found in those USB RGB macropads with a rotaty knob
 biemster
Become a Hackaday.io member
Already have an account? Log in.
Just one more thing
To make the experience fit your profile, pick a username and tell us what interests you.
Pick an awesome username
hackaday.io/
Your profile's URL: hackaday.io/username. Max 25 alphanumeric characters.
Pick a few interests
Projects that share your interests
People that share your interests


 Necromant
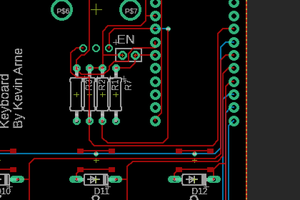
 Kevin Arne
Thank you for the sharing, I've successfully flashed my keyboard.
I'm using a forked version of your reposistory to allow Media keys and modifiers ( https://github.com/MisterRager/3keys_1knob.git ).
Using a hexeditor + this HID table https://gist.github.com/MightyPork/6da26e382a7ad91b5496ee55fdc73db2 helped to create the suitable configuration:
```
00000000 00 01 A9 01 00 06 01 00 19 00 00 7F 00 00 80 00
00000010 00 81 FF FF FF FF FF FF FF FF FF FF FF FF FF FF
```
In my case, first button is for Media play, second for Ctrl+C, then Ctrl+V, and knob click is Mute, then Vol +/-
Cheers