Close
0%
0%

PI3 portable wifi-wifi TOR AP / mini PC

I got this idea from other projects posted. I liked the portable aspect and kept it simple.

Similar projects worth following
This was really fun to figure out. The initial idea came from looking at a few other TOR Raspberry PI projects already posted on the site. After a lot of trial and error along with some research I was able to figure it out.

Also please note: traffic going through the PI GUI or traffic through the CAT5 will not be routed through the TOR. The only traffic routed through the TOR, is the wifi nework traffic from wlan1 throught wlan0. Also, this will only hide you as well as you want to be. If you are unfamiliar with TOR, you can find more info about it here: https://www.torproject.org/

So if you go through the attached files to setup the Wifi AP, install TOR, and setup screen, you're all ready. Swap the screen to the 3.5 display prior to departure and you now have the ability to jump on any open WIFI and secure your traffic.

What you will do is of course plug in your second WIFI USB, your portable keyboard, then power on your PI3 using the portable power. After everything is hooked up, use the GUI to establish a connection through wlan1 to an open network. Once connected validate the TOR services are running from CMD. Then connect to your PI3 wifi network via laptop or portable device. Validate you are going through TOR via browser, check.torproject.org or other means. Then you are good to go!

Remember, you are your greatest enemy when it comes to security so be careful what you do while using TOR. This will in no way give you total anonymity so don't think you can just go surf places you shouldn't carefree. If anything folks are more out to get you in places like the dark web and other places that have unethical intentions. Please be safe when using TOR.

Added bonus, if you don't want to use it as a TOR WIFI AP, you have your PI3 with Rasbian and a portable keyboard, 2 for one! I had a lot of fun getting this completed and hope if you give it a shot you do as well!
plain - 1.13 kB - 12/18/2016 at 19:04

Download

plain - 1.39 kB - 12/18/2016 at 19:04

Download

plain - 2.60 kB - 12/18/2016 at 19:04

Download

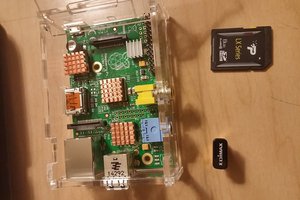
  • 1 × Raspberry Pi 3B
  • 1 × Kootek Wireless-N USB adapter picked up off Amazon
  • 1 × 16G mini SD with noobs https://www.raspberrypi.org/downloads/noobs/
  • 1 × Rii l8 Mini 2.4.Ghz Wireless keyboard picked up off Amazon
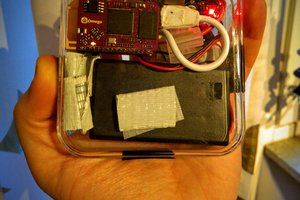
  • 1 × 3.5 OSOYOO touch screen picked up off Amazon and comes with clear case show in picture

View all 8 components

  • 1
    Step 1

    Setup PI3 using document order:

    1. Raspberry Pi 3 Wifi Access Point

    2. Setup TOR PI3

    3. Screen

    *From here, don't forget to swap display to your 3.5 screen or you'll need to find an HDMI to plug into.

    4. Plug in second Wifi USB, portable keyboard and you portable power. (portable power needs to have an output of at least 5v=2.5A)

    5. connect to the open Wifi via GUI

    6. check TOR is running via command: sudo service TOR status

    7. If all is good, connect your laptop or portable device.

    8. check connection is running through TOR via: check.torproject.org

    9. If all checks out your good to surf anonymously

    ***the traffic going through the PI GUI or traffic through the CAT5 will not be routed through the TOR. The only traffic routed through the TOR, is the wifi nework traffic from wlan1 throught wlan0

    10. if you dont want to use the PI3 as a TOR AP, you have your power pack and portable keyboard, Mini PC!

View all instructions

Enjoy this project?

Share

Discussions

Similar Projects

Does this project spark your interest?

Become a member to follow this project and never miss any updates