 Jackson Miller
This project uses Onshape for all 3d printed parts
All the code in this project is in C++
Already have an account? Log in.
To make the experience fit your profile, pick a username and tell us what interests you.
This project uses Onshape for all 3d printed parts
All the code in this project is in C++
|
Adobe Portable Document Format - 20.54 kB - 05/19/2023 at 01:00 |
|
|
|
Adobe Portable Document Format - 34.90 kB - 05/19/2023 at 00:58 |
|
|
Snug Sway logo (1).pngOur team logoPortable Network Graphics (PNG) - 124.65 kB - 05/18/2023 at 21:11 |
|
|
This is the last log and the last week we worked on our project. We made this trifold for a presentation. Our trifold has our Hackaday logs, our mission statement, how it works, material list, and our Hackaday project page.
Positives:
Issues:
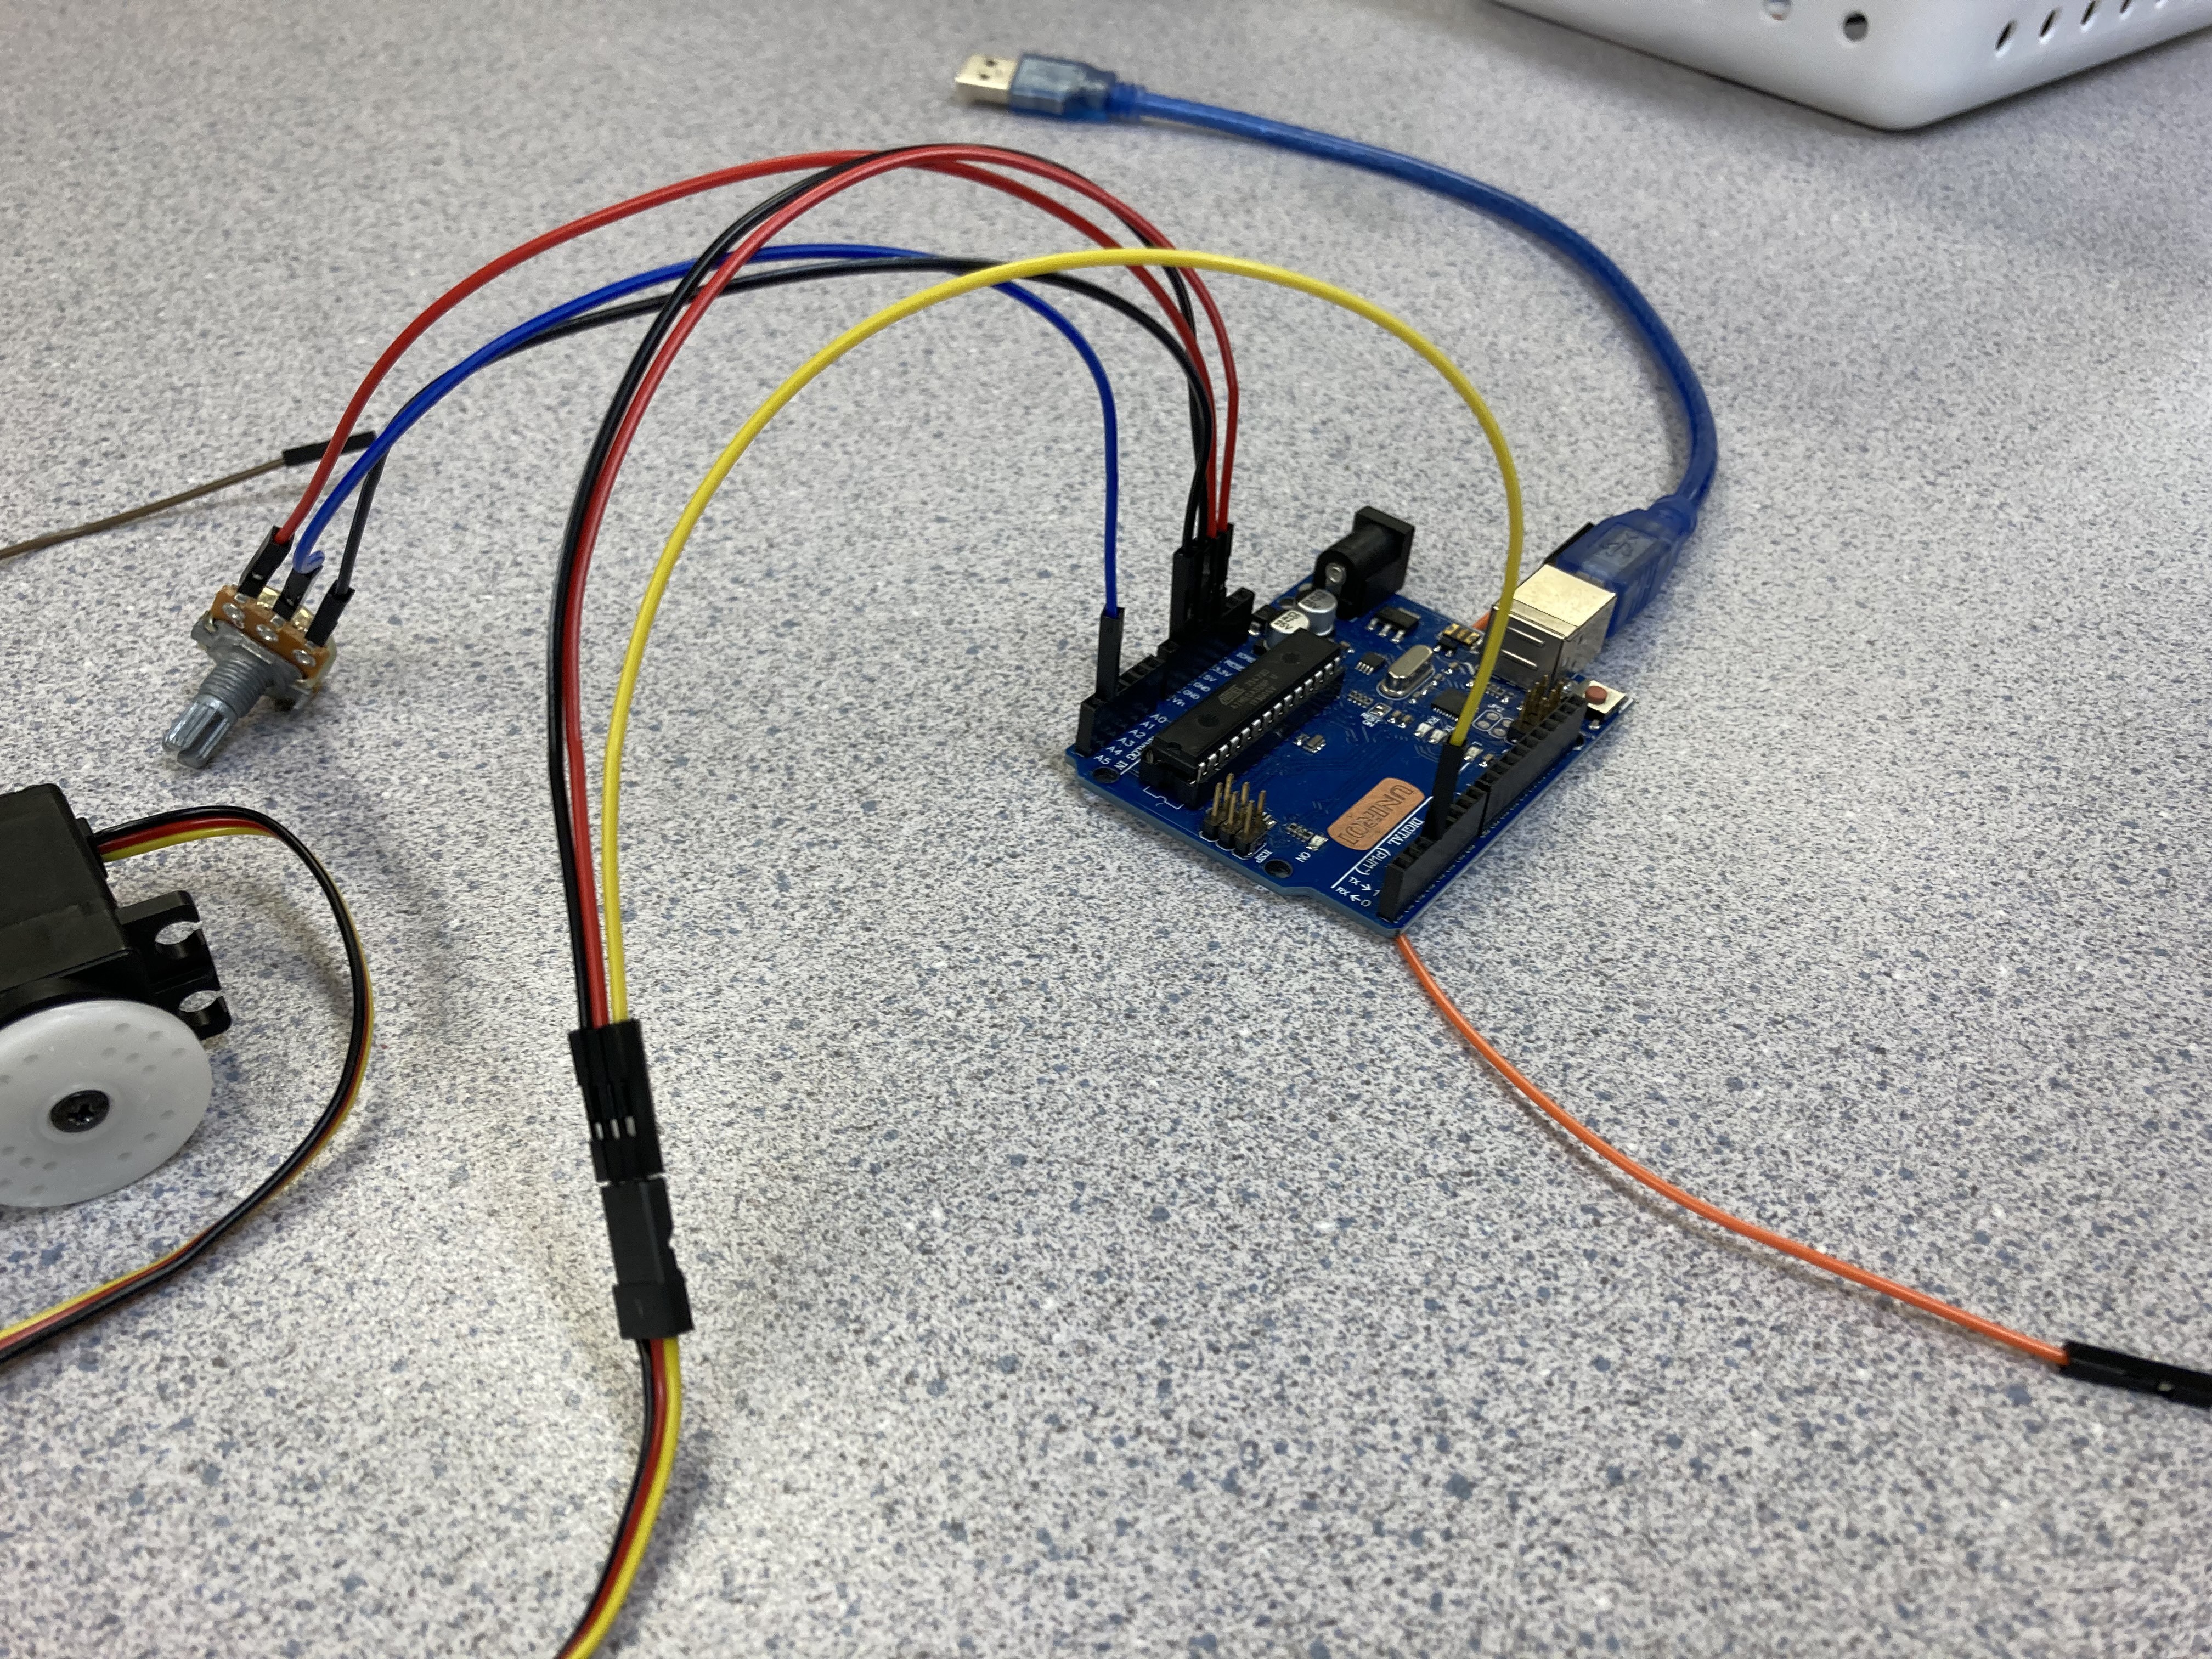
Last week, we added endstops to our spectrum to ensure that our pointer doesn’t run off the rails.
We have failed to make the potentiometer and servo wireless on time, however we know the process to make our spectrum wireless.
Here are the steps we used and you can use to connect a Esp32 to an Arduino
1. Get the materials
2. install libraries at the first link/video
3. Put code into Arduino IDE and knife out and put in code to send or receive data
4. Send or receive data
5. Test to make sure it works
6. Build what you want with it
If you have any more questions, here are the websites and videos we followed:
https://randomnerdtutorials.com/installing-the-esp32-board-in-arduino-ide-windows-instructions/
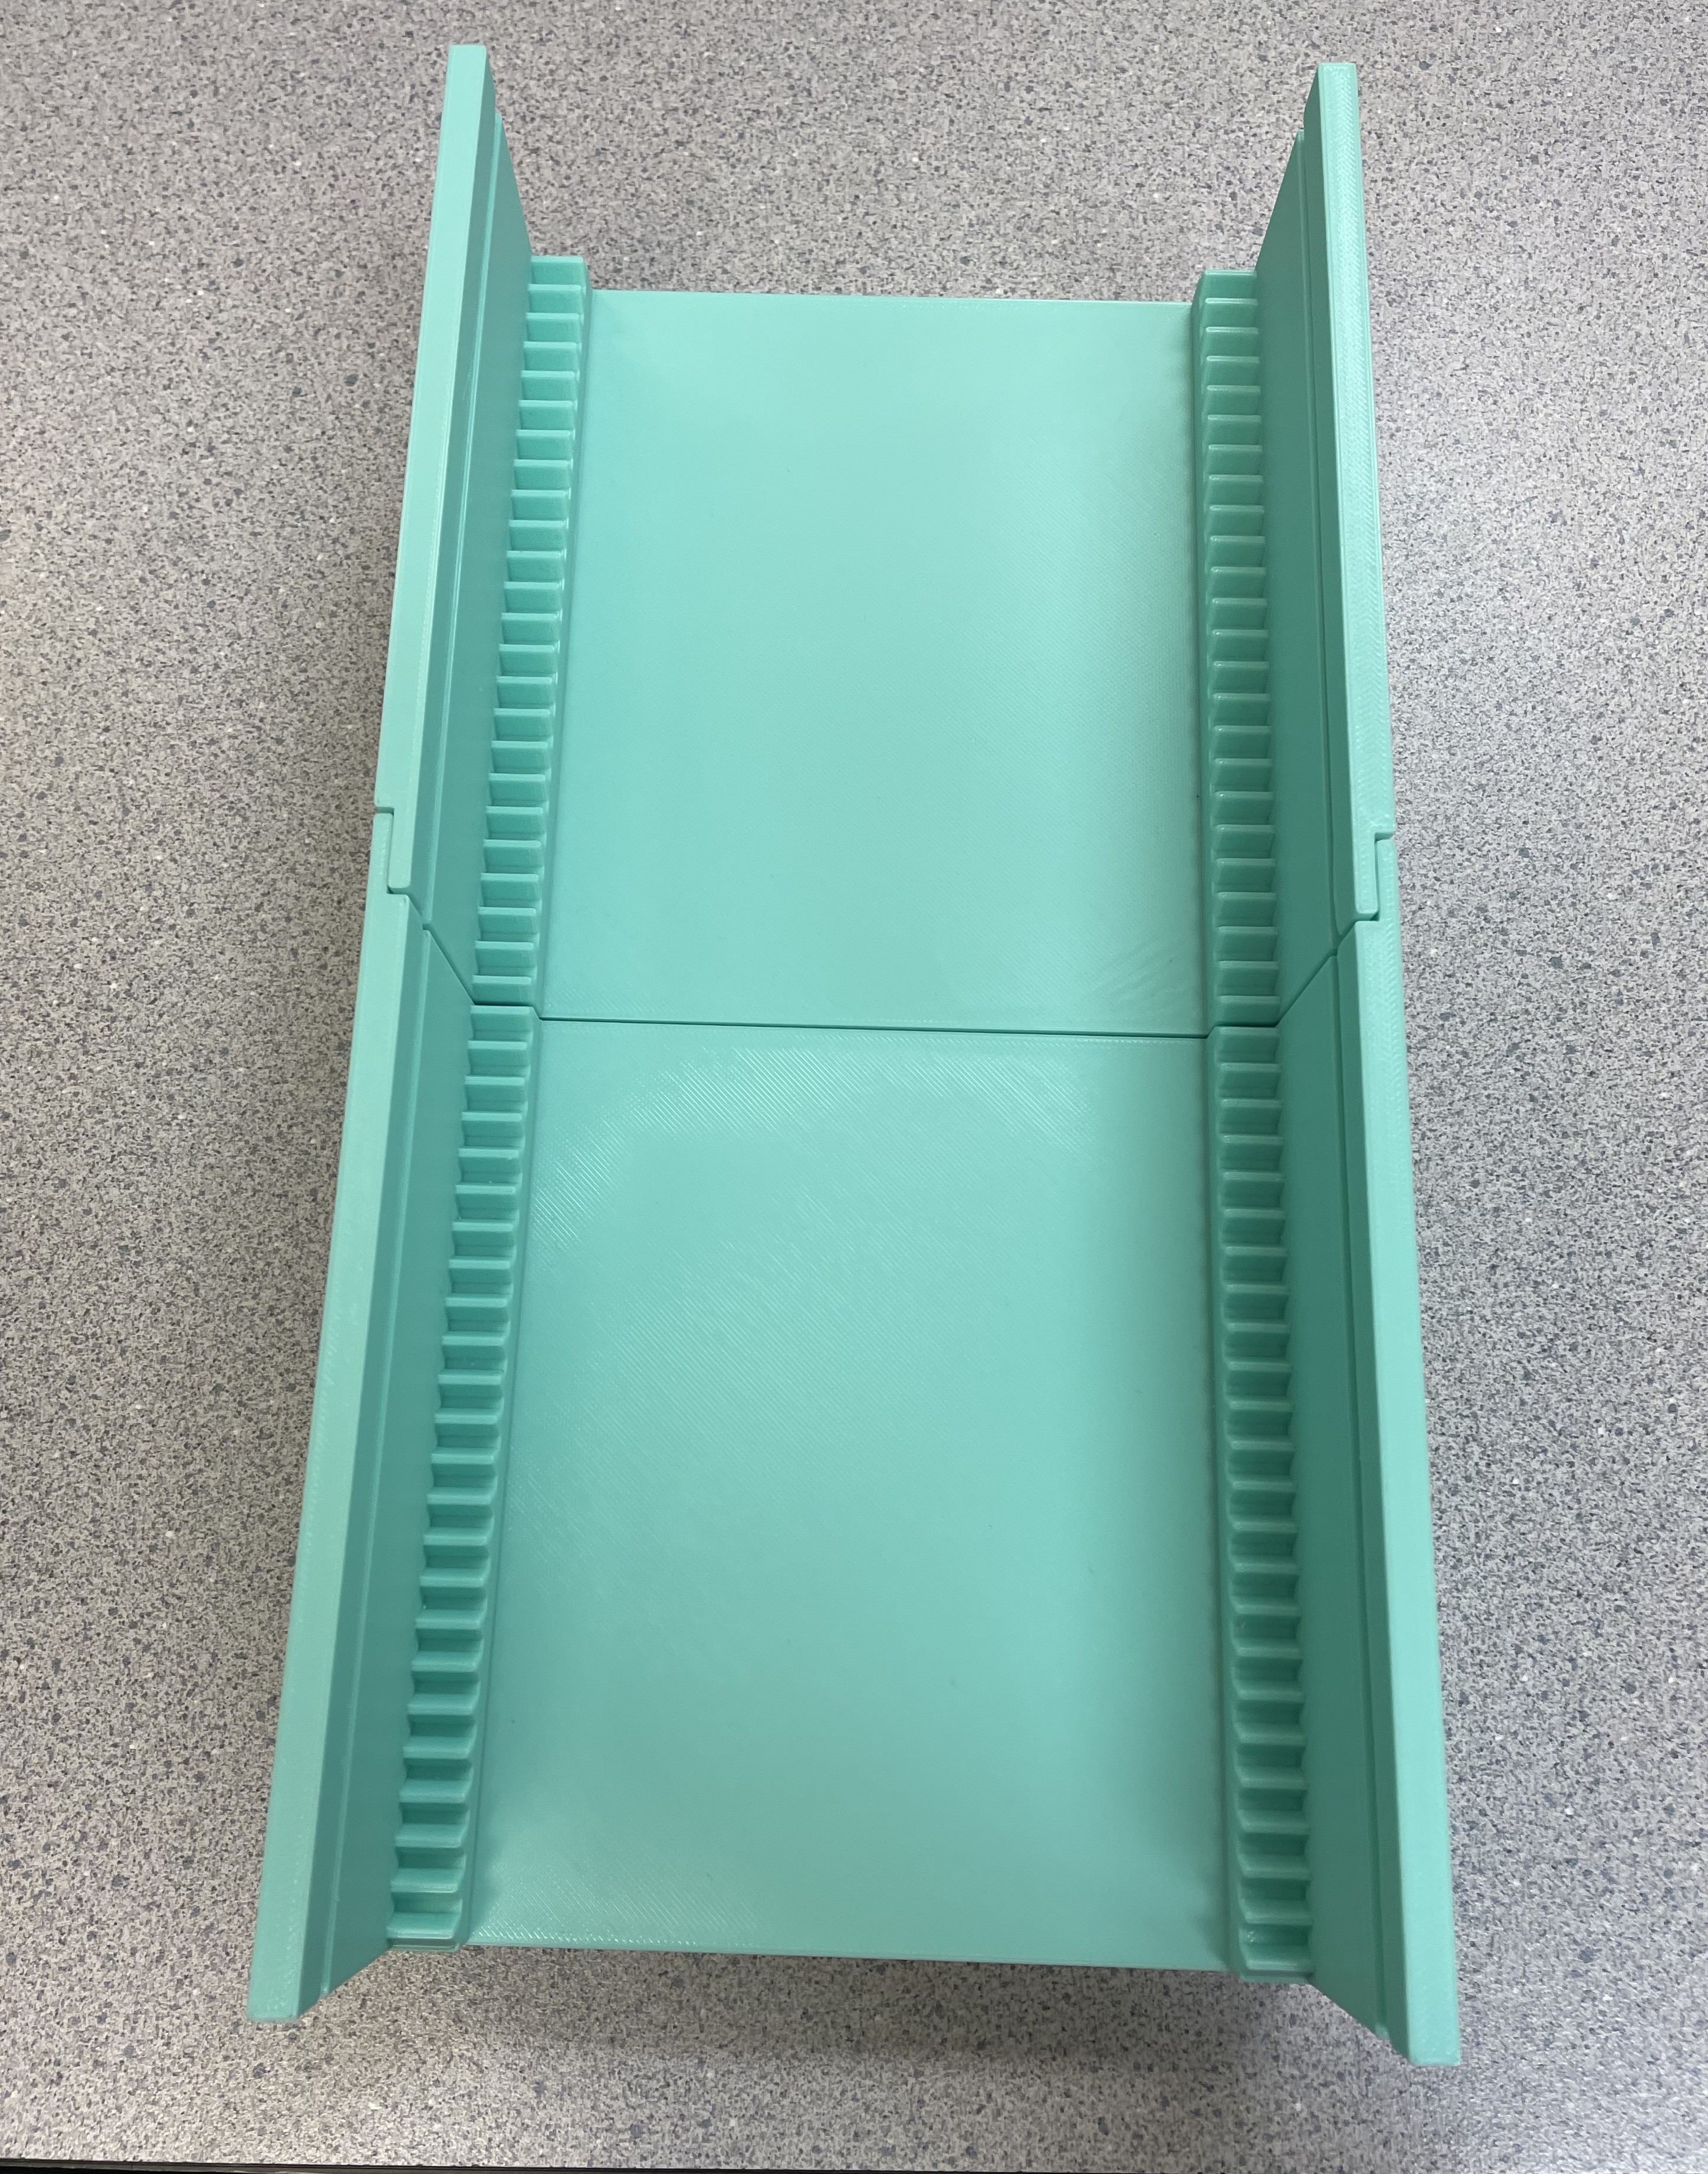
Over last week we printed the color spectrum and attached it to the 3d box. Our color spectrum is this image below printed on a standard piece of paper. The servo was also attached to complete the build. A photo of the final build is also shown. We didn't run into any new issues , but we are still working on getting our potentiometer to wireless. May have to abandon wireless connection in the future.
We settled on our spectrum design. Our 3d printer isn't big enough to fit the whole 3d box so we had to print it in two pieces. We waited to print both pieces until we decided on our final build. When we tested our servo moving across we found that the crease where the two pieces meet has imperfections. The spacing of teeth is off at the crease and the lip for the servo is at a marginal different height. We used a razor to level out the lip, but there is no easy fix for the teeth. Regardless, these issues are small. The servo can still travel across the box, but the crease creates a minor stutter. The crease is the least of our concern at this moment. Our focus is make the potentiometer wireless.
We discussed potentially making a phone app instead of a physical controller to control the servo. Since everyone almost always has their phone nearby, an app would be much more continent than a dedicated controller. The potentiometer is small and fragile. This app could various layouts, such as a slider. Phone apps are often easier for the user. Parts of a controller can be fragile and complicated to fix. An app would eliminate this problem. Overall, an app would be easier for the user, However this will be something to do on the side if we finish with extra time. We want to have a working prototype before we start innovating.
This is the tutorials we used this week:
https://randomnerdtutorials.com/esp-now-esp32-arduino-ide/
We are converting the potentiometer to wireless. We are using esp32s. Esp32s are microcontrollers with bluetooth and wifi capabilities. Our issue is making the arduino and the esp32s talking with each other. The code we currently have is meant to be used with heat sensors. We need to make the code compatible with the potentiometer.
Here are some of the videos and websites we used:
https://www.youtube.com/watch?v=2z7Ow4PjJRc video
https://www.youtube.com/watch?v=r-uLfILKqyY video
We reprinted our 3d box with a lip. The servo attachment was reprinted. The servo attachment now has one tooth on each side for mounting to the lip of the 3d box. The servo glides across the box smoothly.


The issues with the potentiometer were corrected. Here is a video we used:
https://siytek.com/wemos-d1-mini-arduino-wifi/
The servo attachment (top picture), the 3d box (middle picture), and the gears (bottom picture) have finished printing. Design flaws were discovered during assembly. The servo platform doesn't support the servos as expected. The servo platform sags and creates drag for the servos.
We are converting the potentiometer to wireless.

We used this website to get started with 3d modeling:
https://all3dp.com/2/onshape-tutorial-how-to-use-onshape/
We discussed whether to use a continuous servo vs a regular servo and whether to use a potentiometer vs a slider. We are using a continuous servo and a potentiometer in the prototype.
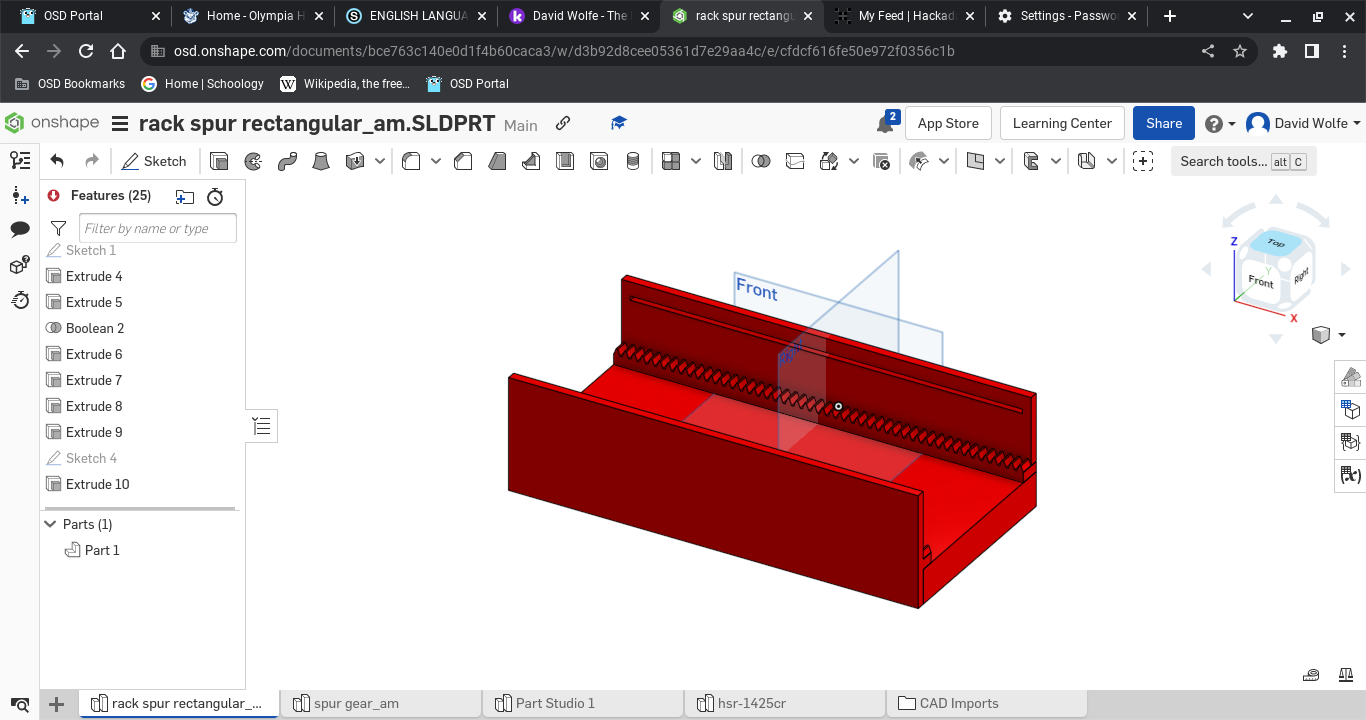
We completed our 3d model of the 3d box and the servo attachments. The code was sent to the printer. The 1st model (in blue) above is the pointer and servo platform. The 2nd model (in red) above is where the servo turns the gear for pointer movement.
One of the problems we encountered during our design process was with the potentiometer. The potentiometer has controlled speed but will never completely stop.
Today the project was created so let it begin.
3d print these 3d models using Onshape:https://osd.onshape.com/documents/bce763c140e0d1f4b60caca3/w/d3b92d8cee05361d7e29aa4c/e/132df27706402643b5f49f92
Plug in arduino to a windows computer via usb for coding in C++
Plug potentiometer and servo into Arduino(Servo:Gnd to black, 5v to red, ~3 to yellow) (Pot: Gnd to rightermost pin, A3 to middle pin, 3v to leftmost pin) using breadboard wires.


 Luke J. Barker
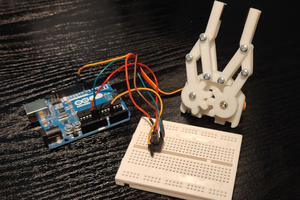
 Adam Redfern
 Nick Rehm
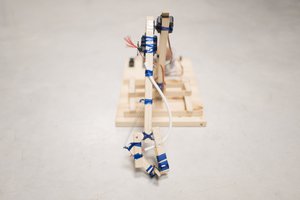
 circuito.io