-
1Get Access to Control Board
First we need to gain access to the front panel control board.
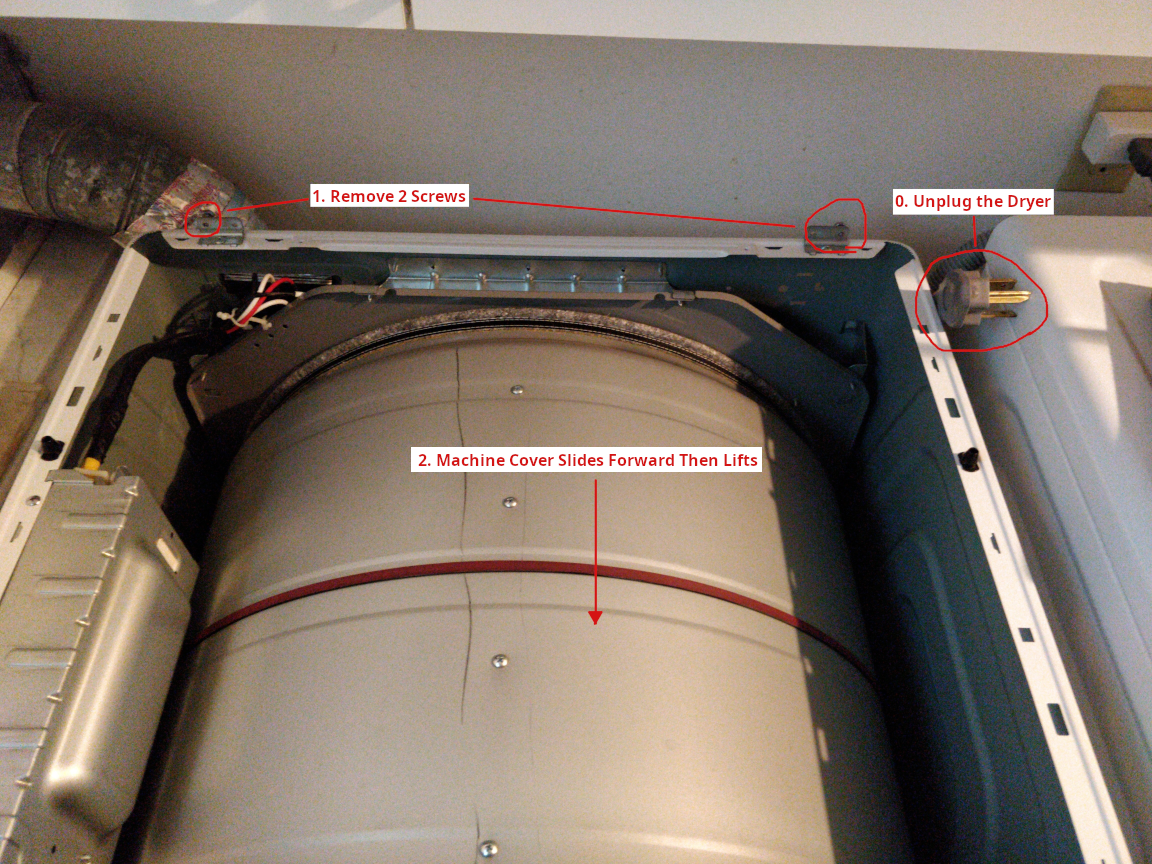
Disconnect the power from the machine before doing anything!
First, undo the two screws at the back of the dryer in order to remove the top panel. The top panel will slide forward then lift off once the two screws are removed.
![]()
Once the top is off, there are four screws along the front of the machine that hold the front panel piece on. Undo them, then carefully pop the front panel forward a bit. Behind the panel are two wires with connectors that clip on. Grab and squeeze the clips while removing the wires.
Once the wires are disconnected, the whole front panel pieces comes off and can be taken elsewhere.
![]()
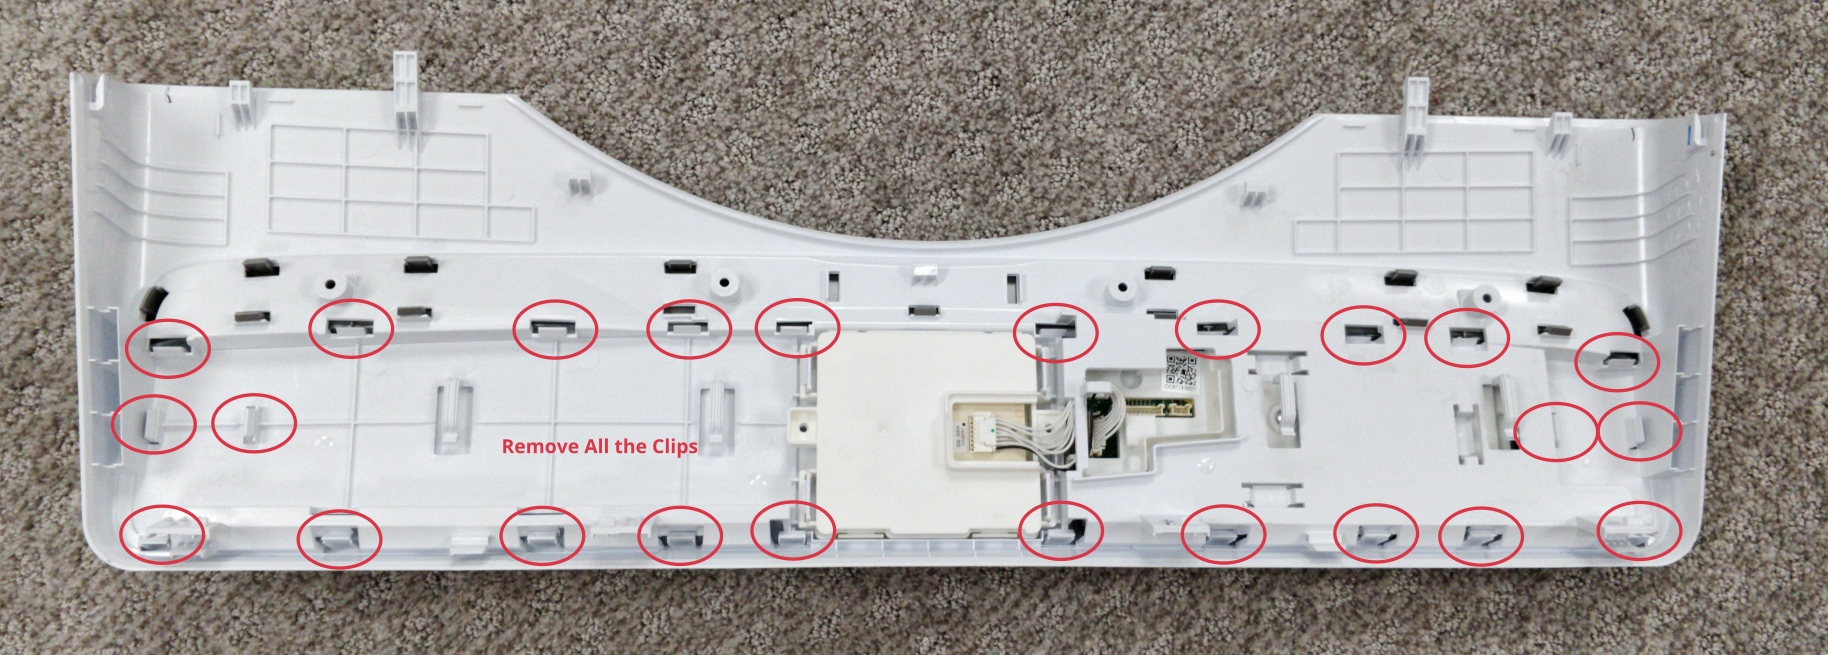
Unclip the last wire from the control board (comes from the encoder), then you have to pop off all the clips.
![]()
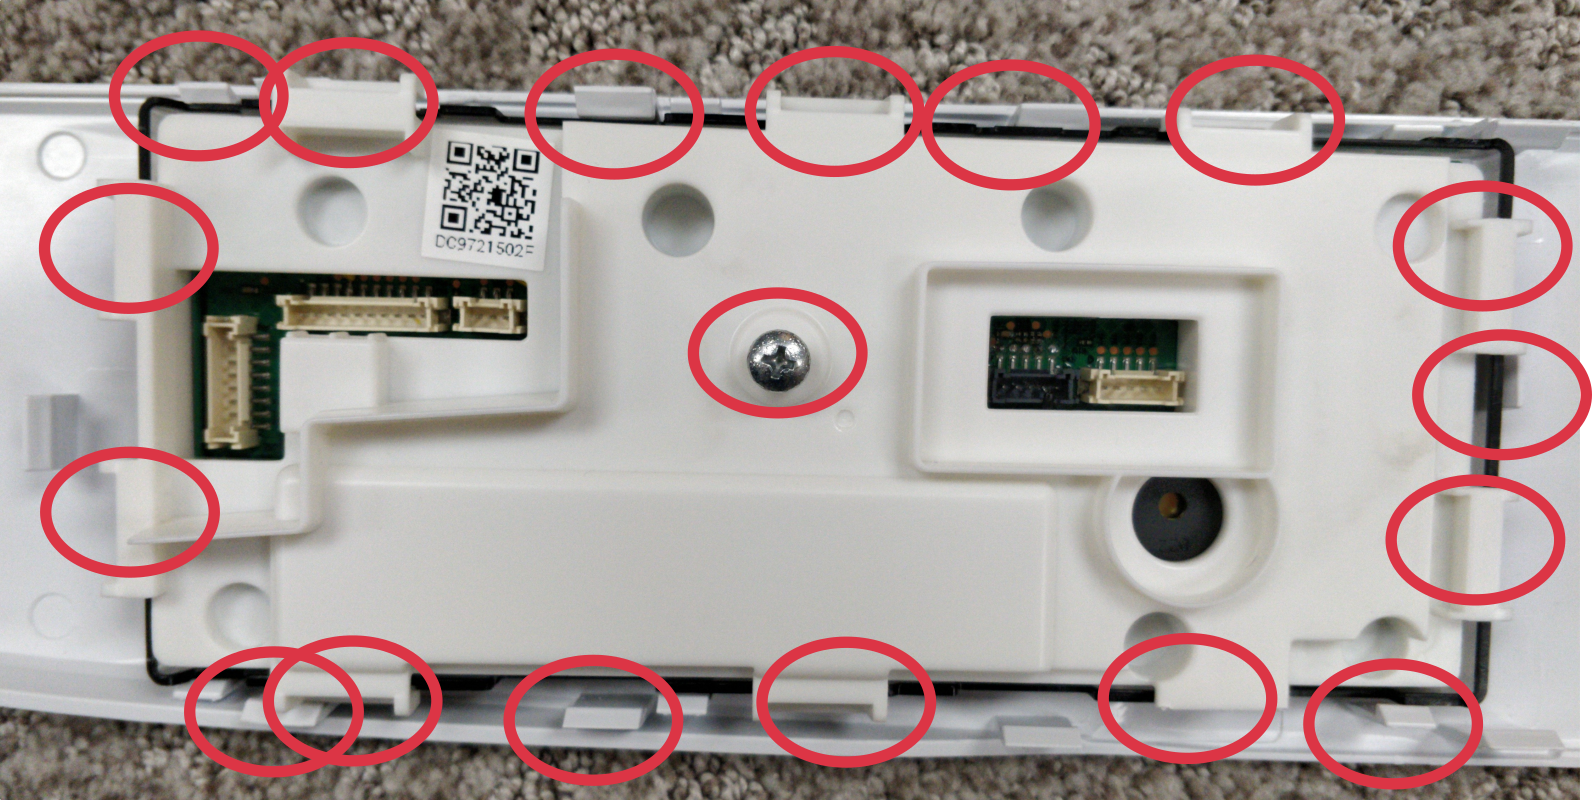
Finally, after a few more clips and one last screw we have access to the control board.
![]()
-
2Reverse Engineering the Board
I spent some time reverse engineering the board to figure out where to connect to. There is conformal coating which makes soldering a bit more tricky, but definitely possible.
You can see the wires I ended up with. I connected to 12V, GND and RX3 (which comes from the central controller.
![]()
You need an ESP-based board that manages to fit within the cover of the board.
-
3ESP8266 Software
Make software in ESPHome that listens to the UART traffic and changes the state of a switch based on specific messages that happen when the dryer is first turned on or off.
The code I used is based on a Custom UART Component in ESPHome and a Custom Binary Switch.
# dryer.yaml
esphome:
  name: dryer
  includes:
    - dryer.h

esp8266:
  board: esp12e

wifi:
  ssid: wifi_ssid
  password: wifi_password

api:
  password: ""

ota:
  password: ""

logger:
  baud_rate: 0 # disable logging over uart

web_server:
  port: 80
  local: true

uart:
  id: uart_bus
  tx_pin: GPIO1
  rx_pin: GPIO3
  baud_rate: 38400

binary_sensor:
  - platform: custom
    lambda: |-
      auto my_dryer_sensor = new DryerUartSensor(id(uart_bus));
      App.register_component(my_dryer_sensor);
      return {my_dryer_sensor};
    binary_sensors:
      name: "Dryer State"
And dryer.h:
// dryer.h #include "esphome.h" #include <string.h> static const uint8_t on_message[] = {0x5a, 0xa5, 0xc0, 0x1e, 0x00, 0x00, 0x00, 0x40, 0x01, 0x00, 0x01, 0x00, 0x01, 0xe6, 0x80, 0xdb, 0x00, 0x01, 0x00, 0x00, 0x00, 0x00, 0x00, 0xff, 0x00, 0x00, 0x00, 0x00, 0x00, 0x23, 0x00, 0x91, 0xef}; static const size_t on_message_len = sizeof(on_message); static const uint8_t off_message[] = {0x5a, 0xa5, 0xc0, 0x00, 0x00, 0x00, 0x00, 0x00, 0x00, 0x00, 0x00, 0x00, 0x00, 0x00, 0x00, 0x00, 0x00, 0x00, 0x00, 0x00, 0x00, 0x00, 0x00, 0xff, 0x00, 0x00, 0x00, 0x00, 0x00, 0x03, 0x00, 0x52, 0x34}; static const size_t off_message_len = sizeof(off_message); class DryerUartSensor : public Component, public UARTDevice, public BinarySensor { protected: int pos_; uint8_t buffer_[256]; uint8_t dryer_state_; public: DryerUartSensor(UARTComponent *parent) : UARTDevice(parent) {} void setup() override { } void loop() override { uint8_t newData; int read_count = 50; //Set max read amount to prevent blocking too long while (this->available() && read_count--) { if(this->read_byte(&newData)) { if((newData == 'Z') || (pos_ == 254)) { if(dryer_state_) { if(!memcmp(buffer_, off_message, off_message_len-2)) { publish_state(false); dryer_state_ = false; } } else { if(!memcmp(buffer_, on_message, on_message_len-2)) { publish_state(true); dryer_state_ = true; } } pos_ = 0; } buffer_[pos_] = newData; pos_ += 1; buffer_[pos_] = 0; } } } }; -
4Putting the Dryer back together
Reassembly is the reverse of disassembly 😄
-
5Setup in Home Assistant
The "Dryer State" sensor just reports whether the dryer is on or not. It cannot really tell whether the dryer is running. However, if they dryer is not running, then it automatically turns off after a couple minutes. So, we can just detect if the dryer is on longer than a certain amount of time (5 minutes works) then it must be running. At the end of a cycle it immediately turns off, so we can assume the cycle is complete once it turns off.
You can setup automations to watch for these two conditions and send notifications based on that.
Thats all there is to it.
Samsung Dryer IoT Hack
I wanted to get notifications on my phone when my Samsung Dryer finishes the cycle.


Discussions
Become a Hackaday.io Member
Create an account to leave a comment. Already have an account? Log In.