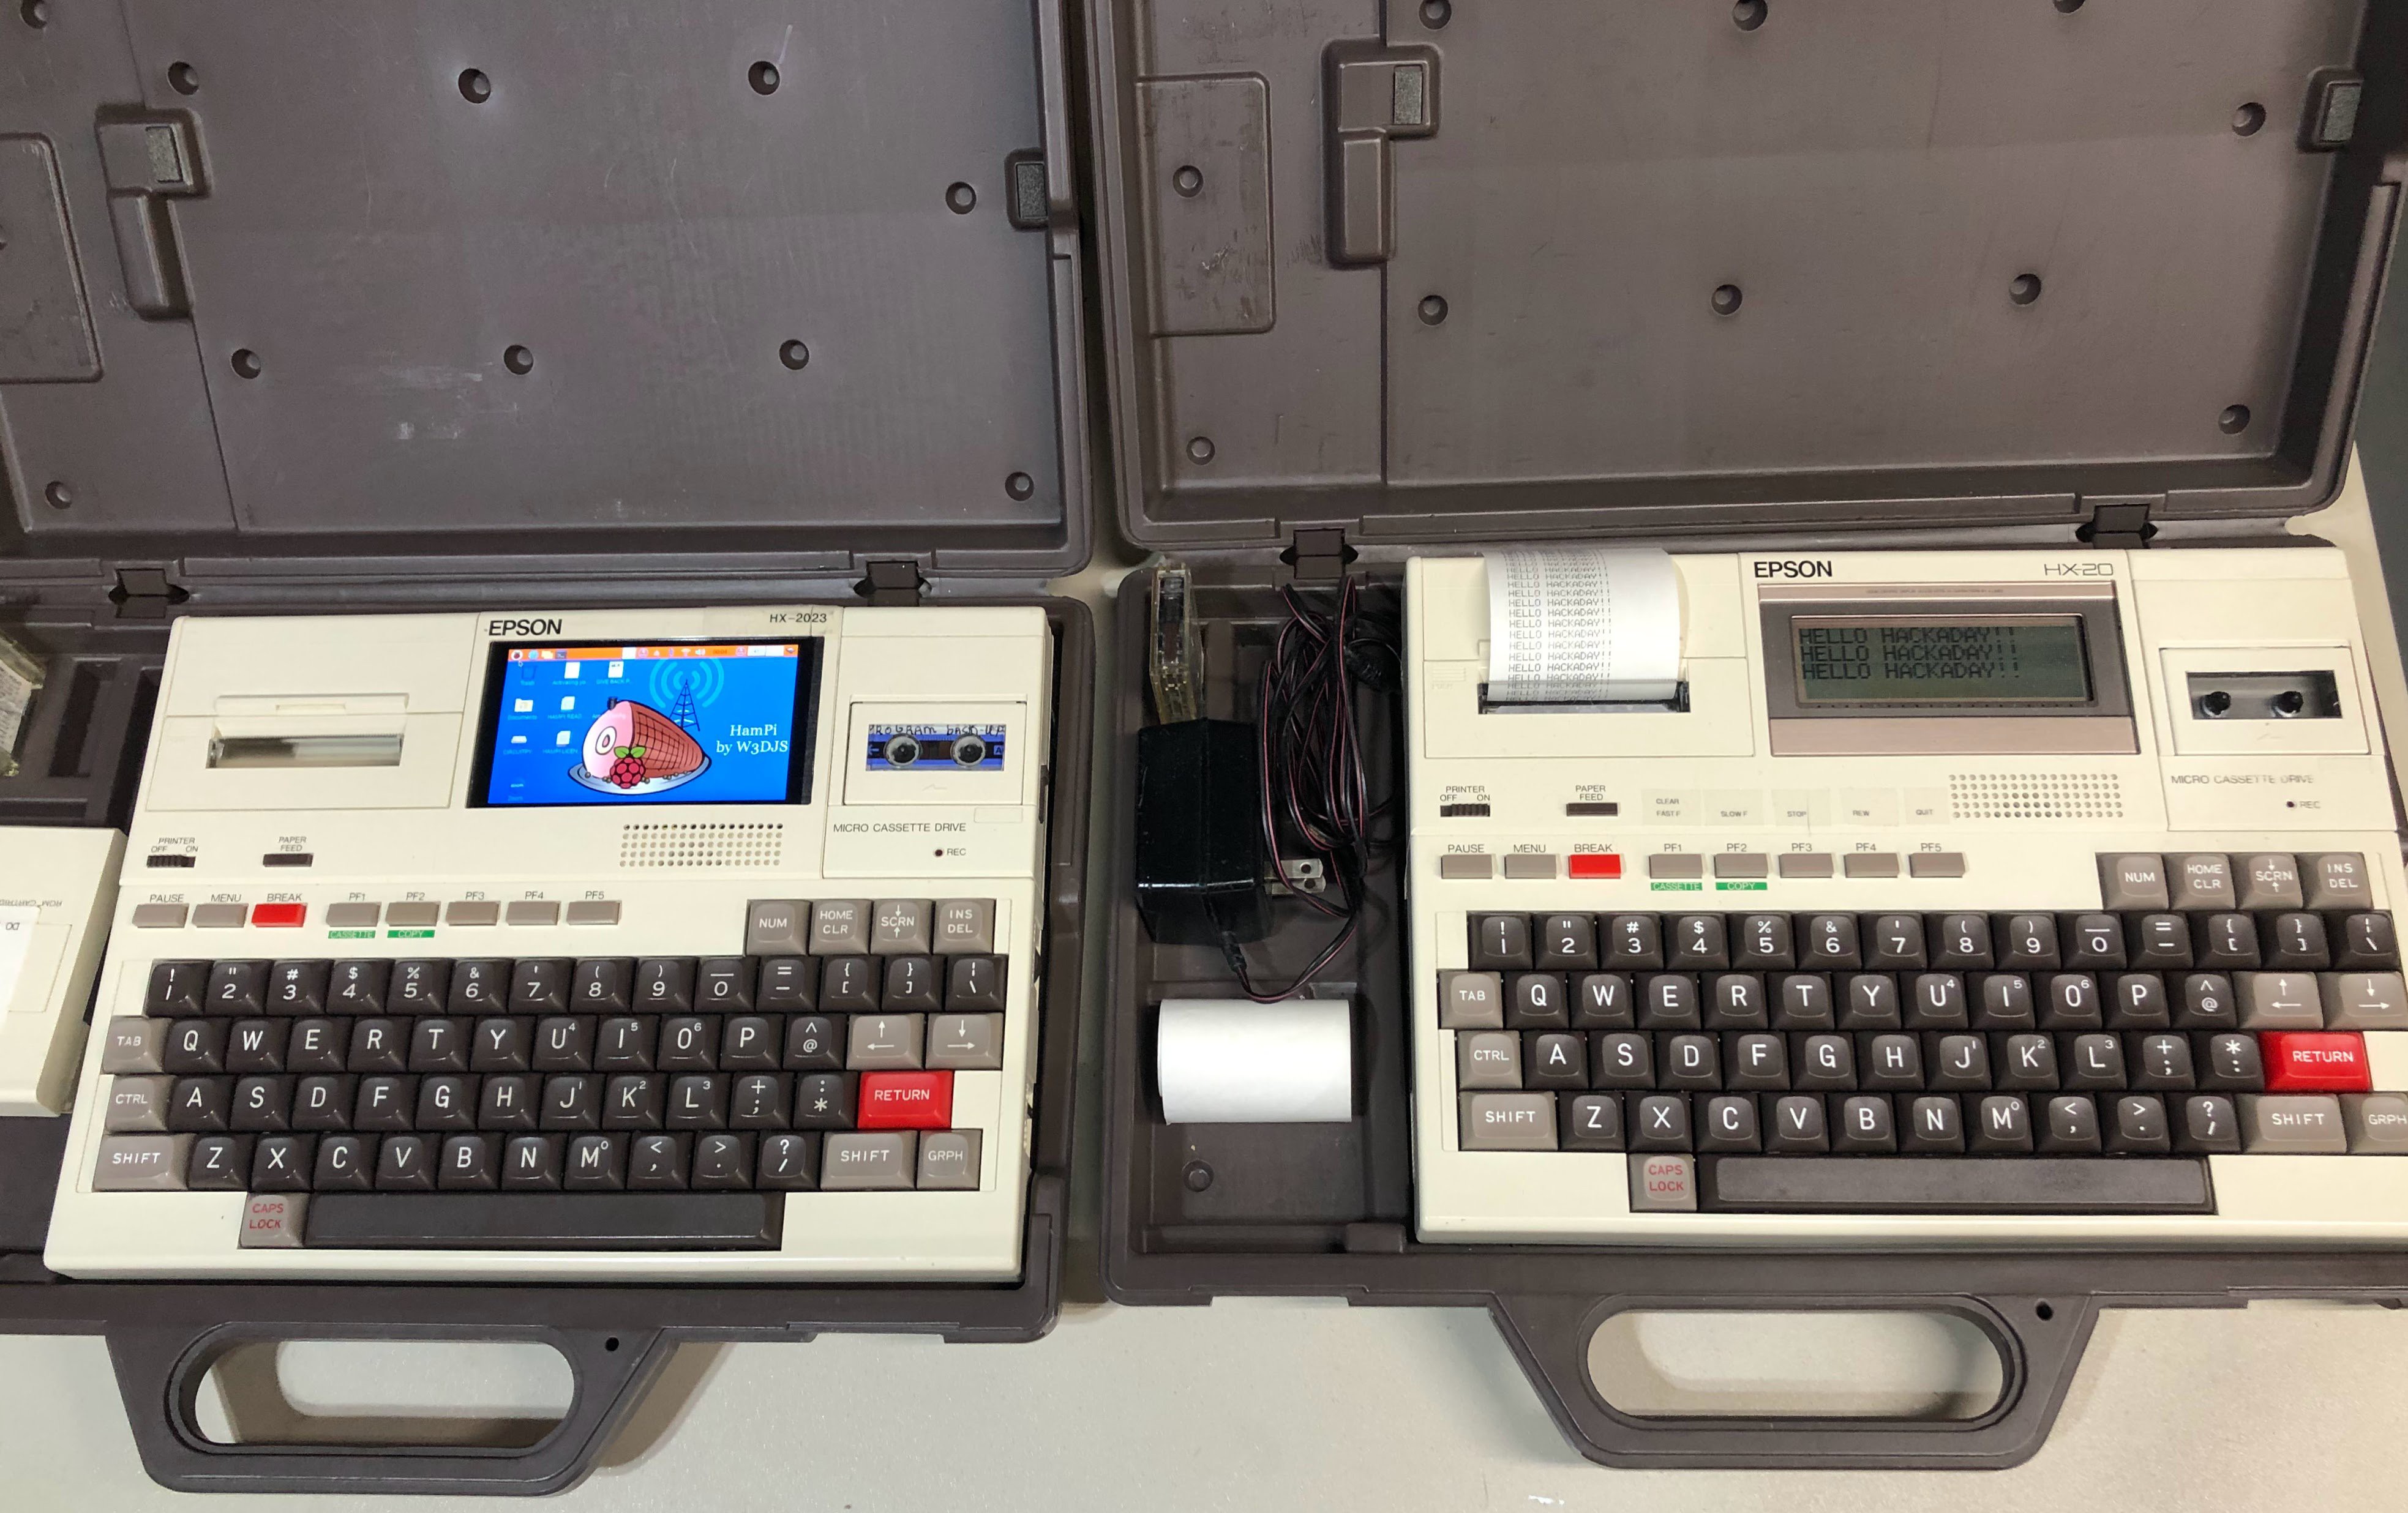
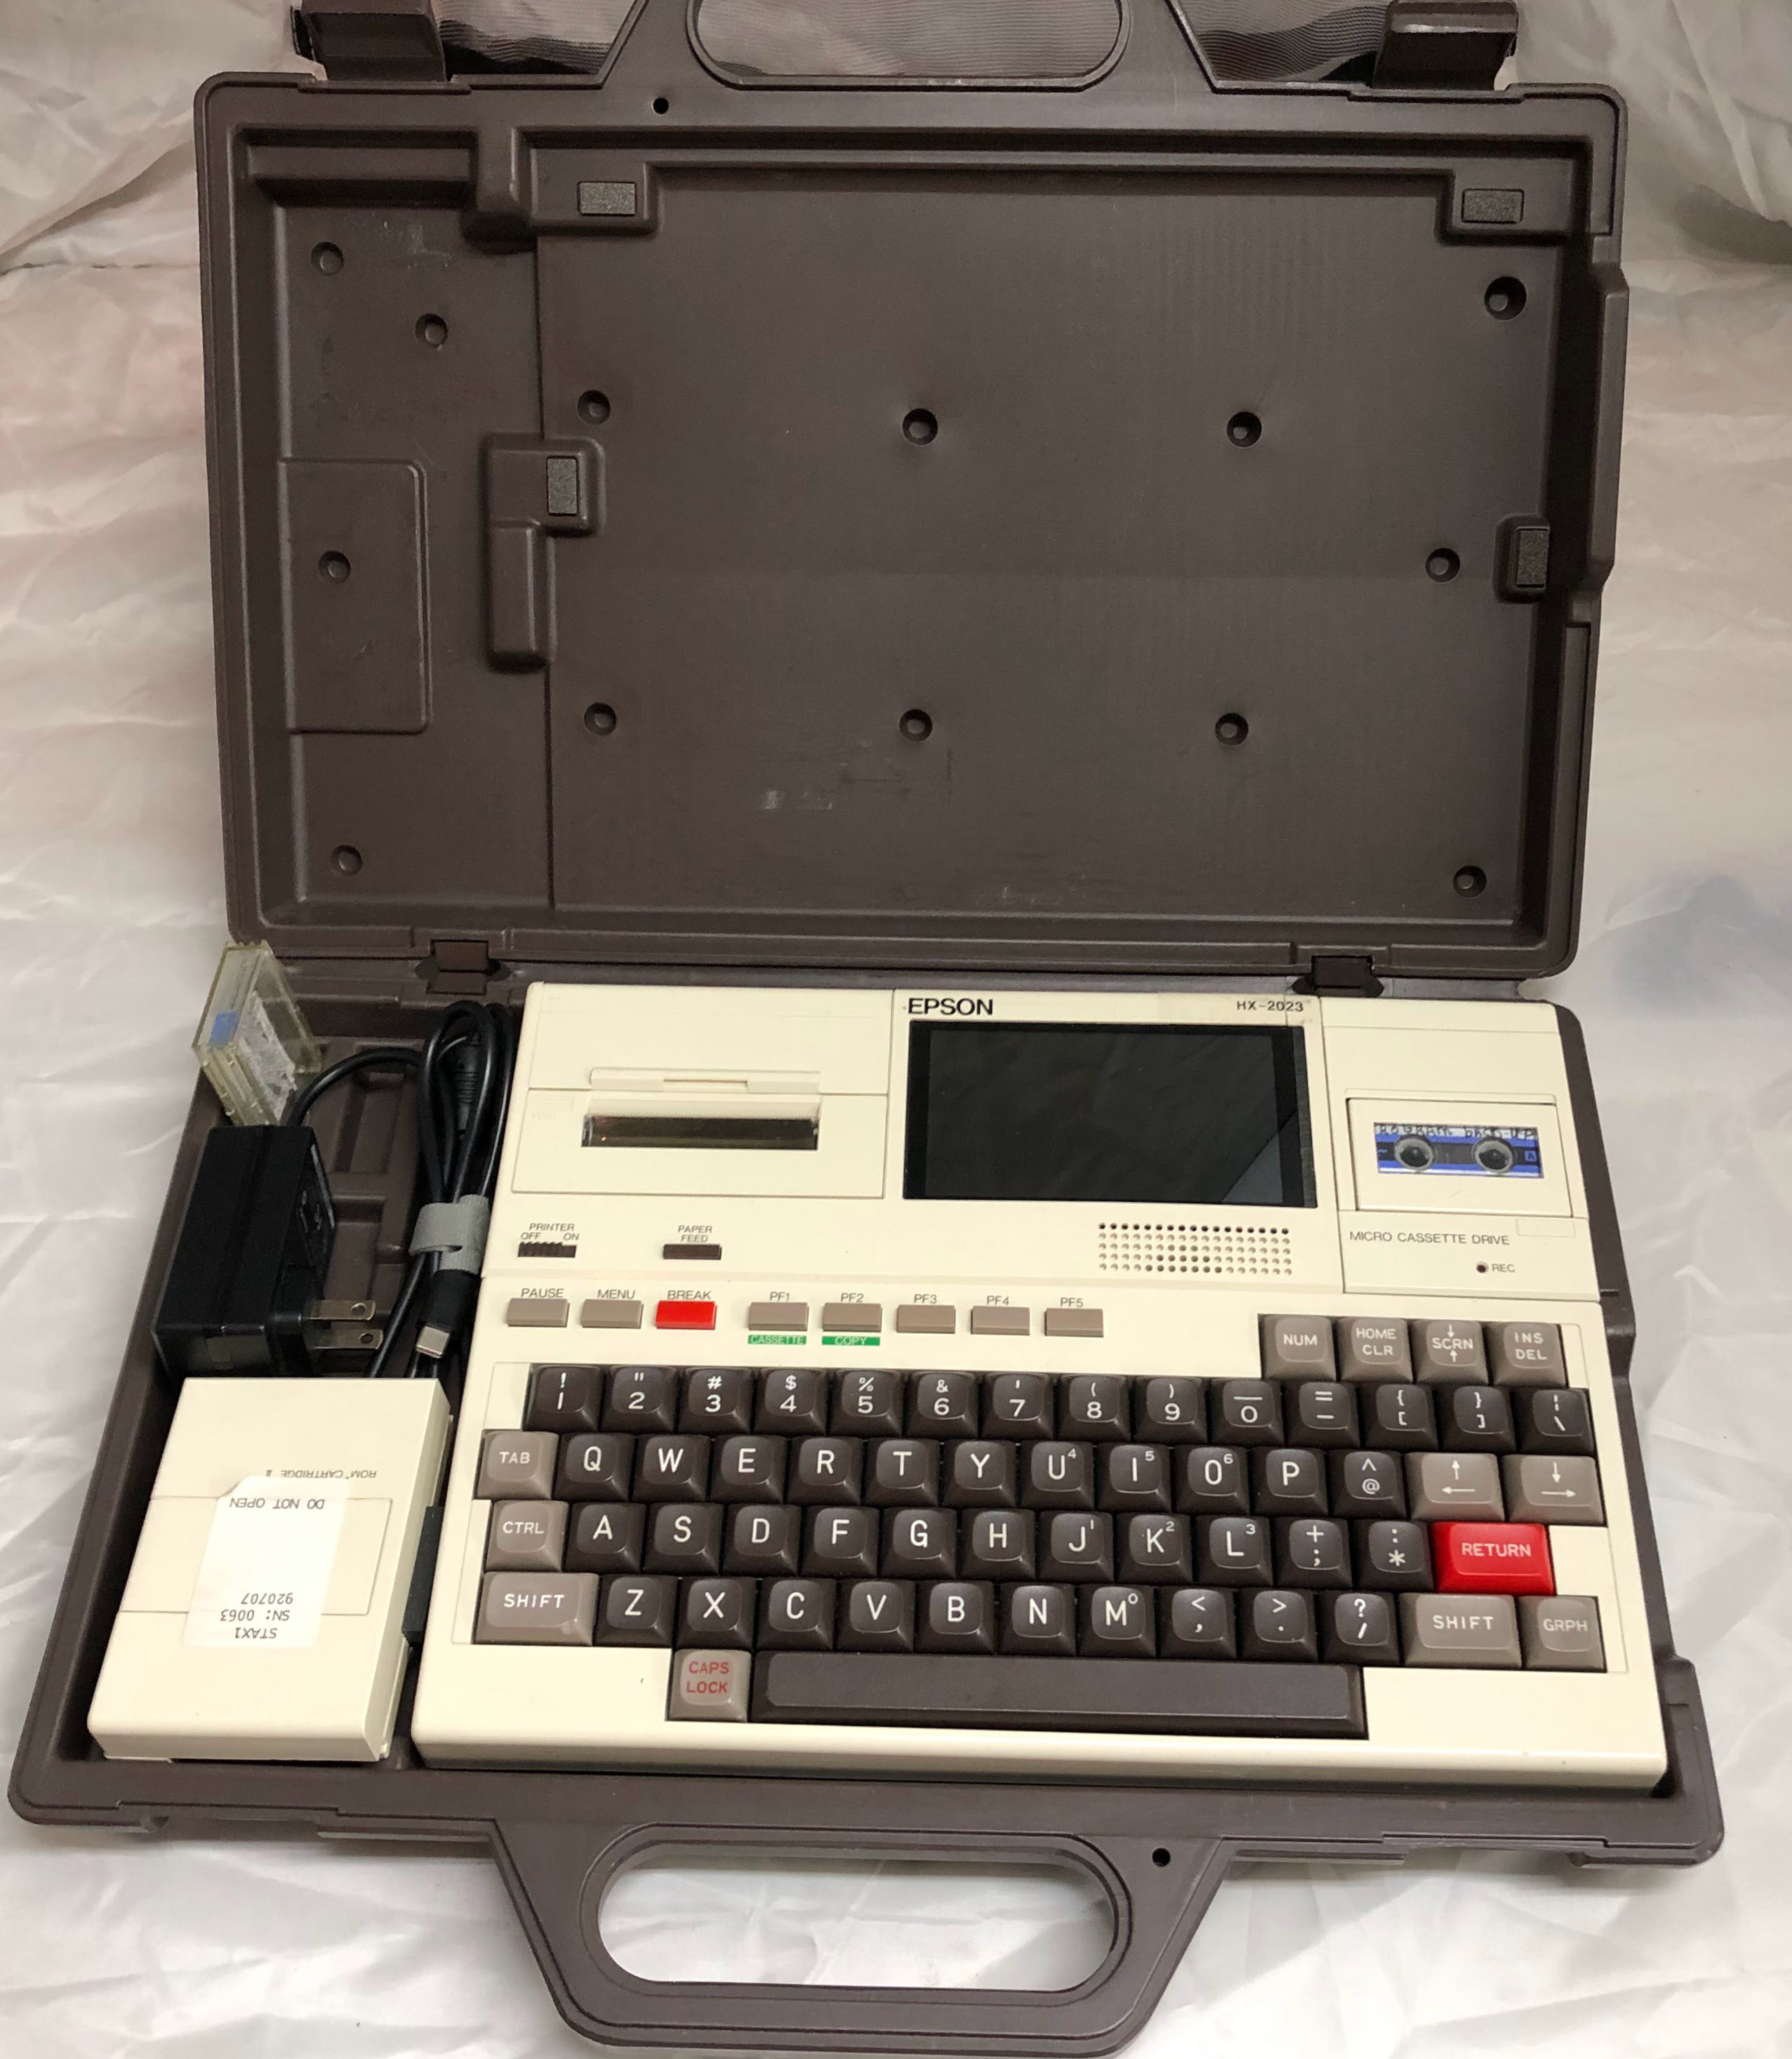
Close
0%
0%

Epson HX-2023

a reimagining of the first "notebook computer"

donDon
Similar projects worth following
It started with just one Epson HX-20 won at auction. After purchasing several and refurbing them I had a few spare parts. Why not do something interesting with it?

 The Epson HX-20 was the first "notebook computer" -BYTE Magazine APR1982 Pg105

This is my project to re-imagine the Epson HX-20 into a sort of retro cyberdeck for 2023. 

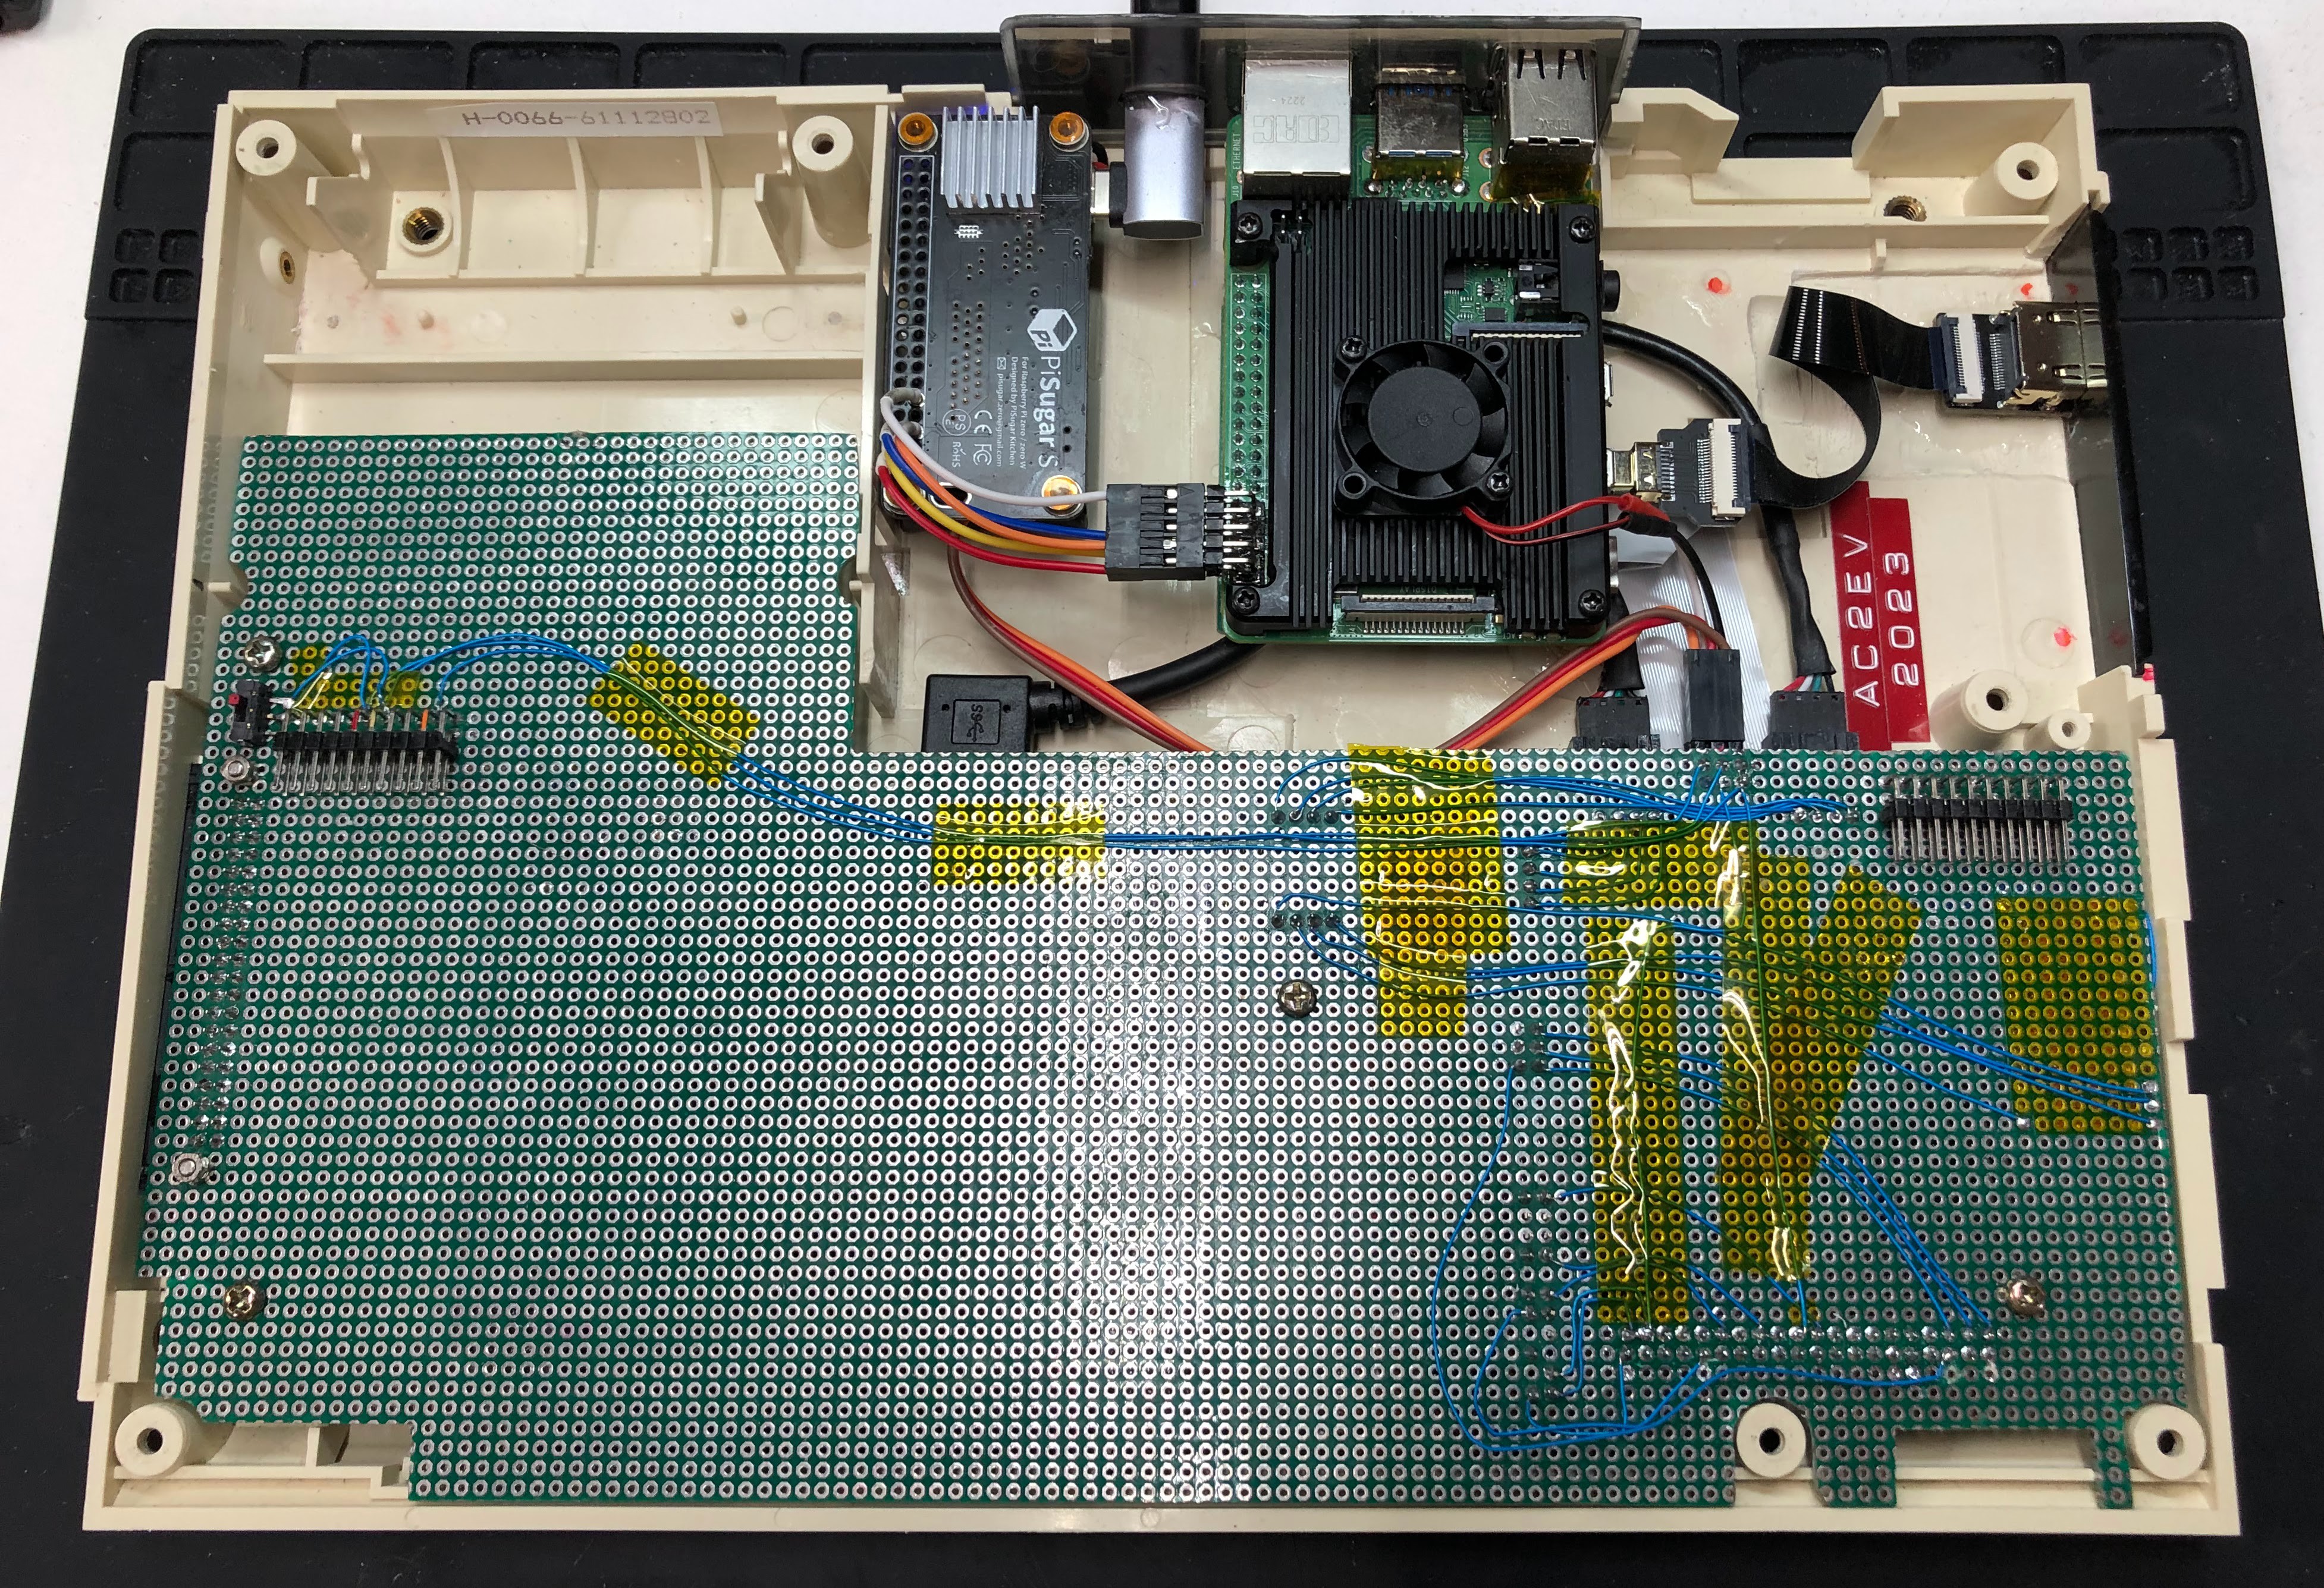
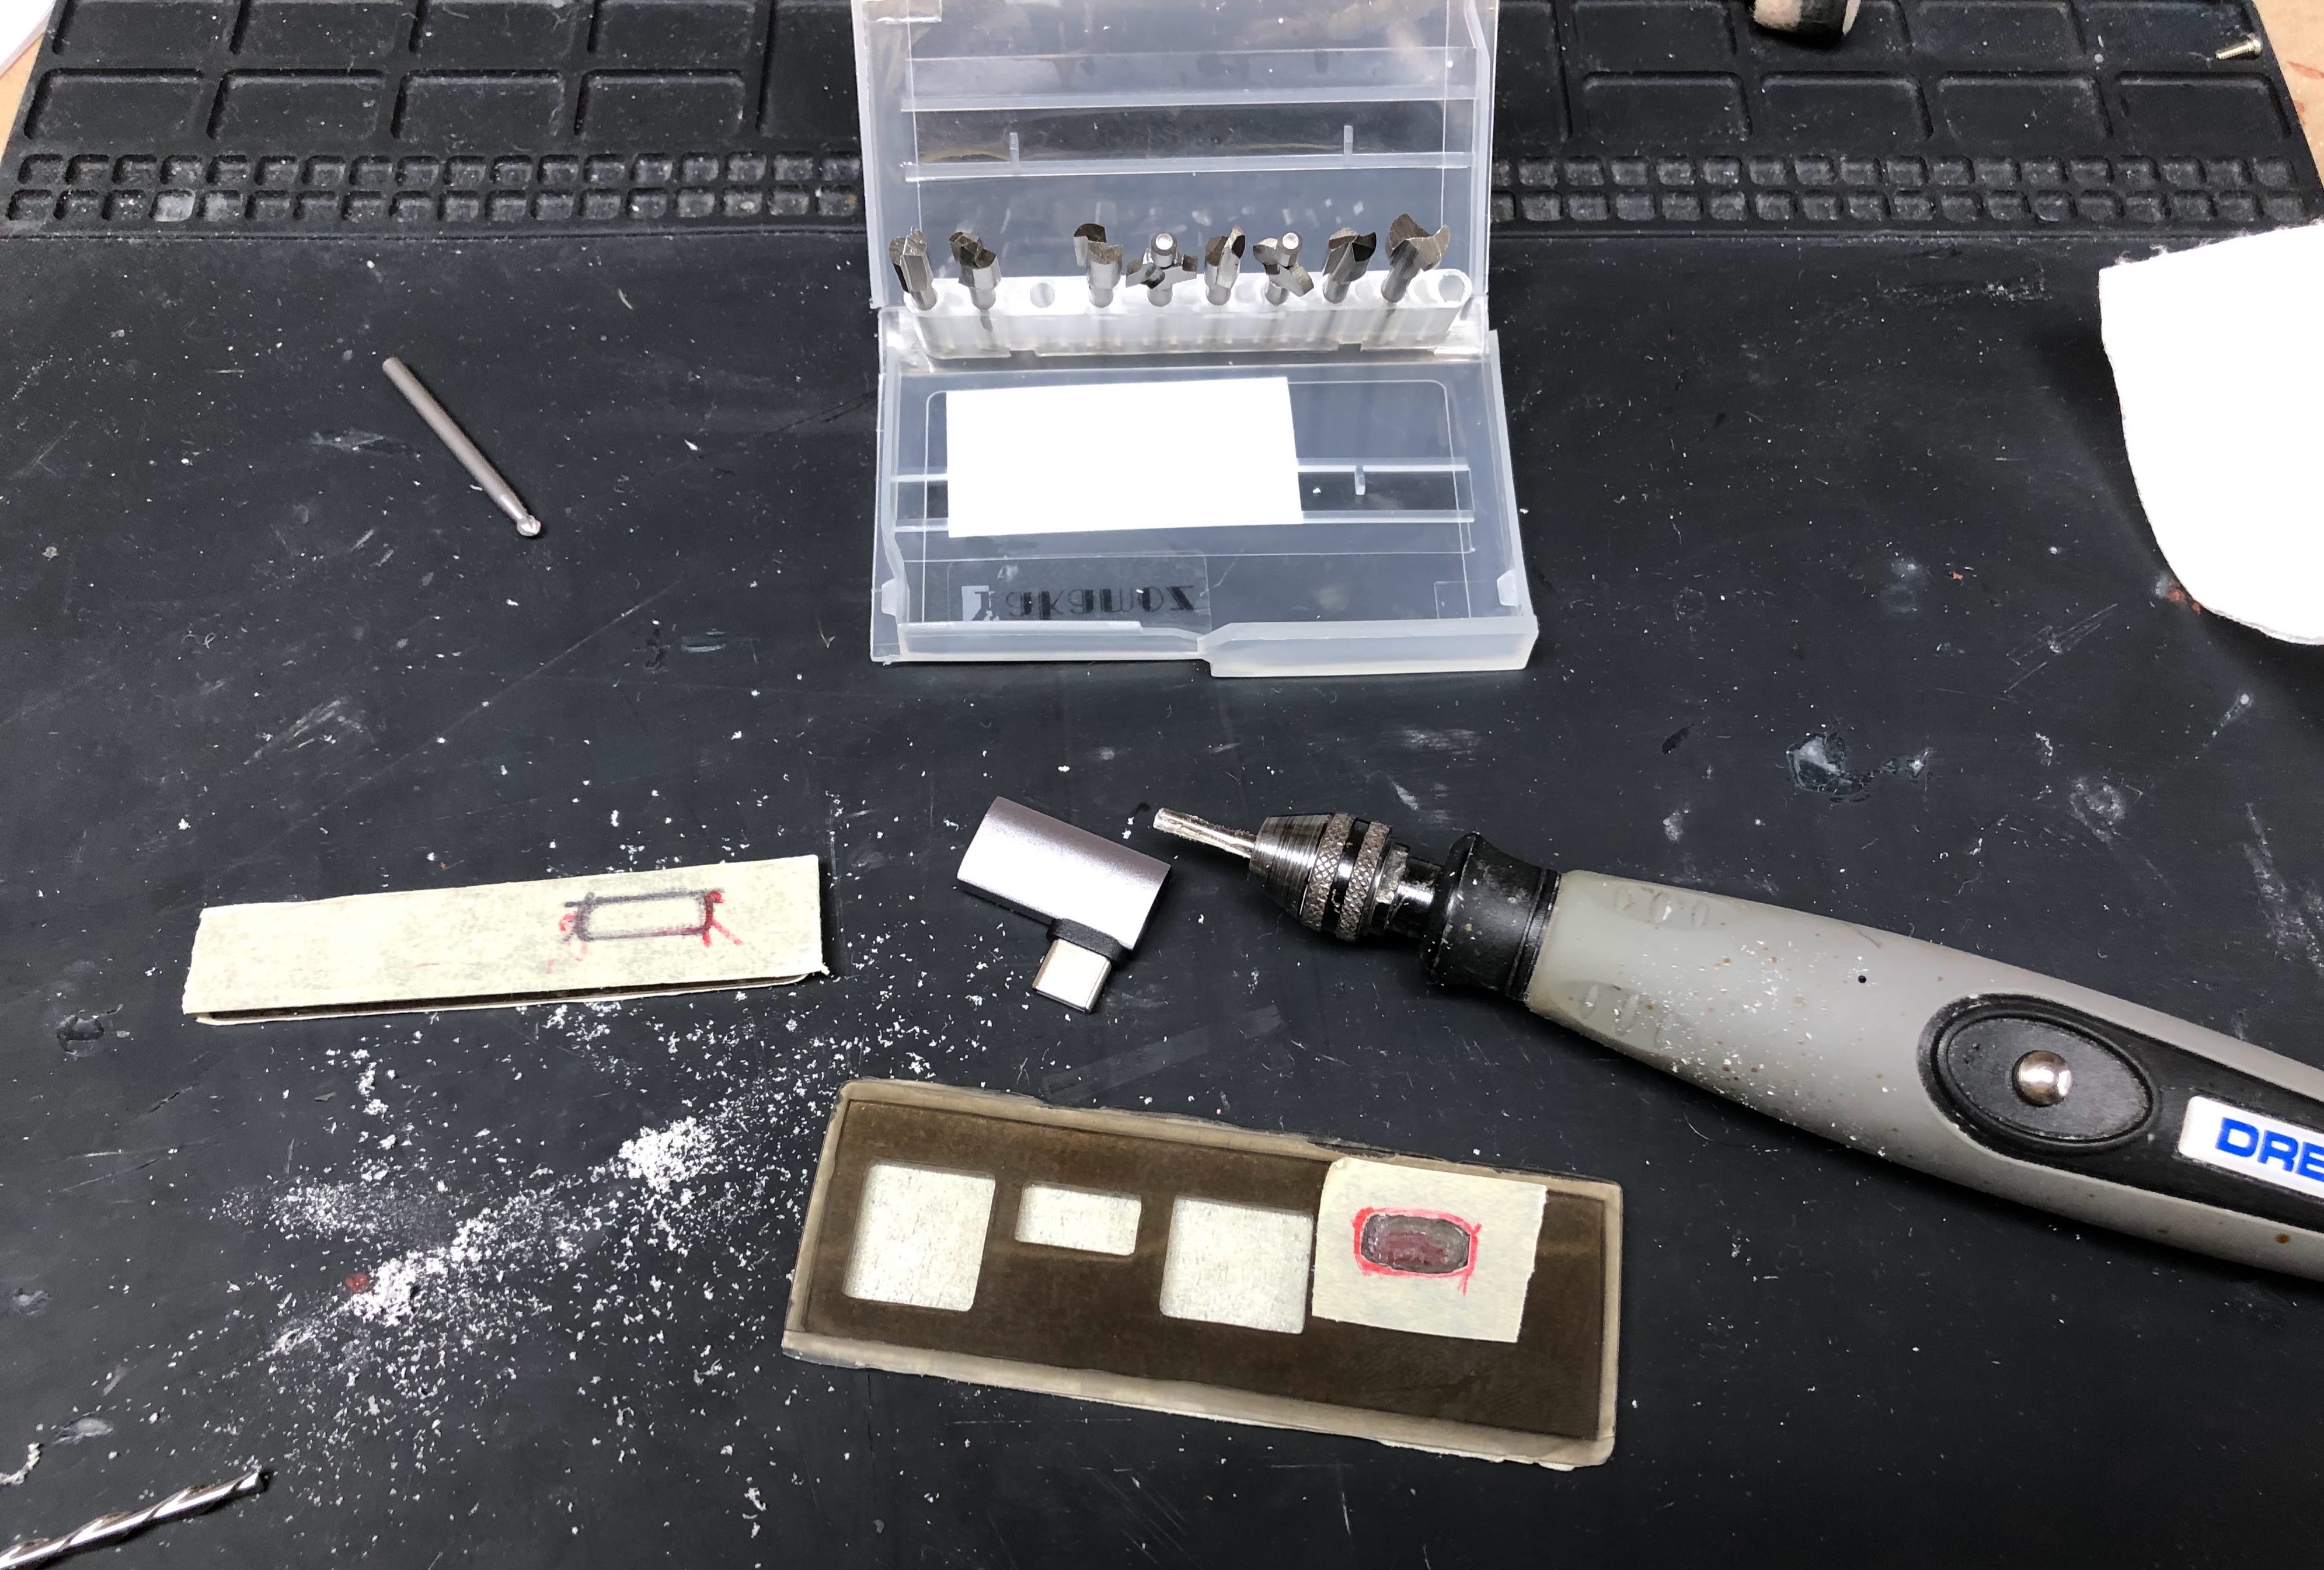
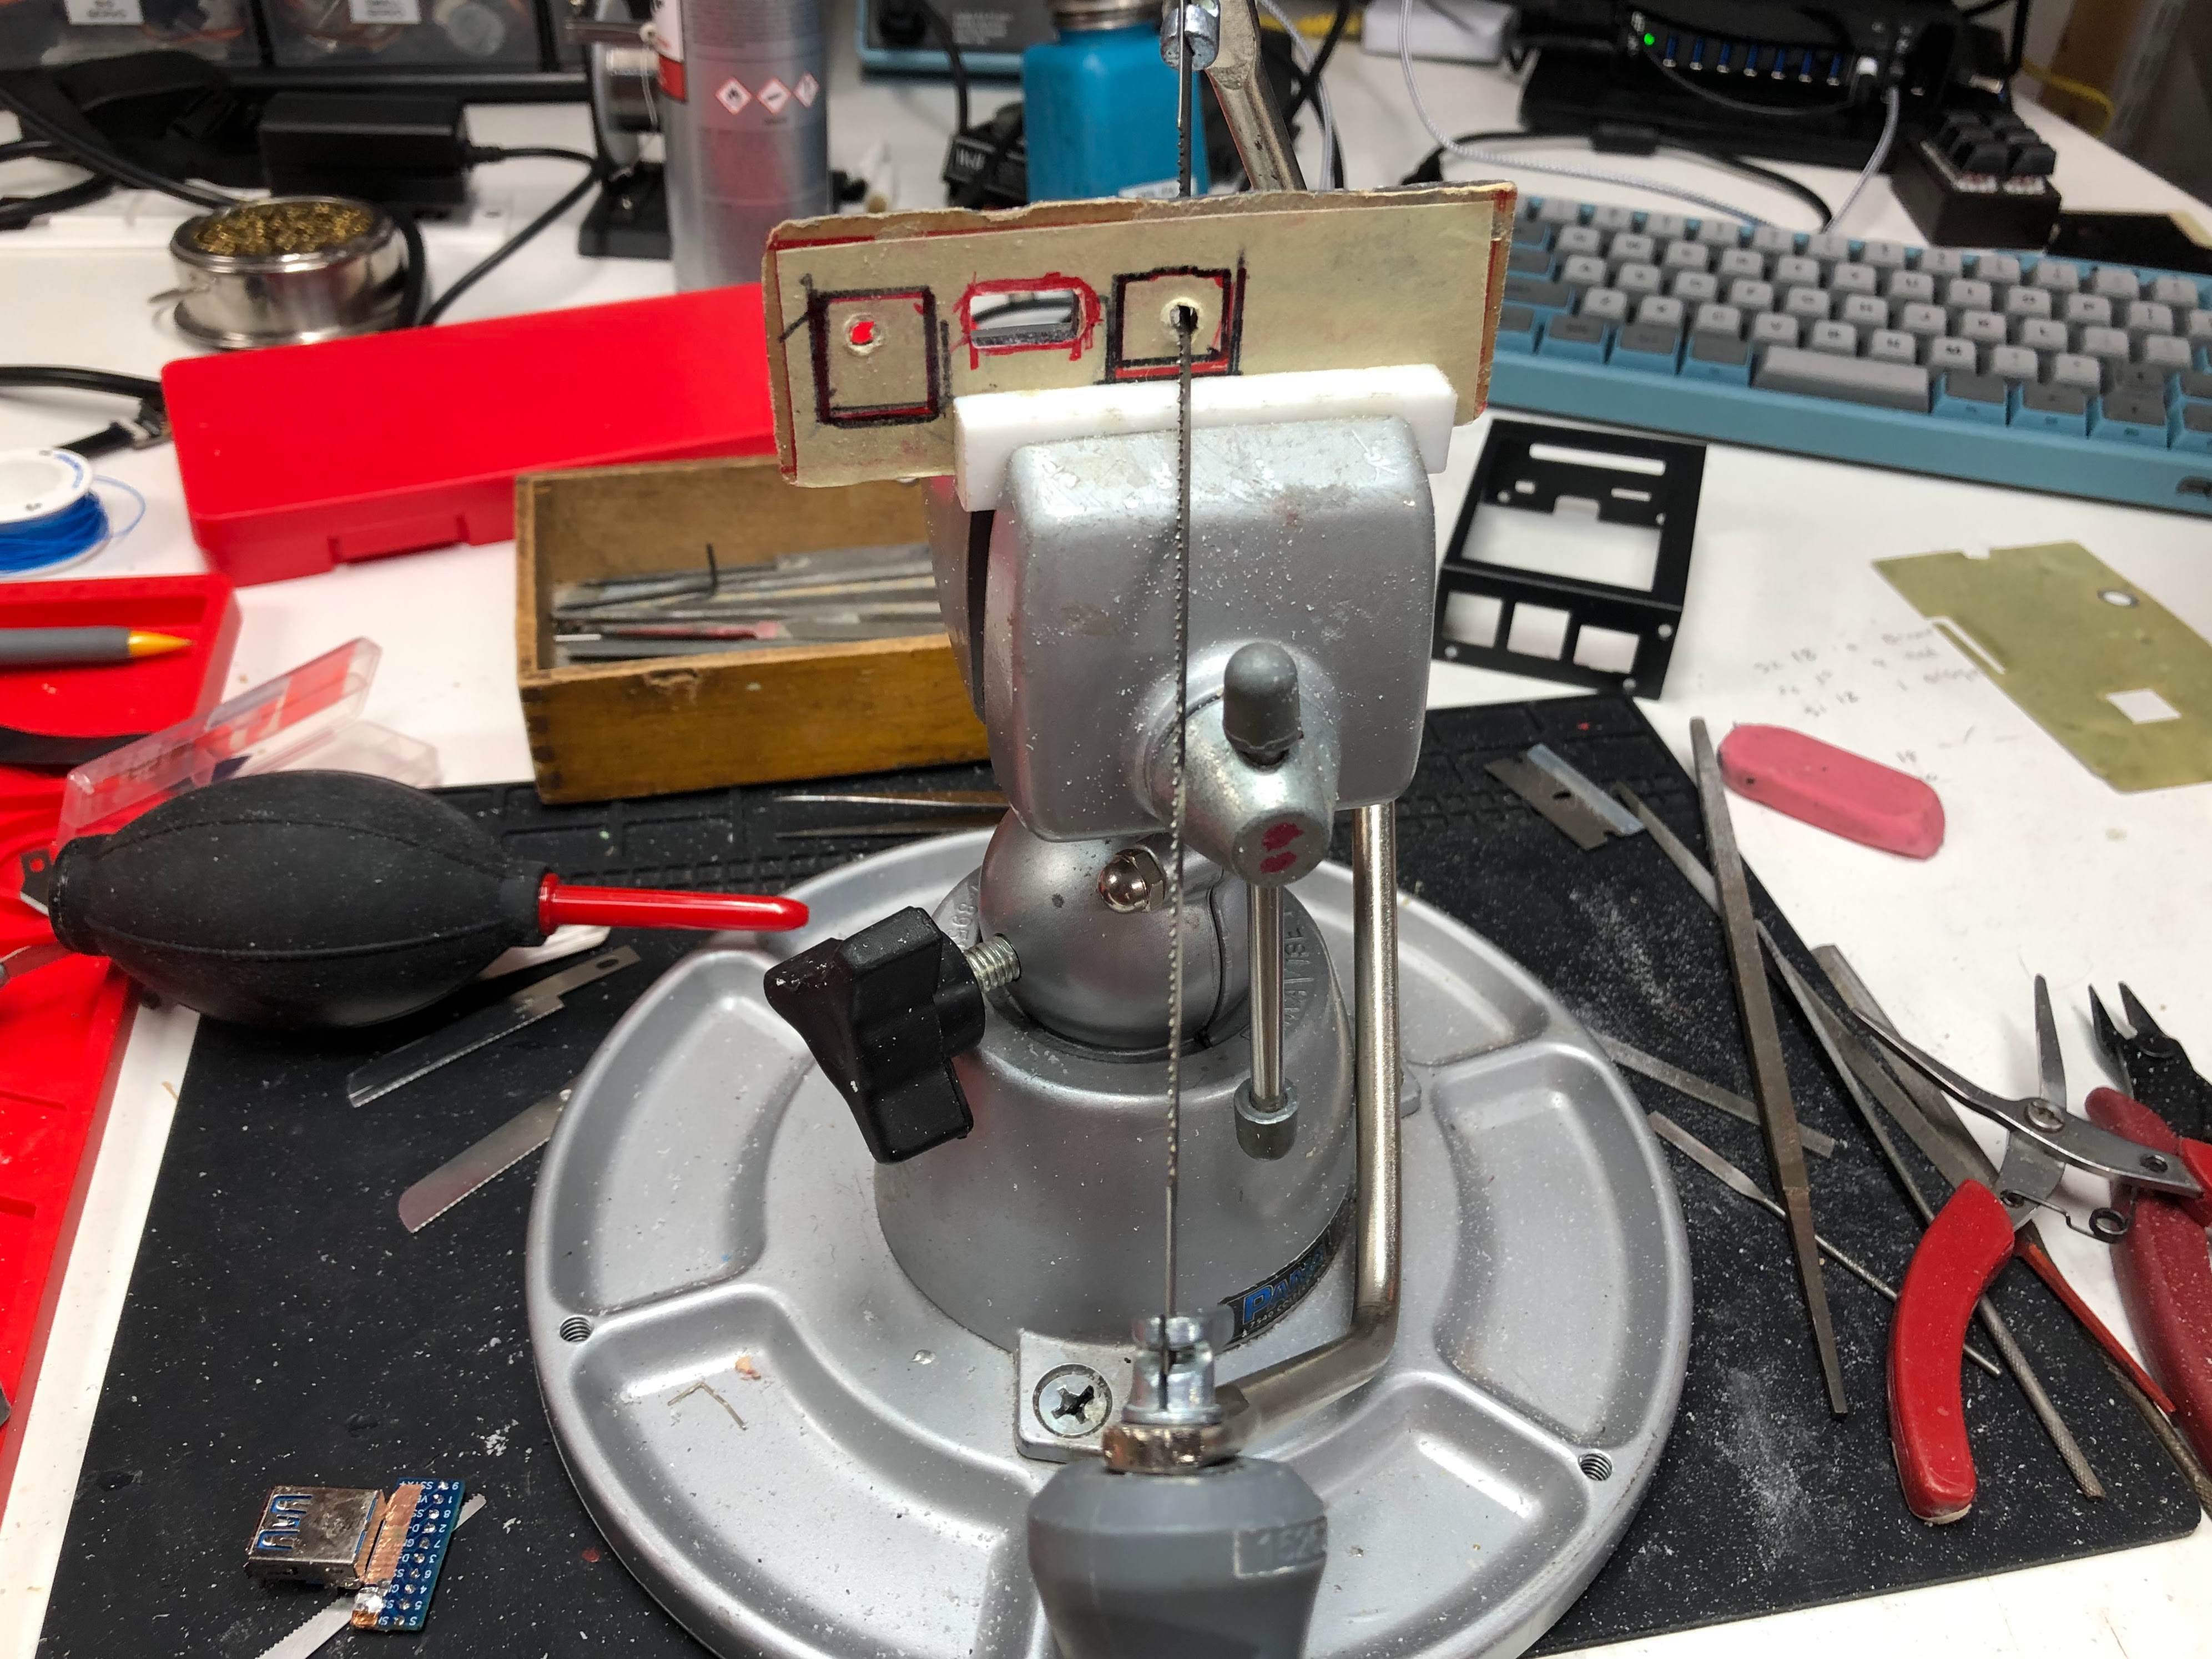
There's no 3D printing here. Everything was done by hand using various Dremel tools, 'Xacto' knife, and lots of sand paper.

The internals have been updated, obviously.

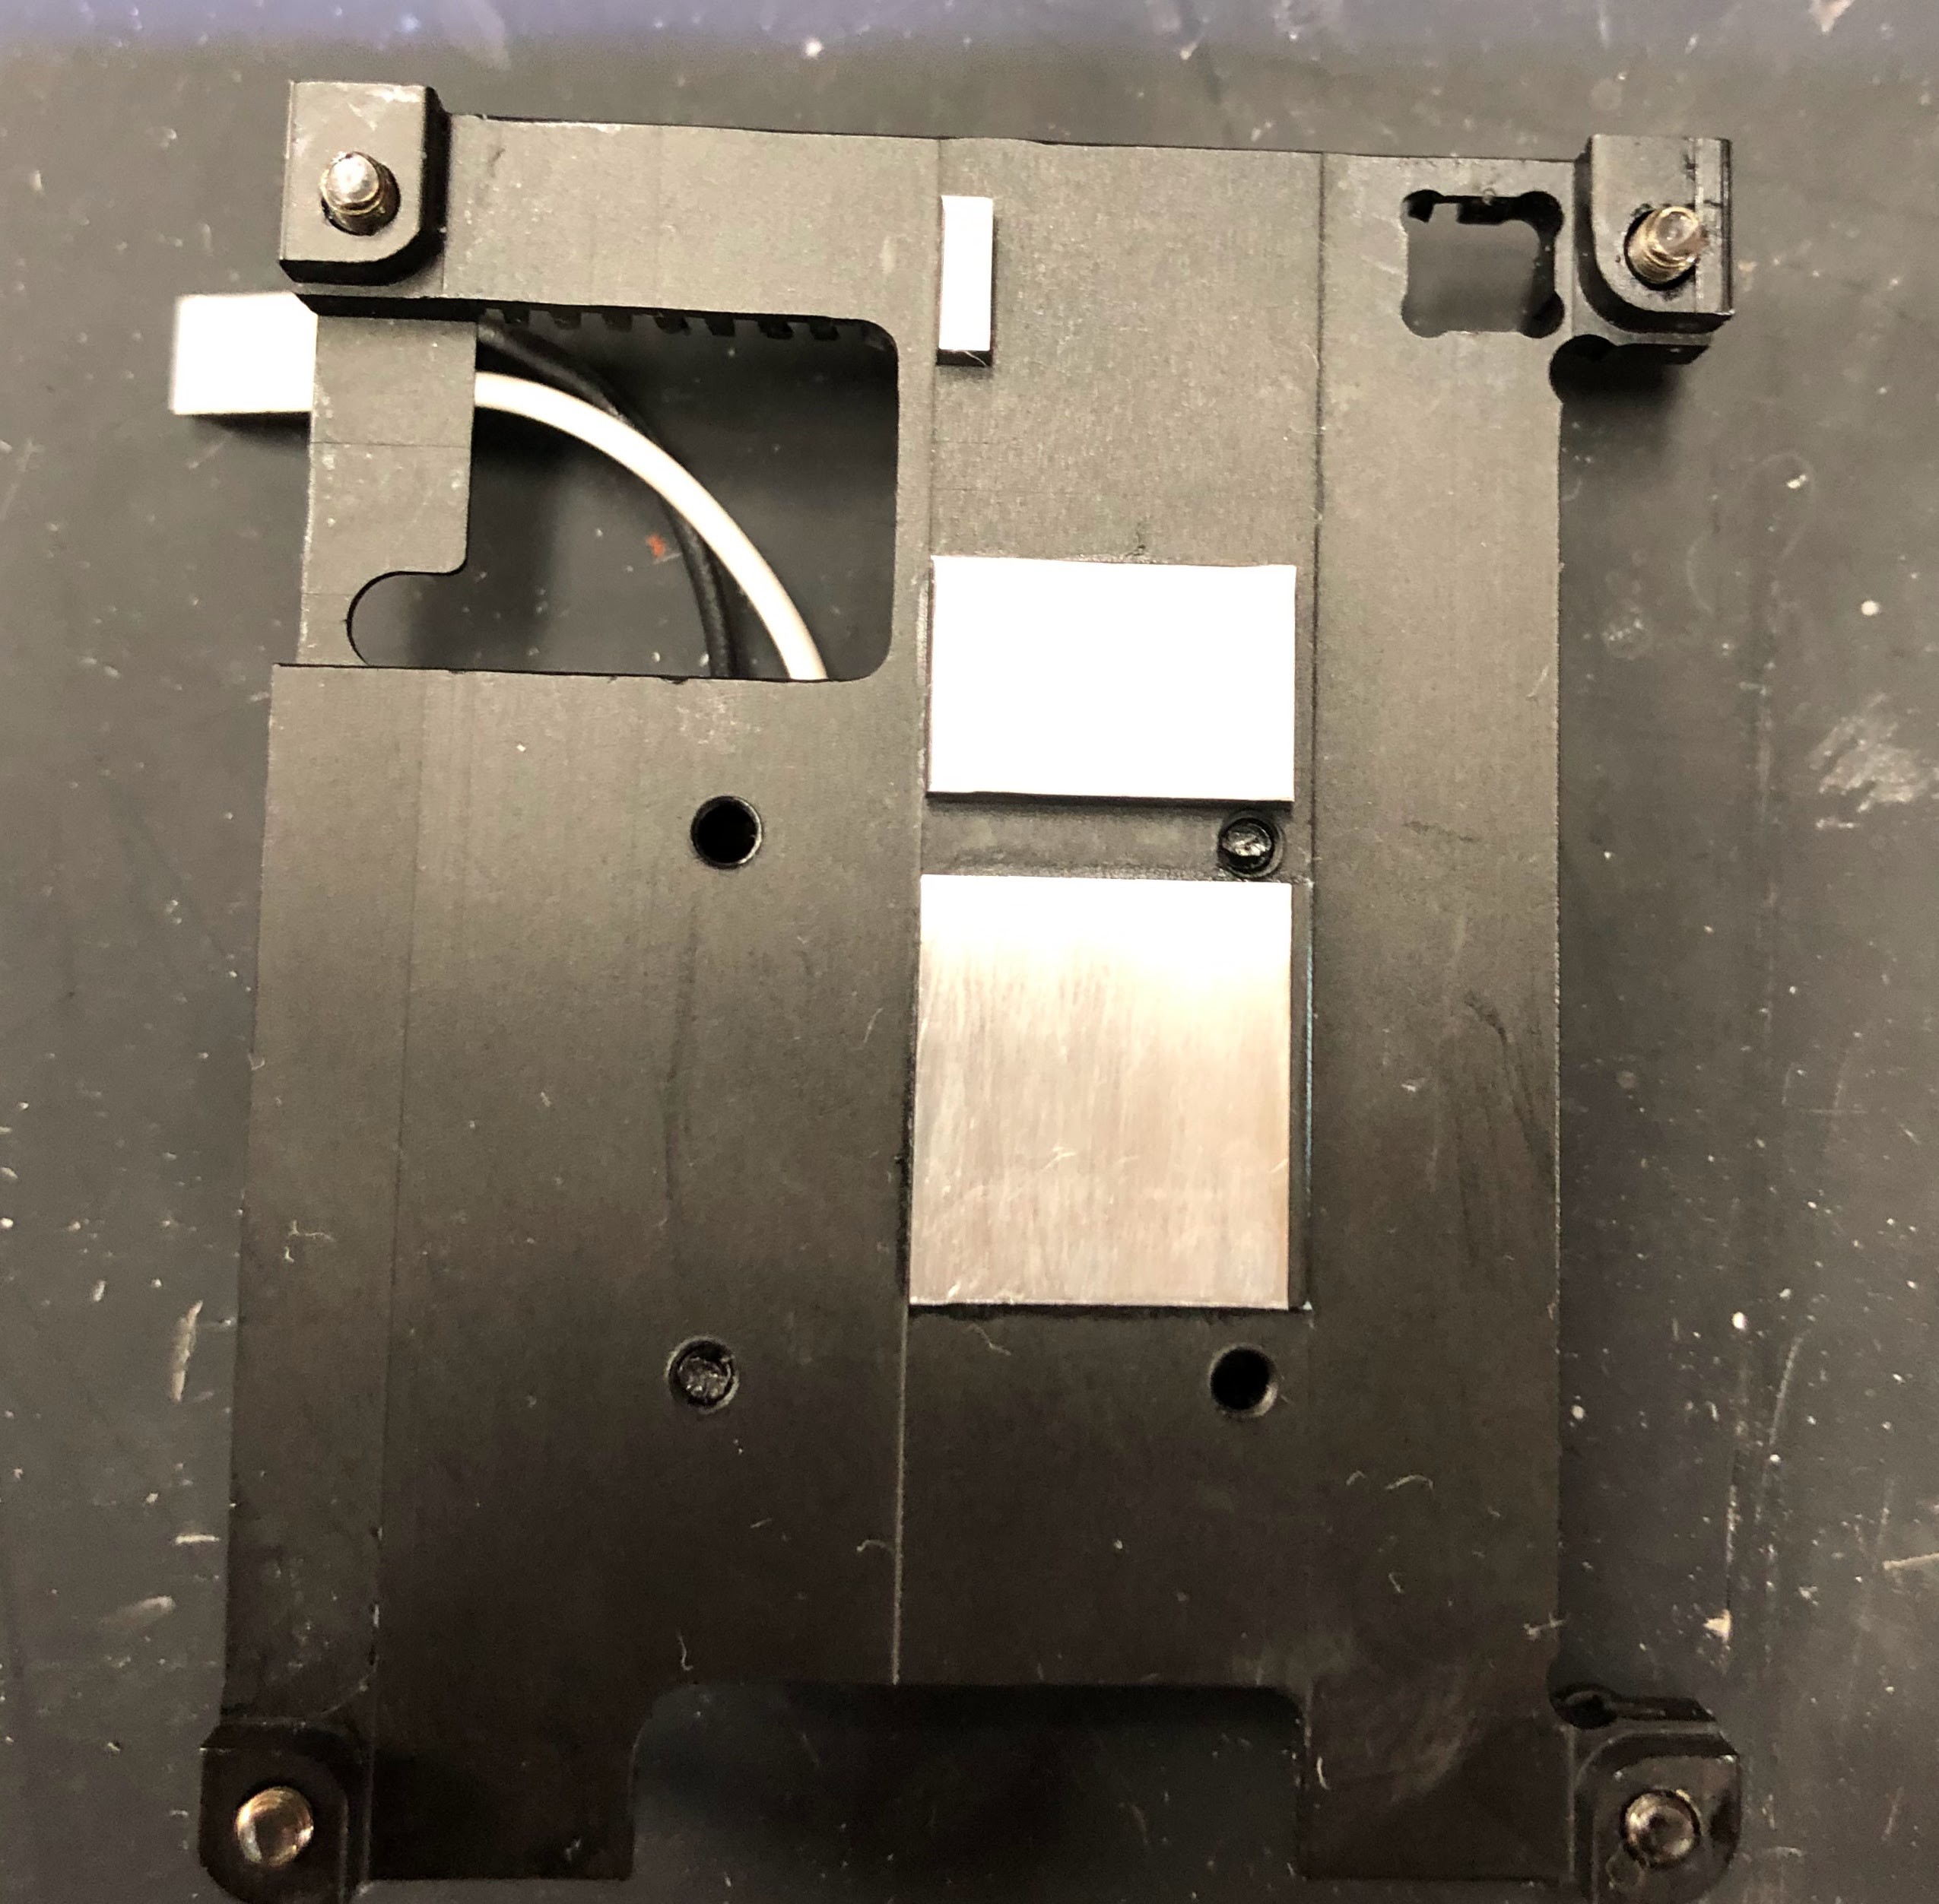
  • Raspberry Pi 4 8GB, 7mm heatsink
  • 500GB SSD part of an Argon M.2 case
  • RaspiAudio Mic + v2 soundcard,
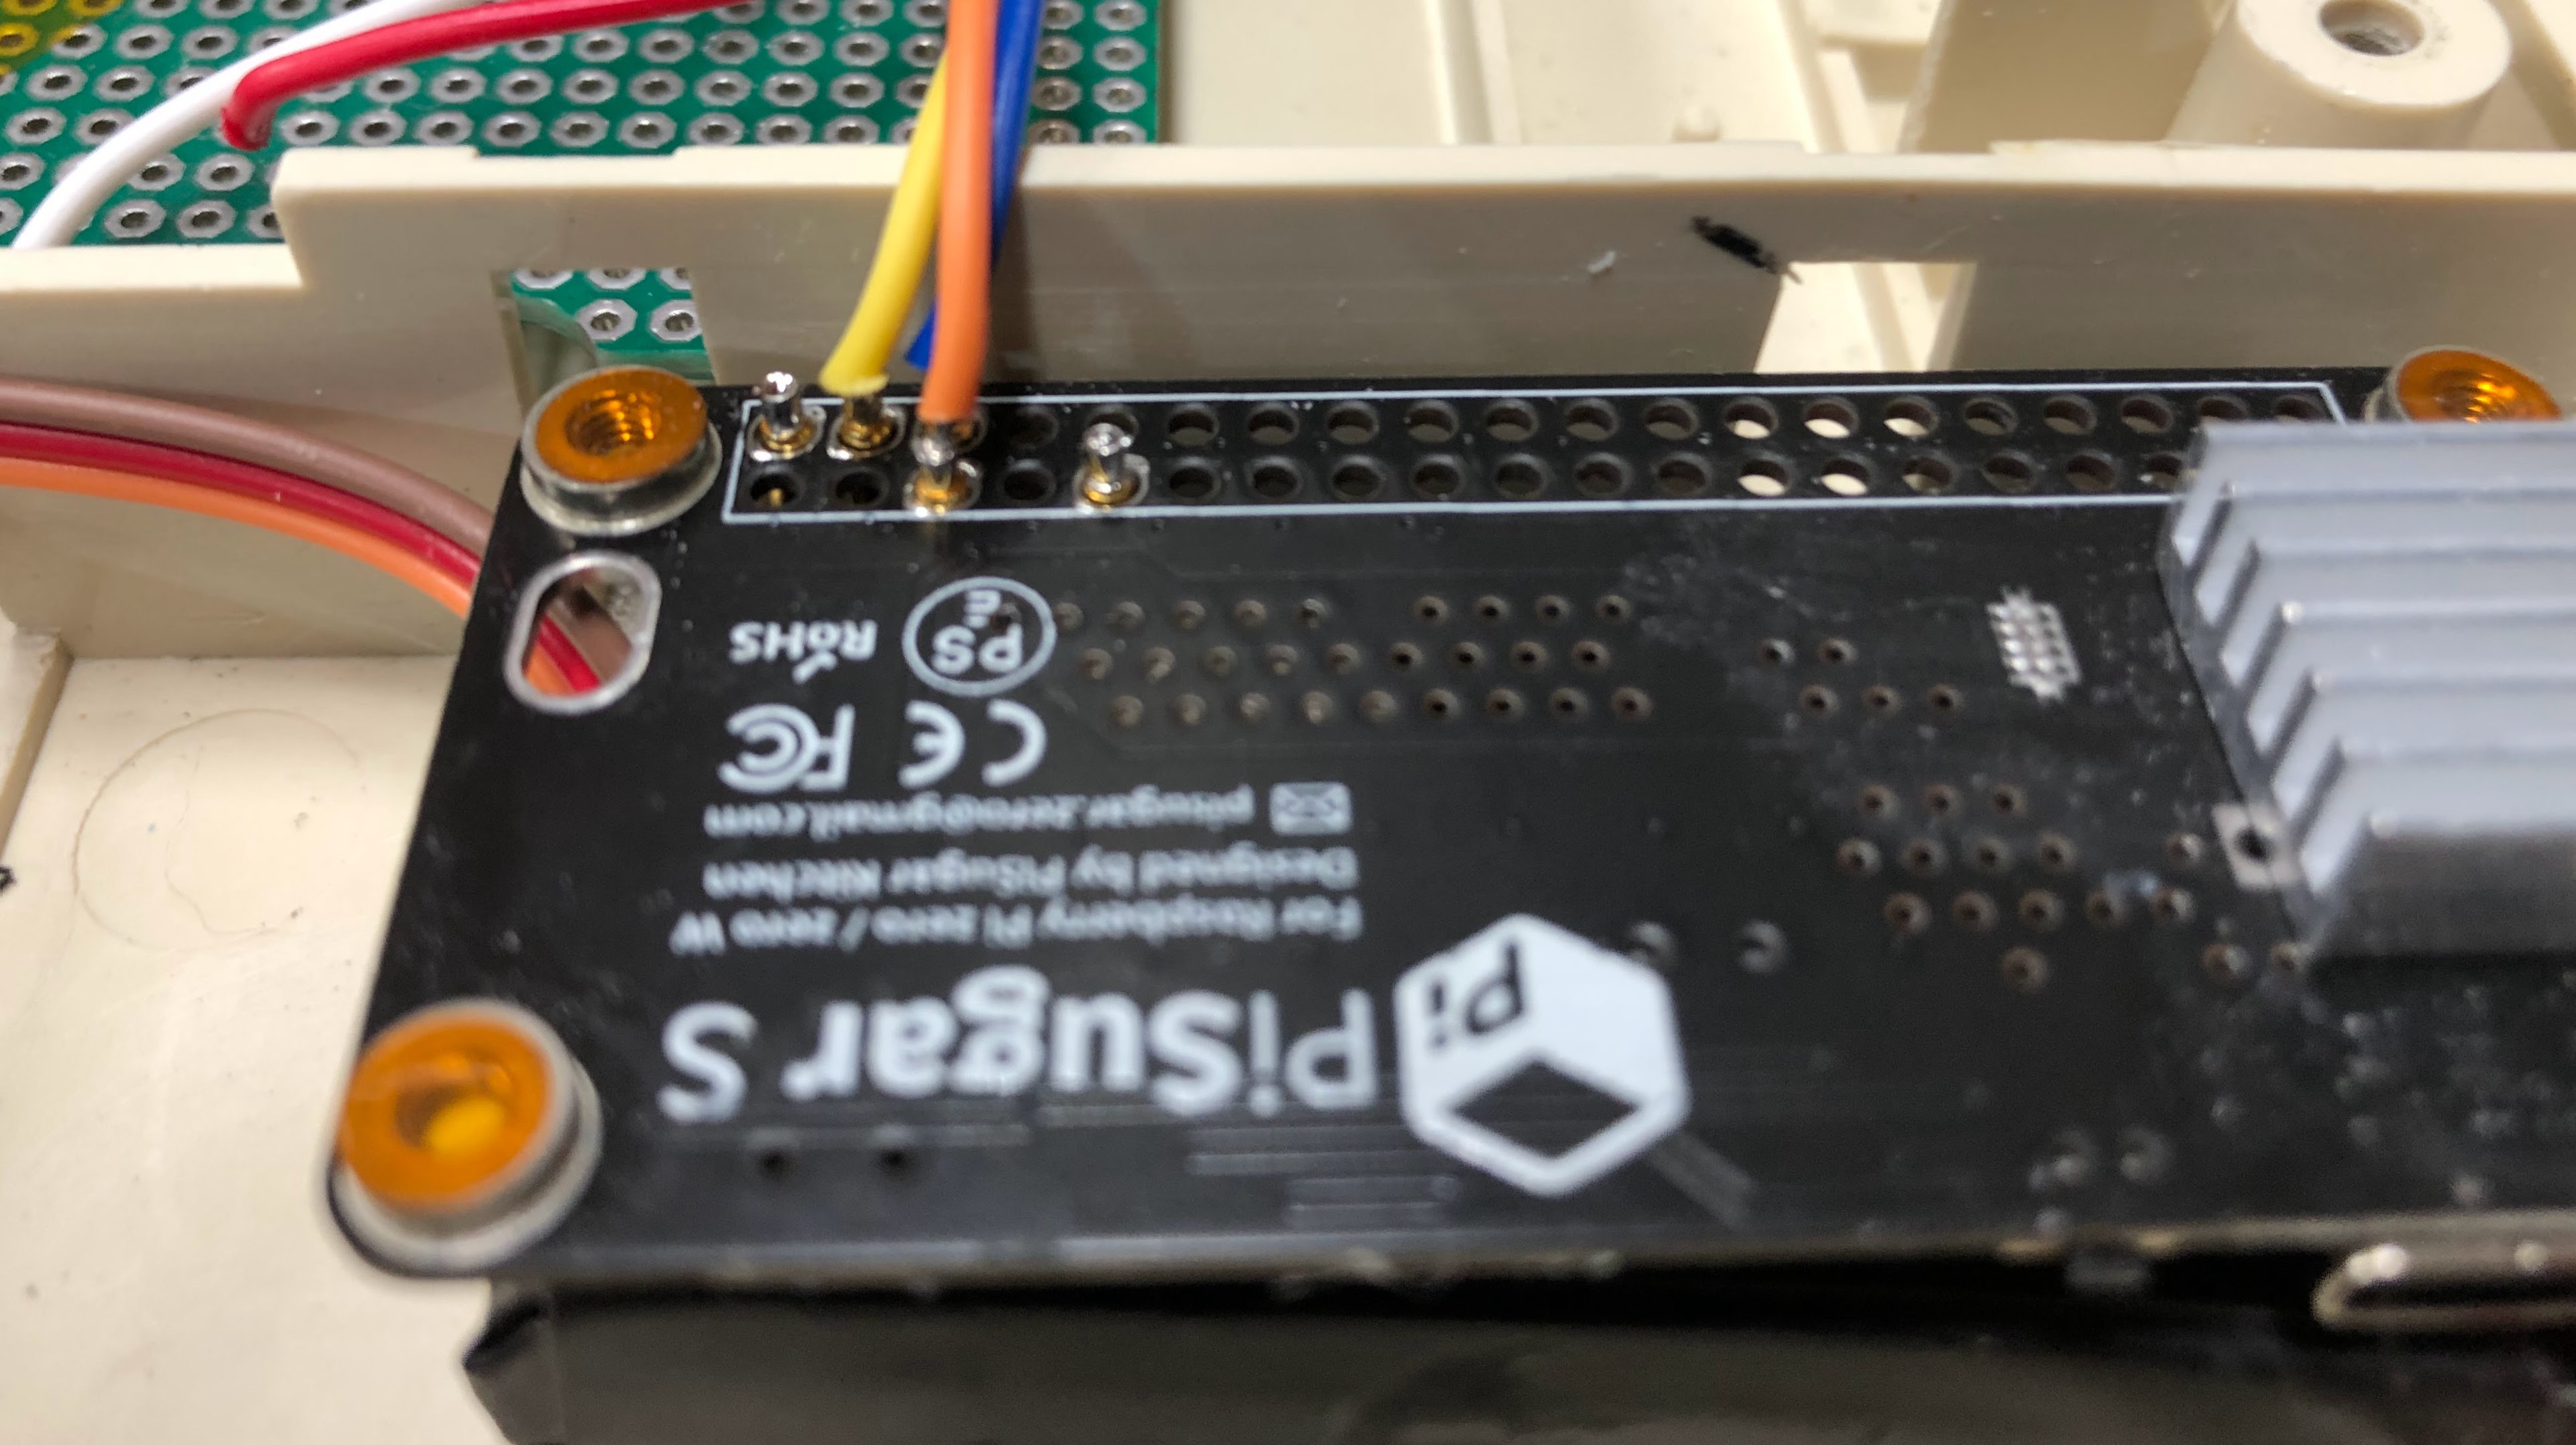
  • PiSugar S UPS made for Pi Zero - unit gets very hot (170F) when charging the battery
  • Waveshare 4.3" color touchscreen
  • Adafruit KB2040 kee boar

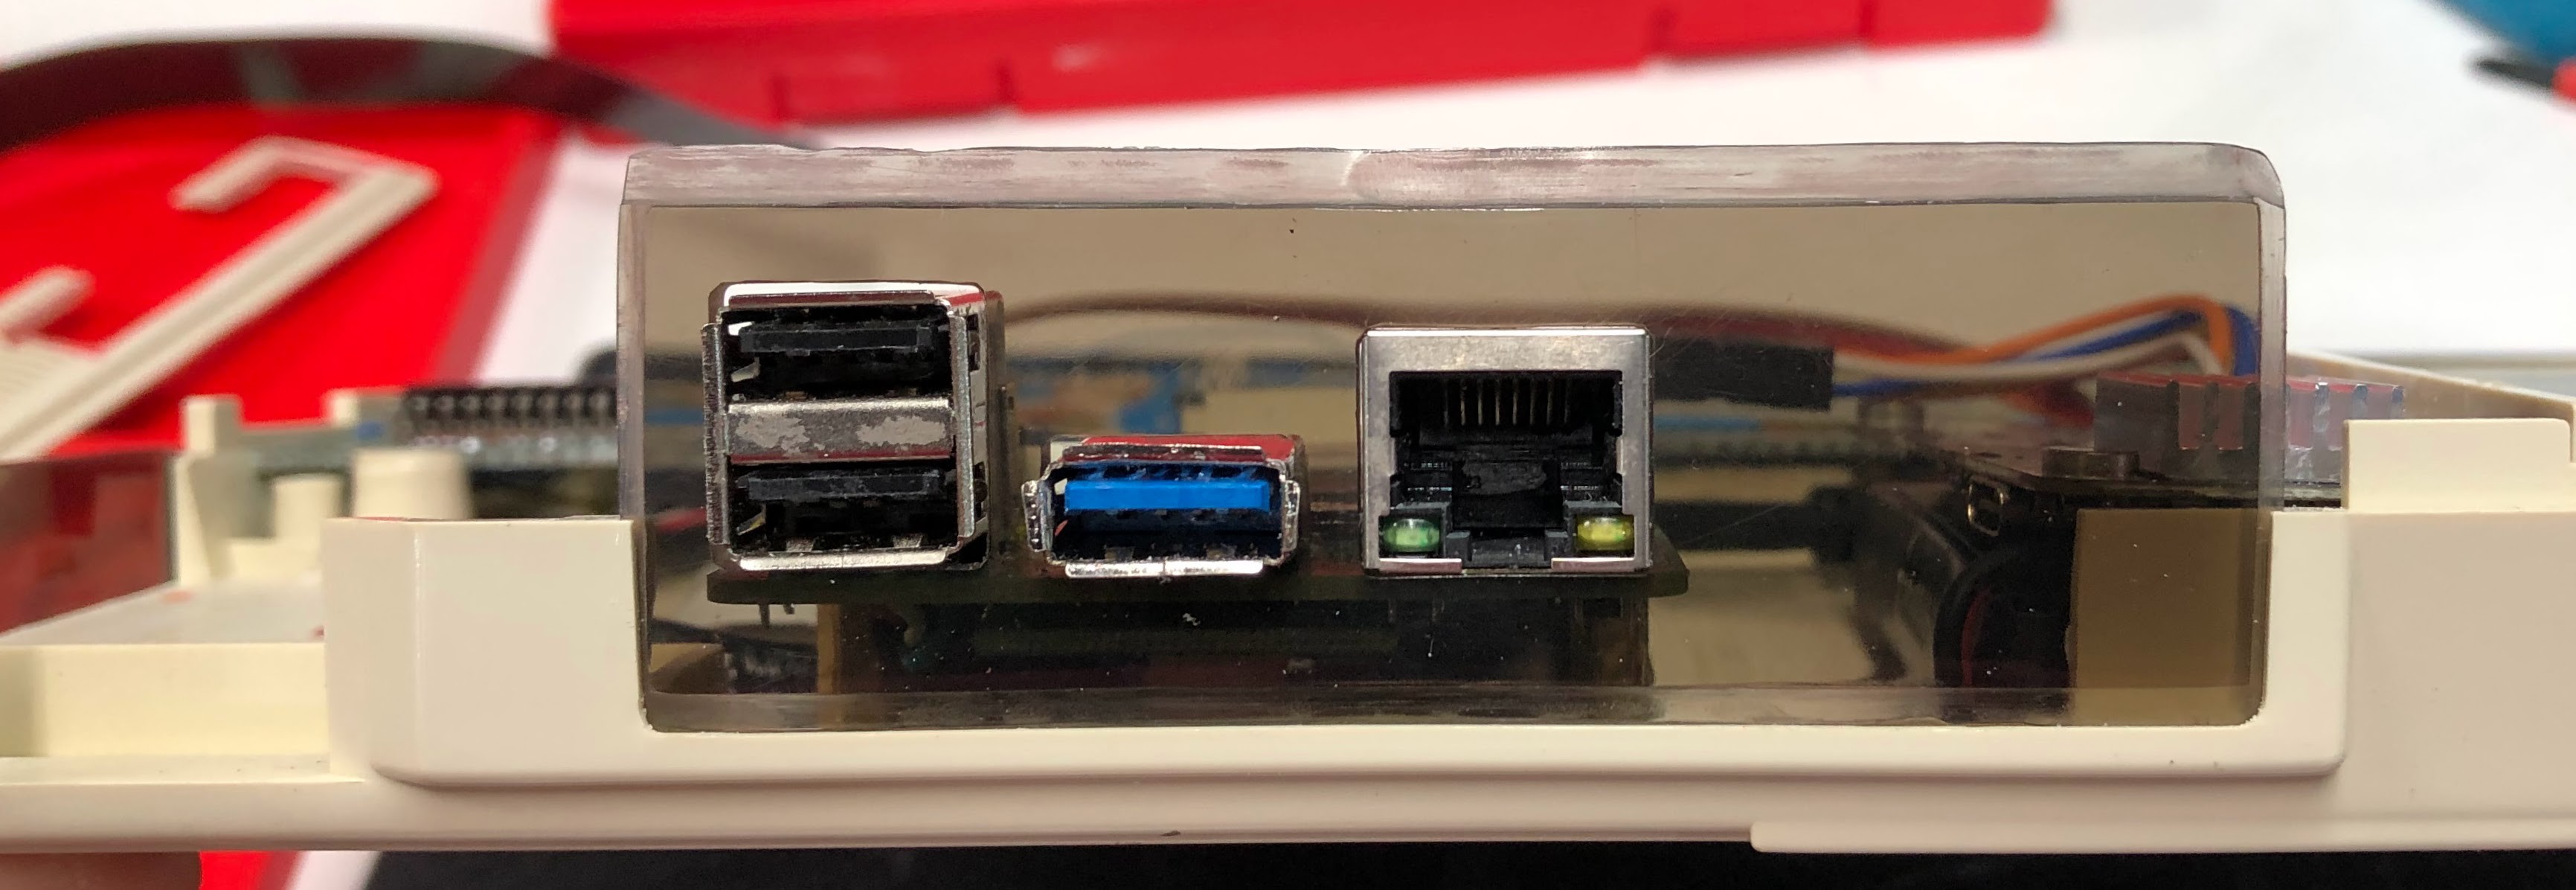
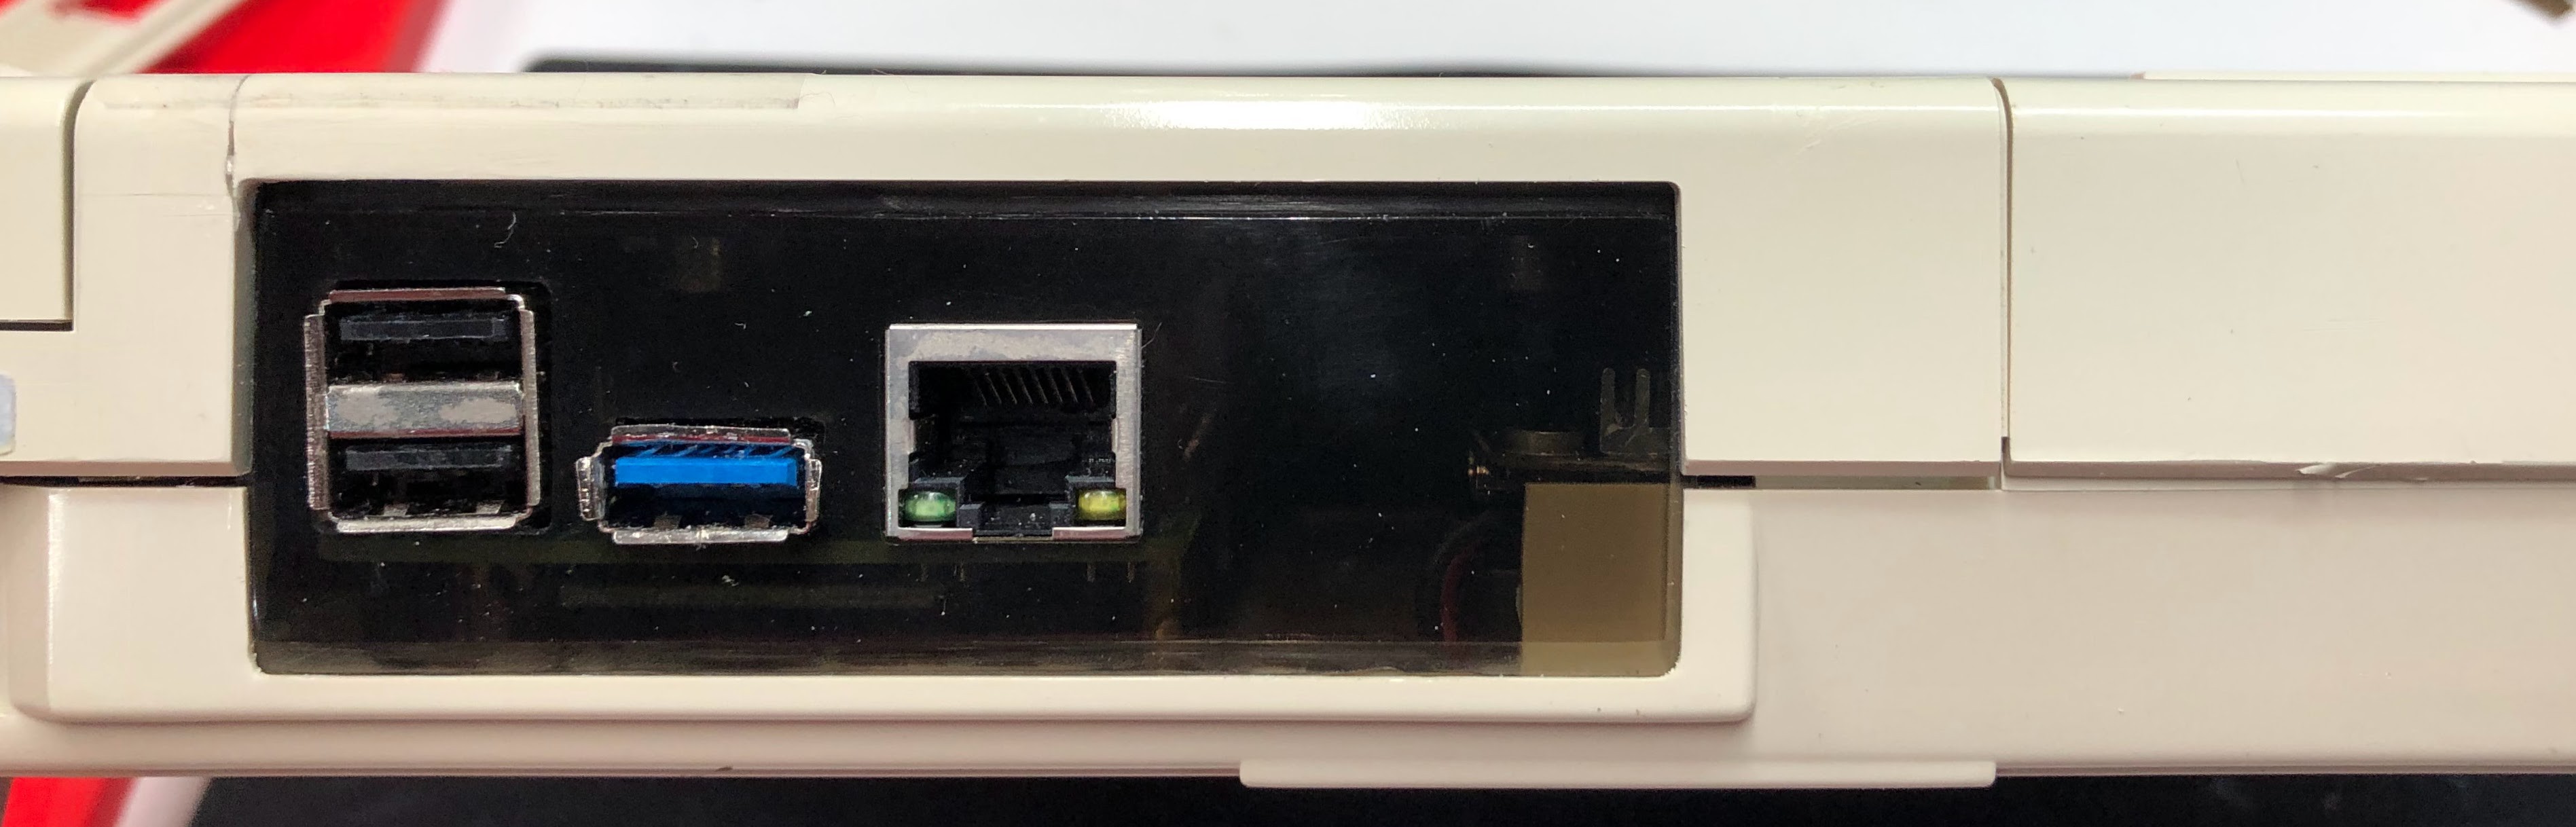
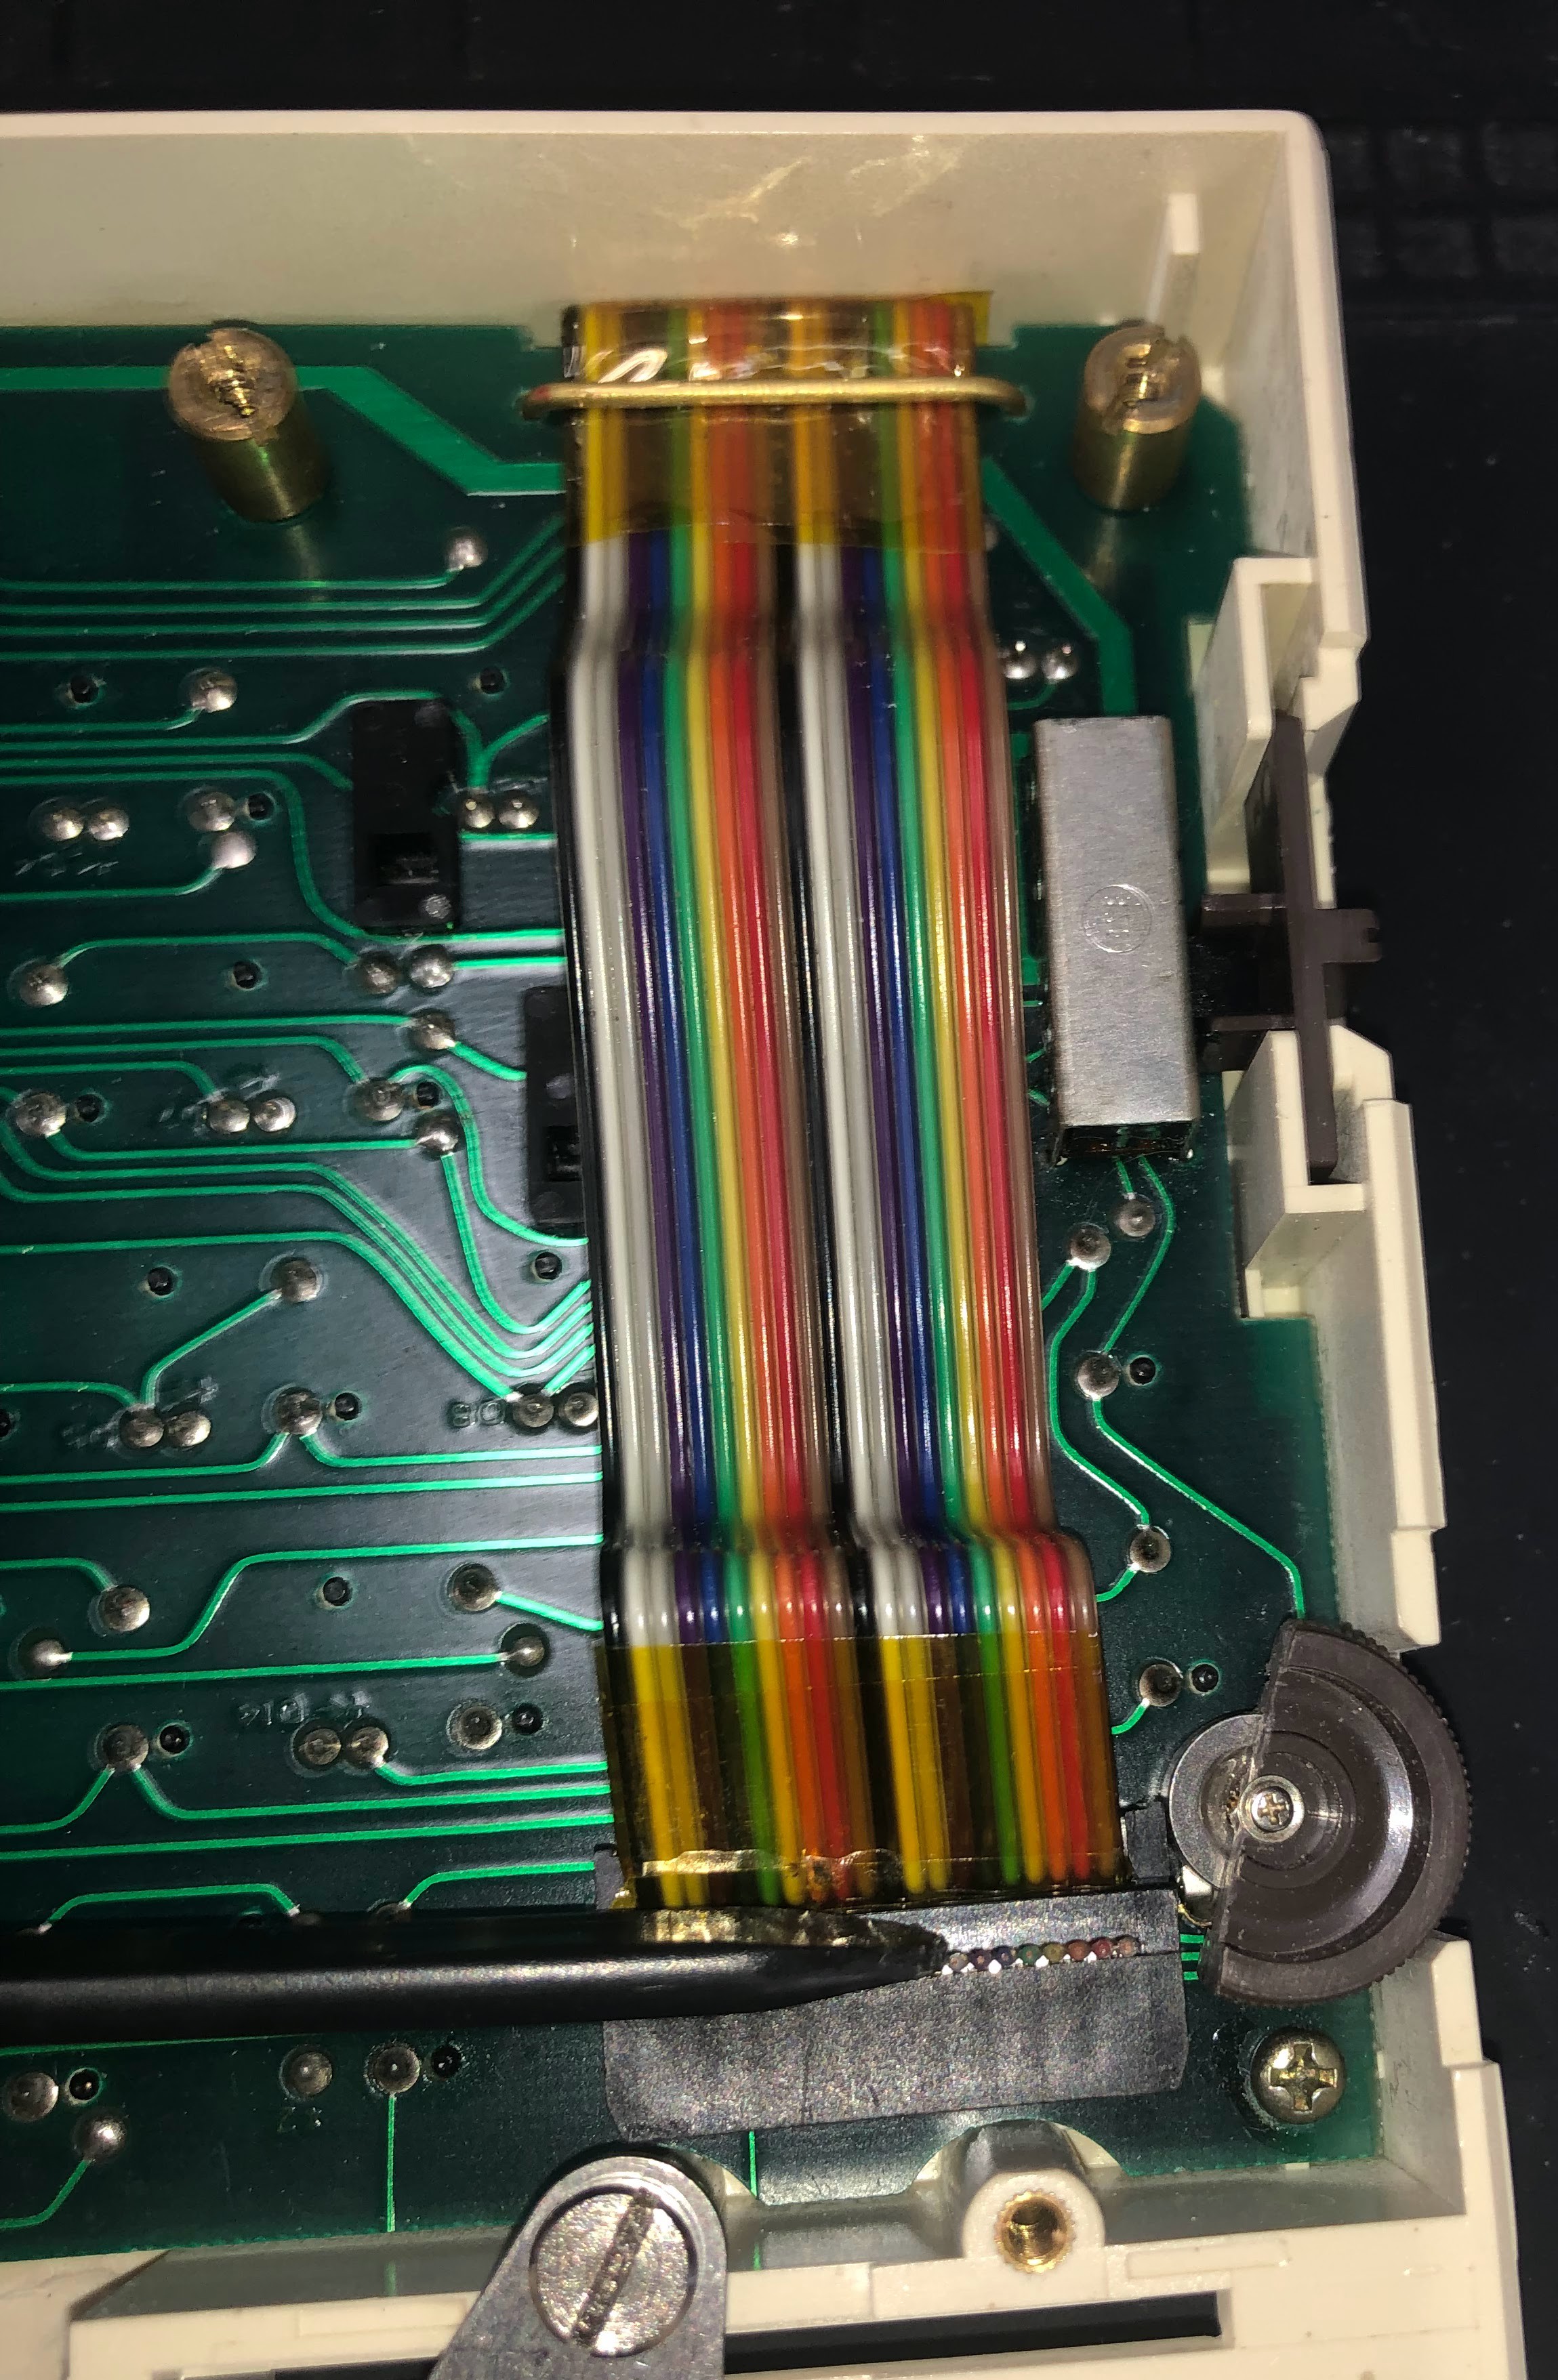
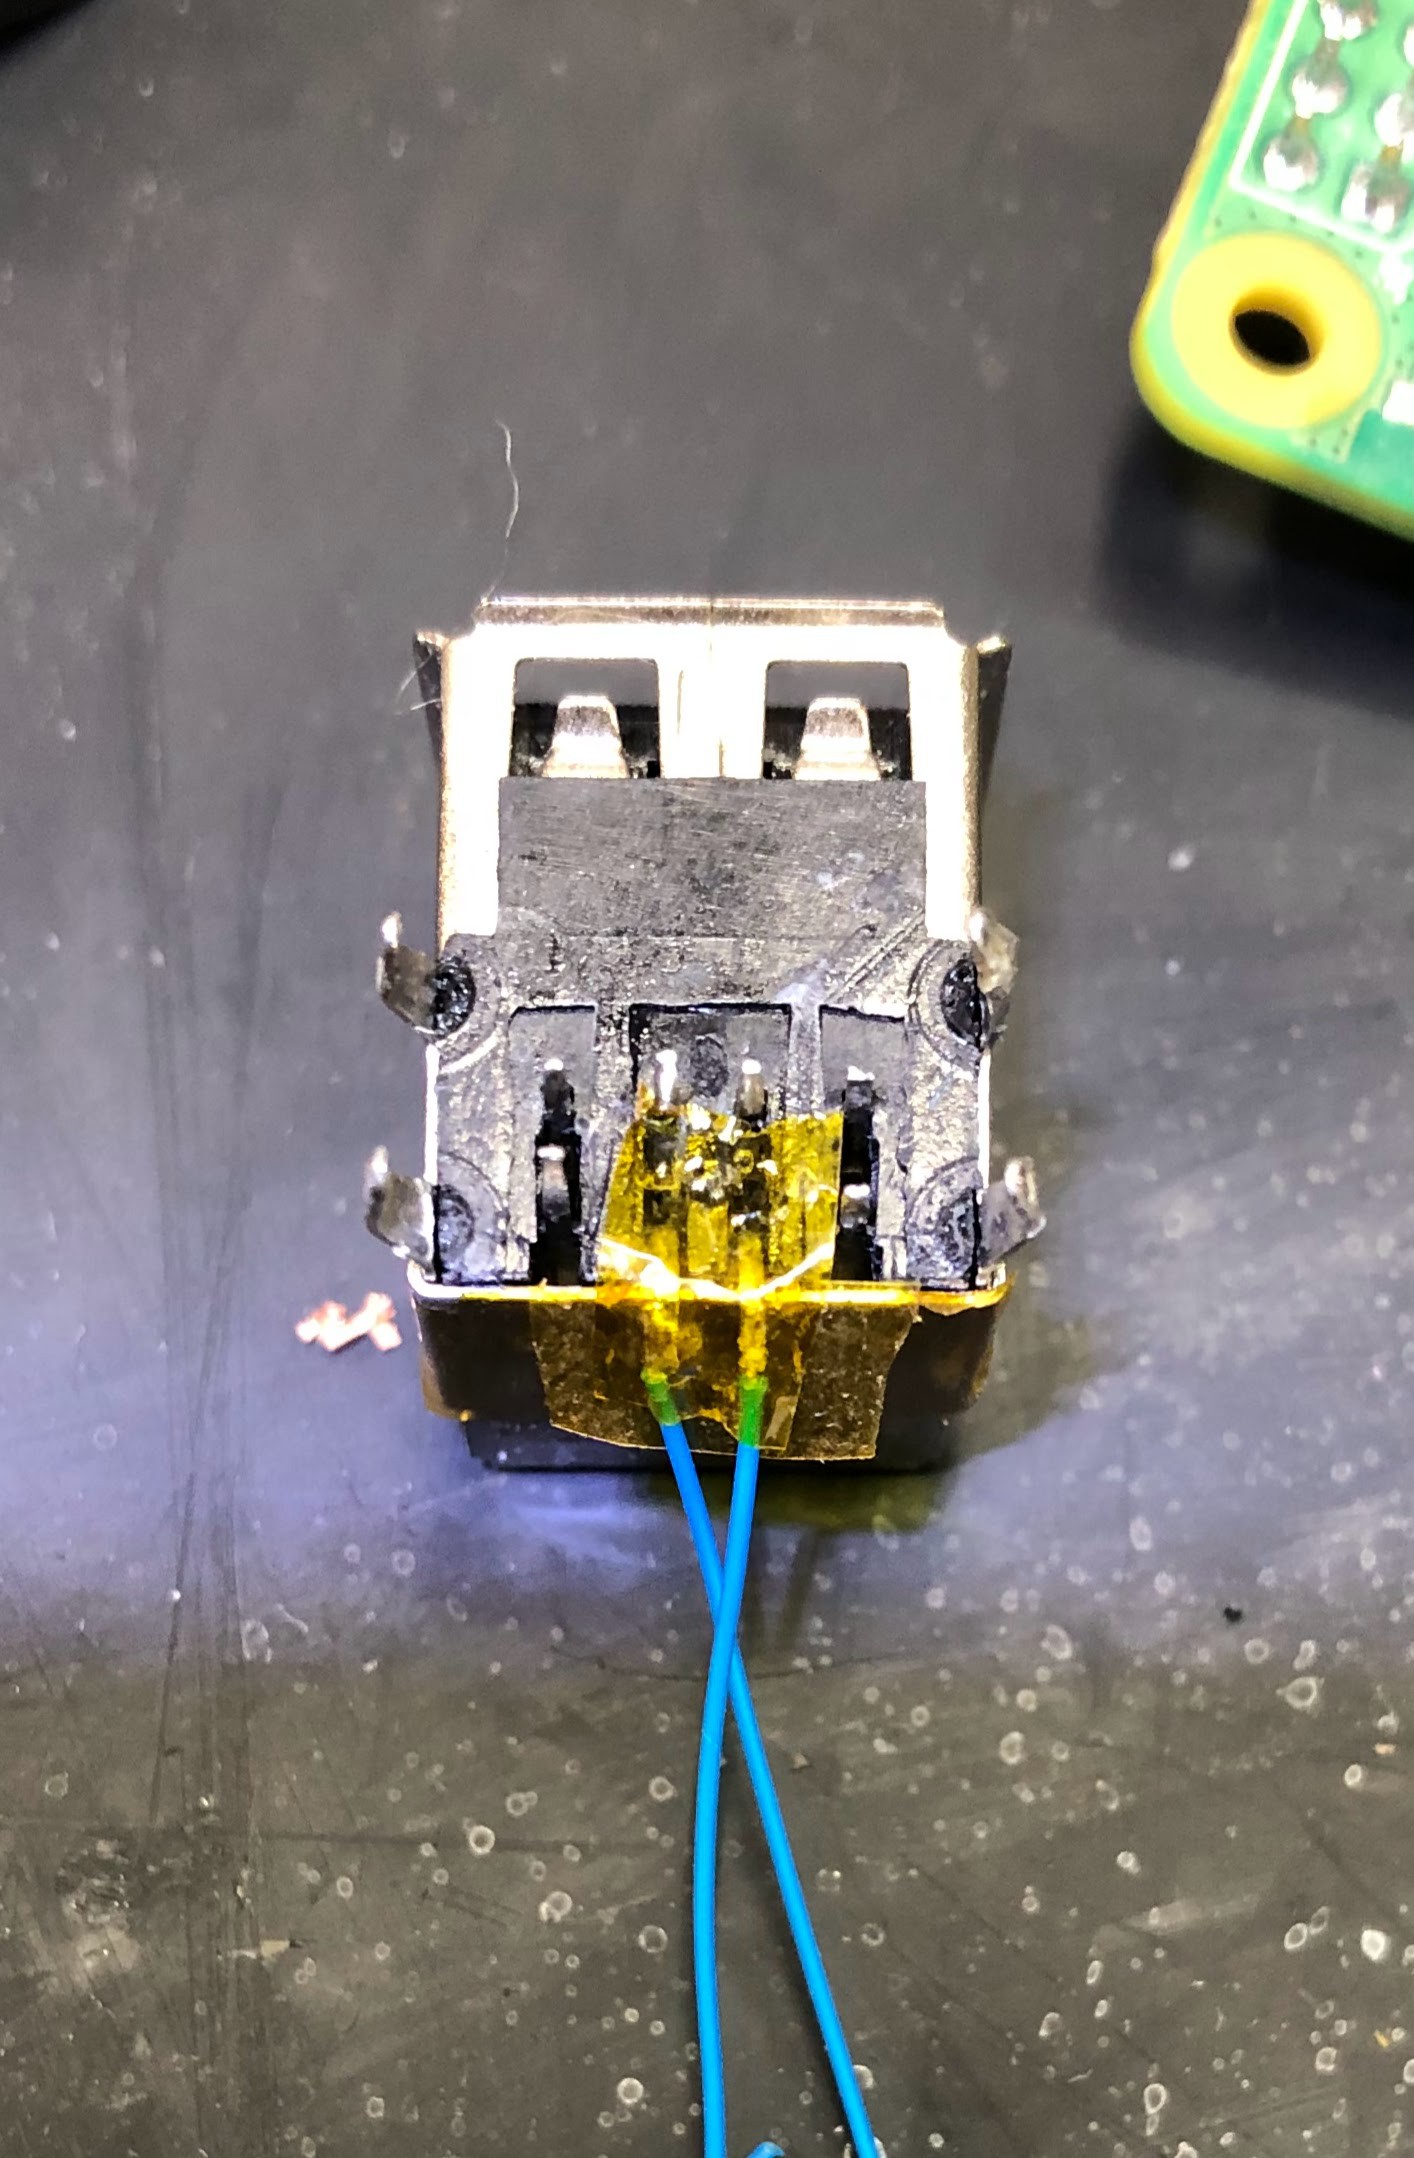
The original keyboard is wired to the KB2040, programmed with KMK. This is then wired to small USB 2.0 2-port hub. One of the original USB 2.0 ports was rewired to provide the signal path to the hub and back without the loss of an additional USB port. 

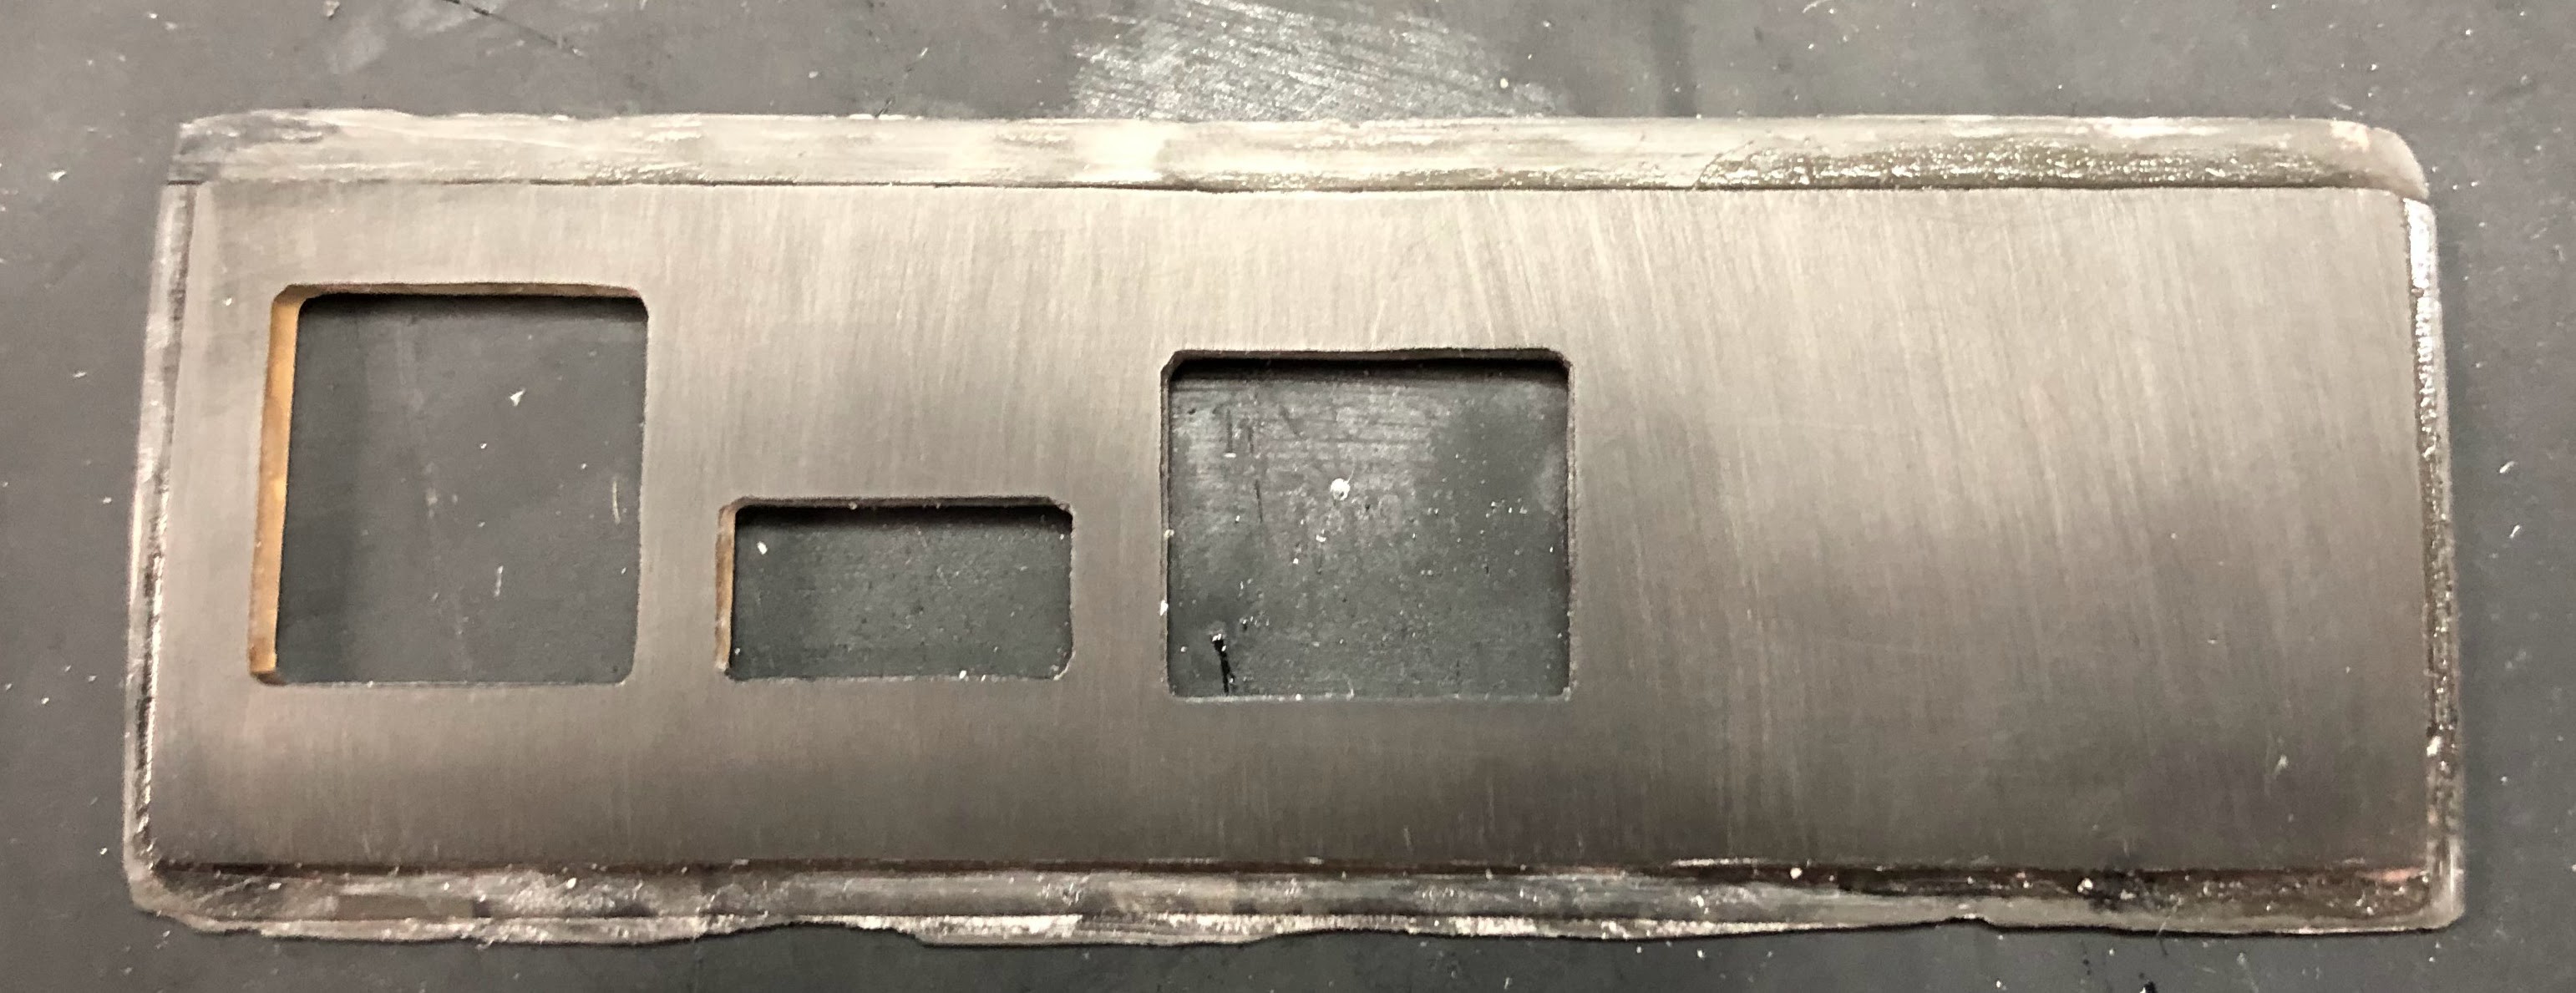
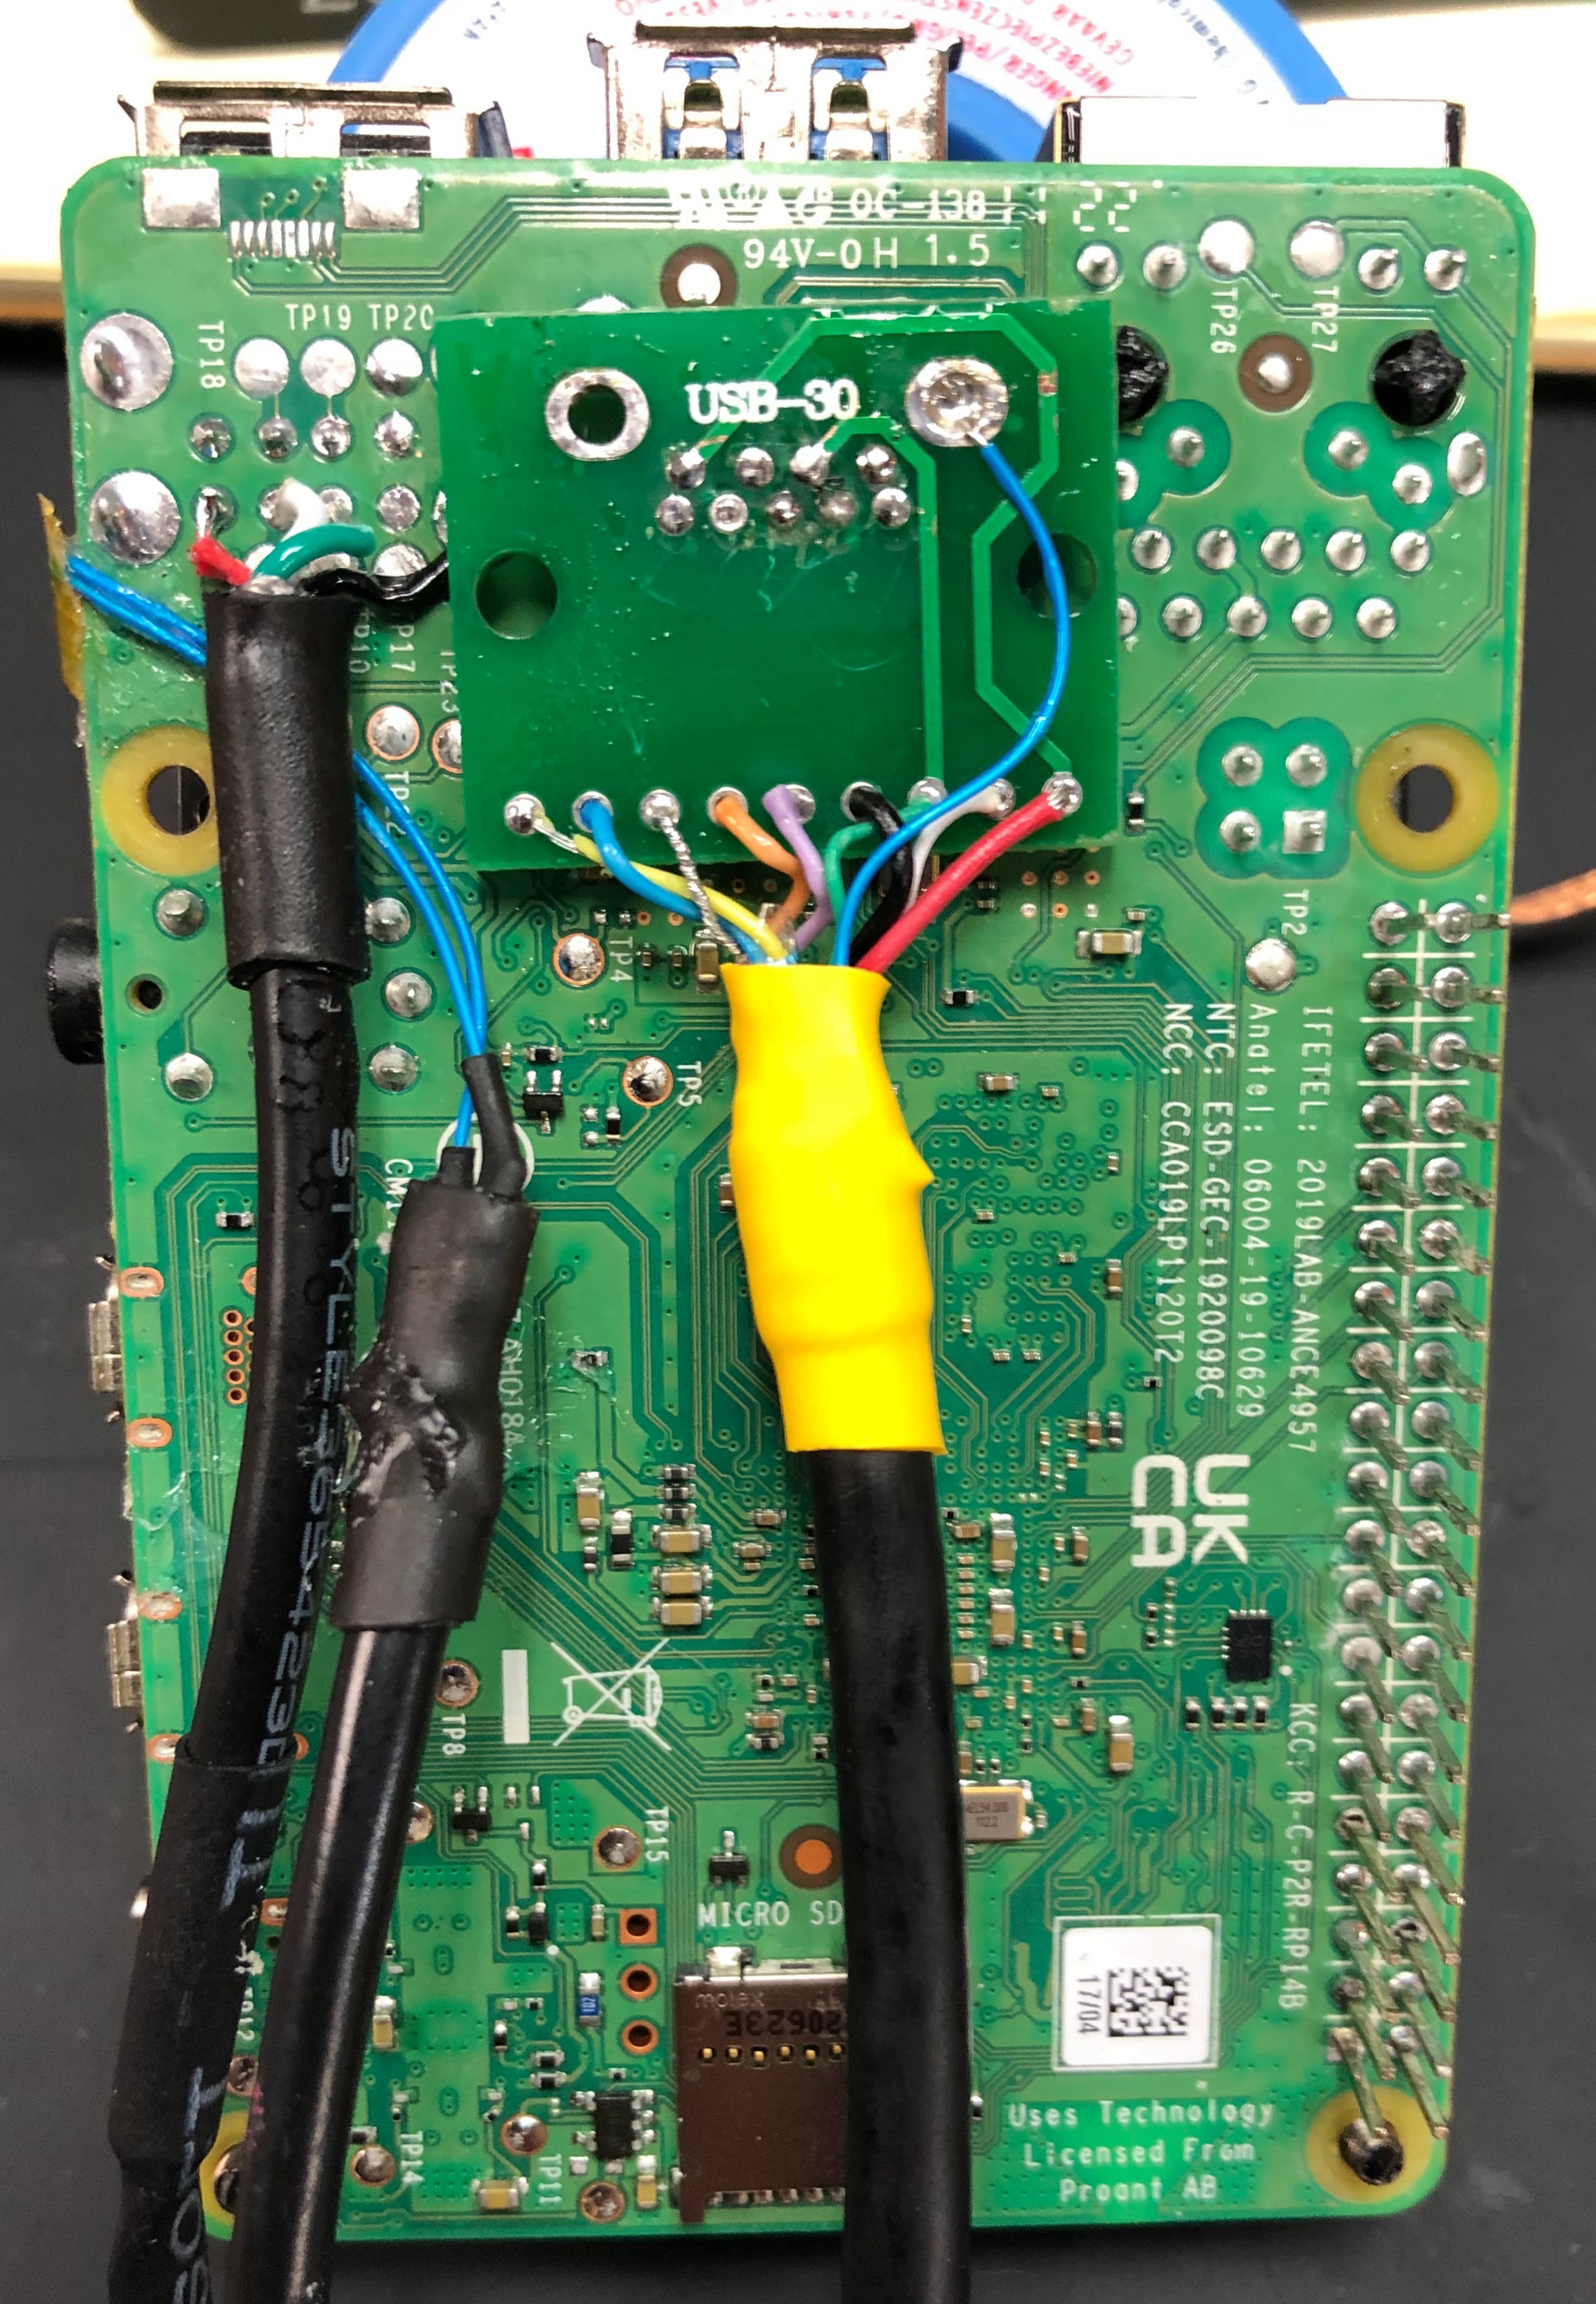
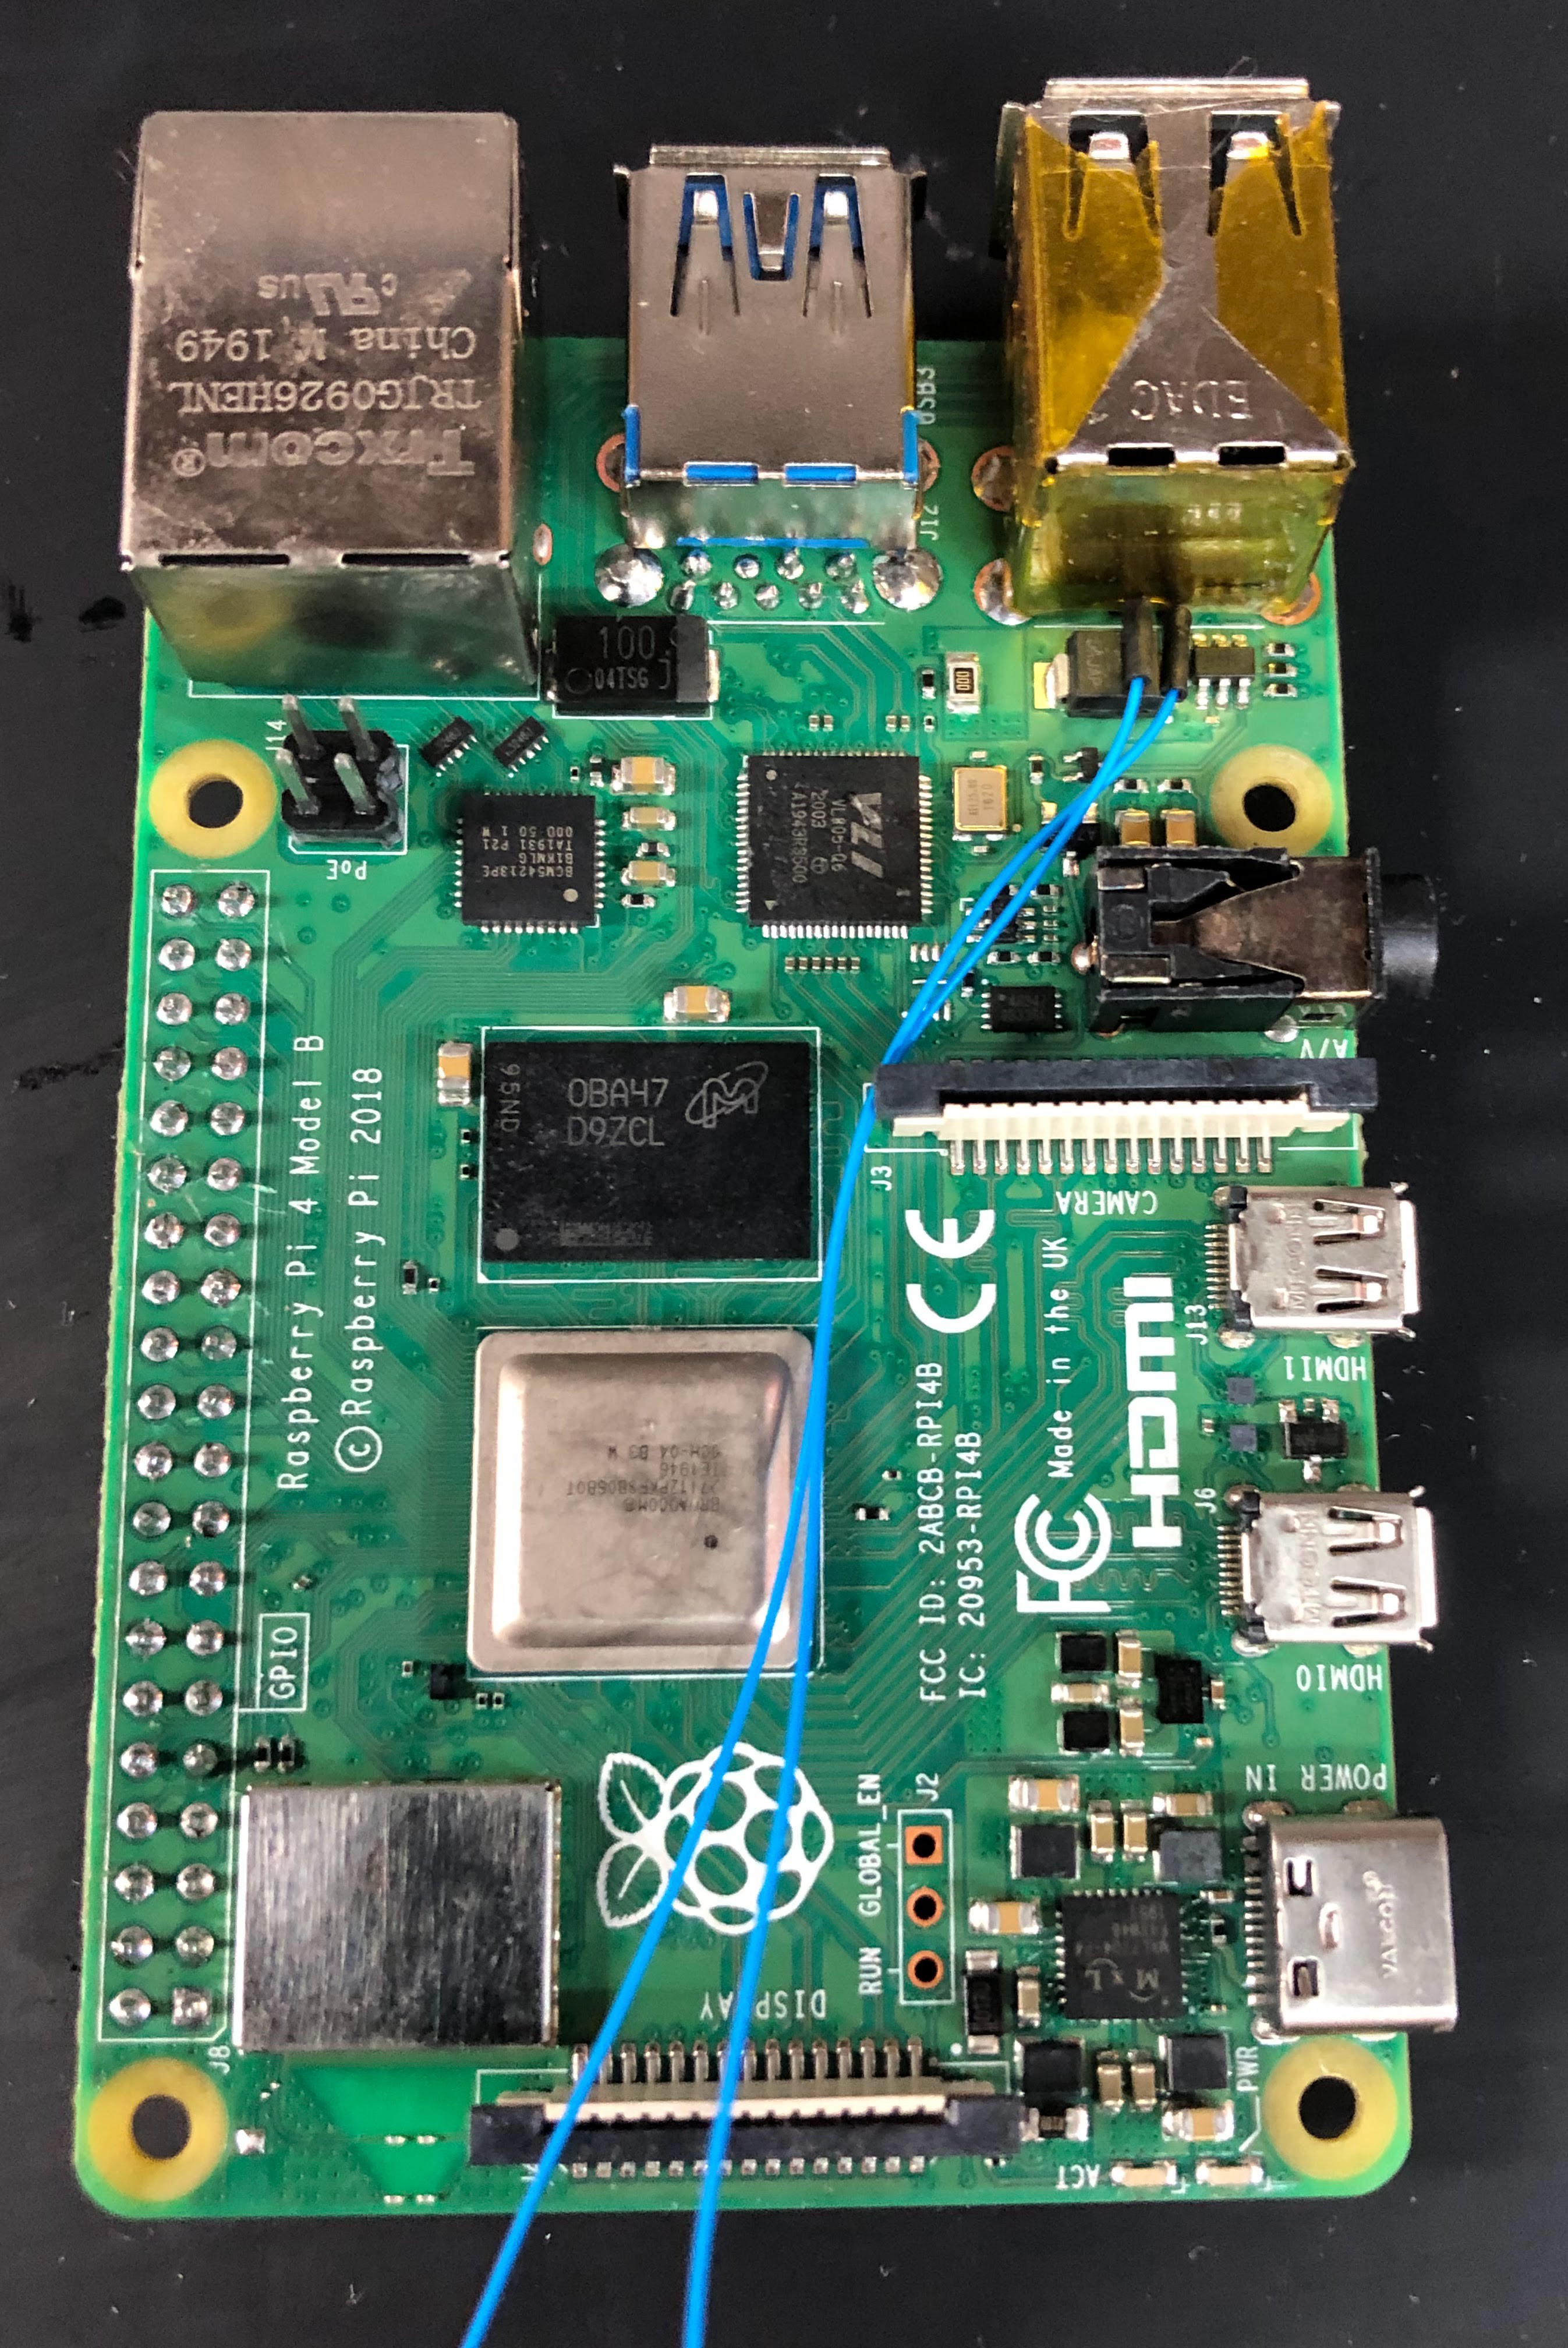
The USB 3.0 port stack was modified to a single port. The 2nd USB 3.0 is rerouted to a custom cable to the SSD.

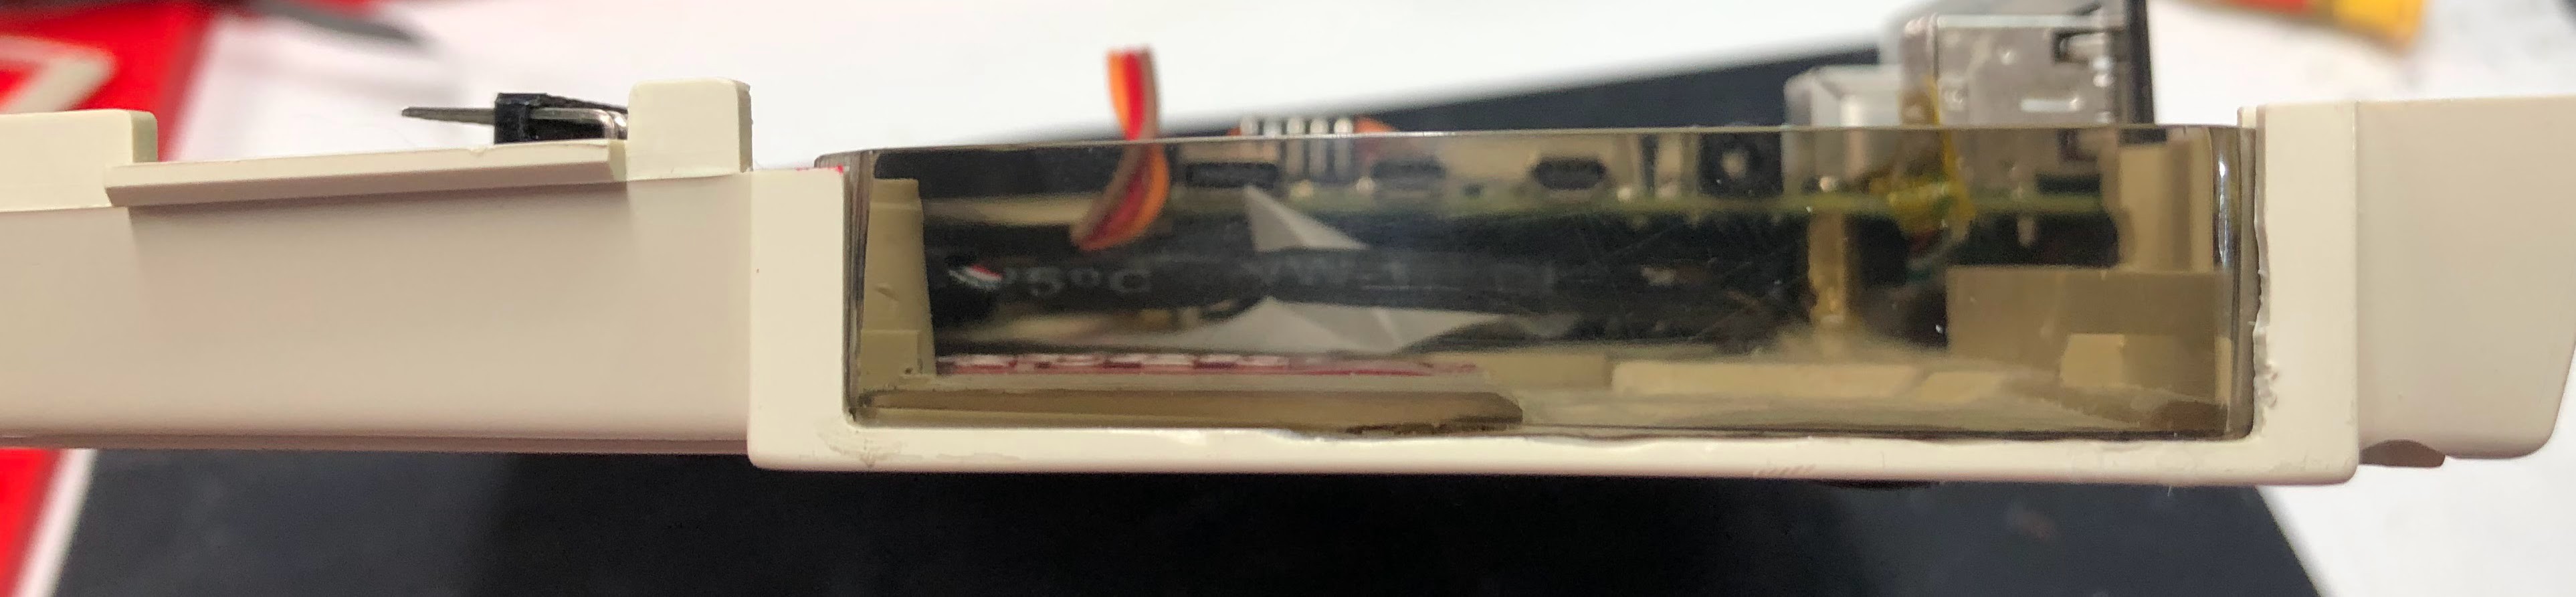
The GPIO on the Pi has been flipped to connect to 40pin to FPC on the underside to fit. The matching FPC to 40pin was also de-soldered and flipped also to fit. 

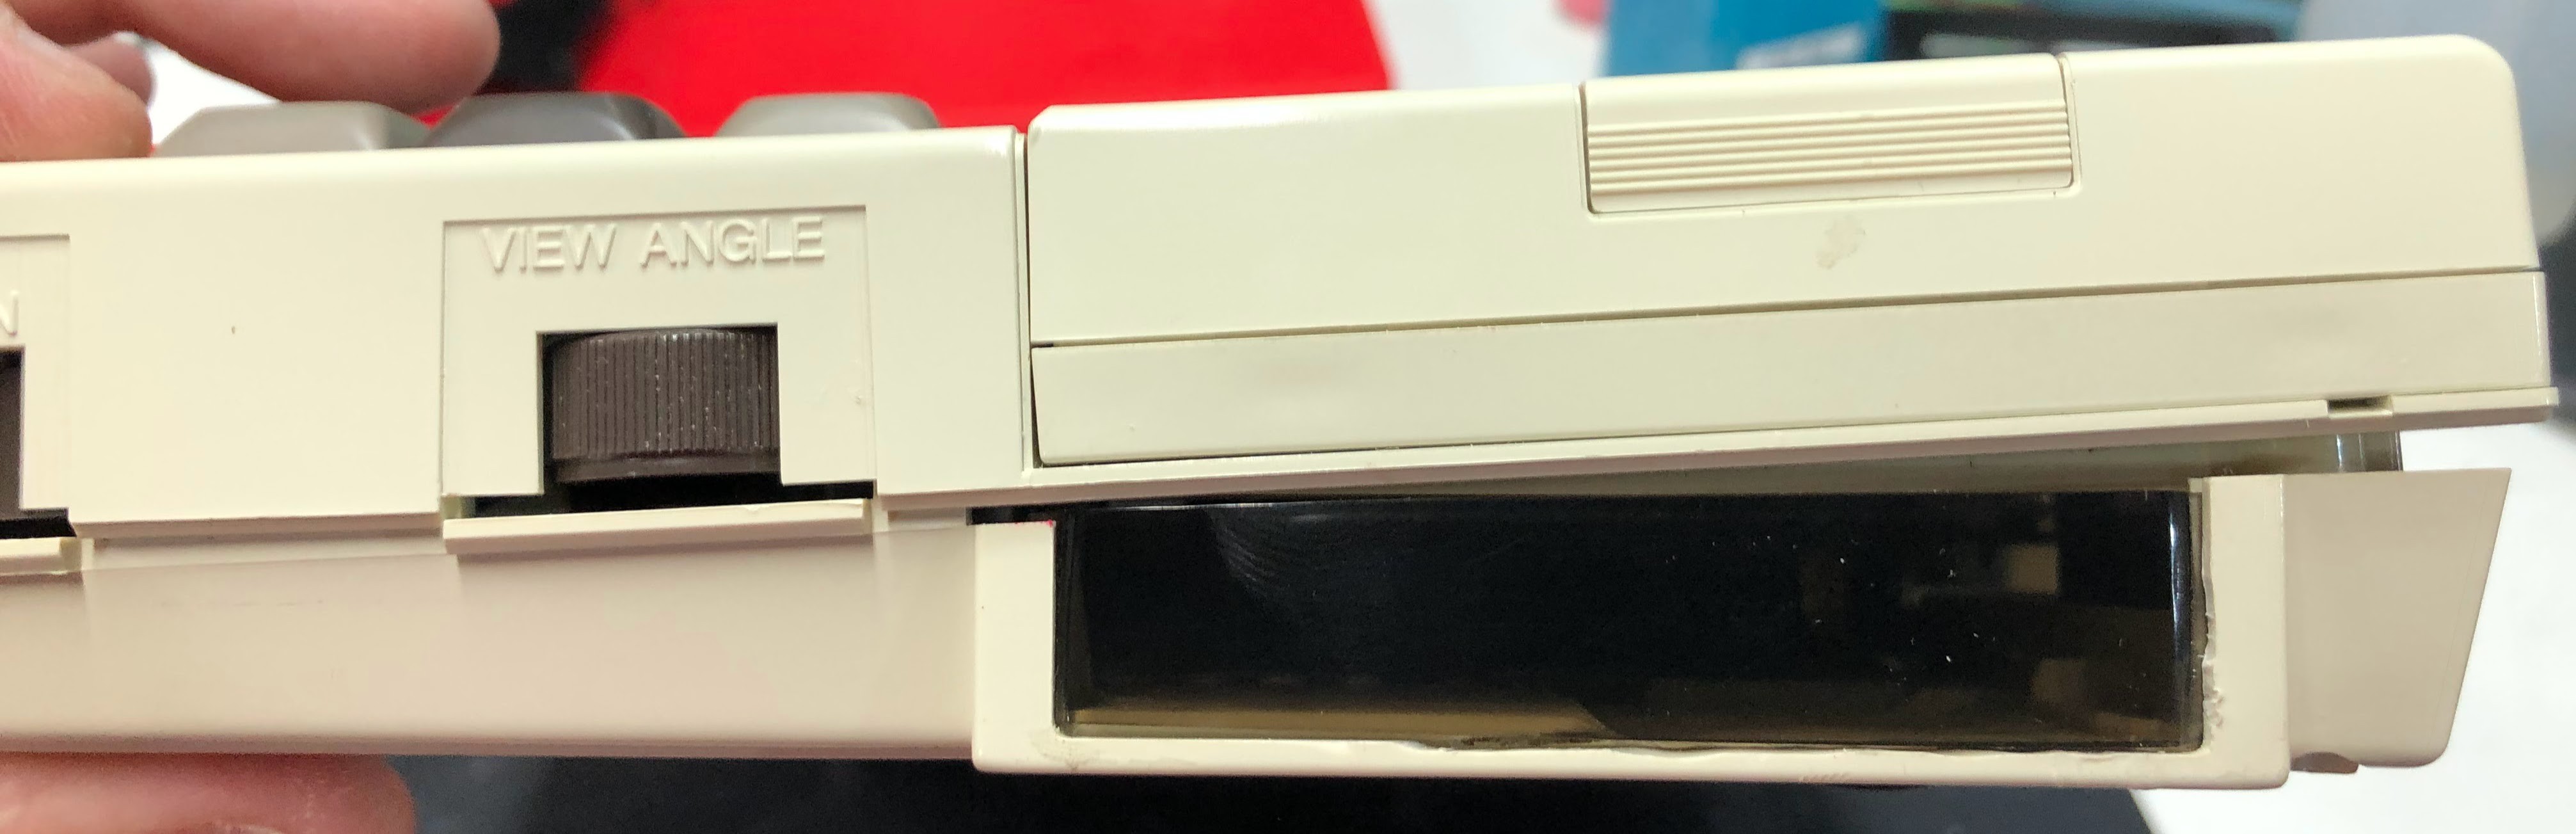
Even though the computer is from the 1980's it's quite compact. 

LCD bezel was custom made from expanded PVC plastic board.

The rear and side plates are made from acrylic sheet.

kb.py

KMK keyboard file

x-python - 502.00 bytes - 06/29/2023 at 17:21

Download

main.py

KMK keyboard file

x-python - 5.48 kB - 06/29/2023 at 17:21

Download

README.md

KMK keyboard file

markdown - 456.00 bytes - 06/29/2023 at 17:21

Download

  • 1 × Raspberry Pi 4 B 8GB
  • 1 × RaspiAudio Mic + V2 sound card with speakers
  • 1 × Waveshare 4.3" DSI color LCD Touchscreen waveshare 4.3 inch DSI LCD Display for Raspberry Pi 4B/3B+/3A+/3B/2B/B+/A+/Compute Module 3+/3/4, 800×480 Touchscreen Capacitive IPS Screen Monitor, Support Raspbian/Ubuntu/Kali /WIN10 IoT/Retropie
  • 1 × Geekworm 7mm heatsink with fan Geekworm 7mm Thickness Embedded Heatsink with Fan (P165-A) for Raspberry Pi 4, Armor Aluminum Radiator with 5V Cooling Fan Compatible with Raspberry Pi 4 Model B Computer
  • 1 × PiSugar S UPS 1200 mAh Pisugar S Portable 1200 mAh UPS Lithium Battery Pwnagotchi Power Module Power Supply for Raspberry Pi-Zero W/WH Model Accessories handhold(Not Include Raspberry Pi)

View all 17 components

  • What about the GPIO?

    Don08/02/2023 at 16:20 0 comments

    I’ve wired the unused GPIO to the original header that is on the left side of the laptop. There a cover on it in the images. Now it’s tinker friendly.

  • Oh, just one last thing.

    Don07/04/2023 at 17:57 0 comments

    ...

  • Tie a ribbon on it, Bob.

    Don07/04/2023 at 17:12 0 comments

    One last pic before I button it up. Temps topped out at about 63C/145F according to the built in CPU temp sensor. A little toasty. Might need to increase ventilation as it's almost against the LCD.

    And there it is.
    Good night.

  • 72 hours later....

    Don07/04/2023 at 17:01 0 comments

    Got a different right angle USB C connector. The new one is 22mm rather than 19.5mm. That gave me the length I needed to fit into the acrylic. It shifted a bit during cure but looks good.

  • oops

    Don07/04/2023 at 16:52 0 comments

    Hey those POGO pins aren't made to be soldered to! Get off my lawn!

    That's better.

    I decided to "upgrade" the heatsink. I got rid of the anodizing and used thermal paste instead of the pads. Sanded to about 5000grit.

  • More sanding and shaping

    Don07/01/2023 at 18:52 0 comments

    When we last visiting the intrepid engineer he was busy sanding. He's still sanding.

    After the polishing there was much rejoicing!

    I'm tempted to add some little people and some lights....

    Full disclosure: my cutting and sanding wasn't perfect. I found it easier to re-glue the Pi then try and make a new faceplate. It's lines up 'perfect', just like I measured, yeah. I don't like that the USB 3.0 port sticks out so much. I'll go back and fix that, eventually.

    Still need to add the USB C power for the UPS and the HDMI port but it's 99% done.

  • Close to finished;smoked acrylic face plates

    Don07/01/2023 at 18:46 0 comments

    Today we spend some time cutting, shaping, and sanding the acrylic to fit. Did I mention it requires sanding? It does, a lot of sanding and fitting. Then we start polishing. 3000 grit to 10,000 grit paper. When you're done with that then it's time to buff it with Novus #2.

    I used a rabbet bit to somewhat carefully cut the rabbets. I'm not patient so it was a little rough.


  • Keyboard wiring and 'view angle'

    Don06/30/2023 at 11:04 0 comments

    At first I wasn't sure how I was program the 'view angle' adjustment. To be honest I'm still not sure what I am going to do with it. However with the new keyboard cables soldered in place I found that I didn't have space for full rotation of the potentiometer. I ended up removing half of the thumb wheel to get it to fit. This presented me with a thumbwheel that only slightly moves up and down. The connector acts as a stop when everything is connected. I think this is serendipitous and will probably turn into something cool. 

  • How the USB 3.0 was done

    Don06/30/2023 at 11:00 0 comments

    For the USB 3.0 to the SSD drive I removed the stacked usb port and added small jumpers to a USB 3.0 breakout.  The breakout then goes to a right angle USB 3.0 cable. The wiring is right to left with the red wire on the right being pin 1 (VBUS). 

    You can also see how I highjacked the USB 2.0 port. The usb 2.0 stack was removed and the data +/- pins we're carefully lifted and soldered to some prototyping wire (30AWG). It was then very carefully re-soldered into place.

  • Hey this thing came with a printer! Where is it?

    Don06/29/2023 at 18:00 0 comments

    The printer is currently on bread board. I've got a small Arduino to handle printing. Right now I've got it working up to the point to put dots on the paper. It runs the motor, counts the pushes, goes to stability and sends the signals to print but the solenoids to fire.
    I can manually activate the solenoids with a pushbutton and I get ink on the paper. I think the Arduino may not be able to source the current to actuate the solenoids. Still looking into this.  The schematic is also there. Once I get the printer working I'll think I'll set it up on the Pi as a serial printer.

    The STA401A should be doing all the heavy lifting. So I'm not sure what's going on. I'll have to hookup the analyzer to it and take some voltage and current measurements of the the actual circuit and mine.

View all 21 project logs

  • 1
    Instructions

    Start

View all instructions

Enjoy this project?

Share

Discussions

Fabian wrote 11/05/2023 at 13:25 point

I started this year learning about the HX 20 and I instantly fell in love! So, now I got two broken ones here to do a similar thing. But I'd love to use an e-ink screen. I got some new parts, but I'm totally to soldering and things like the keyboard and stuff made me hesitate. But discovering your project gives me hope, that I can manage that, too! Thank you for this project! All the best from Germany.

  Are you sure? yes | no

youyoudeyou wrote 10/28/2023 at 23:48 point

Hi, I m  modifying my hx-20 to a modern x86 computer.  wondering how to determine the pin to KB2040 quickly? currently I m stucking at identify the col and raw pin, should it done by a multi-meter right? sorry to ask about that because I'm first trying a mod a mechanic keyboard.

  Are you sure? yes | no

Don wrote 10/29/2023 at 15:07 point

You can find the layout and pin numbers in the keyboard files attached to the project. The technical manual is easy to find and goes into every detail of the laptop. I used it to repair my other units. I didn't use a multimeter because of the diodes. I hooked up a 5VDC and used LEDs.

  Are you sure? yes | no

Don wrote 07/21/2023 at 23:02 point

working with the author of hxemu to get it working on the PI. We’ll see if we get it going.

  Are you sure? yes | no

Jesper E. Siig wrote 07/04/2023 at 20:12 point

I used to work on one of those many years ago (obviously! :).

Wonder if the 2023-version will read the old microcassettes I still have laying around (somewhere), run my old EPSON BASIC programs and print the results on the matrix printer? :)

I understand the wish for a new screen, but would have loved to see it with the original one.

Anyways - amazing job, well done!

Jesper

  Are you sure? yes | no

Don wrote 07/05/2023 at 10:53 point

Phase 2 is to finish programming the printer so that it will work with the Raspberry Pi. After that I may tackle the microcassette. I have 4 fully restored HX-20s at home. This was a good use for the spare parts.  

  Are you sure? yes | no

ScriptedAnarchy wrote 07/02/2023 at 16:08 point

First, amazing job here.  Like, world class and so very well done.

But also, I have a similar unit (the one with the mini-cassette built in and folding screen) I've wanted to do something similar with for years, but I don't know how to pin the keeb to a controller to reuse that keyboard.  I'm hopeful now I can short-cut a bit by following in your footsteps and finally make this unit happen.  

  Are you sure? yes | no

Don wrote 07/03/2023 at 11:08 point

That sounds like either the PX-4 or the PX-8. Building the key matrix is much easier in my opinion than reversing a decades old controller. There was no Ctrl+C and Ctrl+V back then so rebuilding is a better idea, in my opinion.

With the HX-20 it was trivial as the documentation for the HX-20 is phenomenal. The tech manual and the firmware manuals go into great detail every little item. Timing charts, machine code, waveforms, everything you need. 

Even if you don't have a manual it's not too difficult to build a small circuit with LEDs attached to the columns and rows to decipher the matrix. That's what I did with my OAK FTM keyboard. Then start pressing keys and see what lights up. I think I have pictures, I'll create a project if I do.

After that you need to decide if you'll use QMK, KMK, or one of the other keyboard driver software out there. I found the *MK  variety easy to work with. 

The good news is that you can't really destroy anything, without trying hard. Everything is low voltage and low current. I suppose if you messed up the wiring you could do some damage but chances are you won't.

Good luck.

  Are you sure? yes | no

ScriptedAnarchy wrote 07/07/2023 at 18:36 point

Thanks much for the advice!  The good news is that I have a spare keyboard for it around here too (from an older cyberdeck project).  I agree it's much, MUCH easier to redo with a new controller, the PX-8 (the model in question) has the ancient controller integrated to the mobo so I'd have to slice it out and still teach it to speak to a modern device either way...

Part of my delay has also been a classic case of 'wrong approach'.  It didn't occur to me to just wire to a new controller directly and i kept trying to find a controller the original ribbon cable would mate with rather than just... rewiring.  Also, the keeb on the px-8 is essentially low-profile mechanical switches on a board, so it shouldn't be rocket science to work out like you said.

Also, pretty sure that at this point, push comes to shove, I can also get a custom pcb made for it to just replace the stock keeb with a new hotswappable mech keeb pcb that has a slot for the new controller... but that's the less 'authentic keyboard appearance' route.

The harder part will likely be a clean replacement of the screen.

(Also now I'm hesitating to try to finish before the contest deadline and submit the entry because like... I see you entered and I don't want to dilute or detract from the absolutely bang-up job you did.  I wouldn't even be revisiting it atm if I hadn't seen this.)

  Are you sure? yes | no

Don wrote 07/01/2023 at 18:53 point

Thanks. Just "finished" the face plates today.

  Are you sure? yes | no

Tom Nardi wrote 07/01/2023 at 06:01 point

Some great work here, love the internal layout.

  Are you sure? yes | no

Similar Projects

Does this project spark your interest?

Become a member to follow this project and never miss any updates