Sagar 001
Whenever we have to use video output in any IoT or robotics project then Esp32-Cam module comes into mind. It is the one which can fulfil all the needs and has comparatively low price than other modules available. The good this is we can use SD card to store the video and images or we can stream to another device using Wi-Fi.

There are some other options also you may try like integrating the module with blink IoT, cloud or telegram to get the data anywhere on internet. In this tutorial we will set up a server for Esp32 camera and then implement the same with telegram bot. Using server the access is limited within Wi-Fi range but with telegram we can get the images over internet.
Esp32 Sense:
Seeed Studio XIAO ESP32S3 Sense integrates a camera sensor, digital microphone, and SD card support. Combining embedded ML computing power and photography capability, this development board can be your great tool to get started with intelligent voice and vision AI. See more in the datasheet of ESP32S3.

· It has detachable OV2640 camera sensor for 1600*1200 resolution, compatible with OV5640 camera sensor.
· It supports programming in Arduino and Micro-Python.
· Support 2.4GHz Wi-Fi and BLE dual wireless communication, support 100m+ remote communication when connected with U.FL antenna
Features:
- Xtensa LX7 dual-core,32-bit processor that operates at up to 240 MHZ
- 2.4GHz Wi-Fi and low-power Bluetooth® BLE 5.0 dual-mode
- 1x UART, 1x l2C, 1x l2S, 1x SPI, 11x GPIOs (PWM), 9xADC
- On-chip 8M PSRAM & 8MB Flash
- Onboard SD Card Slot, supporting 32GB FAT
- Input voltage (Type-C): 5V
- lnput voltage (BAT): 4.2V
- Temperature range: -40°C ~65°C
Components required:
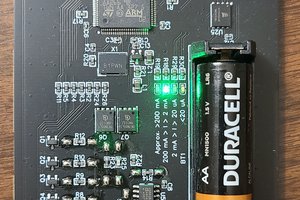
ESP32S3 by XIAO Is overpowered, it has onboard programmer, battery monitoring circuit and camera hardware. So no need of external programmer like other Cam modules. Just plug the board to PC through USB and we are ready to go. You can connect an external battery to ESP32 directly , charging imitated automatically with a max of 100mA current. Only Lithium ion and Li-po battery support this features.

(You can try Seeed Fusion PCB Assembly service from here)
2) Battery
TINY-ML to ESP32S3:
Using this board many machine learning projects can be made, few are listed here. You can replicate these project in order to learn Tiny-ML from scratch. To make any type of prototyping project using ESP32-Sense you can send your designed 3D-prints and PCB to JLCPCB for fabrication. JLCPCB is China based PCB manufacturer having more than 10 years of experience in this field. JLCPCB recently launched many other prototyping services like RF PCB, High precision PCB, 3D printing and Metal CNC.

I always suggest JLCPCB because it is the only manufacturer provide services in very low prices (5pcs of 2-layer PCB in just $2) and quality is also very good. Sign-up now using this link to JLCPCB and get free coupons up to $54 for next projects.
Upgrade to ESP32s3:
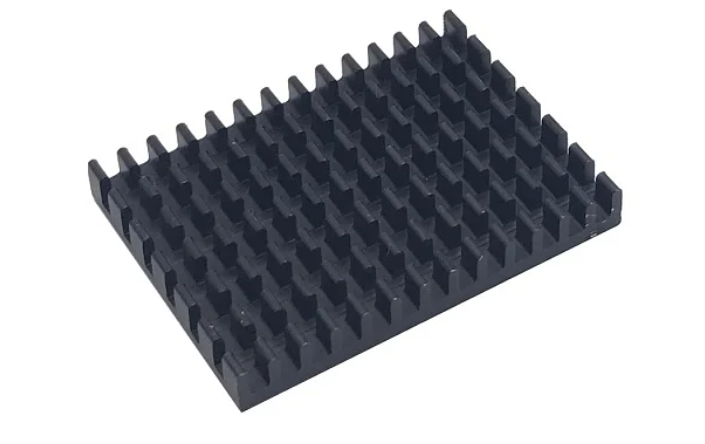
This board has a very small form factor which is great but due to having overperforming CPU it dissipates a lot of heat. Which can be felt in the back side of module. Continuous video streaming may damage the CPU because of high power consumption (350mA) so it is suggested to add a small heatsink with insulated thermal pad on the back of side PCB.
Setting up the Telegram bot:
It is basically a bot making procedure. We have to make a bot which send command to ESP32 over internet and then we can demand for images over internet through commands.
Step1: Open the Telegram App and search for “BotFather” (https://t.me/BotFather) then send command as:

1) Start the bot: /start
2) For new bot: /newbot
3) Name your bot, mine was as: SENSE
4) Give ID to Bot should be ending with bot, mine was as: Sense_32bot

This will generate an HTTP API key and a bot messenger link. API you can use in your code to implement telegram bot and through...
Read more »
 Monstrofil
 Joshua Elsdon