 thesage1014
Let me know if you have questions or suggestions! I'll be adding more info, including a wiring diagram soon. This is a kalimba(or thumb piano/thumb drum) with an internal contact mic, a Teensy 3.2 w/ attached audio board, and knobs for effects modulation. It has jacks for mono 1/4" guitar output, or stereo 1/8" headphone output. The code I have running now has a very basic set of 4 effects knob: delay, low pass, bitcrunch, bitcrunch samplerate. Thanks SO MUCH to Paul Stoffregen for his work making the Teensy and audio board for it.
0%
0%
Electric Kalimba
A handheld instrument made with steel tongs. Uses a teensy for audio effects.
Become a Hackaday.io member
Already have an account? Log in.
Just one more thing
To make the experience fit your profile, pick a username and tell us what interests you.
Pick an awesome username
hackaday.io/
Your profile's URL: hackaday.io/username. Max 25 alphanumeric characters.
Pick a few interests
Projects that share your interests
People that share your interests
 Stefan Wagner
 arturo182
 Matt
Matt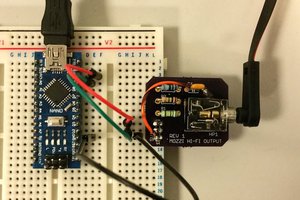
 Ben Holmes