 Roni Bandini
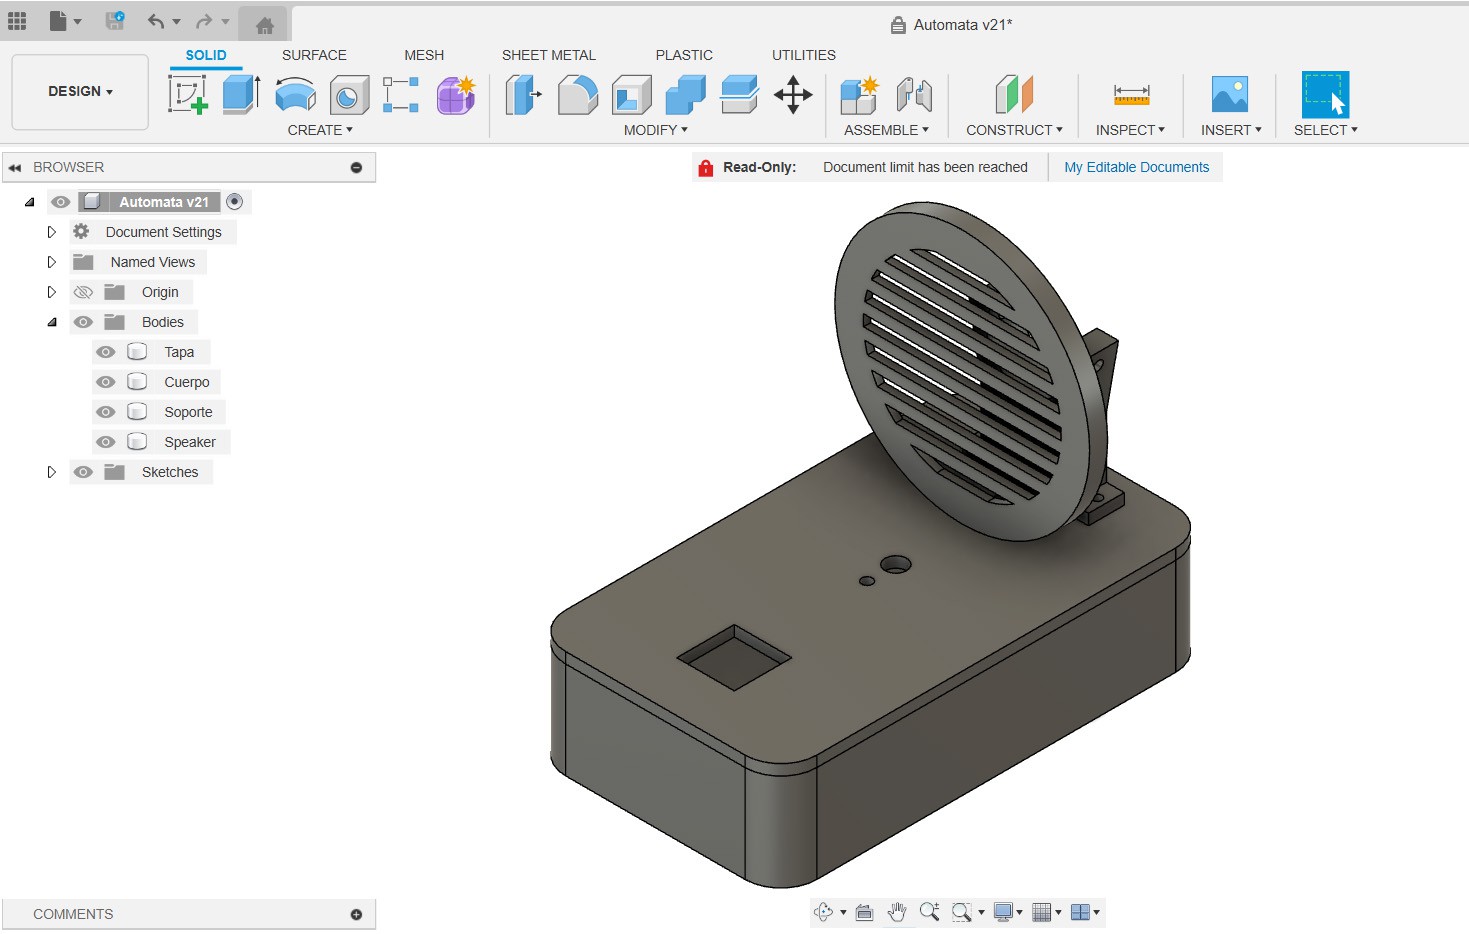
In the realm of all things geek, my calendar skipped a beat on Pi Day, but fear not, for I was determined not to let another crucial date escape my notice – the deadline for unveiling a Halloween project. So, what's in the works? a tiny Arduino automaton, equipped with a voice recognition module, ready to orchestrate sound and spooky movements for a trick-or-treat Halloween installation. 🎃🤖
Voice Recognition Module
Gravity Voice Recognition module is a small device by DFRobot that can be used to add voice recognition to any Arduino, ESP and Raspberry Pi project. Some interesting features of this module are:
- . It works off line
- . It comes with pre-trained commands
- . It can learn new commands
- . It can be easily trained
- Once it has been trained, a simple I2C or UART connection will give you the IDs of the commands
What can you do with this module? You can add it to any interface instead of wiring buttons and coding bouncing.
Functionality
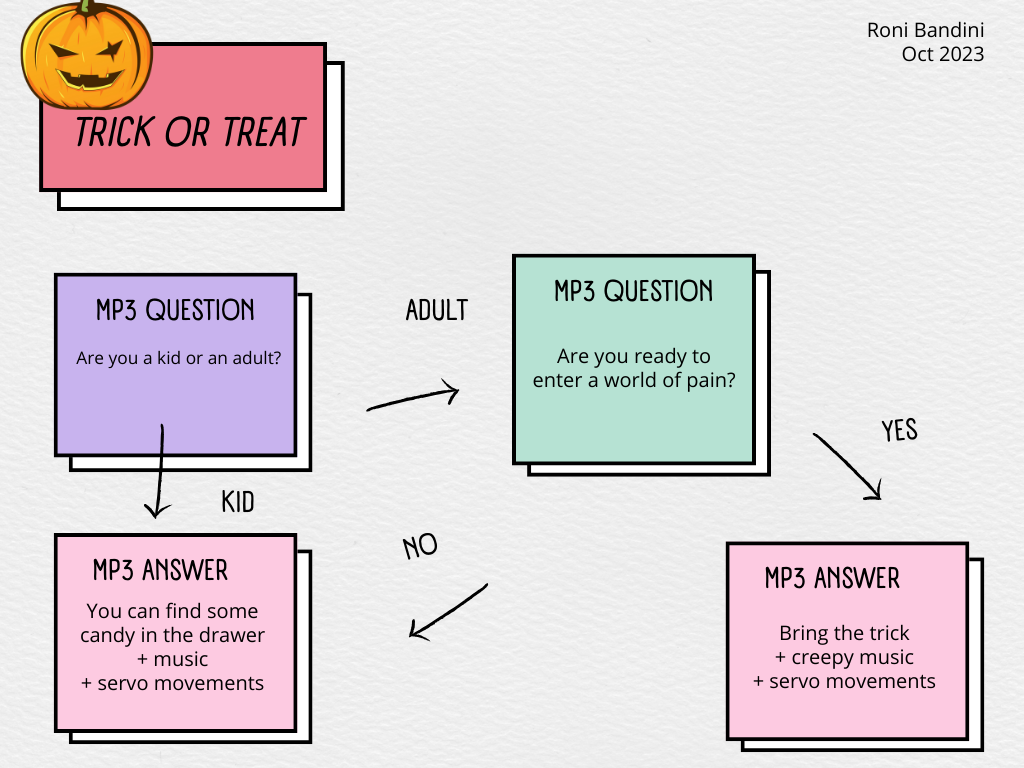
When the button is pressed the device will start listening for “trick or threat” voice command.
After this point, the device will ask new questions and it will wait for answers. Some music and servo movements will be added to increase the dramatic effect.
Parts required
- Arduino Nano
- Voice recognition module
- DFPlayer Mini
- microSD card
- 4ohm speaker
- SG90 Servo motor
- Self locking led button
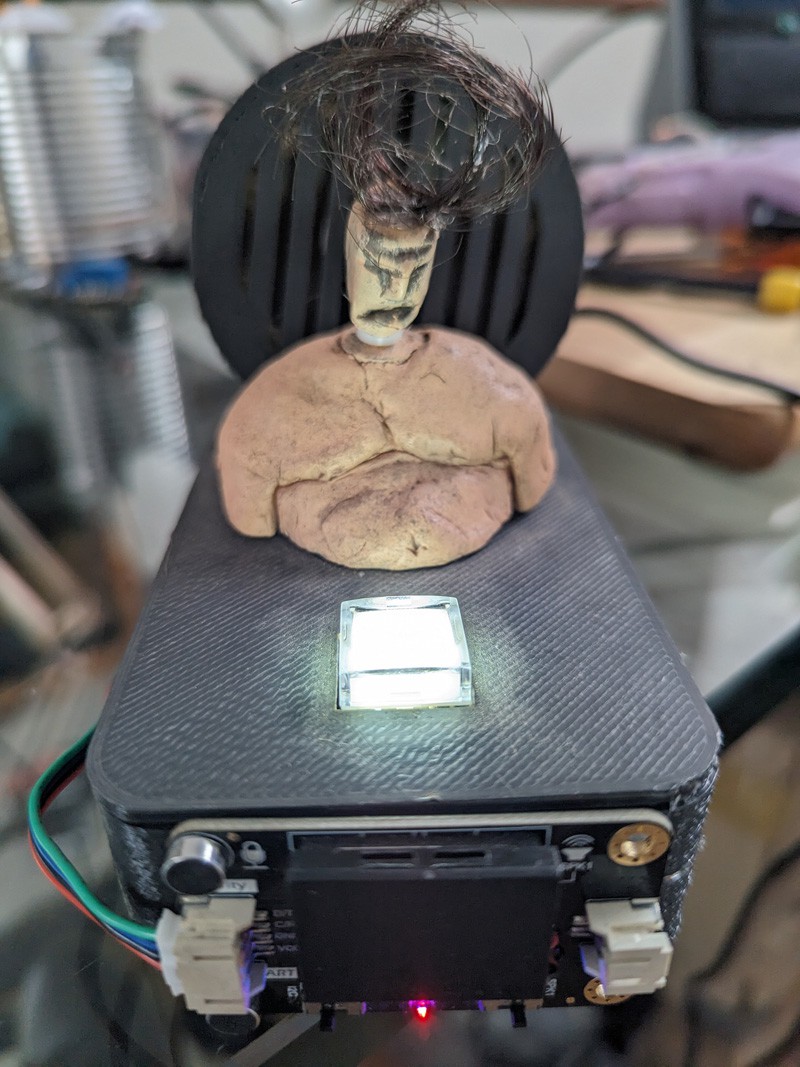
- Clay or sd printed figure with animated head
Animated figure

I have made the figure with clay inserting the SG90 servo and leaving the movement for the head. You can replace it by a 3d printed figure or make it with any other material.
Speech, sounds and movement
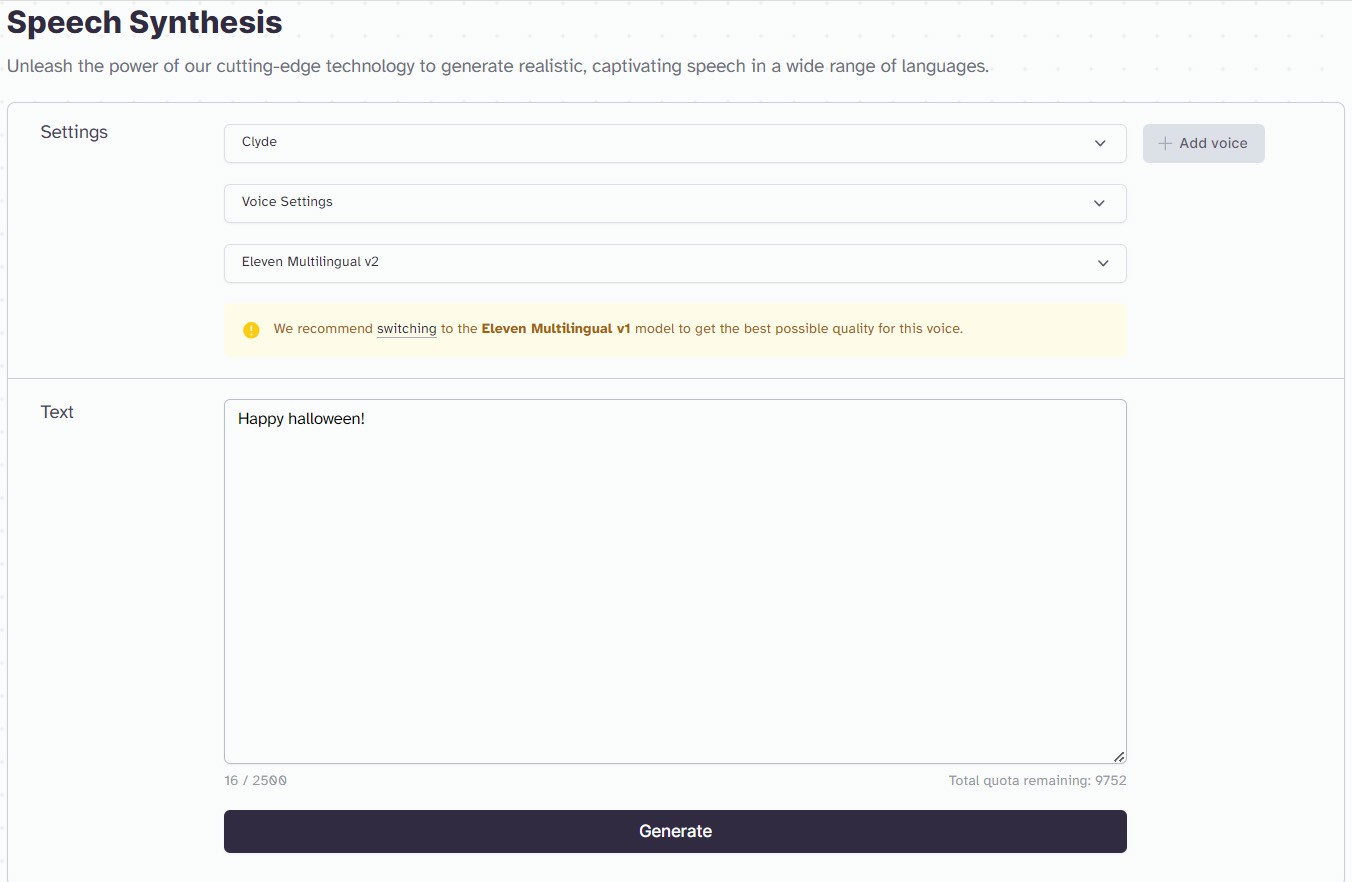
For the speech mp3 I have used https://elevenlabs.io/ You can select from several natural voices and add some customizations
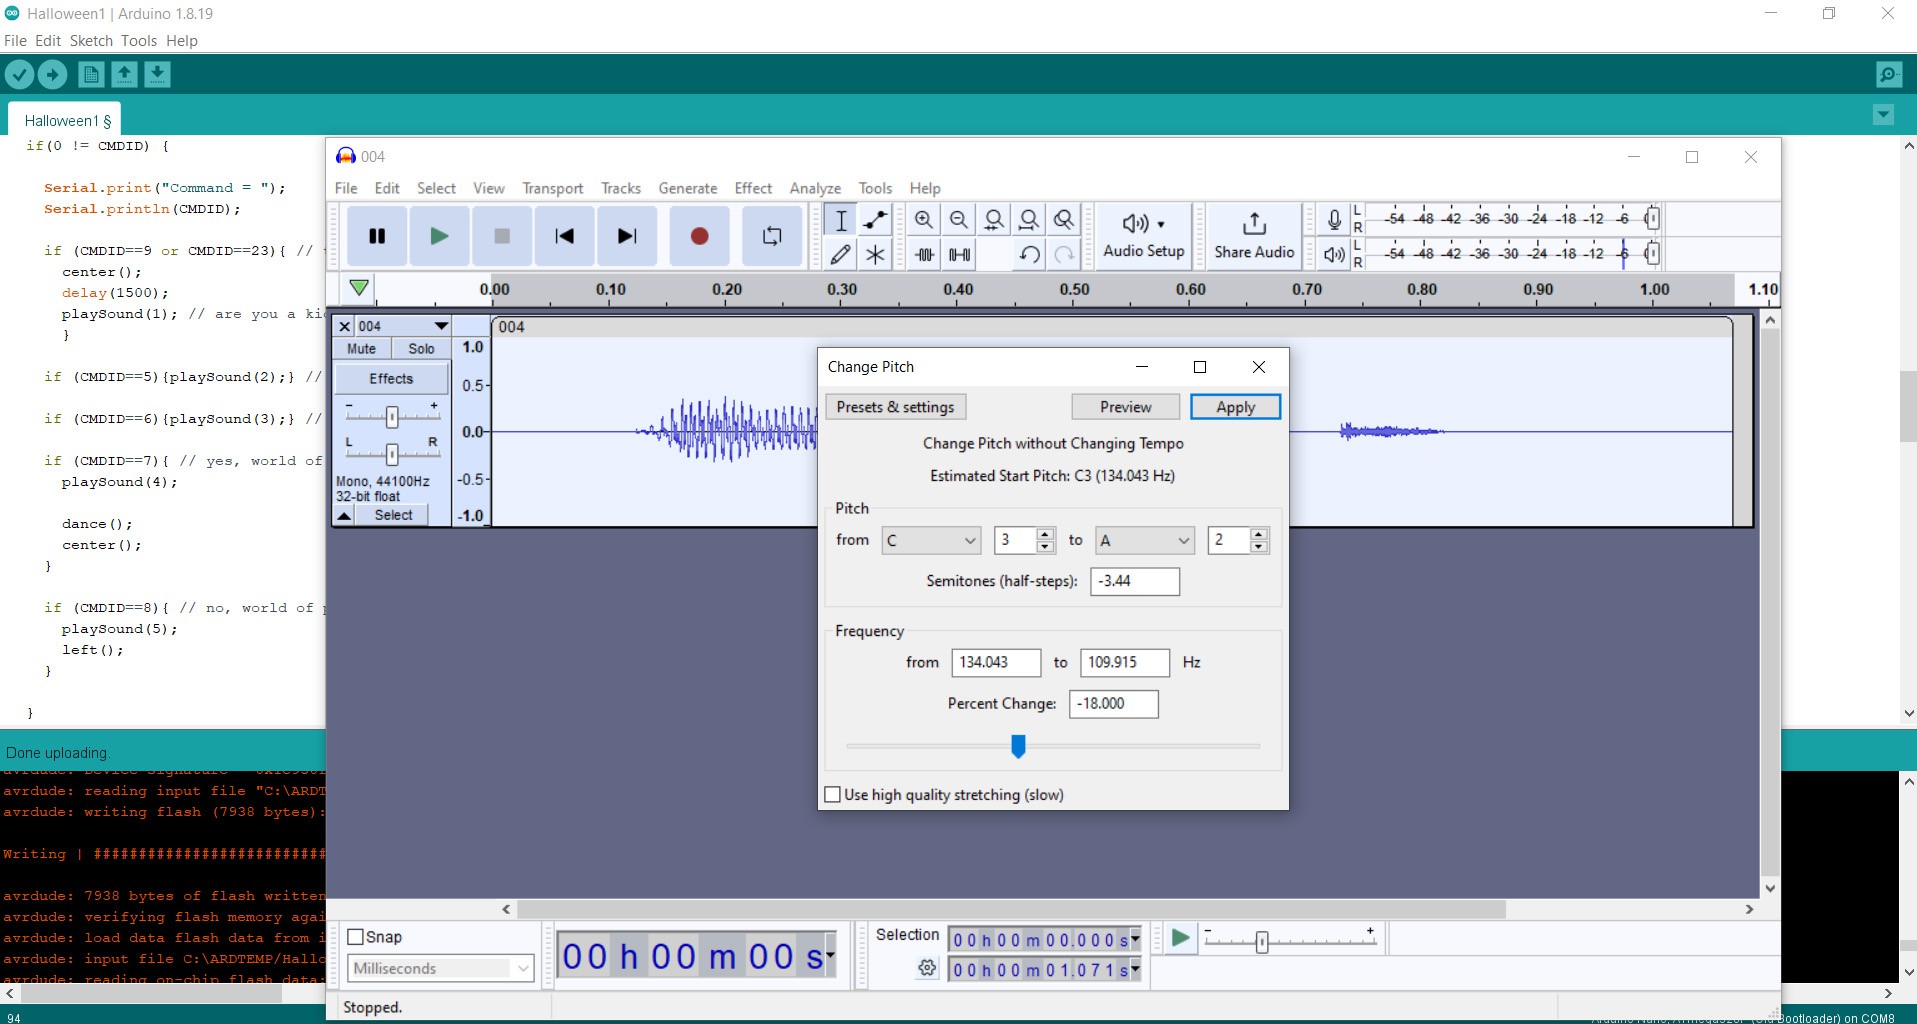
Then I used Audacity to lower the voice pitch.
All MP3s were loaded into the microSD along with some dramatic sounds that can be easily called with the DFPlayer Mini.
void playSound(int myId){

delay(500);

execute_CMD(0x0F,0x01,(byte)myId);

delay(500);

}
Movement is easily obtained by sending angles to the servo motor.
void right(){

myServo.write(160);

}
Teaching commands to the module
Power up the module with 5v and say: “Hello robot” Then say “Learning command word” Now follow the instructions and repeat 3 times the following words:
- Kid
- Adult
- Yes
- No
- Trick or treat
They will get assigned IDs from 5 to 9 and we will use those IDs from the code.
Note: if you have uploaded the .ino code please consider that mute mode has been enabled. You can disable with:
DF2301Q.setMuteMode(0);
Forcing wake up word
The Voice Recognition module, by default requires a wake up phrase like “Hello, robot”
By giving that command through the code with
DF2301Q.playByCMDID(1);
The device will be at command mode with the front blue light turned on.
Circuit
DFPlayer Mini TX and RX to pins 10 and 11. GND and VCC to external 5v Power. SPK+ and SPK- to Speaker.
Servo motor signal to pin 12. GND and VCC to external 5v Power
Button to pin 7 and GND.
Voice module to A4 and A5. GND and VCC to external 5v Power.
3d Parts
Download all 3d parts and print with PLA
Where to go from here
The voice recognition module has a total of 138 command words, 121 of which are fixed and 17 are customizable. This means that you can easily extend the conversation and make the toy more complex. However, it’s important to note that the state of the conversation is not checked by default. For instance, if you say “yes” or “no” instead of “kid” or “adult”, it will go to that part of the conversational tree. To avoid this, a state variable can be added and checked inside if-statements.
If you’re interested in replicating this automata in large scale, you can use strong servos, woodwork,...
Read more »


 Michael O'Toole
 Scott Clandinin
 ElectroBoy
FYI, "automata" is plural. The singular form is "automaton".