Close
0%
0%

Sky rider game controller

Interactive game controller for the Sky riders online game

lbLB
Similar projects worth following
247 views
0 followers
The game in itself is a simple racing game which only uses four buttons: forward, backward, left and right.
In our version it would be a two player game with one player in charge of the left and right controls and one player in charge of accelerating and stopping. The left/right player doesn't have a view of the screen.

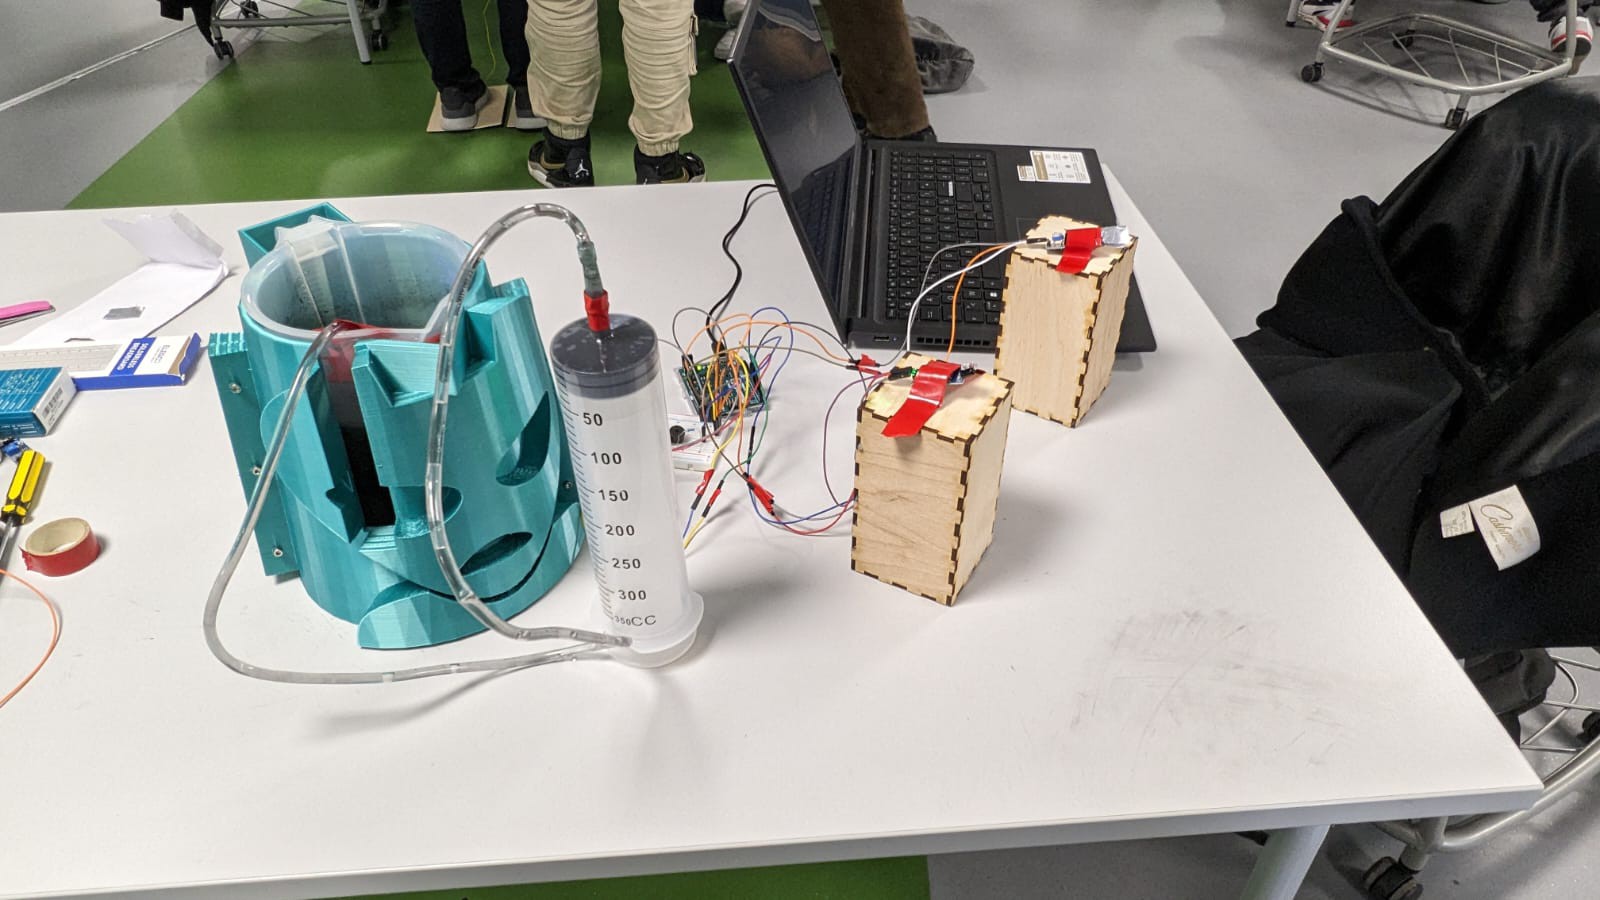
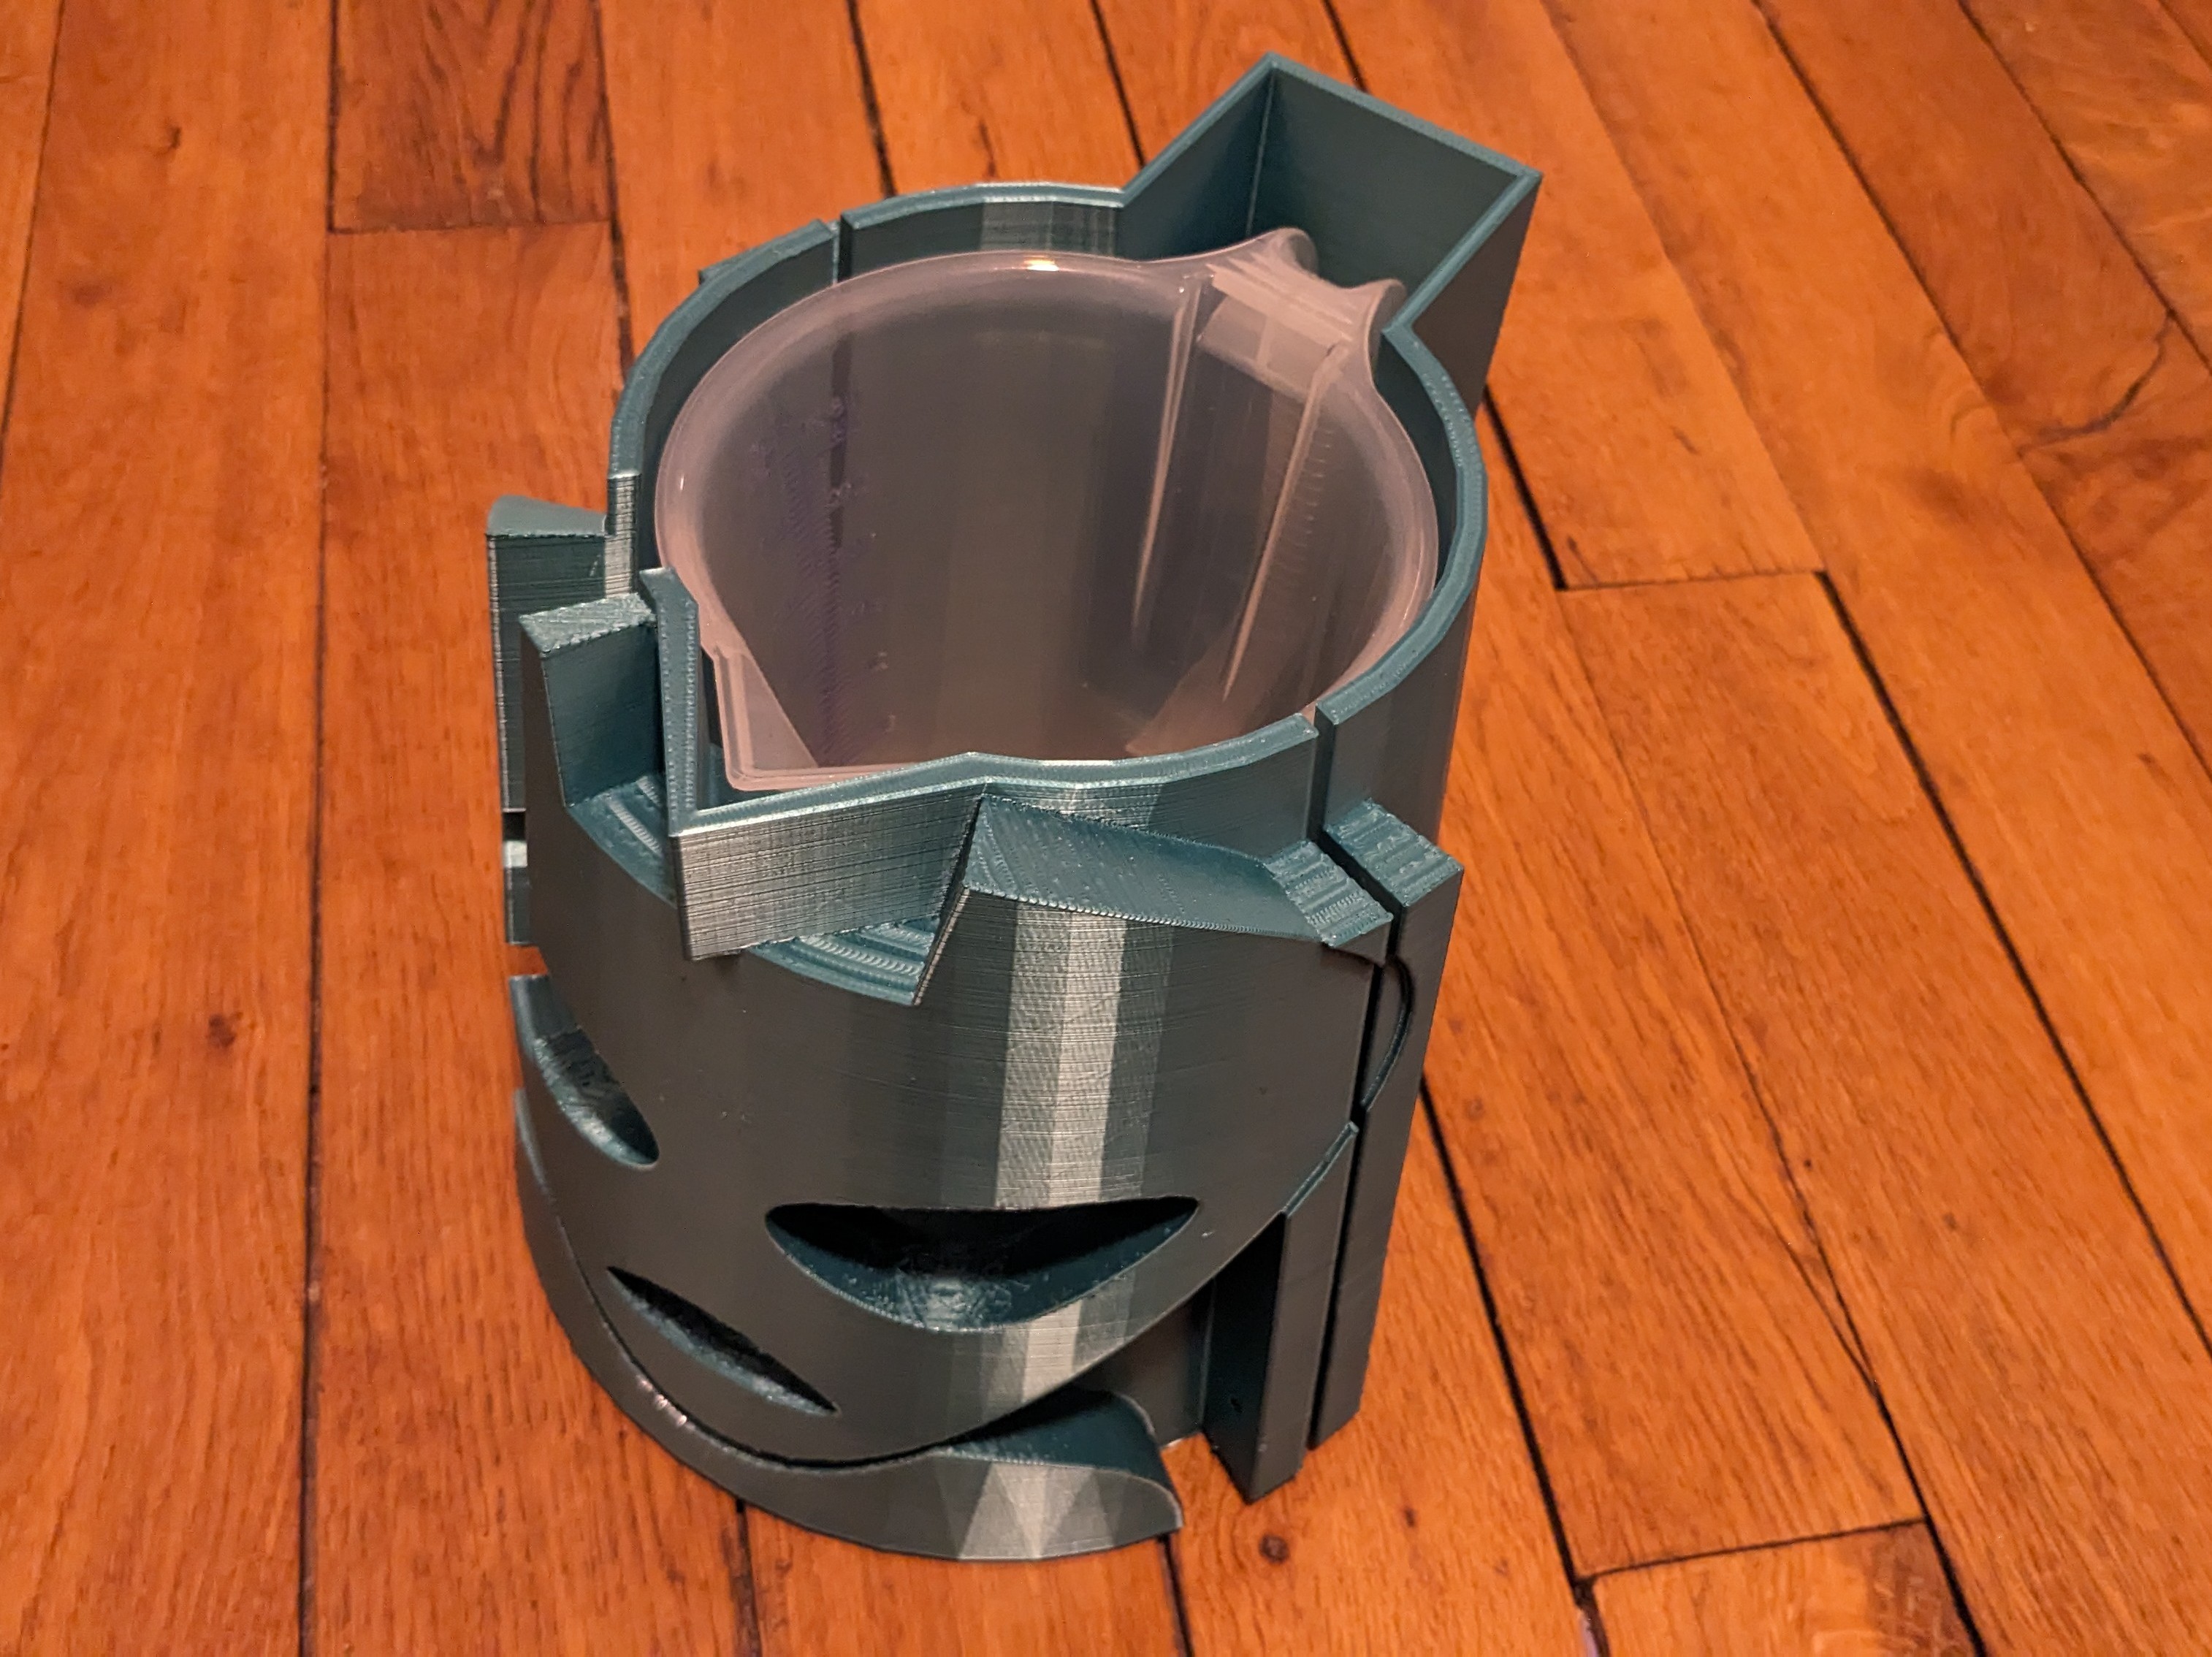
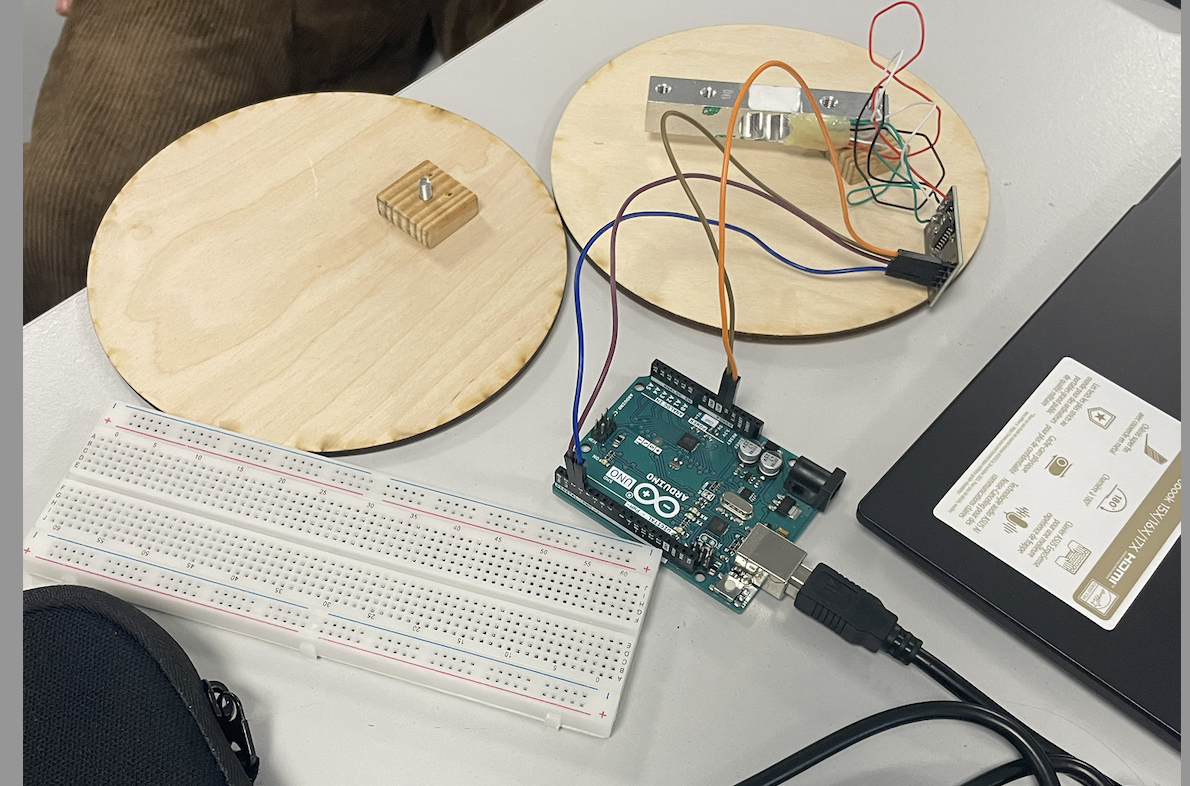
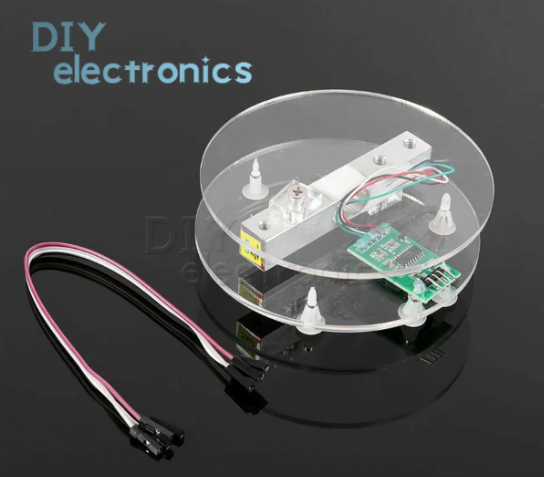
In order to go forward or backward we 'll use a weight sensor. Indeed we want to use a graduated pitcher, the more water you put in it the faster the car and the less water you put in it the slowest your car will go. To change the level of water we'll use a syringe to avoid spilling water on electrical components.

To change the direction we'll use 2 movement sensors ( one for right one for left) and a buzzer that will make a sound each time you pass in front of the movement sensor. You must keep in mind that the one of the two players, turning right and left won't have access to the screen so he will only rely on the other player indications.

WhatsApp Video 2024-01-09 at 15.32.35.mp4

Video of how the syringe system works

MPEG-4 Video - 1.62 MB - 01/09/2024 at 14:50

Download

WhatsApp Video 2024-01-09 at 15.32.40.mp4

Video of how the turning left and turning right part works

MPEG-4 Video - 3.10 MB - 01/09/2024 at 14:49

Download

  • 2 × motion sensor
  • 1 × weight sensor
  • 1 × Arduino Leonardo
  • 1 × Syringe
  • 1 × Buzzer

View all 7 components

  • final day

    LB01/09/2024 at 14:49 0 comments

    Our final setup looks like this:

    With a closer look at our wiring:

    As you can see we added a buzzer which makes a small sound when you turn left or when you turn right (to let you know that you are in front of one of the motion sensors)

    The turning left and turning right part of out project works.

    However, our weight sensor stopped working although our code works; so the acceleration part of out project doesn't work.

  • Aesthetic part 2

    Angèle01/05/2024 at 21:56 0 comments

    Concerning the movement sensor we did 2 boxes in order to put the sensor at certain height from the ground to make it possible to pass our hand in front of it without hurting our hand:

  • Aesthetic part

    Angèle01/05/2024 at 21:54 0 comments

    Finally we worked on the aesthetic part of you project. To do so, we decided to use a 3D printer in order to "cover" the different component used for the eight sensor (including the recipient). 

    We used fusion 360 to do this sketch and once printed we had:

    We have decided to choose an alien for the design, since it's quite an original one we thought it would fit.

  • movement sensor

    Angèle12/12/2023 at 16:27 0 comments

    Today we worked on the movement sensor in ordre to turn right and left. We used the following code:

    void setup() {
      pinMode(7,INPUT);
      Serial.begin(9600);
      int a=0;
    }
    void loop() {
      int a=0;
      Serial.print("IRSensorip  ");
      Serial.println(digitalRead(7));
      if(digitalRead(7)==0){
       a=0;
       Serial.println(a);
       delay(10);
      }
      else{
        a=1;
        Serial.println(a);
        delay(10);
      }

  • Code

    Angèle12/05/2023 at 15:31 0 comments

    We used arduino to test our system, and see the different value when we applied different weight on our sensor:

    #include "HX711.h"

    const int DOUT_PIN = 2;
    const int SCK_PIN = 3;

    HX711 scale;

    void setup() {
      Serial.begin(9600);
      scale.begin(DOUT_PIN, SCK_PIN);
    }

    void loop() {
      if (scale.is_ready()) {
        long weight = scale.get_units(); // Get the weight in grams
        Serial.println("Weight: " + String(weight) + " g");
        delay(1000); // You can adjust the delay based on your requirements
      } else {
        Serial.println("Error reading from scale");
      }
    }

  • Weight sensor

    Angèle12/05/2023 at 15:28 0 comments

    We drilled the wooden plate to fix the weight sensor. 


  • Components

    LB12/03/2023 at 18:17 0 comments

    We received the first half of our components for the project (the pressure sensor, syringe and recipient). 

    However the pressure sensor cables fell off so we welded them back in place:

    Our objective is to create this: 

    https://www.diyengineers.com/2022/05/19/load-cell-with-hx711-how-to-use-with-examples/

    So we started by laser cutting two circular wooden plates (after having 3D modelled them):

  • Laser

    LB11/02/2023 at 15:26 0 comments

    Idea 3: In order to move left and right. We would have two laser transmitters and two laser receivers. When the second player runs/ Put their hand in front of one of the lasers (blocking the signal) the car would turn left or right depending on which laser is blocked. 

  • Different alternatives to the pressure sensor idea

    LB11/02/2023 at 15:24 0 comments

    Idea 1.1:

    Regarding the previous idea, we initially thought of using a colorimetric sensor and have the liquid be some shade of grey so if more liquid is added, the blacker the solution.

    A humidity sensor was also an option, however since this game should be designed to be played several times, the container would not have time to dry off completely between plays. So this is not the best option.

    We also had the idea of using a movement sensor which would detect if the water reached a certain level. However, as we are adding the water, the sensor would sense the falling water as movement. 

    So the pressure sensor seems the best solution.

  • Pressure sensor

    LB11/02/2023 at 15:16 0 comments

    idea 2: for the accelerate and stop controls.

    This idea is to use a container filled with some liquid (most likely water). The container is situated on top of a pressure sensor. So the heavier the container (the more water is inside, the faster the car goes. And the lighter the container (the less water there is ) the more the car slows down. The player would use a big syringe to either add or take out water according to how fast they would want the car to go.

    Below is a quick sketch of this idea: 

    We already tested out an Arduino code with a pressure sensor which worked.

    The idea would be to use JoyToKey or a similar program in order to compute the oscillation of pressure into a computer key stroke.

View all 11 project logs

  • 1
    Pressure sensor

    First we begin with a weight sensor. ( A little advice: check that everything is functional because in our case we had to weld cables back in place). In order to build a scale using this weight sensor you need two plaques (ours is made out of thin wood but plexiglass works too) as well as small separators (so that the plaque does not directly touch the weight sensor) and you need to screw a plaque to each side of the weight sensor (be careful when screwing the plaques to make sure you screw both plaques opposite each other )

    You have to then wire the weight sensor to an arduino card, in our case the best one is a leonardo arduino card (you can also test out different wirings with the Tinkercard website). 

    You can then test you’re component and it’s sensibility levels using the following code:

    #include <Keyboard.h>

    const int weightSensorPin = A0;  // Replace with your actual pin for the weight sensor
    const int thresholdHeavy = 600000;  // Adjust this threshold based on your specific sensor and requirements
    const int thresholdMedium = 570000;
    const int thresholdLight = 200;

    void setup() {
      Serial.begin(9600);
      Keyboard.begin();
    }

    void loop() {
      int sensorValue = analogRead(weightSensorPin);

      if (sensorValue > thresholdHeavy) {
        // Heavy weight detected, simulate pressing the up arrow key for a long time
        Keyboard.press(KEY_UP_ARROW);
        delay(5000);  // Adjust delay as needed
        Keyboard.release(KEY_UP_ARROW);
      } else if (sensorValue > thresholdMedium) {
        // Medium weight detected, no keypress
      } else if (sensorValue > thresholdLight) {
        // Weight between medium and light, simulate pressing the up arrow key for a shorter time
        Keyboard.press(KEY_UP_ARROW);
        delay(2000);  // Adjust delay as needed
        Keyboard.release(KEY_UP_ARROW);
      } else {
        // Light weight detected, simulate pressing the down arrow key
        Keyboard.press(KEY_DOWN_ARROW);
        delay(2000);  // Adjust delay as needed
        Keyboard.release(KEY_DOWN_ARROW);
      }

      // Add any additional logic or conditions as needed

      delay(500);  // Adjust delay based on your requirements
    }

    You can see that you also link your code to your keyboard. 

  • 2
    Motion sensor

    Concerning the motion sensors, you just have to wire it to the arduino (same as before) and thanks to the code you’ll be able to transform it into data. 1 if something passes in front of the sensor and 0 if there’s nothing in front of the sensor. Then we'll translate it in order to make our car going right or left. In addition to the motion sensor you can add a buzzer that will make noise when you activate the motion sensor. 

    Here we have the final version the code where you can see how to make those sensors work.

    #include <Keyboard.h>
    #include "HX711.h"

    const int weightSensorPin = A0;  // Replace with your actual pin for the weight sensor
    const int thresholdHeavy = 600000;  // Adjust this threshold based on your specific sensor and requirements
    const int thresholdMedium = 570000;
    const int thresholdLight = 200;

    const int DOUT_PIN = 2;
    const int SCK_PIN = 3; 

    void setup() {
      Serial.begin(9600);
      Keyboard.begin();
      pinMode(7,INPUT);  //left
      pinMode(8,INPUT);  //right
      pinMode(6,OUTPUT); //buzzer
      int l=0;
      int r=0;
    }
    }

    void loop() {
      int sensorValue = analogRead(weightSensorPin);
      int l=0;
      int r=0;

      if(digitalRead(7)==0){
        Keyboard.press(KEY_LEFT_ARROW);
        delay(100);
        Keyboard.release(KEY_LEFT_ARROW);
        tone(6, 10000, 500);  //buzzer ring

      }
      
      if(digitalRead(8)==0){
        Keyboard.press(KEY_RIGHT_ARROW);
        delay(100);
        Keyboard.release(KEY_RIGHT_ARROW);
        tone(6, 10000, 500); //buzzer ring
      }
      else{
        l=0;
        r=0;
        Serial.println(l);
        Serial.println(r);
      }

      if (sensorValue > thresholdHeavy) {
        // Heavy weight detected, simulate pressing the up arrow key for a long time
        Keyboard.press(KEY_UP_ARROW);
        delay(100);  // Adjust delay as needed
        Keyboard.release(KEY_UP_ARROW);
      } 
      
      else if (sensorValue > thresholdMedium) {
         Keyboard.press(KEY_UP_ARROW);  // Medium weight detected 
        delay(500);  // Adjust delay as needed
        Keyboard.release(KEY_UP_ARROW);
      } 
      
      else if (sensorValue > thresholdLight) {
        // Weight between medium and light, no key pressed
      } 
      
      else {
        // Light weight detected, simulate pressing the down arrow key
        Keyboard.press(KEY_DOWN_ARROW);
        delay(100);  // Adjust delay as needed
        Keyboard.release(KEY_DOWN_ARROW);
      }

      delay(100);  // Adjust delay based on your requirements
    }

  • 3
    Aesthetic part

    In order to make our project more aesthetic and to hide the different cables, we decided to use a 3D printer to cover the different component of the motion sensor. To do so we used fusion 360 to modelized our cover.

    Then concerning the motion sensors we decided to make to boxes to put the sensor a little bit higher so it would be easier to pass our hand in front of it. To do so we used a laser cutter.

View all 3 instructions

Enjoy this project?

Share

Discussions

Similar Projects

Does this project spark your interest?

Become a member to follow this project and never miss any updates