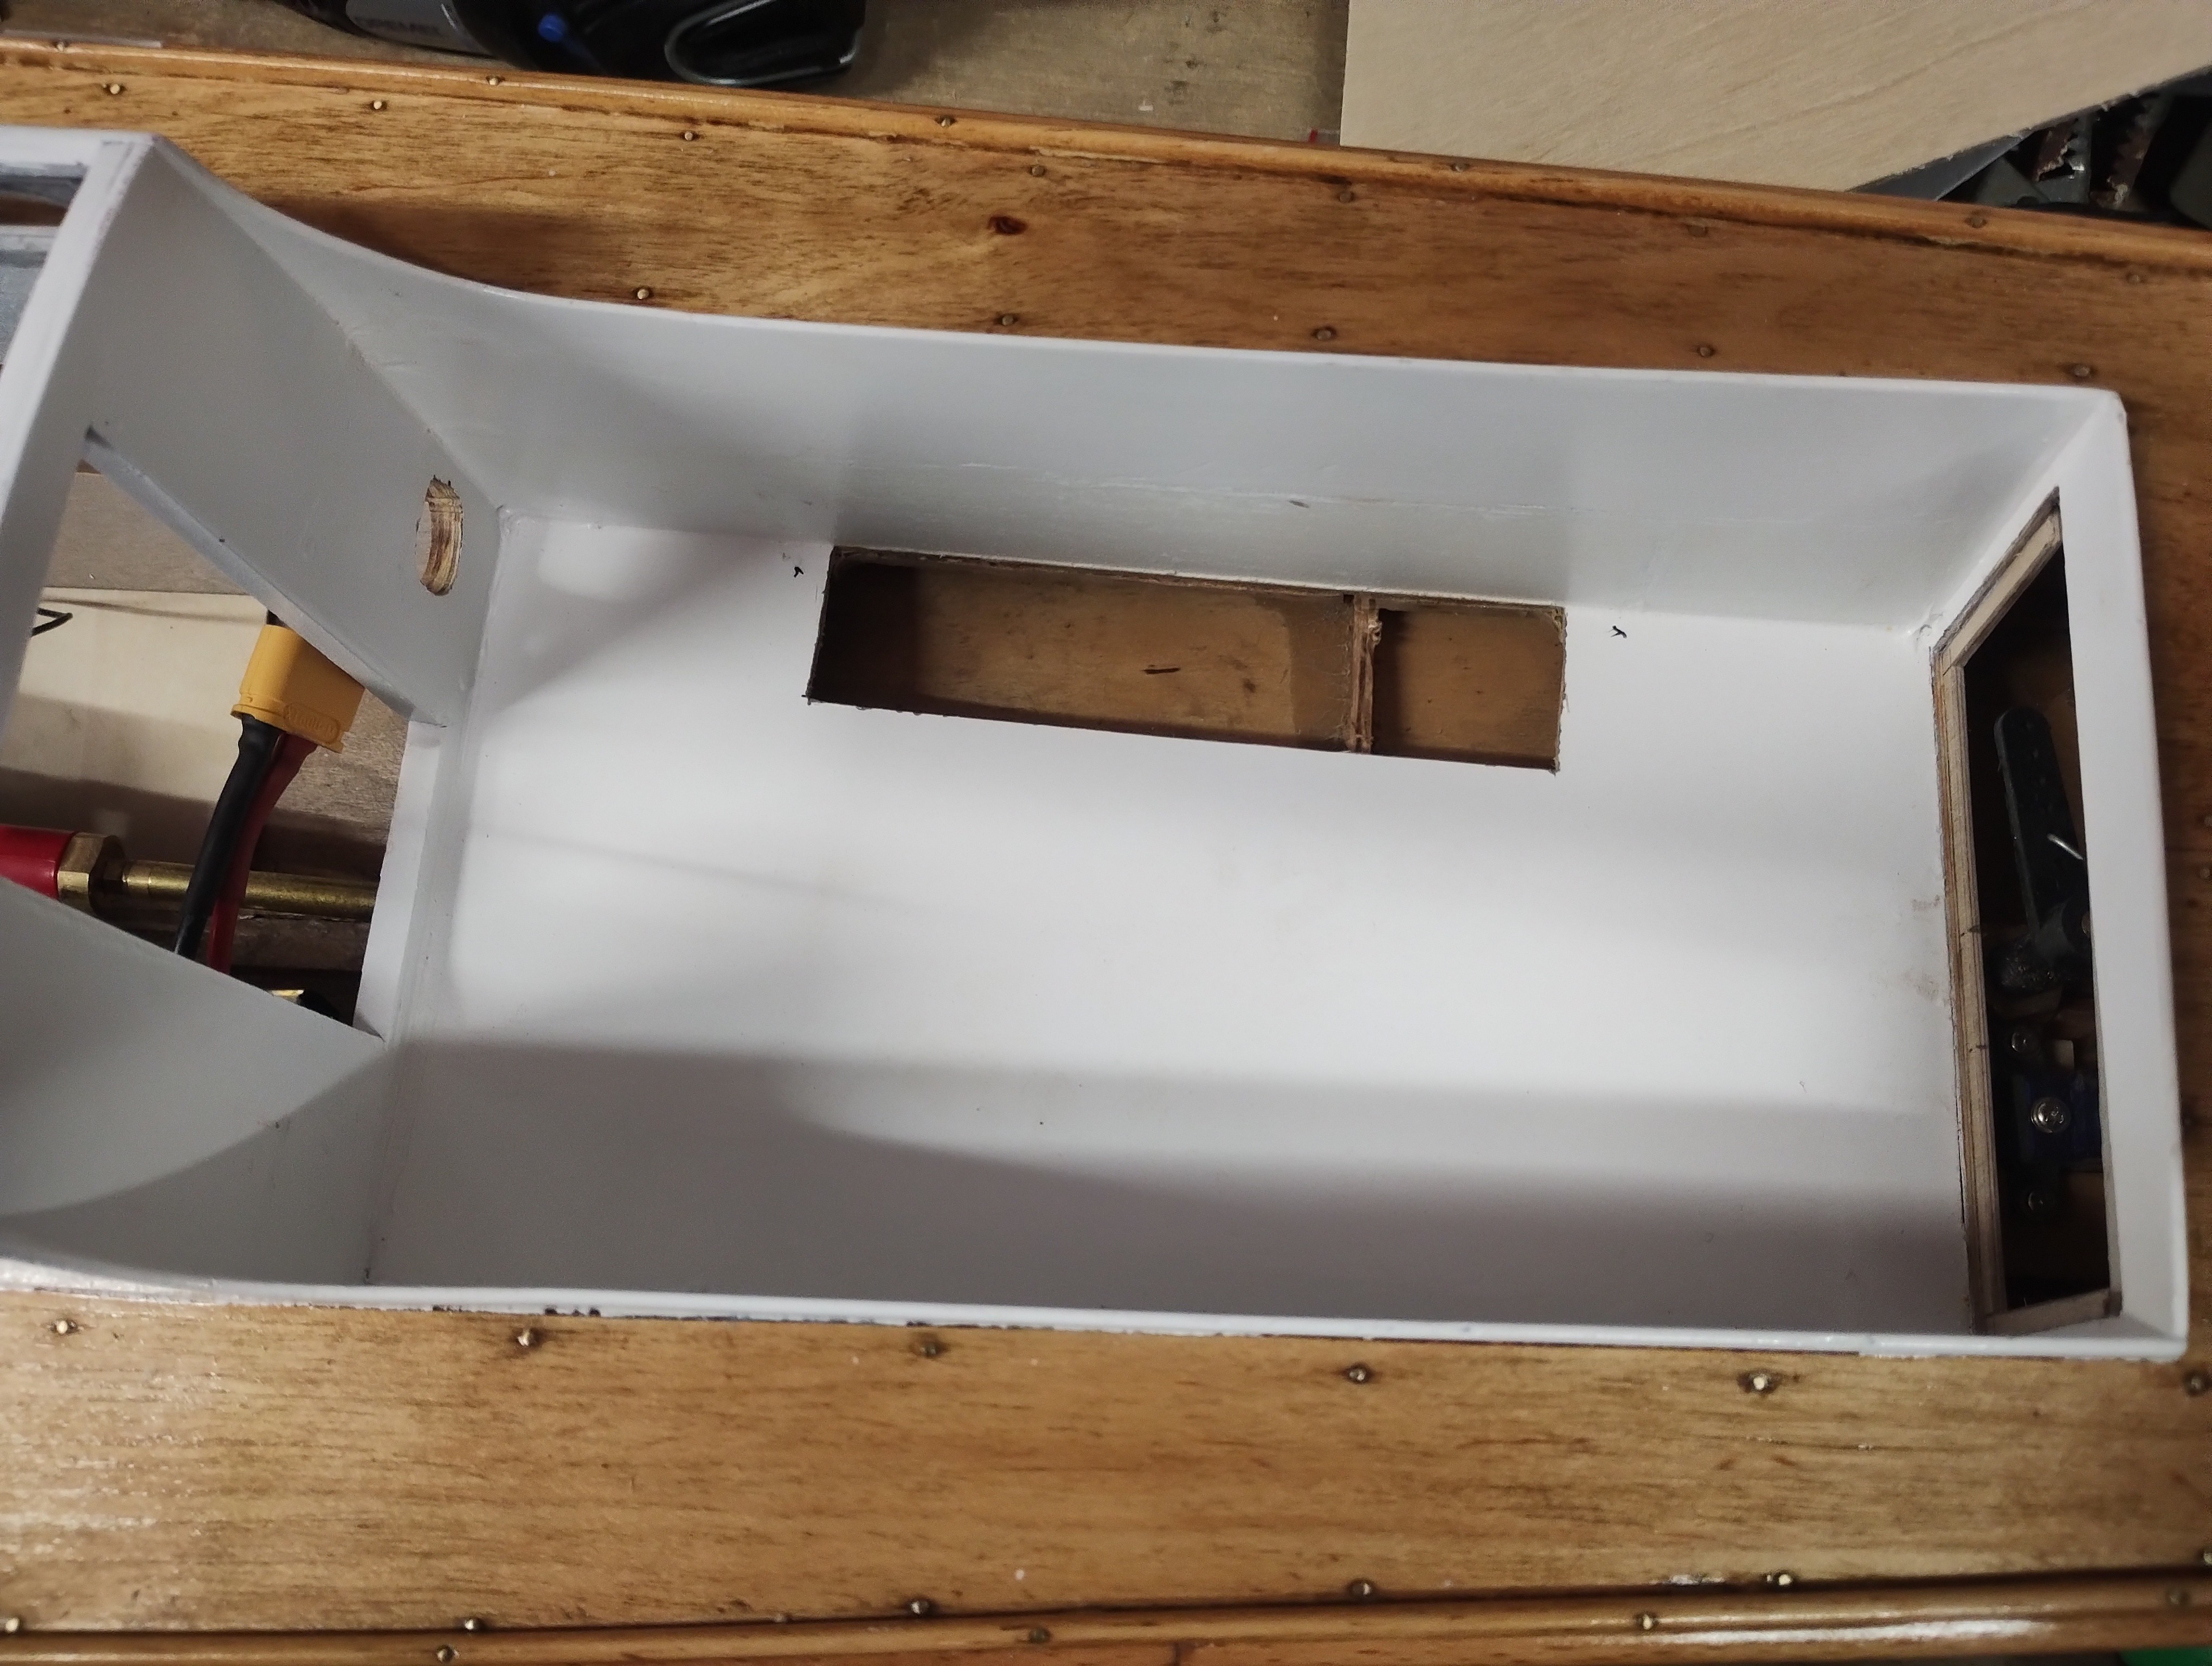
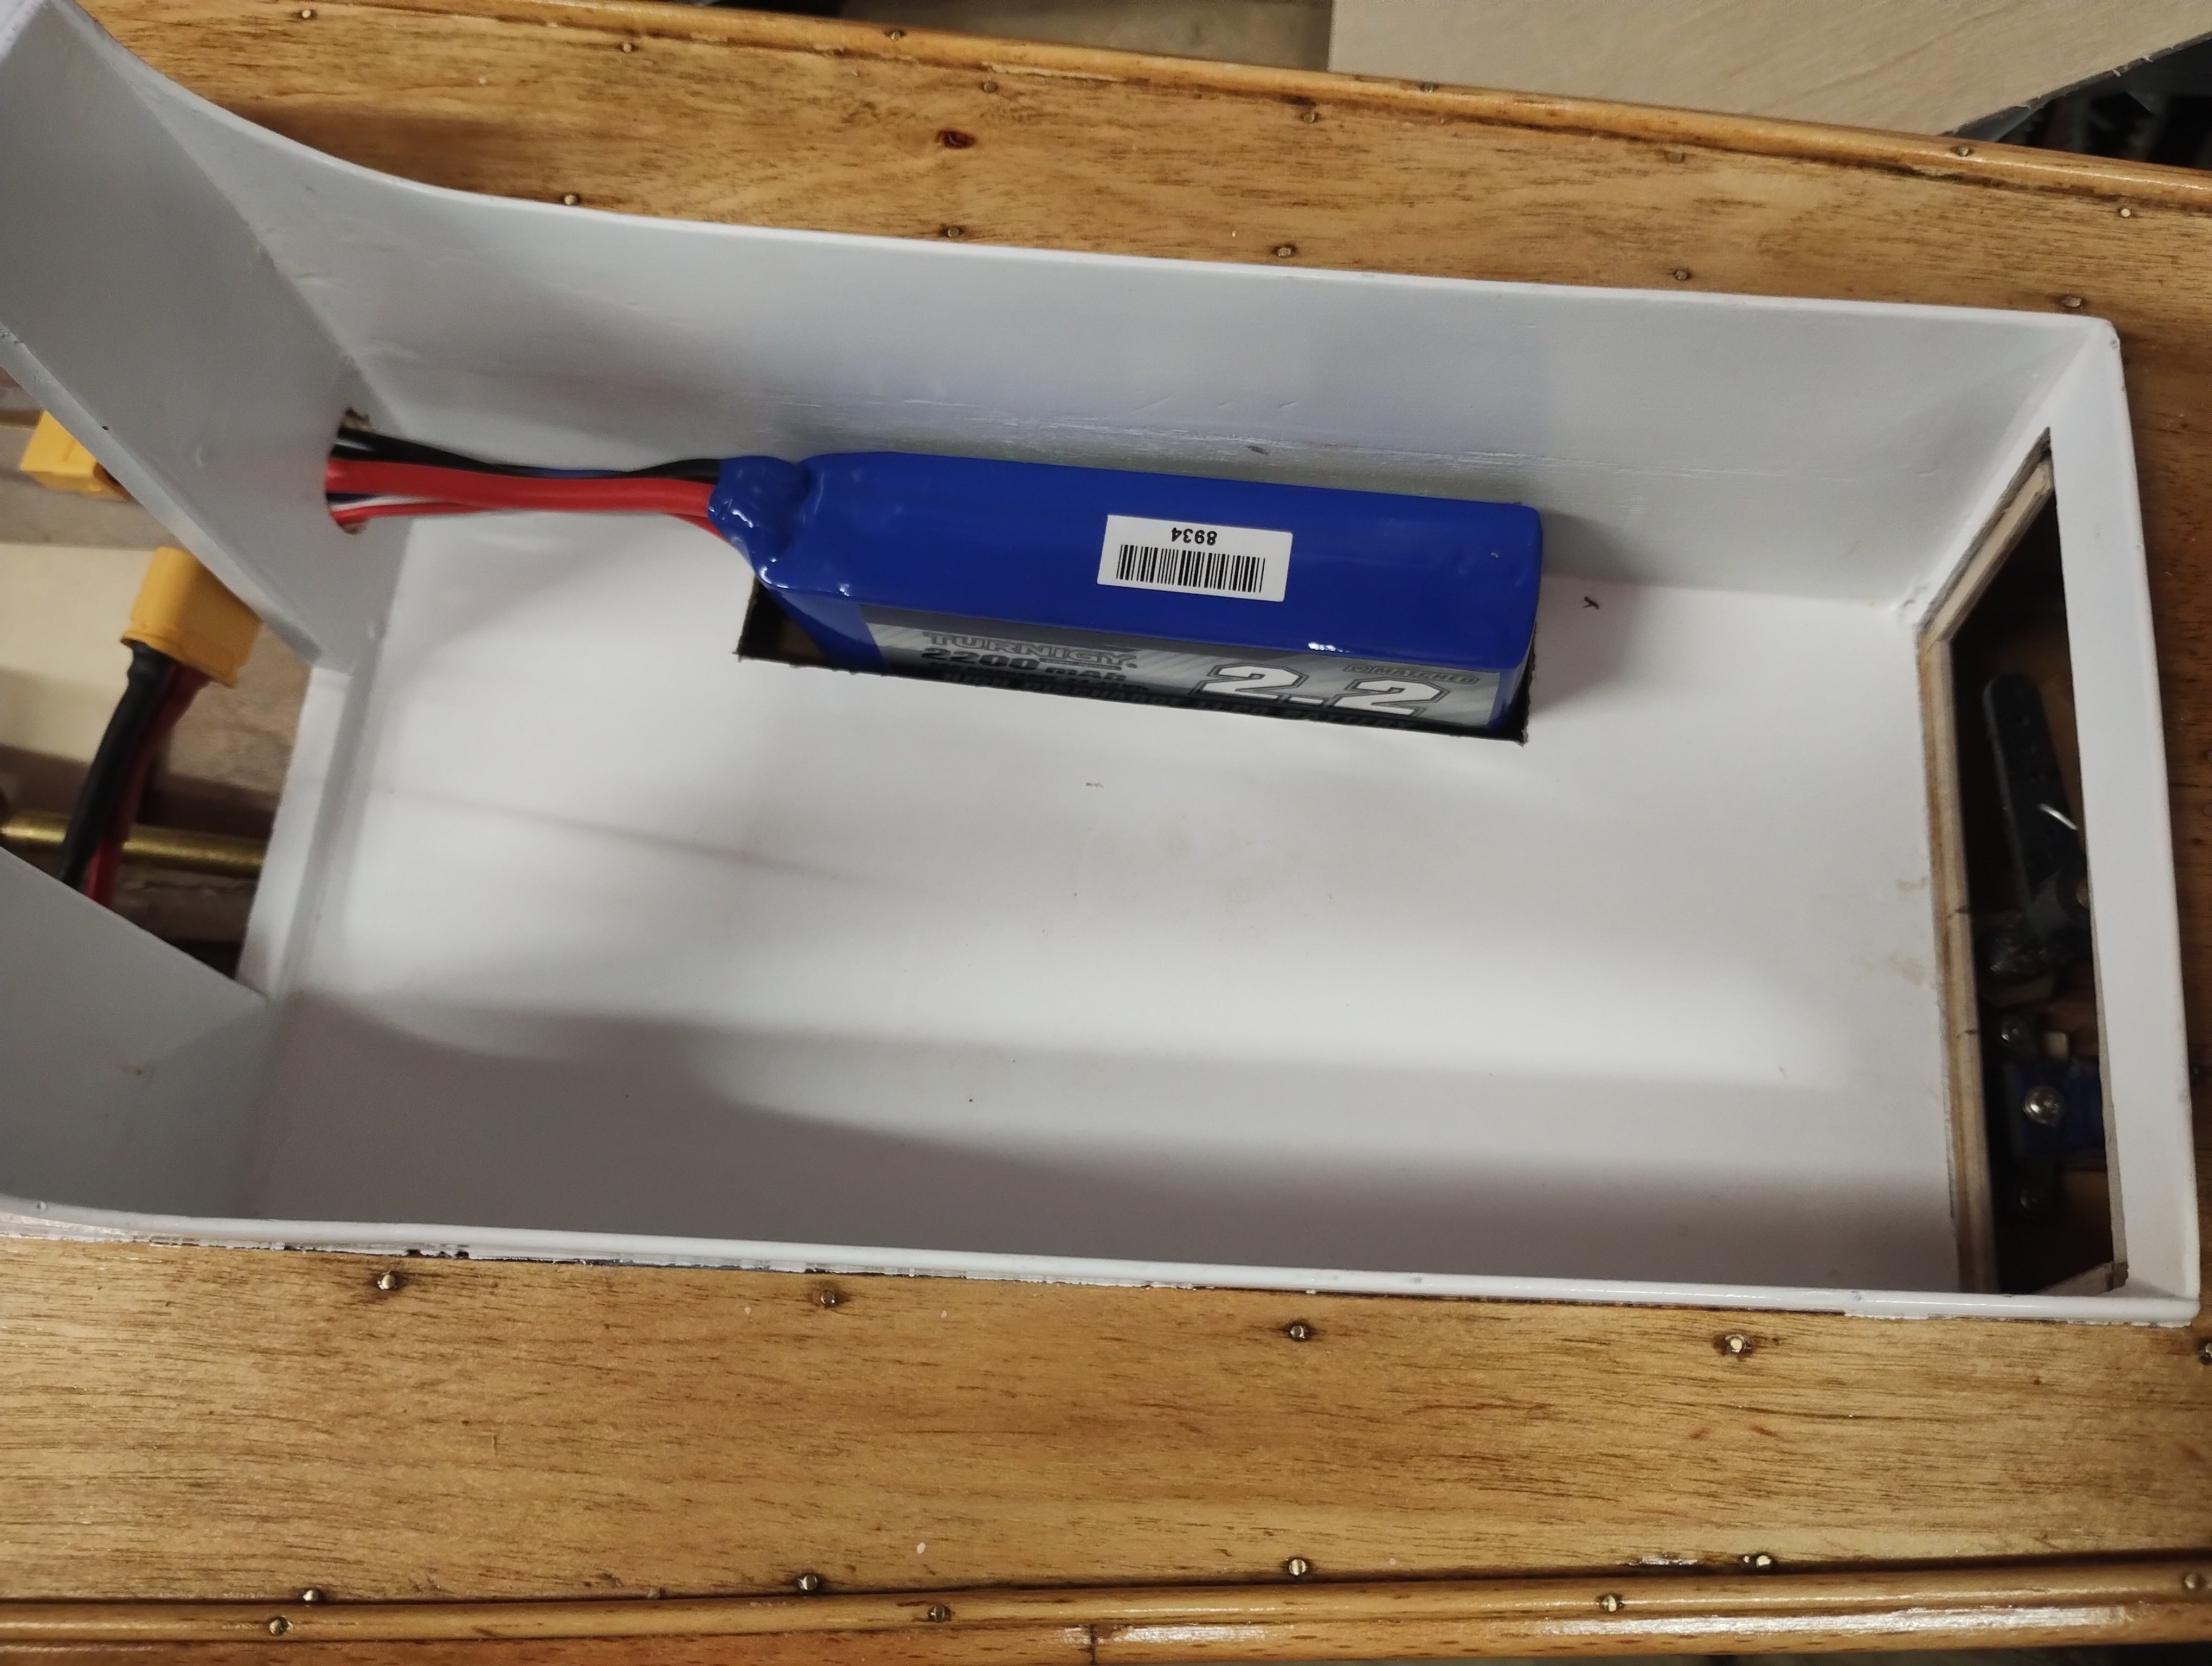
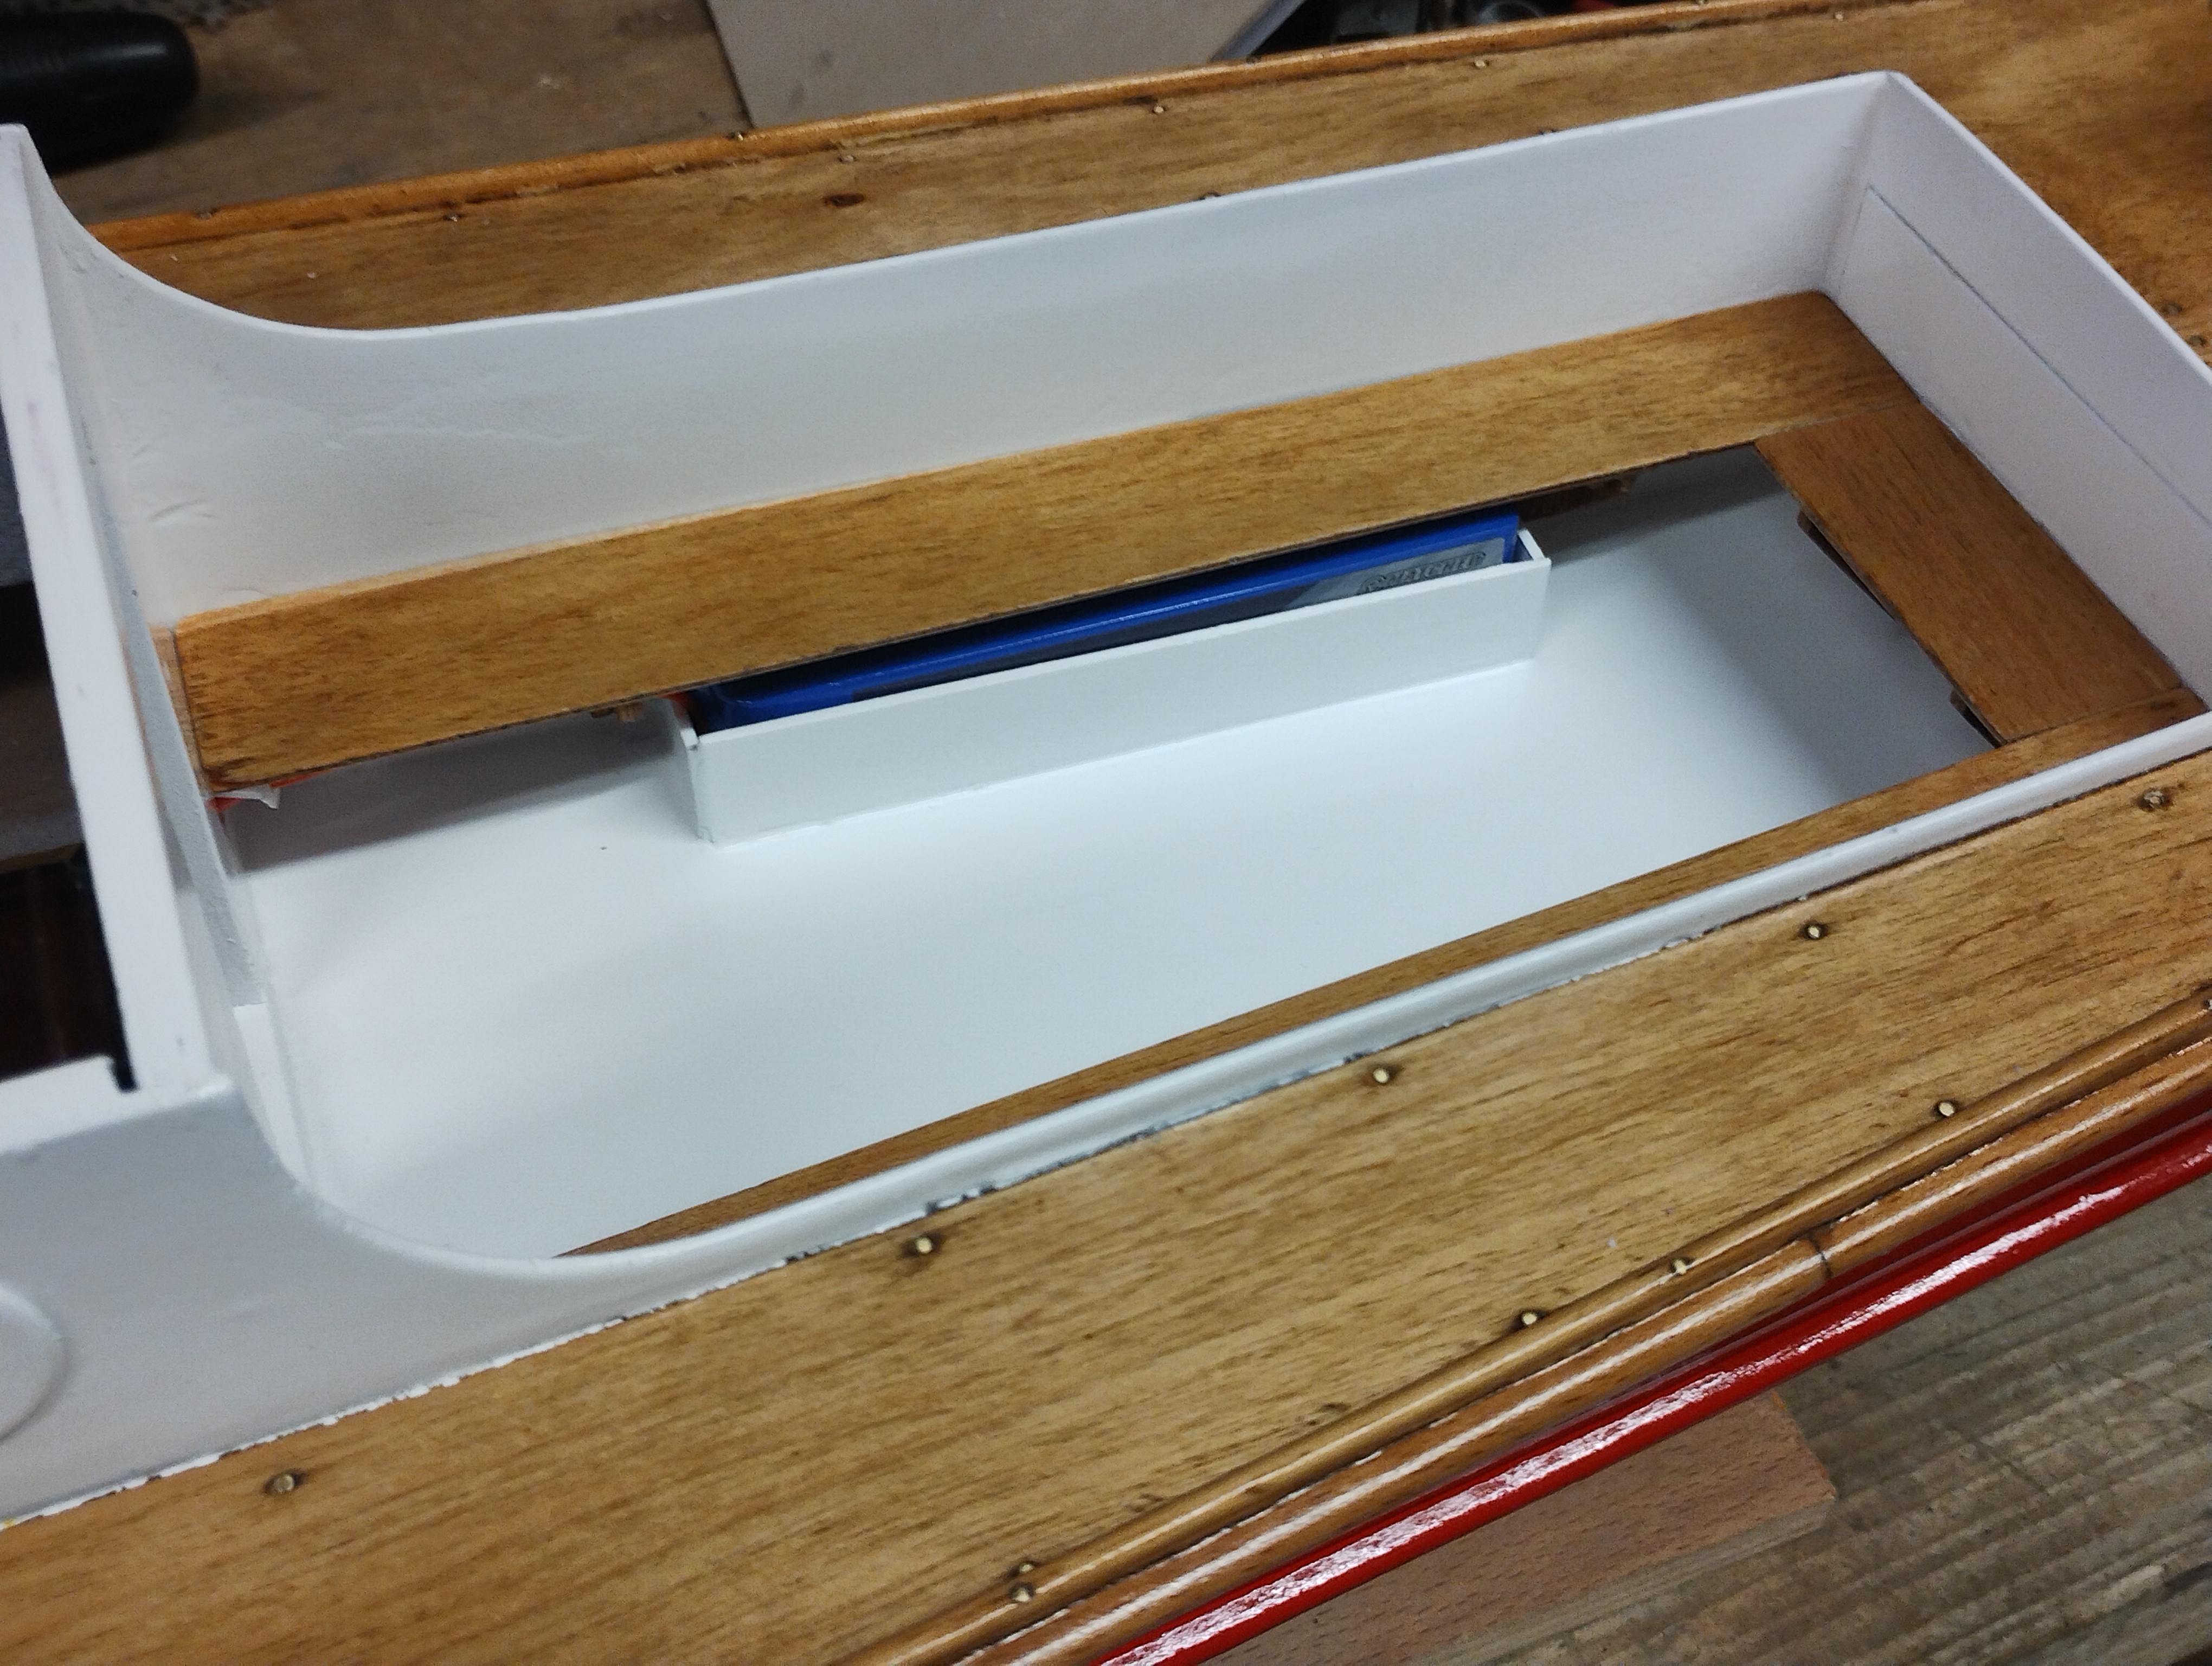
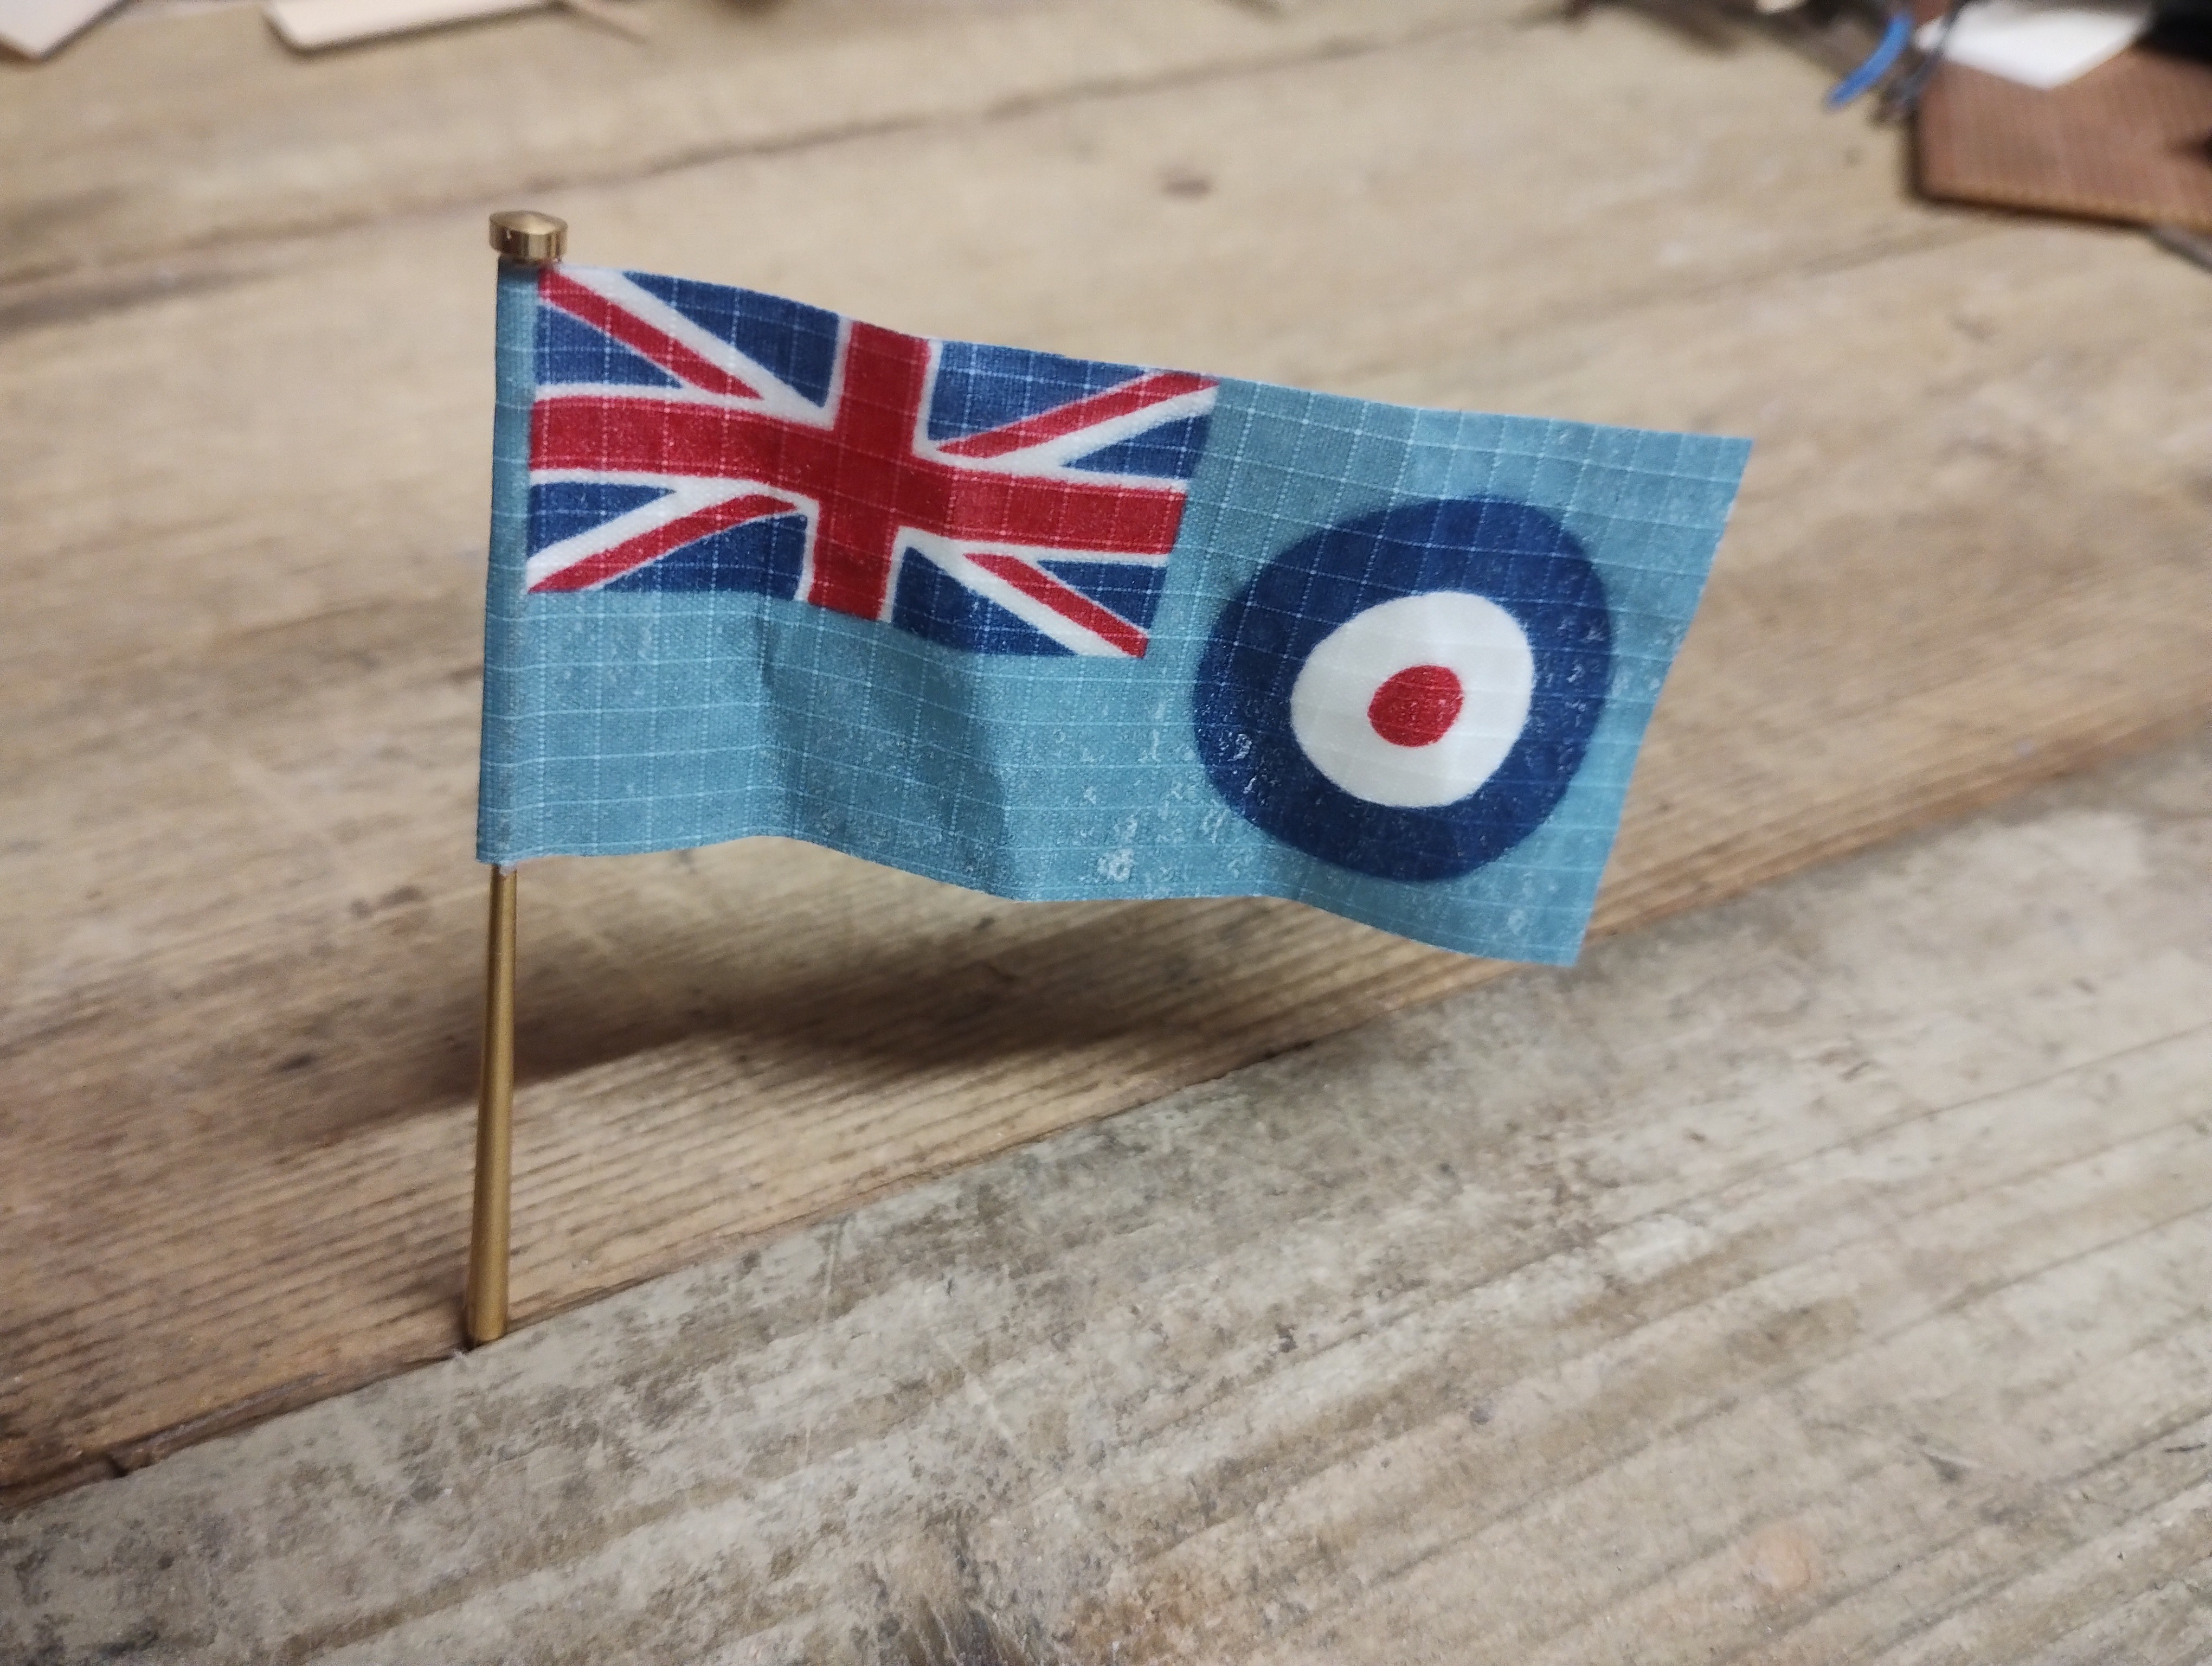
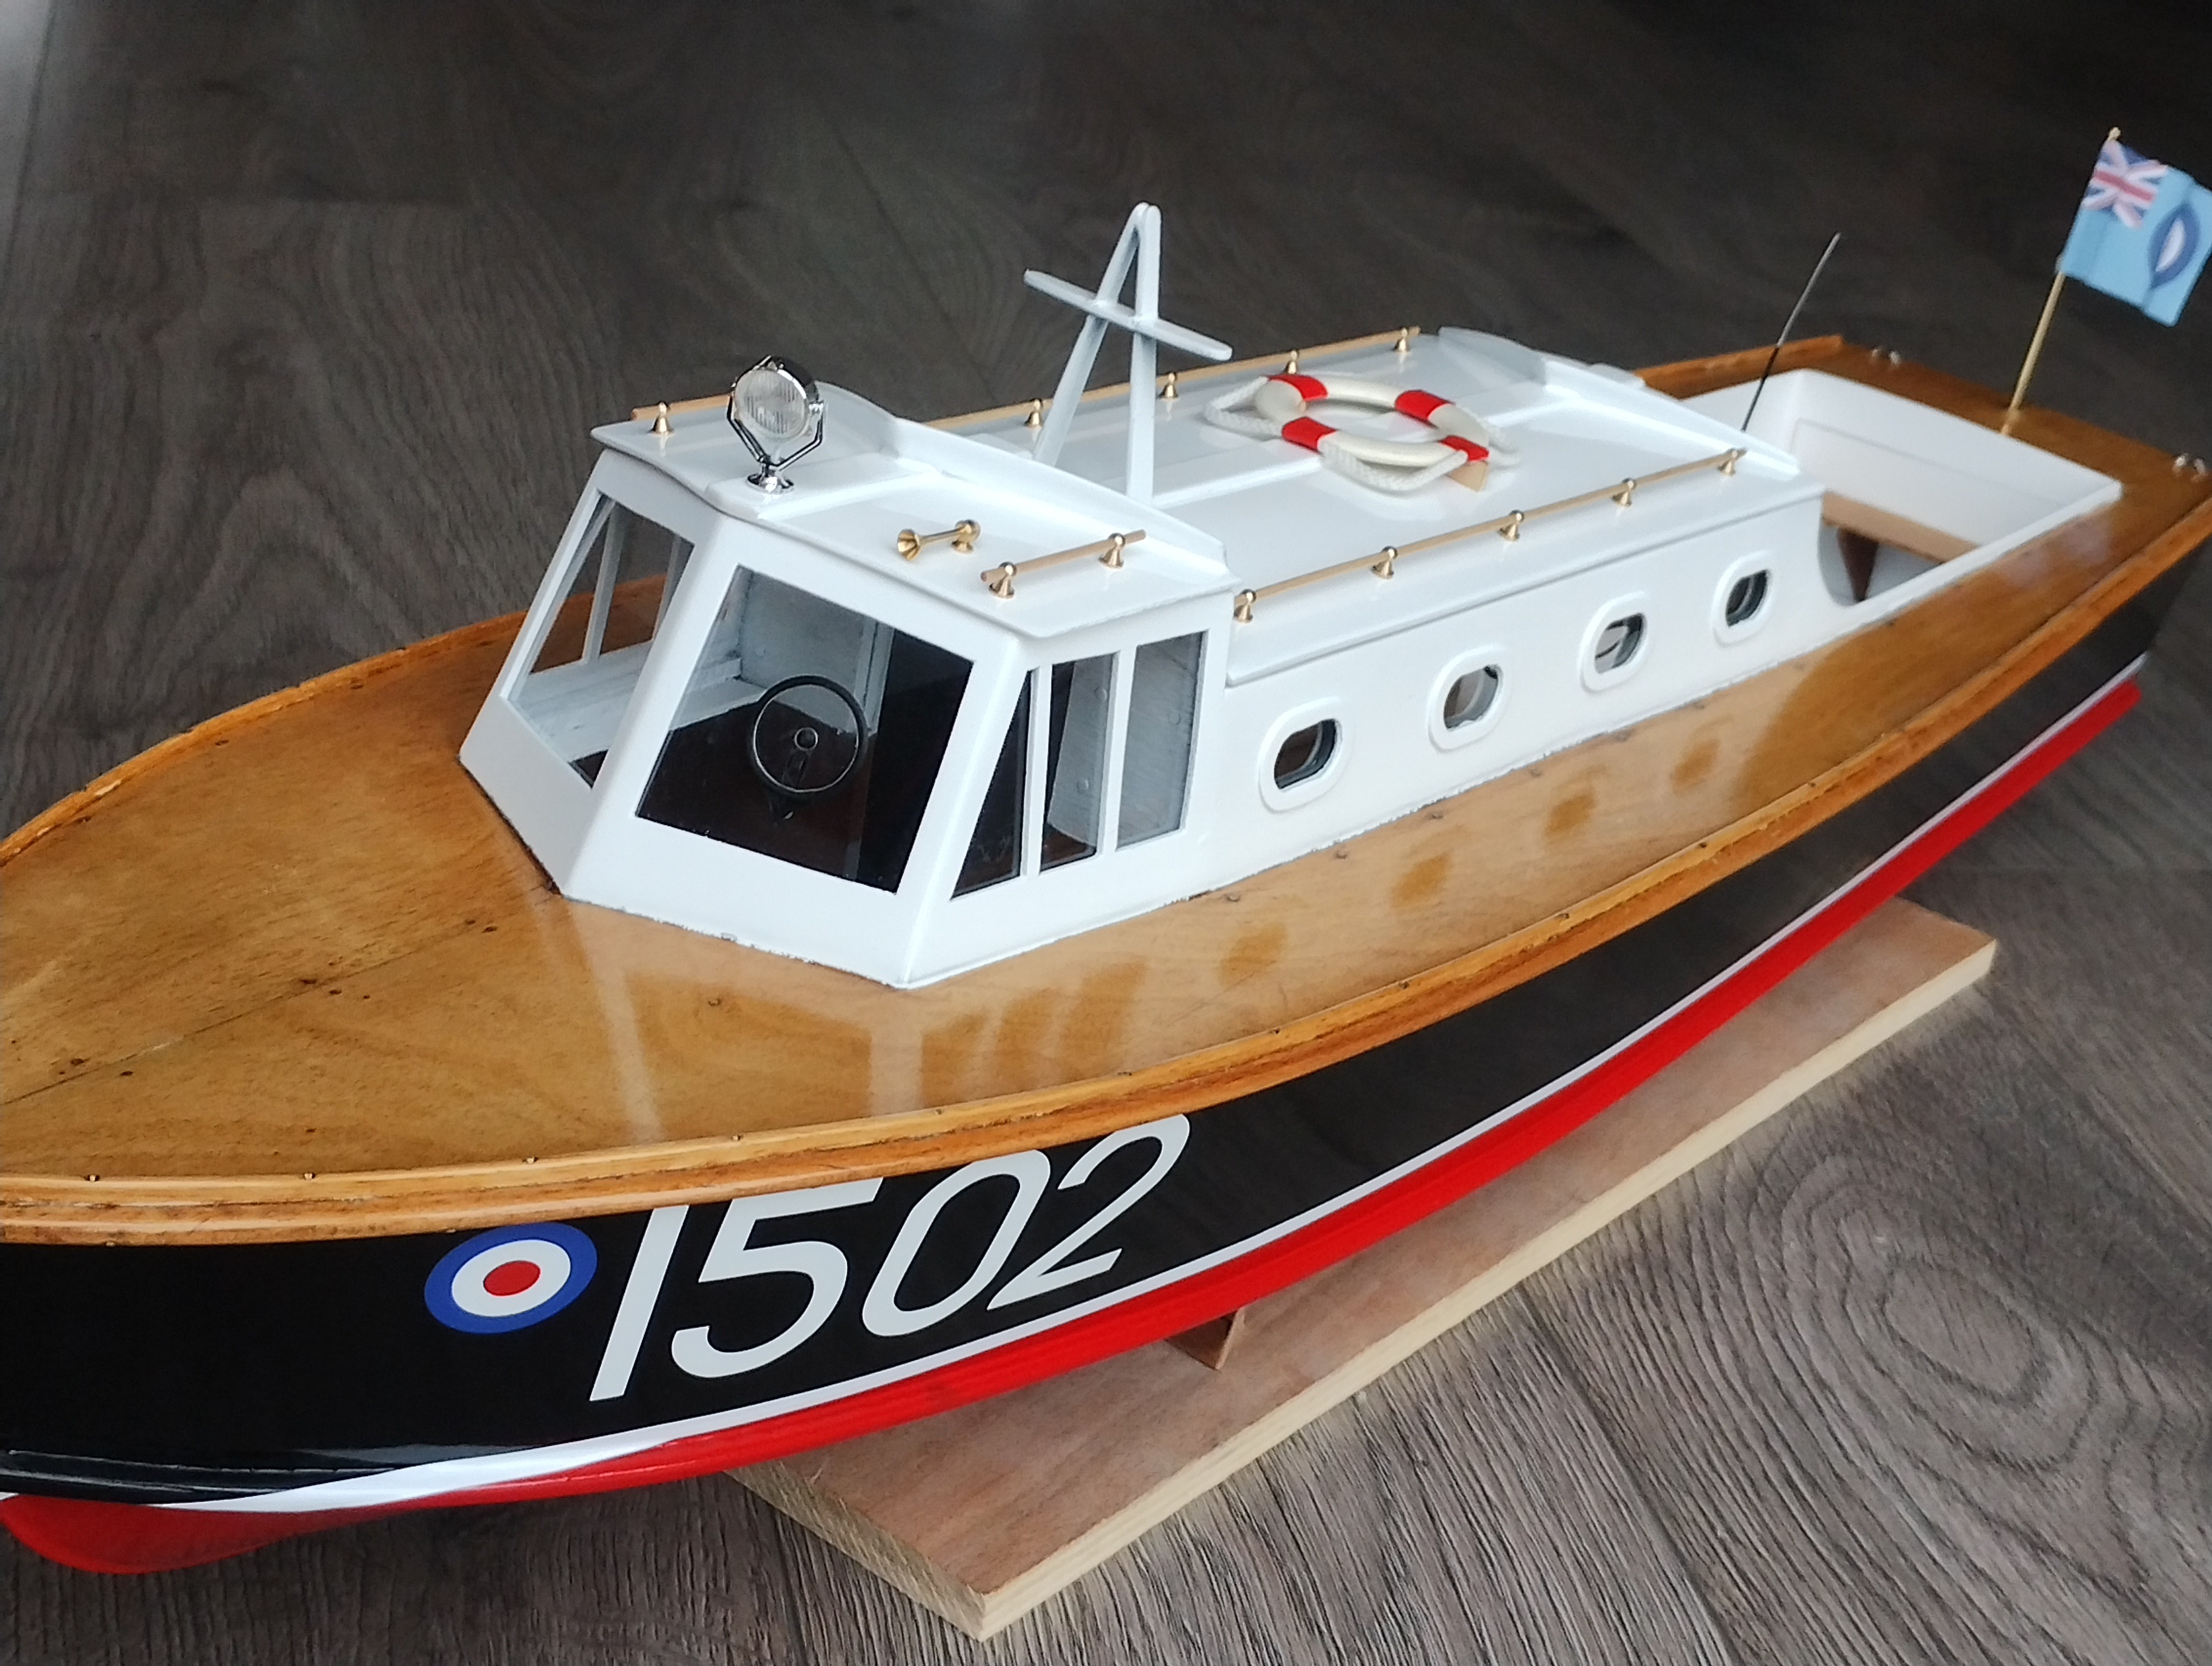
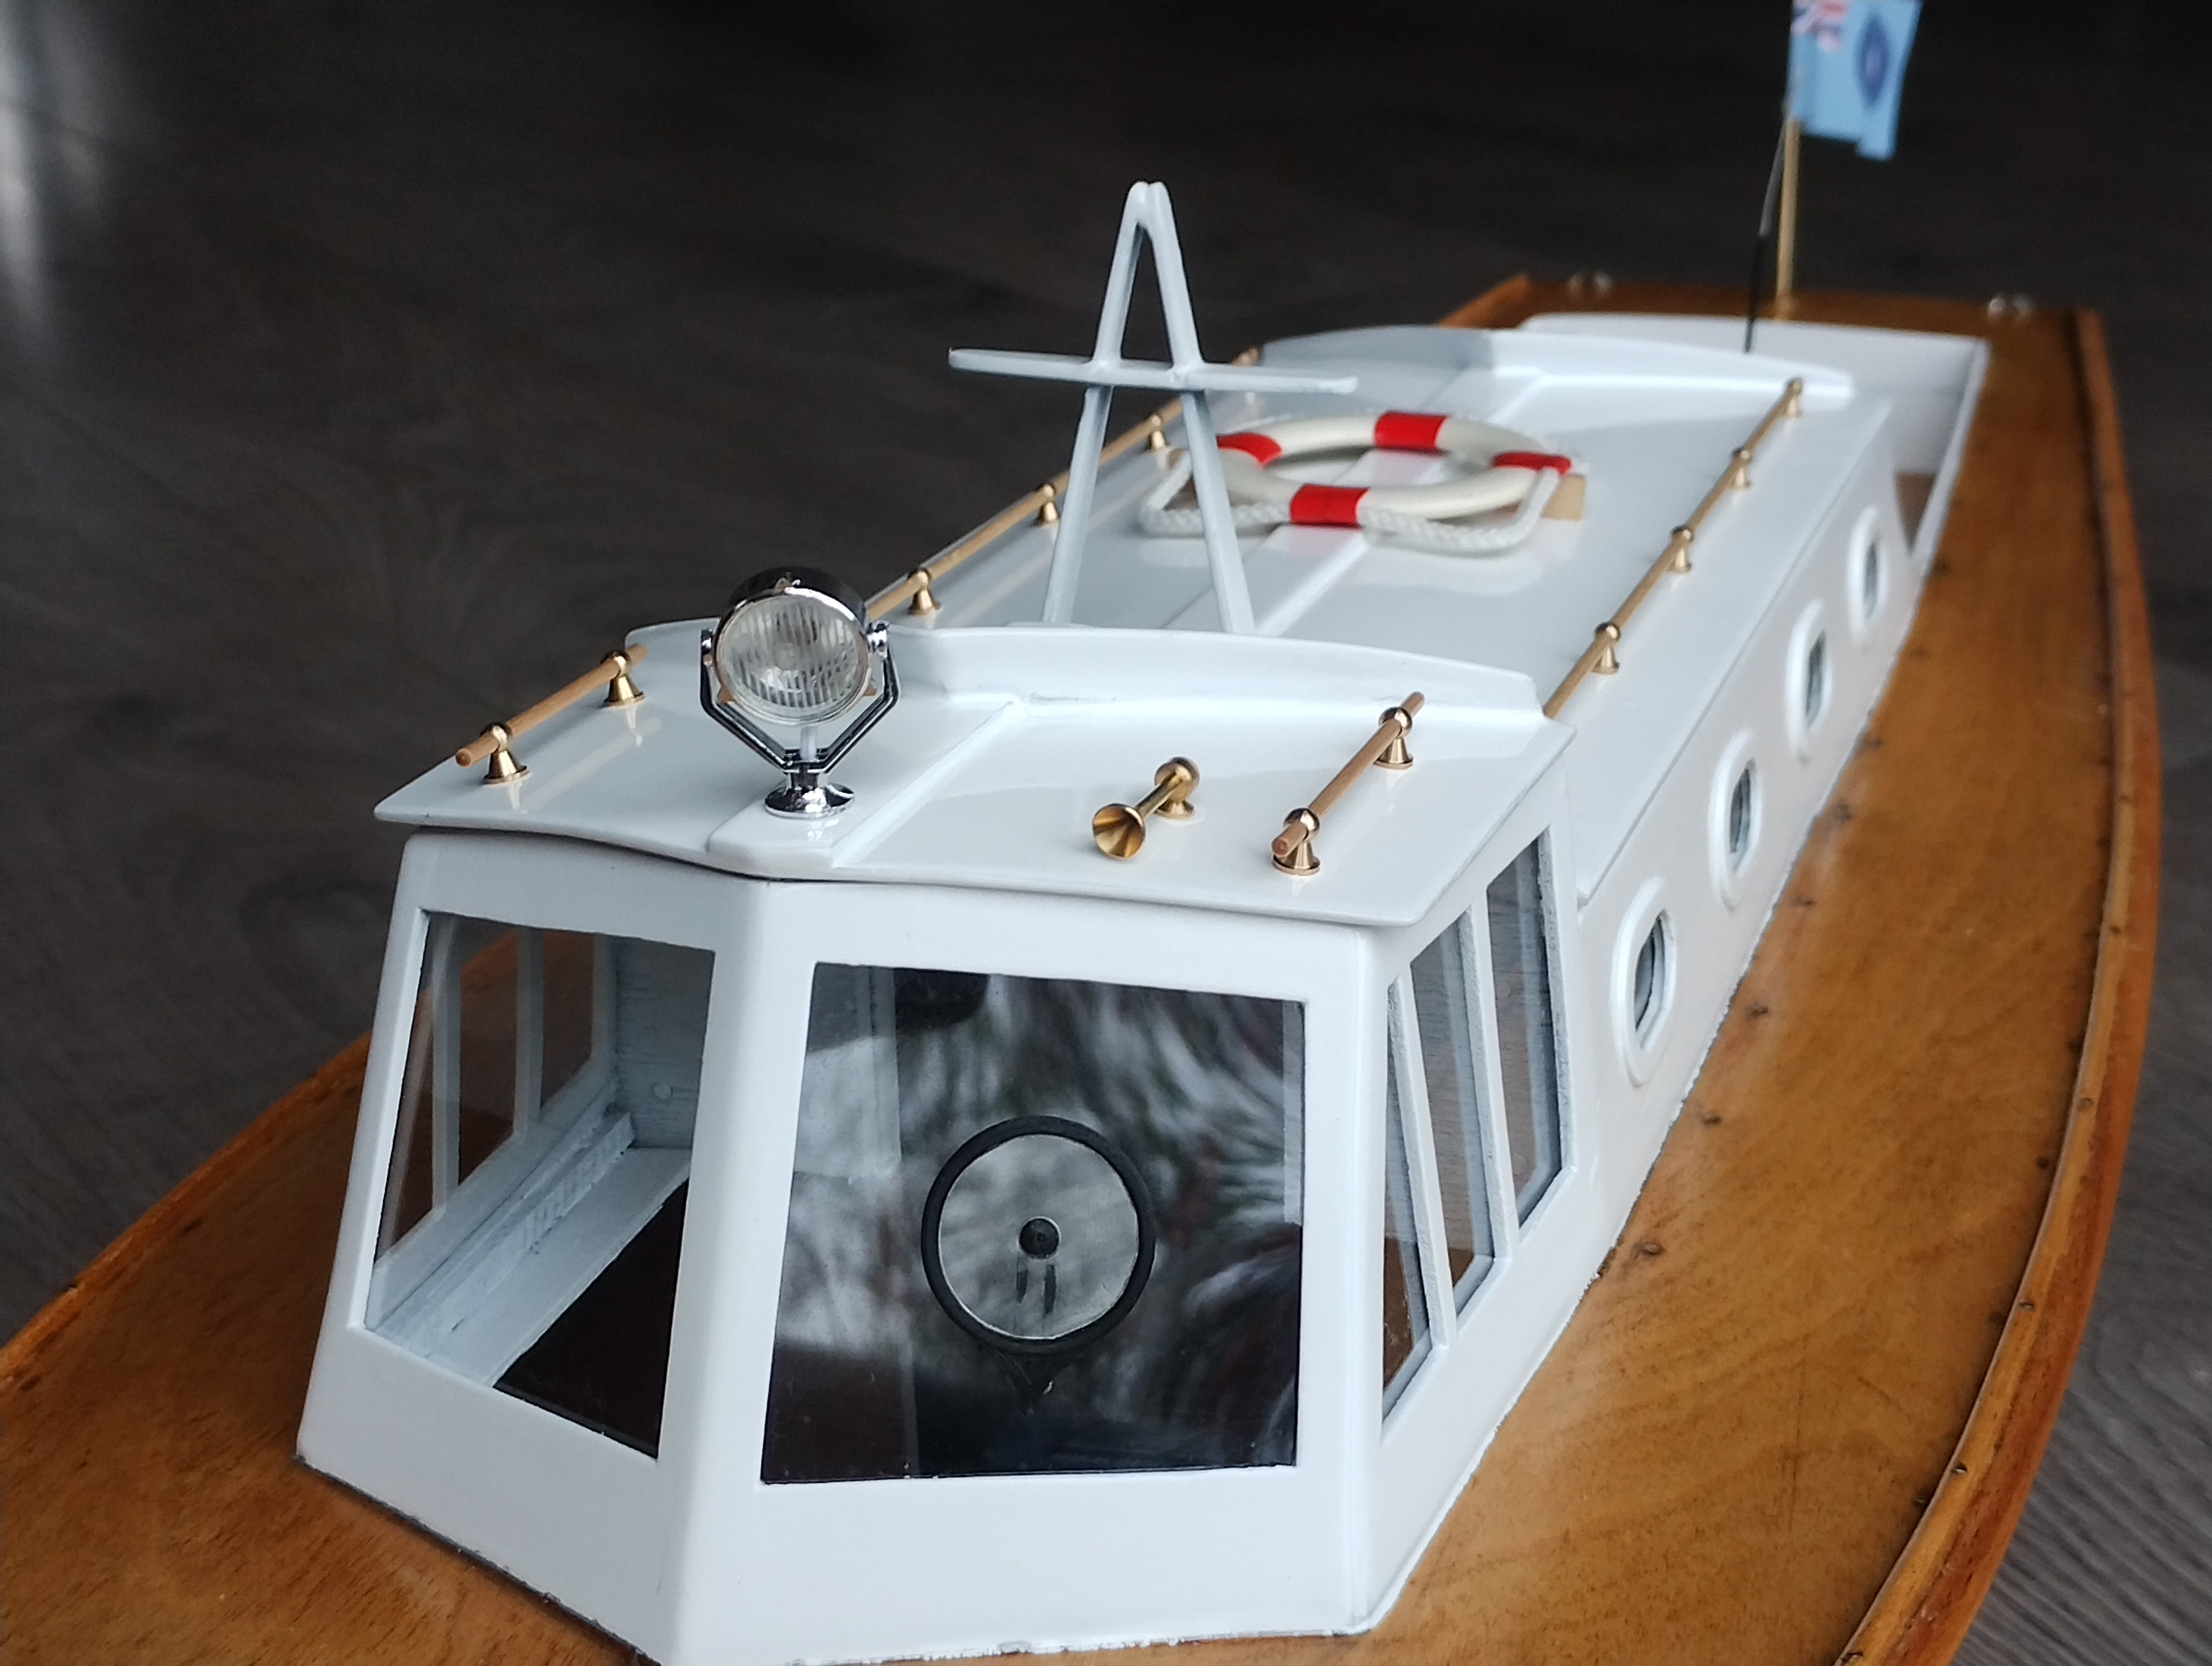
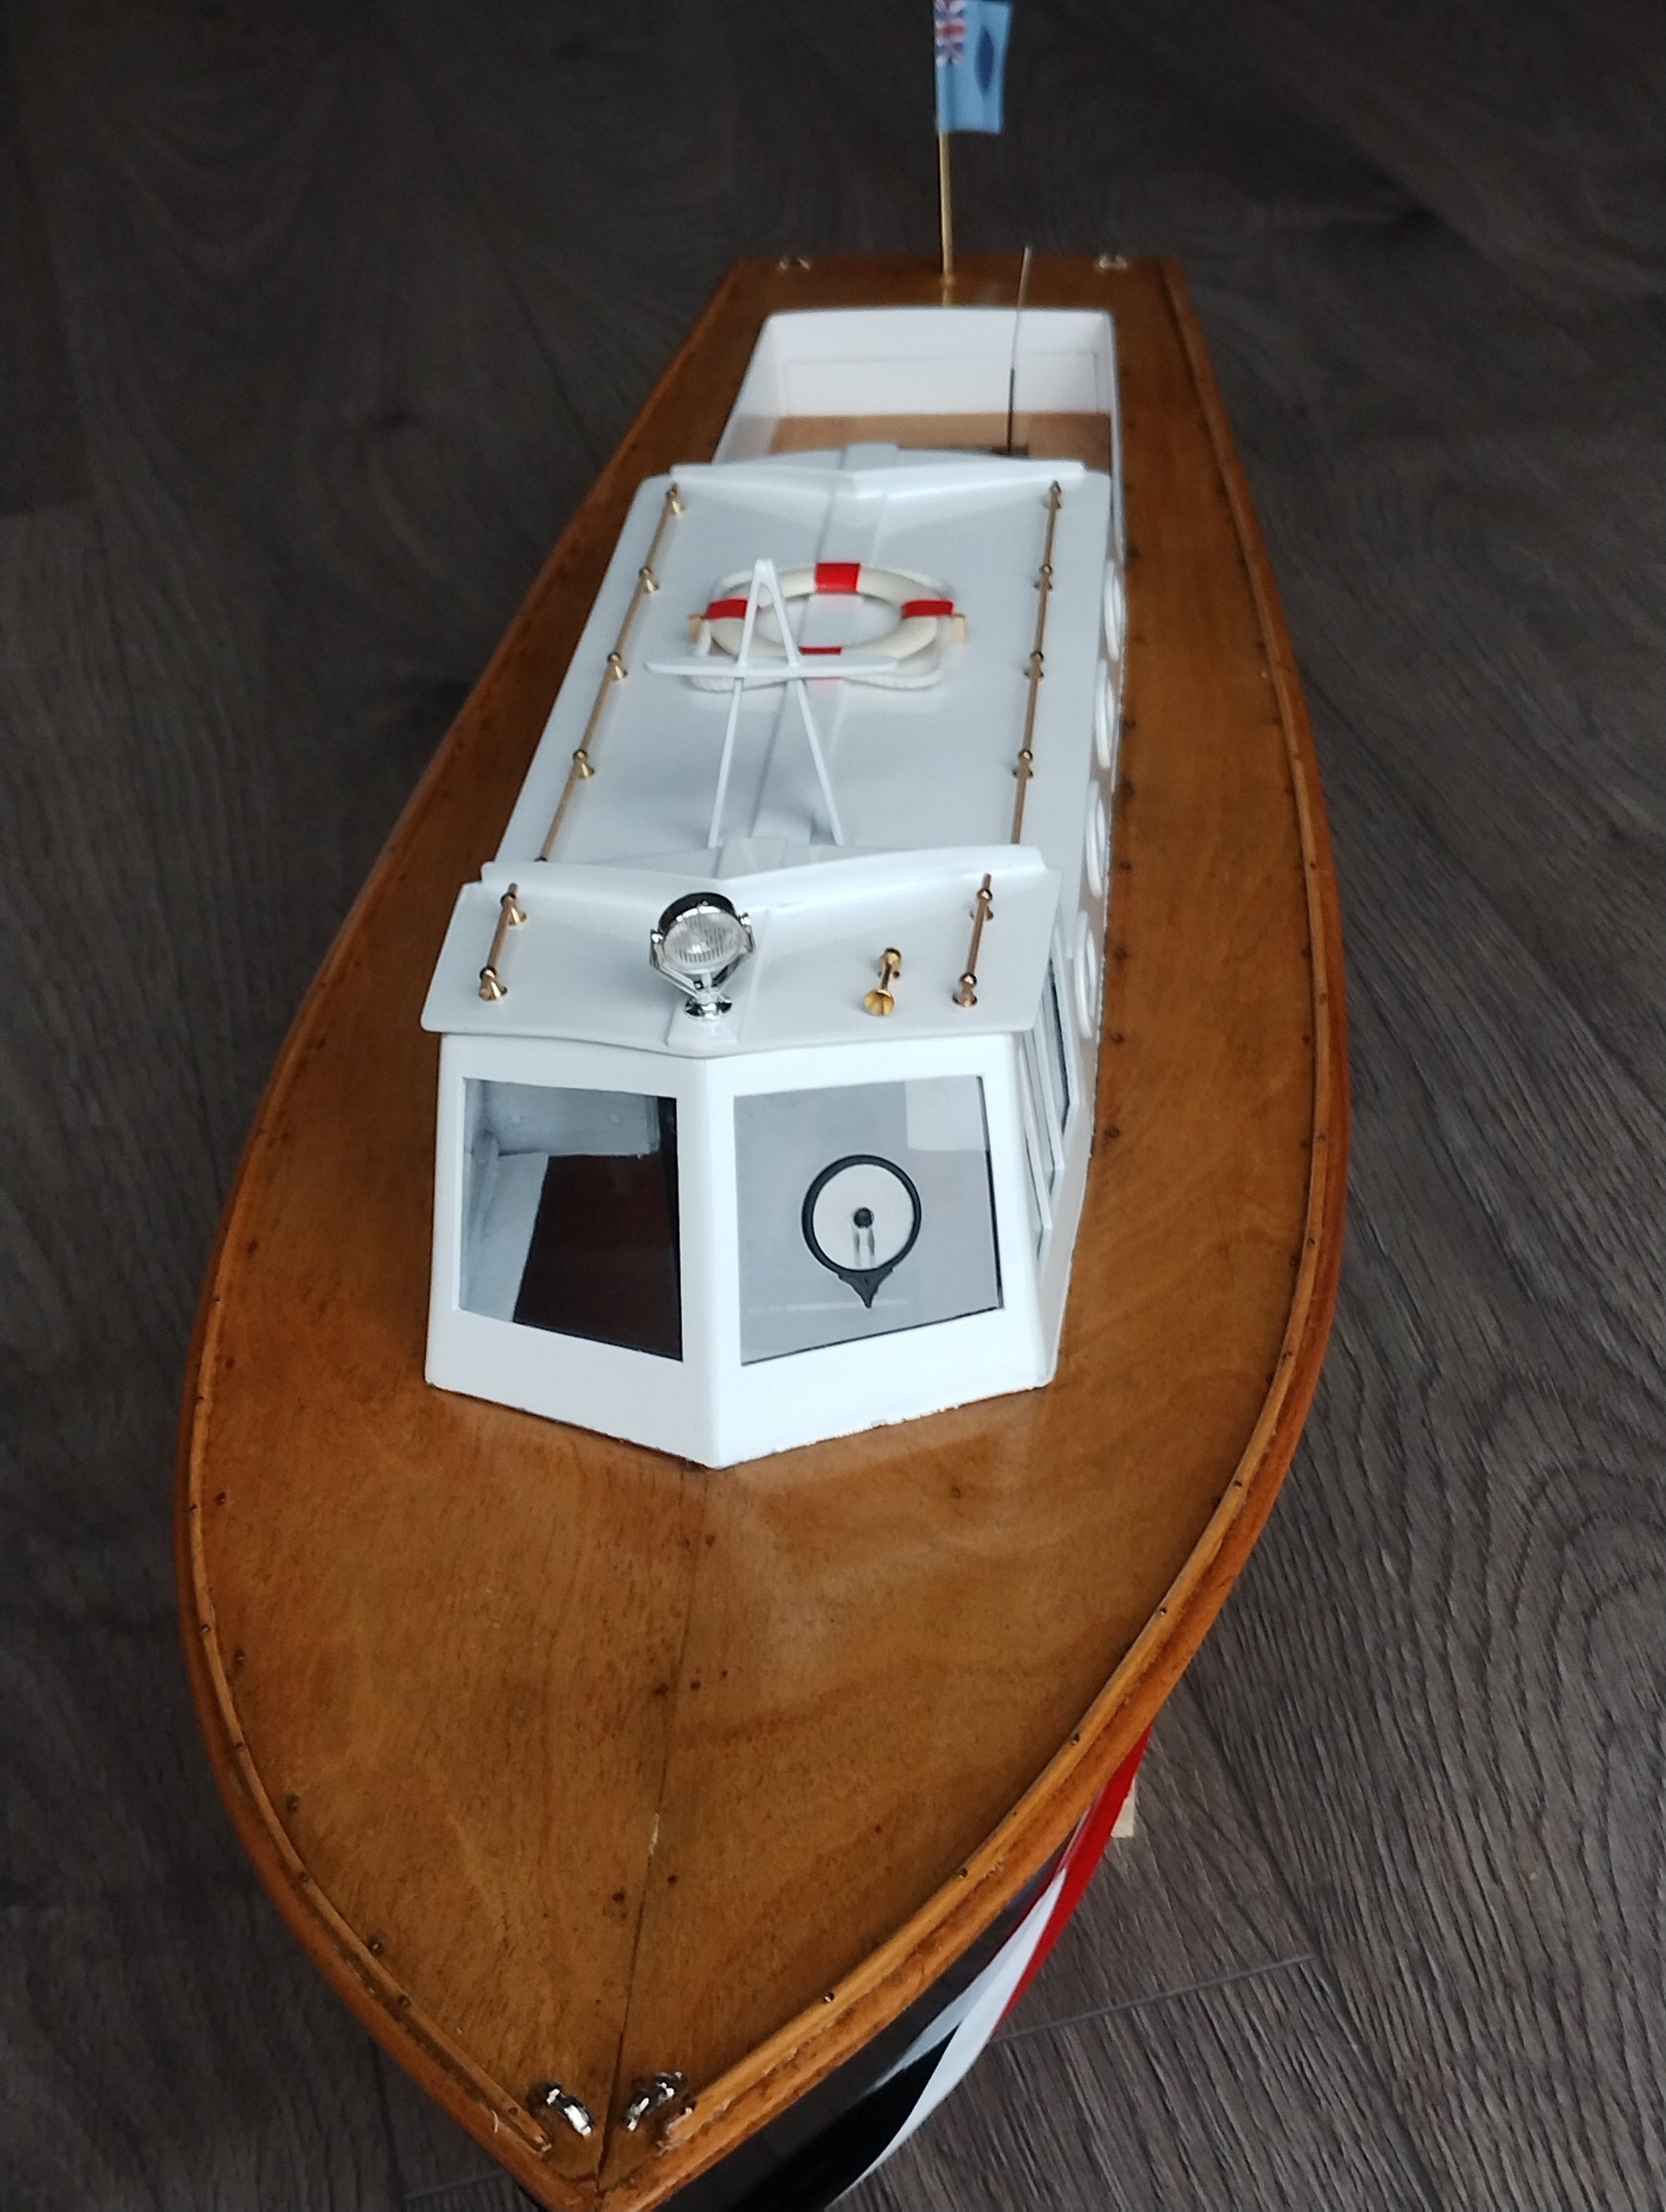
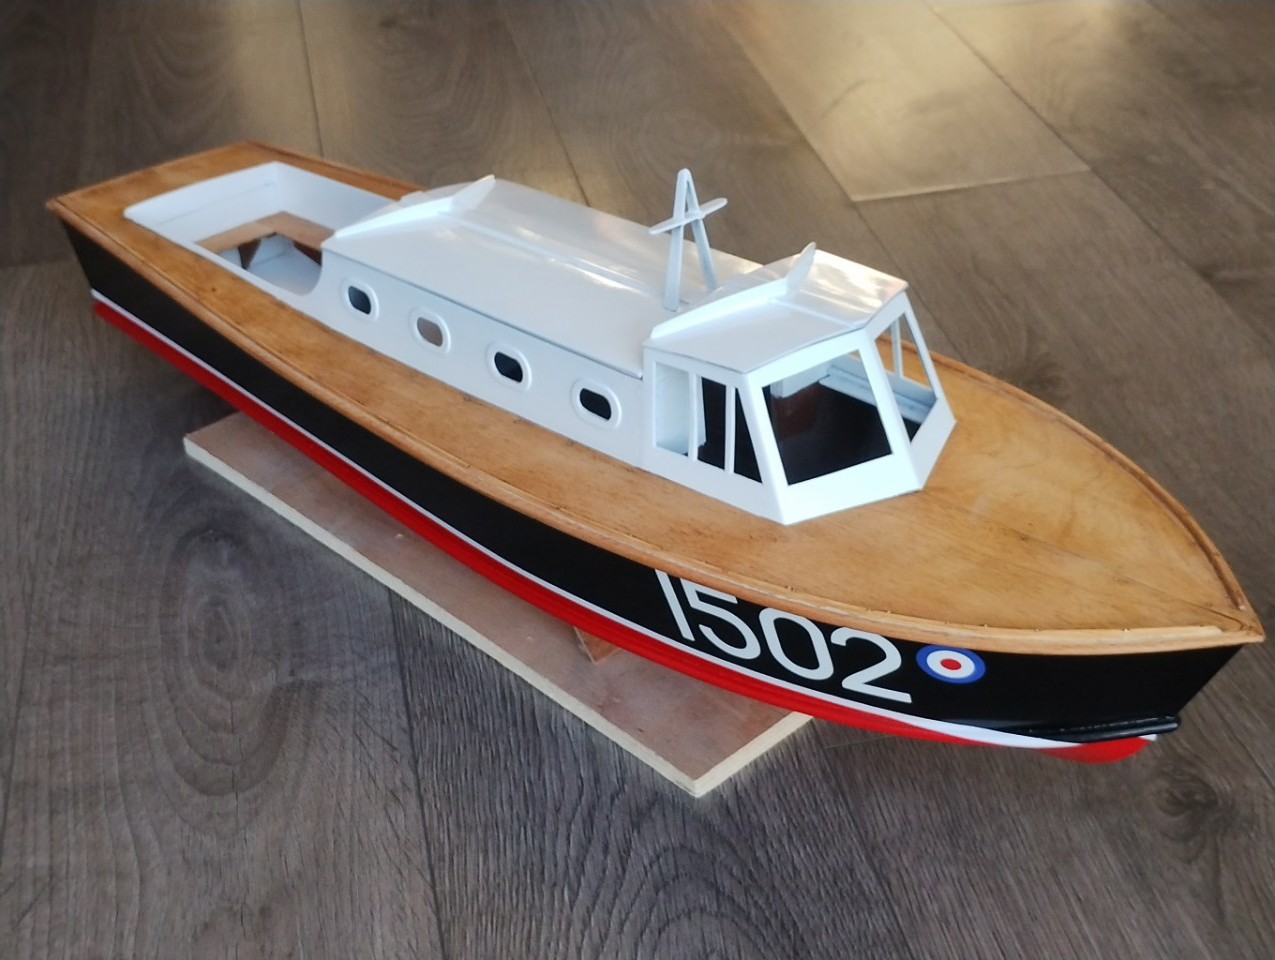
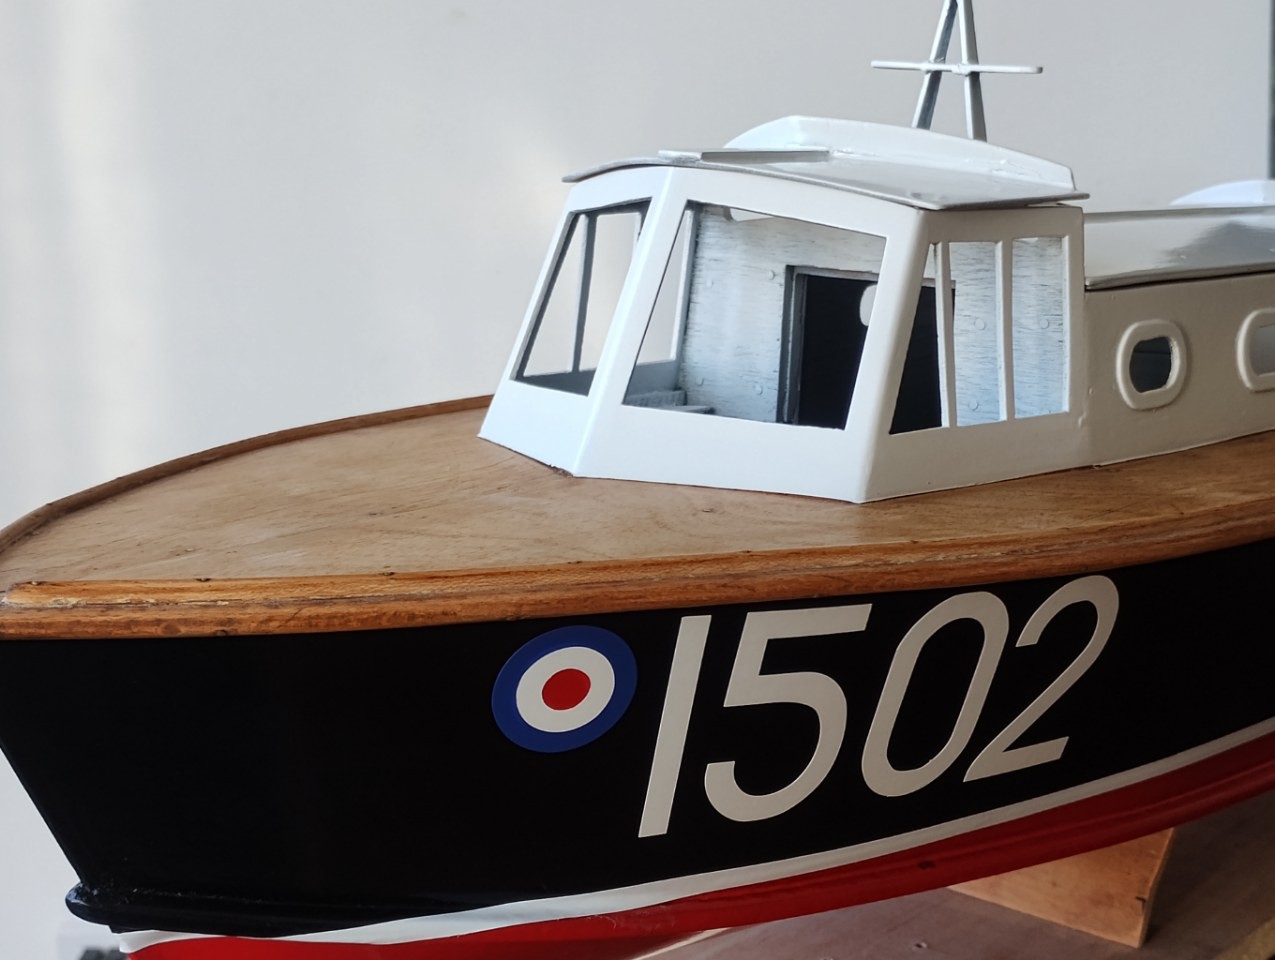
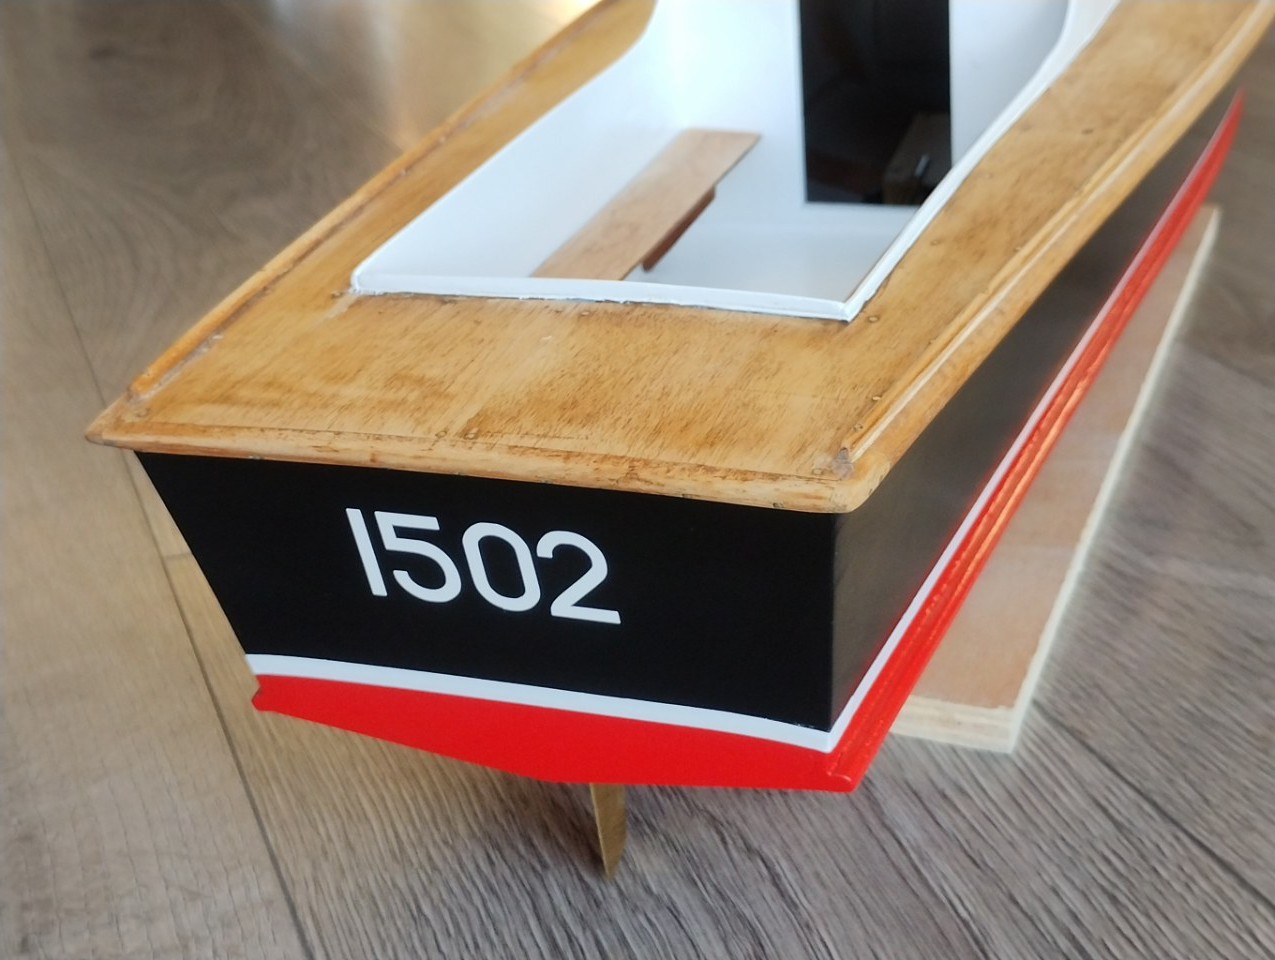
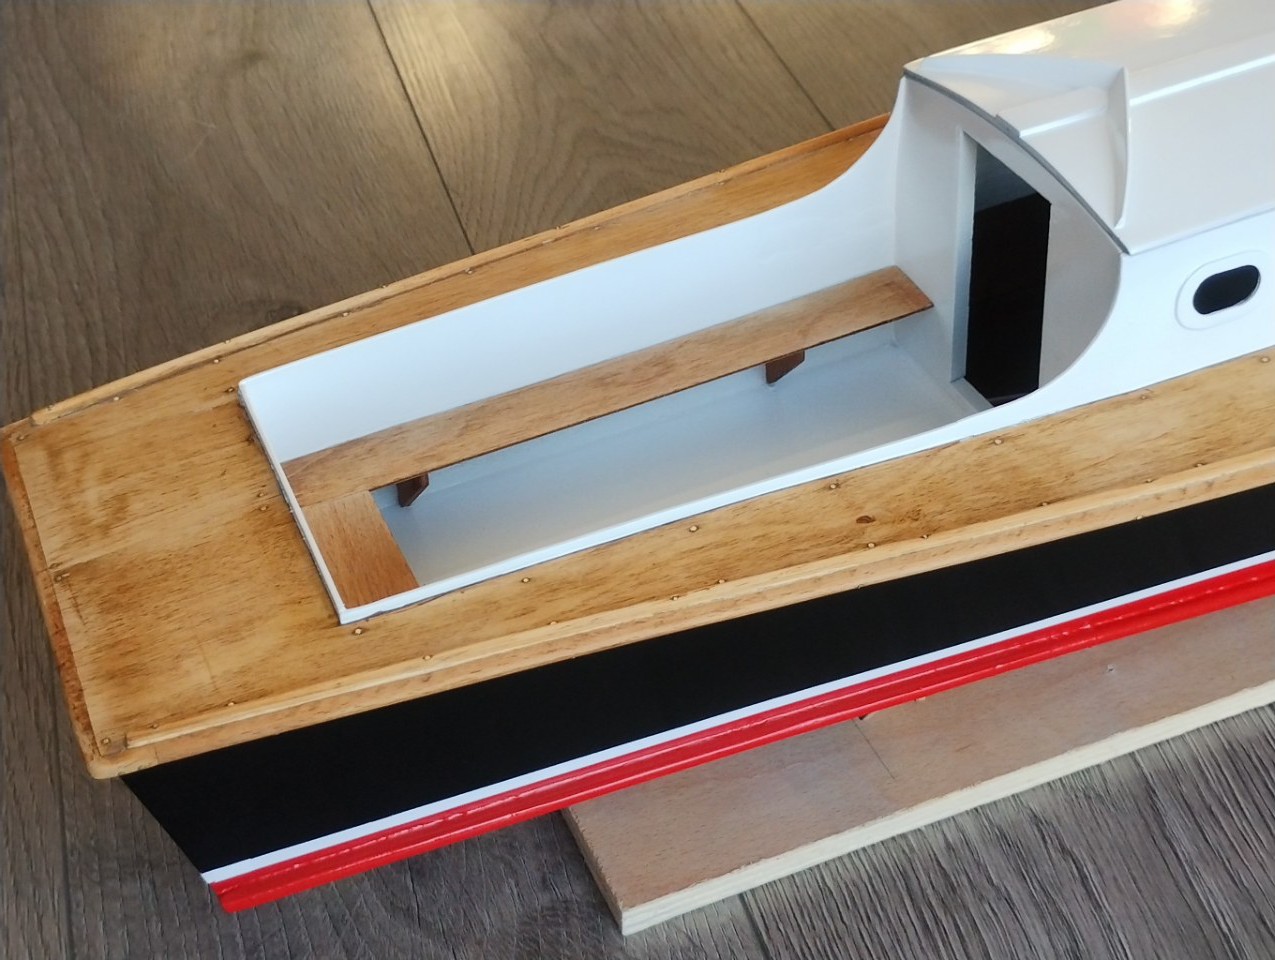
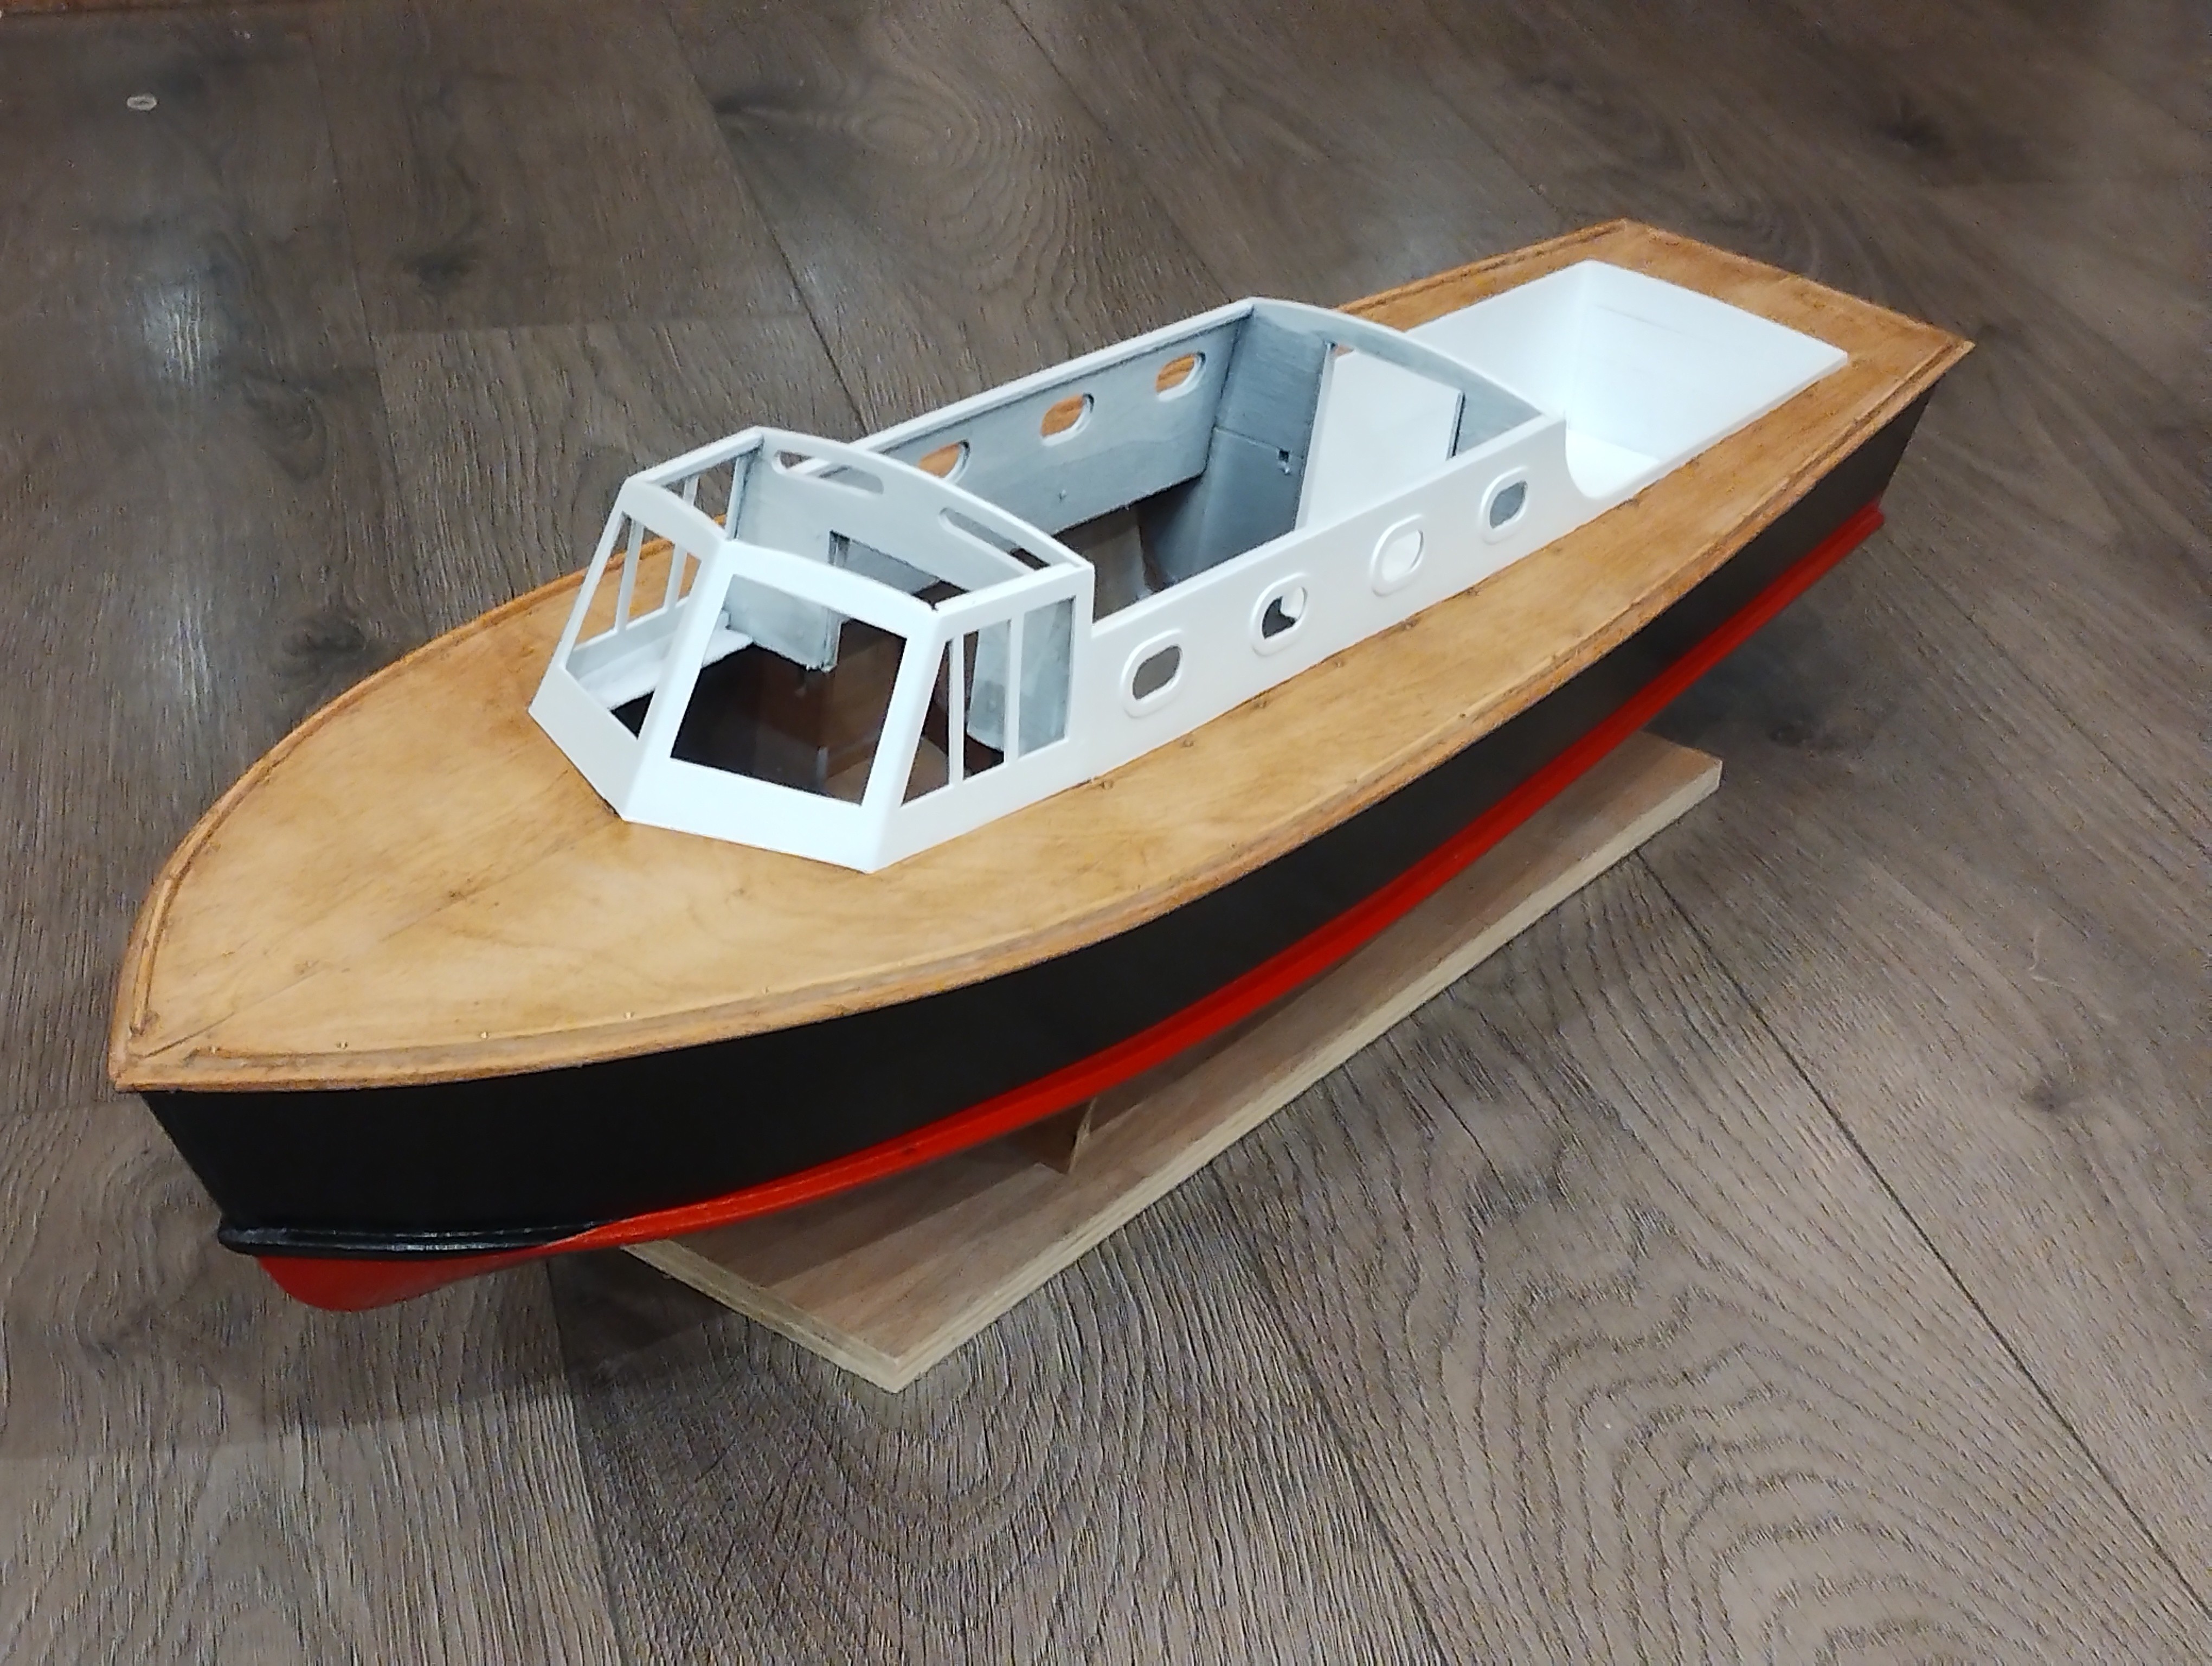
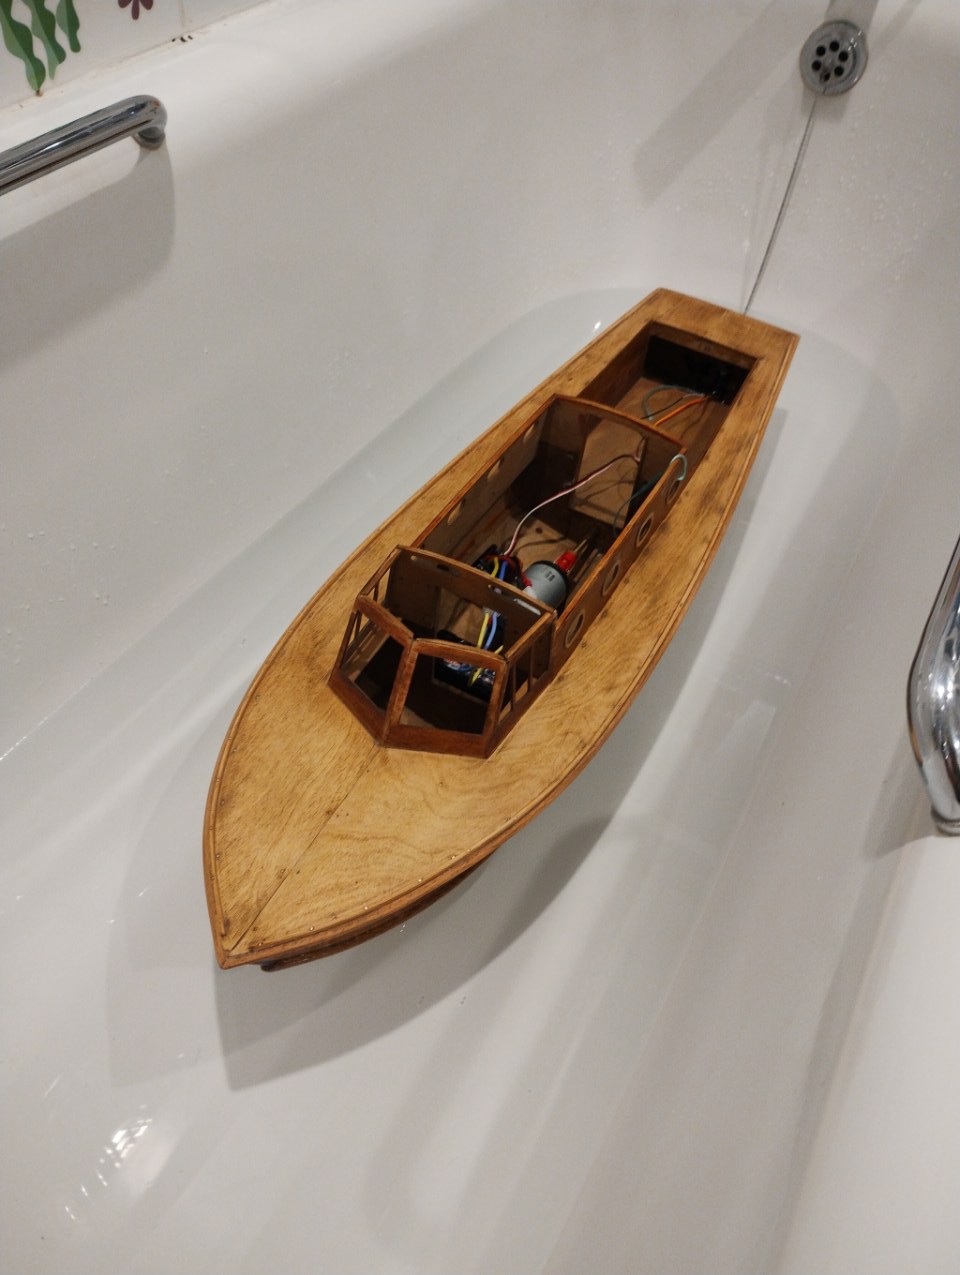
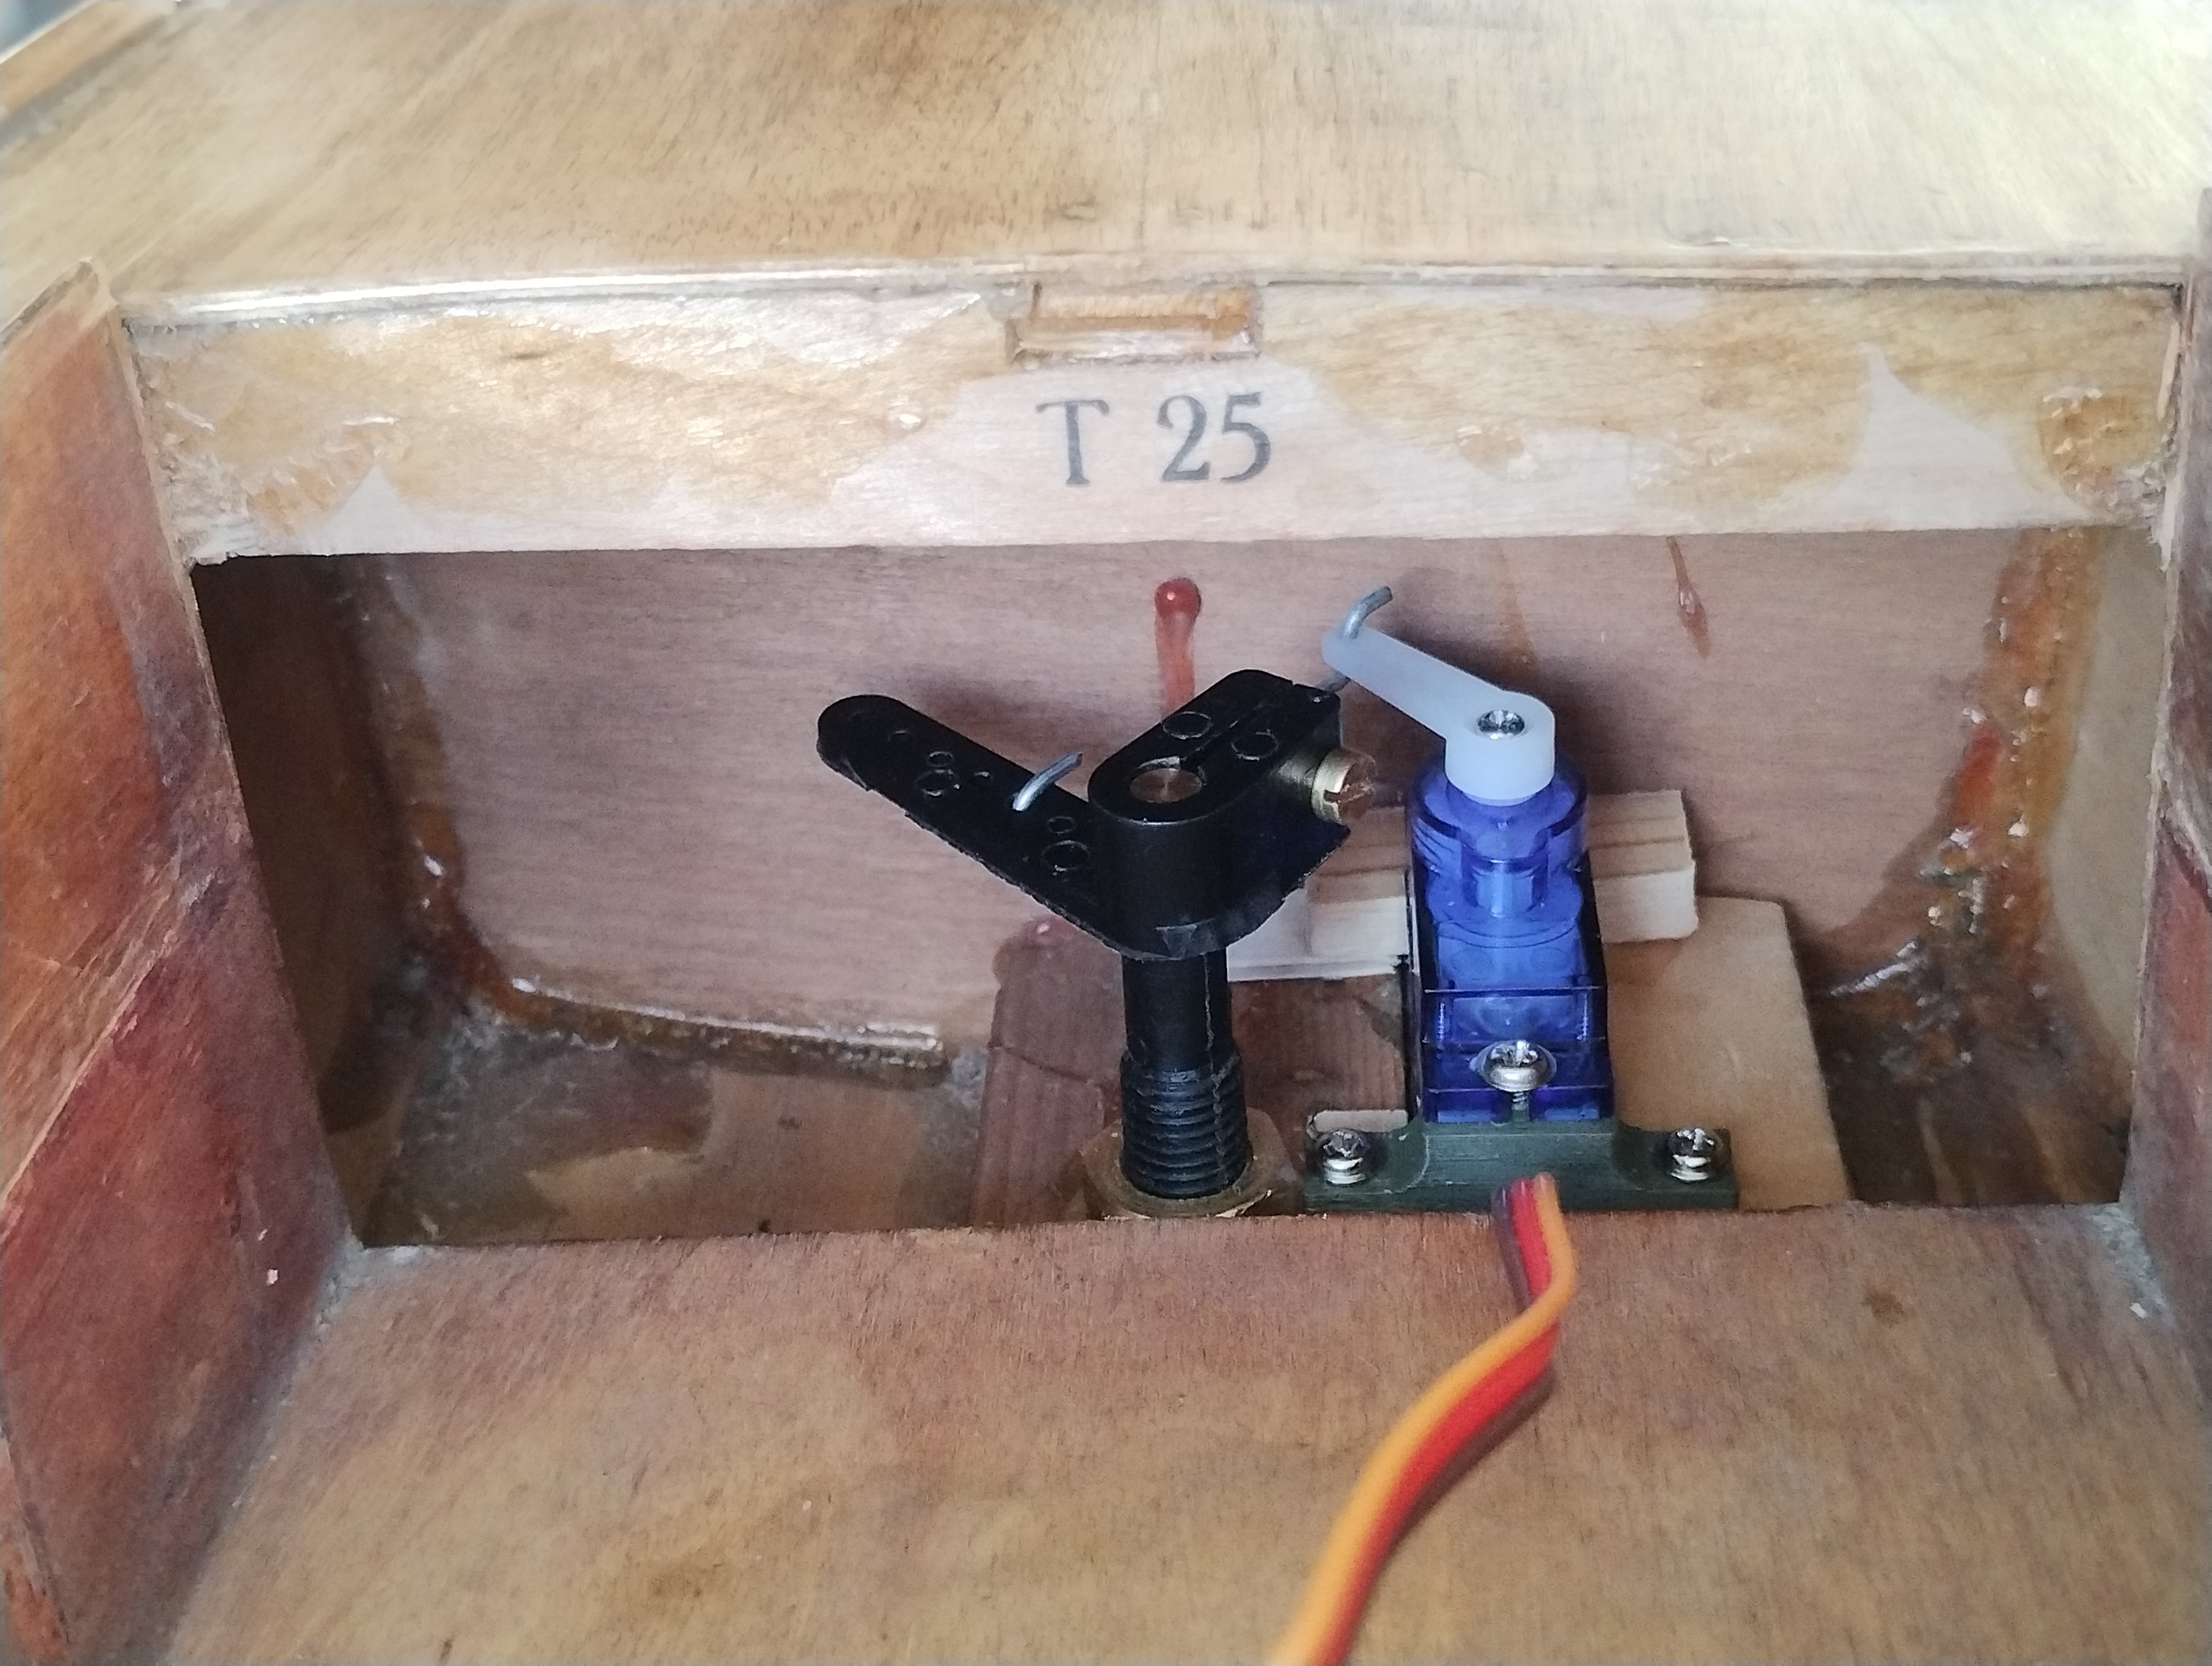
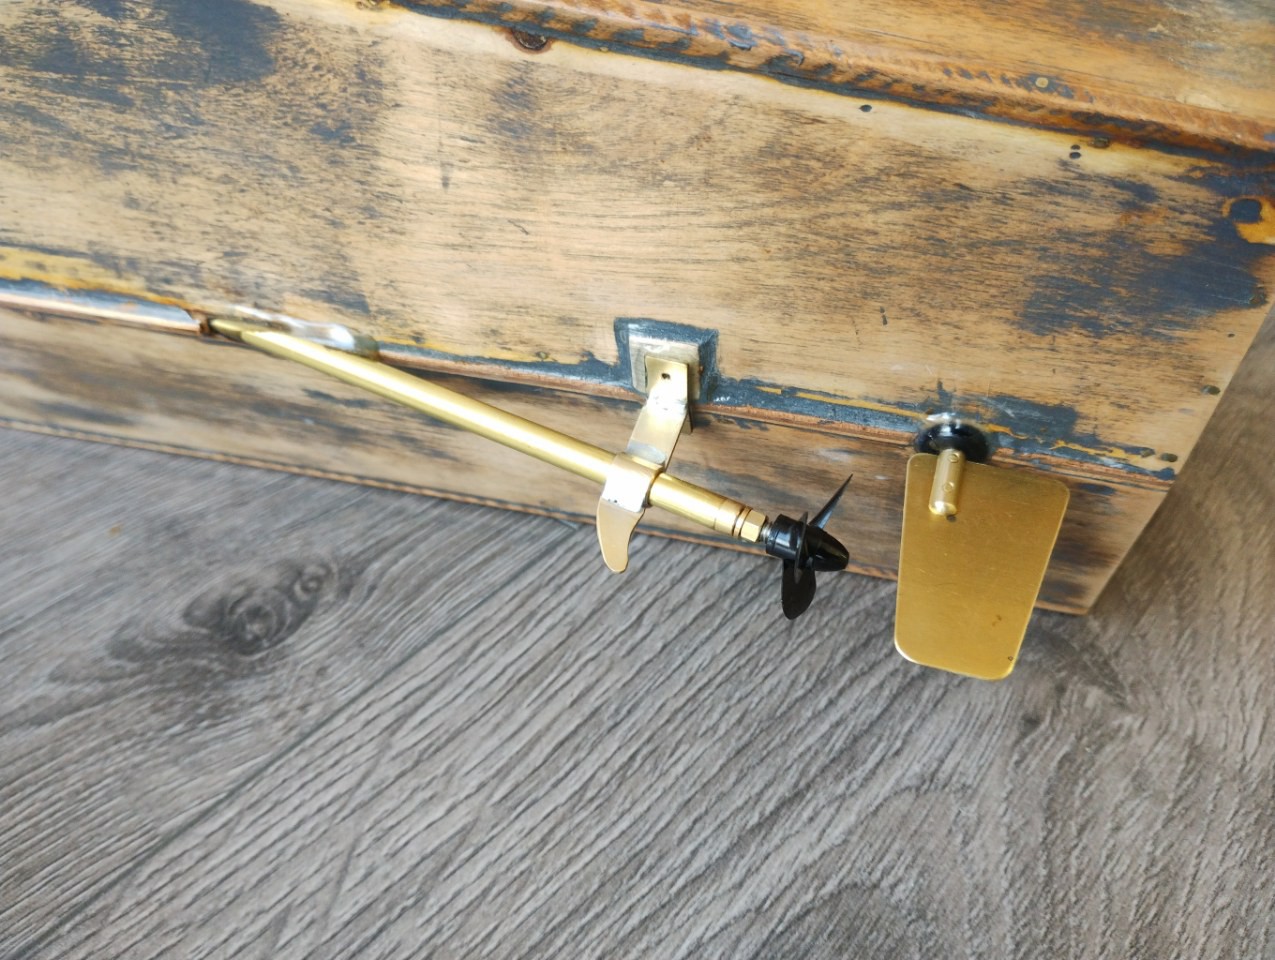
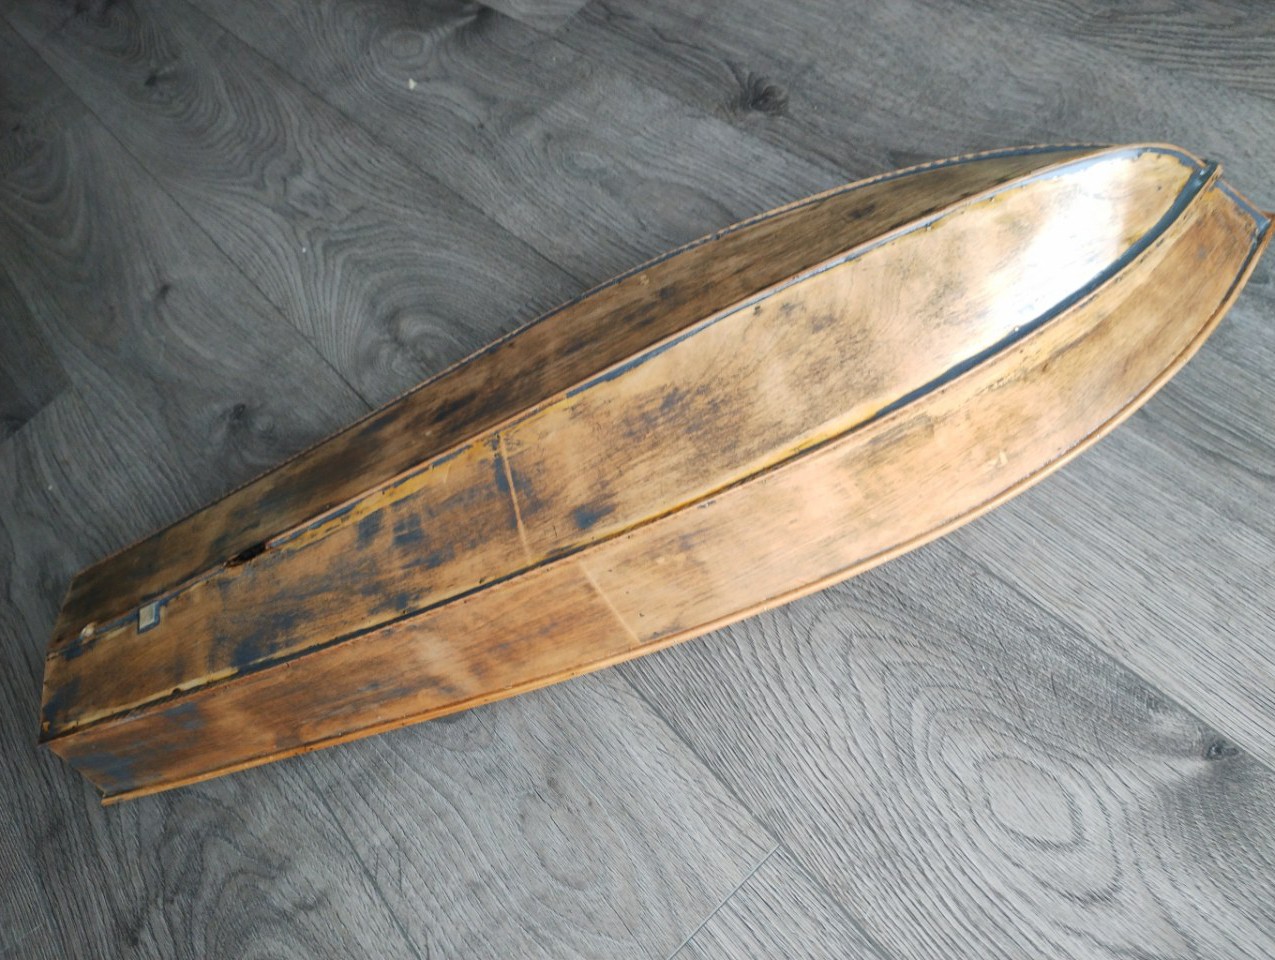
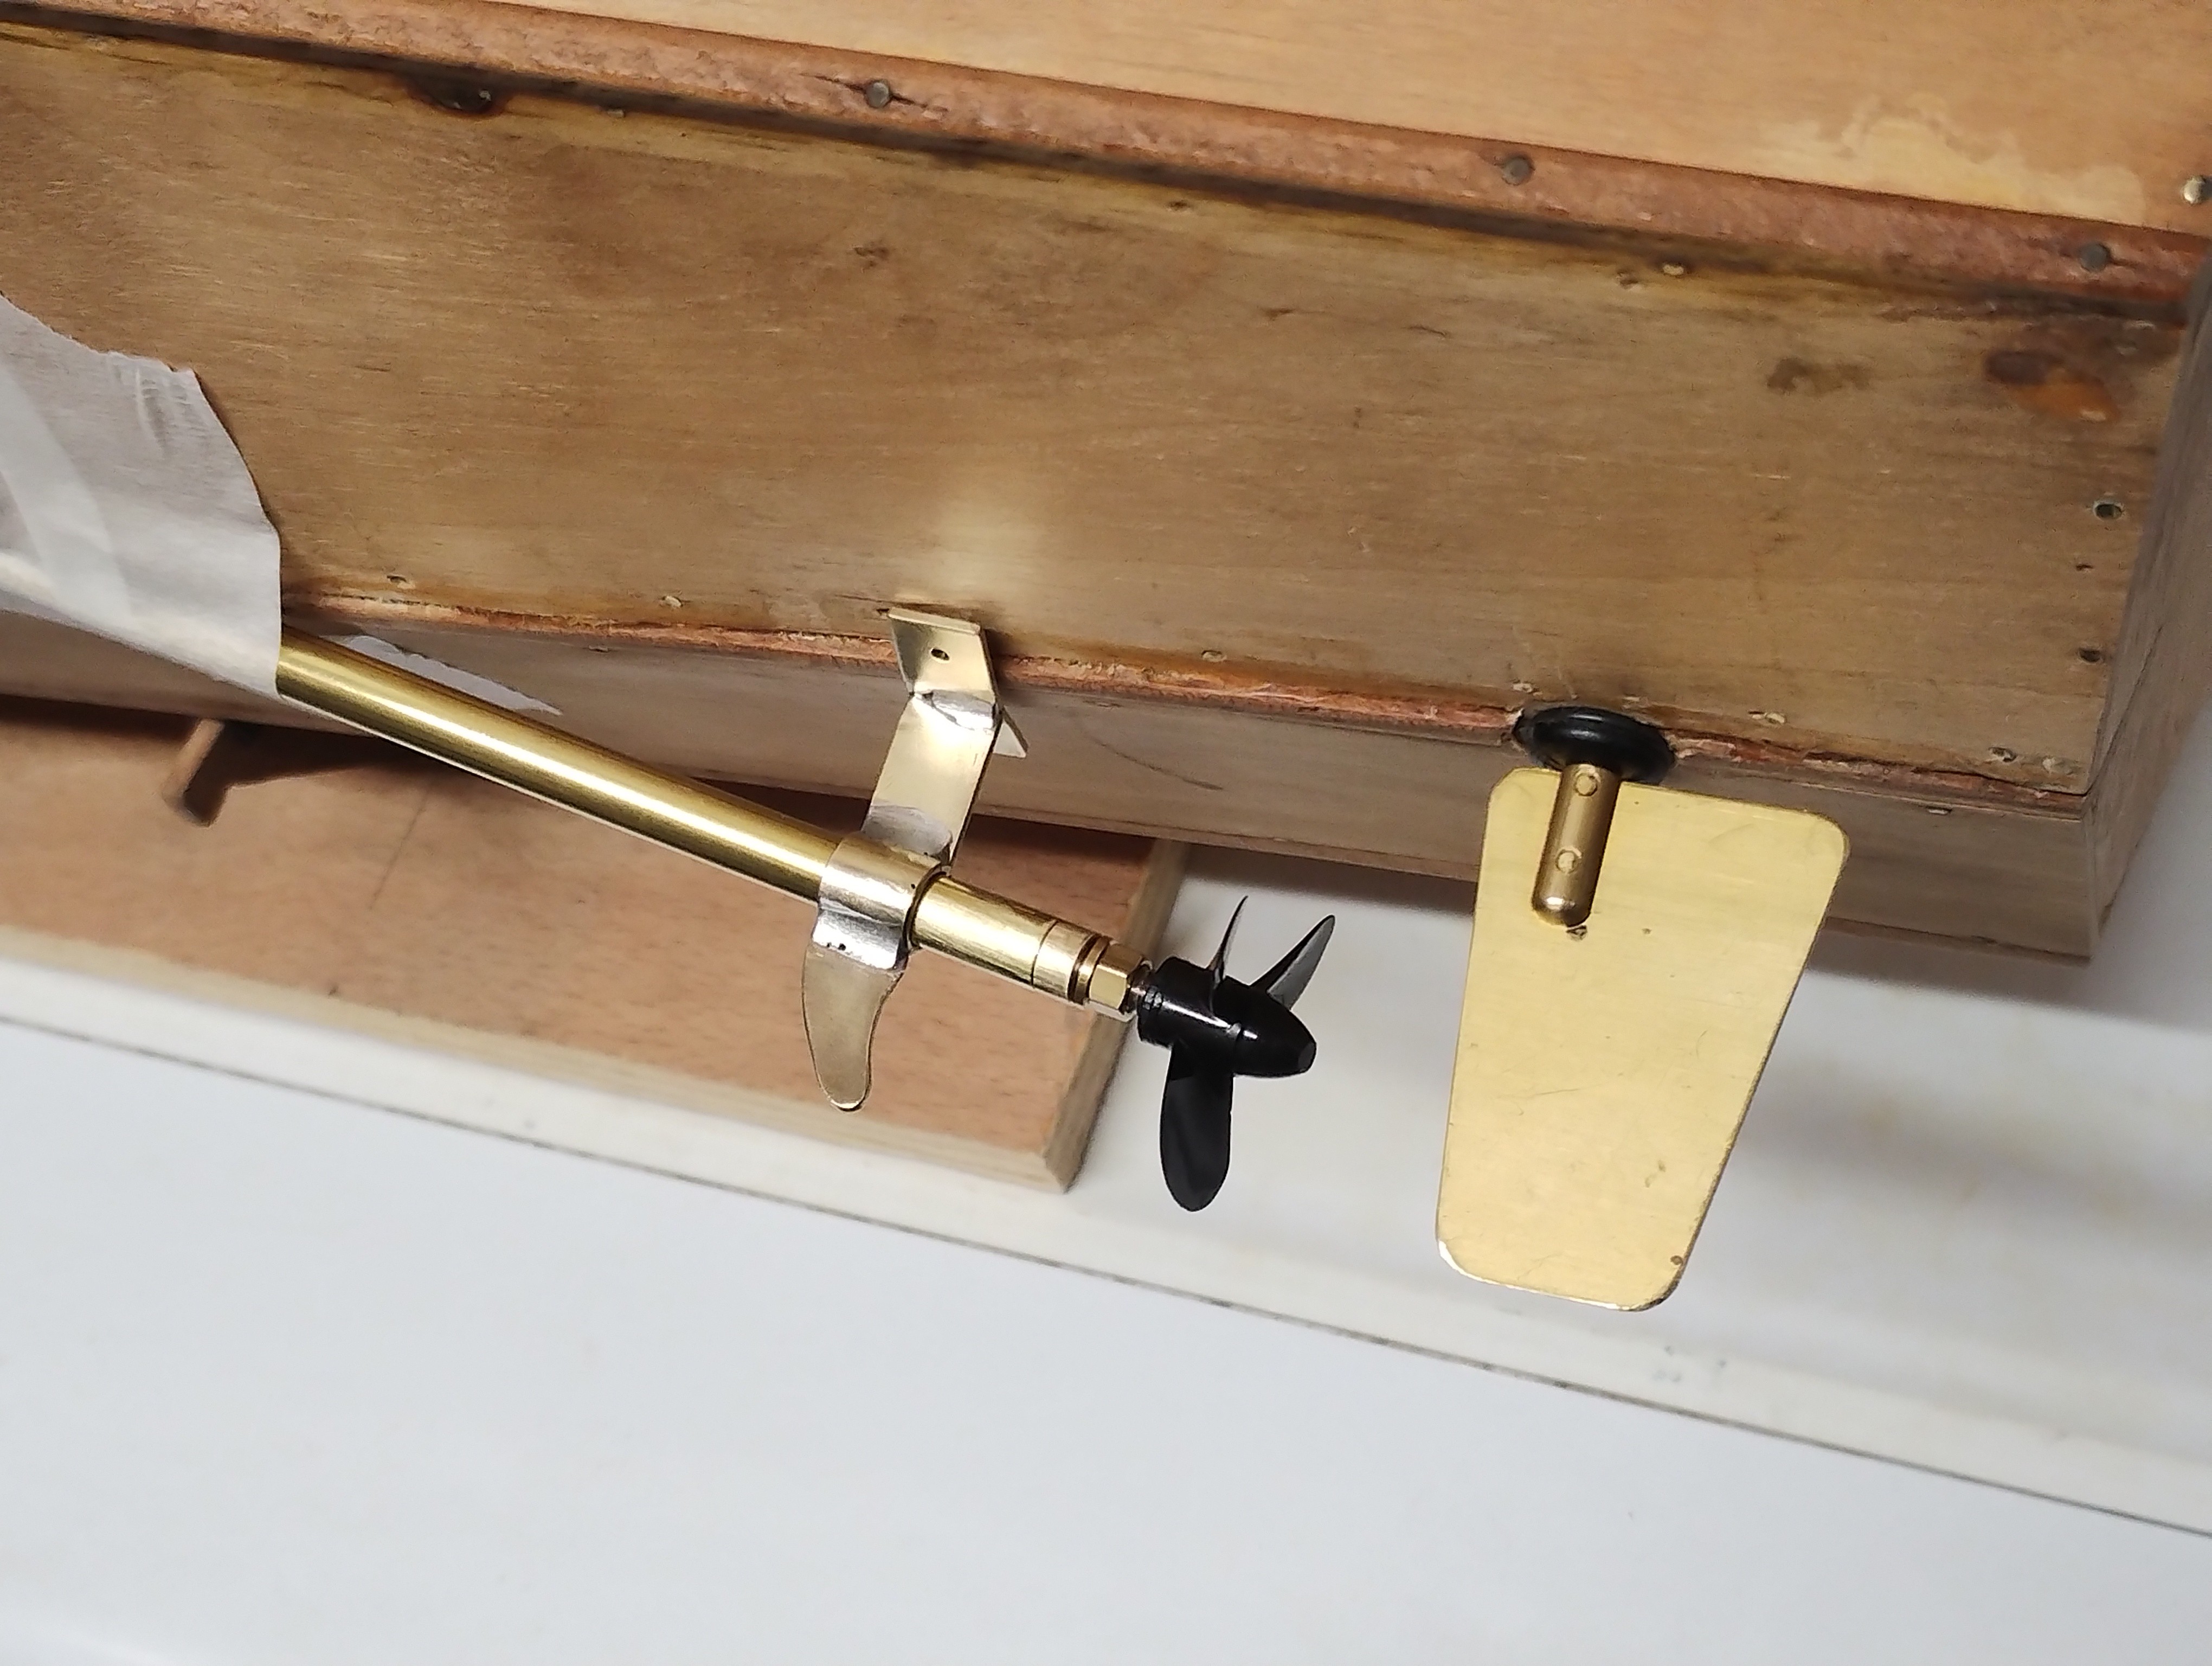
• New battery

    RobG01/07/2024 at 17:06 0 comments

    I bought a 3S LiPo, the smallest that was in stock but still plenty big enough at 2200mAh. A quick spin out of water and I can tell already the motor is a LOT faster, so I can't wait to see how fast she is in the water now. First things first: somewhere to stow the battery.

    I've also moved the ESC and receiver to the side opposite the battery (also same side as the rudder servo) to try and move the C of G near the centre line, with some success. Only a little ballast required to get everything level.

    Update: no ballast required! Finished the re-painting of the battery comparment, put everything together and floated in the bath, and she's pretty much bob-on level.

    Time for another trip to the pond...

  • An early Christmas present

    RobG12/24/2023 at 14:17 0 comments

    The planets aligned to allow me an hour or so at a local model boat sailing club so I could get a first chance to razz her around a bit:

    (filming courtesy of my 10yo daughter)

    Currently running a 40mm twin-bladed prop from a 500 brushed motor and a 2100mAh 7.2V NiMH pack, but after today planning to swap the battery for a 11.1V LiPo to go a bit faster. It really helped to have the battery pack positioned as far back as possible, so with a lighter LiPo pack I might have to add some ballast to achieve the same effect.

  • Flagging a bit...

    RobG12/10/2023 at 15:11 0 comments

    Yes I know I could have bought a flag for not much money, in a variety of suitable sizes. But where would be the fun in that when I could spend HOURS of my life instead making one... Duh, what a pain. Cue cheapo heat transfer paper, an inkjet printer, some rip-stop nylon and an iron. After much failed experimenting it turns out:

    1. Get the iron as hot as you can without melting the nylon (three dots on mine)
    2. Use a piece of something hard underneath e.g. MDF board, not an ironing board
    3. Press hard while heating for 30 secs or so
    4. With help from a brave assistant, peel the backing paper off as you run the iron over it so it's as hot as possible. Ignore the instructions about letting it cool first - doesn't work.

    Yeah, got there in the end...

  • Nearly there!

    RobG12/07/2023 at 19:53 0 comments

    Pretty much the last of the decorative items added now, just missing the flag (replaced with a paper one for now). And she now has a 40mm prop which, in the bath at least, pulls like a train. Can't wait to find a pond to have a play in. Bit of a leak up the rudder tube when giving it the beans, but that seems to have been fixed by packing with silicone grease.

    The grab rails were particularly 'fun' to make. I bought stanchions with 2.0mm diameter holes in, and a 100-pack of "2mm sticks" from the 'bay, but the sticks turned out to be oversized. So I drilled out a piece of brass with a series of holes stepping down from 2.3 to 2.0mm, and pulled the sticks through each hole in turn, progressively shaving off tenths of a millimetre at a time, until they were right. Sweet.

    Oh, and yes, the searchlight works. :)

  • Been busy

    RobG11/29/2023 at 17:05 0 comments

    A lot of changes in the last week or so. Painting is basically all done, decals and pinstriping is done, clearcoat done, windows in. Time to reinstall the motor, ESC, battery etc and add a few finishing touches.

  • Starting to look pretty nice

    RobG11/24/2023 at 18:21 0 comments

    The bulk of the painting now done. Just pinstriping and lettering next, then clear coat over everything. I'm sure my family are starting to get sick of the smell of paint!

  • The painting begins...

    RobG11/18/2023 at 17:08 0 comments

    The hull has now had a few laps of primer, filling, sanding, primer, etc. and the colour coat can go on. Nice. I've chosen to try and replicate the real-life ST 1502 which, rather helpfully, is quite local to me in Portsmouth - I might have to go and see her one day.

    And while the painting progresses slowly, I can get the numbers and roundels cut from vinyl using the 3D printer (see my other project). The typeface is one I found on the web that's a close match to the photos of ST 1502 (post refurbishment), which I then tweaked a bit in Inkscape.

  • She floats!

    RobG11/14/2023 at 19:57 0 comments

    Got the main motor hooked up, with ESC and radio gear, so time to try her out in the bath!

    Is this what's meant by 'soak testing'?

  • Rudder control

    RobG11/11/2023 at 09:25 0 comments

    This one took a bit of thinking, and several changes of mind between a) fitting a micro servo right next to the rudder and b) making a mechanical linkage actuated by a rod running forward under the rear deck into the main bay where everything else lives. In the end, it was tight, but the micro servo option worked out fine. I can still remove it if it ever fails or gets wet.

    Quite a squeeze, but it's in!

    The rudder and prop shaft are now also glued in, and the hull filled and sealed, so we're pretty much ready for painting.

    Before that though, I want to hook up the motor and ESC, and see if she floats!

  • Fabricating, filling, sanding...

    RobG11/05/2023 at 20:08 0 comments

    The new parts have arrived, including prop and prop shaft, rudder, motor, coupling, etc. Had to fabricate a 'p frame' from scratch out of 8mm brass strip. That was fun, but it came out ok - first trial fit of all the bits:

    Lots of effort spent on parts no one will ever see!

    Since then, lots of filling and sanding to close up numerous gaps between the various panels. Also re-made the back of the seating area so that there's now a hatch for accessing the rudder and its servo. Pics next time.