-
1Step 1: 3D Print the Case
The base and gun were designed by me. It can house the Nano and the battery, and it has an opening for the servo and BT Module. The cannon was also designed by me and I made it wide enough to fit my rubber duck. Adjust it as you wish. The case for the L298N was designed by Atom's Lab and the original can be found here.
I use an Ender Envy 3 V2 and simple PLA, 0.2 mm. If you don't have a 3D printer, you can either order it online or find a local Fabrication Lab (many public libraries have one).
-
2Step 2: Prepare the Arduino Nano
Install the Arduino IDE (if not already installed) on your computer and connect the Arduino Nano via USB cable.
- Select the appropriate board (Arduino Nano Every) and port in the Arduino IDE
- Install any necessary libraries (if required).
- SoftwareSerial
- Servo
- Upload the code
NOTE: If you get an error when uploading the code, remove TX and RX and try again.
-
3Step 3: Prepare the Chassis
Solder wires on the DC motors and then put everything together. Follow the instructions included and tight everything very well.
-
4Step 4: Prepare the On/Off Button
First place the 9v battery in the case, and the solder the positive end (RED) to one of the button's pins. On the other pin, solder a red wire.
-
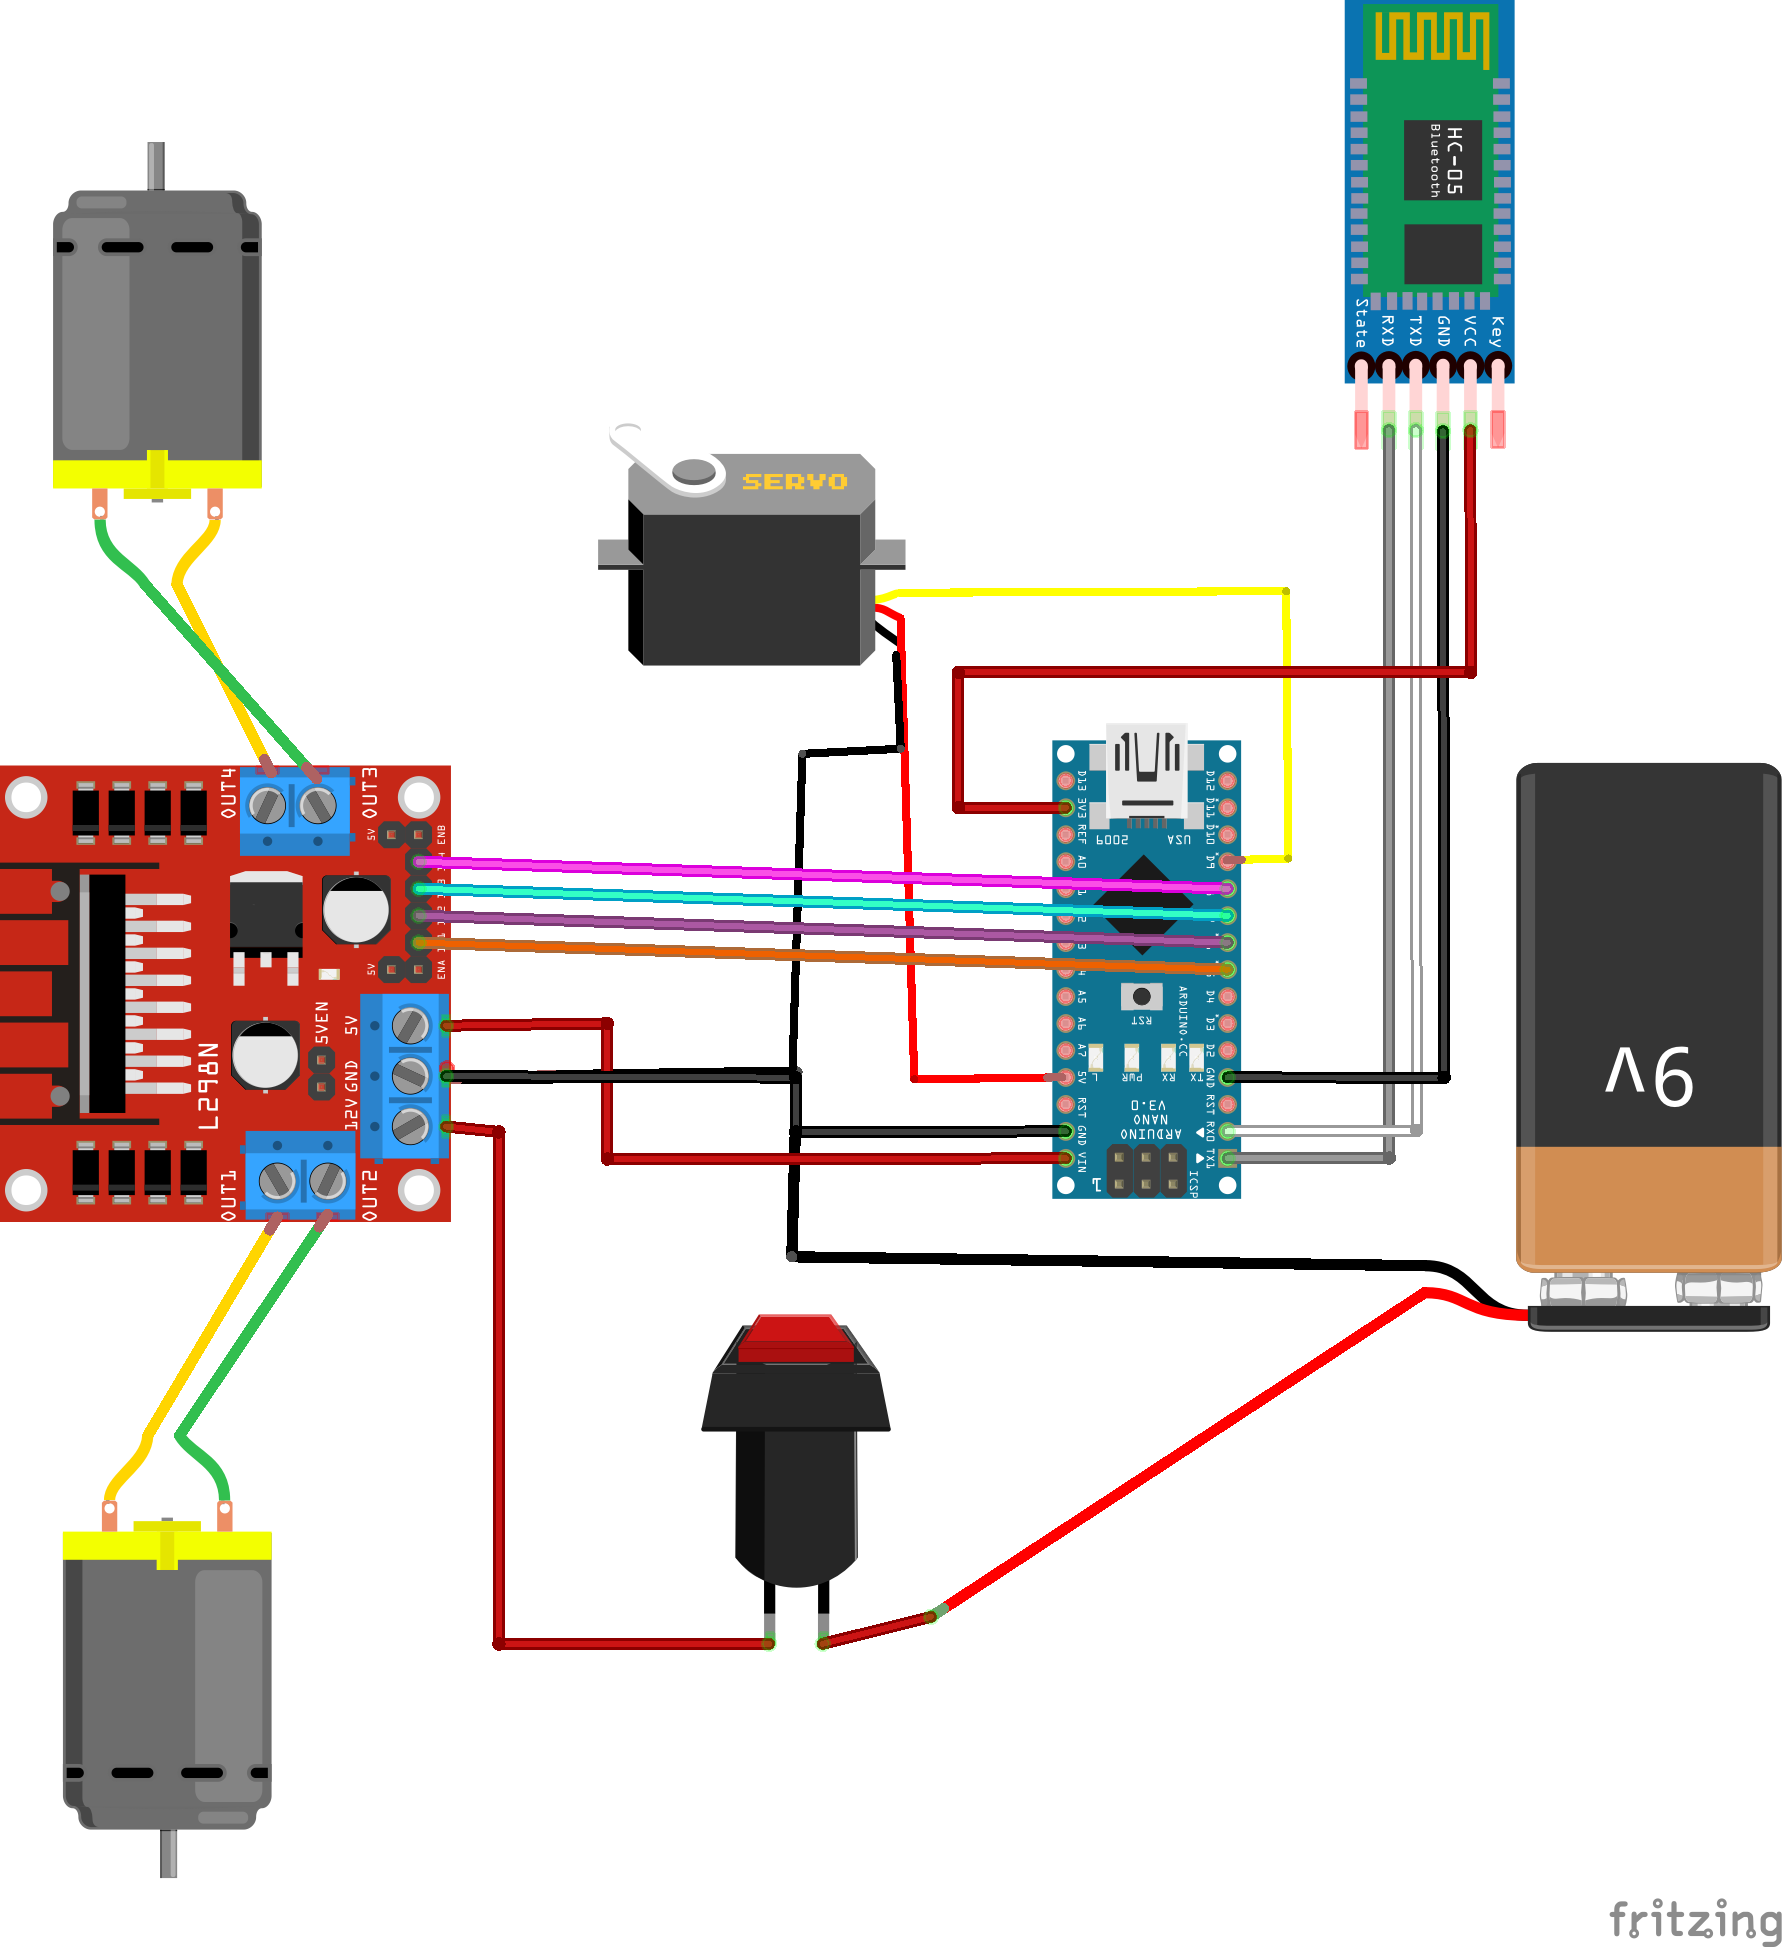
5Step 5: Prepare L298N
![]()
First place the driver in its case. Then add some glue on the chassis and stick the case. Then:
- Use F-F wires for the IN 1-4 pins.
- Left Motor: (+) -> OUT2 and (-) -> OUT1
- Right Motor: (+) -> OUT4 and (-) -> OUT3
- Put the wire coming from the button in the 12V
- Put a wire in 5V with F on the other side. That will power our Nano
- In the GND we need 3 wires
- One coming from the battery
- One with F goes to the Nano
- One with M that goes to the Servo
Use the schematic for reference
-
6Step 6: Fit Servo and HC-05 to the Lid
The lid of the big base has two openings. Fit the servo and the Bluetooth module in them. They are both a bit tight so they hold for a long time no matter the terrain the tank is at.
-
7Step 7: Connect Everything
![]()
First, put some glue on the chassis and stick the main base. Place the Nano and the battery in. Time to connect everything according to the diagram.
- Connect 9V Battery and Button
- Place the button in the side opening. Use glue to secure it.
- Connect the RED wire from the button to 12V on L298N.
- Connect the GND from the battery to GND on L298N
- Connect L298N (if you don't follow the instruction the code will not work)
- IN1 to D5
- IN2 to D6
- IN3 to D7
- IN4 to D8
- 5V from L298N to VIN pin on the Arduino Nano.
- GND with F to GND pin on the Nano
- GND with M to servos GND wire
- Connect Micro Servo
- GND should already be connected
- Connect the RED power wire to Nano's 5V pin
- Connect the yellow signal wire to D9 on Nano
- Connect HC-05 Bluetooth Module
- VCC to 3.3V
- GND to GND
- TXD to RX
- RXD to TX
When you're finished, push the button to make sure everything is wired up correctly. The L298N should have a red light on, the servo will rotate 3 times, and the HC-05 will have a red light blinking.
-
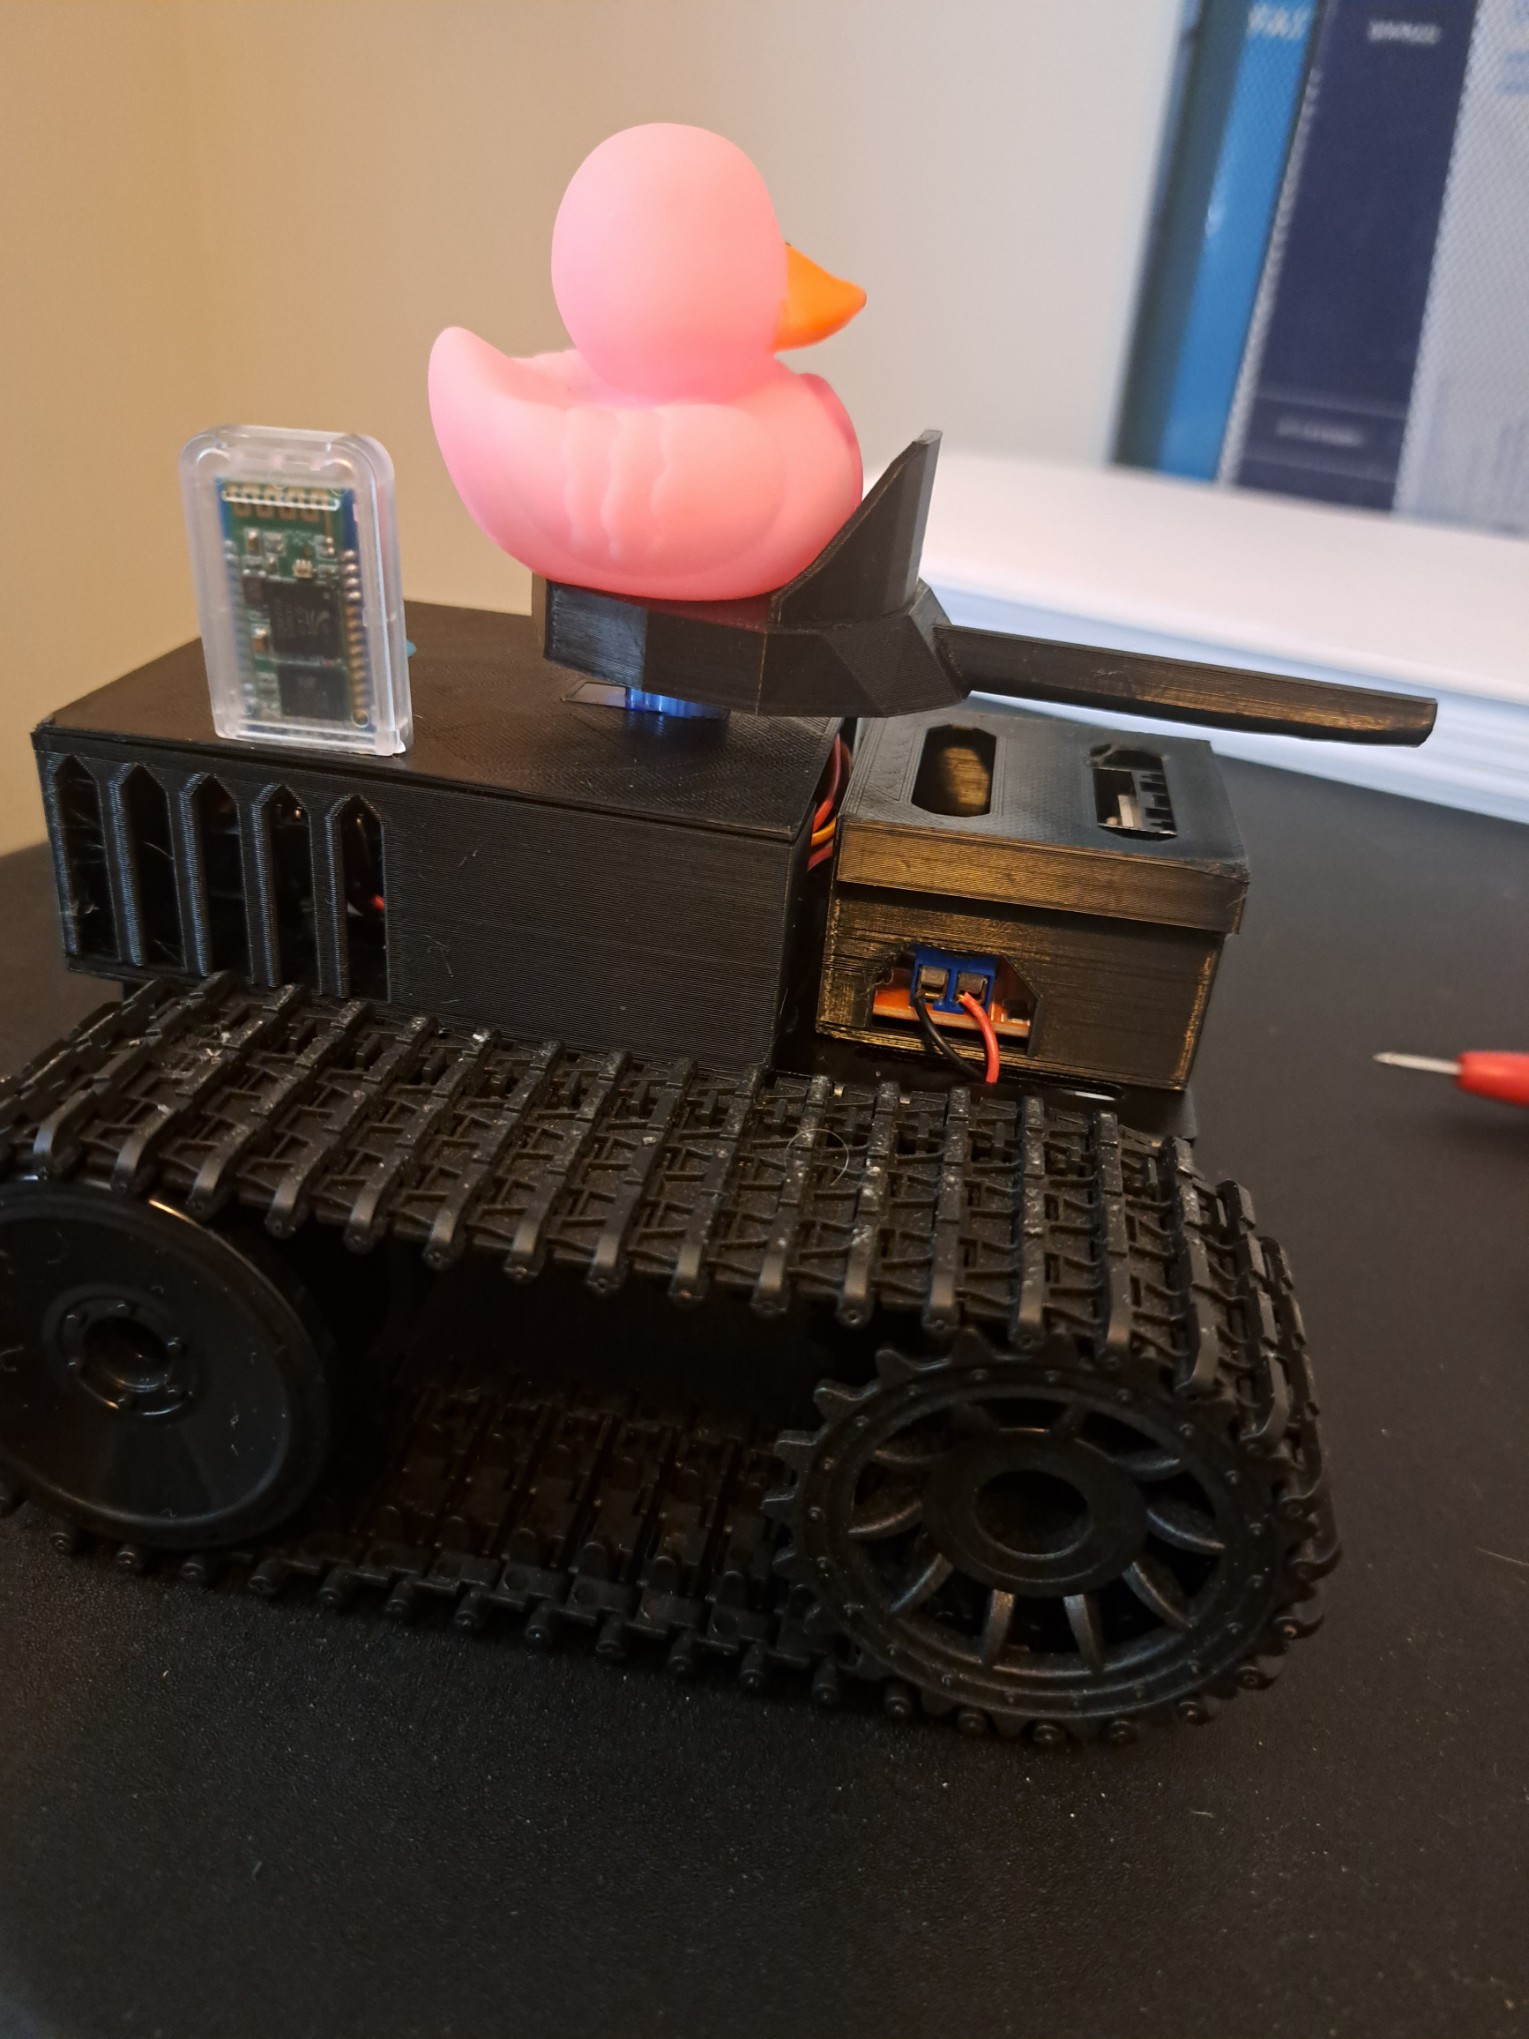
8Step 8: Assemble the Base and Cannon
![]()
![]()
Carefully place everything in the case and close the lid. Use some glue to stick the cannon on the servo. Place a rubber duck or anything you want on it.
-
9Step 9: Get the App
You need an app to operate the tank. The app isn't available on Play Store yet. You can download it from MIT App Inventor. I will update this post once the app is available on PlayStore.
Before you start using it, you need to pair your device with the HC-05. Once you open the app, turn your phone to the side for optimal view. Click on the BT icon and select the HC-05 (make sure the tank is turned on). You're all set. Enjoy!
-
10Step 10: Conclusion
I enjoyed designing and building this tank. If you have any comments or feedback please share them with me. Also, if you make it yourself, I would love to see how it came out


Discussions
Become a Hackaday.io Member
Create an account to leave a comment. Already have an account? Log In.