I'm excited to share the details of my BT Arduino Tank project, which incorporates some impressive 3D-printed components. While the main chassis of the tank was not 3D-printed, I utilized this technology to create two crucial parts: the enclosure for the motor driver and the compartment housing the remaining electronics. Additionally, I 3D-printed a cannon for an added touch of customization.
The enclosure for the motor driver served as a protective housing, ensuring that the L298N motor driver module was securely mounted and shielded from external elements. By designing and 3D-printing this part, I could precisely fit it to the tank's specifications, providing a neat and organized arrangement of the electronics.
In the same vein, the compartment for the remaining electronics, such as the Arduino Nano Every and the HC-05 Bluetooth module, was also 3D-printed. This enclosure offered a clean and organized solution for housing these components, safeguarding them while maintaining easy access for maintenance or modifications.
Lastly, to enhance the tank's appearance and add a touch of personalization, I designed and 3D-printed a cannon. This custom-printed cannon perfectly complemented the overall design, making the tank even more visually appealing.
By strategically incorporating 3D printing into specific parts of the project, I achieved a balance between functionality and customization. The precision and versatility of 3D printing allowed me to create tailored enclosures and a unique cannon, elevating the overall aesthetic and practicality of my BT Arduino Tank project.
 Anthony
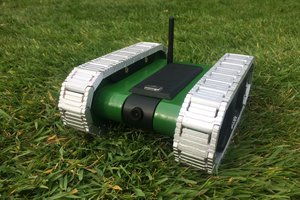
 Brian Brocken
 DeskLabs
 axf33480