The goal ?
Playing fighting games as realistically as possible ! This altervative controller allows you to simulate the fact of typing with boxing gloves, and allows you to move like a real boxing game.
This altervative controller would work for any type of fighting game.
Don't hesitate to try it guys !

 Tom_Neverwinter
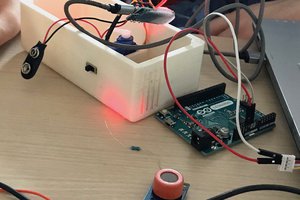

 WalkerDev
 Brian Brocken