Close
0%
0%

PicoRAM 6116 - SRAM Emulator & SD Card Interface

Give your Microprofessor MPF-1B (and other machines) a versatile SD card interface - no more cassettes!

Similar projects worth following
Emulate 2 KBs of 6116 SRAM with a Rasperry Pi Pico and use an SD card for storing and loading full memory dumps. It's first use case is to emulate the U8 2 KB system RAM from 0x1800 to 0x1FFF on the Microprofessor MPF-1B, and the U5 2 KB system RAM from 0xF800 to 0xFFFF on the Microprofessor MPF-1P. You won't need the cassette interface any longer - just use the SD card.

This Hackaday page mostly hosts the (historic) development logs; for the latest version, have a look at the Github repo: https://github.com/lambdamikel/picoram6116

This project is a follow-up to https://hackaday.io/project/192655-picoram-2090

Also see https://www.hackster.io/news/michael-wessel-s-raspberry-pi-pico-powered-6116-sram-emulator-gives-vintage-sbcs-a-major-overhaul-2324810b773c

Please check out the Github for all future updates: 
https://github.com/lambdamikel/picoram6116


A follow-up to my 2114 SRAM Emulator. 

This time I am targeting the 6116 SRAM chip - full 2 KBs and a serious CPU at full speed (i.e., Z80 @ 1.8 MHz etc.)

Features

  • Raspberry Pico-based SRAM 6116 emulation, fully software-based
  • SD card for storing and loading of full 2KB memory dumps
  • comfortable UI with OLED display for file operations
  • ASCII HEX / FAT32 format facilitates file exchange and creation, e.g., with a PC assembler 
  • 4 user-selectable memory banks (UI buttons)
  • powered directly over the 6116 power lines
  • external power supply supported
  • some nice LEDs
  • versatile (i.e., should work with other 6116-based computers)


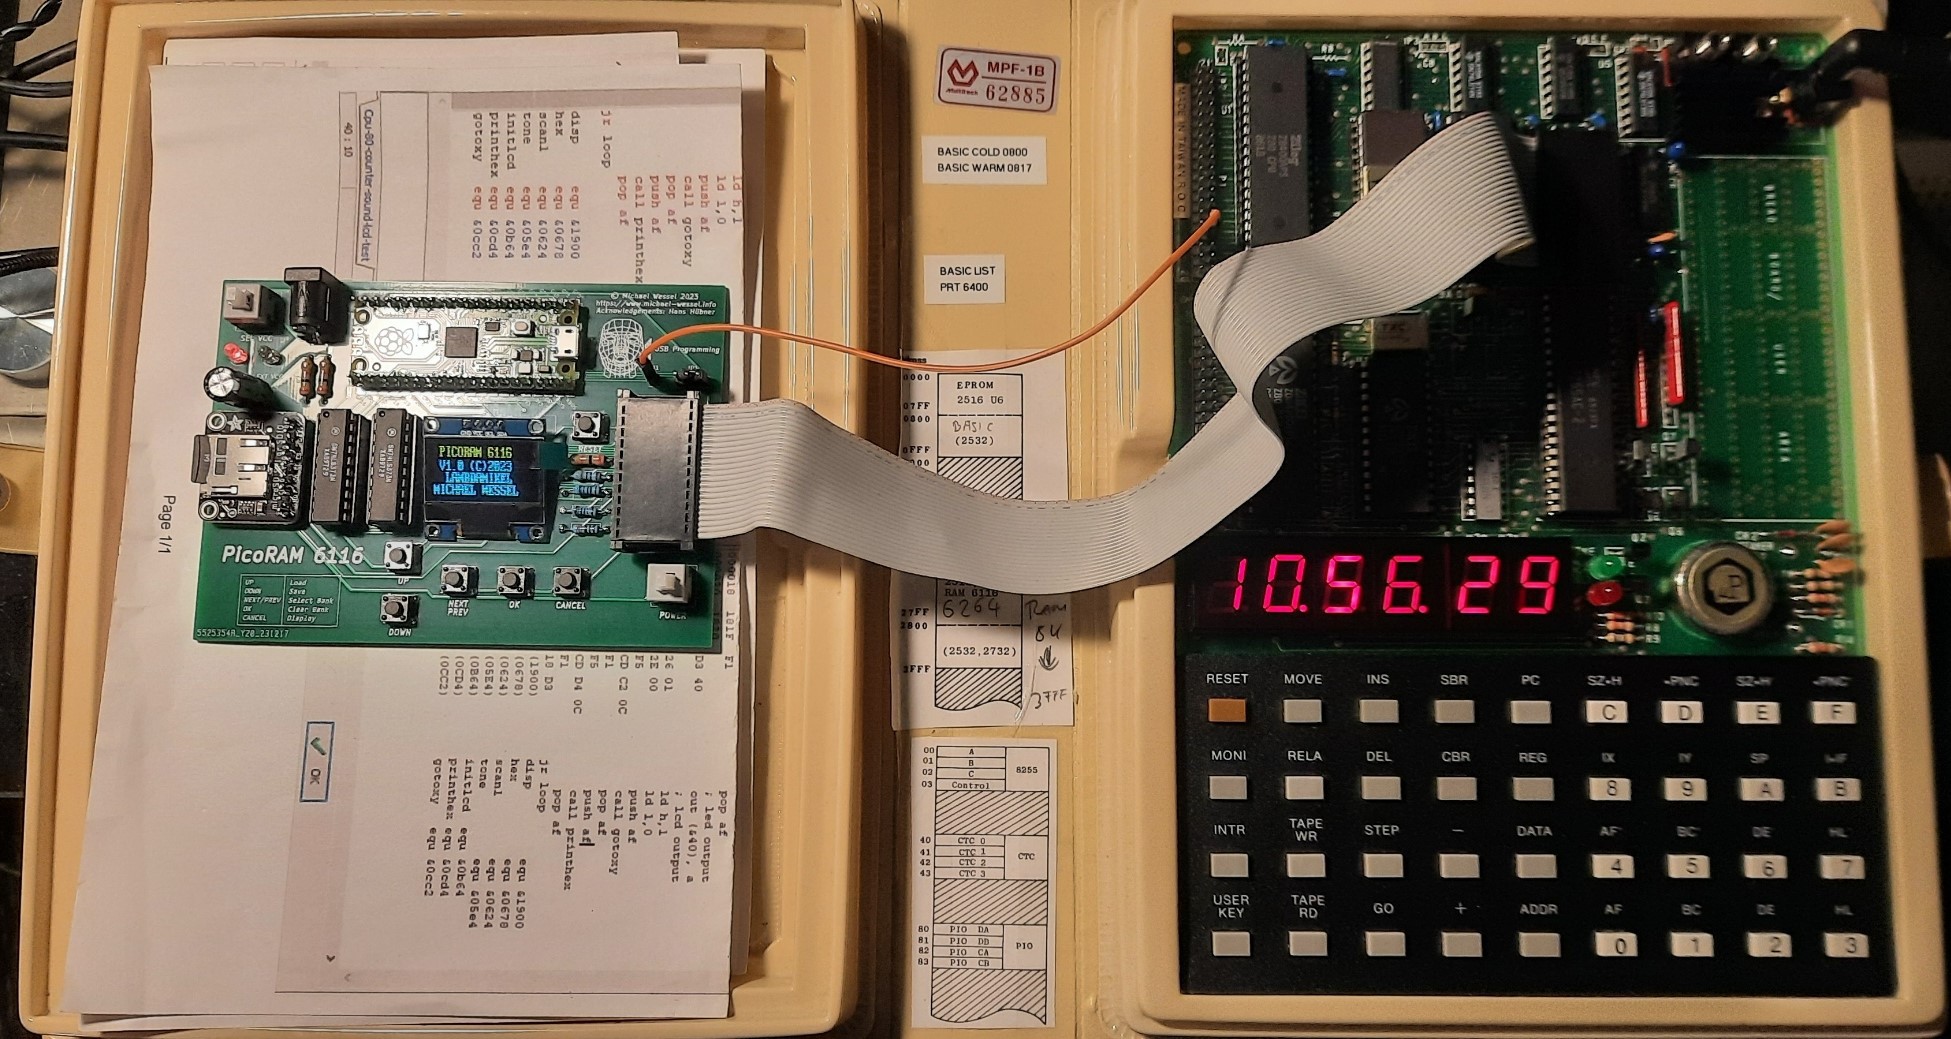
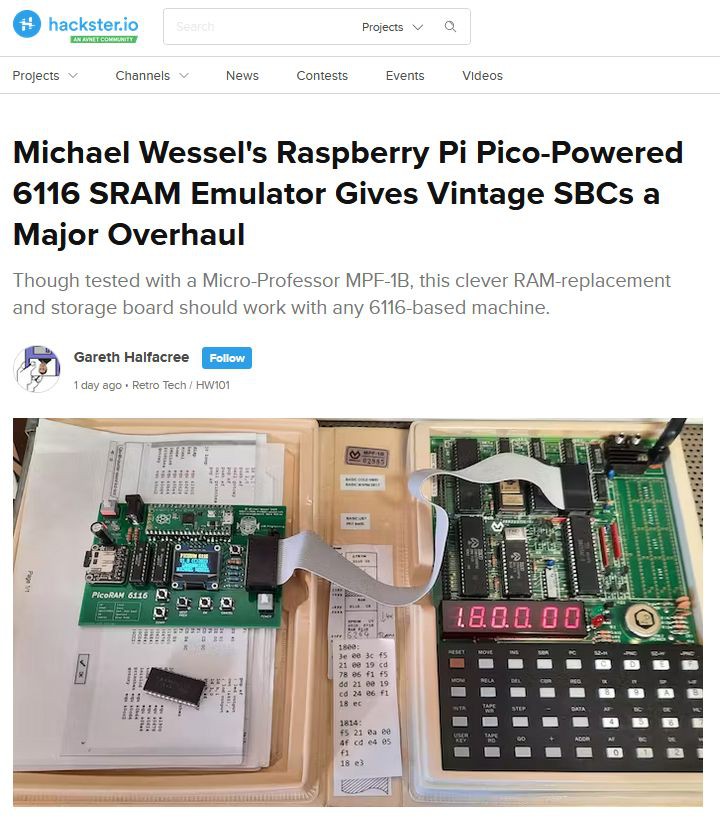
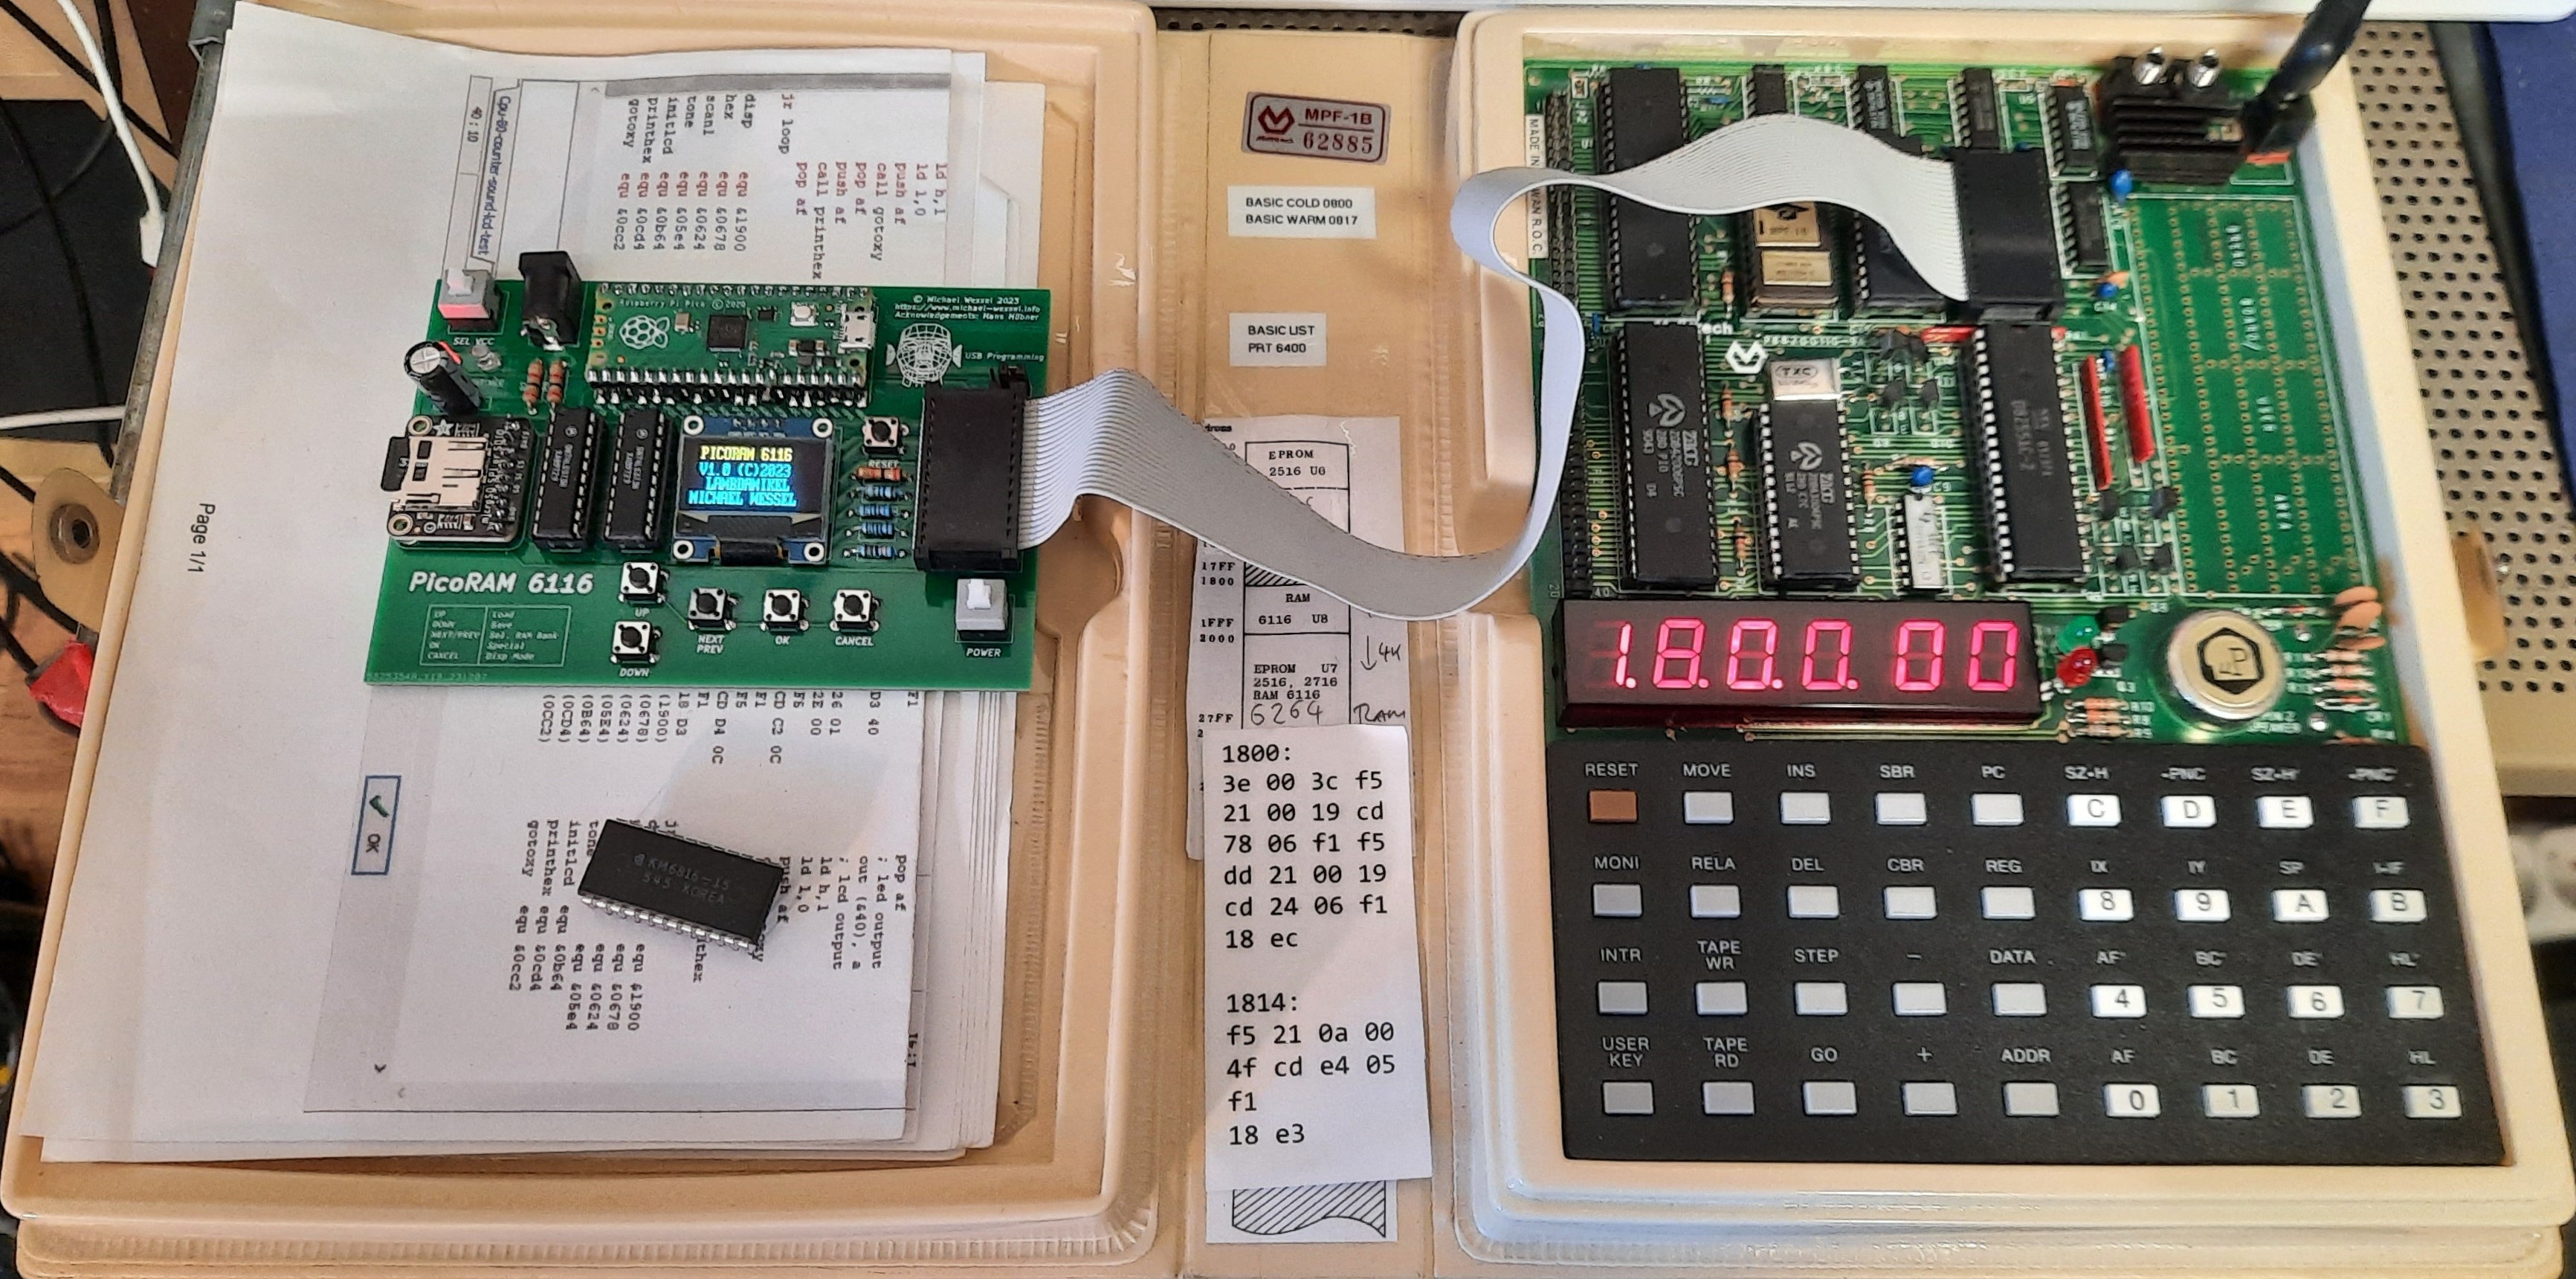
The Microprofessor MPF-1B is the first victim - it's 2 KB user & system RAM (U8) from 0x1800 - 0x1FFF is replaced by PicoRAM 6116:
Video:

The Microprofessor MPF-IP (One Plus, 1P) is the second victim - it's 2 KB user & system RAM (U5) from 0xF800 - 0xFFFF is replaced by PicoRAM 6116:

Video:

Theory of Operation

Well, this was a piece of work, and I wouldn't have succeeded without my trusted HP 1662A Logic Analyzer (see below for some details).

The first challenge was a lack of GPIO pins on the Pico. This wasn't a problem with my previous PicoRAM version, the 2114 emulator - the 2114 only required 10 address lines, 4 data lines, and a single WE (Write Enable) line. The Busch 2090 Microtronic which was the target platform for the emulator didn't even utilize the OE (Output Enable) line. In contrast, the 6116 now demanded a whooping 8 bits of data IO, 11 bits for the address bus, plus OE and WE - 21 GPIOs of the max. 26 that the Pico offers. 
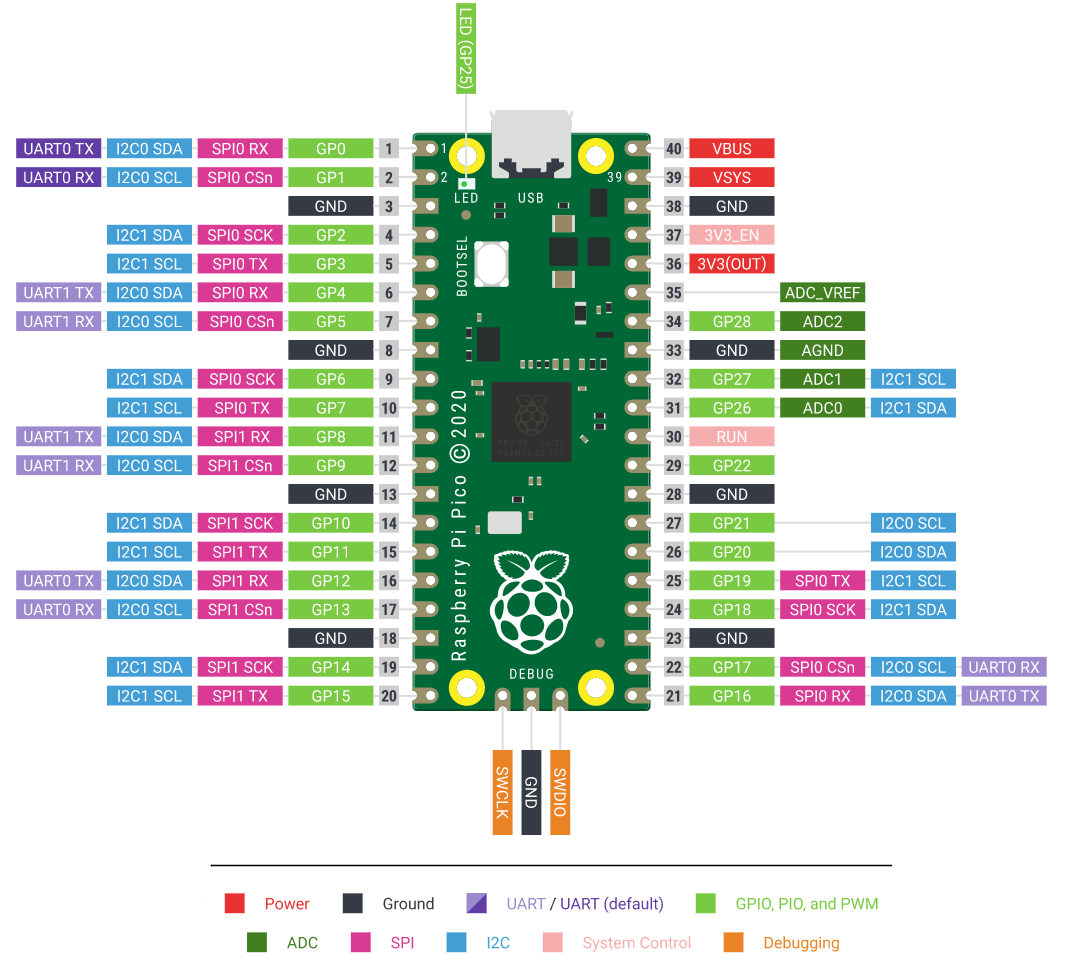
And, some of these had to be used for I2C and SPI, given that I wanted to keep the OLED display and SD card module. In addition, one analog pin for reading the 5 buttons. Hence, another 7 GPIOs became unavailable. I was hence short of by exactly 2 GPIOs to realize my dream design!

As a solution, I decided to multiplex the address bus - using 2x 74LS373 transparent 8bit latches, I came up with a design that introduced two multiplexing lines SEL1 and SEL2 to read the address in two batches - A0 to A5 in the first batch, and A6 to A10 in the second batch. The two latches are basically just used for their tri-state / High-Z ability; I am not even using them as latches. The LE is constantly kept high / 5V, making them transparent, i.e., any change to their inputs is immediately mirrored to the outputs, if enabled (their OEs are connected to SEL1 and SEL2, respectively).
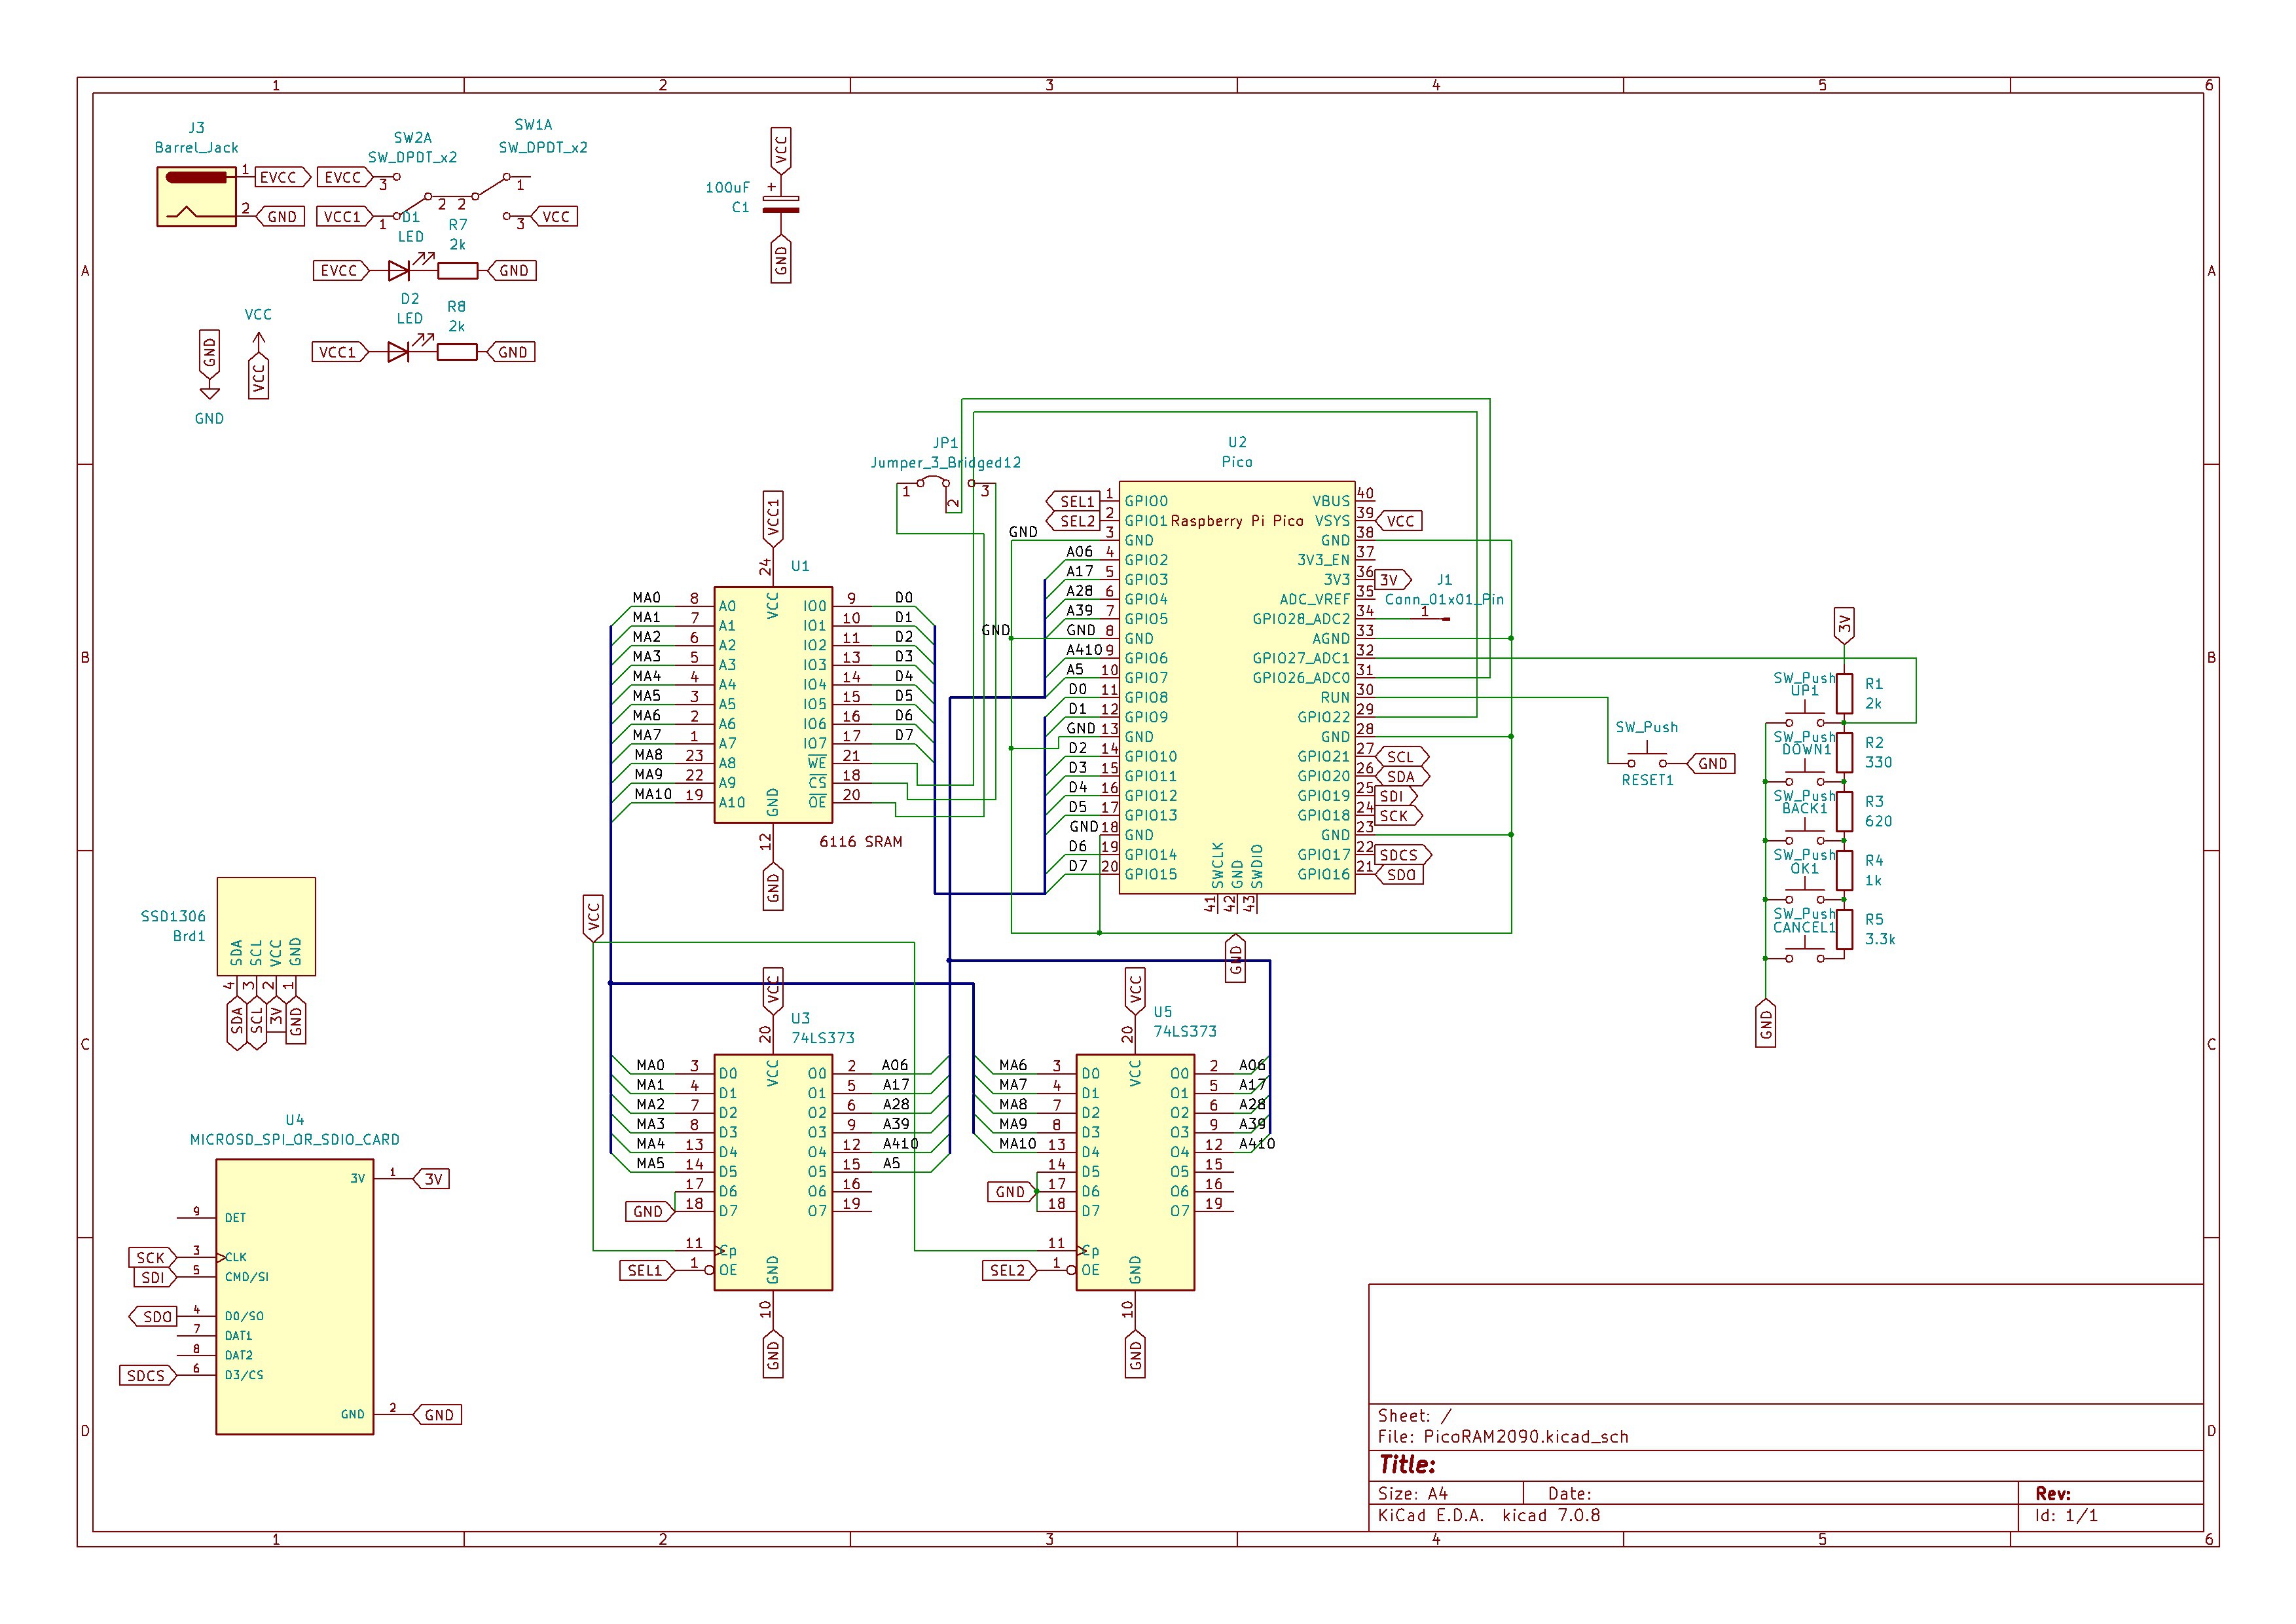
Using this design, I now even had one spare GPIO left! I still don't have any good idea what to do with it, so it's just left as an open pin on the final version of the PCB (the extra pin is not shown in the video yet). Maybe for sound output. It was already extremely useful for analyzing the Pico's timing, i.e., determining the exact execution time of a piece of firmware code in nanoseconds (-> HP Logic Analyzer).

Please note that, unlike my previous PicoRAM 2090 2114 SRAM emulator, I did not include any level shifters or resistors networks. This Hackaday article, and my practical experience with PicoRAM 2090 running for hours without damage without voltage level conversion, convinced me that the Pico / RP2040 really is 5V tolerant. So I am not expecting any issues from that.

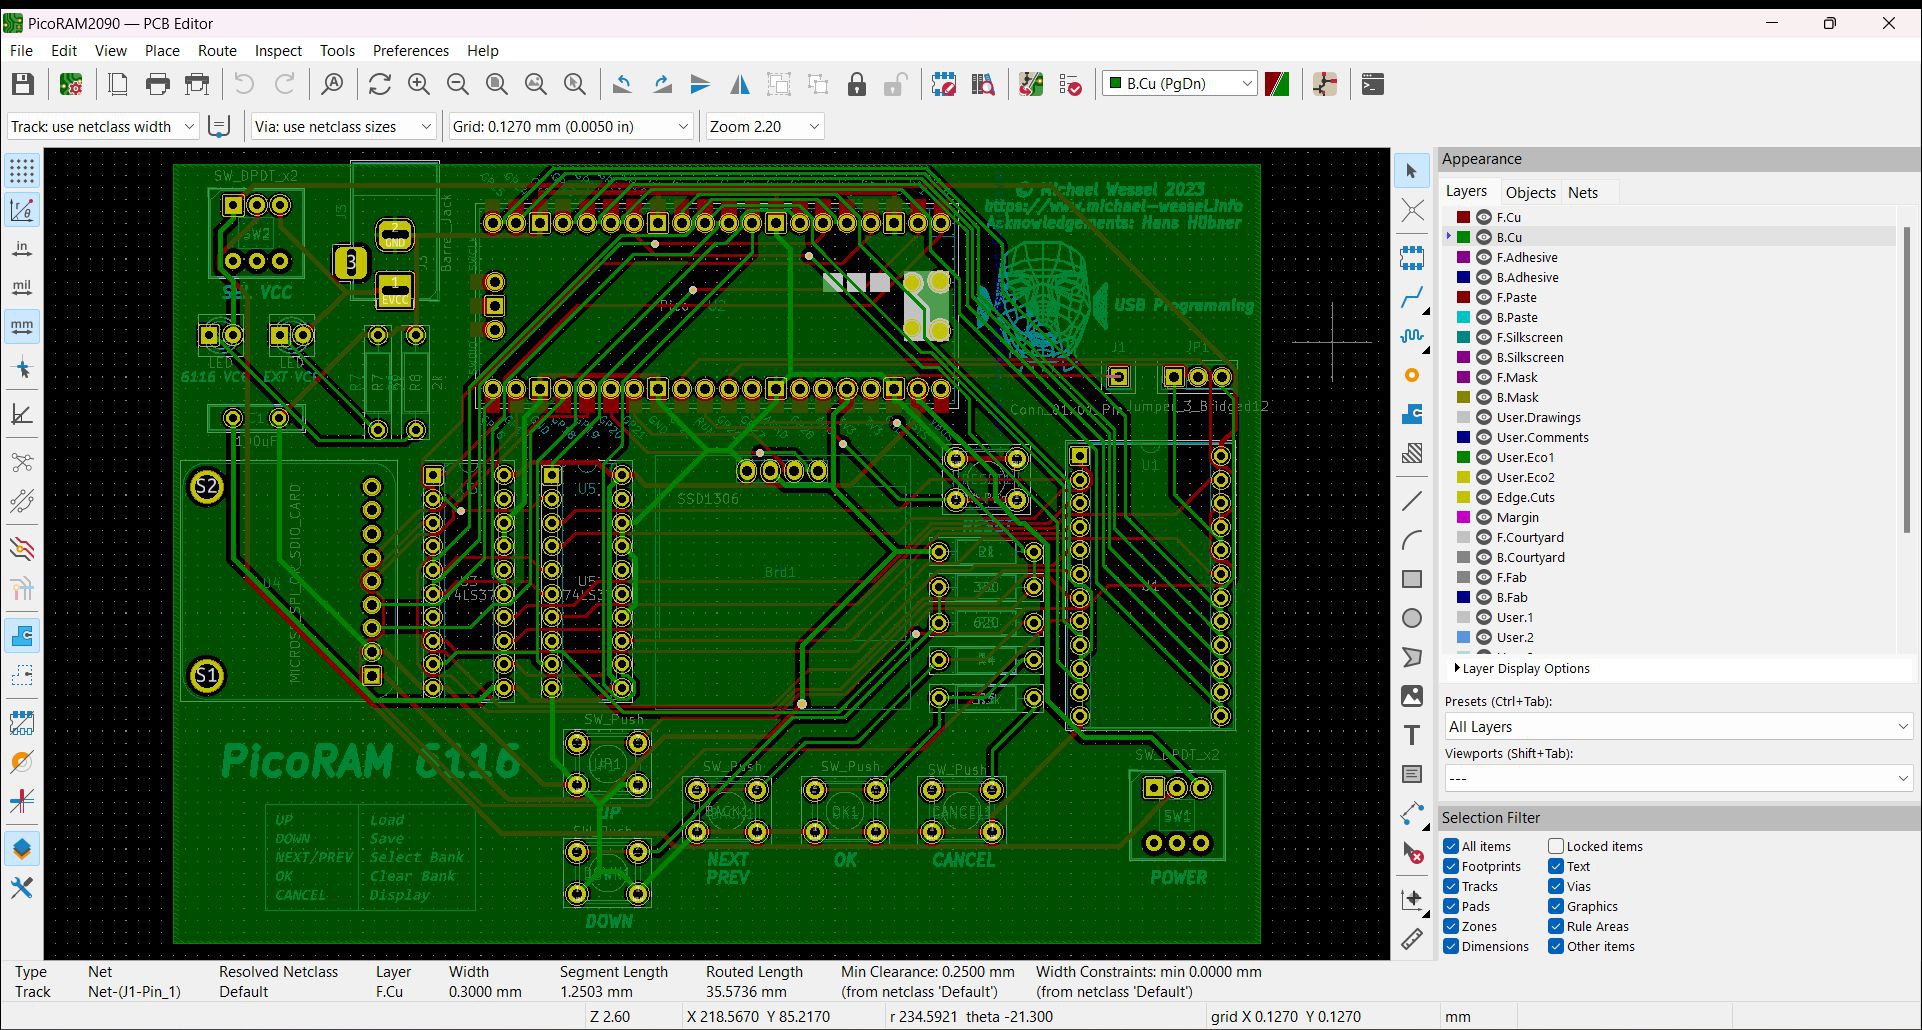
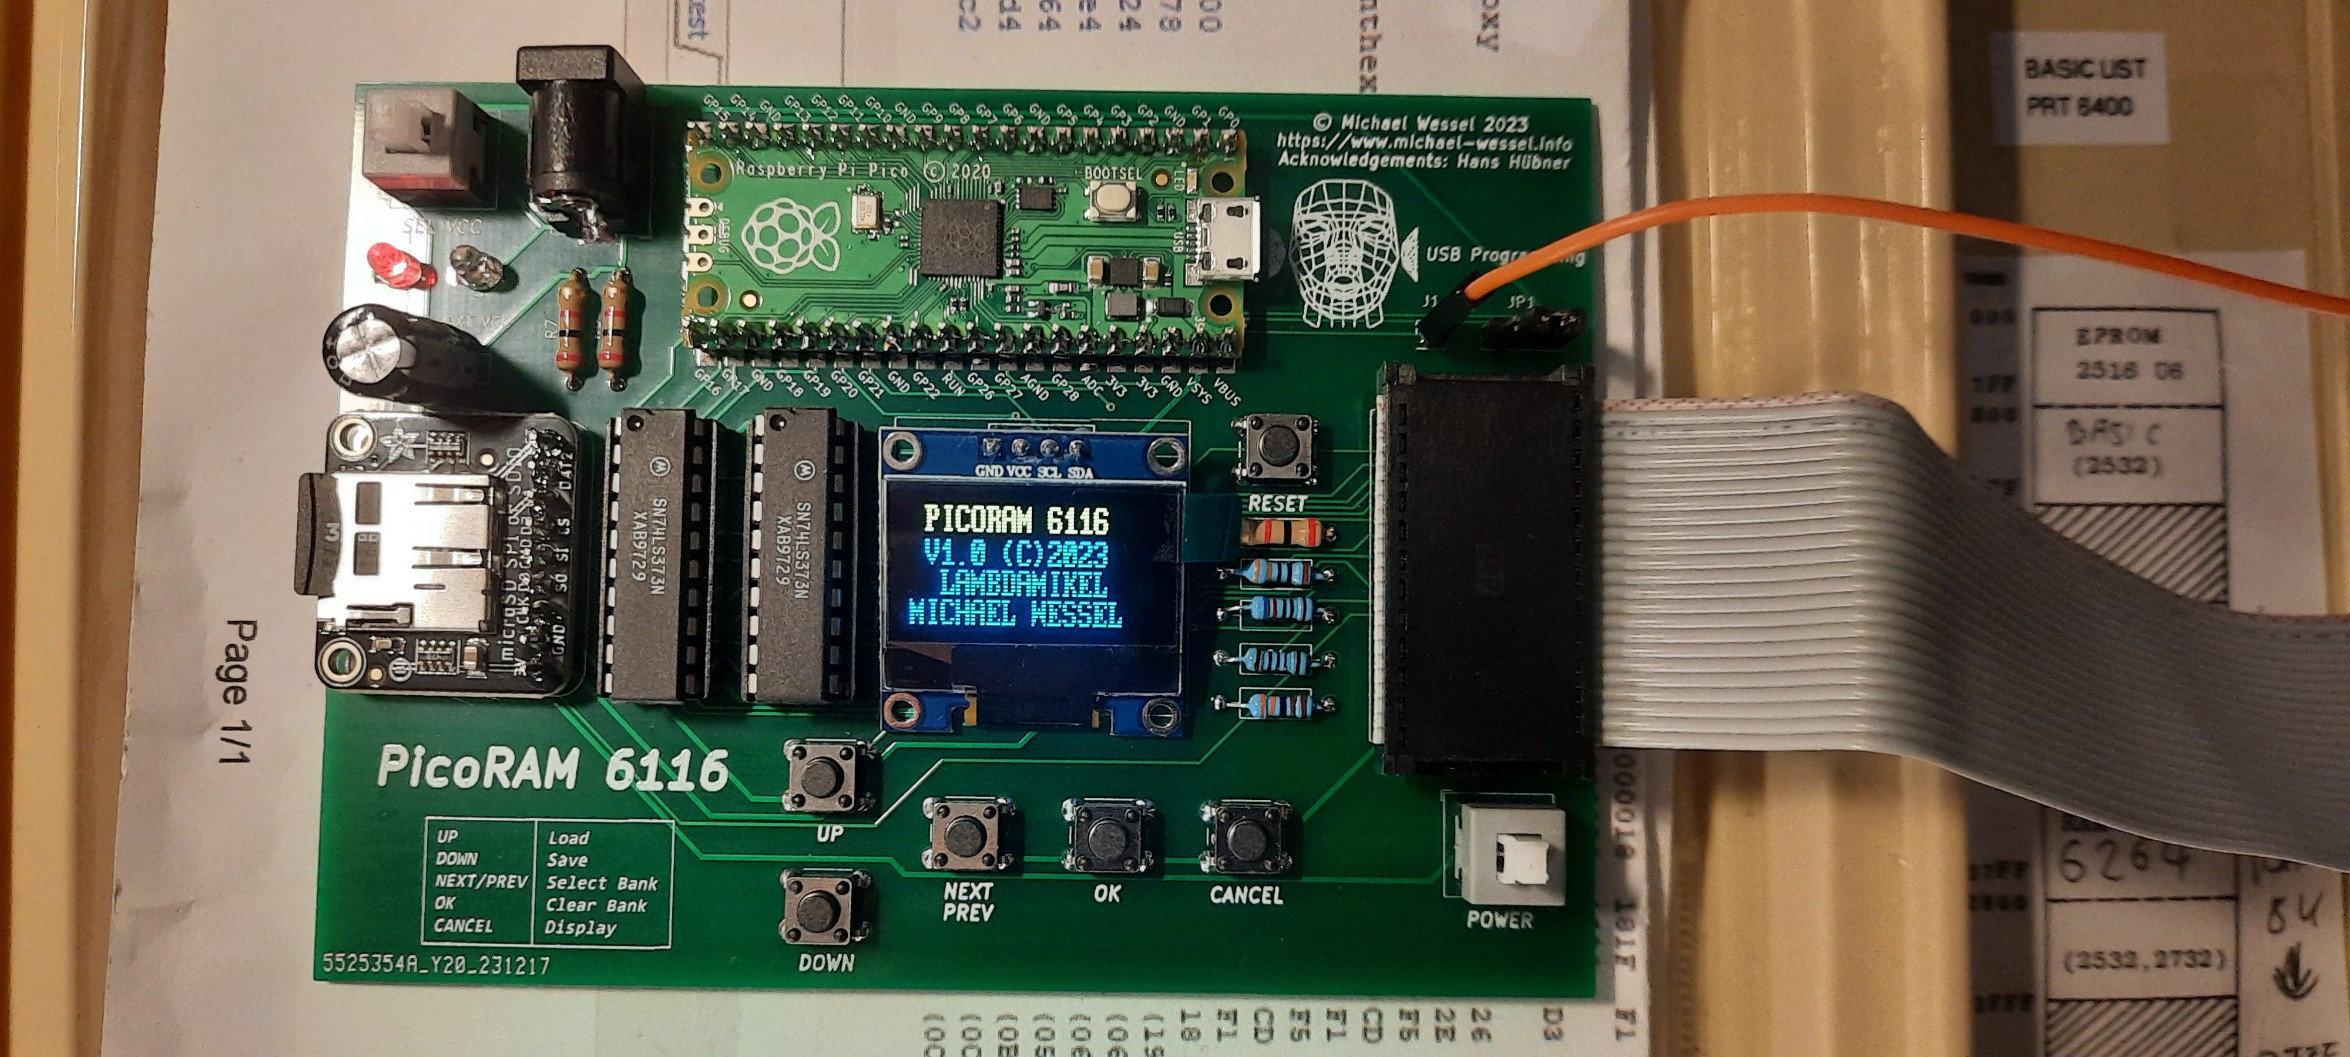
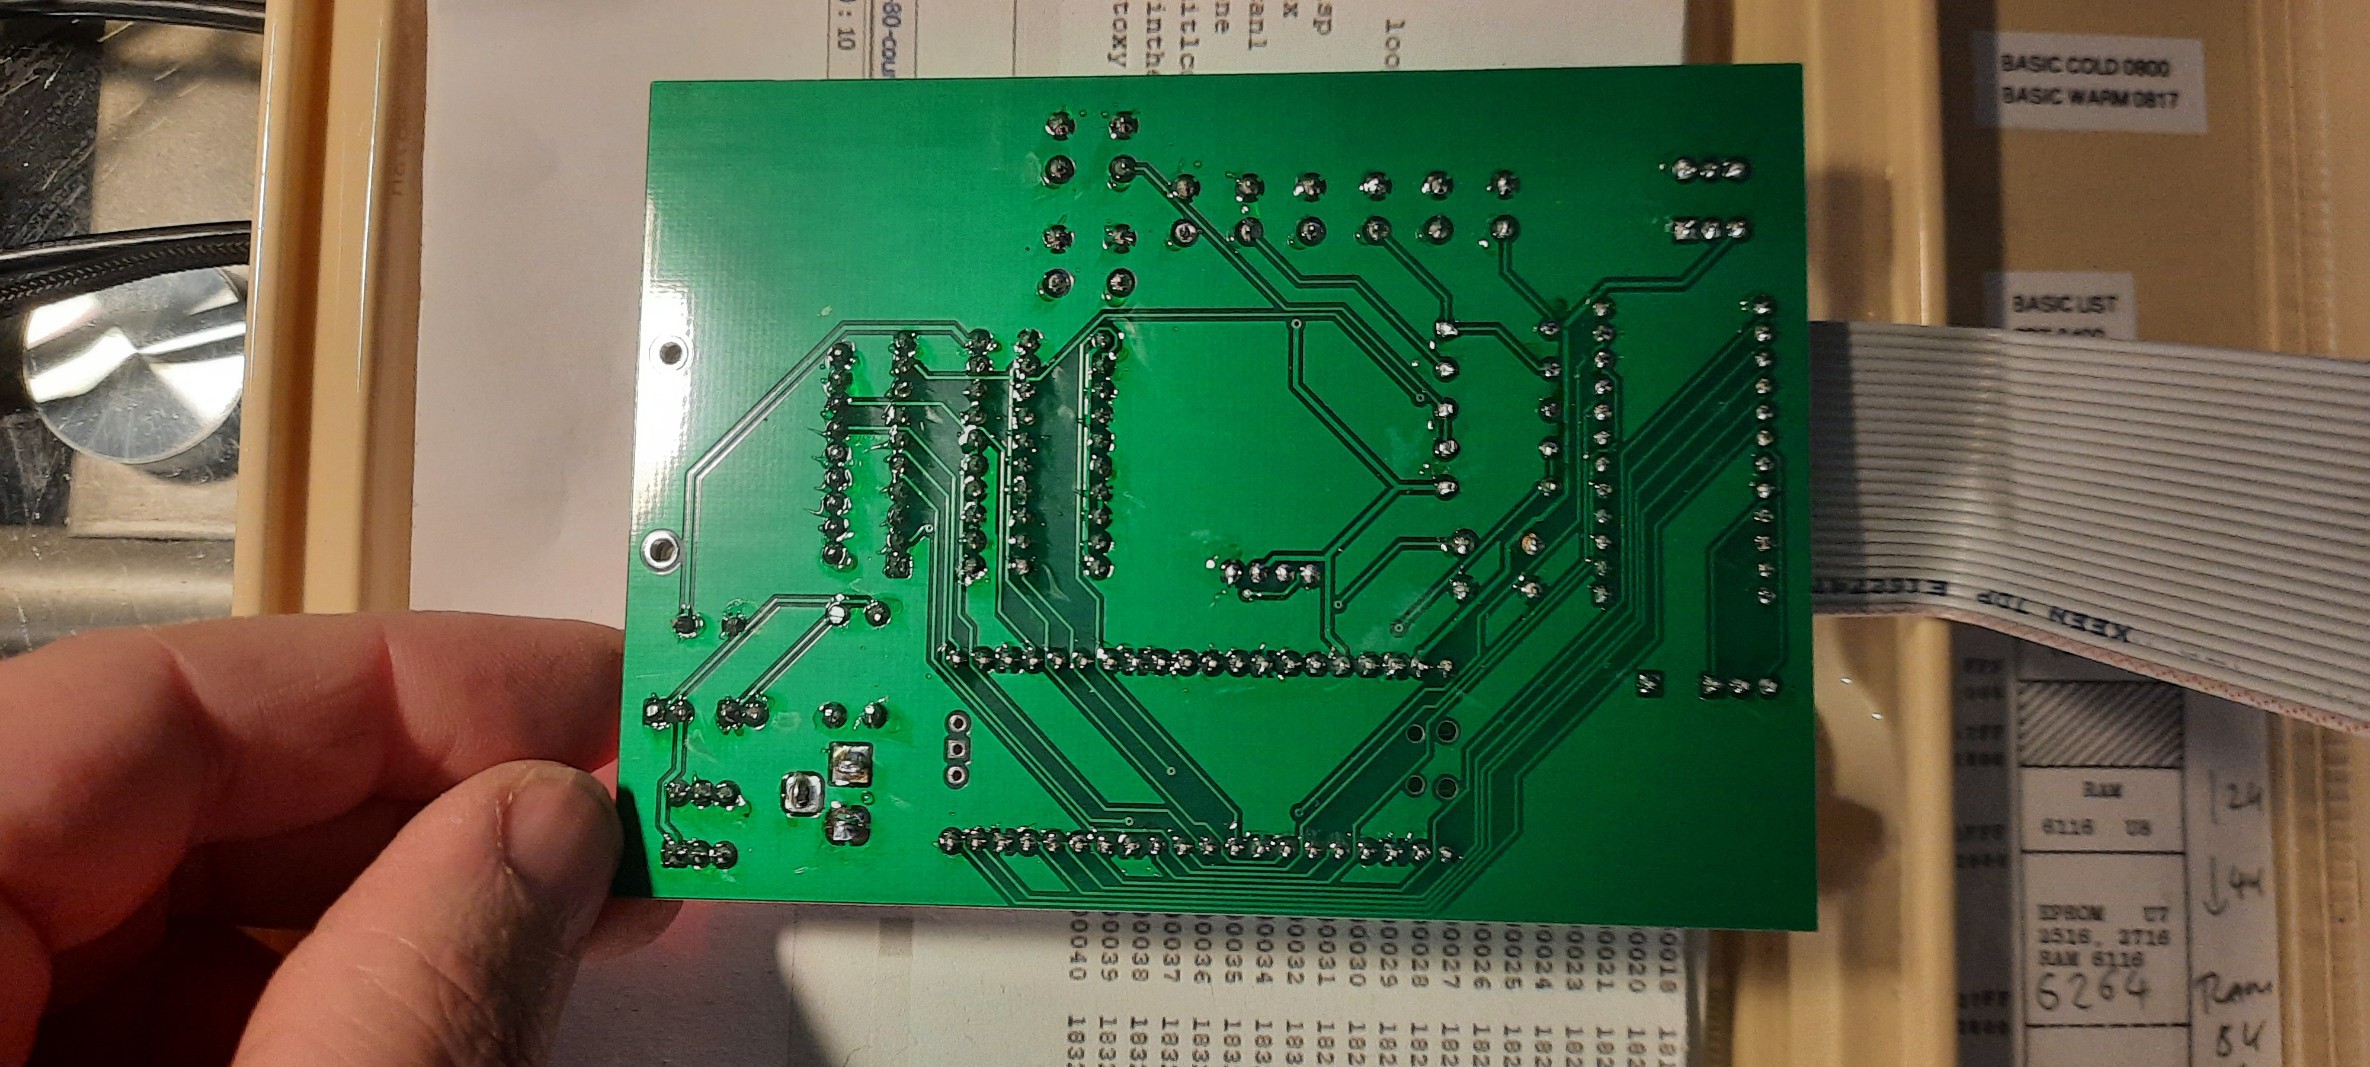
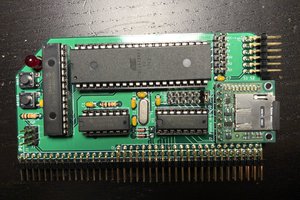
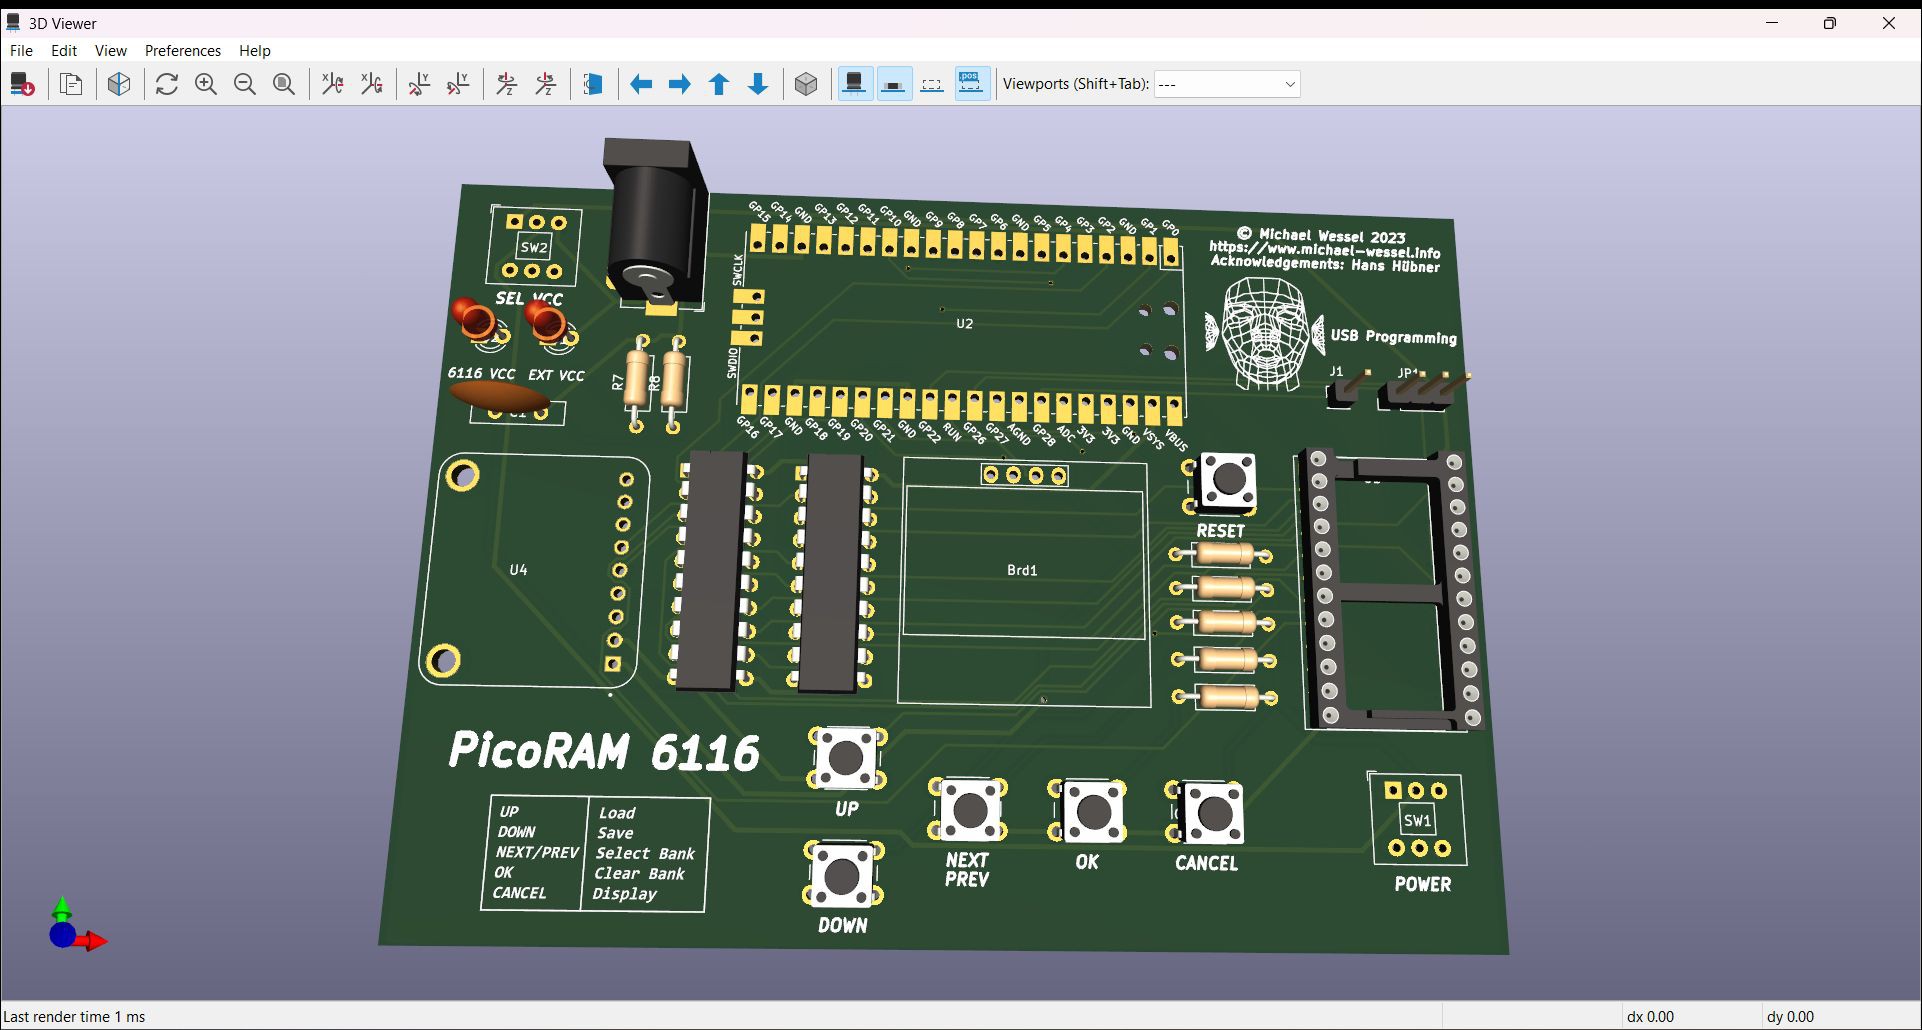
After a number of iterations, the final PCB looks like this - I have to confess that I needed 4 iterations this time. The availability of very inexpensive PCB production services in the far east made me definitely a bit more careless and more daring in that regard compared to previous projects. Also, I didn't do a breadboard prototype this time... my 3rd iteration PCB (seen in the demo video above) still has a glitch that requires a bodge wire - I forgot to connect LE to VCC...
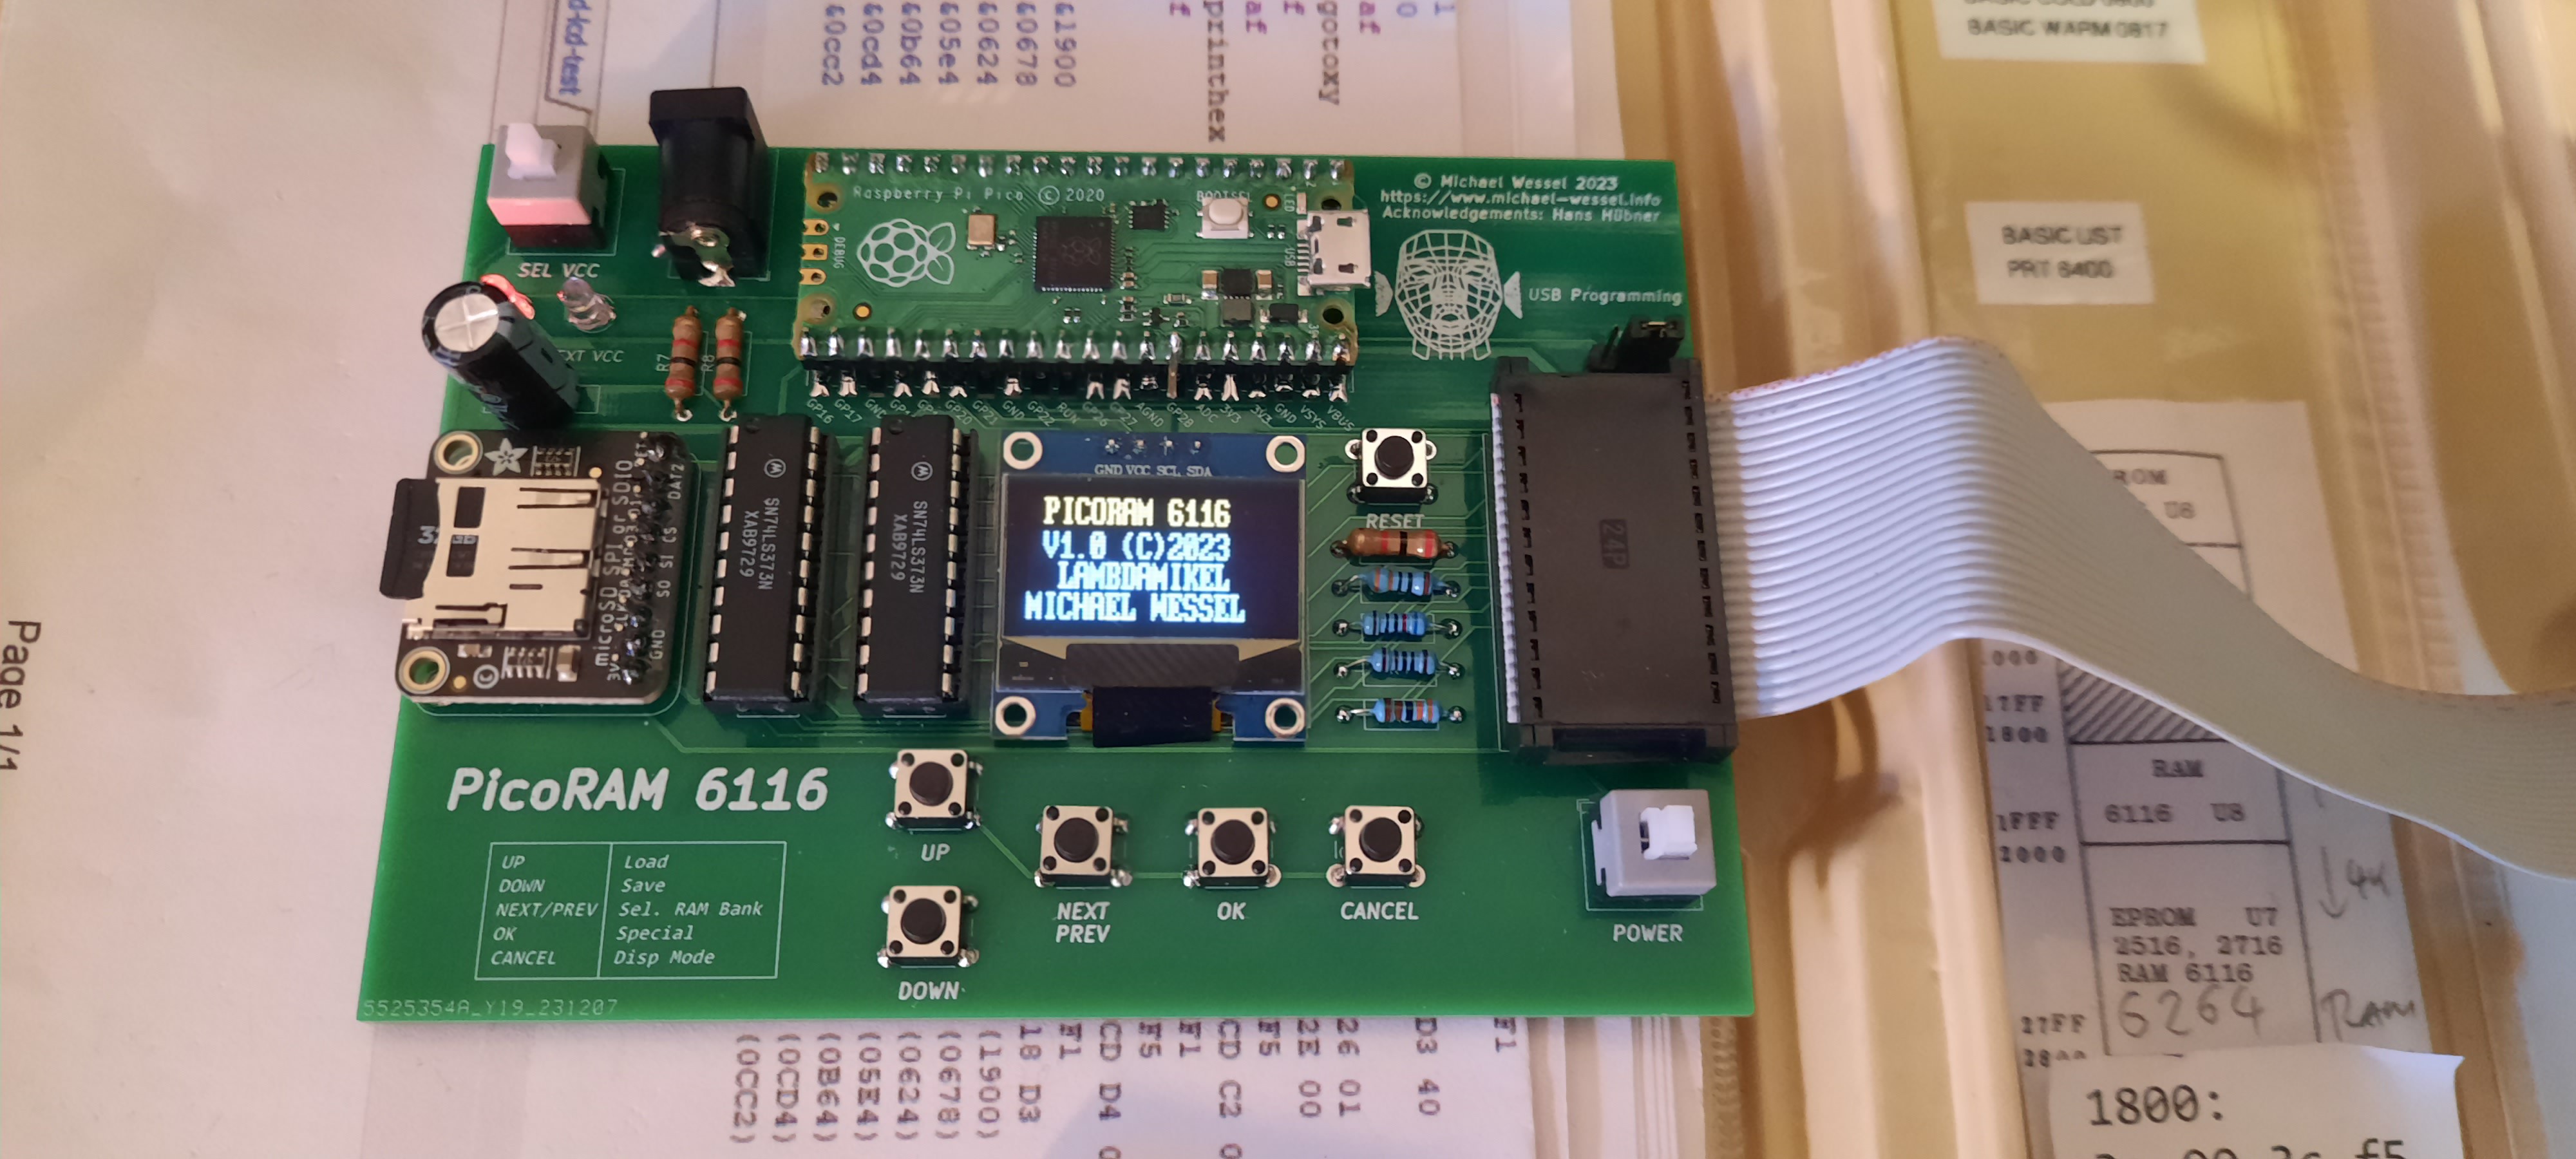
This is the final version: 
The MPF-1B video shows Rev....

Read more »

MPF-1P-PROGS.zip

SD Card Content for MPF-1P

x-zip-compressed - 1.18 kB - 12/26/2023 at 23:19

Download

MPF-1B-PROGS.zip

SD Card Content for MPF-1B

x-zip-compressed - 2.77 kB - 12/26/2023 at 23:18

Download

6116-MPF-1P.INI

6116.INI for MPF-1P (One Plus / IP)

ini - 56.00 bytes - 12/26/2023 at 22:54

Download

6116-MPF-1B.INI

6116.INI file for MPF-1B

ini - 77.00 bytes - 12/26/2023 at 22:45

Download

sram6116.zip

Latest Firmware Version 1.1

x-zip-compressed - 51.59 kB - 12/26/2023 at 22:37

Download

View all 7 files

View all 12 components

  • Using the MPF-1P Printer and PicoRAM 6116 simultaneously

    Michael Wessel04/13/2024 at 19:46 0 comments

    Let's print out a solution for the Towers of Hanoi with 5 disks:

  • The Towers of Hanoi on the MPF-1P!

    Michael Wessel04/12/2024 at 17:53 0 comments

  • Next-Level Software Development with PicoRAM 6116

    Michael Wessel02/26/2024 at 05:56 0 comments

    PicoRAM 6116 is taking Microprofessor MPF-1B software development to the next level - instead of keying in hex codes with the monitor, use a comfortable state-of-the.art Z80 assembler on the PC or Mac, assemble / compile the HEX file there, put it on SD card, and feed it to the Microprofessor! In this video I am developing a "Towers of Hanoi" program for the MPF-1B (recursive version) using asm80.com:

  • Github repo available!

    Michael Wessel12/27/2023 at 17:08 0 comments
  • Firmware v1.1 Release - "6116.INI File" Support

    Michael Wessel12/26/2023 at 22:42 0 comments

    Given the difference in ADC level configuration for the MPF-1P and MPF-1B, I decided to make these configurable. PicoRAM 6116 now reads the 6116.INI file on startup. The file specifies the machine type (MPF-1B or MPF-1P), ADC analog levels for the 5 buttons, 4 auto-load programs for the 4 banks which are loaded on startup, and one more flag (0 or 1) which can be used to debug / determine the voltage ADC levels for the analog buttons. If 1 is used, PicoRAM enters a "debugging loop" which constantly prints the ADC value on the display. The user can then press the buttons and note the values to be specified in the INI file for button configuration.

    I am attaching two 6116.INI files to the files section of the project (one for the MPF-1B, one for the MPF-1P). These need to be renamed as 6116.INI.

    This is the 6116.INI file for the MPF-1B - note that the file requires UNIX EOL (i.e., single LF EOL): 

    MPF-1B
    D00
    C00
    900
    700
    300
    100
    CLOCK.MPF
    DICE2.MPF
    COUNTER2.MPF
    EGGTIME.MPF
    0

  • PicoRAM and the Microprofessor MPF-IP (One Plus)

    Michael Wessel12/25/2023 at 16:08 0 comments

    To my surprise, PicoRAM 6116 () worked almost out of the box on the faster (Z80A-driven) MPF-IP. The only thing I needed to adjust was the analog input for reading the UI buttons - VCC is much more noisy on the MPF-IP; I guess that's because of the VFD. Also, this is Rev. 4 now of the PCB - the little bodge wire pulls down the WAIT line of the Z80. I hence no longer have to hold the Microprofessor in RESET while operating the PicoRAM (or during boot / power cycle).

  • Final PCB revision assembled and confirmed working

    Michael Wessel12/24/2023 at 15:29 0 comments

    The final PCB just arrived - assembled, and tested. Looking good. I am now using the free GPIO (28) from the Pico to pull down the Microprofessor's WAIT line low. Previously, to power cycle the Microprofessor, I needed to hold down the Microprofessor's RESET button to prevent it from accessing the SRAM emulation before the Pico was up and running. Obviously, it takes a bit of time for the Pico to power up - by the time the SRAM emulation was up and running, the Microprofessor had already crashed if not held in RESET otherwise. Now, upon power cycle / reset, I am pulling down WAIT and it is released when the SRAM emulation is up and running. This allows me to power cycle and reset without having to hold down the Microprofessor's RESET button. The WAIT line is on Pin 37 of the Microprofessor expansion pin header.

    The firmware might still get tweaked and improved here and there, but the hardware part of this project is done. I am satisfied with the current revision - of course, it's not perfect, but what is?

  • Thanks to Hackster.io for covering the project!

    Michael Wessel12/20/2023 at 02:35 0 comments
  • Byte Order in the ASCII HEX Files Corrected

    Michael Wessel12/19/2023 at 07:43 0 comments

    Turns out that the bytes in the generated ASCII HEX files were "out of order" because the internal memory addresses of PicoRAM 6116 don't match the linear order of the physical address space. Well, the Microprofessor obviously doesn't care as long as the address (re-)mapping is consistent (and it was) - but once you export this "internally garbled" memory content to an ASCII HEX file all your bytes are out of order and you don't recognize your program any longer. And editing on the PC becomes impossible, of course. 

    So, I needed some masking and bit shifting before writing the HEX file - this is doing the trick: 

      for (uint32_t b = 0; b < 2048; b++) {
        uint32_t i = 
          ((b & 0b00000000000000000000000000100000) ? 1 : 0) << 0x5 |
          ((b & 0b00000000000000000000000001000000) ? 1 : 0) << 0x0 |
          ((b & 0b00000000000000000000000010000000) ? 1 : 0) << 0x1 |
          ((b & 0b00000000000000000000000100000000) ? 1 : 0) << 0x2 |
          ((b & 0b00000000000000000000001000000000) ? 1 : 0) << 0x3 |
          ((b & 0b00000000000000000000010000000000) ? 1 : 0) << 0x4 |
          ((b & 0b00000000000000000000000000000001) ? 1 : 0) << 0x6 |
          ((b & 0b00000000000000000000000000000010) ? 1 : 0) << 0x7 |
          ((b & 0b00000000000000000000000000000100) ? 1 : 0) << 0x8 |     
          ((b & 0b00000000000000000000000000001000) ? 1 : 0) << 0x9 |
          ((b & 0b00000000000000000000000000010000) ? 1 : 0) << 0xA ;
        sdram[b] = ram[cur_bank][i];      
      }

    The order of the bytes in the sdram array then matches the byte order in the physical address space and what is observed by the user with the MPF-1B monitor program. Hence, I can now write ASCII HEX files on the PC, using an assembler, or a simple text editor, in a natural way. 

    I have updated the firmware file in the files section here.

    Also, I extended the ASCII HEX file format so that I can specify a start address (origin, via @<address> in the file), and partial HEX files are fine as well (i.e., you don't have to specify 2048 Bytes, fewer are fine - obviously, it would be super annoying of having to add hundreds of zero bytes just for padding your program to fill the memory). In addition, the reader is now accepting upper and lower case HEX characters (A-F, a-f), just to facilitate editing with a text editor on the PC (CAPS LOCK and HEX doesn't go together well, as you are losing the numbers with CAPS LOCK!)

    Here are a few example programs illustrating the file format: 

    Simple Counter: 
    
    3e 00 3c f5 21 00 19 cd 78 06 f1 f5 dd 21 00 19
    cd 24 06 f1 18 ec
    
    Simple Counter with Sound starting at address 0x1900 (instead of default which is 0x1800): 
    
    @1900
    3e 00 3c f5 21 00 19 cd 78 06 f1 f5 dd 21 00 19
    cd 24 06 f1 f5 21 0a 00 4f cd e4 05 f1 18 e3 00
    
    ASCII HEX saved by PicoRAM (full memory dump): 
    
    3E 00 3C F5 21 00 19 CD 78 06 F1 F5 DD 21 00 19
    CD 24 06 F1 F5 21 0A 00 4F CD E4 05 F1 18 E3 00
    00 00 00 00 00 00 00 00 00 00 00 00 00 00 00 00
    00 00 00 00 00 00 00 00 00 00 00 00 00 00 00 00
    00 00 00 00 00 00 00 00 00 00 00 00 00 00 00 00
    00 00 00 00 00 00 00 00 00 00 00 00 00 00 00 00
    00 00 00 00 00 00 00 00 00 00 00 00 00 00 00 00
    00 00 00 00 00 00 00 00 00 00 00 00 00 00 00 00
    00 00 00 00 00 00 00 00 00 00 00 00 00 00 00 00
    00 00 00 00 00 00 00 00 00 00 00 00 00 00 00 00
    00 00 00 00 00 00 00 00 00 00 00 00 00 00 00 00
    00 00 00 00 00 00 00 00 00 00 00 00 00 00 00 00
    00 00 00 00 00 00 00 00 00 00 00 00 00 00 00 00
    00 00 00 00 00 00 00 00 00 00 00 00 00 00 00 00
    00 00 00 00 00 00 00 00 00 00 00 00 00 00 00 00
    00 00 00 00 00 00 00 00 00 00 00 00 00 00 00 00
    00 00 00 00 00 00 00 00 00 00 00 00 00 00 00 00
    00 00 00 00 00 00 00 00 00 00 00 00 00 00 00 00
    00 00 00 00 00 00 00 00 00 00 00 00 00 00 00 00
    00 00 00 00 00 00 00 00 00 00 00 00 00 00 00 00
    00 00 00 00 00 00 00 00 00 00 00 00 00 00 00 00
    00 00 00 00 00 00 00 00 00 00 00 00 00 00 00 00
    00 00 00 00 00 00 00 00 00 00 00 00 00 00 00 00
    00 00 00 00 00 00 00 00 00 00 00 00 00 00 00 00
    00 00 00 00 00 00 00 00 00 00 00 00 00 00 00 00
    00 00 00 00 00 00 00 00 00 00 00 00 00 00 00 00
    00 00 00 00 00 00 00 00 00...
    Read more »

  • First Demo Video Online! Microprofessor MPF-1B and PicoRAM 6116

    Michael Wessel12/17/2023 at 18:52 0 comments

View all 10 project logs

View all instructions

Enjoy this project?

Share

Discussions

Michael Wessel wrote 12/17/2023 at 15:18 point

Thanks Ken - ha, yeah, emulating the Pico with the 6116 would be an even bigger challenge I guess :rofl

  Are you sure? yes | no

Ken Yap wrote 12/17/2023 at 05:41 point

Very nice job. 👍 The debugging possibilities are endless. Too bad the emulation can't go the other way as I have this pile of 6116 RAM chips... ☹️🤷

  Are you sure? yes | no

Similar Projects

Does this project spark your interest?

Become a member to follow this project and never miss any updates