Close
0%
0%

Sustainable optical media data destruction

This project is an overview of available options for safe data destruction on optical media without physically destroying the discs.

Public Chat
Similar projects worth following
448 views
Most common suggestion for protecting personal information on optical media is physical disc destruction. However this does not always means the most sustainable way of dealing with the problem.
Optical media discs are not widely recyclable and thus meaning that discs have to shipped to a special recycling facility (possible data breach) or destroyed (shredded) at the point of origin, but limiting the recyclability of the material, which still requires shipping.
Keeping CDs and DVDs intact but with destroyed data means that they could be safely shipped to be recycled or reused for an art project etc.
This projects covers available options for data destruction on CDs and DVDs, while keeping the discs intact.

This project started with a small digitization project in a University - transferring student project from various storage media to cloud storage from a historic span of 30 years.

This generated around 500 CDs and DVDs. Apparently these discs are not widely recycled and not many facilities guaranties safe data destruction. Keeping the discs intact is an interesting proposition for secure shipping, recycling at facilities that does not provide secure destruction service and even art projects.

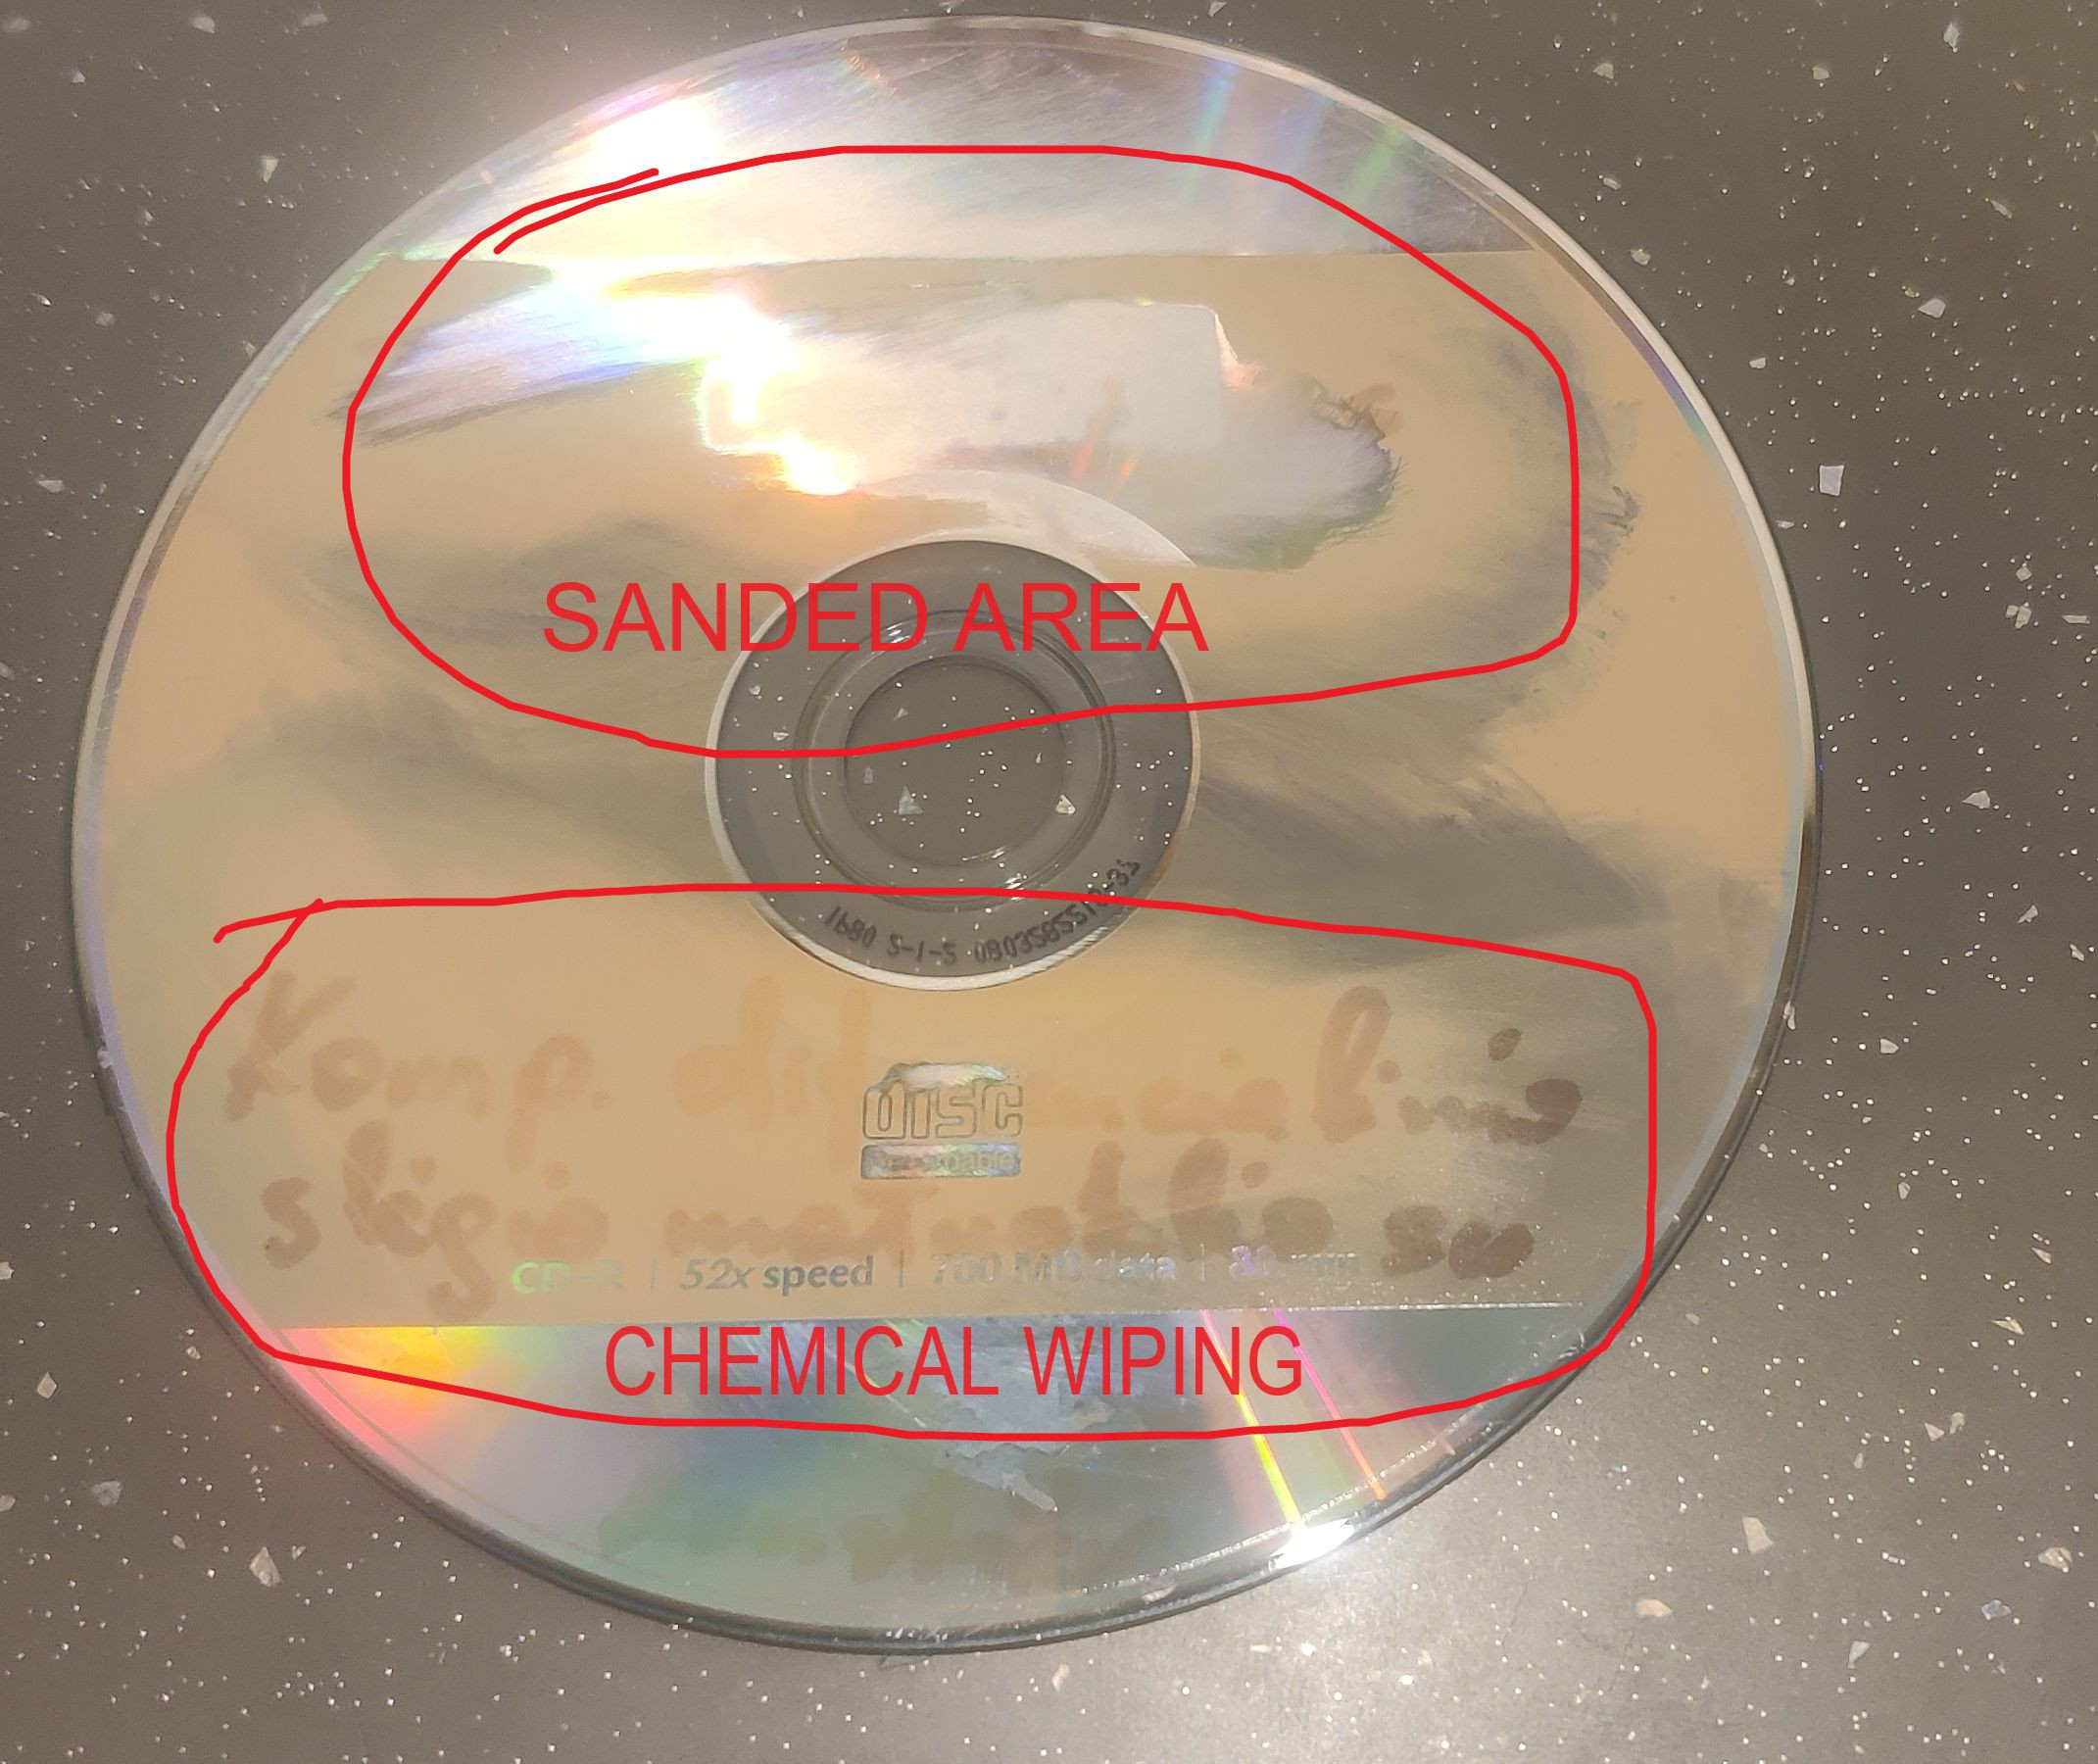
Falling back on the physics of operation of CD/DVDs it is intuitive to think that it should be possible to force overwrite of the data effectively destroying any structures in the data layer. Unfortunately standard optical drives does not allow for this due to firmware limitations.

There are only several optical drives that are capable of achieving this, with proprietary software. Namely

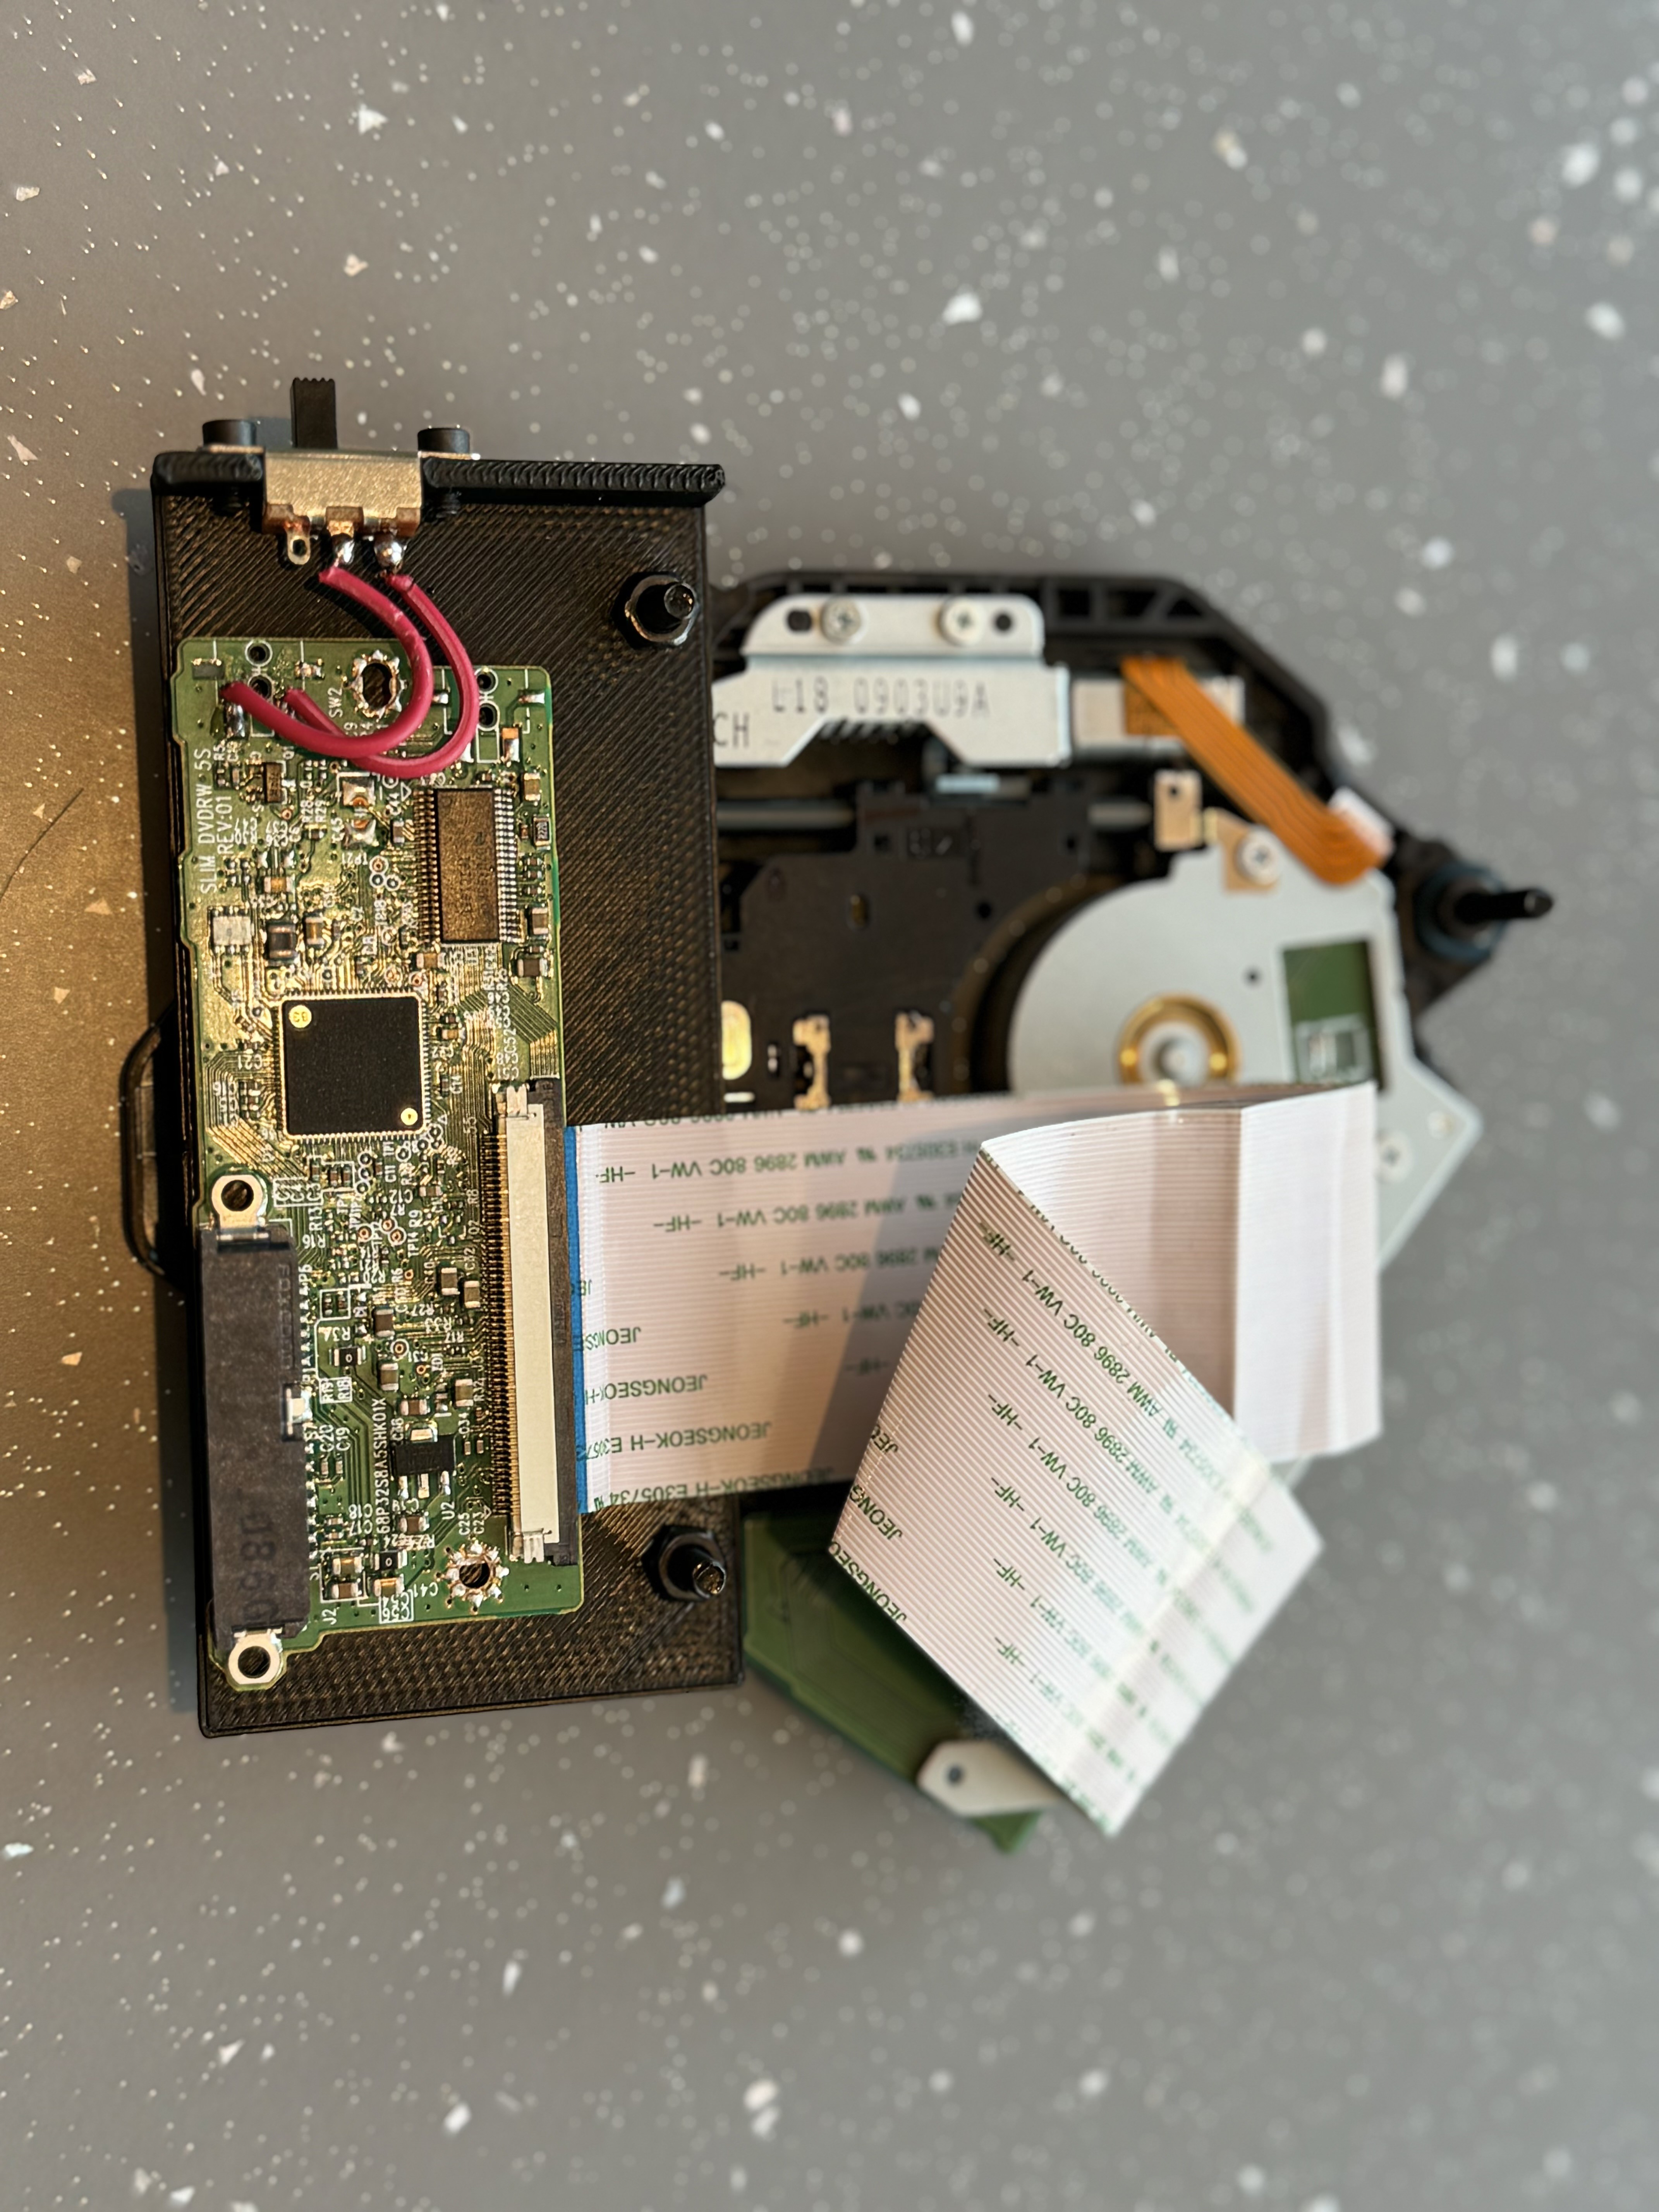
Lite-on SmartErase feature in drives: IHAS324, IHAS424, IHAS524, DS-8A5SH and DS-8A5LH

Asus E-hammer feature in drives: DRW-24B3LT, DRW-24B1ST

Plextor PlexERASE feature in drive: PX-Q840U (possibly others, as difficult to find info on Plextor drives).

Also there is a specialty device that performs only the data destruction - Plextor Plexeraser PX-OE100E.

Lite-on bracket.stl

Bracket for 3D printing to hold the control board

Standard Tesselated Geometry - 10.73 kB - 12/30/2023 at 17:57

Download

EHammer.zip

E-hammer utility installer for compatible Asus drives

x-zip-compressed - 3.20 MB - 12/27/2023 at 18:50

Download

SErase.zip

Standalone SmartErase software for compatible Liteon drives

x-zip-compressed - 855.37 kB - 12/27/2023 at 18:49

Download

  • 1 × Lite-on DS-8A5XX drive
  • 1 × Slimline SATA to USB adapter
  • 1 × Slide Switch
  • 1 × M3x20 DIN912 bolts with nuts
  • 1 × 3D printed bracket

  • USB powered optical disc data destructor

    Benas01/07/2024 at 08:18 0 comments

    As in the previous project log - two slim Lite-on drives supports SmartErase feature. SmartErase software processes the full disc surface, regardless of the amount of actual burnt data on the disc. While Asus E-hammer only processes the burnt data area, making it way faster for discs with small amount of data, but it did not seem to work with DVDs and DVD-DLs on several setups tried. Also Asus drives with E-hammer are only full size desktop drives.

    With all this in mind it would be nice to have a USB powered (slim optical drive) that could process the discs faster and would be able to cope with all media types (BD-Rs are not in question here).

    By modifying a DS-8A5 to have a manual eject button it is possible to have a USB powered device that is smaller than a disc and can erase the disc up to a manually controlled area.

    Required components are in the components list. Steps for making the USB powered disc destructor:

    Take a Lite-on DS-8A5XX drive apart, keeping the main disc drive assembly, wide ribbon cable (which is glued to the case and requires careful removal) and the control board.

    Main optical assembly is held on 3 pegs that protrudes through rubber bushings. M3 bolts works well to be used as standoffs (see pictures).

    Flex cable needs to be refolded as in the pictures.

    Main board requires one modification - the microswitch that is at the edge (for disc carrier detection) of the PCB, needs to be removed and two small wires soldered on the contact pads.

    Component list has the file for 3D printable PCB/switch holder that mounts on the two M3 bolts mentioned earlier as a standoff.

    The 3D model only has the large cutout for the slide switch, but the bolt holes (due to switches being different dimensions), but they can be easily made with a soldering iron before final assembly.


    To finalize the device - solder the two wires from the PCB (modification mentioned earlier) to the slide switch. Mount the PCB with double sided tape to the printed holder. Mount the switch to the 3D printed holder. Mount the holder to the optical assembly on the two M3 bolts as standoffs.

    What this device allows to do is to stop the data destruction process at any point by sliding switch to off position - simulating the ejection of the disc. This results in correct finalization of the process in the SmartErase software. Take the disc off, put the new one on, slide the switch, and You are good to go again. With this mod, One can quickly process discs with only a few MB of data burnt (like some student project file), by stopping the process when it is passed the burnt data area. This obviously requires some trial and error. From experience stopping the process at 40% indication on SmartErase software covers enough of disc when up to a 50MB of data. With DVD it is possible to see the laser doing its job through the disc label side, so the stopping point can be visually determined.

    Pictures speak a thousand words:

  • Data on the Label Side

    Benas12/30/2023 at 17:16 0 comments

    Previous entries described tested options for the data. Unfortunately there can also be personal information on the label side of disc which must be removed.

    During this digitization project, about 150 discs had personal information on them, like names, years of graduation etc.

    I had the discs classified into groups based on physical properties of labels:

    1. No writing
    2. Marker writing - about 140-150 discs
    3. Stick-on labels - 5 discs
    4. Lightscribe/Labelflash - 4 discs


    Simplest to remove/process are the stick-on labels - some minutes in water and they just come off easily, paper labels to recycling. Only had several of these, so no problem.

    More interesting are the marker labels. Oldest discs were from 2004, making them 20 years old now. Tried chemical solvents - isopropyl alcohol and acetone to remove the writings. Worked ok for removing the actual marker paint. Acetone being more aggressive did a quicker job. Used some cotton pads as a wipe. But this made an inconsistent result, was quite messy overall and toxic chemicals were involved.

    Biggest issue was the fact, that even after chemical wiping the original markings were etched into the label layer of disc, making the information readable even after the marker paint was removed. This was not good.

    Really efficient way that I found to work is using 800 grit wet-and-dry sandpaper with water. Most discs required minimal effort to "sand-off" the markings even without chemically treating before hand. For around 150 discs I have used about half of A4 sheet of sandpaper. No chemicals needed and light sanding of label side keeps the actual data layer intact. Below is an image for how the text looks like after only wiping.

    Lightscribe and Labelflash markings can also be removed by sandpaper, but the labels has a protective layer, which makes the process more labor intensive. Go with sandpaper if only a few discs.

  • Lite-on SmartErase

    Benas12/27/2023 at 20:24 0 comments

    Below is a short experience description with the Lite-on SmartErase.

    Going by Lite-ons' website only drives IHAS324, IHAS424, IHAS524 supports SmartErase feature. These drives are pretty much unobtainium, but... When looking for supported hardware I came across this blog post: https://moisescardona.me/the-liteon-ds-8a5s-supports-smarterase/  by Moisés Cardona. Here he tries out Lite-on DS8A5S and it seems to support the SmartErase feature, although not specified by Lite-on.

    This drive was commonly in various brands of laptops. With this in mind I have managed to obtain 10 drives for 2 Eur/each from a laptop recycler - awesome.

    One note on hardware - laptop optical drives uses Slimline SATA connector, which is not physically compatible with the regular SATA connectors. Data part is compatible, but power side is not physically and electrically compatible. Thus this drive, if used through USB, requires a Slimline SATA to USB adapter.


    Same as with E-hammer, SmartErase has two options - Quick Erase and Full Erase. Quick Erase seems to be identical to E-hammer, where only the Lead-in and Lead-out are deleted. Full Erase processes the whole disc surface. Whole disc surface gets "overwritten" with a pattern which looks like a vinyl record when viewed against a light source.  SmartErase software works well on Windows 10+11

    Full Erase of a CD takes around 3 minutes and does not depend on the amount of data on the disc - it still processes the whole disc. Thus if many discs, with small amount of data on them, needs to be destroyed than Asus would generally be a better option.

    With Lite-on drive different types of DVDs were processed correctly. DVD-DL included.

  • Asus E-hammer

    Benas12/27/2023 at 19:23 0 comments

    Below is a short experience description with the Asus E-hammer.


    Going by Asus website only drives: DRW-24B3LT and DRW-24B1ST support E-hammer software.

    Since these drives are not really available new in the EU, firstly I tried the Asus DRW-24D5MT drive in the hope that it might support E-hammer and is just not listed, since E-hammer is from Windows XP era.

    No, DRW-24D5MT does not support E-hammer. Then I got a new DRW-24B1ST from US, since a used desktop optical drive market is not really a thing.

    Used a SATA to USB adapter to connect the drive to the computer. E-hammer works with both Windows 10 and 11.

    E-hammer utility is a blast from the past, where its interface is based on some images. Anyway... The facility is really basic, provides just two options - Easy Delete and Total Delete.

    Easy Delete destroys only the Lead-in and Lead-out areas of the discs. Leaving the disc unreadable by the operating system, but potentially the data could be recovered, since it is not overwritten.

    Total Delete destroys the slightly larger disk area than where the data is. This can be visually seen as the area of the disc that has "different color" extends past the original burned data area.

    It takes up to 3 minutes for a full disk destruction. If only a few MBs are used up then the process is significantly shorter - up to 30 seconds per disc for 50MB of data.

    After "erasing" the disc, it shows up as a blank disc, or the drive thinks there is no disc inserted.

    During testing/destruction of discs, Asus drive struggled with DVDs. It might have been my setup, but the E-hammer just did not do anything when a DVD was in the drive.


View all 4 project logs

Enjoy this project?

Share

Discussions

Ken Yap wrote 12/27/2023 at 21:18 point

I just microwave the disc for 5 seconds in a plastic bag (to catch the fumes).

  Are you sure? yes | no

Similar Projects

Does this project spark your interest?

Become a member to follow this project and never miss any updates