What is it?
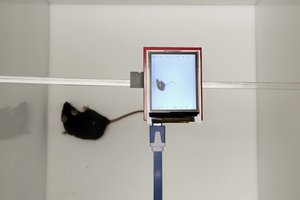
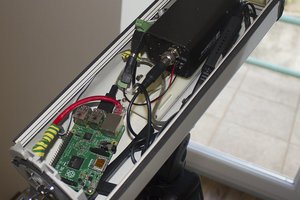
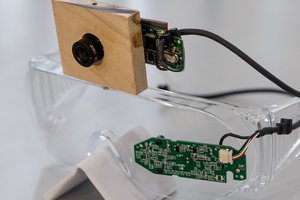
lalelu_drums is a system (hardware + software) that can be used for live music performances in front of an audience. It consists of a camera recording a live video of the player, an AI network that estimates the body pose of the player from each video frame and algorithms that detect predefined gestures from the stream of pose coordinates and create sounds depending on the gestures.
Video 1: Example video showing basic drum pattern
Why?
This type of drumming allows to incorporate elements of dancing into the control of the drum sounds. Also, the drummer is not hidden behind the instrument. Both aspects should promote a more intense relation and interaction between the musician and the audience.
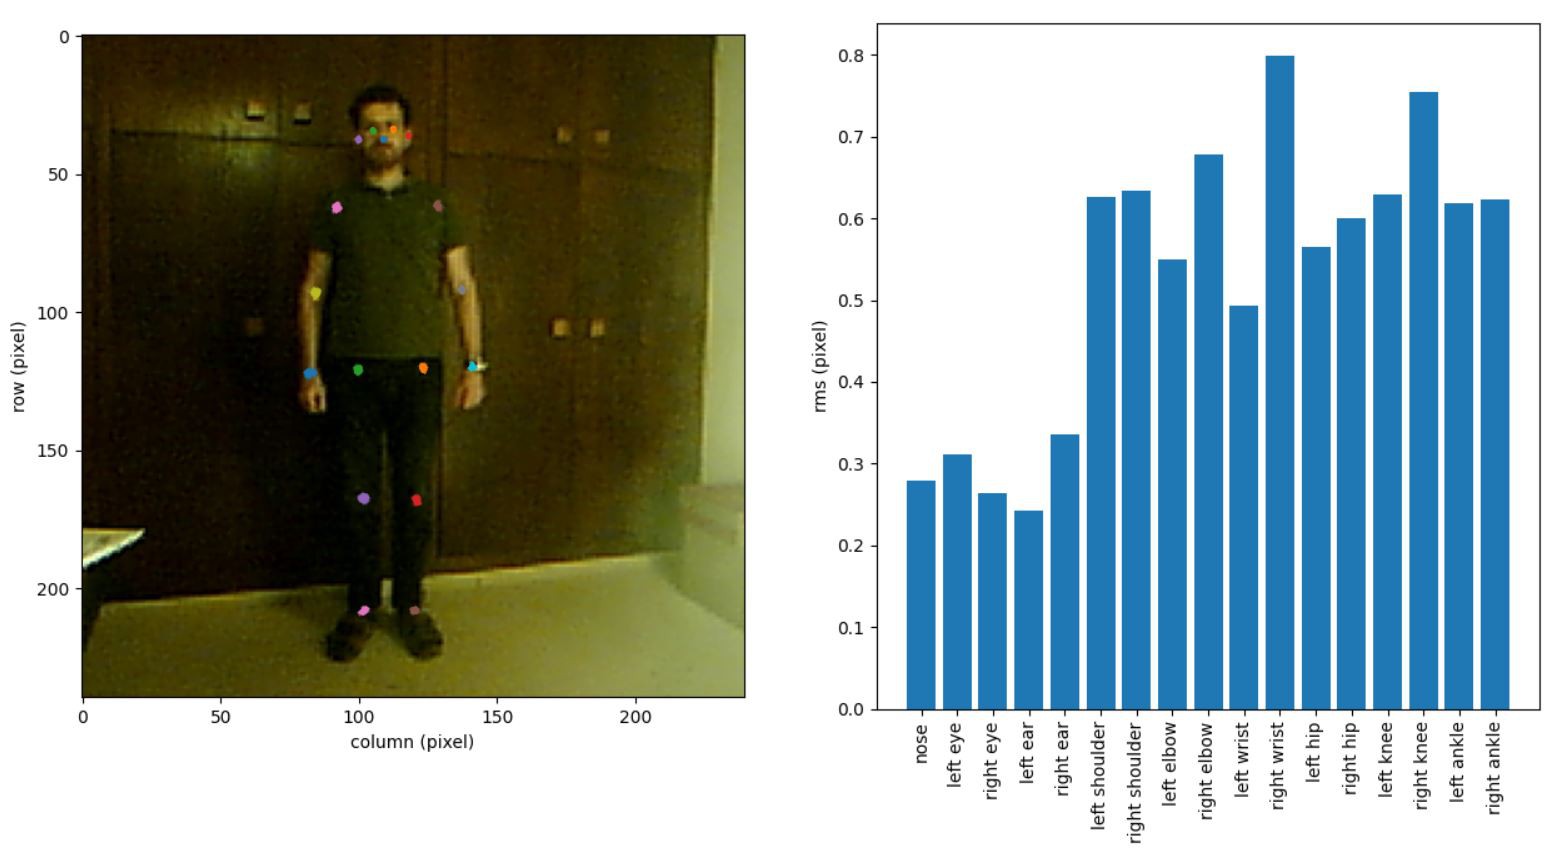
The pose estimation yields coordinates of many different landmarks of the human body (wrists, ellbows, knees, nose, eyes,...) and I envision that there are intriguing options how to create music from gestures with these.
Compared to other forms of modern electronic music control, lalelu_drums can be played with a minimal amount of tech visible to the audience (i. e. the camera in front of the player). It is therefor especially well suited to be combined with acoustic instruments in a low-tech setting.
With this kind of atmosphere in mind and in order to foster a good contact to the audience, I would like to design the system in a way that the player has no need to look at any display while playing. For checking basic parameters like illumination or camera positioning or for troubleshooting, I think a display will be necessary. But it should not be needed for the actual musical performance so that it can be installed in an unobstrusive way.
An interesting application of lalelu_drums is to augment other instruments with additional percussive elements. In such a hybrid setting, the gestures need to be defined taking into account the normal way of playing the instrument.
Video 2: Acoustic cajon and egg shaker augmented with snare drum and two bells
While it is certainly possible to use the arrangement of lalelu_drums to control other types of instruments apart from percussion (e. g. Theremin-like), I chose percussion for the challenge. If it is possible to design a gesture controlled percussion system with acceptable latency and temporal resolution, it should be straight forward to extend it for controlling other types of sounds.
Prior art
There are examples of gesture controlled drums using the kinect hardware:
https://www.youtube.com/watch?v=4gSNOuR9pLA
https://www.youtube.com/watch?v=m8EBlWDC4m0
https://www.youtube.com/watch?v=YzLKOC0ulpE
However, the pose estimation path of the kinect has a frame rate of 30fps and I think that this rate is too low to allow for precise music making.
Here is a very early example based on video processing without pose estimation:
https://www.youtube.com/watch?v=-zQ-2kb5nvs&t=9s
However, it needs a blue screen in the background, and since there is no actual pose detection it can not react on complex gestures.
There is a tensorflow.js implementation from 2023 of a pose estimation based drumming app, but it seems to be targeting rather a game like application in a web browser than a musical instrument for a live performance:
https://www.youtube.com/watch?v=Wh8iEepF-o8&t=86s
There are various 'air drumming' devices commercially available. However, they either need markers for video tracking (Aerodrums) or they use inertia sensors so that the drummer still has to move some kind of sticks (Pocket Drum II) or gloves (MiMU Gloves) and can not use gestures comprising ellbows, legs or face.
One other interesting commercially available device is the Leap motion controller. It uses infrared illumination and dual-camera detection to record high-framerate (115fps) video data of the user's hands from below. The video data is processed by some proprietary algorithm to yield coordinates of the hand and finger joints + tips. Here is a project using the device for making music:
https://www.youtube.com/watch?v=v0zMnNBM0Kg...

 Dario Zubovic
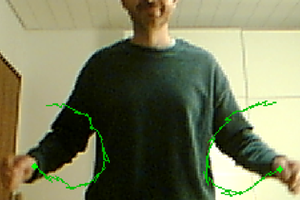
 John Evans