 John Rampelt
ARPS Overview
ARPS (Arduino®-compatible Robot Project Shield) is beginner-friendly add-on shield for the popular Arduino UNO R3 and Arduino UNO R4 circuit families. ARPS is designed to help new learners focus on rapidly developing their programming and interfacing skills without the typical slowdowns associated with assembling, debugging, and reassembling breadboard circuits, and to piggy-back on top of the large numbers of Arduino UNO circuits that are already in use in schools and makerspaces.
A complete set of freely distributable learning activities uses the common beginner electronic devices and circuits built into ARPS to lead new learners through microcontroller fundamental programming concepts. After mastering the basics, learners can continue to apply their skills, adding other hardware devices to the built-in expansion header, or building ARPS into a variety of simple robots.
ARPS Hardware
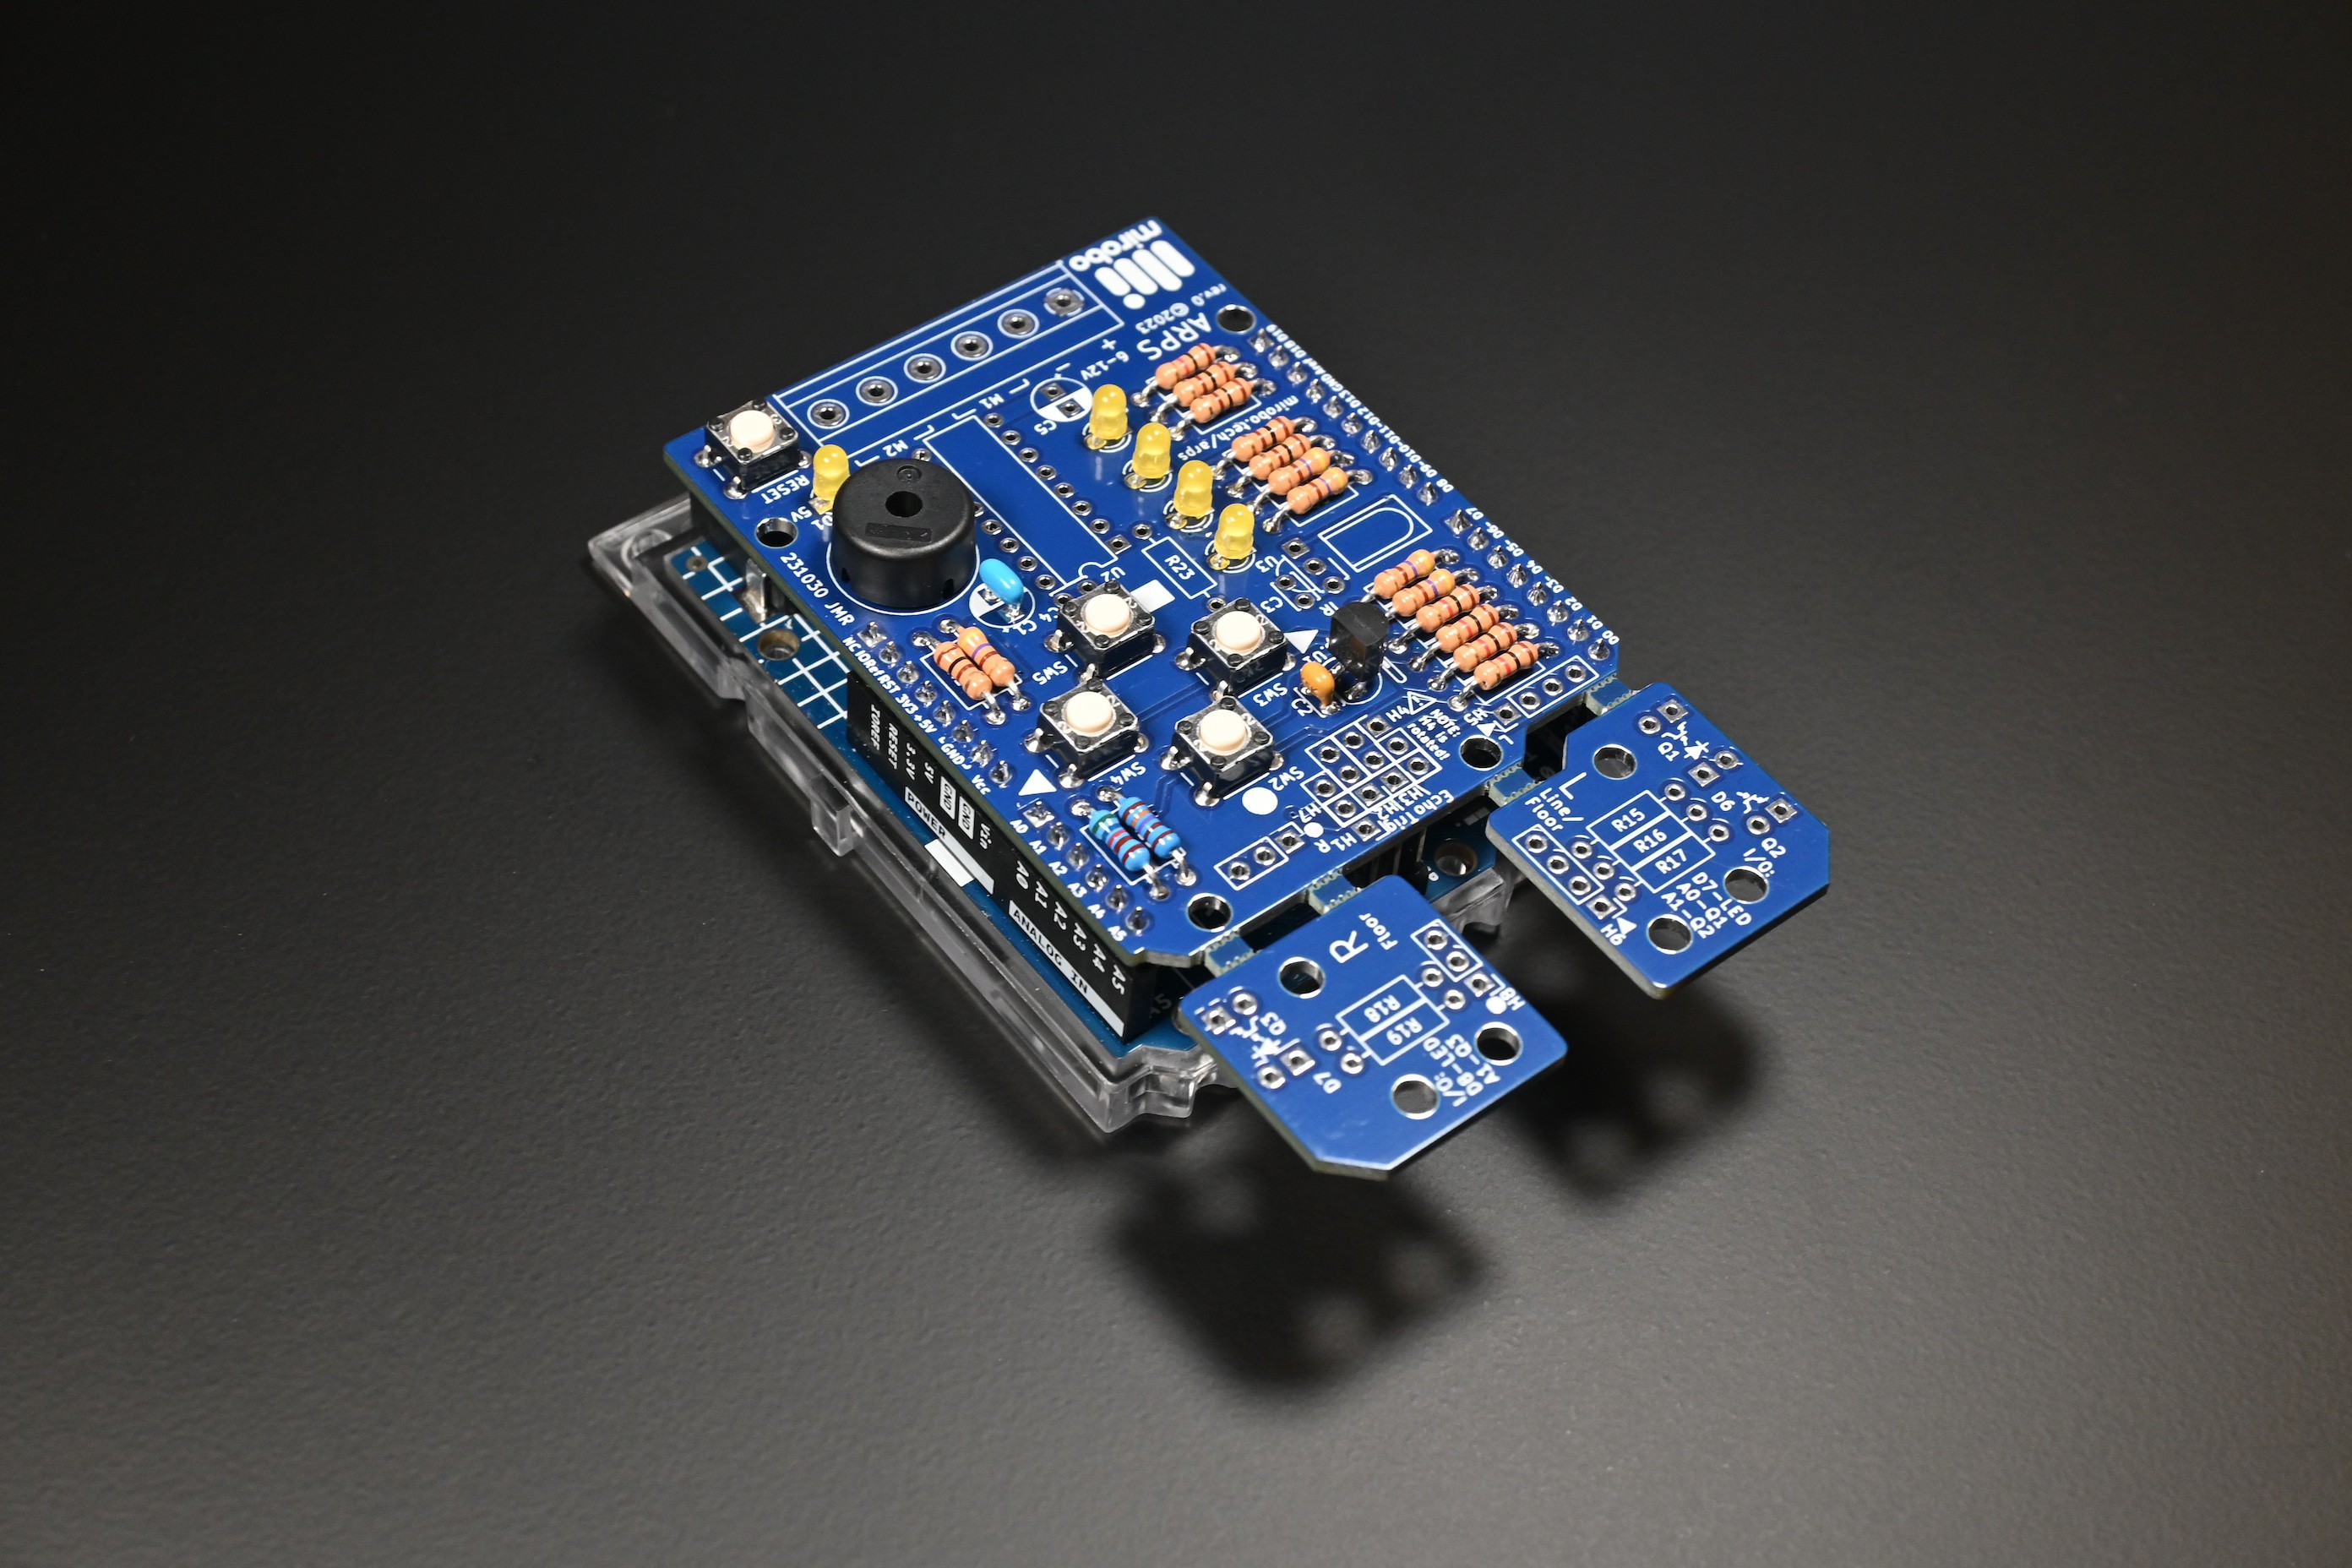
The ARPS circuit hardware is designed to be easy for novices to build, and specifically addresses some of the challenges facing schools, tech clubs, robot camps, and makerspaces. Through-hole components are used exclusively, making it easy for beginners to build their own ARPS circuits while learning about electronic components and soldering without having to deal with tiny USB connector pins or surface mount parts.
ARPS can be purchased as a bare board, or a kit, and can be assembled in a number of configurations, allowing ARPS to be customized for specific applications, projects, or grade levels. For example, schools could reduce overall course costs by not fully populating ARPS circuits with unneeded components and devices, and both classes and robotics clubs could have the flexibility to have ARPS grow with the students as they learn.
ARPS Educational Starter Configuration
The simplest, lowest cost ARPS configuration adds four user pushbuttons, four user LEDs, a piezo speaker, and an analog temperature sensor to Arduino UNO, as well as an additional power LED and RESET button to make it easier use Arduino with the ARPS shield attached. All five introductory learning activities are designed to use only the parts in the Educational Starter configuration, allowing students to assemble and start programming this ARPS configuration quickly, in less time and at a lower cost than a full build.
An ARPS circuit built in its minimal-components Educational Starter configuration, mounted on an Arduino UNO R4. All five introductory learning activities are supported with just the components in this configuration.
Simple Robot Configuration
After completing the introductory programming activities using the Educational Starter configuration, learners can add the motor driver, power supply voltage divider, and screw terminal strip to their ARPS board to control two DC motors in forward and reverse (or four uni-directional DC motors, or a stepper motor). The detachable optical sensor modules make it easy for beginners to add IR LEDs and phototransistors to make line-following robots, or robots with floor or wall sensing.

A simple classroom robot can be assembled using MDF for the chassis material. MDF is easy to cut and drill and makes it simple to mount the detachable floor sensor modules while providing optical isolation between the phototransistors and LEDs.
Sumo Robot/Advanced Configuration
A small expansion header allows for the addition of up to four servos or an ultrasonic SONAR distance sensor module, enabling learners to make ARPS into an obstacle sensing robot or Sumo robot. The addition of an IR demodulator on-board ARPS enables more advanced students to learn about data transmission and encoding, and to create a remote-controlled robot.
ARPS Courseware and Learning Activities
A set of five introductory learning activities as well as a number of advanced activities and starter project examples have been developed for ARPS, and all of these are freely available in the mirobotech GitHub repository and...
Read more »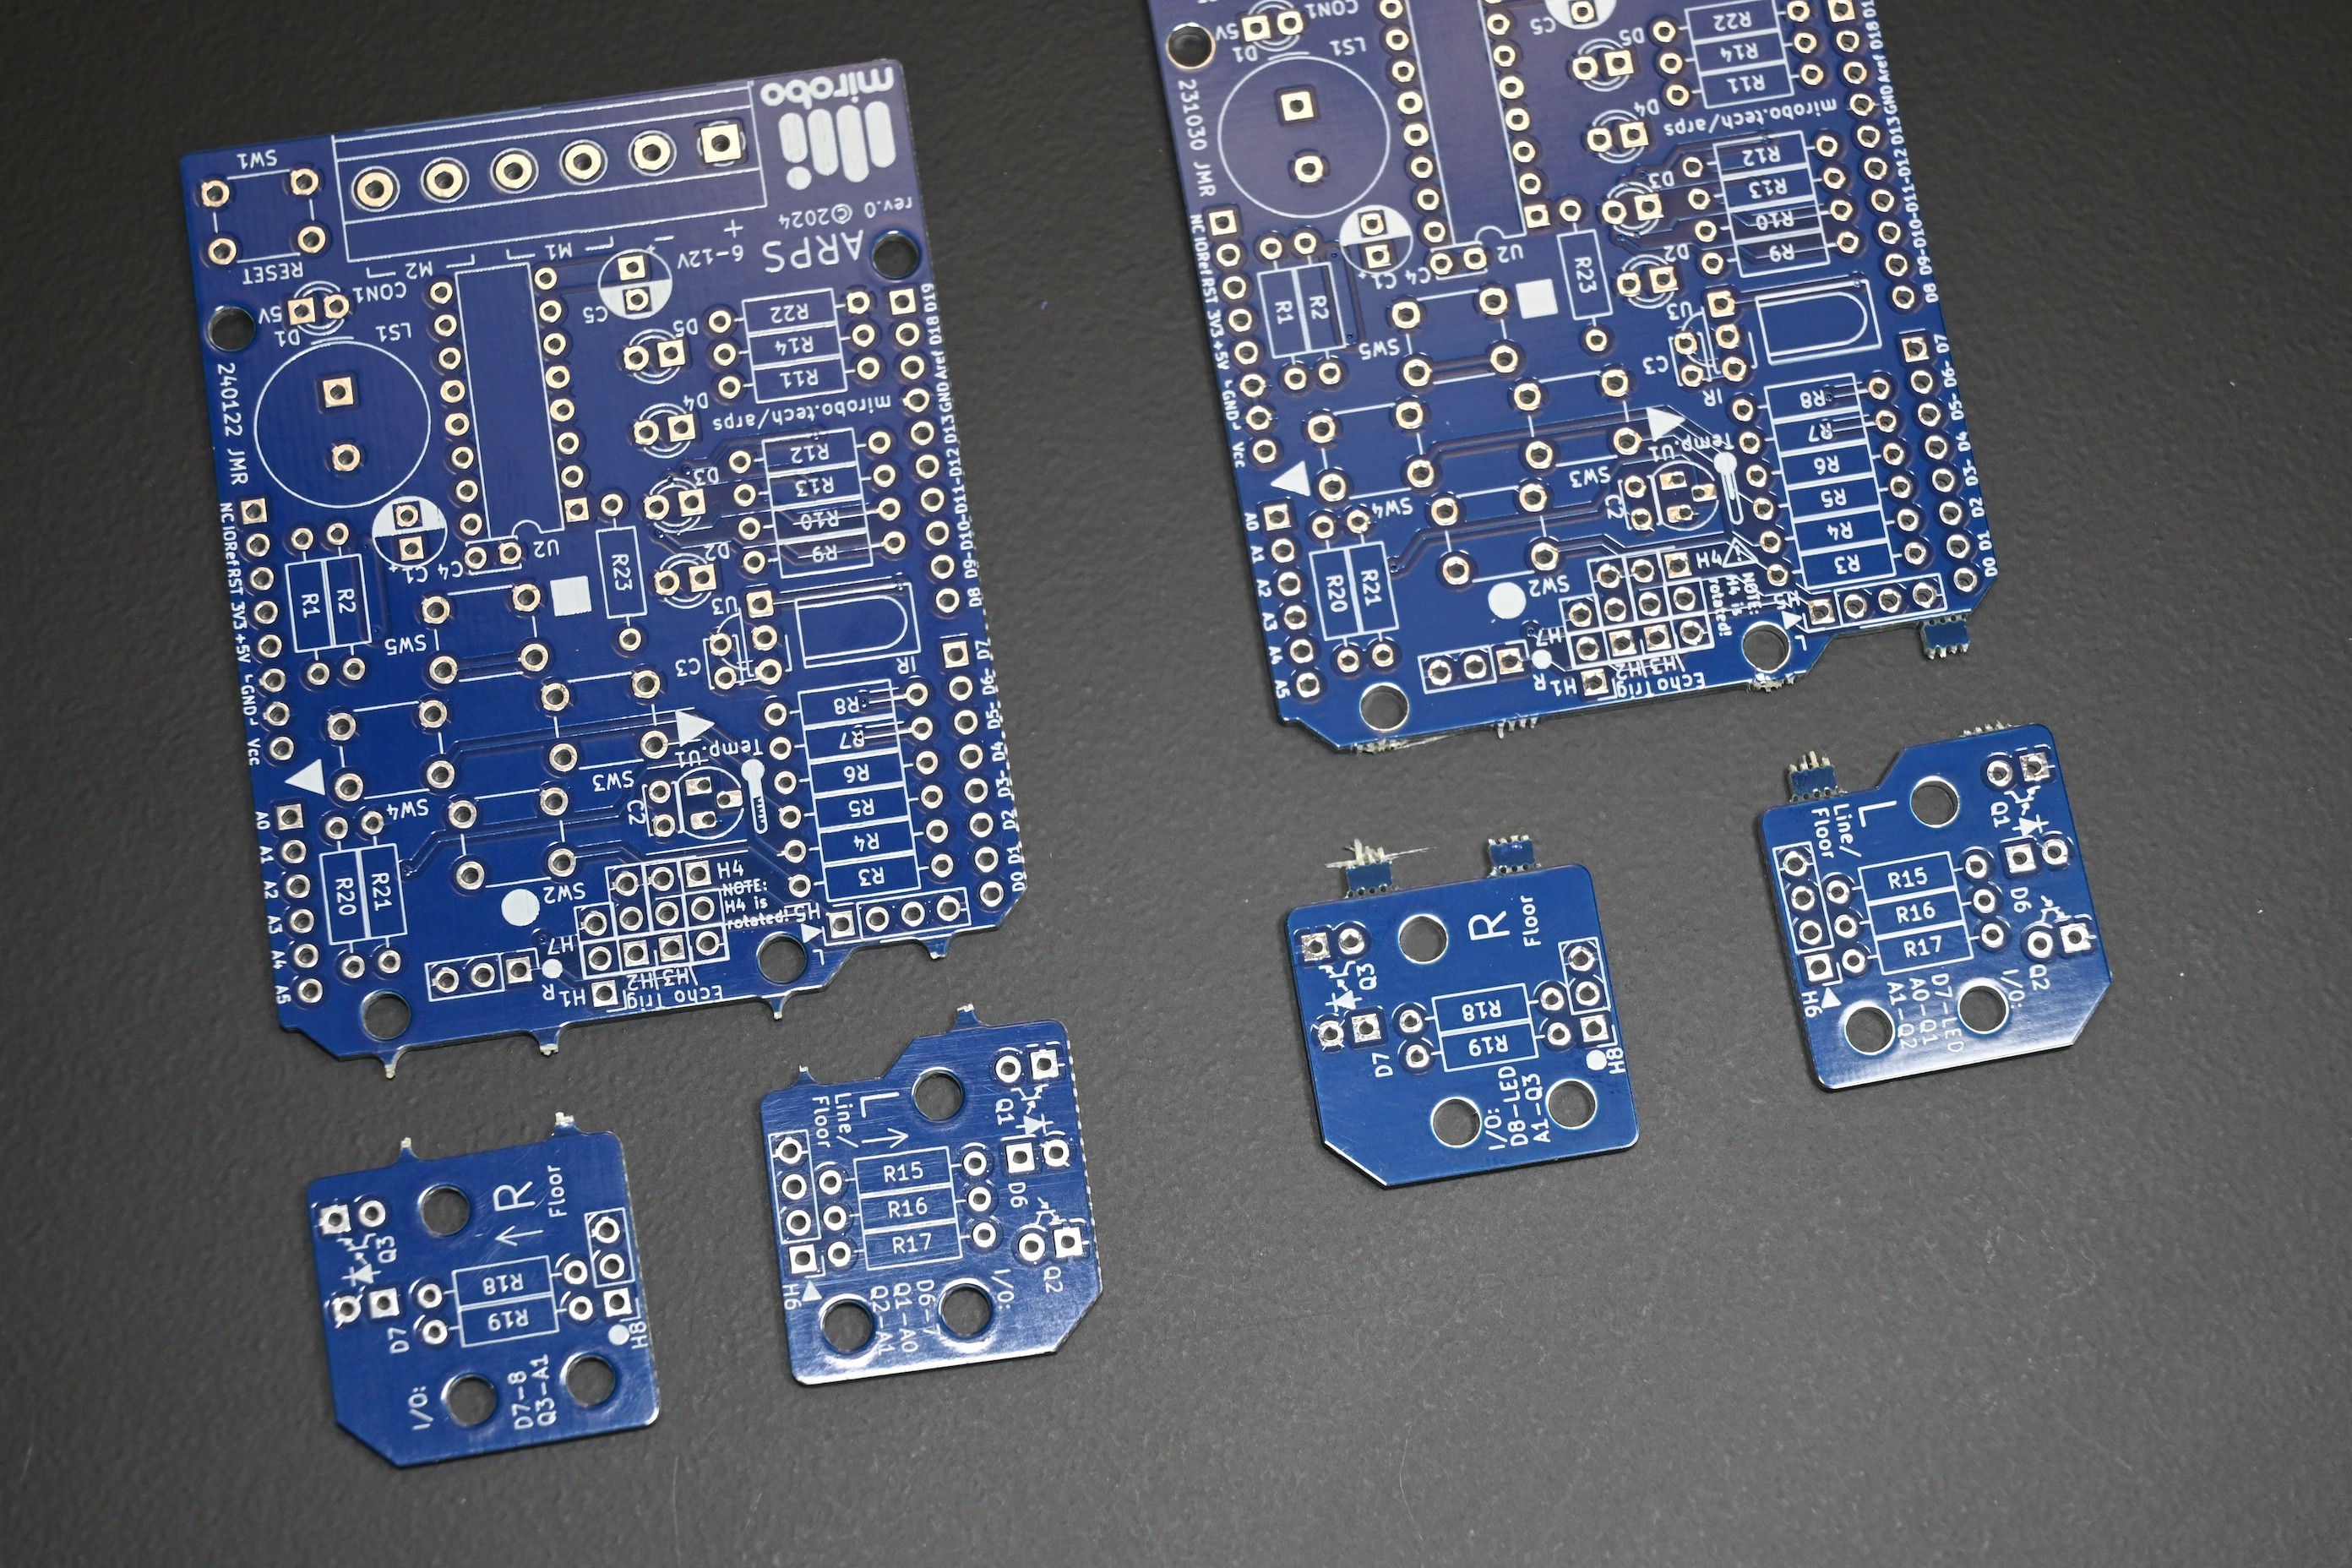
 Jithin Sanal
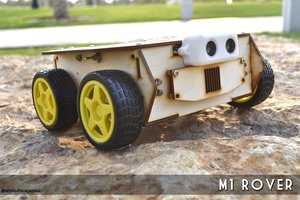
 Ahmed Azouz
 Arcadia Labs