 Sophi Kravitz
The goal is to have a rolling spaceship that a bunch of people in a room can control from their phones by going to a webpage. Picture 30-40 people all fighting to gain control over left/ right + forward/ back.
I'm starting with a $20 remote controlled car (on the 49 MHz band), but I don't want to deal with reverse engineering the car protocol so I'm going to swap out the RF part with an ESP8266. Also, I want this all to run on WiFi.
I've got the Adafruit Feather Huzzah, which includes an ESP8266 + level shifting + diagnostic LEDs. The ESP8266 has 9 GPIO pins. I have learned that ESP8266 can only support 4 connections- in fact I have only been able to get 3 connections to work. This is because the DHCP server on the ESP8266 has only 4 addresses to choose from. I haven't been able to find solid documentation on this - I've gotten all of my info from forums and slack channels.
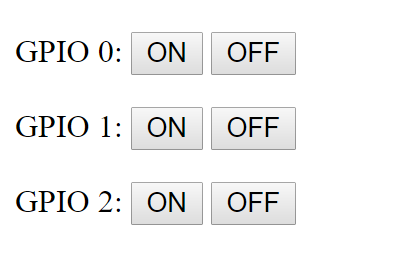
Step 1: Write a server for the ESP that has some GPIO buttons and test that the diagnostic LEDs (GPIOs 0, 1, 2) can be turned on and off from phone/ PC.
Done: modified an Arduino sketch I found here.
Step 2: Rip apart the car to see how many motors are in it (it only goes forward and reverse, left and right), see if there is speed control and measure the voltage that the motor(s) need to work.
Done: There are 4 push/ pull circuits on the control board containing 8 transistors altogether. 4 are NPNs (C3279), and 4 are C8550, called push-pull output amplifiers.
Step 3: Investigate the remote controls themselves to see if they send a "shaky signal"- not that it matters, I'll be removing the remote control unit entirely and replacing it with my phone.
Done: meh- nothing to see here really.

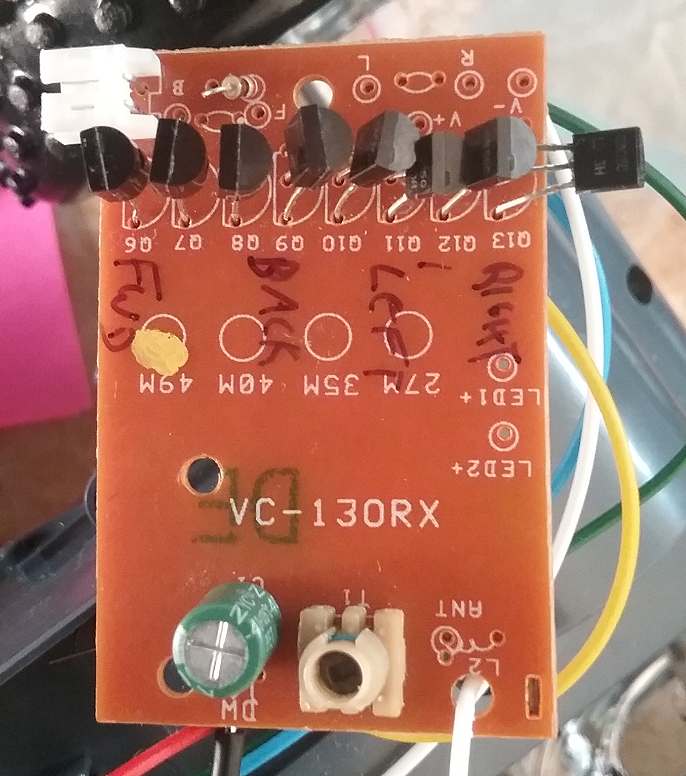
Step 4: Connect the GPIO outputs to the inputs of the car control board. Should be as straightforward as connecting to the base of these transistors.
Done: NOPE! The inputs to the transistors come from a RX-2B Decoder For Remote Controller With Five Functions.
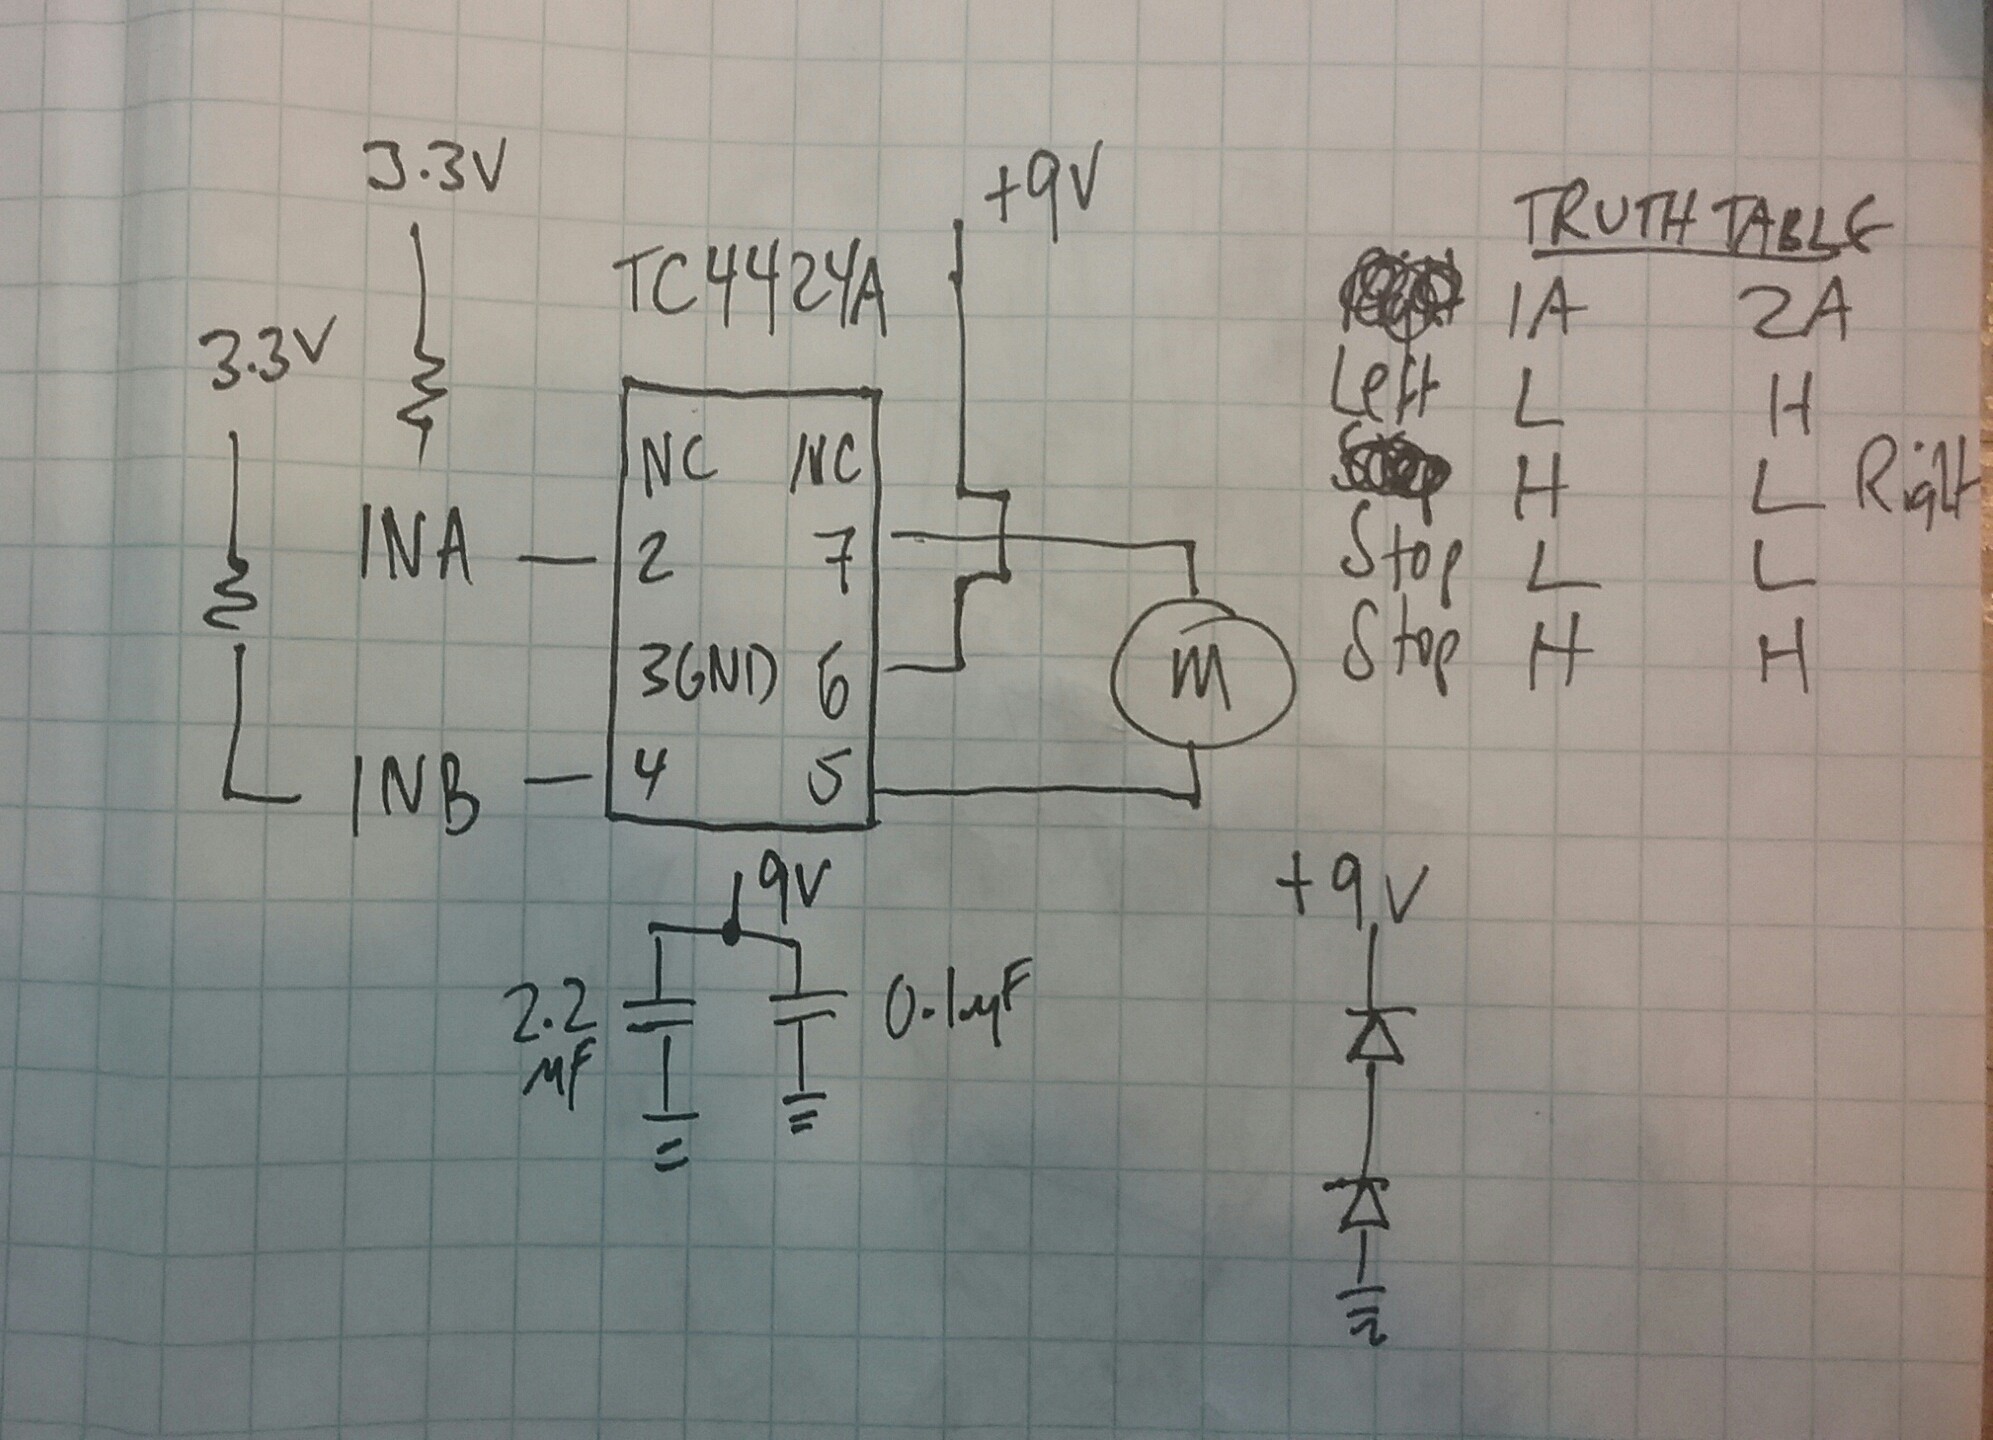
Step 5: Design new circuit to connect to GPIO pins. It's Sunday, I don't feel like ordering anything new (piles of stuff everywhere in my shop), so I'm just going to use what I have. UPDATE: Here's the H-bridge circuit using the TC4424A I sketched for testing. I've just hooked up the left/ right steering output (I need another H-bridge for the other motor) but it works. Driving a motor from my phone...YEAH!
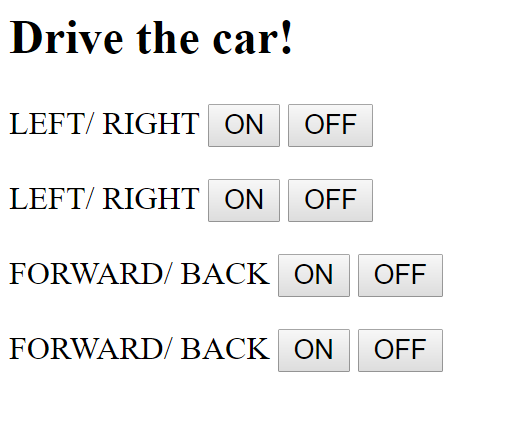
Step 6: Add more GPIO to the html on the ESP server and test that the motors turn on/ off.
DONE: UI doesn't look that good yet. It's an interesting process to get here. First make the UI graphically in this site, then convert it to a string and include it as a *.h in the Arduino code.
Weirdly, stuff like "height = * " and "width= * " doesn't seem to take. Will add "make it nice" to Step 9 ;)
Step 7: Measure current draw from motors then design circuit to drive both motors. This is just a sanity check as the motor driver that I have TC4424 can source only 150mA.
 shlonkin
 shane.snipe
 davedarko
 Andy Preston