Close
0%
0%

WiFi Rocks

I purchased a tiny WiFi router from Indiegogo. Time for an IoT Pet Rock

Similar projects worth following
Forget the internet connected egg tray. That's not what the "Internet of Things" is all about. What everyone needs is a WiFi enabled pet rock.

Pet rocks are cool. Every kid needs one. But we're now in the age of the Internet of Things. Simple unconnected devices don't cut it for kids these days ( Don't even start on Loom Bands....)

Time for a rockin' upgrade. Get your Pet Rock to start rocking some connectivity. ( Please add more rock pins to the comments!)

This project is about connecting a rock to the internet. Instead of just sitting there, not doing anything, it can host a website, or tell you how warm or cold it is outside (especially if it is a solar powered rock that has been left outdoors). This rock contains a mini Linux computer with wifi, so you could say "Linux Rocks"...

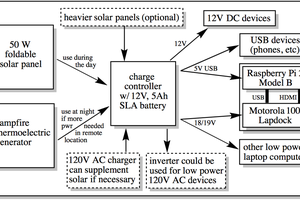
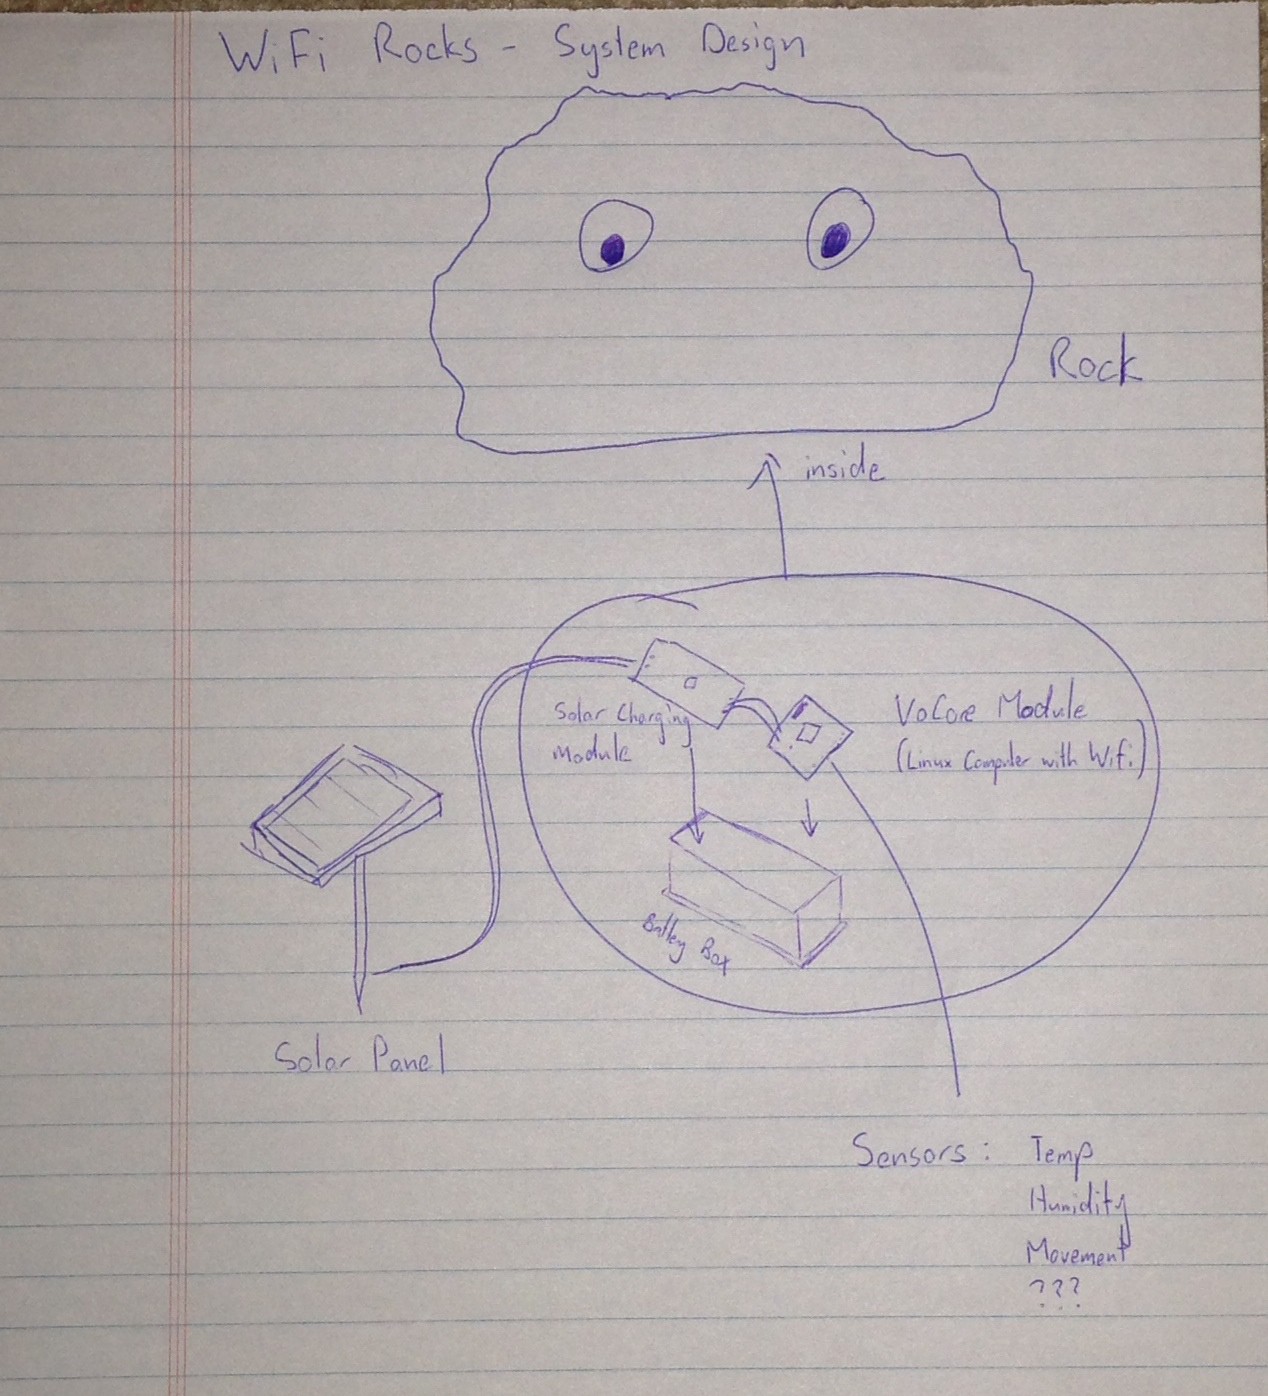
Here's a system overview:

  • 1 × VoCore mini Wifi router module https://www.indiegogo.com/projects/vocore-a-coin-sized-linux-computer-with-wifi
  • 1 × Rock Choose an aesthetically pleasing rock. For best results, choose a rock that isn't actually a rock.
  • 1 × LiPo battery To replace the AA's in the rock
  • 1 × USB / Solar charging module I don't expect the standard charging circuit inside the rock to be any good, so something from Adafruit or Sparkfun will do here.
  • 1 × Solar Panel - at least 1.5W output In order to continuously operate the rock, the panel needs to generate over 1.5W

  • Backup Plan

    OzQube08/14/2014 at 16:33 0 comments

    Even though this project started with the idea of using the VoCore module for the connectivity side, there are other ways that the rock could connect with WiFi

    One potentially simpler method is to use an Electric Imp module. I've heard that these are relatively simple to get started with, and there's a bunch of tutorials to help you get started. Plus, the power management is much better, so while the Max power of the Imp is higher than the VoCore, the average or typical power shown on the datasheet is much less. 264mW instead of 1.3W. 

    So I've bitten the bullet and gone and ordered one, along with an April breakout board. It may or may not arrive before the comp closes, but I may try it in the rock if the battery keeps going too flat with the VoCore.

  • Officially supported platform!

    OzQube08/07/2014 at 15:05 0 comments

    The Linux heart of the rock is the VoCore module. The version of Linux that the module was made to run is OpenWRT, and now the VoCore is an officially supported platform! https://dev.openwrt.org/changeset/41939

    So if you want to build an image, you can just select the VoCore profile when following the instructions here.

  • Progress!

    OzQube08/03/2014 at 15:52 0 comments

    This weekend I thought I'd revisit the VoCore Alpha modules. The Alpha version needs a small modification - remove one of the 0402 capacitors and solder it between another surface mount capacitor and resistor.

    My first attempt didn't seem to work ( probably because I fried the poor capacitor ). I had  spare 0603 in the right value, so I tried to squeeze that in. The result at 9pm Sunday night?

    It's alive!!!!!!!!

    I might be able to actually have something working by the end of this competition now!

    On the solar side of things, I have a few of the small solar cells that I'd bought off eBay. I don't have any tabbing wire to join them together, but I did find a small piece of brass shim in the shed. Turns out that brass shim tins very easily, so I cut it to the width of the electrode in the middle of the solar cells. I then used a flux pen to coat the electrode on the solar cells (solder doesn't stick easily to the white coloured electrodes without some help, plus the cells don't like high temperatures). I joined 4 in series, top electrode to the bottom of the next one, before I ran out of shim!

    This gives me just over 2V and 400ma. Not quite enough, but it may do for testing. I'm going to find an old photo frame to house the cells for the time being.

    In other news, I've been getting to grips with the Linear Technology LTC3105 datasheet, in order to work out the specifics of the components I'll need to acquire to make the power supply and battery charging board. I'll probably do something like the reference schematic, where the output of the LTC3105 charges a battery, as well as providing the input for the VoCore module. I should have an Eagle file soon!

  • Size doesn't matter......

    OzQube07/27/2014 at 13:23 0 comments

    OK. So I knew that Thin Film solar cells weren't as efficient as mono or polycrystalline cells, but here's a nice comparison for you all.

    So the larger one is the solar panel from the shed sensor light, and the smaller blue one is a single polycrystalline cell.  I measured the voltage just prior to this picture, and the large panel was 5V, and the small cell .5V. Ohms Law gives us 219mW, and 85mW respectively.

    The Thin Film panel is a bit over 3 times the size of the polycrystalline one, yet is only 2.5 times the output.

    Another surprising test was in direct sunlight, the thin film panel didn't get close to the 350mA that I did from the halogen light!

    Either way, I think I'm going to need a bigger panel to support the 1.3W power requirement!

  • The WiFi Heart

    OzQube07/26/2014 at 15:47 0 comments

    As I'd described earlier, the heart of this rock is going to be a mini Wifi module I am getting from IndieGogo called "VoCore". Now I haven't yet received the final product, but I have got one of the Alpha boards. One of the problems with the Alpha boards is that there's a capacitor in the wrong spot. So I did my best with a soldering iron, but I don't think it worked, as the module boots, but the Wifi doesn't work.

    In case you haven't read the details of the VoCore module, it's core is made from a Ralink RT5350F SoC. To quote the RT5350F datasheet: 

    "The RT5350 SoC combines Ralink’s IEEE 802.11n draft compliant 1T1R MAC/BBP/PA/RF, a high

    performance 360 MHz MIPS24KEc CPU core, a 5-port integrated 10/100 Ethernet switch/PHY and a USB

    host/device."

    This SoC is usually found in 3G travel routers. Here, it runs the OpenWRT Linux distribution, which opens up the options on what we can do with the rock!

    I'll have to try and get the wifi sorted, as I don't think the final module will arrive before the end of the Hackaday Prize closing date.

    In the meantime, I'll keep working on the power supply side. Hopefully a schematic in a few days. I'm still trying to decide how do do it, as I don't want the system to run LiPo's down til they're empty, although I could just use protected 18650 batteries, and not worry about any additional circuitry. Ahh. Decisions. Decisions.....

  • Ready to Rock and Roll

    OzQube07/25/2014 at 13:44 0 comments

    I took a trip to another big hardware store, and found myself a Pet Rock! I've updated the project photo to show what it looks like before it receives its WiFi conversion.

    I also bought a spare, because probing the innards of rocks could cause distress.....

    The rock, which was originally waterproof, has a nice switch on the bottom that I could use to turn the rock on and off. Instead of replacing the original battery holder...

    I may just end up using the empty housing and mounting the replacement battery, VoCore module, and power supply circuit on top of it, inside the rock.

    The LED light will probably be replaced, as will the original tiny solar panel. The charging circuit is this rock looks far better than the shed light, except it is for a Ni-Mh battery. It has a single through hole resistor, and something under a blob of epoxy.

    I had thoughts of using the reflector from the LED as a sunlight concentrator.......or I could remove it completely and just leave the clear cover so you can see inside the rock? Thoughts? I could connect a red LED to one of the GPIO's and do something there? RedRock?

  • Hardware shopping

    OzQube07/24/2014 at 14:24 0 comments

    Had a look at my options in Bunnings ( a large Hardware chain in Australia). No rocks :-( . But I found one solar sensor light that said it has a Lithium Ion battery, and a larger solar cell than the average garden light. Surely this is a step up in the charging department compared to a garden lamp that uses a Ni-Cd battery..........

    Weeeellllllll...........its a small step up....as you'll see.

    None of the solar products actually specified their power output, so without going overkill, I went with the sensor light with the Lithium Ion battery for a whole $20.

    So what do you get for $20? Time for a teardown ( cue Dave Jones!)

    First thing I looked at was the battery, as its in a separate compartment. Its labelled as a 3.2V, 400maH, 14500 size. This is the same size as an AA. Interesting though, seeing as most 14500's are 3.6 or 3.7V.......

    Multimeter says a smidge under 3.3V, but I'm not sure of its state of charge. Weekend test I think. 

    On to the main electronics enclosure. After unscrewing the back, it was pretty obvious the build quality left alot to be desired. Not only that, the wire connecting the solar panel to the small circuit board was snapped off at board level - meaning the light would have never charged! I'll have to fix that if I ever want to use the light for its original purpose. The electronics consists of the back of the main power switch, a small circuit board, and wires connecting the PIR, the LED, the Solar Panel Connector and the battery. After unscrewing the circuit board, you get to see the 5 components that comprises the charging circuit. 

    1 x SS14 diode( probably something like this)

    1 x 431 ( cj431?) Regulator

    3 SMT resistors. 47K, 20ohm, and 100K.

    As you can see, the soldering is terrible! So terrible, another of the wires from the PIR was loose. Talk about dry joint!

    Anyway, I'll read the datasheets to work out the charge rates etc.

    Time for the solar panel. It's about 18cmx18cm. As it's night here, I tested the panel under a halogen floodlight to get an idea of the specification. Turns out it's about 5V, and short circuit current straight through the multimeter was about 350ma! Whew- just enough to power the rock! And a bit spare to charge the battery.

    So after all this, I still haven't found the right pet rock for this project, so I'd better start trawling the local eBay sellers and see what can get here in a week or so.

    Til next time :-)

  • Sizing the power system

    OzQube07/24/2014 at 06:38 0 comments

    The VoCore by itself, with the WiFi operating will draw 260mA via USB, so that's 1.3W. The power output of the original solar panel on the rock is probably too low to keep the VoCore running, so an upgrade is in order. I'm thinking something like the Adafruit USB / DC / Solar charging module. This needs a 6V solar panel, so I have a few options:

    1. Sacrifice several solar garden lights to get the required power level (up to $15 depending on quality)

    2. Make a solar panel from bare cells  (cheap if you don't want weather protection.....)

    3. Buy a suitable panel with the charging module ( $25)

    4. Use a solar panel from an LED shed light, as these look to be the right size (I'm going to have to go to Bunnings and check them out) ($20+)

    As for the battery - I'll find a cheap small single cell LiPo around somewhere. Cost is under $10 from somewhere like HobbyKing.

    So for a 2000mAh battery, I might get about 6 hours of usage from a single charge. I should probably aim for a non-stop-rock, so a 5000mAh capacity battery might keep the rock up all night. Something like this maybe? I really only want to plug the rock into a USB  socket in case of emergency, unlike some rocks that need a constant connection...

  • Shopping for Parts

    OzQube07/24/2014 at 04:49 0 comments

    So my VoCore from IndieGogo is on its way. I need to go and get a rock. Ebay looks like the fastest way to get a pet rock. Or the local hardware store.

    Did I mention that the WiFi Rock is going to be solar powered?

    I'm converting a solar powered rock light, and turning it into a solar powered WiFi Rock!

View all 9 project logs

  • 1
    Step 1

    Step 1 - Find yourself a pet rock that will be receiving the Wifi Linux heart. You may have a little difficulty if you choose a small rounded pebble as your target. A garden LED spotlight type of rock may be more suitable here. Something that has space inside it.

  • 2
    Step 2

    Step 2 - Pretend you're a rock doctor, and remove it's insides! Try not to break the rock, as it won't be waterproof any more. Unless you've chosen a massive rock, the existing solar panel can be left on for aesthetic reasons. It's way too small to power this rock.

  • 3
    Step 3

    Step 3 - Assemble the charging board

View all 6 instructions

Enjoy this project?

Share

Discussions

DigiGram wrote 08/03/2014 at 19:41 point
You just might *sink* the opposition with this pet rock!

  Are you sure? yes | no

OzQube wrote 08/03/2014 at 22:46 point
Hopefully I can rise above them at the same time!

  Are you sure? yes | no

Similar Projects

Does this project spark your interest?

Become a member to follow this project and never miss any updates