Matt Moses
-
Making Bricks
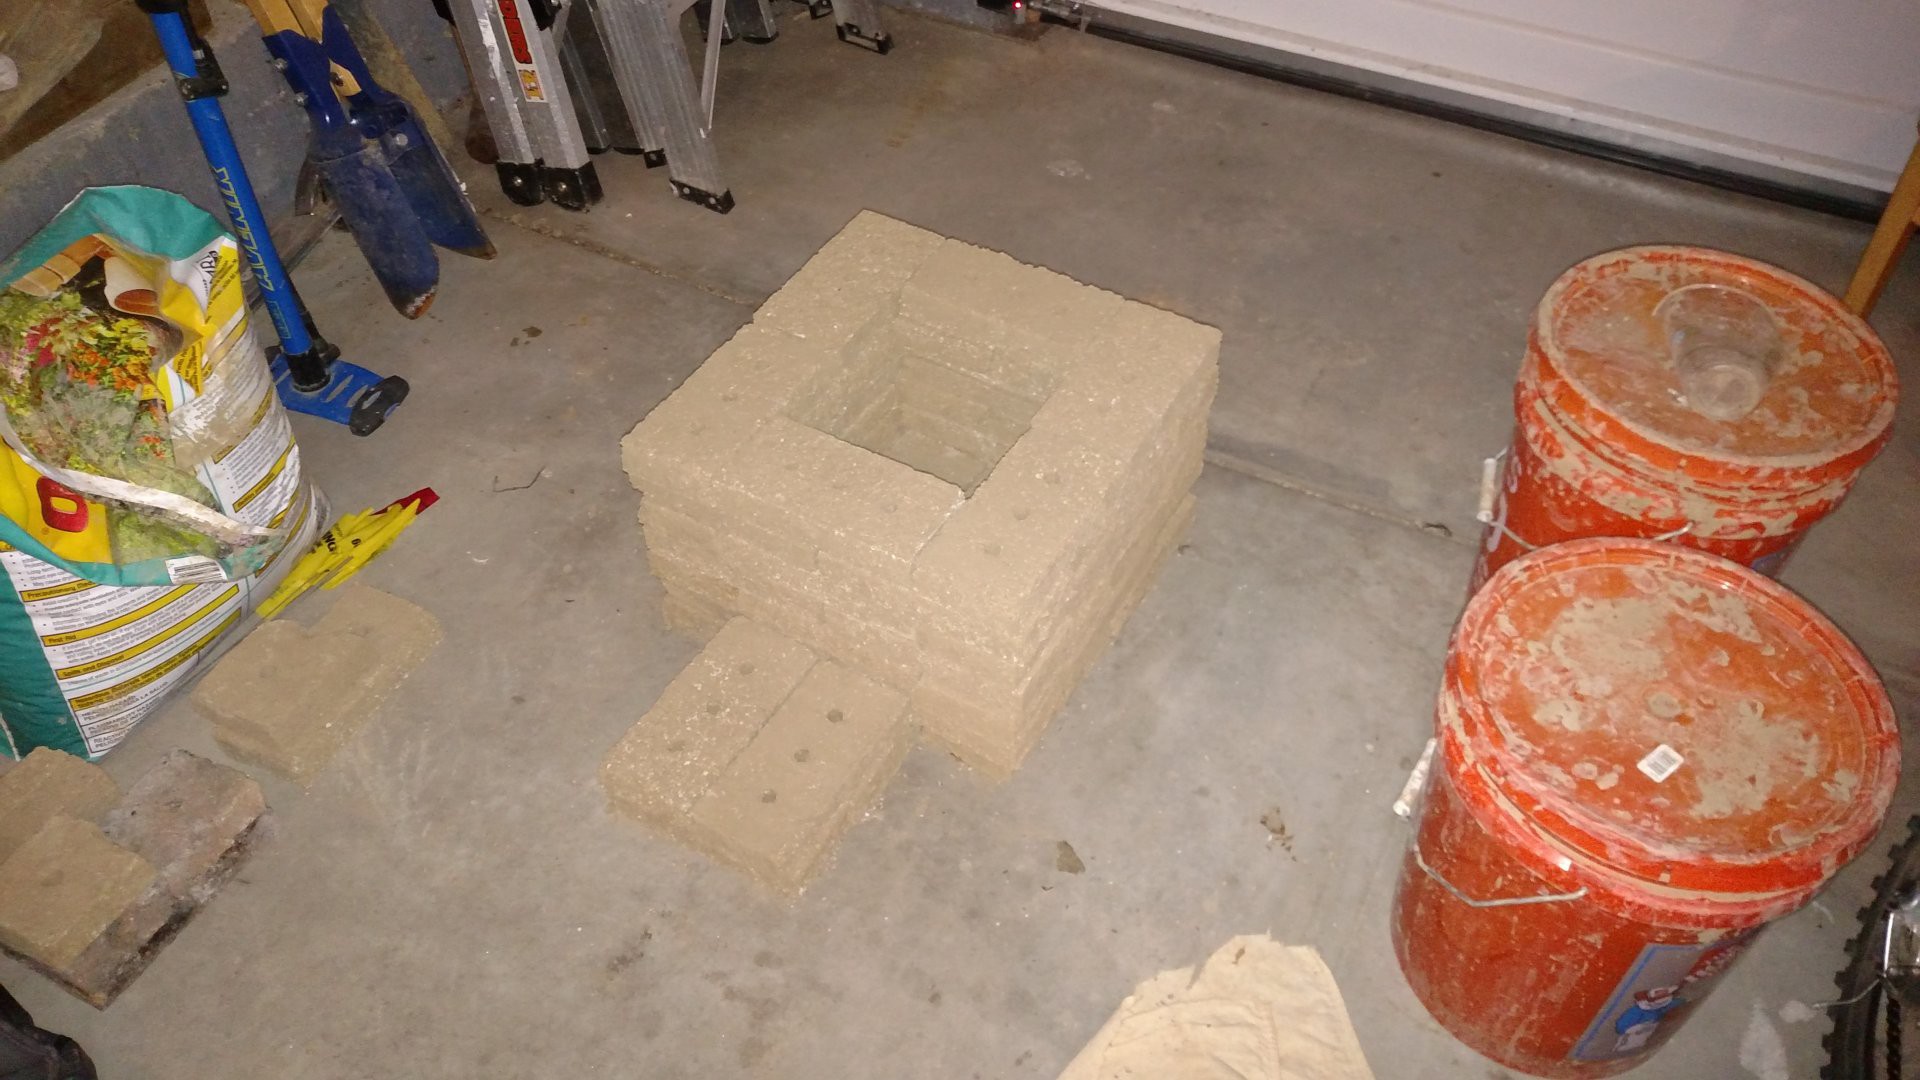
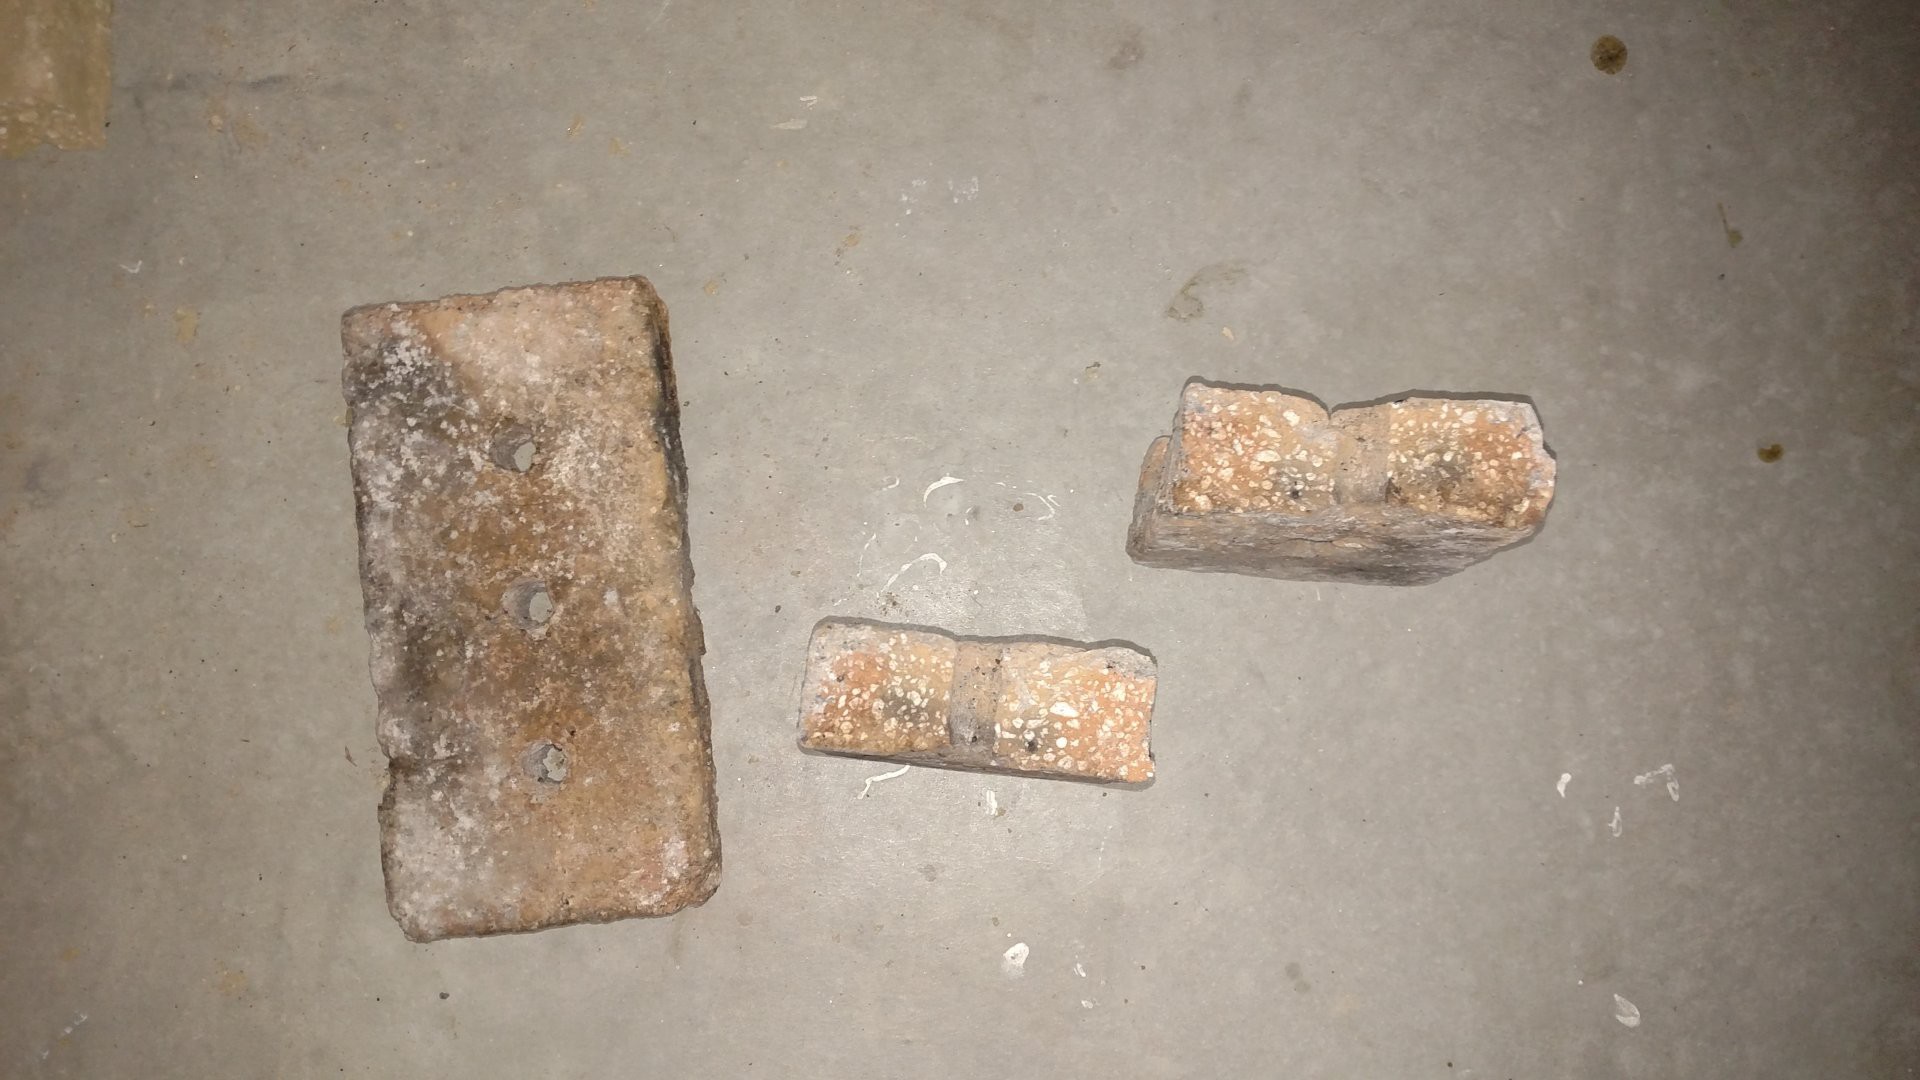
07/18/2017 at 17:40 • 0 commentsThe finished kiln will need about 70 bricks. So, since the last update almost two months ago, I have been making bricks. Lots of bricks. The stack-up so far looks like this:
![]()
The bricks are made from a roughly one-to-one mix of natural clay and expanded perlite. The perlite is purchased from the hardware store (Home Depot, also where all the orange buckets came from). Raw perlite is a naturally occurring mineral. Upon heating, it expands into the popcorn-like substance that is sold in stores. The purpose of the perlite is to make the bricks better insulators, and also to some extent to reduce the thermal mass of the bricks. As a future project, it would be interesting to try to use homemade Lightweight Expanded Clay Aggregate (LECA) as a substitute for perlite. In theory, the kiln itself could be used to make LECA from natural clay, which would then be used to make more firebricks.
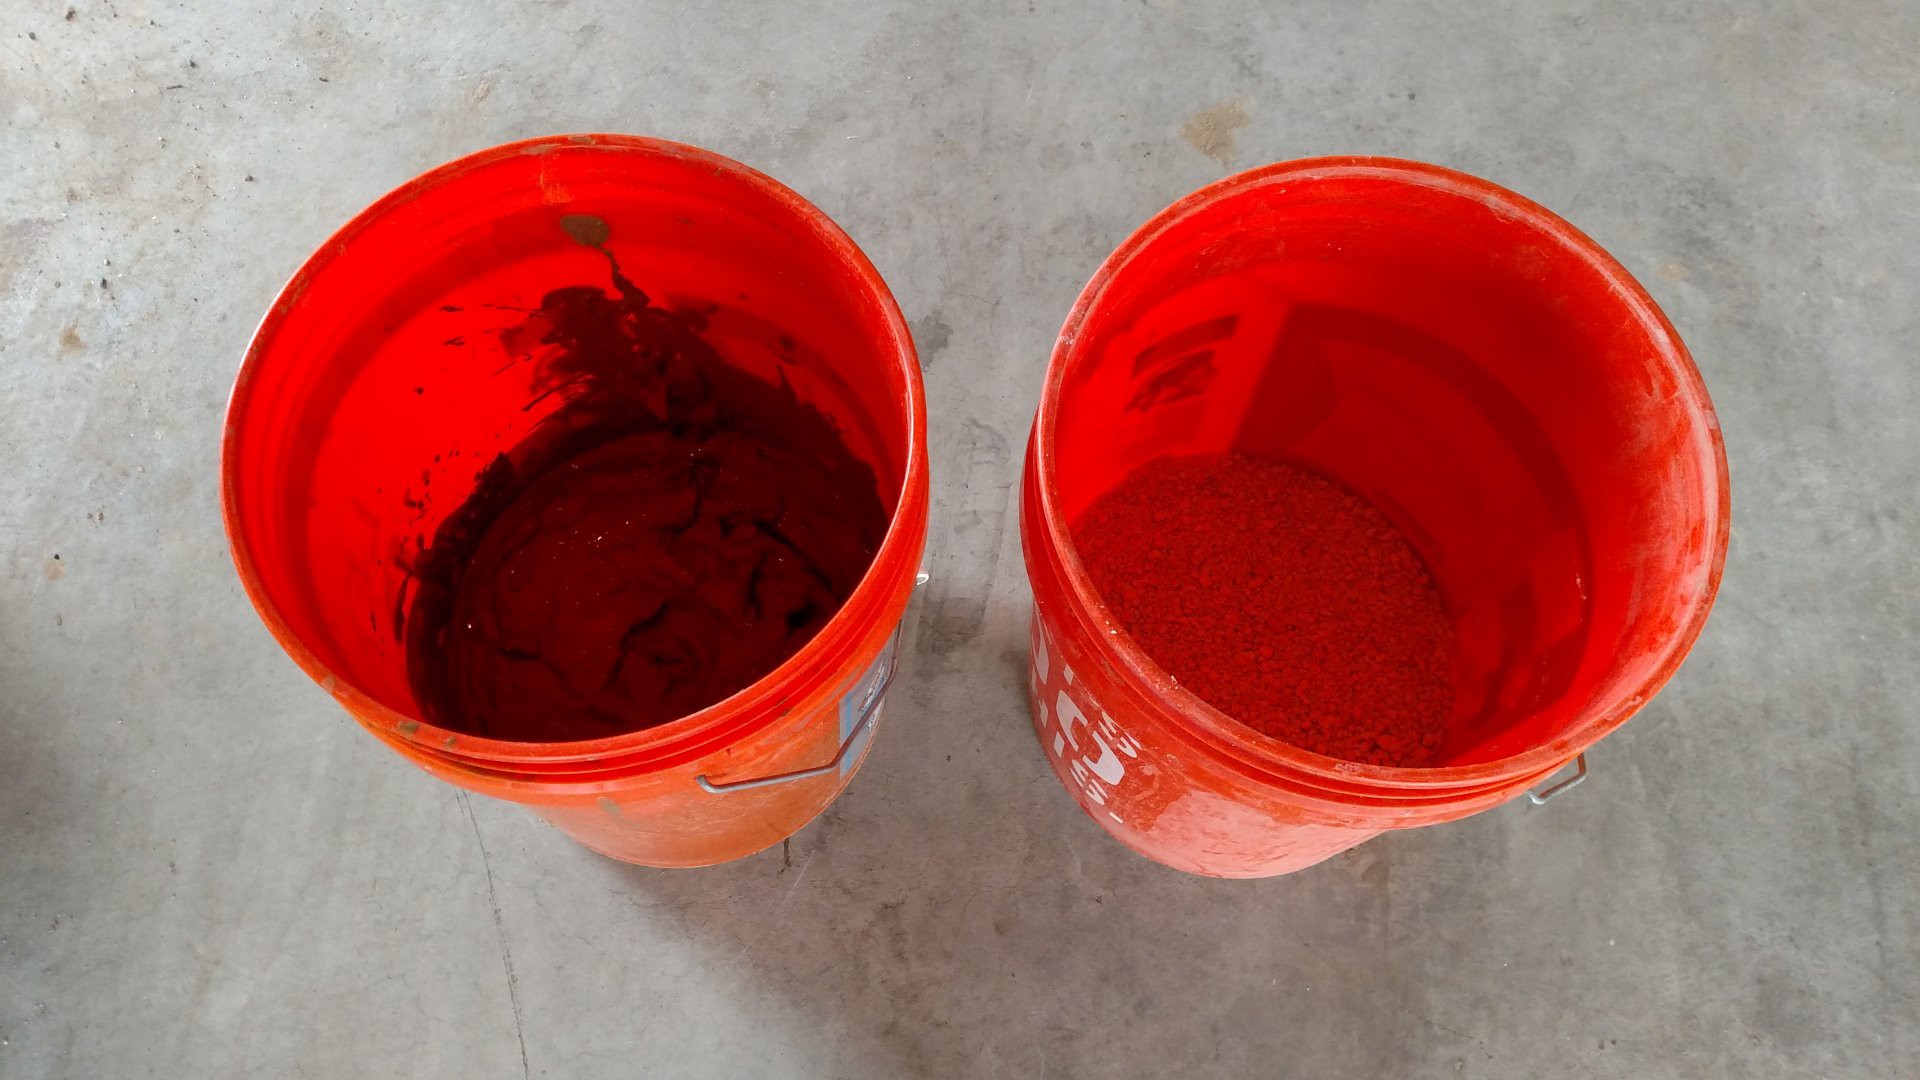
All the natural clay I have processed is stored wet in buckets. The first step in making bricks is to mix the wet clay with damp perlite:
![]()
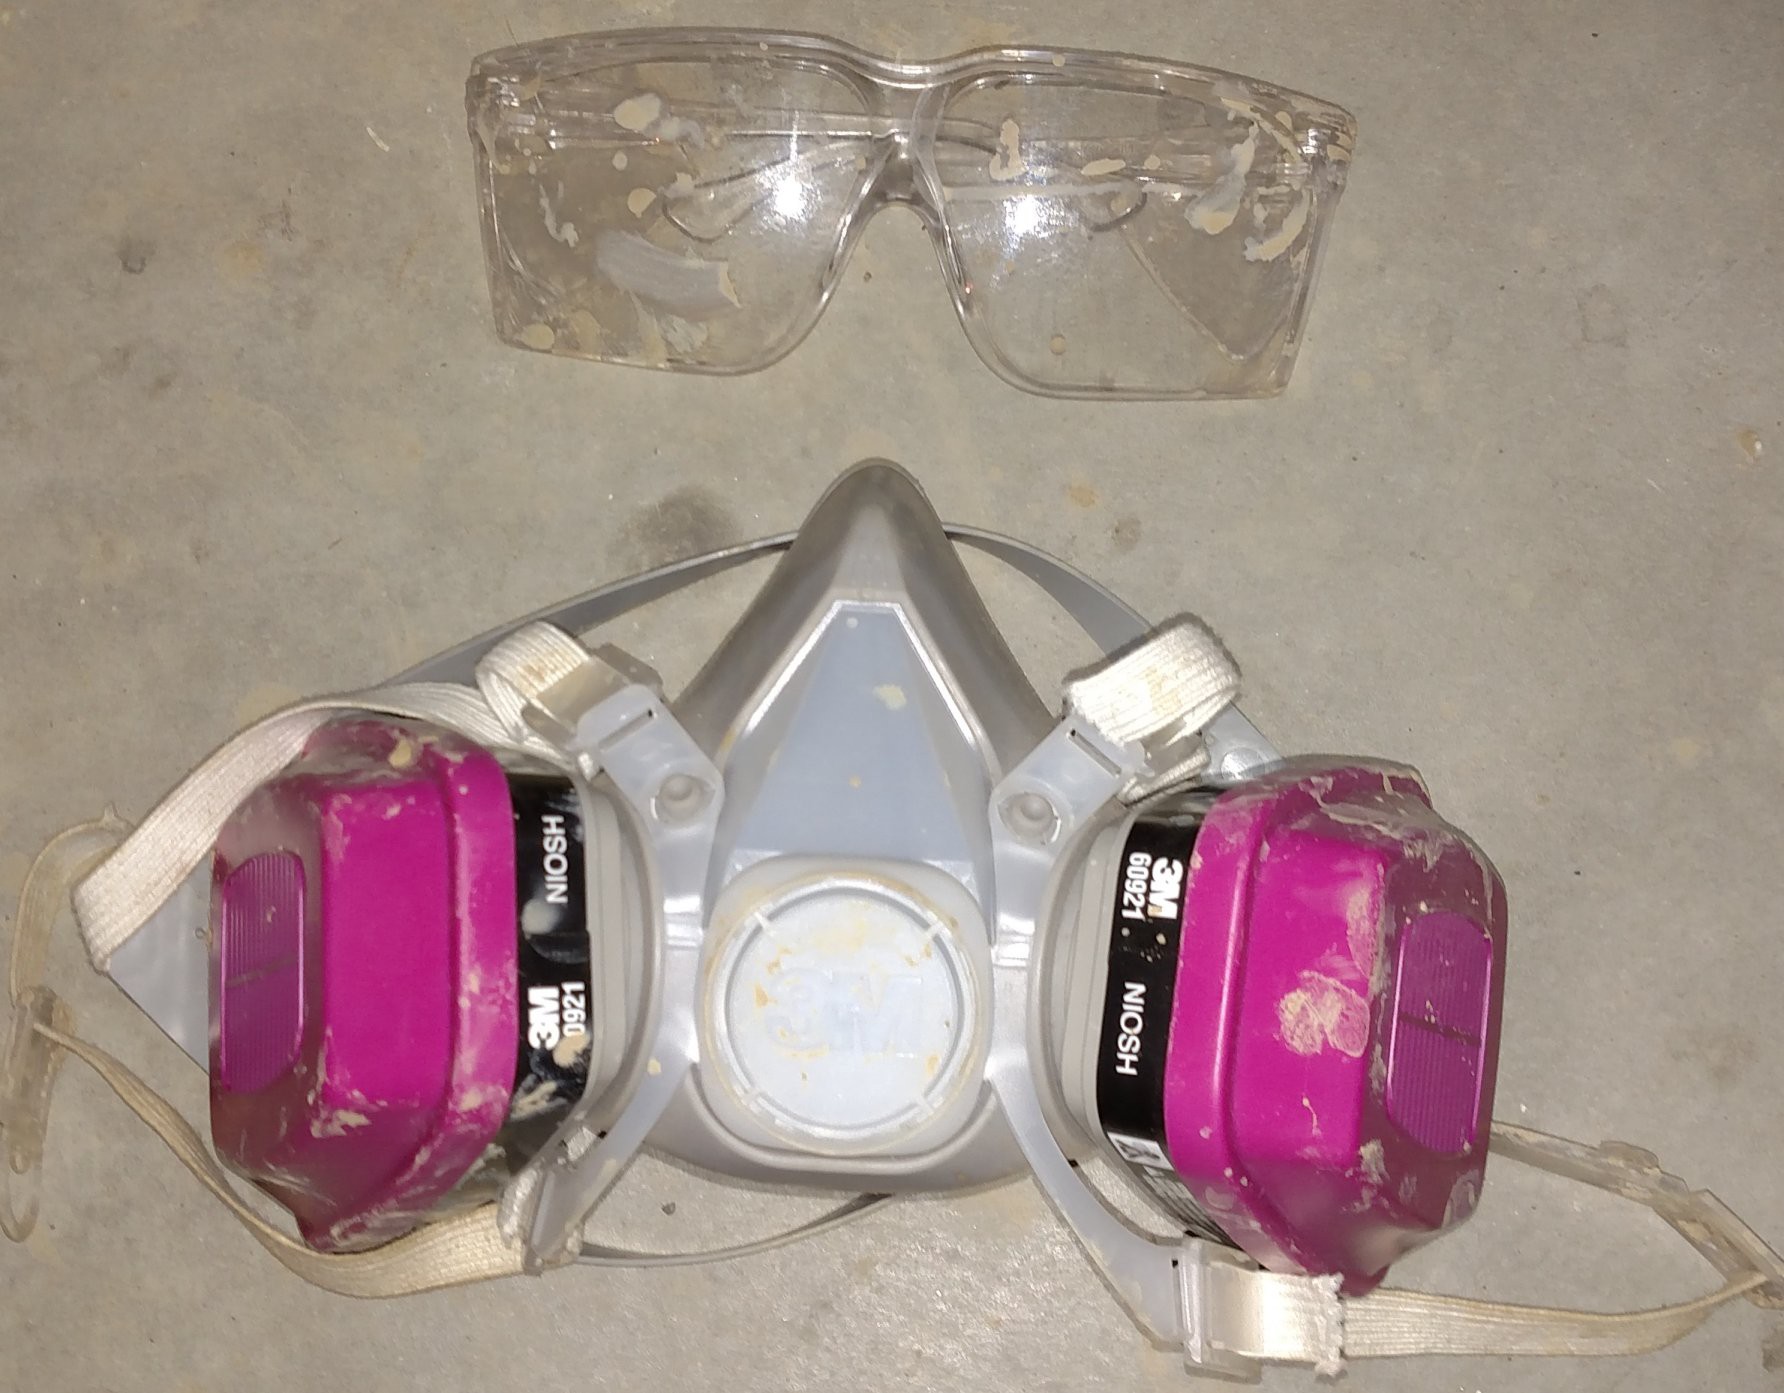
It is a good idea to wear a respirator or mask when handling the perlite, as it is very dusty. Spraying it down with water also helps mitigate the dust. But why the goggles? Well, if you've never been scooping glops of wet clay into a bucket and then had a blob of it splash up and hit you square in the eye, let me tell you, it hurts.
![]()
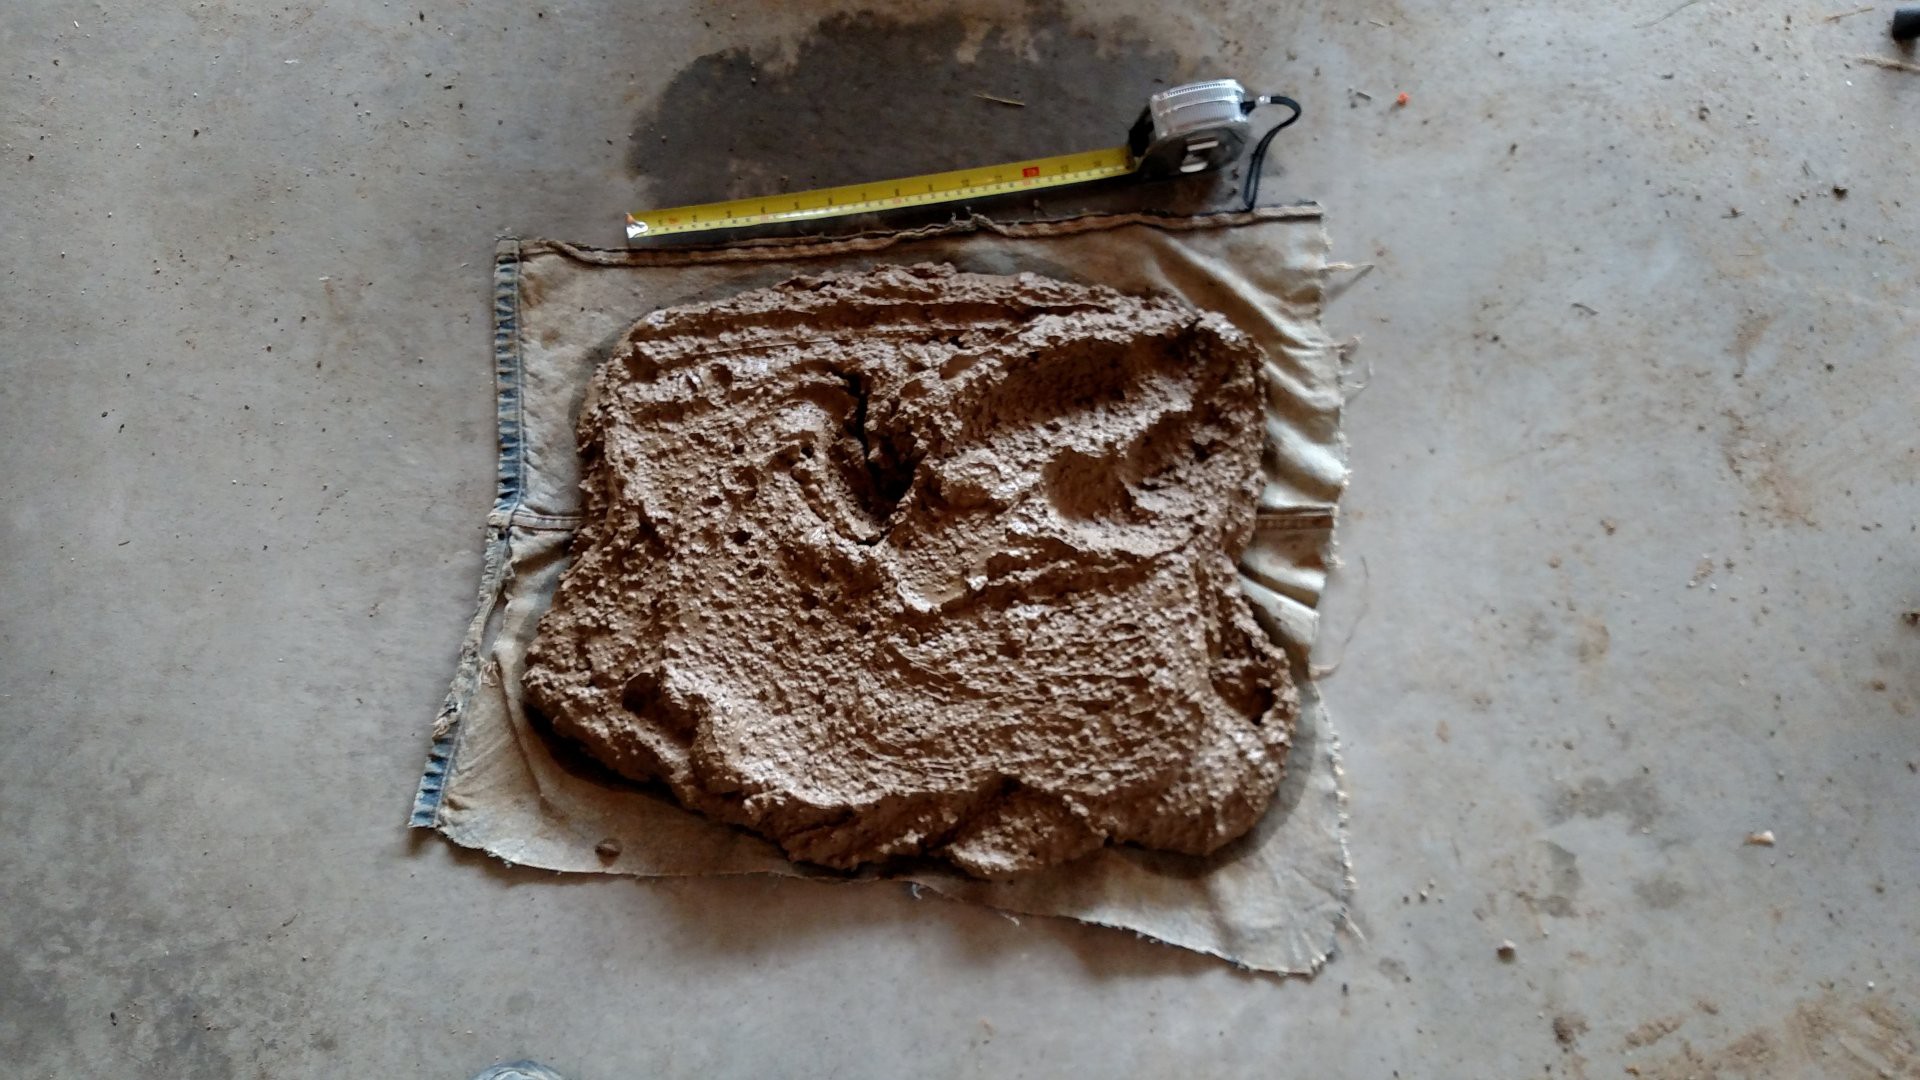
The next step is to set the mix out on a piece of cloth (an old pair of pants here) and let it dry for a while. It can dry for several hours, up to a full 24 hours. The goal is to get an acceptable consistency for making bricks. Too much water and the bricks just turn into piles of gloop when removed from the mold. Too dry and the mix is hard to form and does not stick together well.
![]()
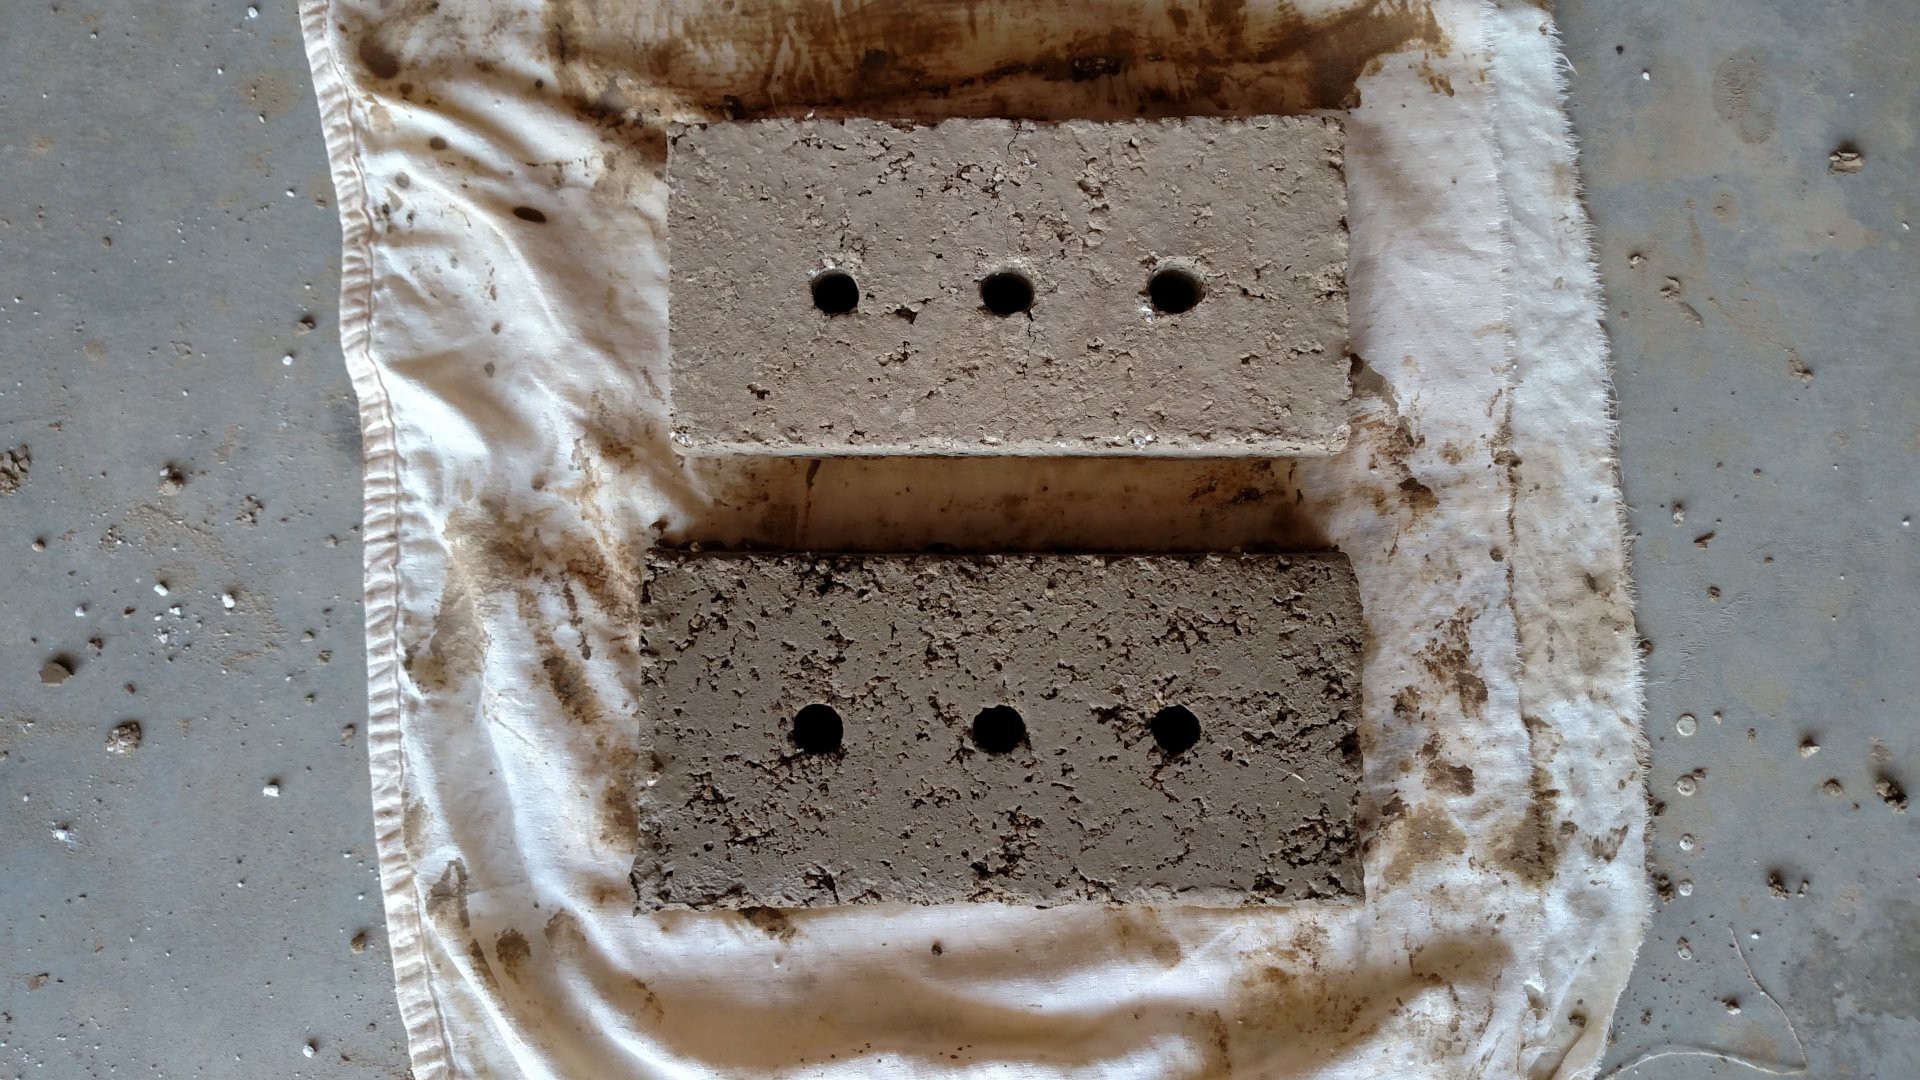
When the clay mix has dried to the right consistency, it gets pounded into the brick mold (see previous log for info on the brick mold). A putty knife is used to carefully go around the edges of the brick within the mold, to help release it. Then the mold is pulled up and you have a brick! The bricks are dried on a piece of cloth (in this case an old bed sheet) so that they do not stick to the underlying substrate and crack as they dry. The picture below shows a dried brick (top) compared with a fresh brick. The shrinkage is visible in this picture - dry brick is about 1/2 inch shorter than fresh brick. During drying, the bricks are also covered with a cloth to help keep the drying process slow and uniform. If they dry too fast they crack. After about a week of slow drying, the bricks are dry and warm (or rather not cold) to the touch, and they can be handled easily.
![]()
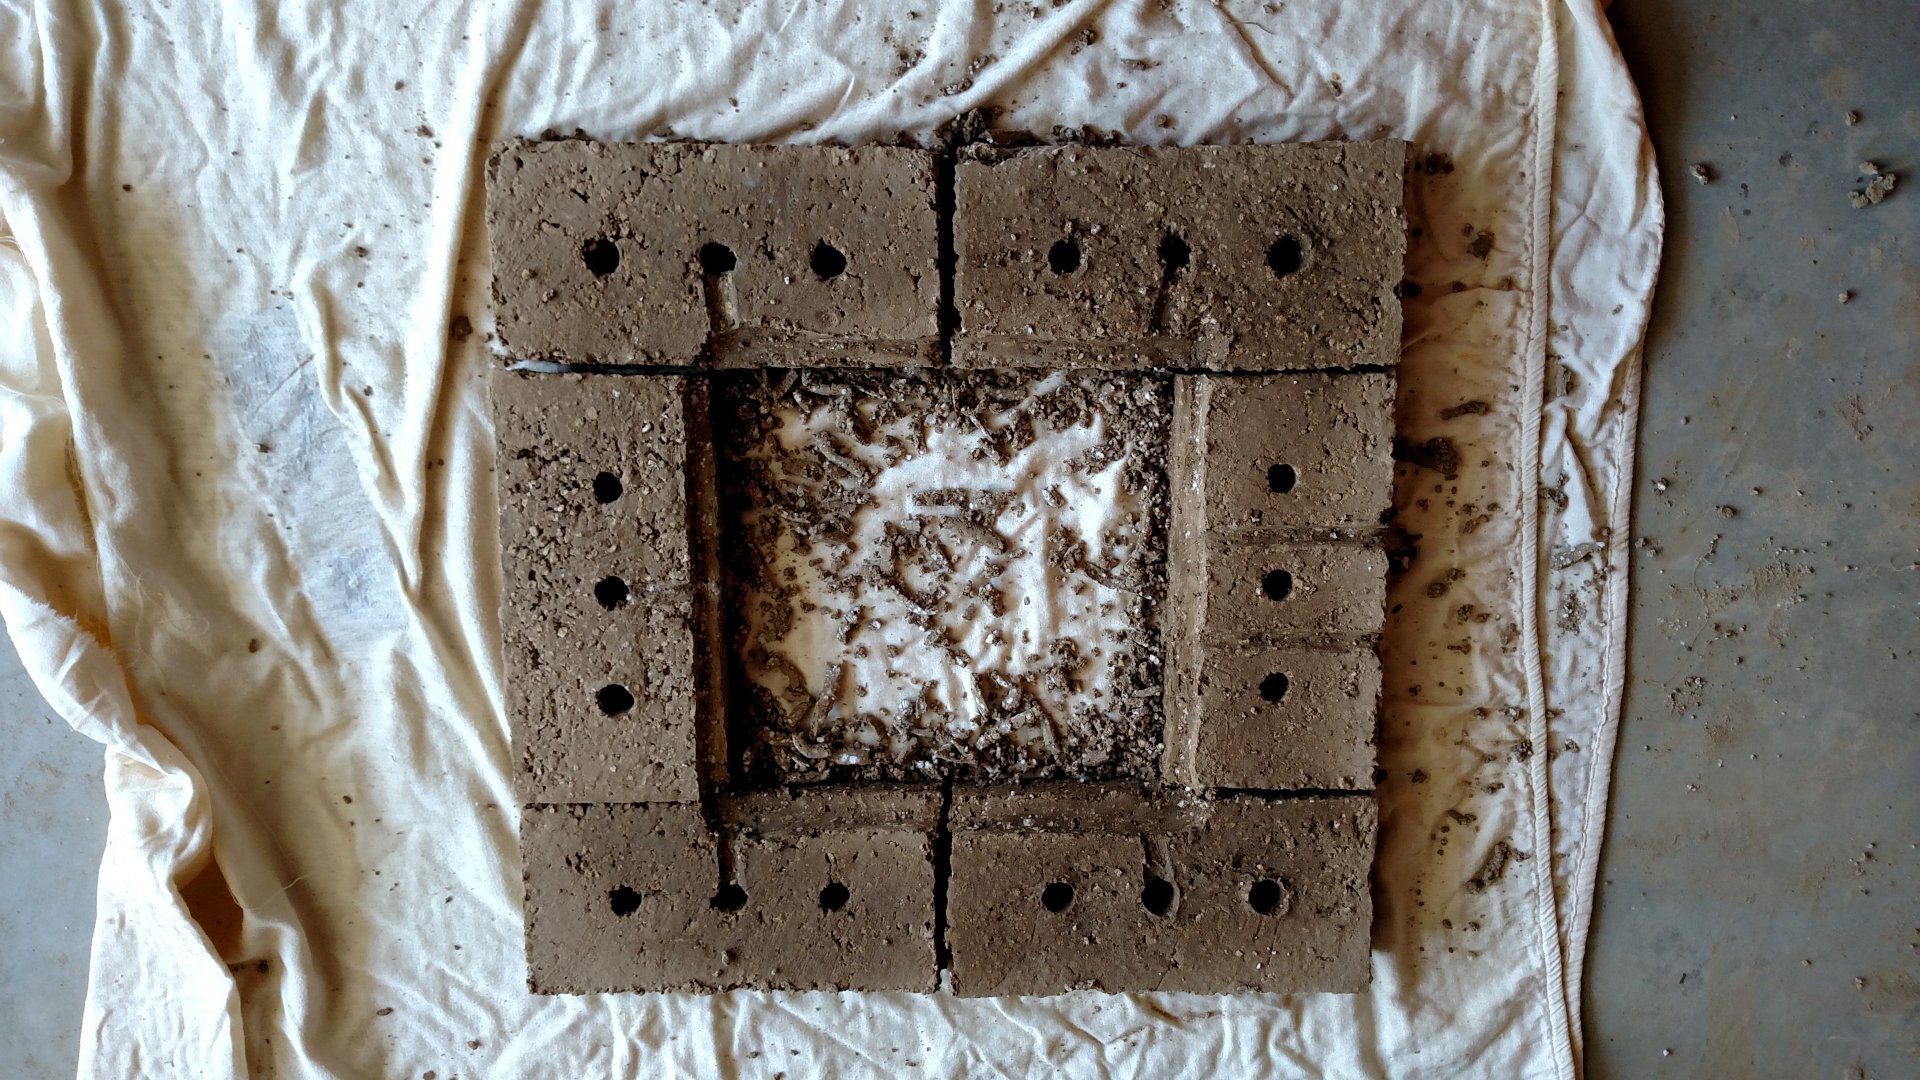
The next image shows how the grooves for one of the heating elements were carved in the somewhat-wet bricks (these have dried for about a day before carving). This was done using a simple loop tool made by taping a slice of aluminum can to a stick. The plan is to have two heating elements, probably wired in series.
![]()
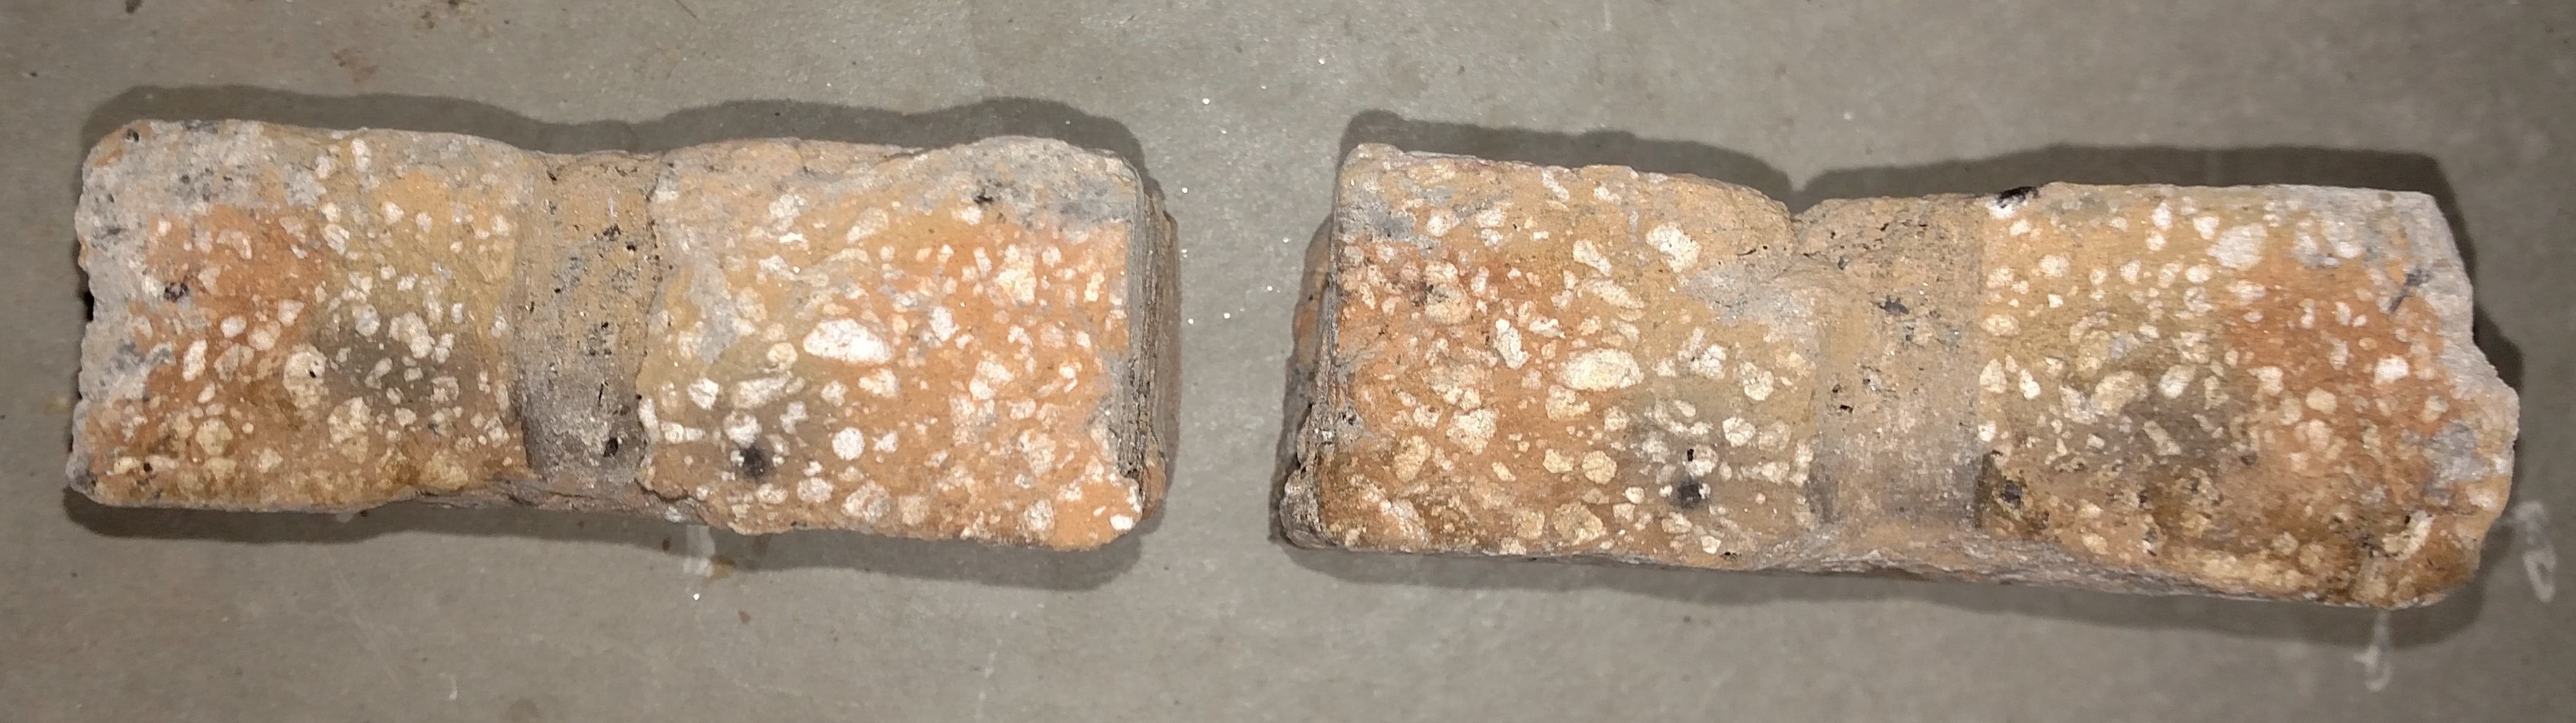
Two of the dry bricks spent a week or so in the bottom of a back yard fire pit, as sort of an improvised test for their high temperature performance. They turned sort of a pleasing red-brickish color, so that is somewhat encouraging.
![]()
One of the bricks broke in half, but this might be because a log fell on it, who knows. At any rate, you can see in the closeup image that the crack went through the middle of the perlite grains, rather than around them, which suggests there is a good strong bond between the clay and perlite.
![]()
-
Brick Molds
05/23/2017 at 07:24 • 2 commentsTo review the big idea:
- Make clay out of dirt
- Make bricks out of clay
- Make kiln out of bricks
- Make stuff out of kiln
This project log deals with step 2, making bricks out of clay. There are a lot of great videos on youtube of people making bricks by hand. Here are a few that I drew inspiration from:
- Primitive Technology Guy making clay tiles with his bare hands
- Throwing the Mud. Pennsylvania brick making
- Molding homemade firebricks
- Simple brick making machine from India
I built three brick molds so far before getting one that even kind of works.
Brick Mold Version 1
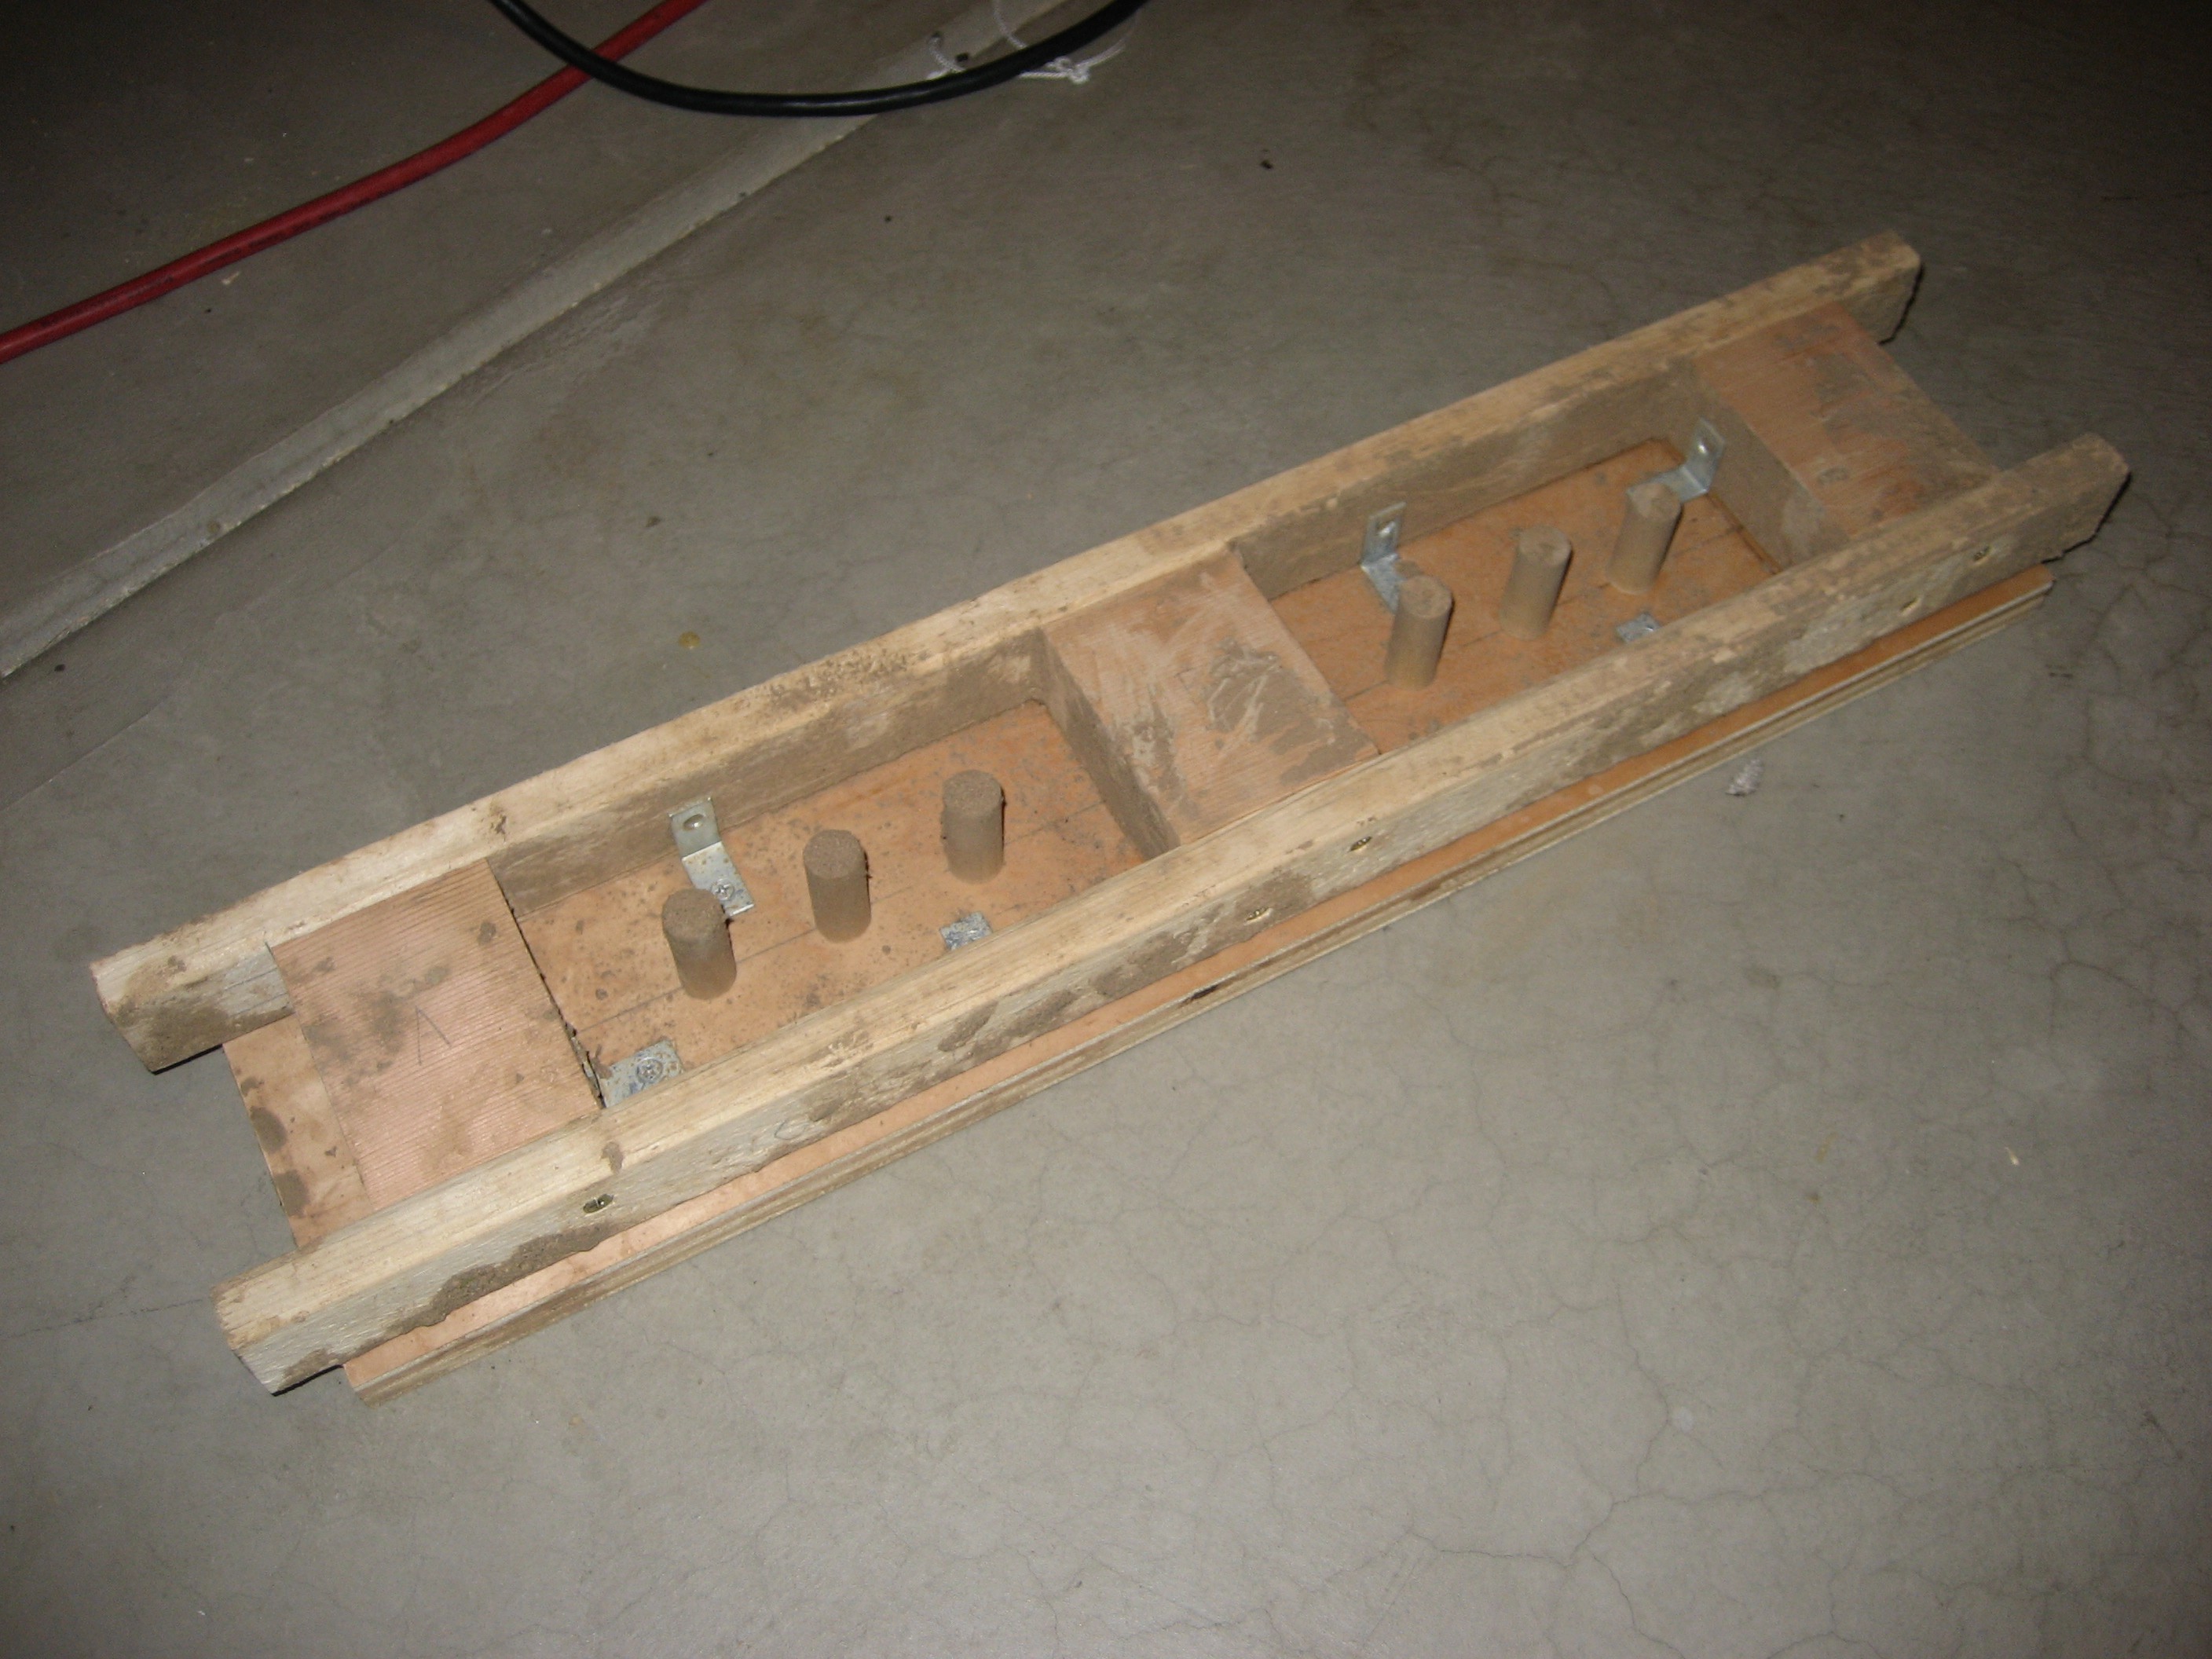
The first version is shown in the image below. This is a two part mold. The dowels and angle brackets are attached to the base plate, while the frame lifts off. The idea is that you fill it from the top, flip it over, remove the back plate, and then lift up the frame. The problem was that the bricks did not release cleanly during this process, and the result was just multiple blobs of gooey clay stuck hither and yon. It was a mess.
![]()
Brick Mold Version 2
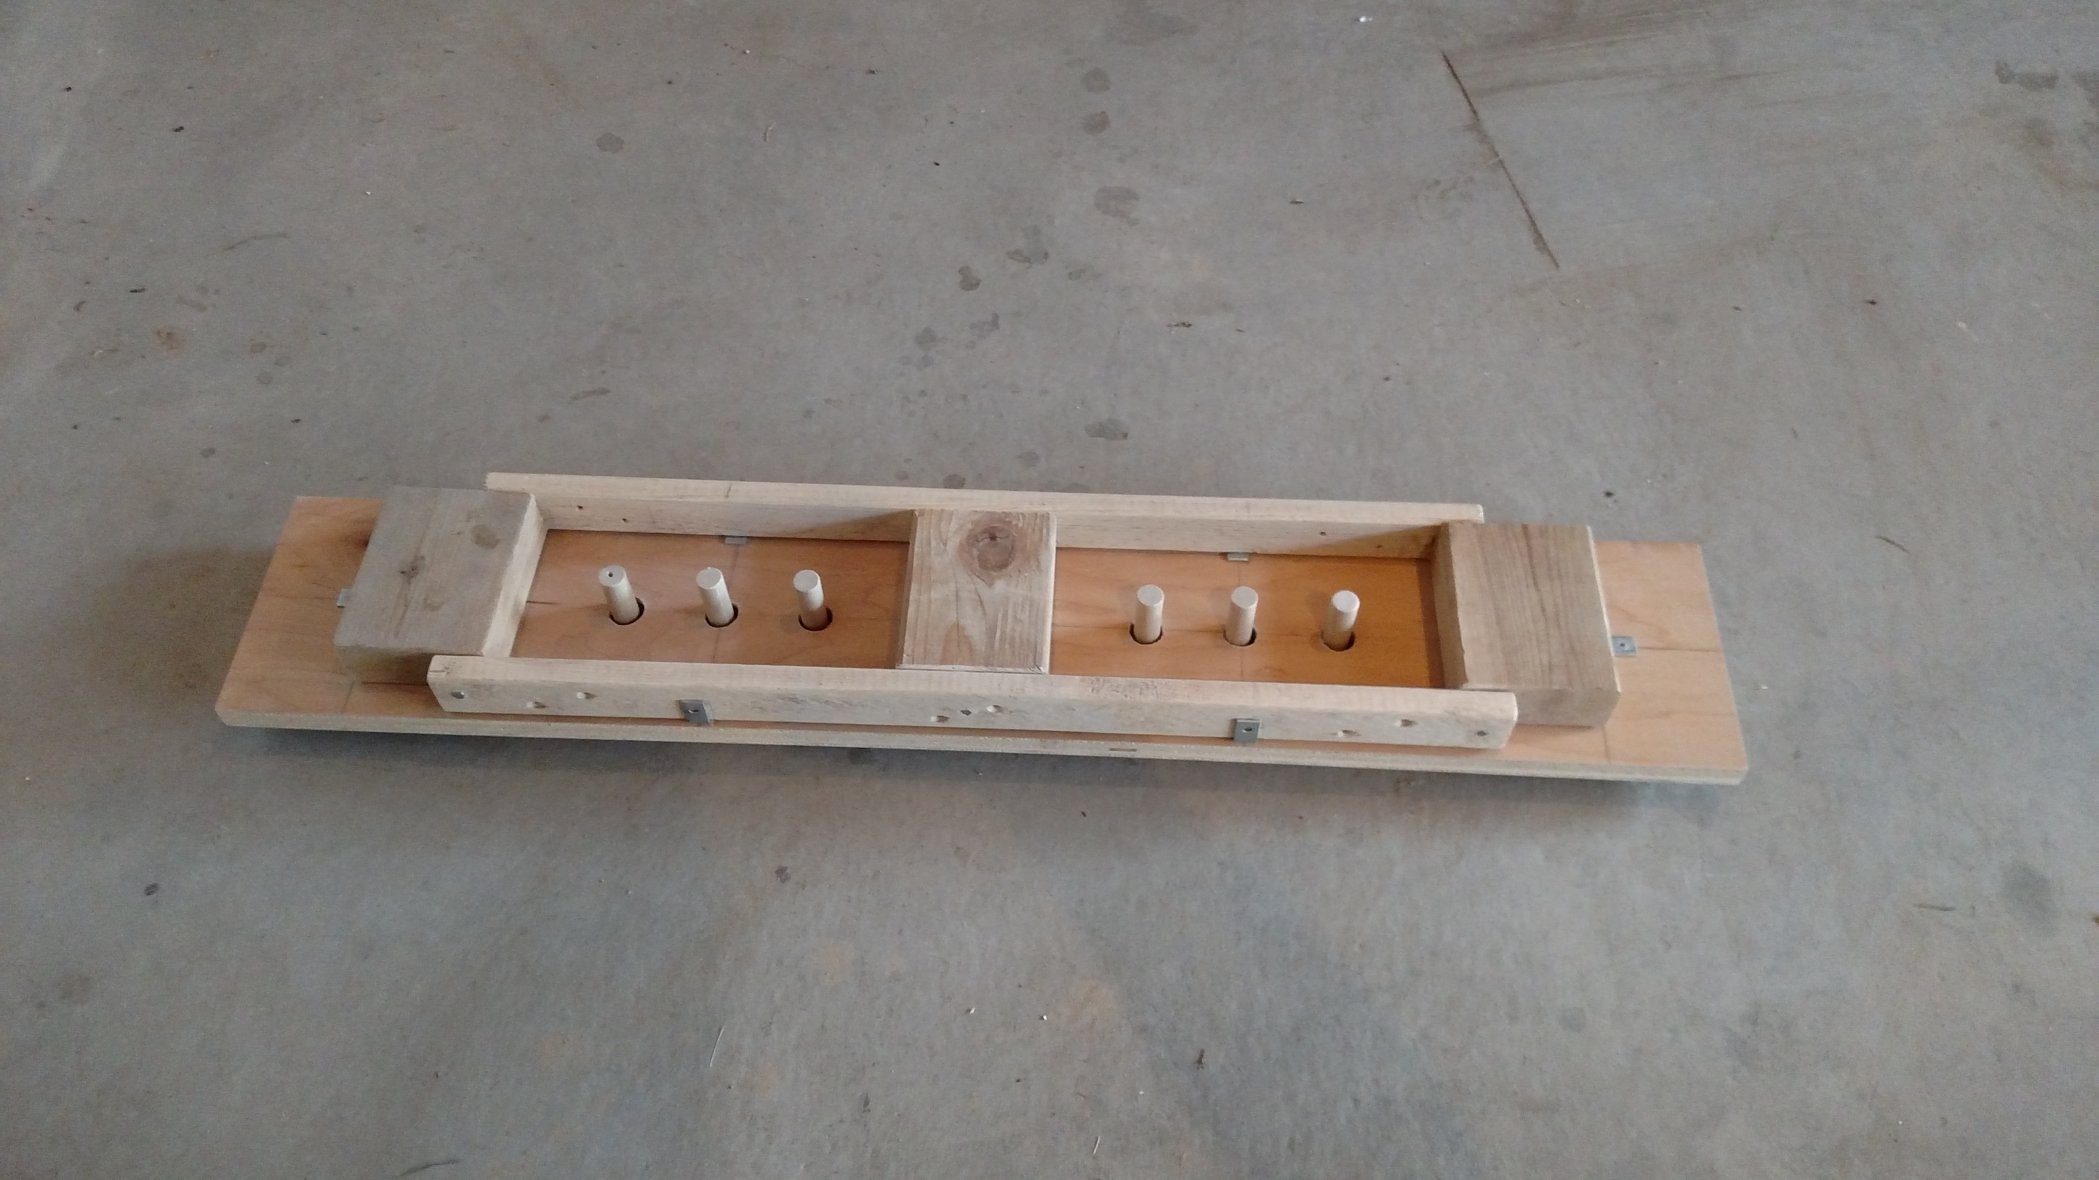
I had high hopes for this version, but it didn't work either. The metal angle brackets on the large plate made it difficult to slide the plate off the bricks. Trying to lift the large plate off didn't work either, because the bricks would tear into pieces and portions of brick would stay stuck to the plate.
![]()
![]()
![]()
Brick Mold Version 3
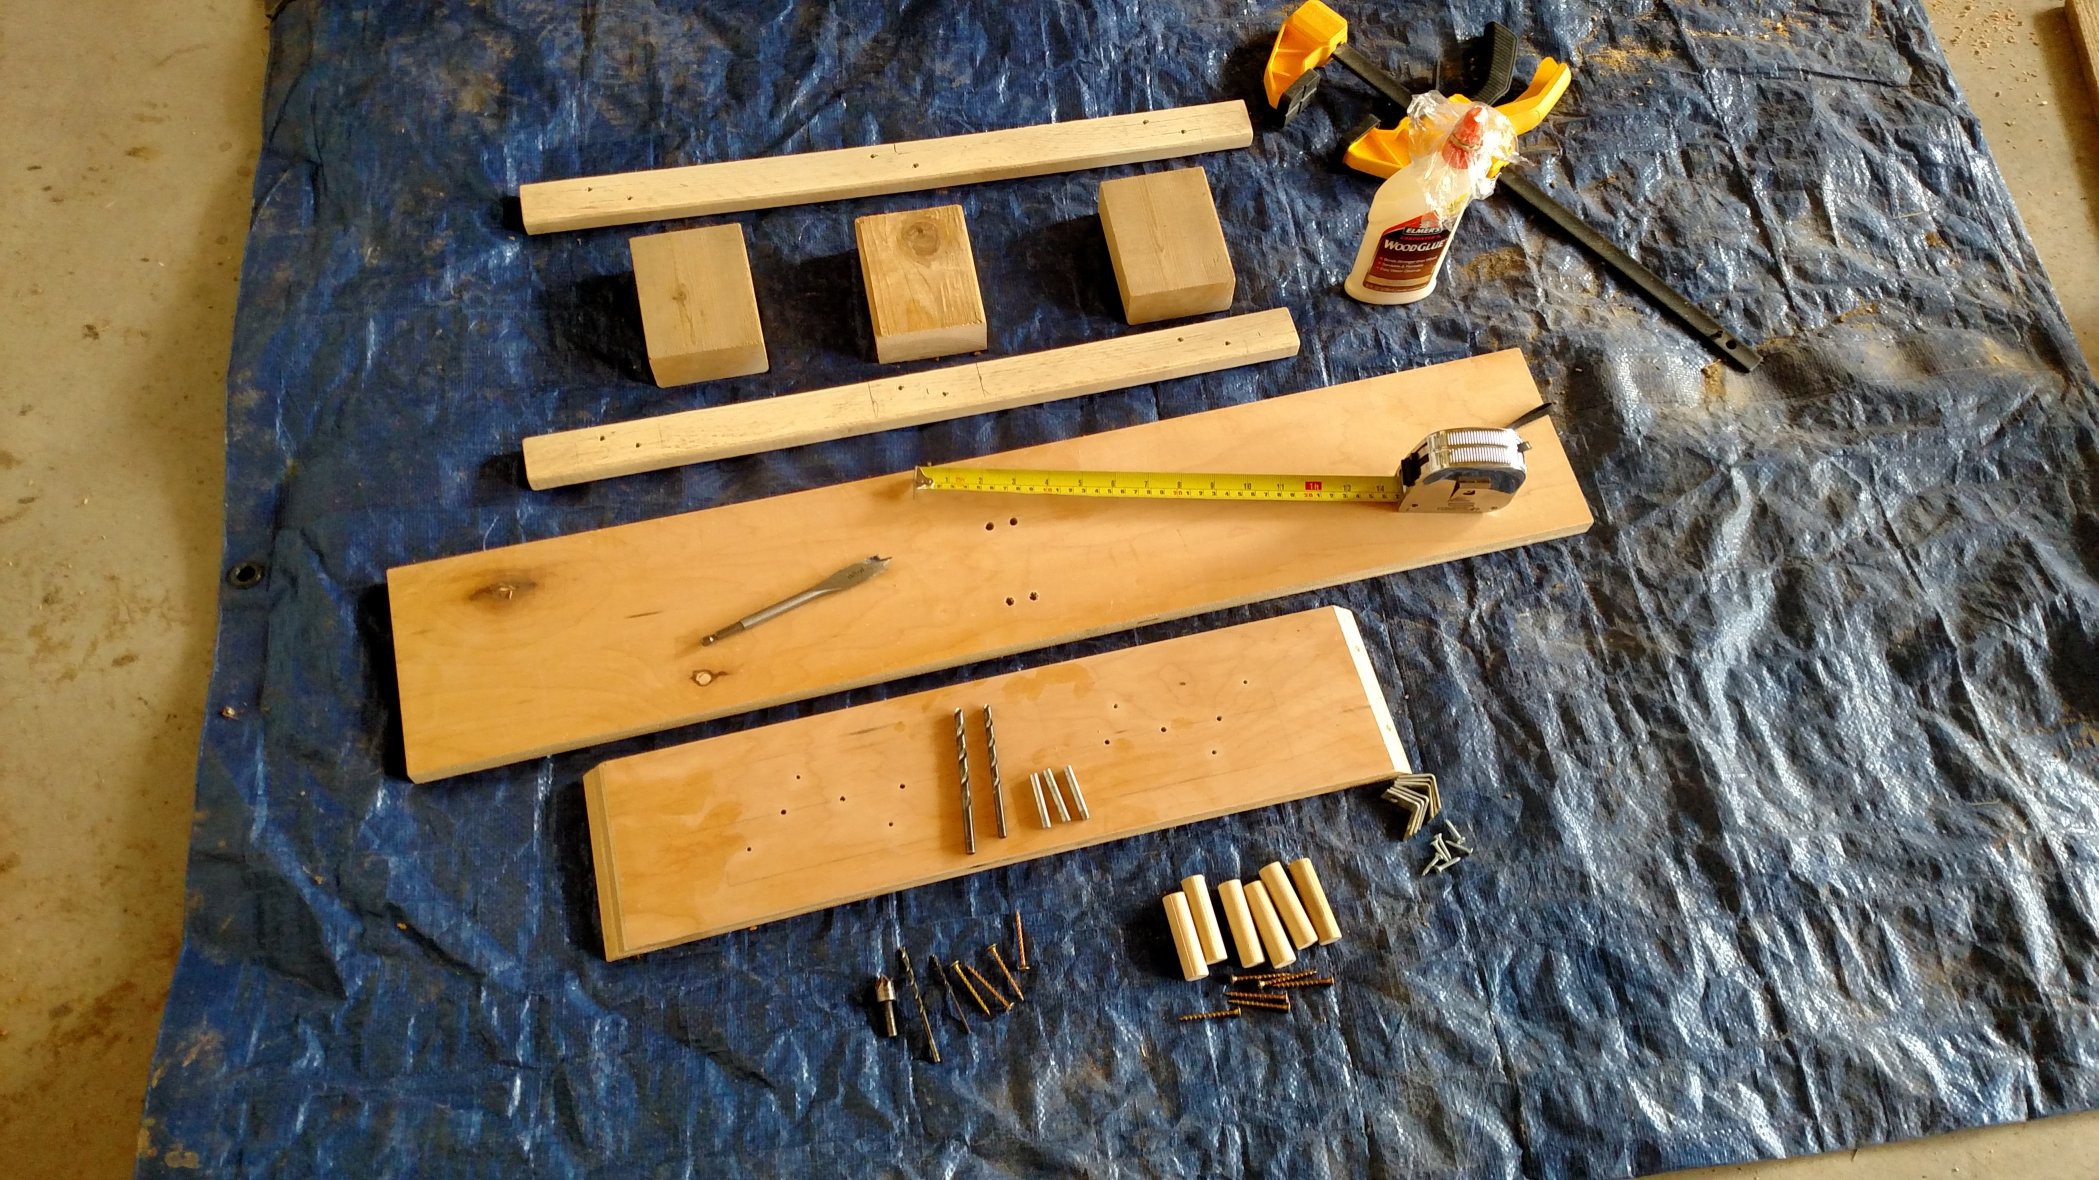
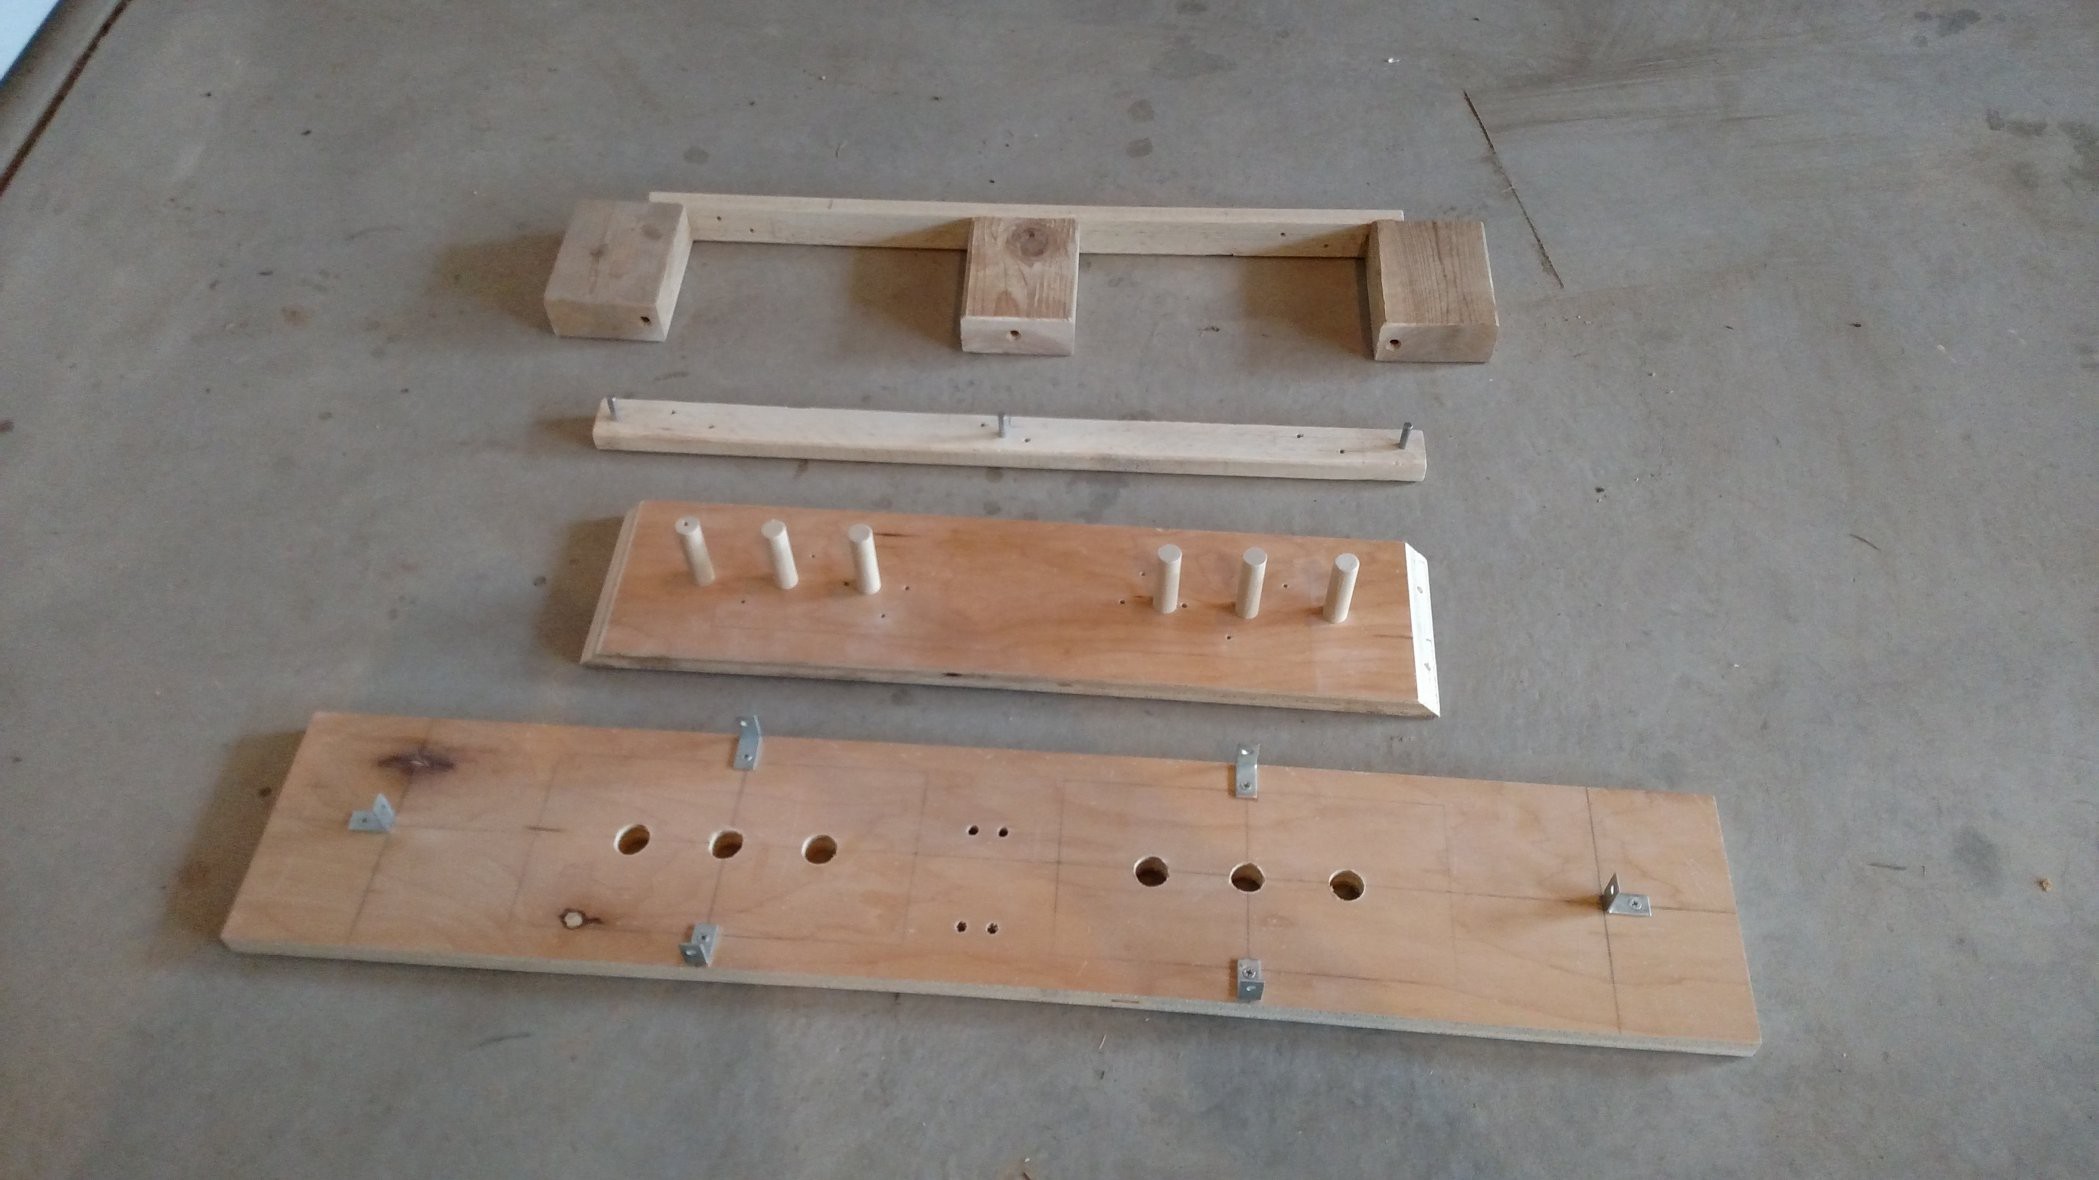
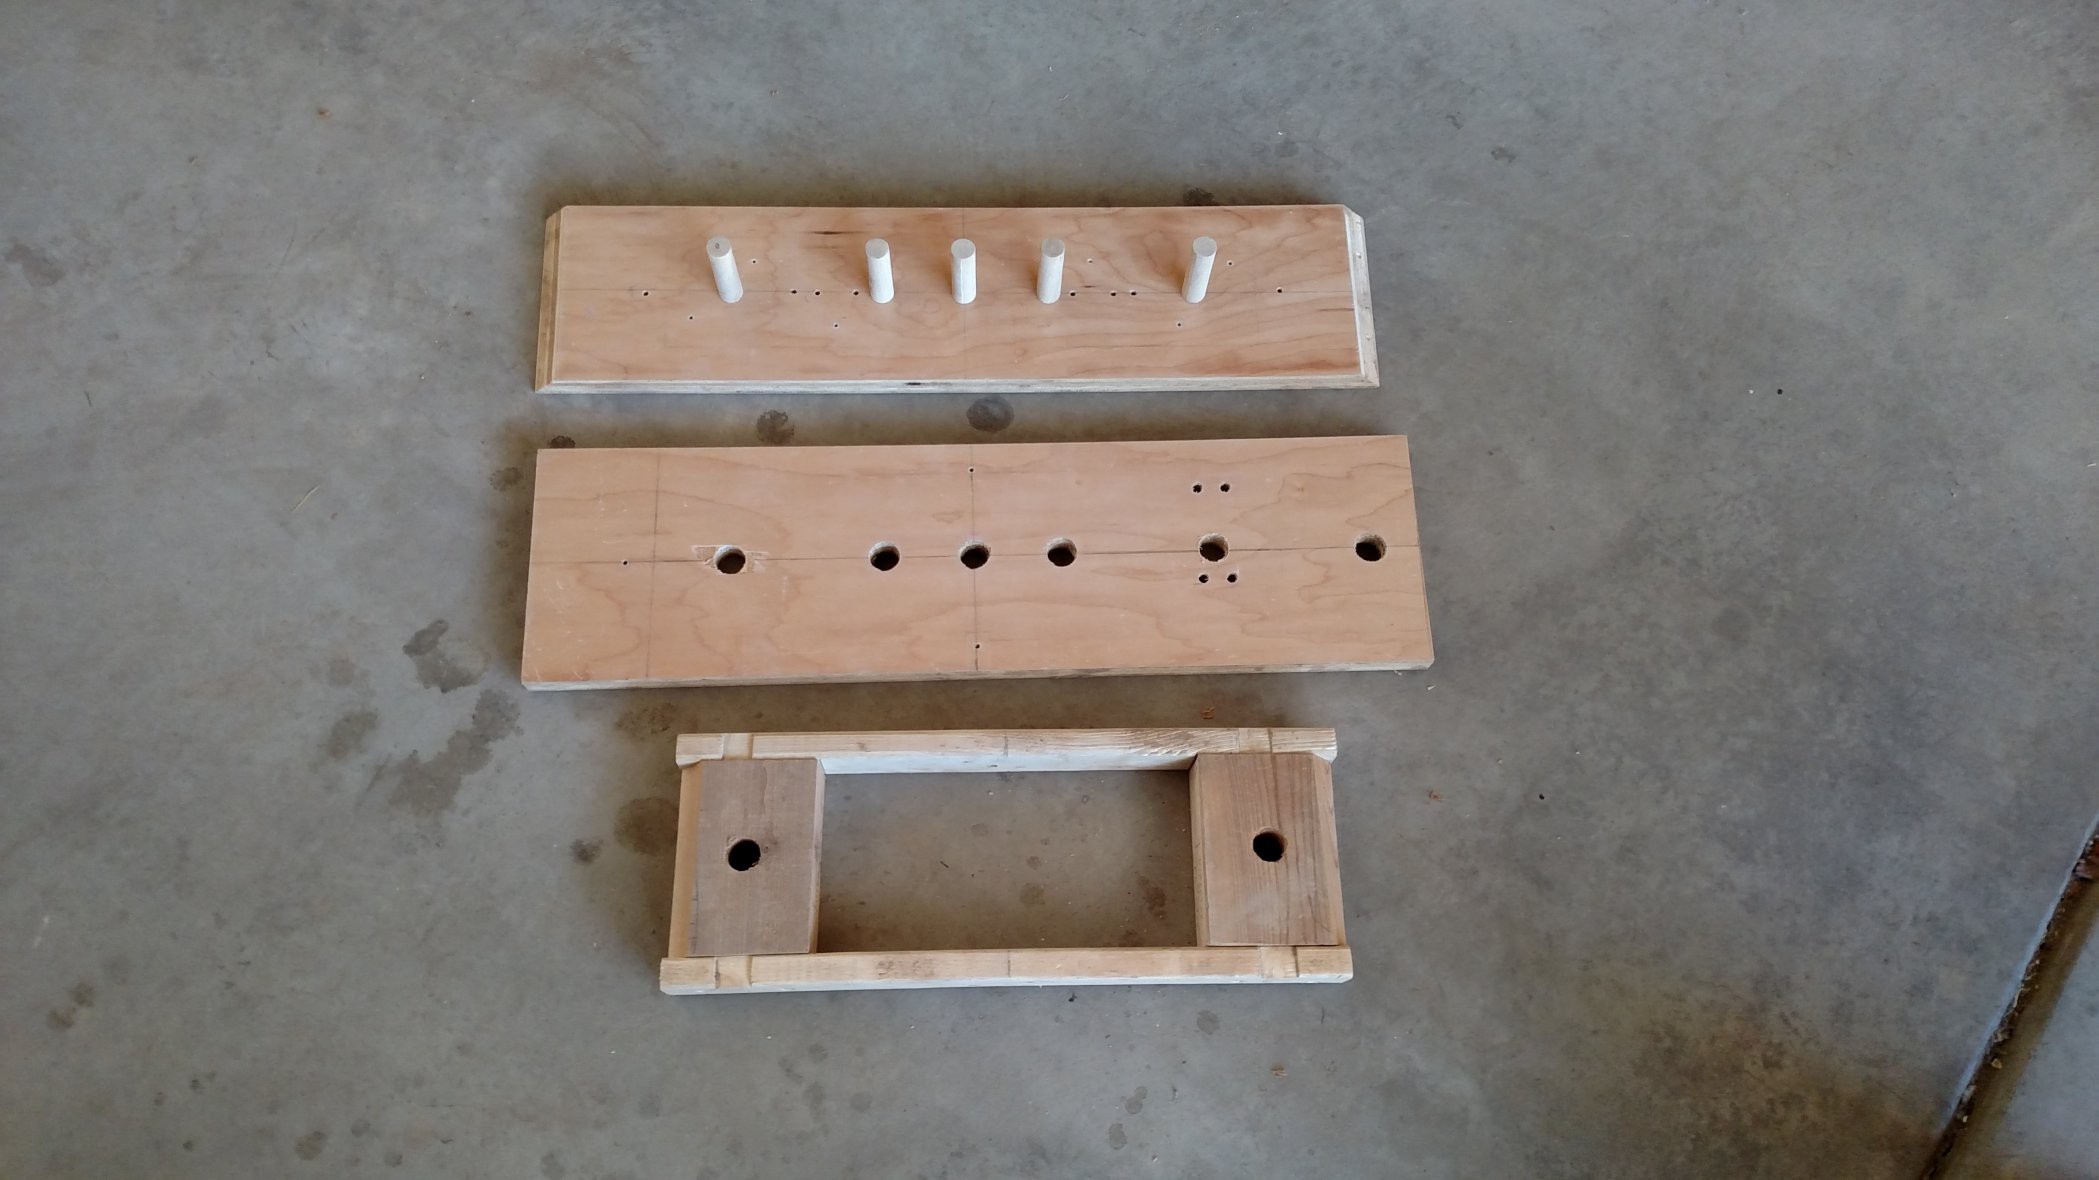
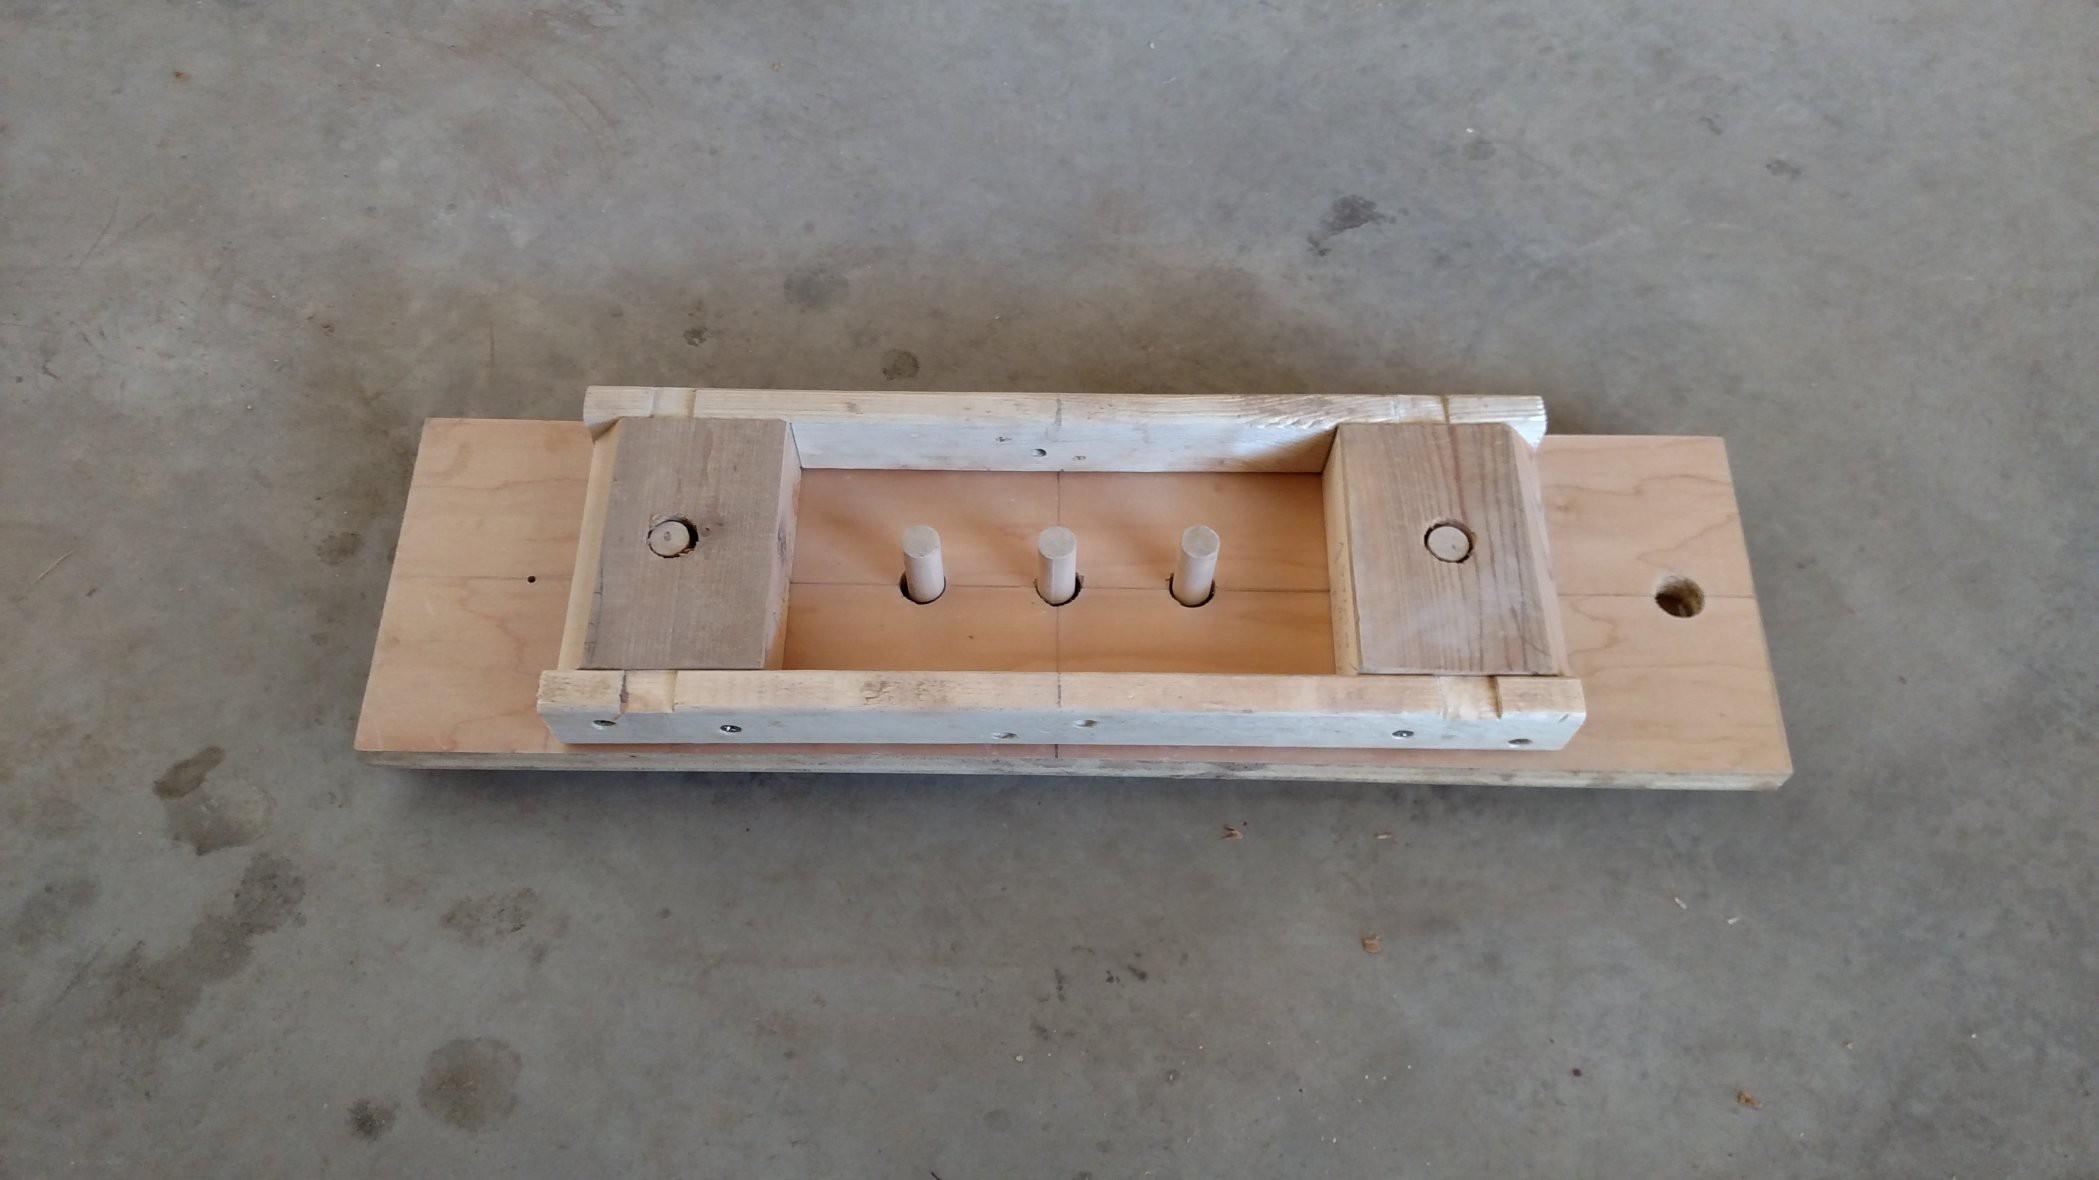
The third version simplifies the design and has space for only one brick. The back plate (the thing with the holes in it) is completely smooth so it can be slid off the bricks, instead of lifted. There are two extra pegs on the pegboard to perform alignment. The frame is one piece, but it has a slight draft angle built in to aid with removing the bricks.
![]()
![]()
Wedges drawn on the blocks show the acute angles of the bevels, for creating the draft angle in the frame when assembled.
![]()
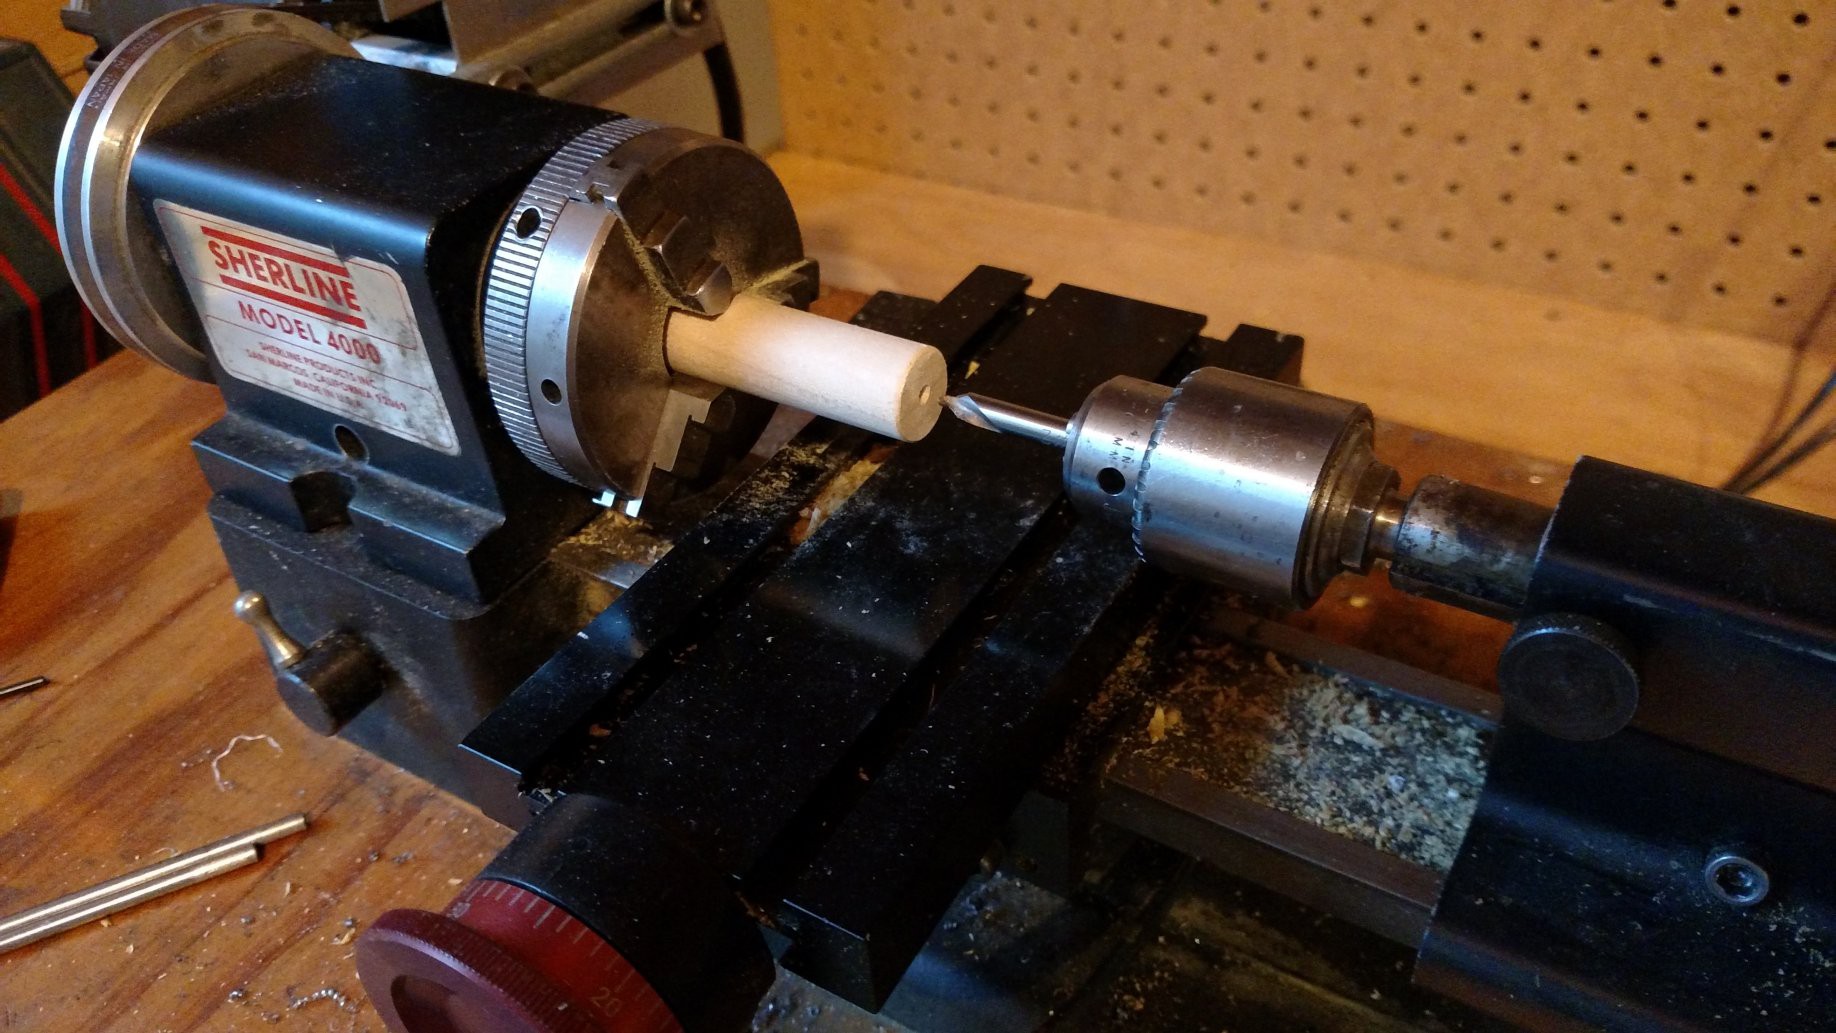
It is important to have the pegs aligned as accurately as possible. The pegs were cut square with a chop saw and then drilled with a lathe to get the holes on center.
![]()
-
Processing Natural Clay
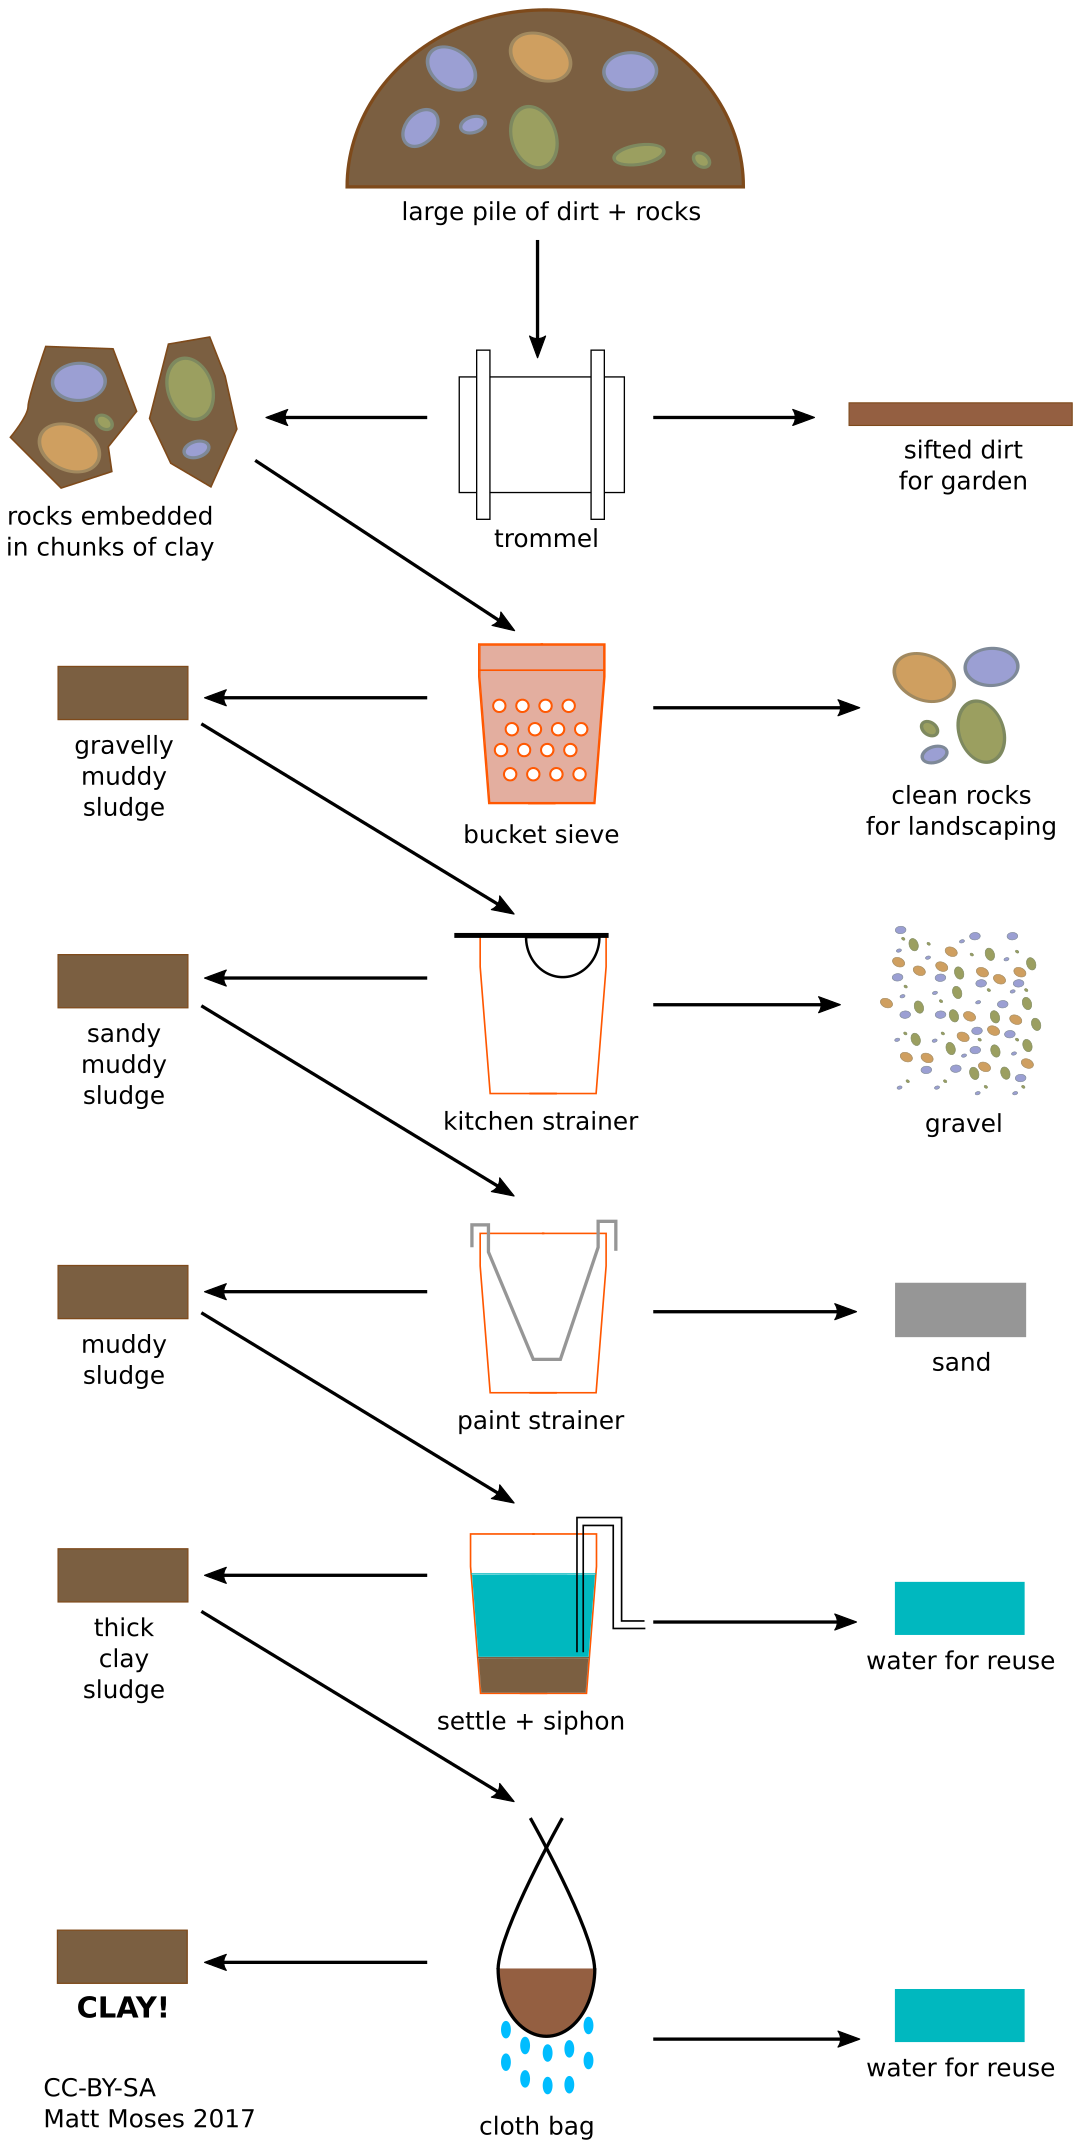
05/12/2017 at 20:12 • 0 commentsDirt is really complicated stuff. Check out the Wikipedia article on soil to get an idea. There are six processing steps to go from the large pile of rocks and dirt dug out of the ground to a semi-usable natural clay that can be formed into crude pottery. The steps I used are shown in the drawing below. There are many variants of this process (people have been doing this for thousands of years after all) and youtube has a lot of interesting tutorials like this one and this one.
![]()
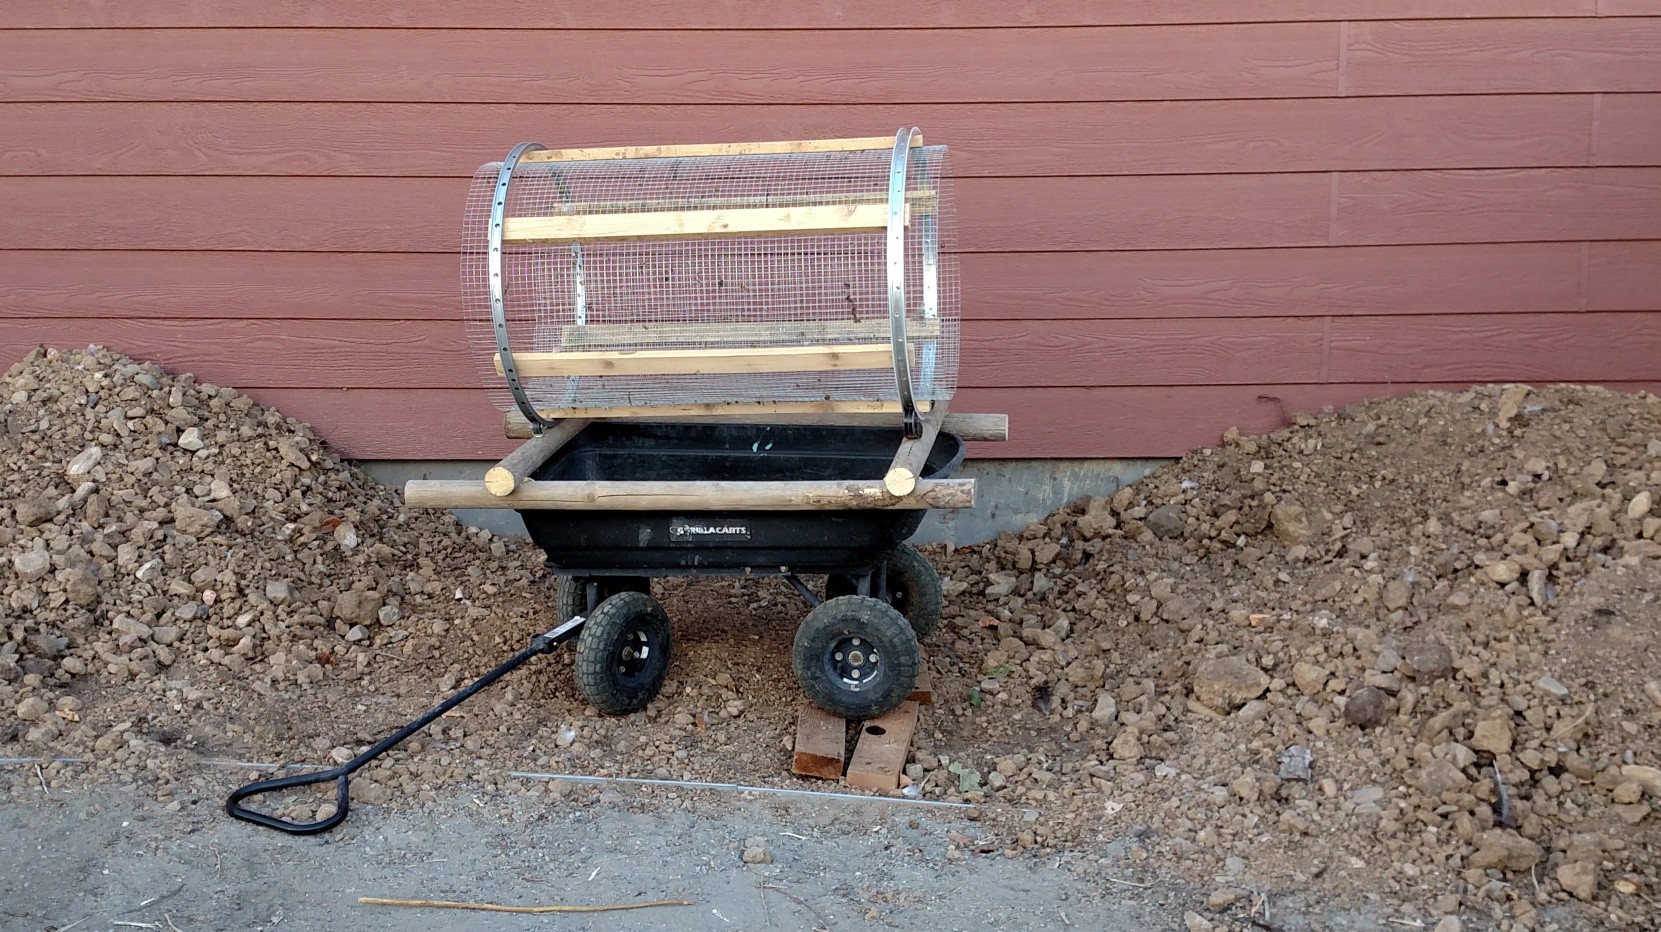
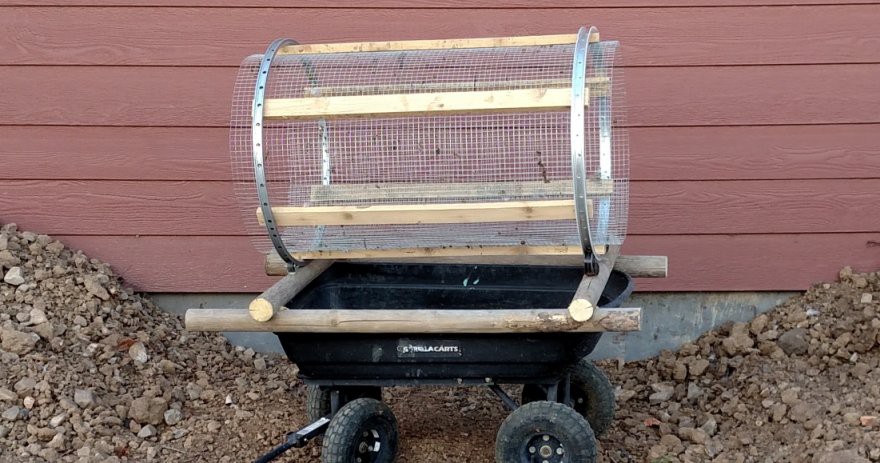
Step 1. Trommel Screen. This is a cylindrical screen made of chicken wire, mounted on old bicycle rims. The cylinder spins on caster wheels. The raw dirt goes in the cylinder, rocks embedded in chunks of clay go out the end after spinning. I got the idea for this from this youtube video. When I searched youtube for trommels I was amazed at how many people have made DIY trommels.
![]()
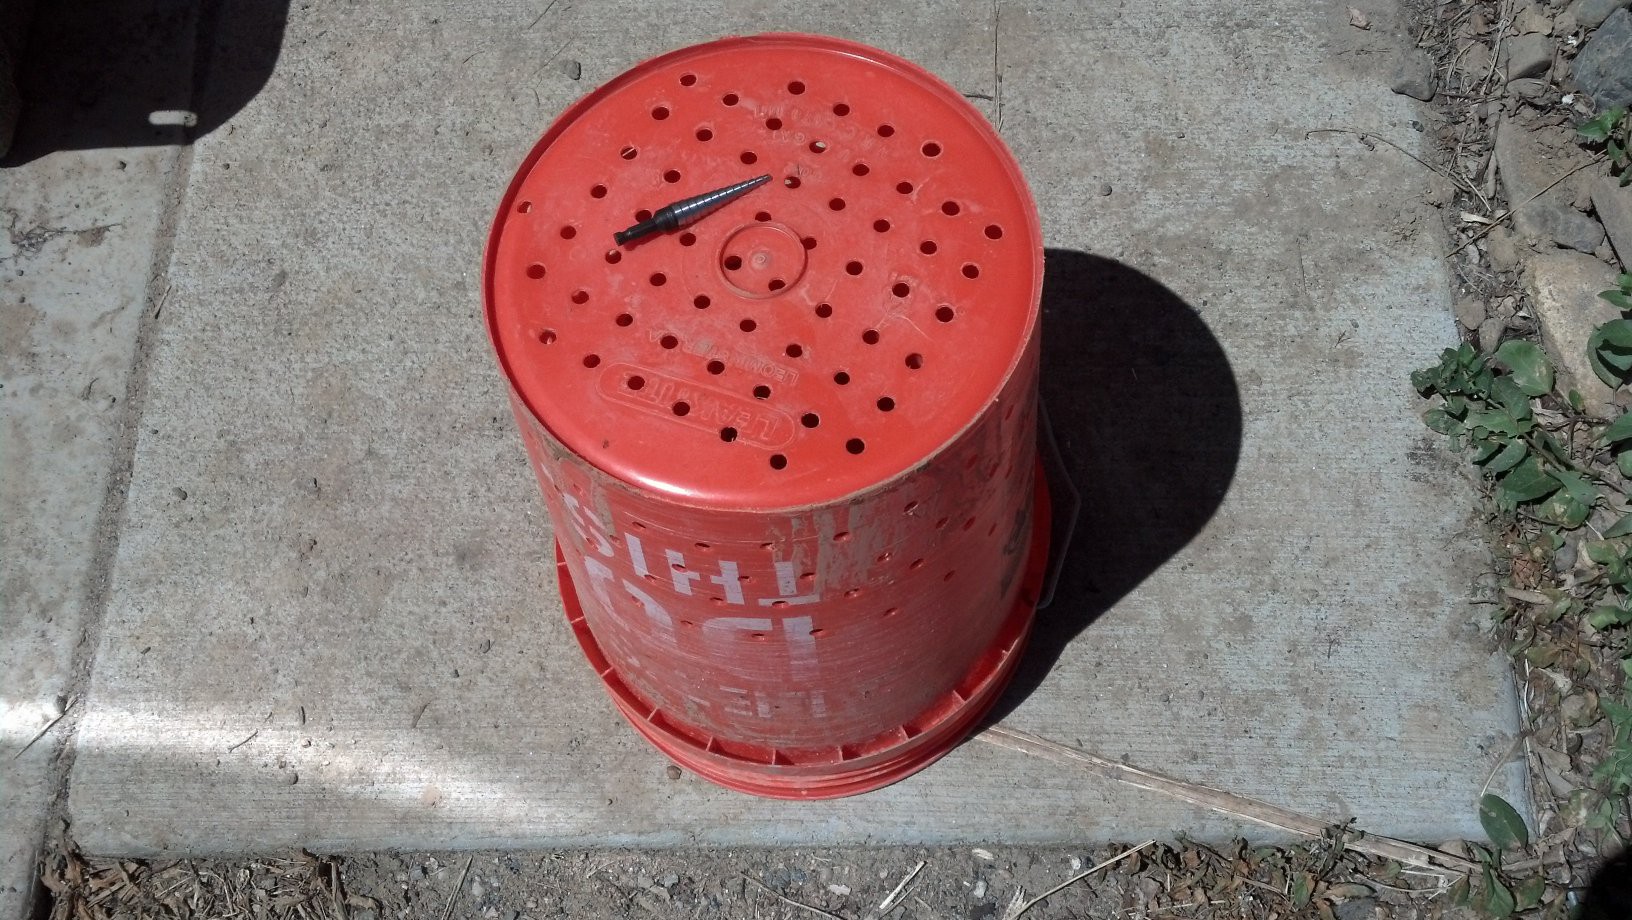
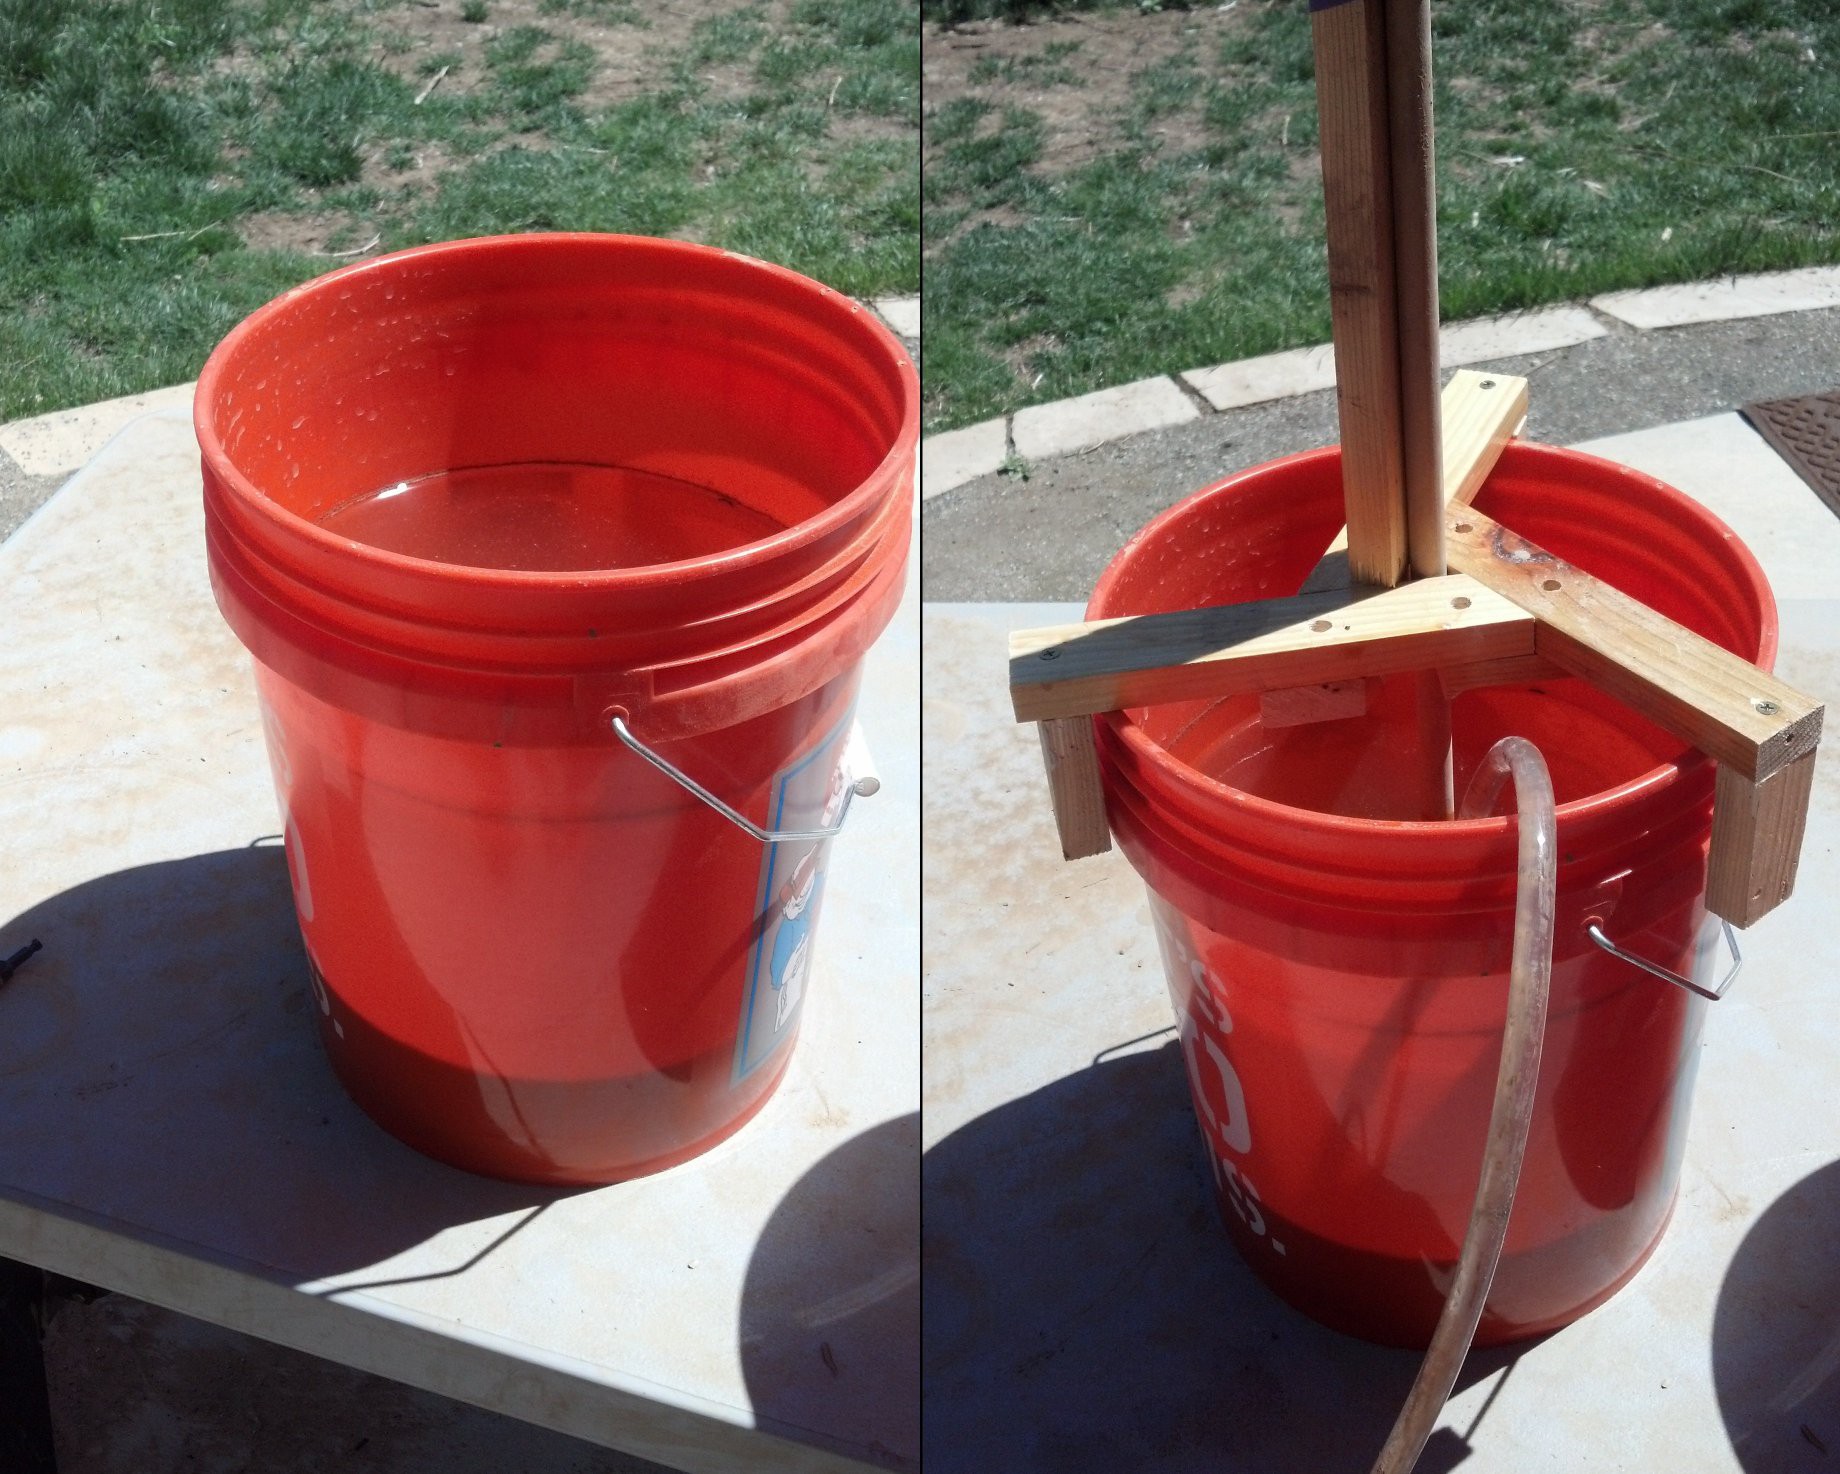
Step 2. Bucket Sieve. The "bucket sieve" is a bucket with holes drilled in it. I used a piece of pegboard as a template and a step drill (shown in the image).
![]()
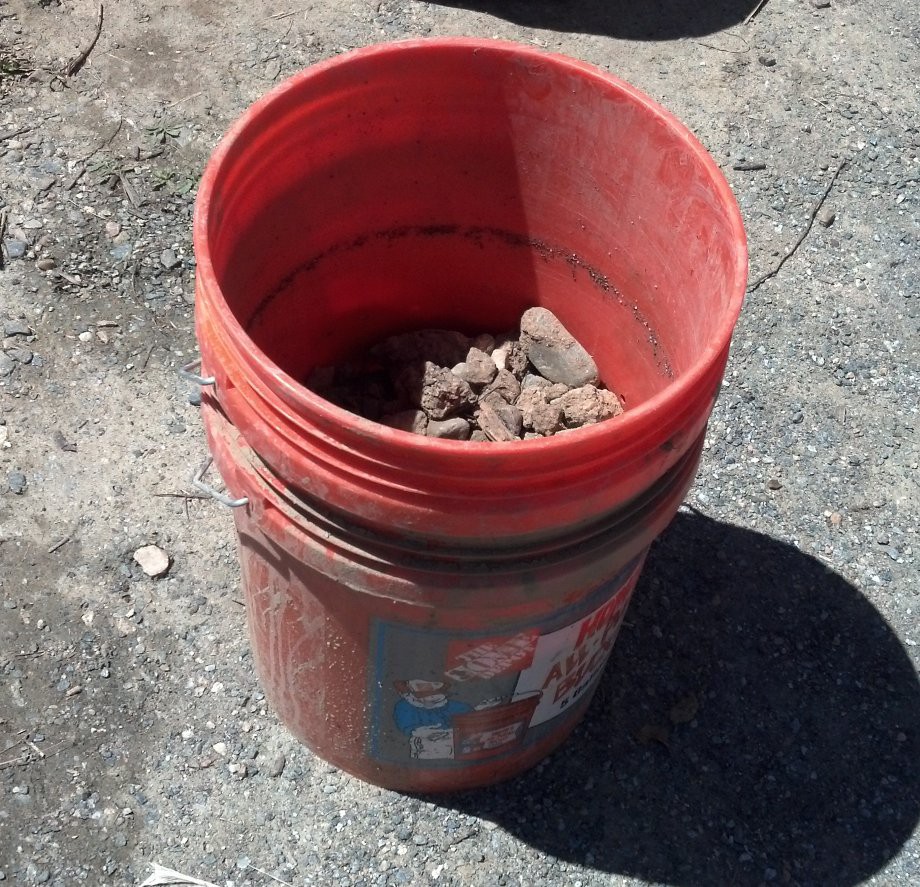
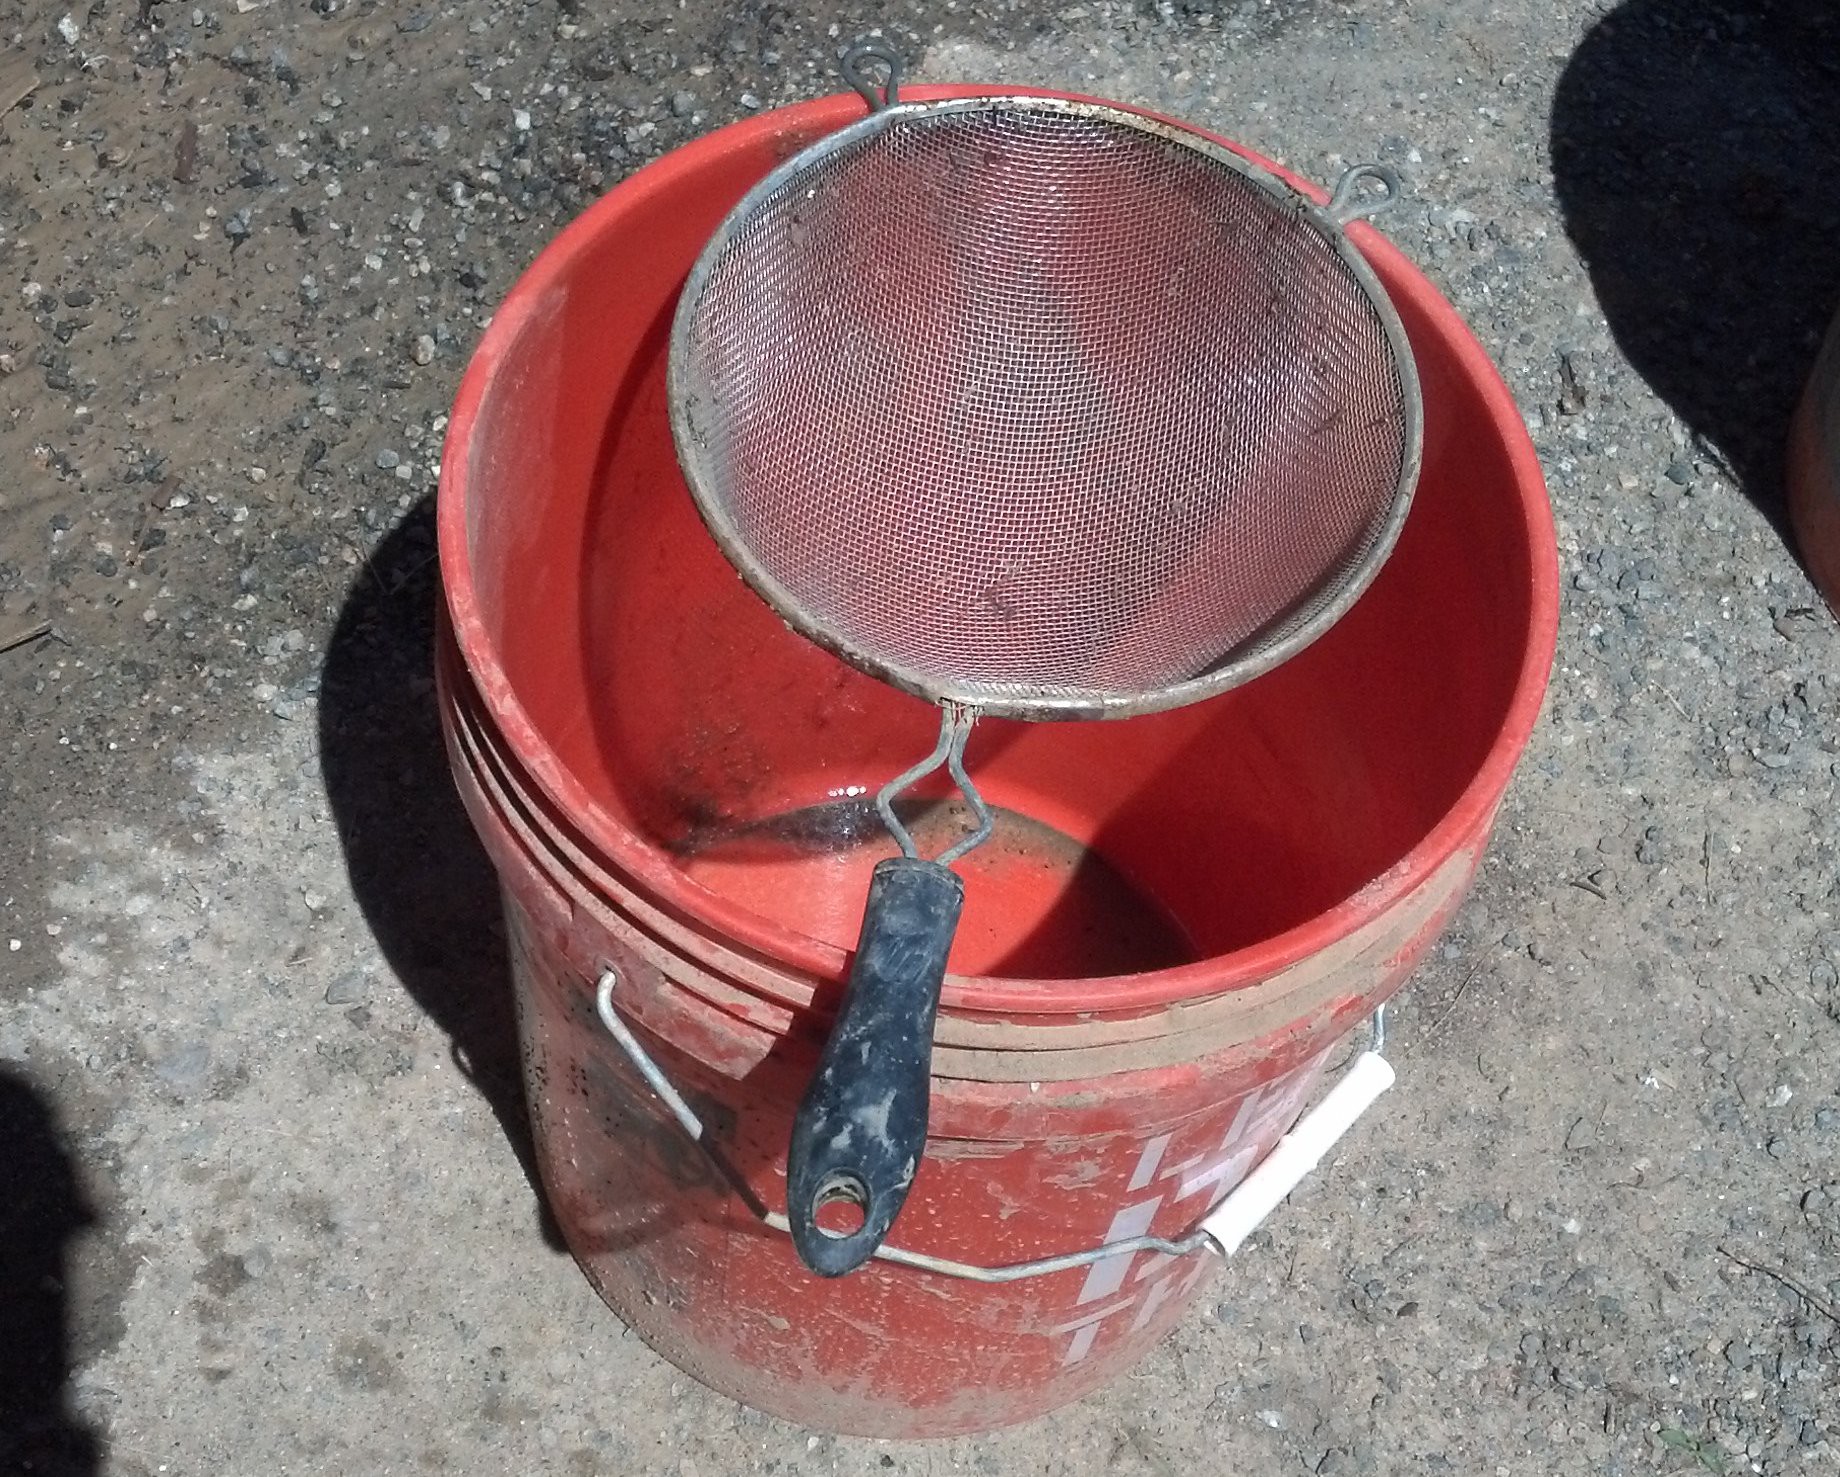
The bucket with holes in it nests inside a normal bucket. Three scoops of rocks embedded in chunks of clay go into the top bucket, and then a bucket of water is poured in on top. When the water goes in, it makes an immensely satisfying bubbling and frothing noise as the air underneath escapes upward. Here is what a loaded bucket sieve nested into a normal bucket looks like:
![]()
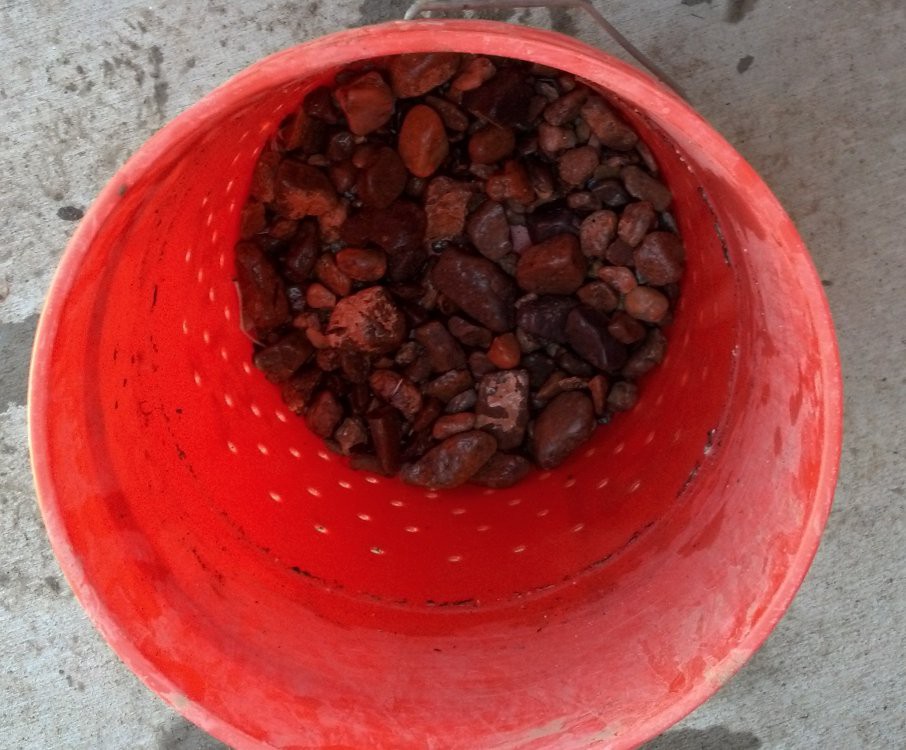
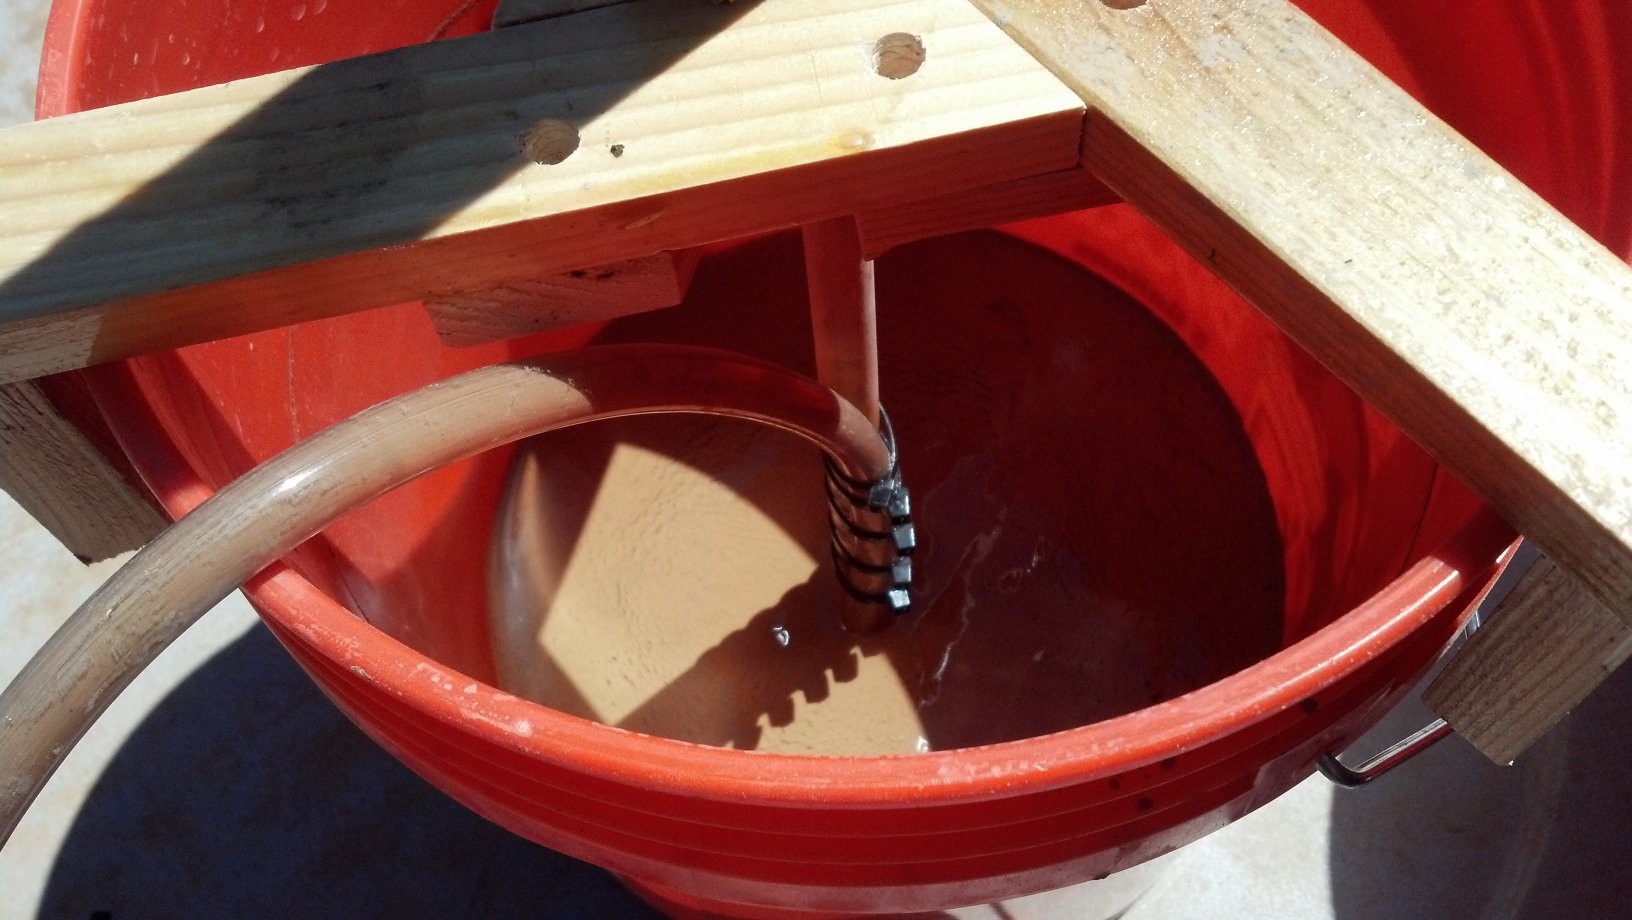
After lifting the bucket sieve up and down for a while, the clay, gravel, and sand sink into the bottom bucket. Clean (well mostly clean) rocks are left in the top bucket. The clean rocks are reserved for later use in landscaping projects. The next steps continue to process the clay+gravel+sand+water mixture in the bottom bucket.
![]()
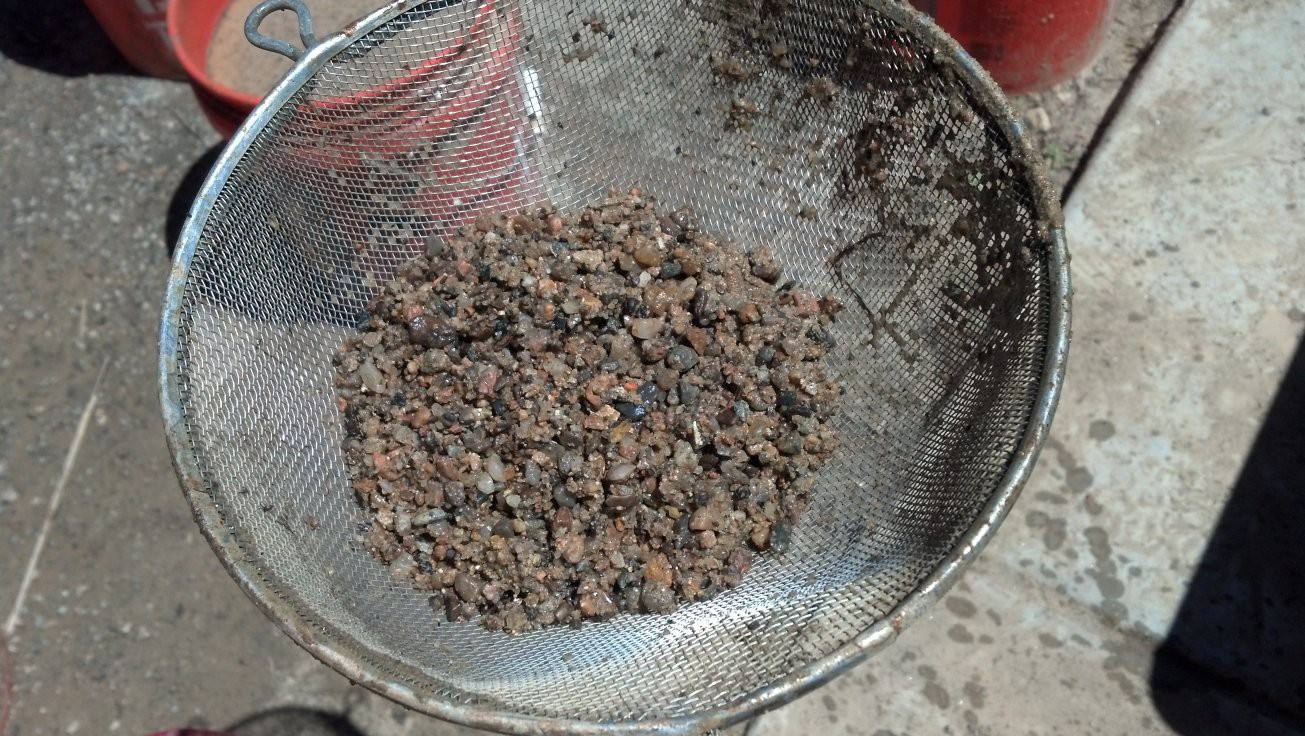
Step 3. Kitchen Strainer. Just a normal kitchen strainer from Target or Walmart. Stir up the stuff in the bucket, poor it through, and then we have separated out the gravel. It's that simple!
![]()
![]()
Step 4. Paint Strainer. You can find these strainers at Home Depot near the paint spraying equipment. These ones came in packs of three. They are meant to strain out tiny clumps in house paint so the spraying devices don't get clogged up. They worked really well for this application.
![]()
A muddy sand blob is left in the filter after the clay mixture is poured through. After further cleaning, this sand might be useful as foundry sand for making castings.
![]()
Step 5. Gravity settling and siphoning. After filtering through the paint strainer, the water+clay mixture is left to settle for several hours (12 to 24). A layer of thick clay sludge settles out on the bottom, and the water on top is siphoned off for reuse.
![]()
![]()
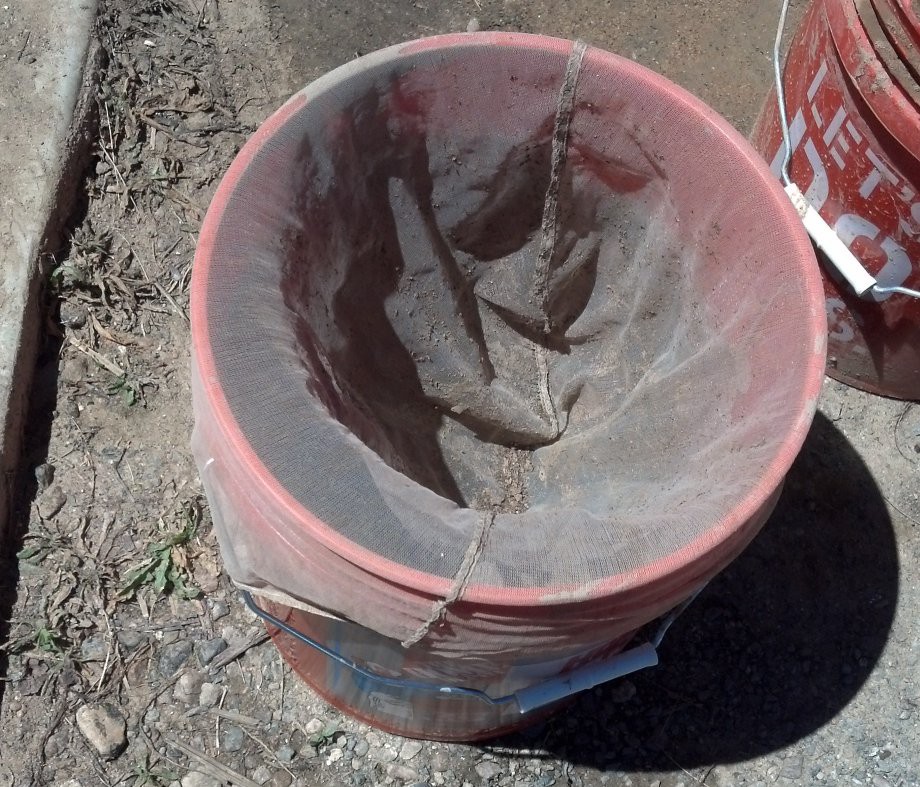
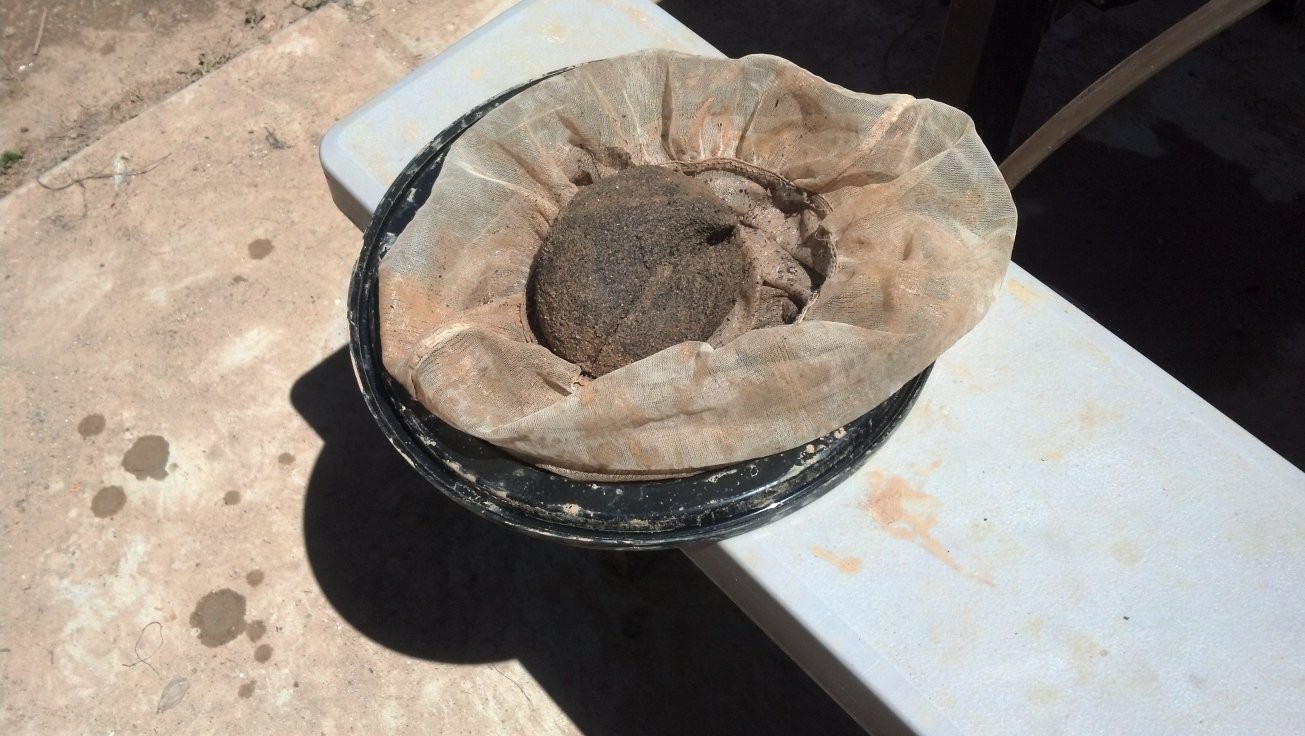
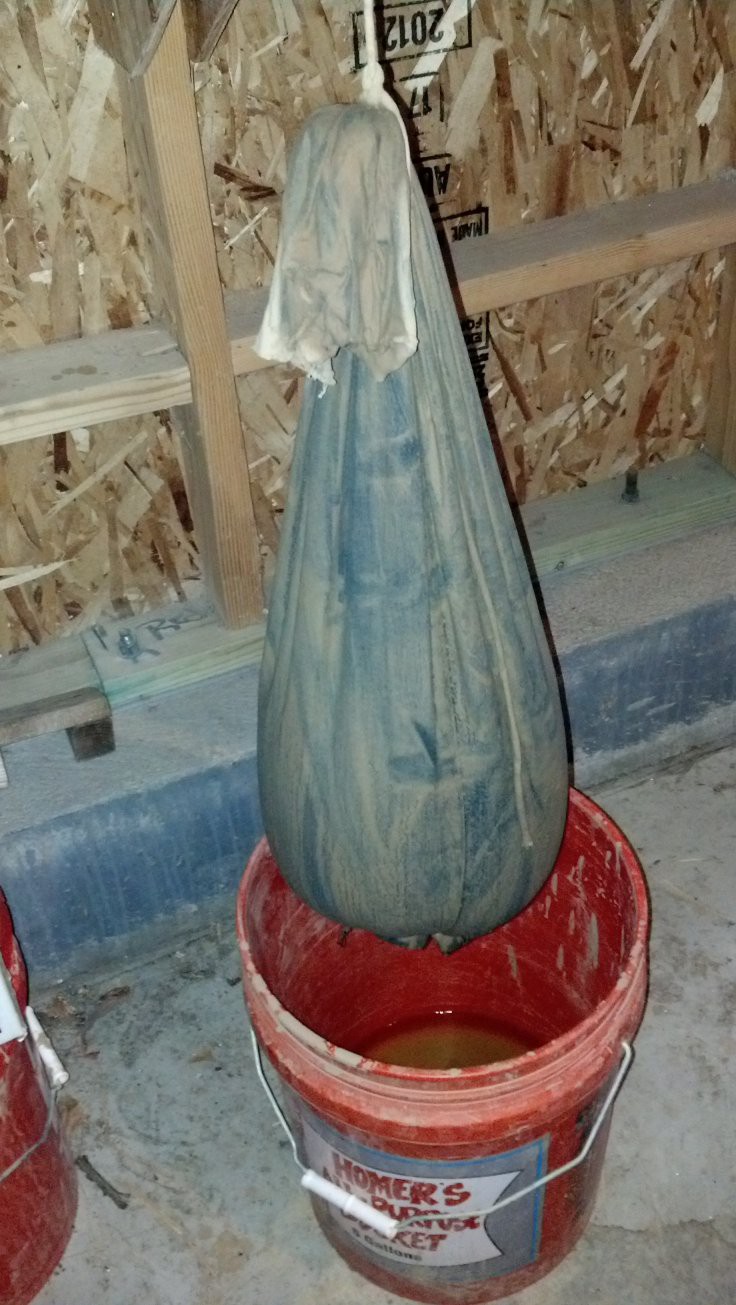
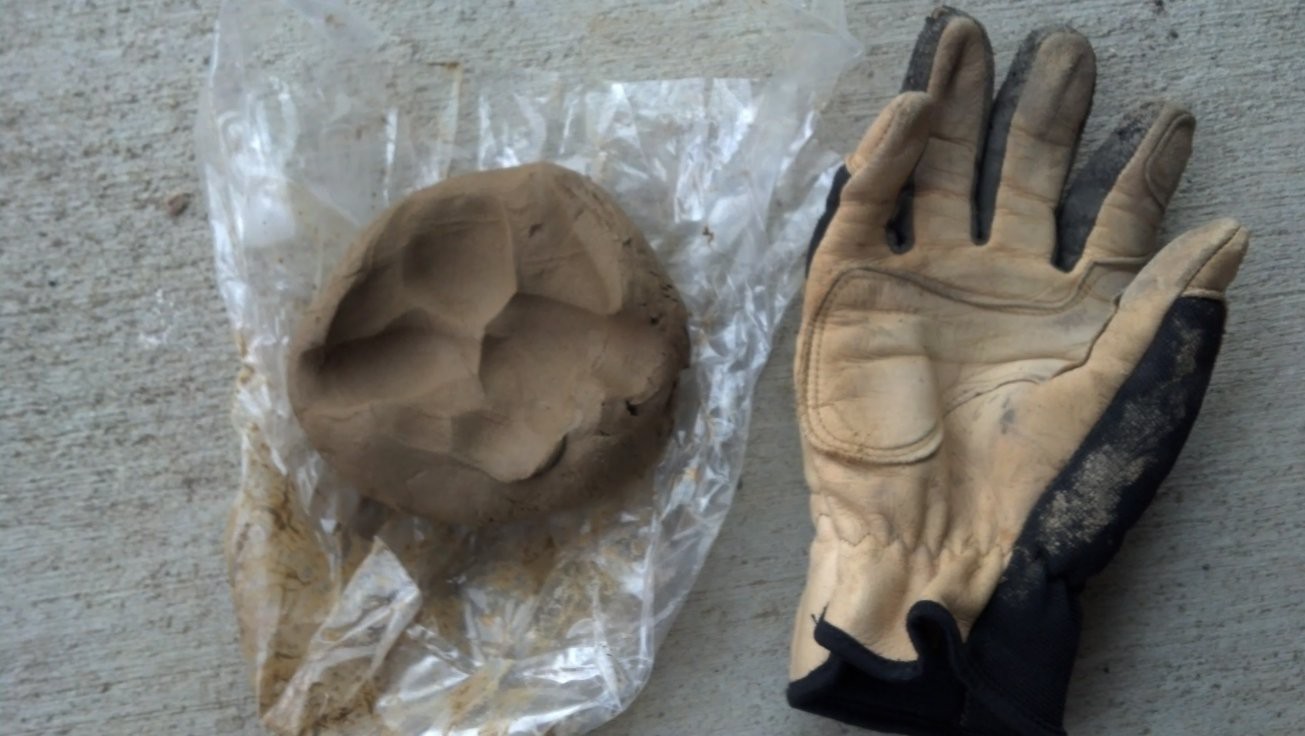
Step 6. Cloth bag. The thick clay sludge from Step 5 is scooped out with a plastic cup, and either placed in a bucket for long term storage, or dumped into a cloth bag. Yes, the cloth bag seen in the picture is the leg of an old pair of blue jeans that is tied off at each end. The clay stays in the cloth bag for a day or two or three as it dries out. When it is an acceptable consistency, the bag is opened, balls of clay are rolled into form and stored in sealed plastic bags for later use.
![]()
![]()
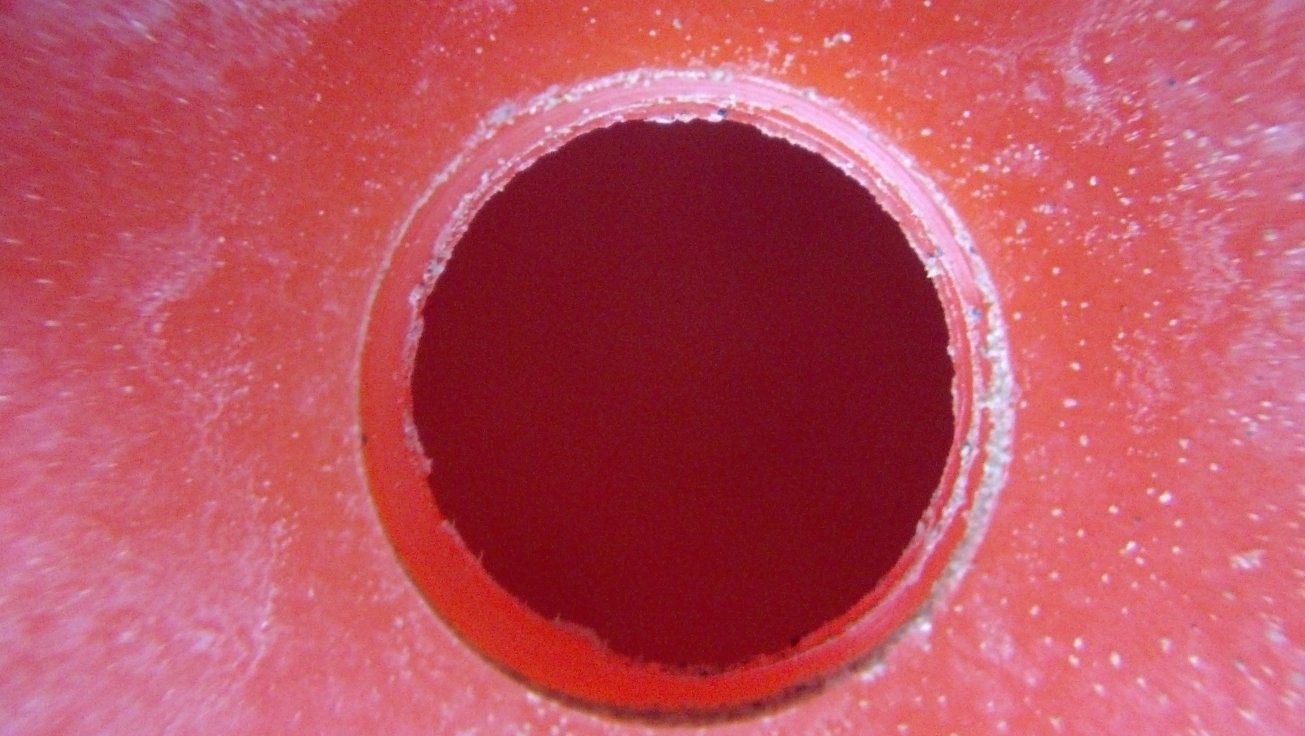
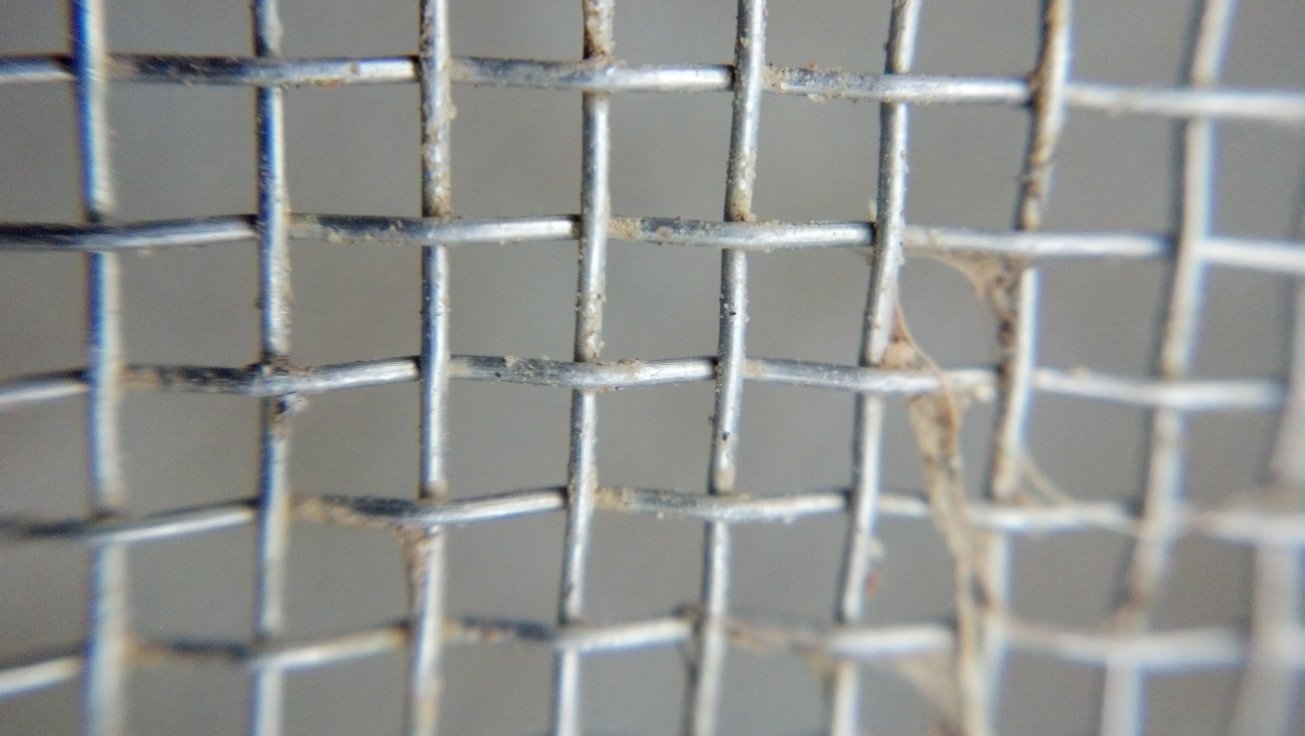
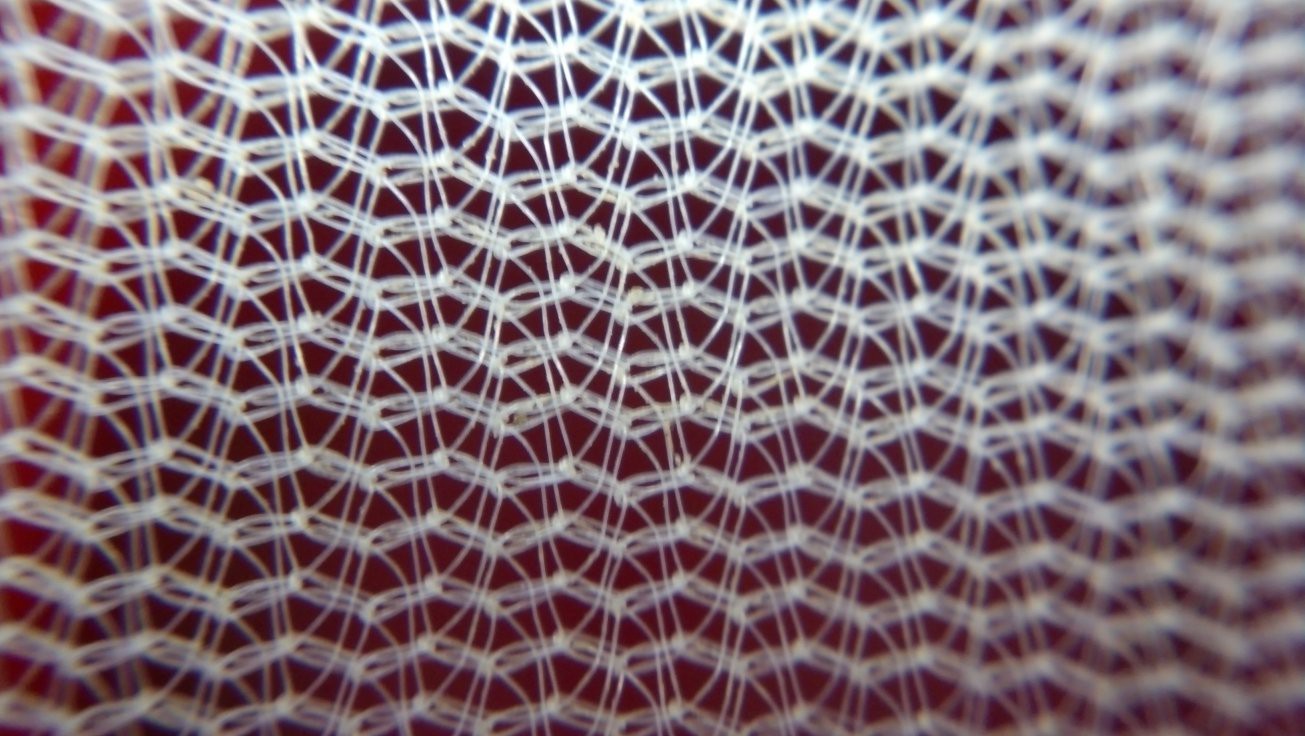
Filter Sizes. Just for fun, the last three pictures compare the size of holes in the three filter materials. The three pictures are at the same scale. Bucket sieve holes = 0.31 inch (7.8 mm) diameter; kitchen strainer holes = 0.08 inch (2.0 mm); paint strainer holes = 0.02 inch (0.5 mm).
![]()
![]()
![]()
-
Heat Transfer Calculations
05/08/2017 at 03:54 • 0 commentsThe most important requirements for the kiln are that it
- is powered with simple mains electricity
- gets hot enough to melt aluminum
- gets hot enough to fire clay pottery
Being a modest man in a modest house in the United States, "mains electricity" means about 15 amps at about 115 volts AC. To be conservative we'll assume that by the time all the current makes its way through the wiring, we'll get about 1500 watts of power at the kiln's heating element.
Pure aluminum melts at 1220 °F (660 °C). A common aluminum alloy called 6061 melts at 1085 °F (585 °C). So to be safe let's just say we need to get to 1220 °F (660 °C) to melt whichever aluminum scrap we may be dealing with.
Firing (and especially glazing) pottery can get somewhat complicated. If you consult a kiln firing chart you will find a bewildering array of different effects that take place at a range of temperatures from about 750 to 2550 °F (400 to 1400 °C). An acceptable mid-range temperature to aim for seems to be about 1800 °F (1000 °C). This should be adequate to fire simple objects made from the natural clay used in this project. As a point of reference, the heat color of an object at 1800 °F is orange.
At this point we have several important design parameters tentatively chosen:
- design temperature T_in = 1800 °F (1000 °C)
- heater element power Q_dot = 1500 W
- wall thickness L = 4.5 inches (11.4 cm)
- nominal wall thermal conductivity k = 0.6 W/mK
The next step is to run some heat transfer calculations and see if we can arrive at a practical kiln design that is consistent with these parameters. We could go crazy with finite element analysis software, but (see above) I am a modest man in a modest house so instead we will make some crude assumptions, simplify the problem to the fullest extent possible, put some equations into a spreadsheet, and twiddle the numbers until it works.
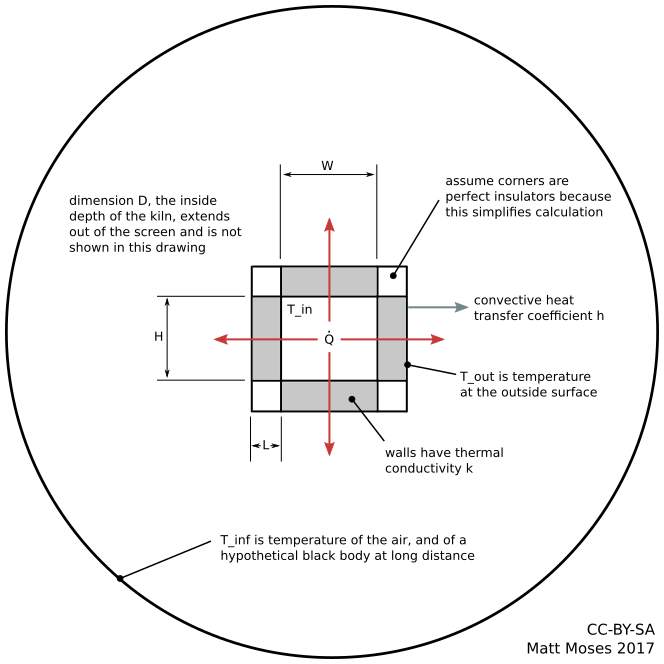
Here is a drawing showing how the heat transfer problem is set up:
![]()
Basically we assume the kiln is a just a box with six walls, and use 1D heat conduction to model the wall, and convection and radiation transfer from the outside of the wall to ambient. This model assumes the outside temperature is uniform across the entire kiln, and the inside temperature is uniform as well. Heat conduction through the wall is just
where Q_dot is the rate of heat transfer in watts, k is thermal conductivity in W/(m*K), T_in and T_out are inside and outside wall temperatures respectively (in Kelvin), L is wall thickness (in meters), and A is the heat conduction area (m^2), which in the case of our box kiln is
The outside temperature of the kiln T_out is found by making a wild guess about the convective heat transfer coefficient h and then using the relation
where T_inf is the "temperature at infinity" or basically just the room temperature (in Kelvin), and sigma is the Stefan-Boltzmann constant in W/(m^2 K^4). The convective heat transfer coefficient in air typically varies between 10 and 100 W/(m^2 K) (source). For no particular reason we use a value of h = 30 W/(m^2 K) because that's close to the geometric mean of 10 and 100.
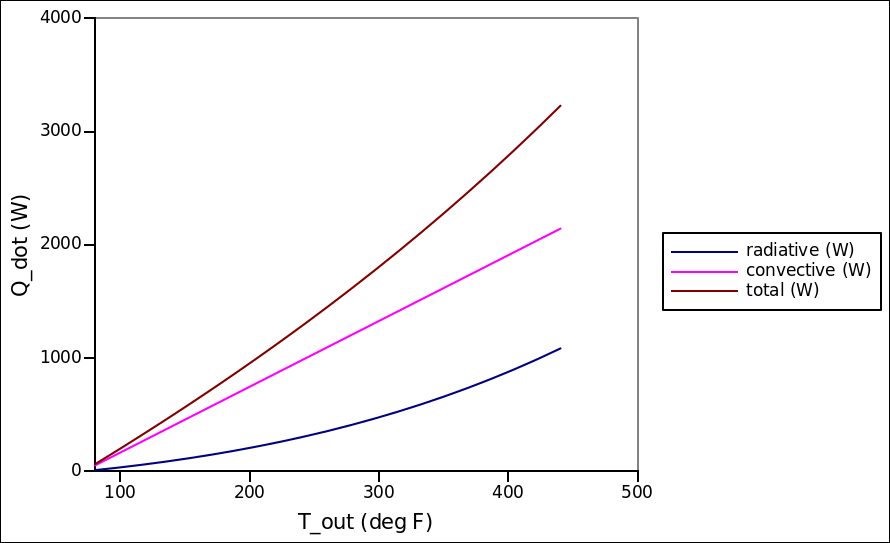
We could solve the fourth order polynomial analytically for T_out, but instead we can hack together a solution with a spreadsheet, by plotting Q_dot as a function of T_out and then manually picking off the plot the T_out corresponding to Q_dot = 1500 W. Once we determine T_out, we plug it into the conduction equation above to get T_in.
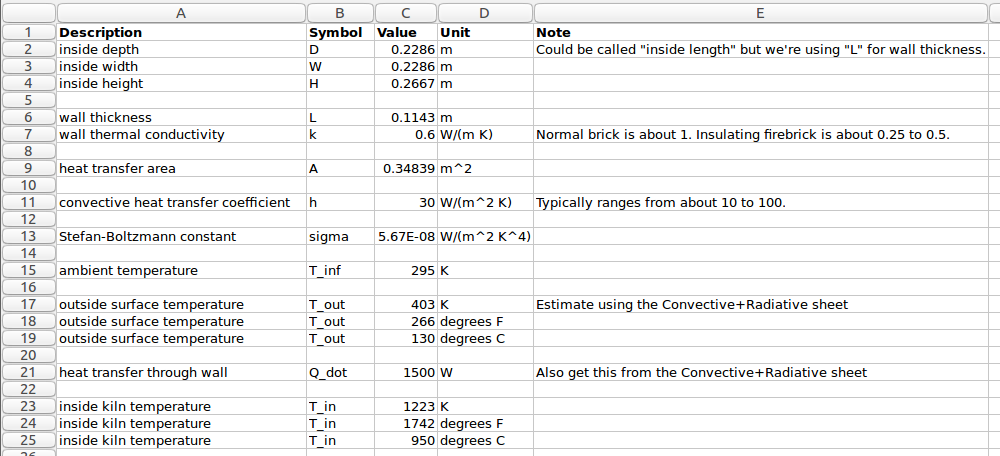
The spreadsheet was created in Gnumeric - .ods and .xls versions have been uploaded to the files section. After a bit of fiddling we get the following plot and associated parameters:
![]()
![]()
The inside kiln dimensions are H = 10.5 inches, D = 9 inches, W = 9 inches (or 26 X 22 X 22 centimeters). This doesn't quite get us to 1800 °F (1000 °C) but it's close enough to go for it and hope we pick up a few extra degrees here and there with a bit more power and a bit better insulating bricks than we've accounted for.
-
Brick Design
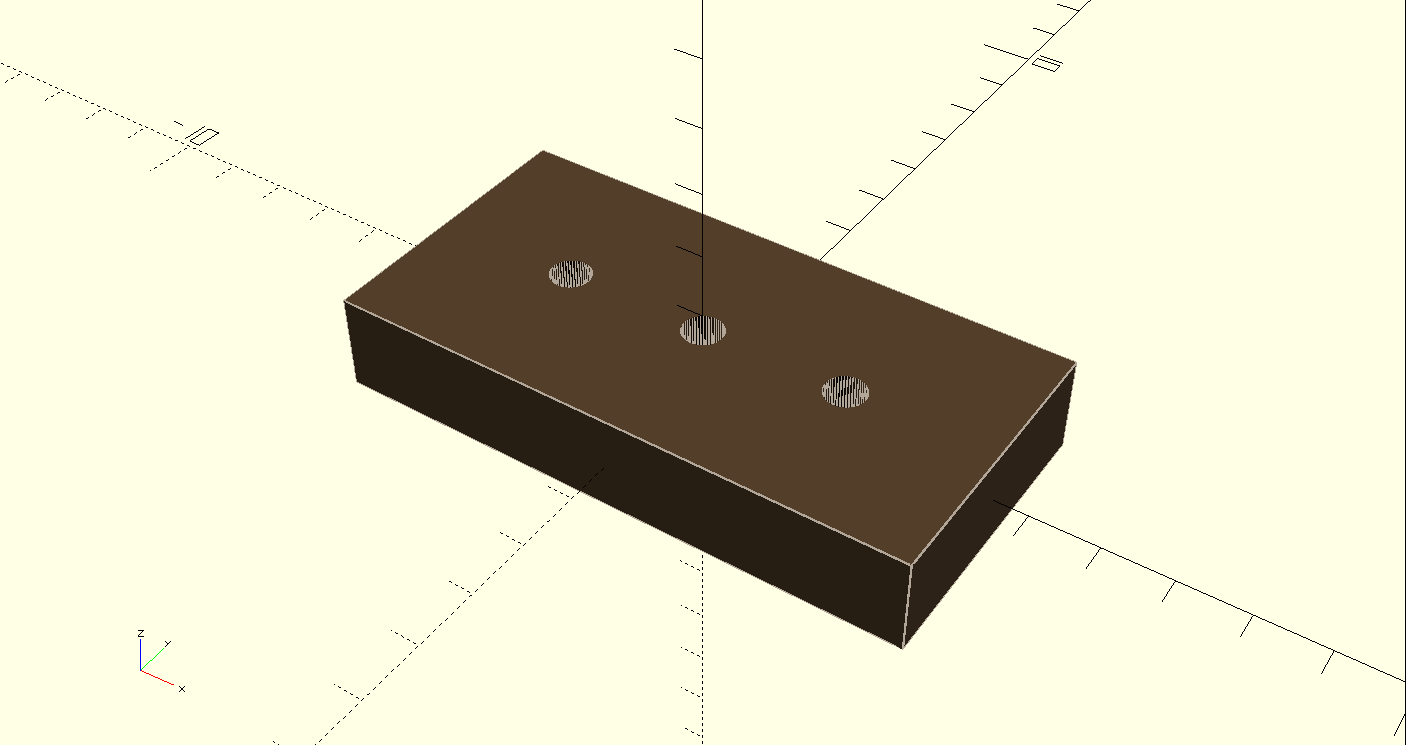
05/06/2017 at 06:50 • 0 commentsStandard firebricks have dimensions of 9 X 4.5 X 2.5 inches. Initially I wanted to use bricks that were 7 X 3.5 X 1.5 so it would be easy to make brick molds using standard 2X4 lumber. However, a back-of-the-envelope thermal calculation indicated that 3.5 inches would not be sufficient wall thickness to provide adequate insulation. So, back to 9 X 4.5. I decided to keep the thickness the same as a standard 2X4 to simplify mold construction, resulting in an overall brick size of 9 X 4.5 X 1.5 inches.
![openscad model of one brick]()
The three holes in the brick are 5/8 inch. This should give plenty of clearance when assembling the kiln - the plan is to hold the bricks in place via threaded rod going through stacks of bricks. The holes also are intended to help the clay dry uniformly and prevent cracks.
For the heat transfer calculations (in an upcoming log) it is important to have an estimate of the thermal conductivity of the bricks. This site lists red brick as k = 0.6 W/(m*K) and insulating firebrick as k = 0.15 W/(m*K). Other sources list a wider range. If I use the crude natural clay from my backyard, I expect roughly k = 1 W/(m*K). If Perlite is added to the mix, as suggested in several online recipes, the thermal conductivity can probably be brought down to perhaps (I'm guessing) k = 0.4 W/(m*K).
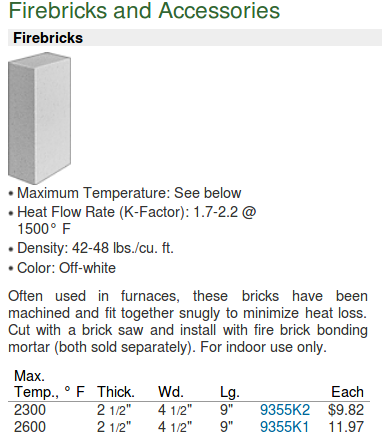
As a point of comparison, these firebricks available from McMaster-Carr have k = 0.25 to 0.32 W/(m*K).
![]()
How do we convert McMaster's K-Factor to thermal conductivity in W/(m*K)? According to McMaster: "To calculate the R-value of additional thicknesses, divide the material's thickness [in inches] by its K-factor." Let's take the K-Factor = 1.7, and calculate the R-value for a 1 inch thickness:
The rate of heat transfer is in units of Btu per hour. The heat flux density through a given area is in units of (Btu per hour) per (square foot). The R-value is how much temperature drop there is across a material for a given heat flux density, so it has units of degrees per ((Btu per hour) per (square foot)). This is commonly simplified to (hour * square foot * degrees) / Btu, which is more compact but less intuitively clear. To convert to sensible metric units, multiply by 0.1761101838.
Finally we can recover thermal conductivity by dividing an inch (in meters) by RSI
and that's where we get our k = 0.25 W/(m*K) number reported up above for the McMaster bricks.
-
Introduction
05/01/2017 at 09:36 • 0 commentsThe RepKiln project aims to create a small, simple, inexpensive, and relatively safe and clean kiln/furnace/oven for melting aluminum and firing basic pottery. It will be made by assembling homemade firebricks. It should be able to produce more bricks of the type from which it is made, hence the "Rep" (for replication) in the name.
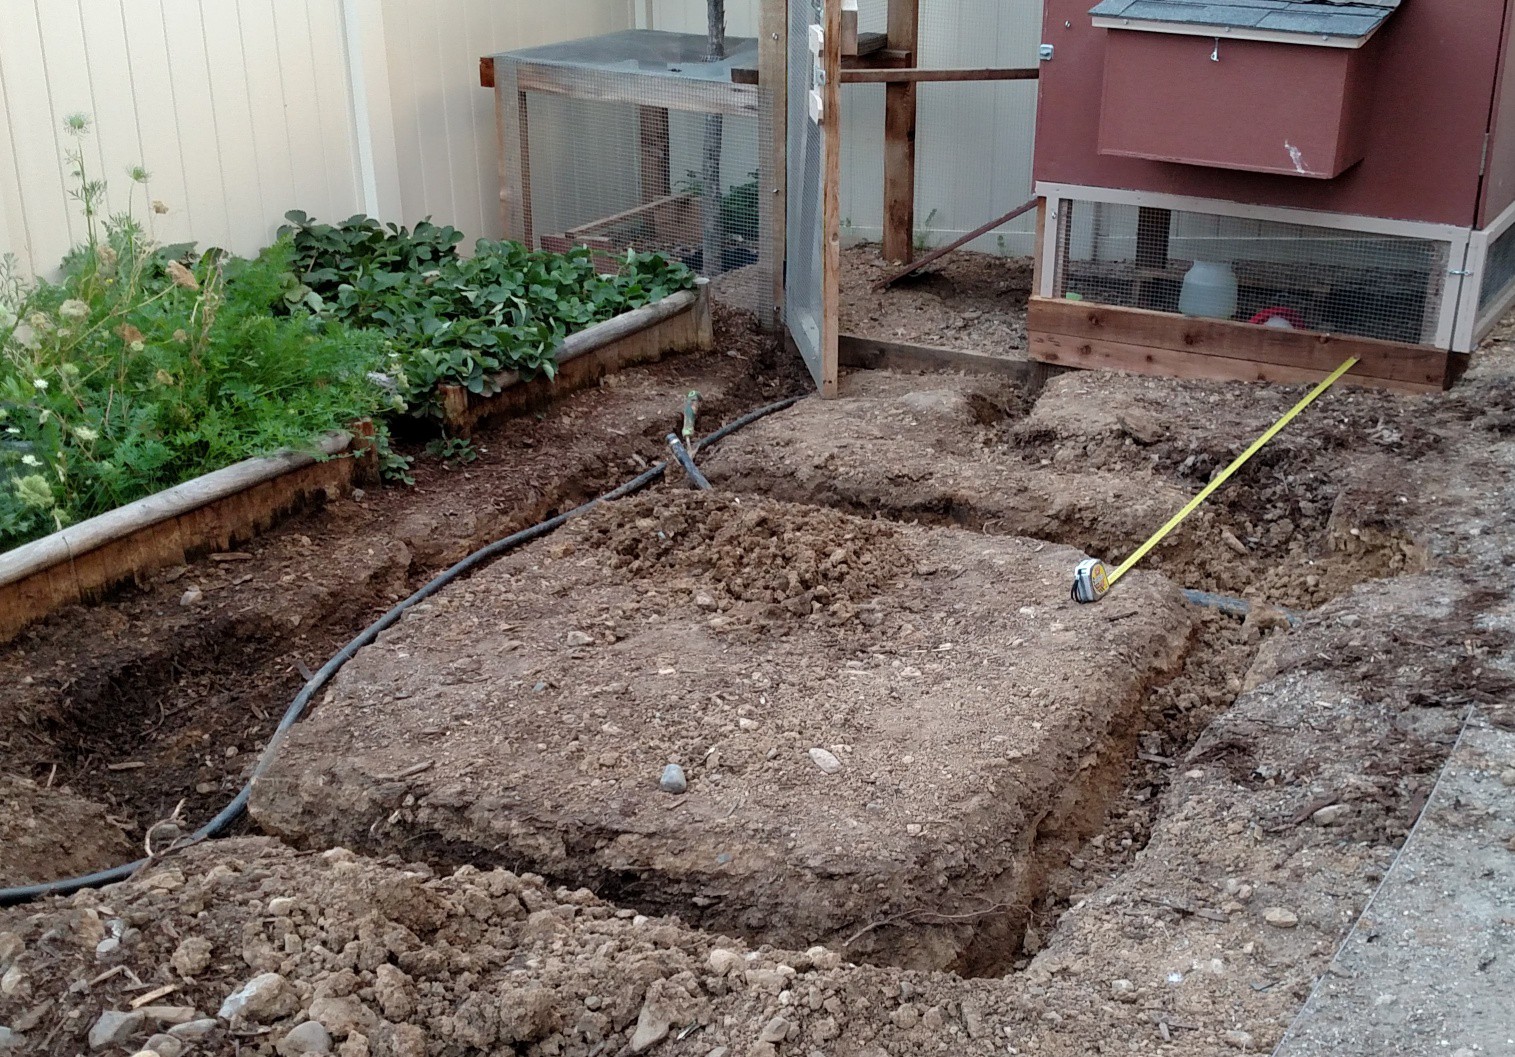
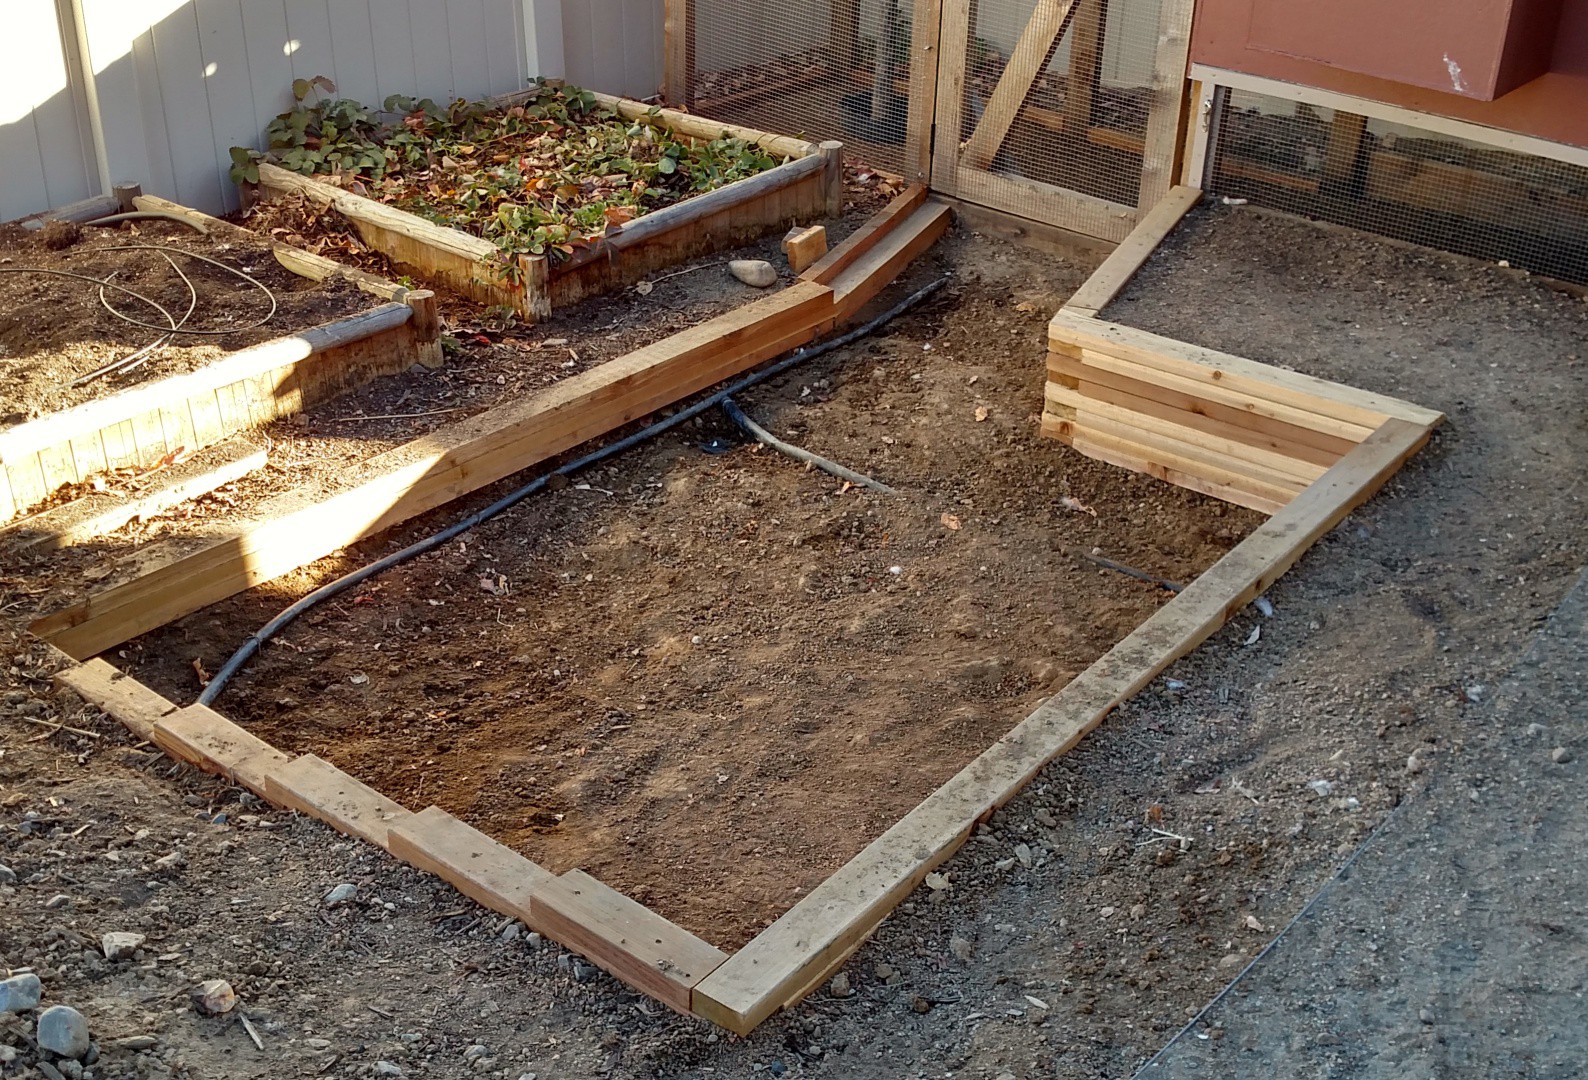
RepKiln got started as a spinoff of a completely different project: a backyard chicken coop. As shown in the before/after pictures, a good chunk of dirt had to be excavated to make a giant sandbox for the chickens to poop in. I live in a densely populated subdivision where the backyards are small and not all the neighbors are thrilled about chickens. Hence chicken poop management is important.
After building the chickens their fantastic sandbox, there was a lot of soil leftover. Due to the small yards (see above) this soil couldn't just be dumped off in a corner and forgotten about. So I hatched a ridiculous scheme to "process" the soil and return/disperse it back into the yard. This process will be described in detail in a later log, but one part of it - the trommel - is shown in the images.
The soil is primarily very thick clay interspersed with rocks. So I ended up with a lot of natural clay that I wasn't sure what to do with. After watching Primitive Technology on Youtube build a kiln out of dirt with his bare hands, I thought it might be fun to try something similar, although not quite so primitive.
The idea is to process the soil into clay, process the clay into bricks, put the bricks together into an (electric) kiln, and use the kiln to do something useful - like fire pottery made from some of the rest of the clay (there's tons of it) or melt aluminum for casting.
![]()
Chicken coop before - lacking a giant sandbox in which for chickens to poop.
![]() Sandbox ready for poop.
Sandbox ready for poop.
![]()
This is a trommel screen for separating dirt, clay, rocks. I got the idea for this from this youtube video. This particular design uses bicycle rims, chicken wire, leftover landscaping logs, and swivel casters. There are tons of designs for DIY trommels on youtube.
![]()
A initial prototype brick mold. This one didn't work so well because it was difficult to release the bricks.


 Sandbox ready for poop.