Close
0%
0%

openDrive

We used a combination of Processing and Arduino to interface with the onboard system on most power wheelchairs, allowing control from a PC.

Similar projects worth following
One of our friends is a power wheelchair user, and has a condition called muscular dystrophy. The nature of the condition is progressive, which means that, with age, this person will continue to get weaker and lose muscle mass. Currently, navigation between different "Modes" of the wheelchair is controlled via a joystick, operated with the chin.

Access to a wheelchair's "Modes" is vitally important. In addition to controlling the speed and sensitivity of the wheelchair's movement, "Modes" are also responsible for allowing users to tilt and recline their seats. While this function may seem lavish, it is important because it gives the wheelchair user the ability to change their seating position, which will prevent the person from experiencing events such as skin breakdown, pressure sores, and decreased circulation.

WHY?

He doesn't have control of any musculature below the chin. Muscles in the neck are not strong enough to support the weight of our client's head, which means that a headrest must be used to keep it in-place. It has become tiresome for him to utilize two joysticks that control the wheelchair. Due to his deteriorating condition, an additional button or joystick would require too much neck movement. To remedy this issue, we sought to integrate a technology that he was familiar with, into the functionality of his wheelchair; thus, we came up with the idea for an interface that would allow him to use his existing pupil tracking (Tobii) to toggle between the "Modes" of his wheelchair. 
 
We needed to incorporate a delay functionality into our solution for multiple reasons. The pupil tracking device will only initiate a button click, and not a button hold. Consequently, positioning of the seat is relative to the duration button press or joystick motion. In our interface, the delay functionality allows the user to select the amount of time that the seat should travel along the reclining/inclining path, press the button once, and be finished.

HOW?
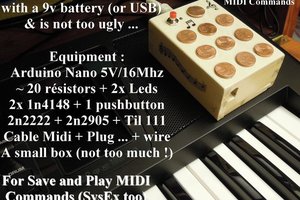
Using Processing to create a front-end GUI, he is able to use his existing Tobii device for pupil tracking. We take that input and pipe out serial data to an Arduino that is connected to the chair. When he selects a button press, the Arduino simulates a button press which the chair electronics understands. While the existing Tobii device was sufficient for him to use the computer, the front-end software can use any input method (Mouse, Keyboard, Sip and Puff, Etc.)

pinout.png

Pinout of the female side (connected directly to chair)

Portable Network Graphics (PNG) - 15.47 kB - 08/01/2017 at 19:55

Preview
Download

openDrive.pde

Take note of which pins are connected. These may need to be changed

pde - 4.93 kB - 08/01/2017 at 19:38

Download

openDrive.ino

Flash this to your Arduino.

ino - 462.00 bytes - 08/01/2017 at 19:38

Download

  • To be used with...

    st0chastic08/30/2017 at 17:56 0 comments

    The following question came up in discussion, "Where is the Arduino supposed to plug into the chair?". 

    The DB9 (Serial port) adapter in this design is intended to be plugged into a power wheelchair that utilizes the RNET interface. Both the Input/Output module and LCD Omni module can be used. Both the I/O and Omni module have documentation on how to program the interface to allow button press input.

    The chain should look like below

    Computer -> Arduino -> DB9 Connector -> Power chair with RNET interface

    Hopefully, that clears it up!

  • Initial Load

    st0chastic08/01/2017 at 20:06 0 comments

    Initial upload of project contents. Keep in mind that this is a work in progress and detailed instructions/photographs will be added.

View all 2 project logs

  • 1
    Download pre-requisite software

    You will need the Arduino IDE and Processing application. Download and install each using the following:

    https://processing.org/download/

    https://www.arduino.cc/en/Main/Software

  • 2
    Setup Processing

    This sketch requires the ControlP5 (Button elements) and Serial (data communication) libraries. 

    Ensure the libraries are installed by navigating to Sketch -> Import Library -> Add Library

  • 3
    Setup the Arduino IDE

    Plugin your Arduino Nano using a USB cable. If needed, install drivers. Once complete, select the appropriate Board Type and COM port under Tools

View all 7 instructions

Enjoy this project?

Share

Discussions

Similar Projects

Does this project spark your interest?

Become a member to follow this project and never miss any updates