 NaranInc
Smart office automation w/ Raspberry Pi

The smart office concept has evolved significantly over the last few years. Energy efficiency is one of the most common functions for smart offices. Office Automation facilitate efficient and detailed information through the use of devices. Automation also increases the goodwill and reputation of any workplace because it adds to the prestige and status symbol of the enterprise.
In this Instructables, we hope to show how you can easily automate your office or workplace with Prota OS with no skills and tailored specifically to your needs. The idea is to strategically use office resources that can monitor energy usage and enable easy control for devices. The key idea of this instructable is to optimize workplace resources and utilize them well.
Features
- Automated and connected devices, lights and appliances.
- Trigger automation when entering or leaving office using IFTTT
- Turn your webcam into a smart cam and receive snapshot of your workplace and to monitor it easily.
- Save power and manage resources efficiently
- Get notified for each and every automations easily
Step 1: REQUIRED COMPONENTS
All the required components can be tailored based on your specific needs. Here is a list of the components which we used in our office automation.

Necessary components:
- Raspberry Pi 2 or 3 = $25~35 each
- 32GB SD card = $15~20
- RF transceiver (with soldered antenna) = $2
- RF socket = $3~5 each
- Jumper wires = 1$~2$
Optional components
- Old webcam
- MicroBot Push
- Amazon Echo Dot or Google Home
If you don’t have Echo or google home, you can use the app “Reverb” instead of Alexa and Google assistant for smartphones as well.
For IOS
For Android
Step 2: SETTING UP YOUR PROTA SMART HUB
Prota OS is available on RPi B, B+ 2, 3. It can be downloaded for free from here. It’s only 3.8GB and easy to burn on a SD card (make sure to use a 16GB card).
Follow the instructions of Raspberry Pi foundation to write the OS image on your SD card. Extract the .img file from the zip in your SD card. Download and open Etcher, select the image and the drive and start the process.That’s it!
Once Prota OS is burned on the SD card, you can follow this simple installation guide to set up your Prota hub (less than 1 minute!). You only need to define its name and password, your time zone and your email address and the rest is completely automatic!
That’s it! Within 10 to 15 minutes and with no hassle, you transformed your Raspberry Pi into a Smart Office automation hub!
Step 3: SETUP YOUR SMART PLUGS

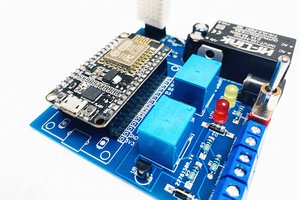
The connectivity of your Raspberry Pi allows you to create easily your own smart office which can be used to connect the switches easily. To do that we need to connect a RF (radio frequency) antenna to your Raspberry Pi, configure it then pair it to RF sockets. You can solder and make the antenna very easily in a minute.
You need to solder the RF transceiver and self-made antenna together. Make sure the soldering connects the antenna to the ANT port on the RF transceiver.


You can have more information on how to make an external antenna in this article.
Keep in mind that the required length of your antenna will depend on the frequency of your RF socket. Our OS supports 433, 477 and 315 MHZ.
Once soldering is done, plug three jumper wires to your RF transceiver (433/477/315 MHZ).
VDD = Electric current (5V)
GND = ground (select a ground PIN)
DATA = has to be connected to GPIO23

You can connect those three jumper wires as we did on PIN 2 (5V), PIN 6 (GND) and PIN 16 (GPIO 23).
The last step is to connect the configured antenna with the RF socket.
- Open App Libraries and download ON/OFF app
- Click on “Add socket”
- Type-in the details, select “On Board” and click on “Done”
- The app will start scanning the surrounding sockets. Press and hold on the socket’s button until the LED blinks
- When the LED stops blinking and stays on solid red, it means your Prota Pi has paired with your socket....


 Abid Jamal
 Kevin Van Ryckegem
 Sumit
Sumit
 Chris
Chris