lion mclionhead
-
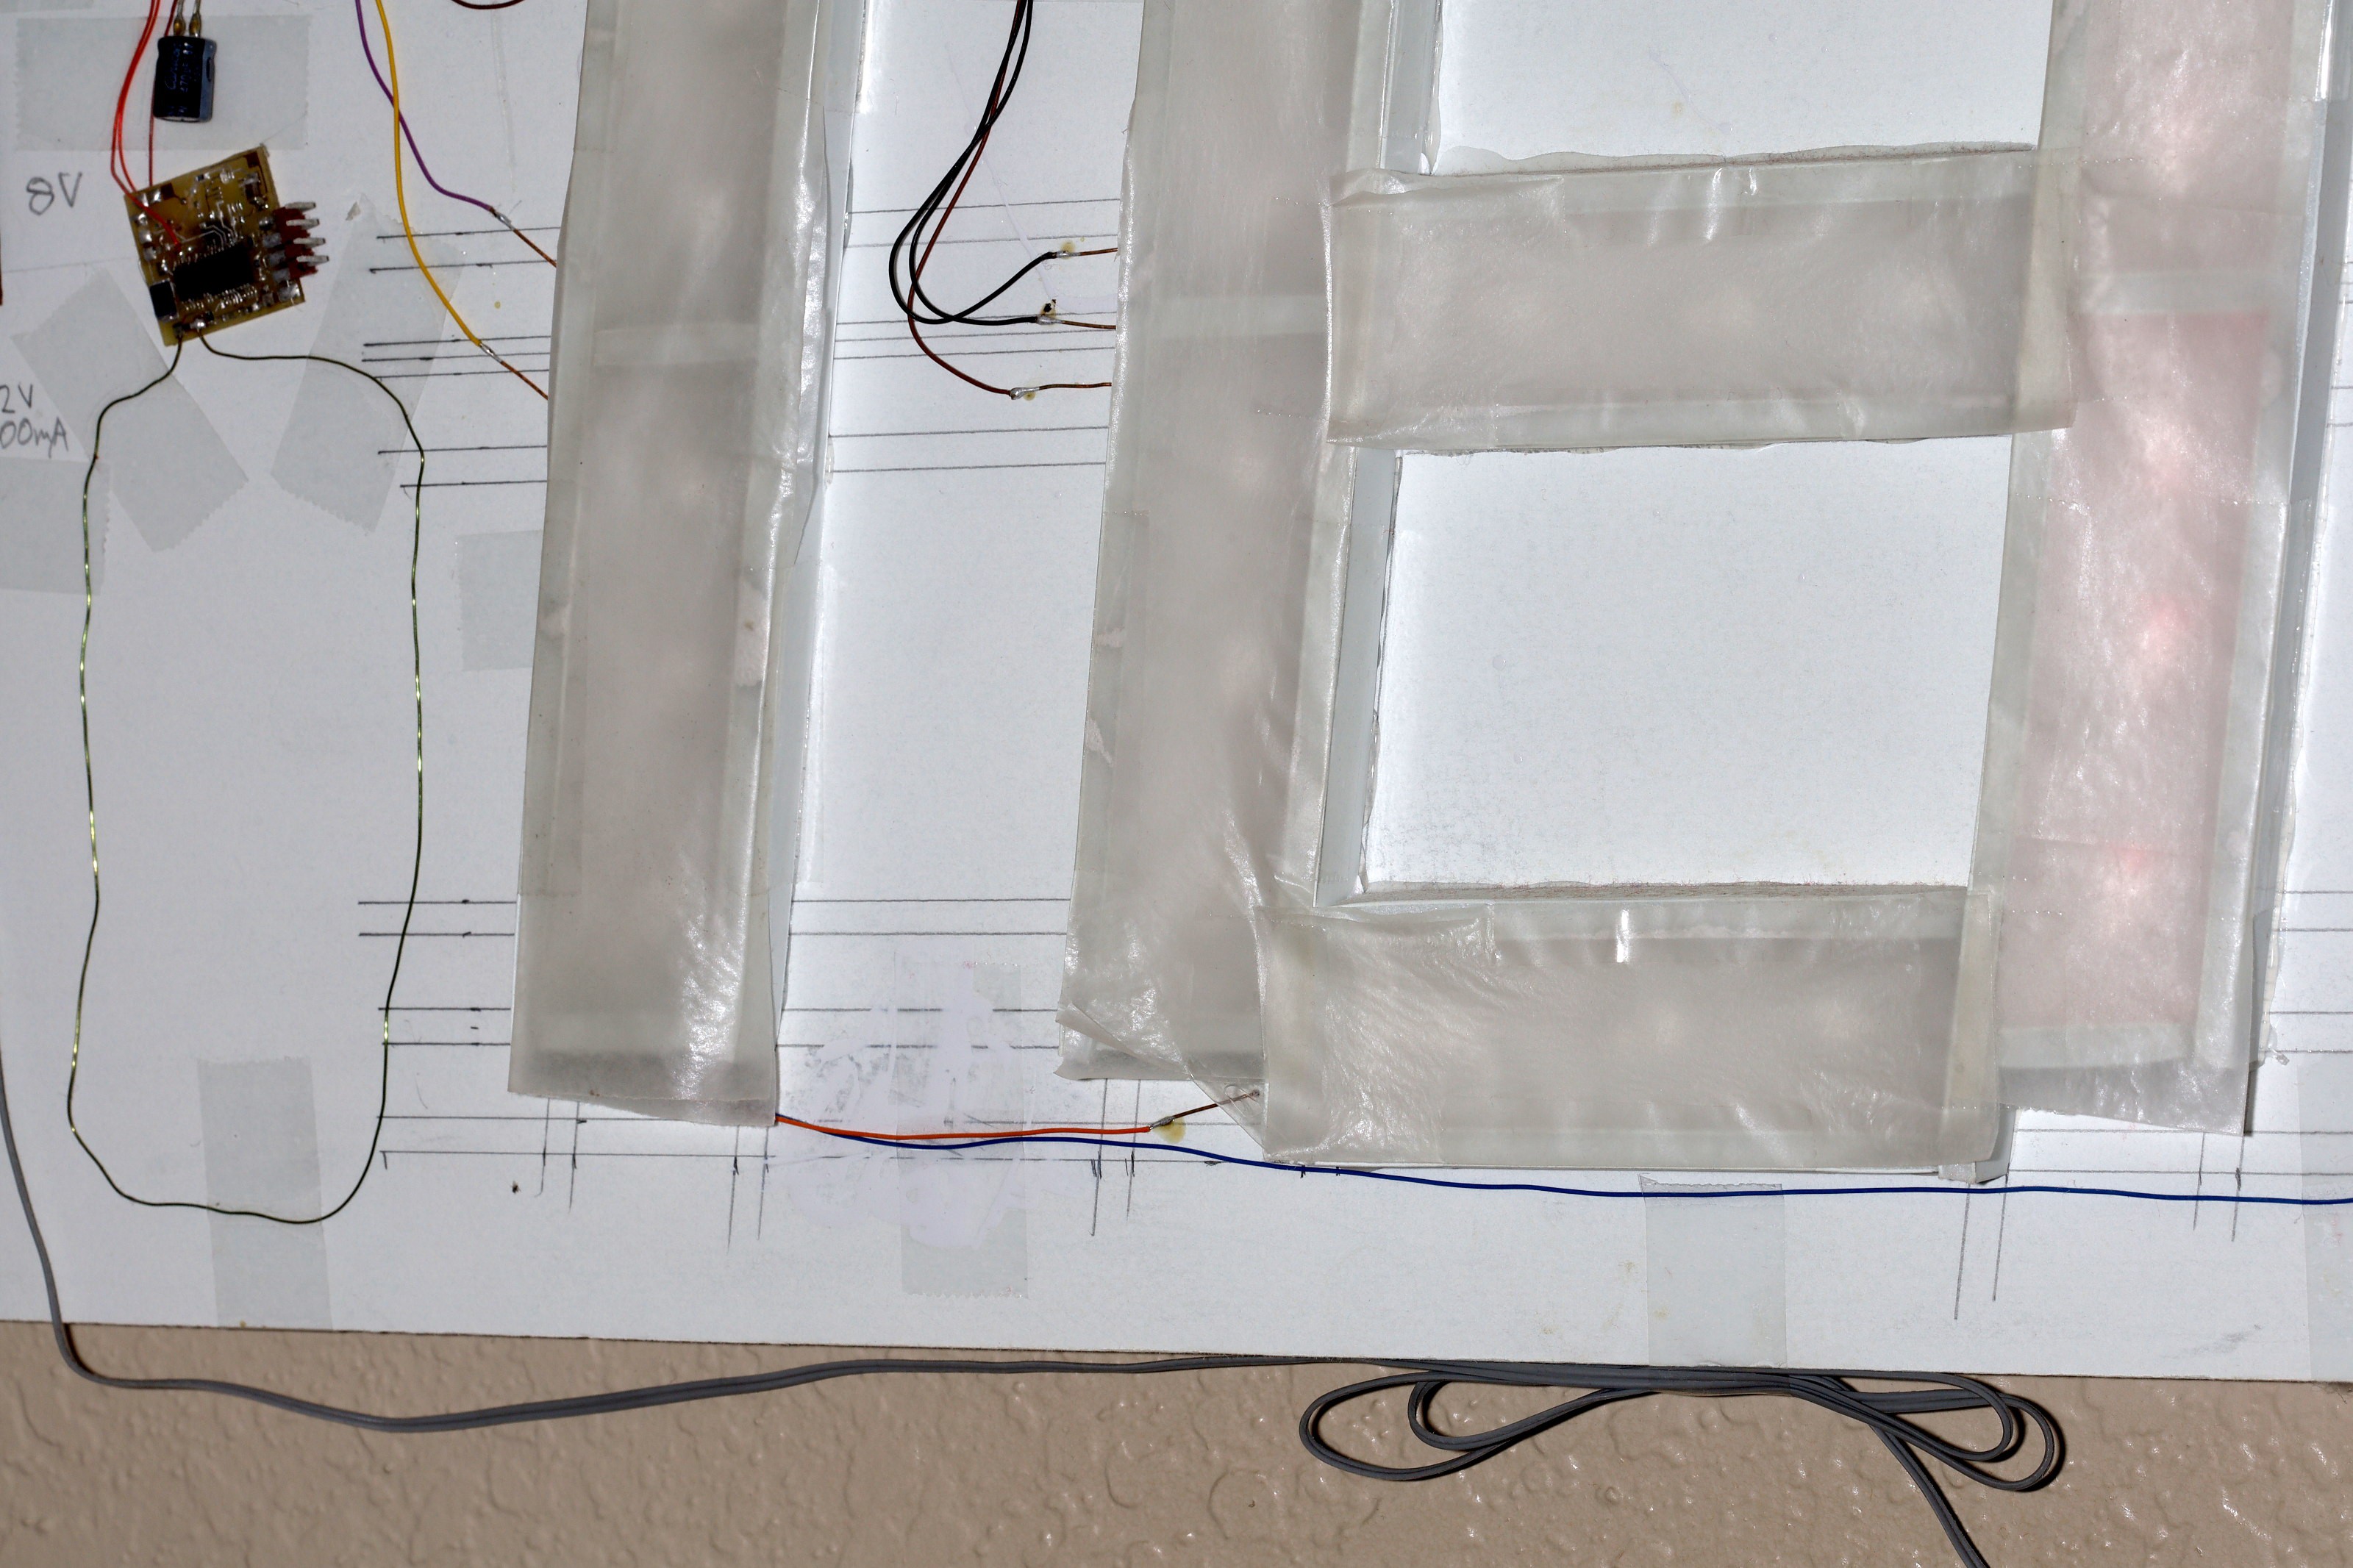
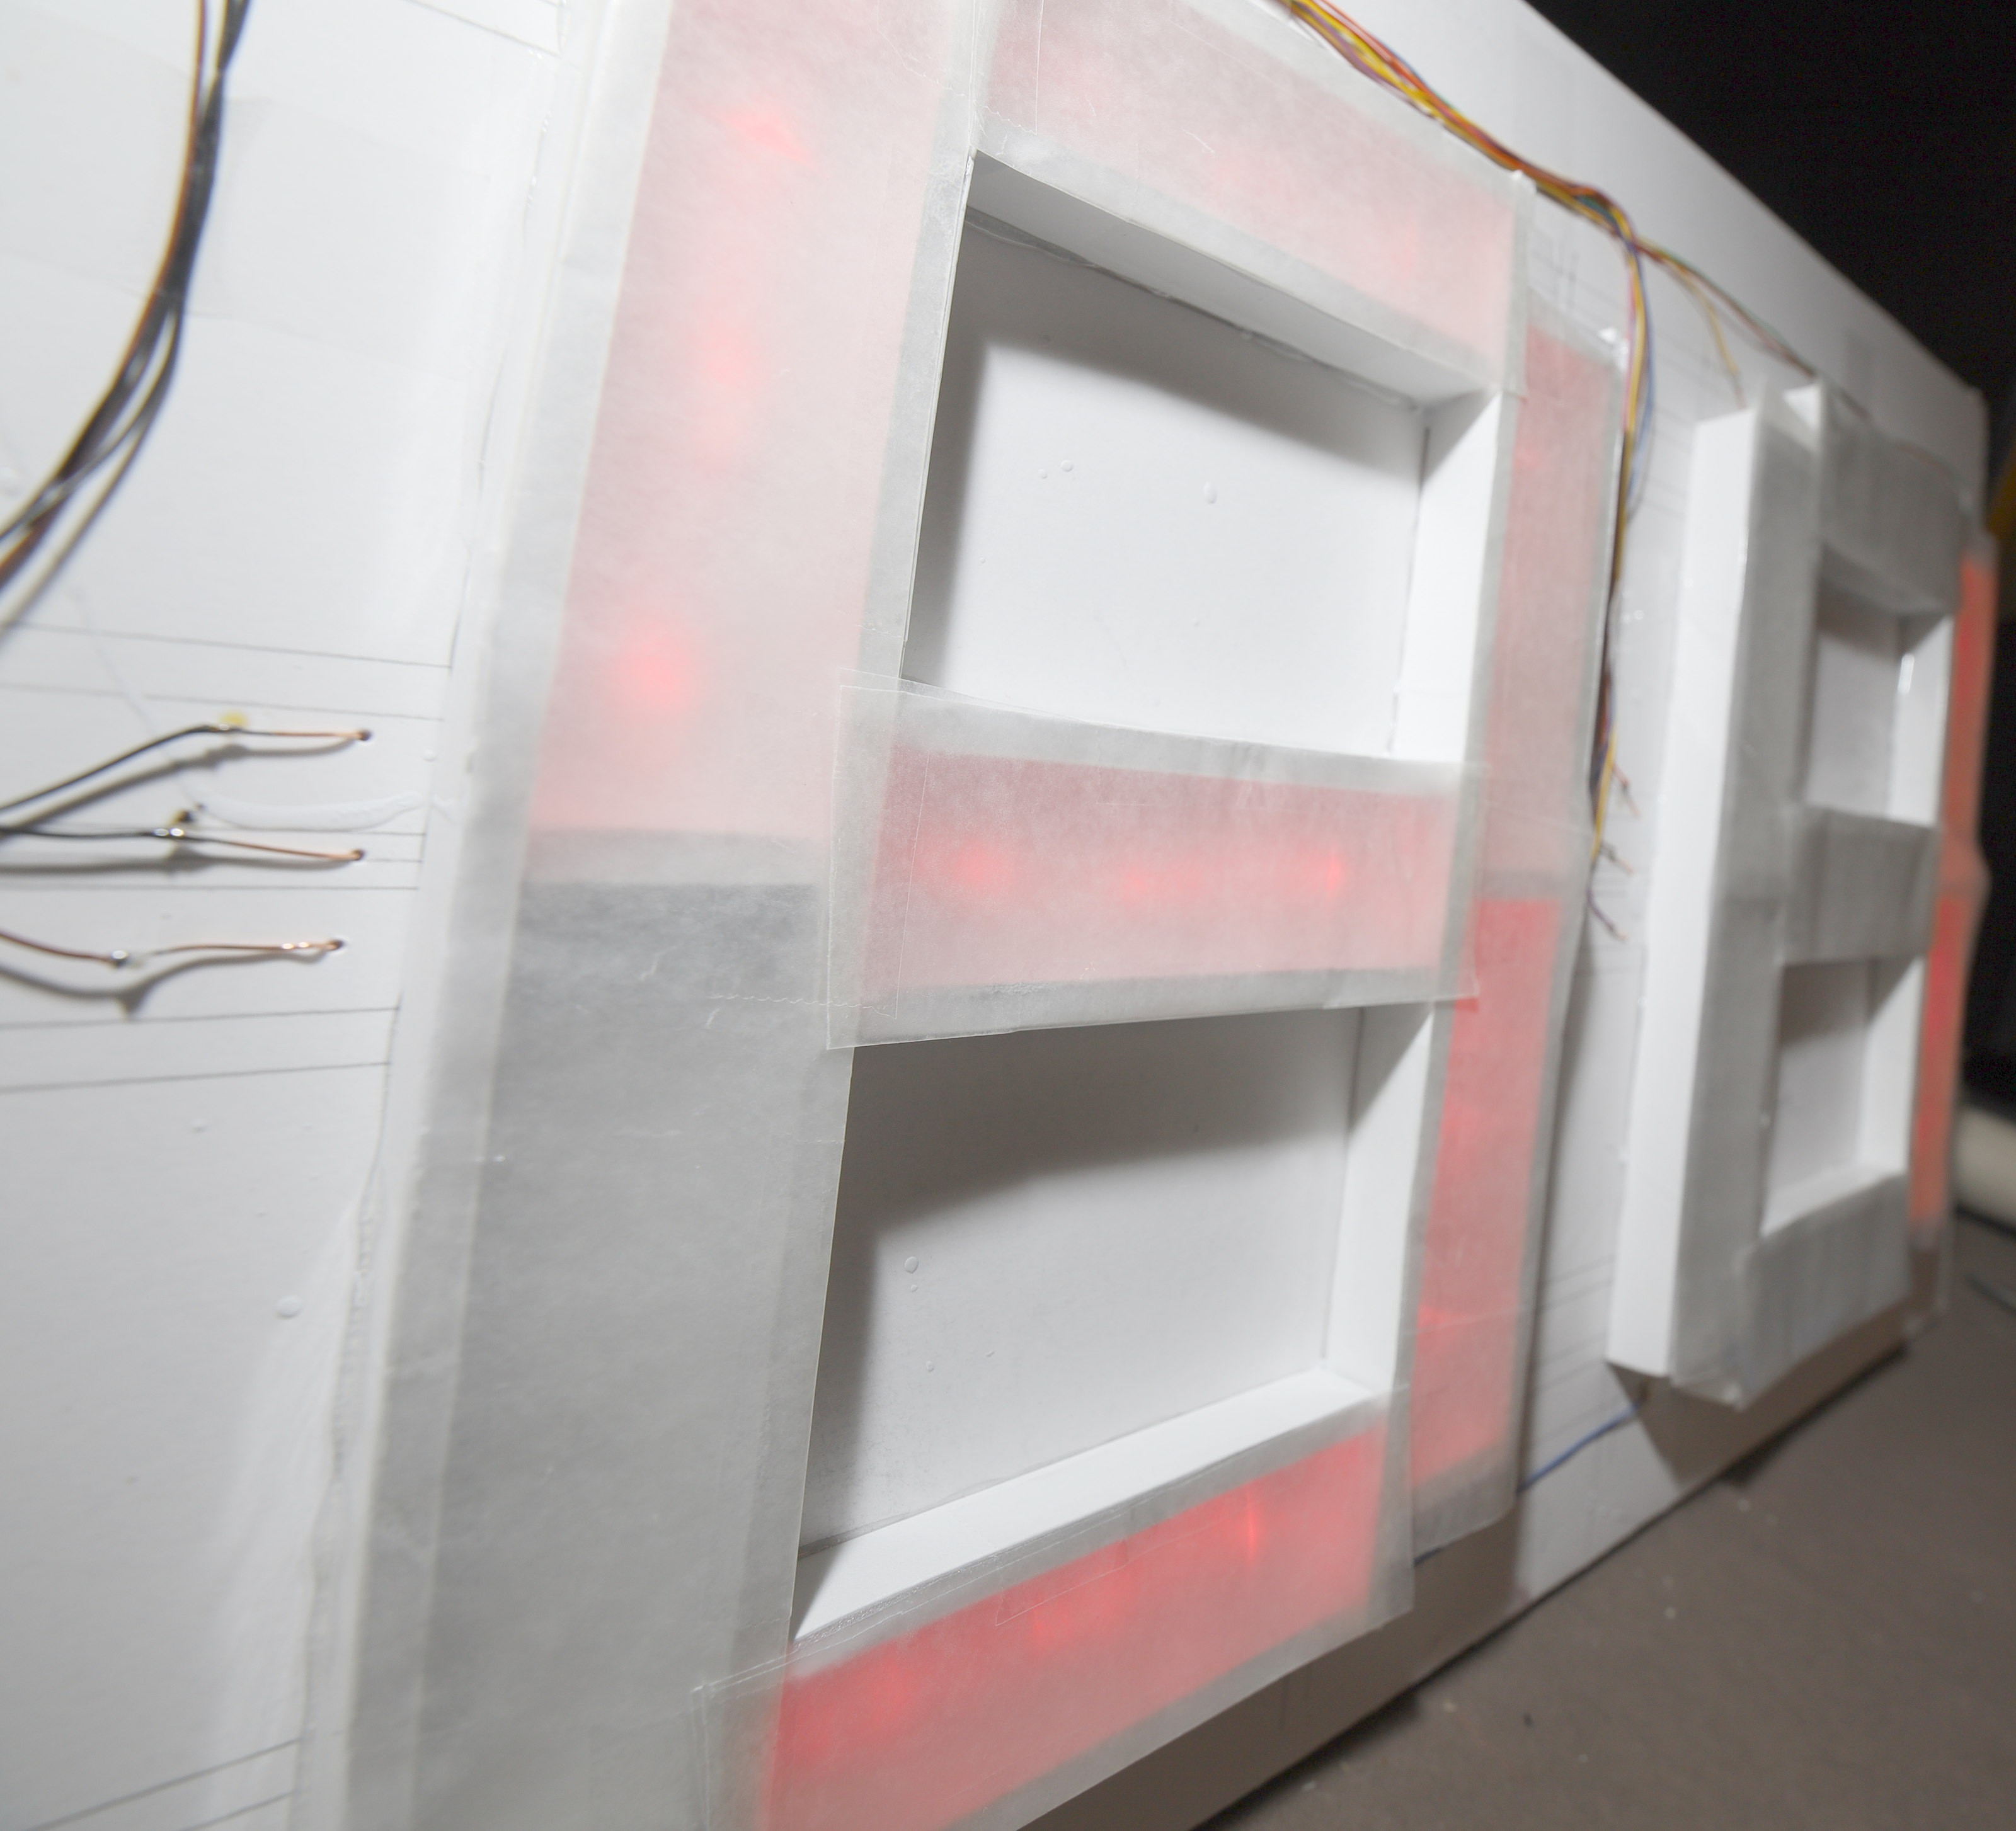
Diffuser upgrade
10/10/2022 at 01:31 • 0 comments![]()
![]()
The humidifier chewed up the wax paper, so it was time
![]()
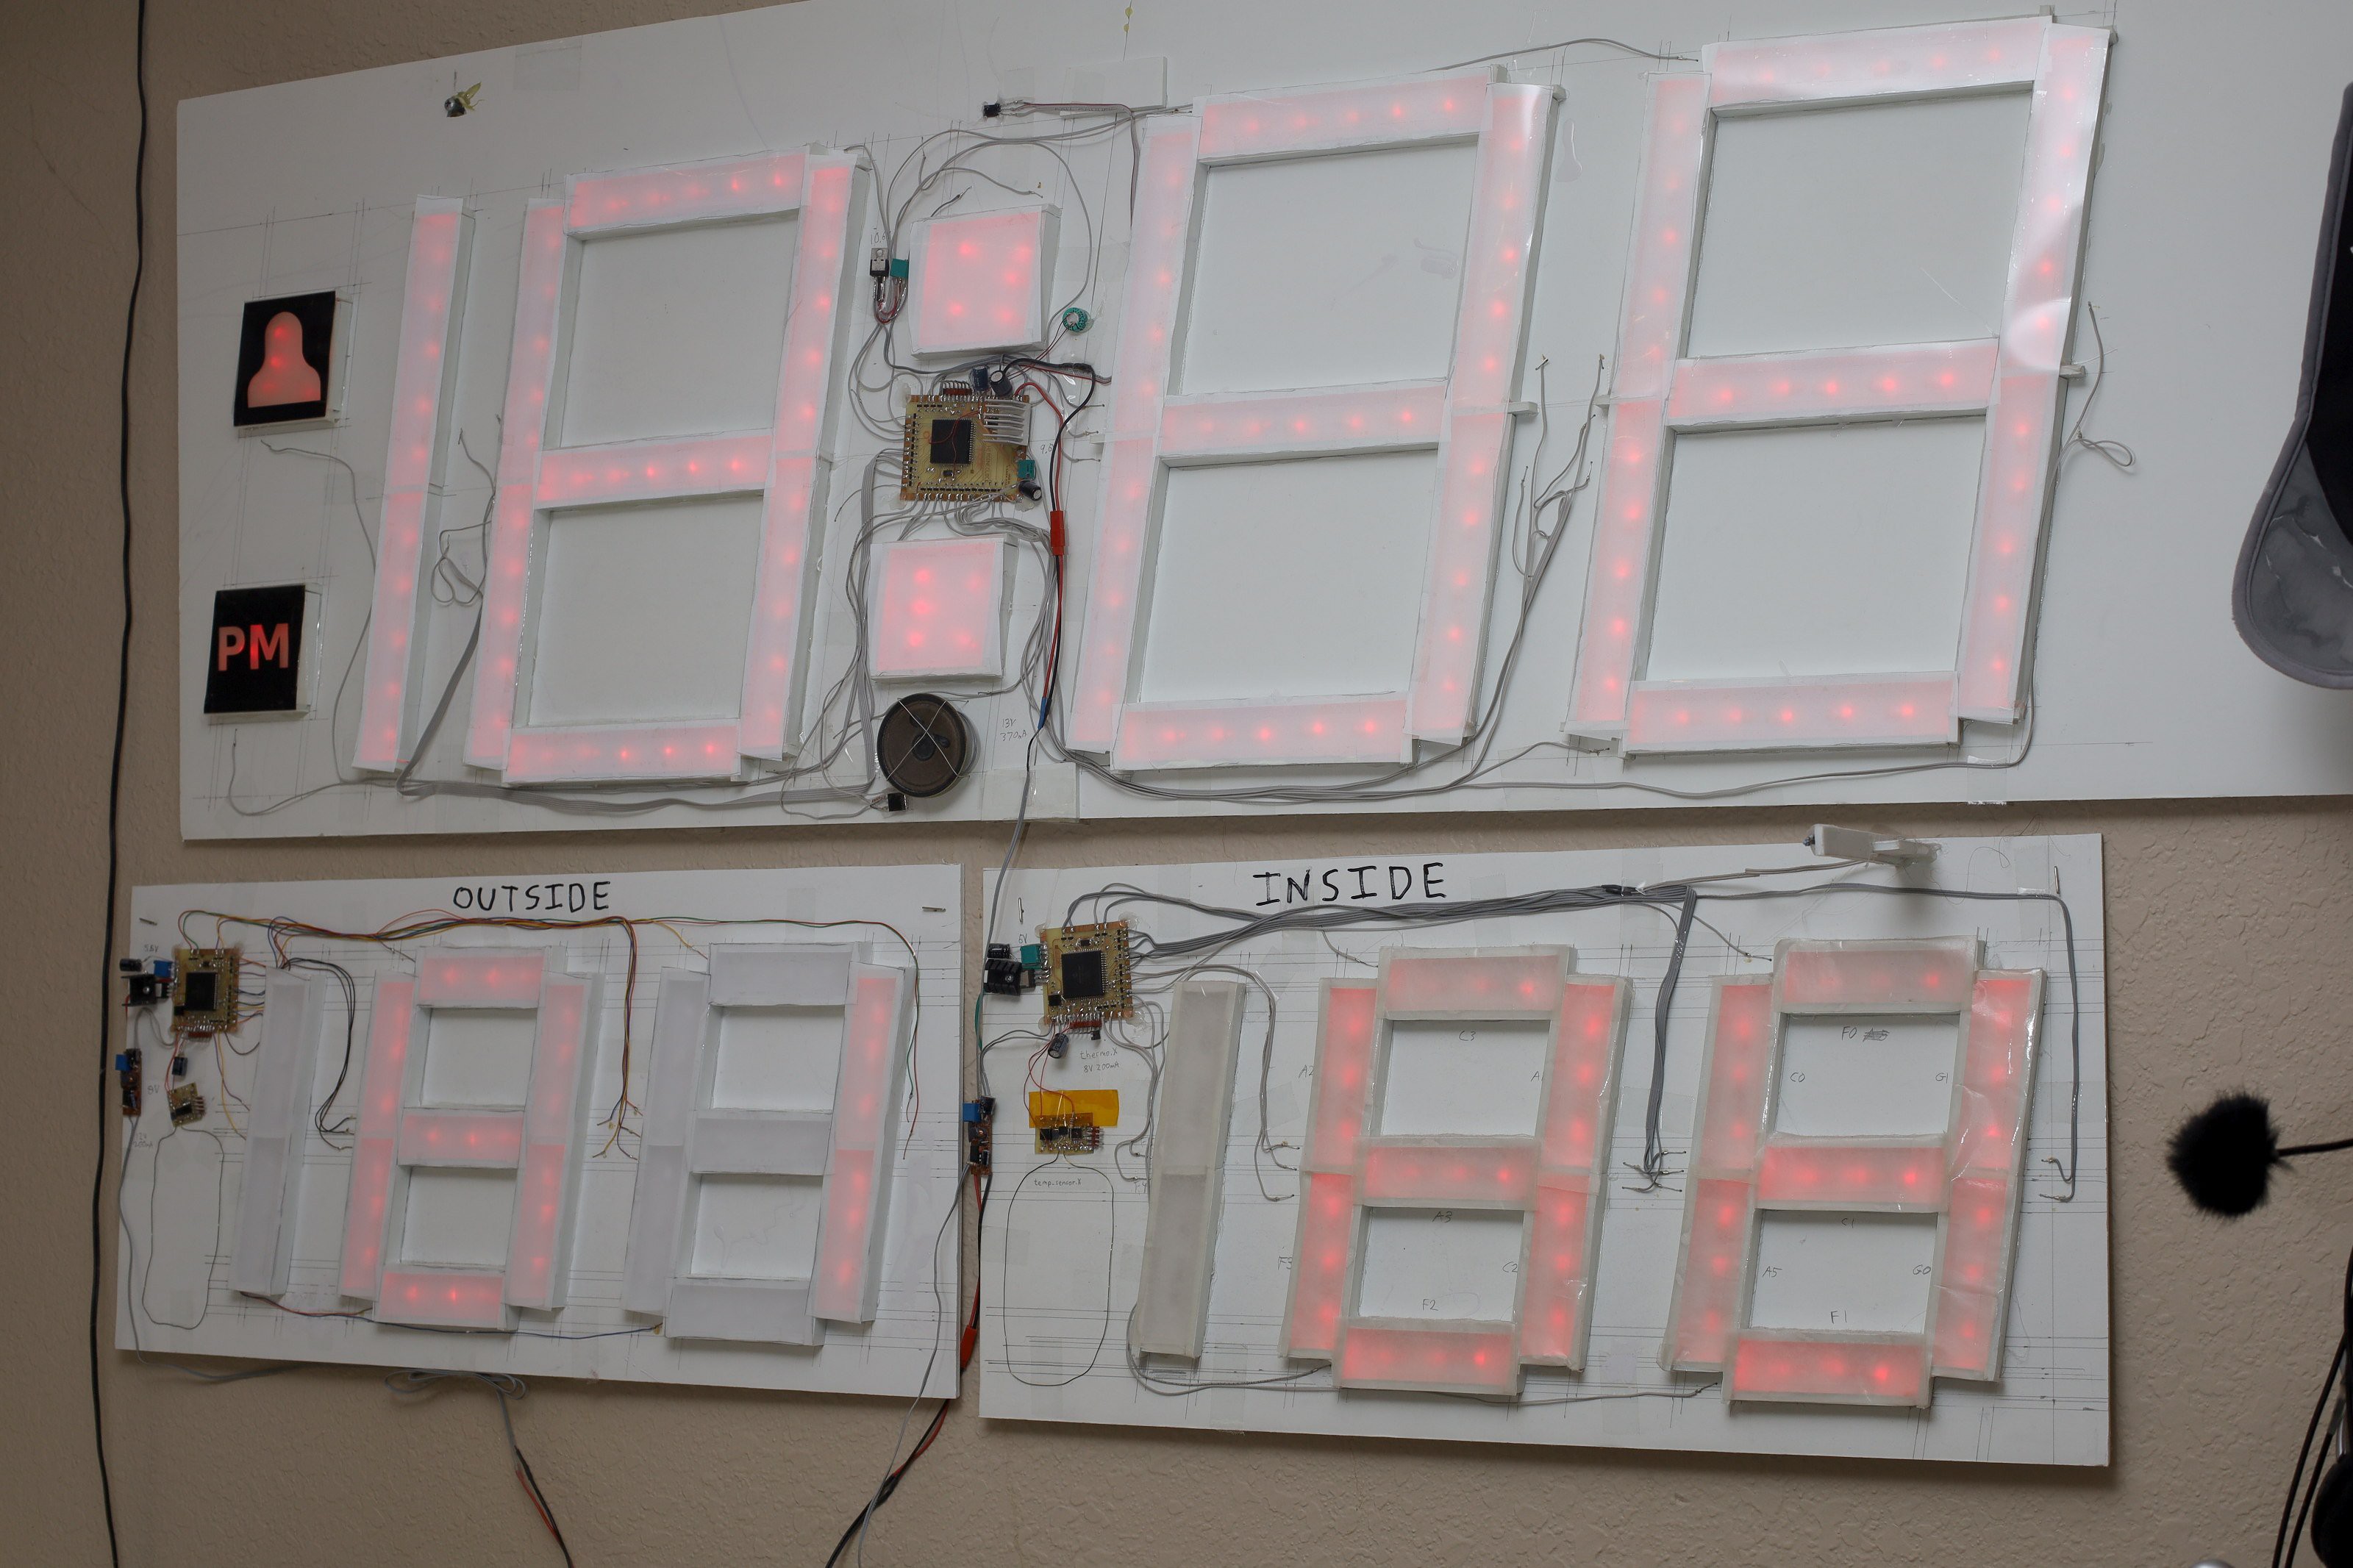
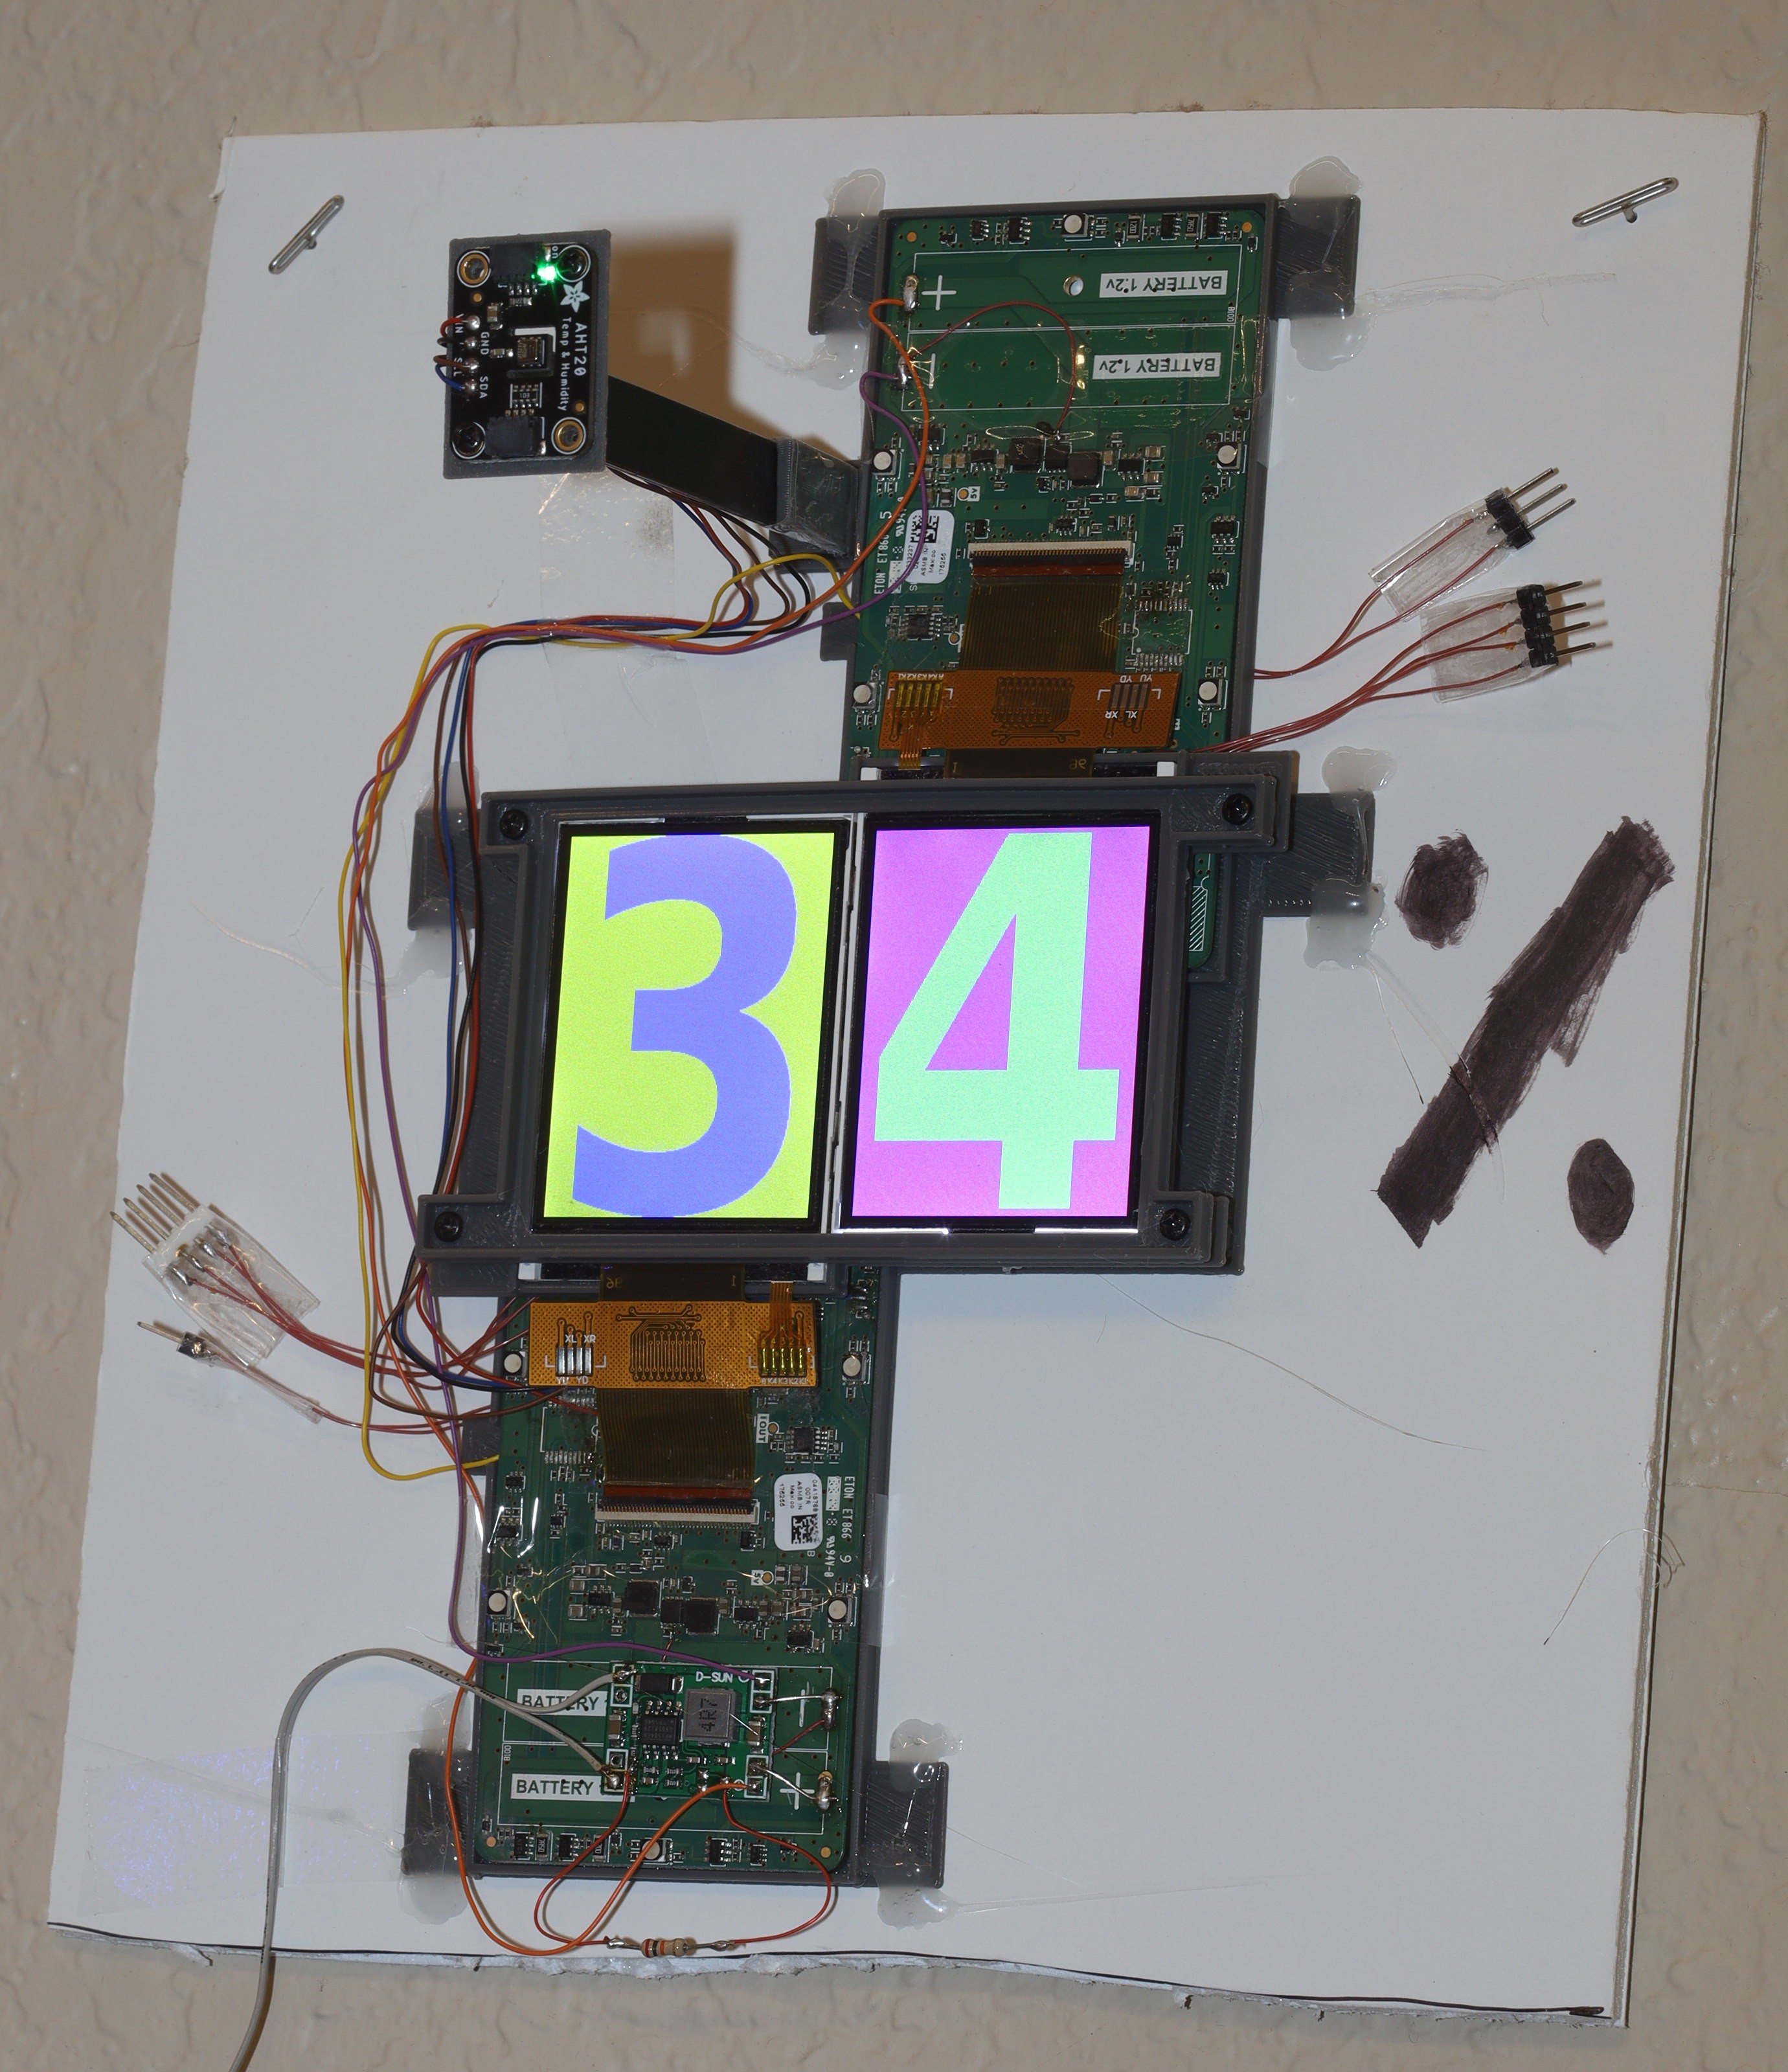
To upgrade most of the weather wall to LCD panel diffuser. Sadly, it's not as diffuse as wax paper.
![]()
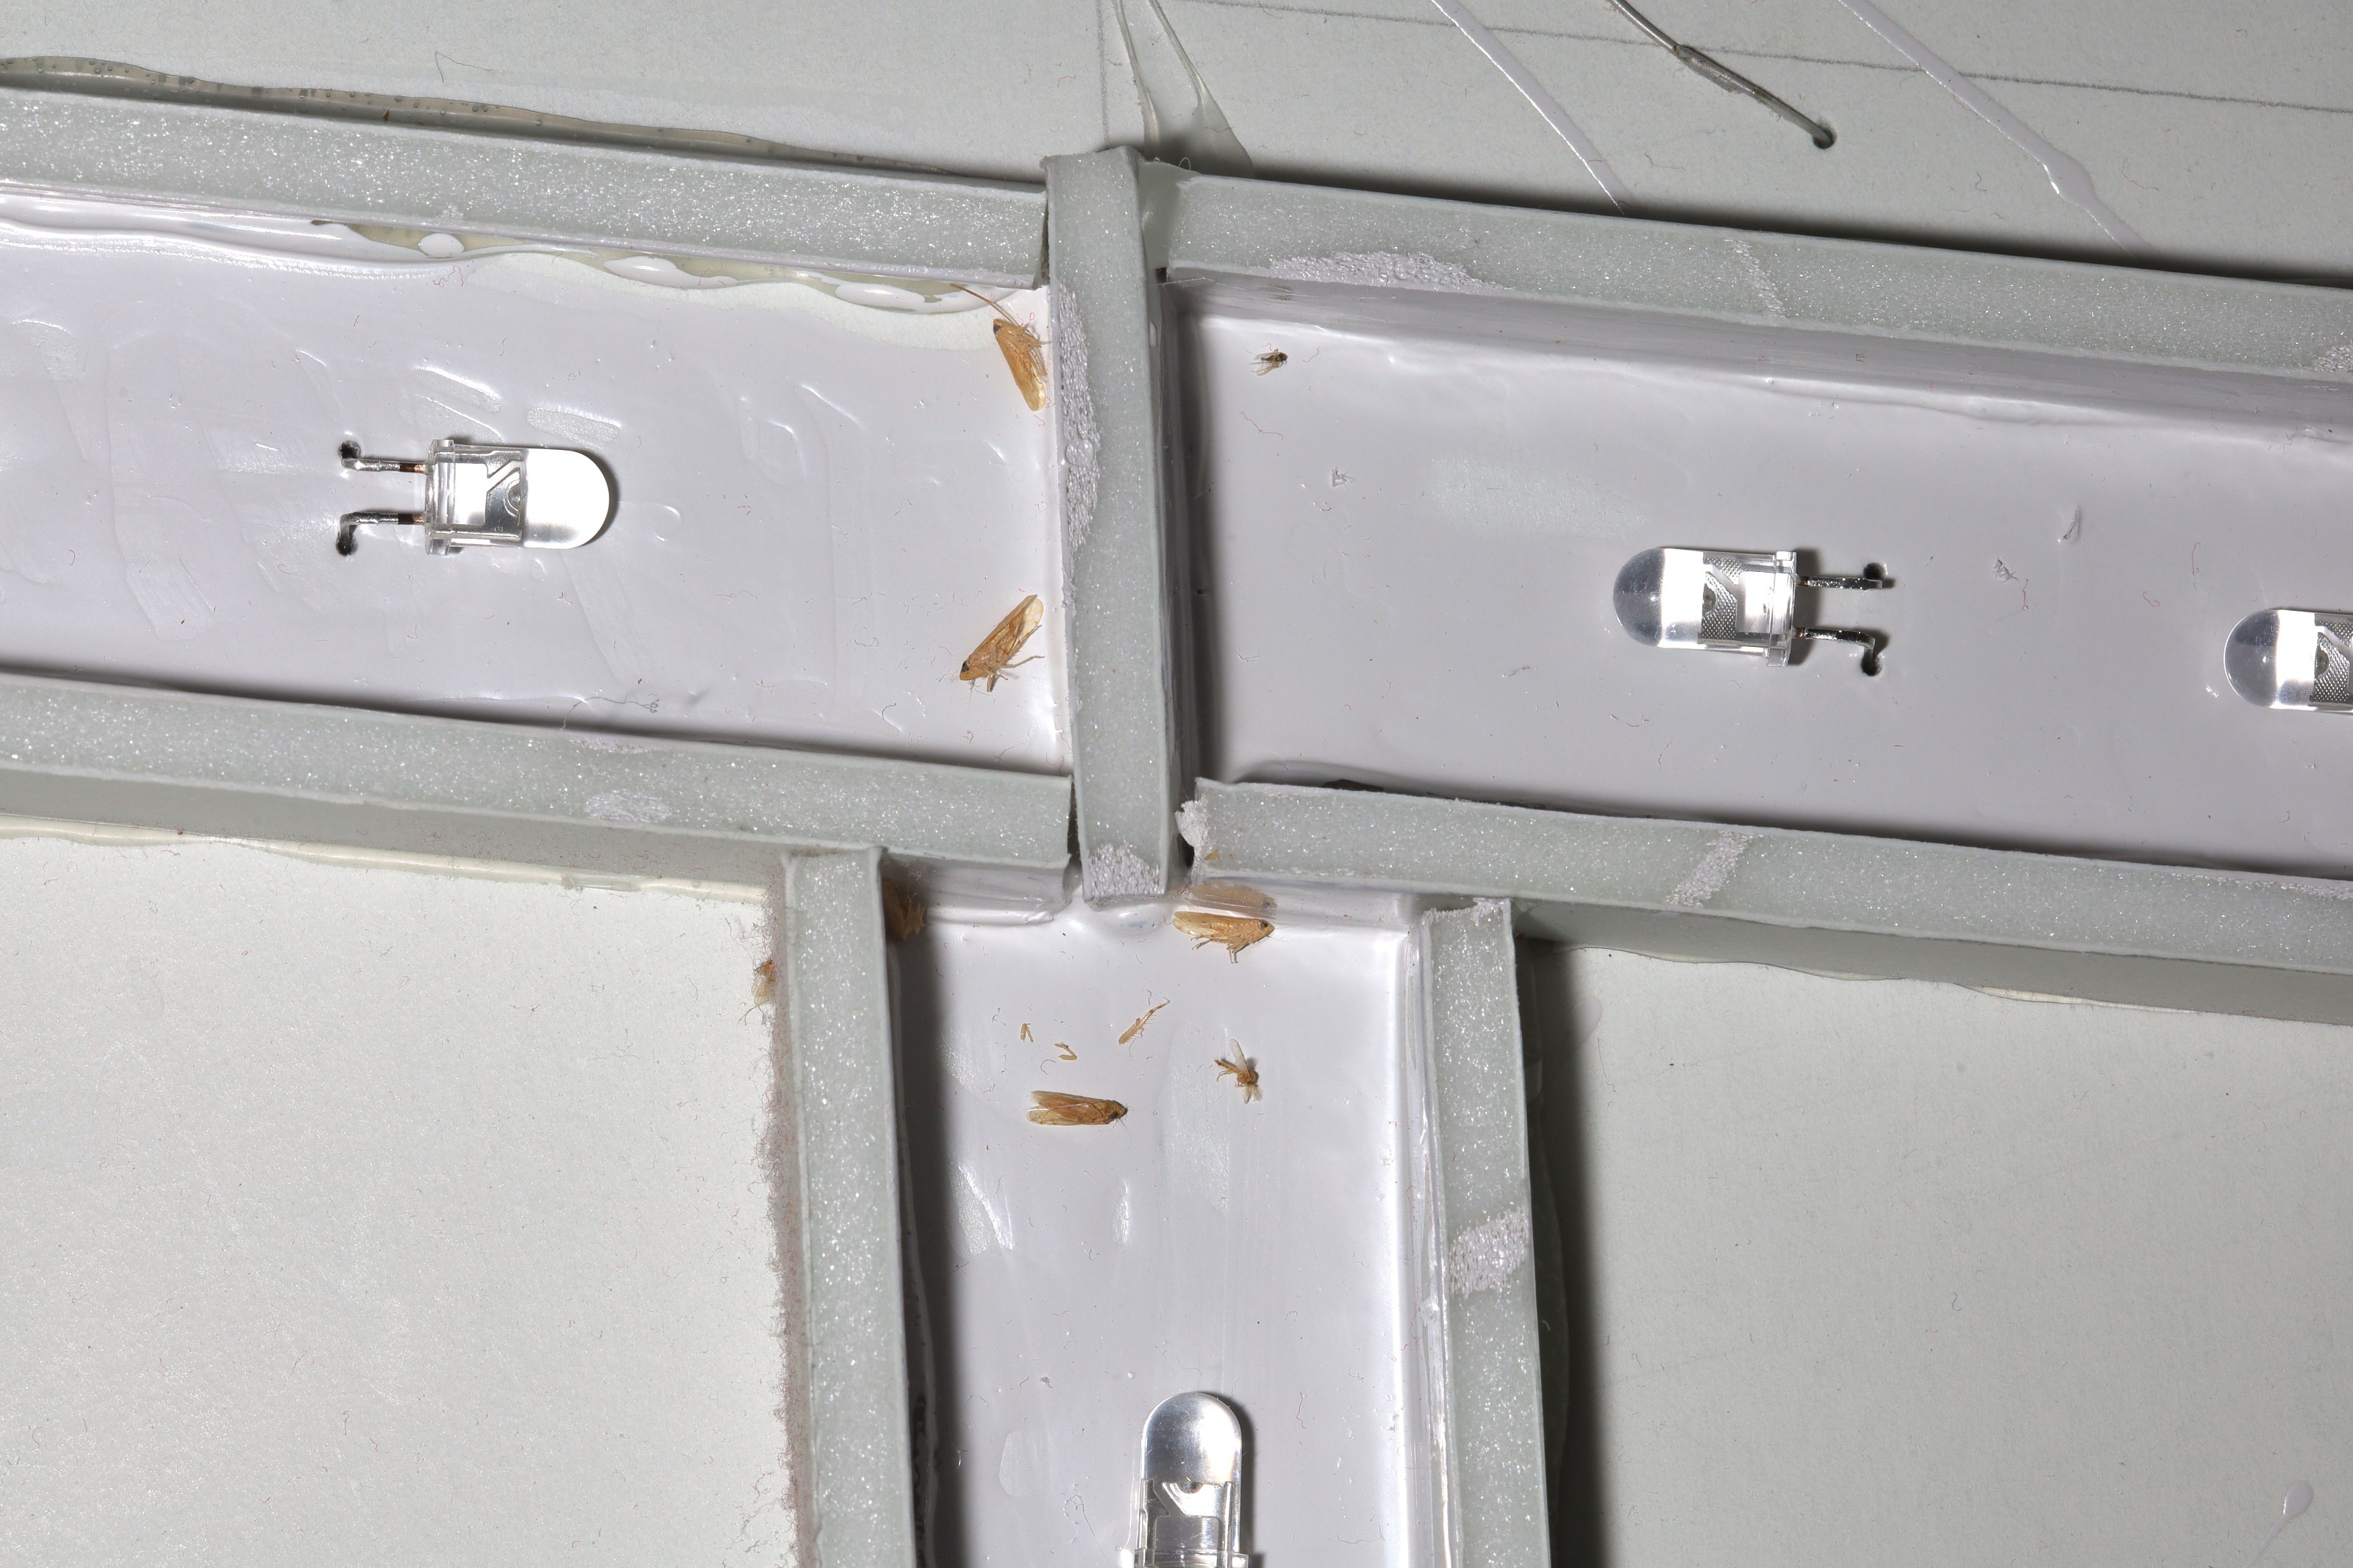
Heroineclock had to be cleaned of many critters.
![]()
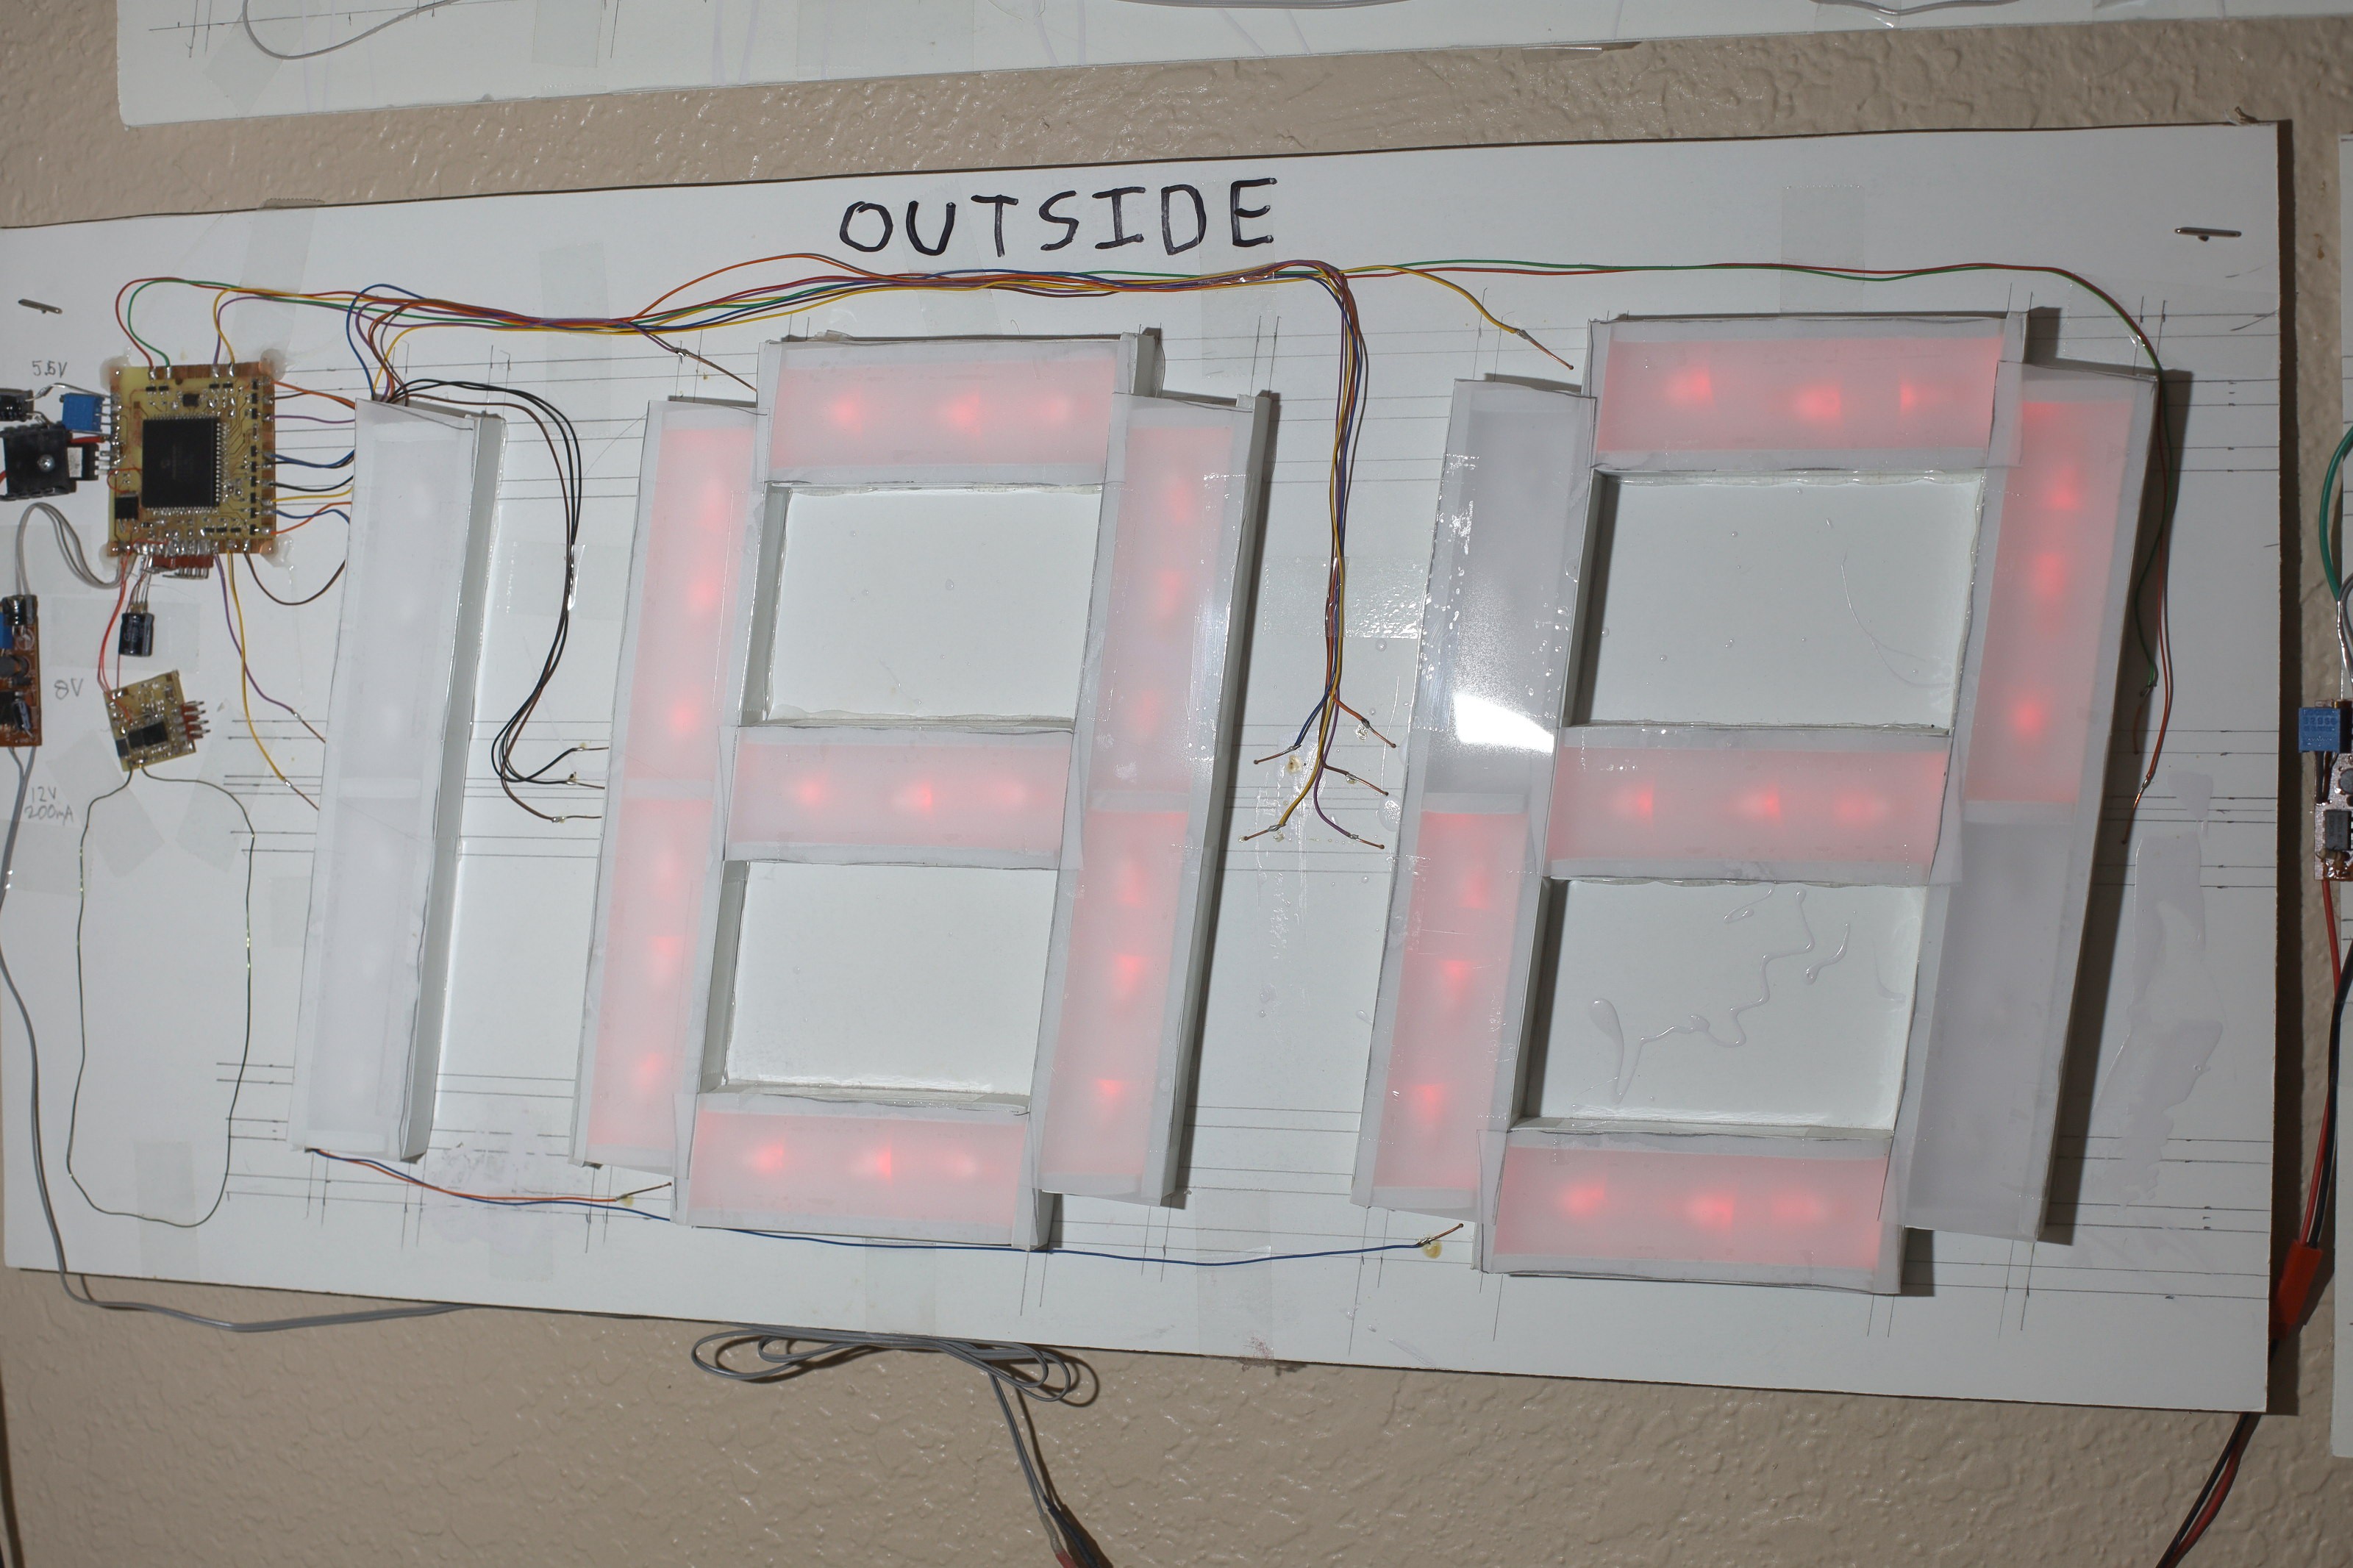
Outside thermometer got HP panel diffuser. Heroineclock II got Dell diffuser which was decidedly less diffuse. Inside thermometer remaned wax paper, since it's held up better.
![]()
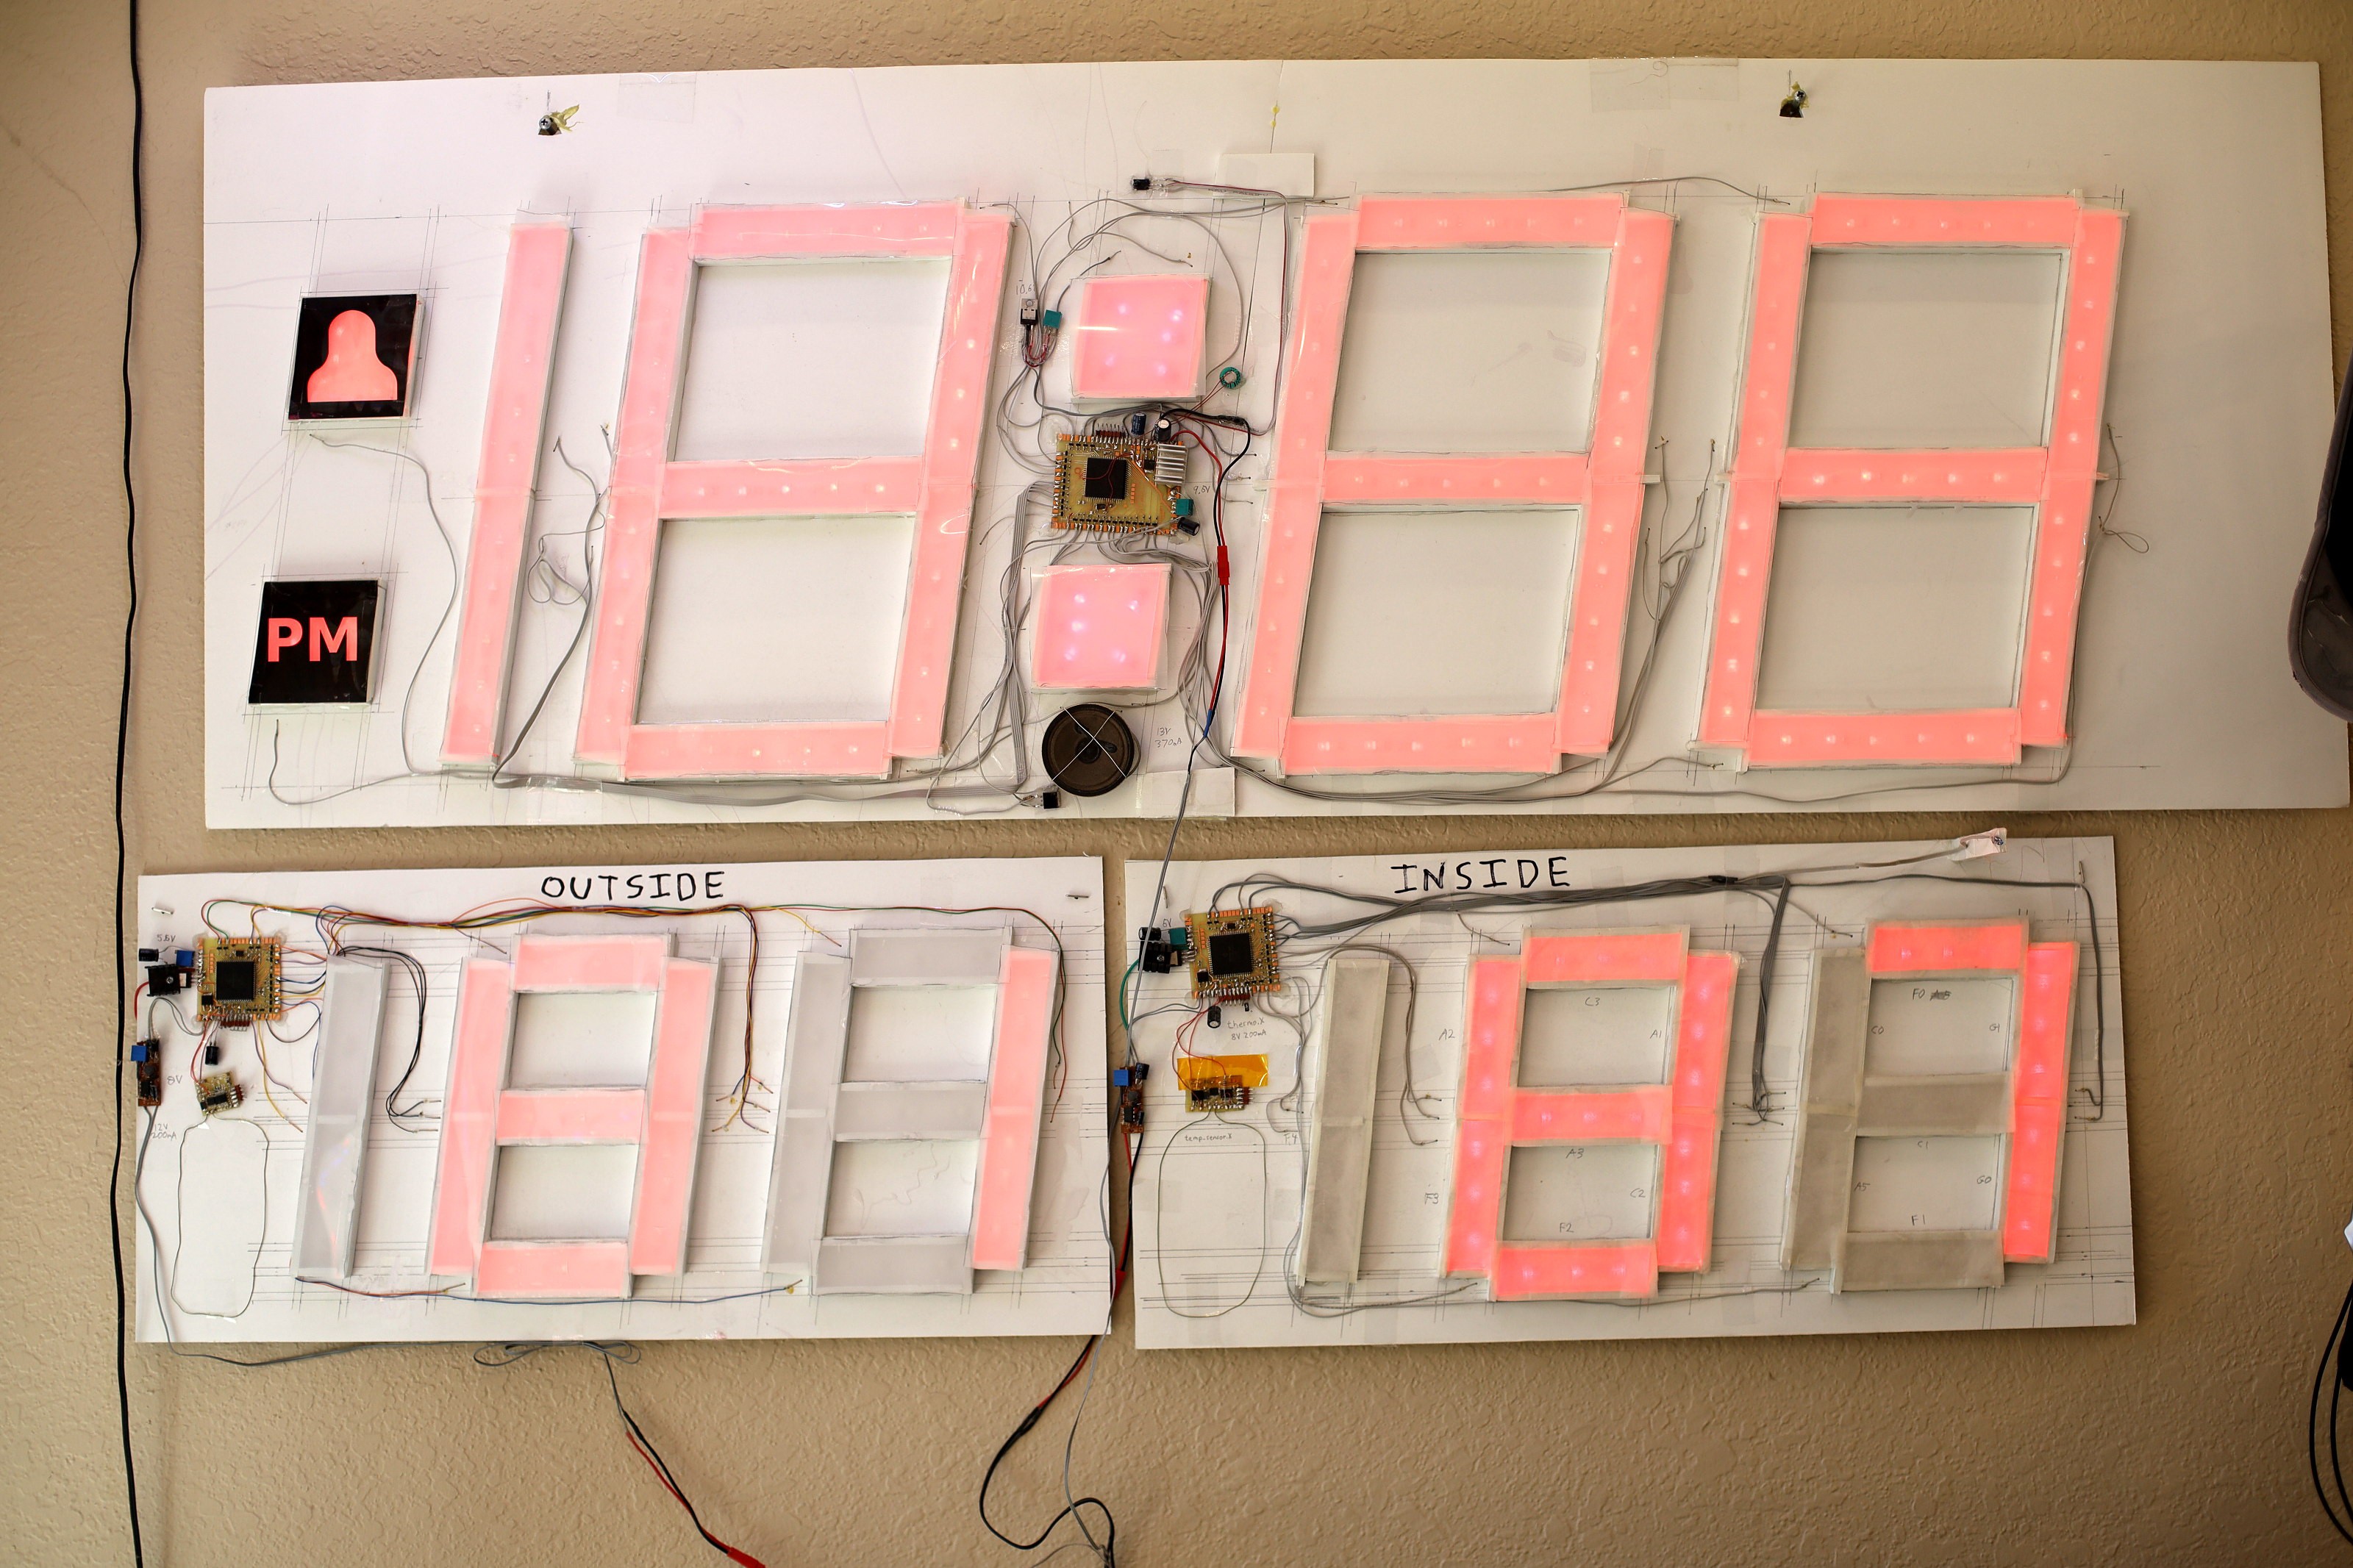
The heroineclock icons remaned wax paper since they're covered. Wax paper definitely degrades if it's exposed. Heroineclock I lasted 15 years with enclosed wax paper.
Future directions are going to have to be white PLA for the segments & diffusers. The oil based paint of the past is no longer sold. The diffusers aren't doing the business. The segments might have to be 1" deep.
-
Hydrometer
06/10/2022 at 17:53 • 0 comments![]()
The weather wall got the world's most expensive hydrometer, an essential instrument for printing TPU & using a swamp cooler. It was made from 2 day job boards. Helas, the readout is too small for lions to be very happy with it. At least it proved lions would not be happy with any commercial sized panel.
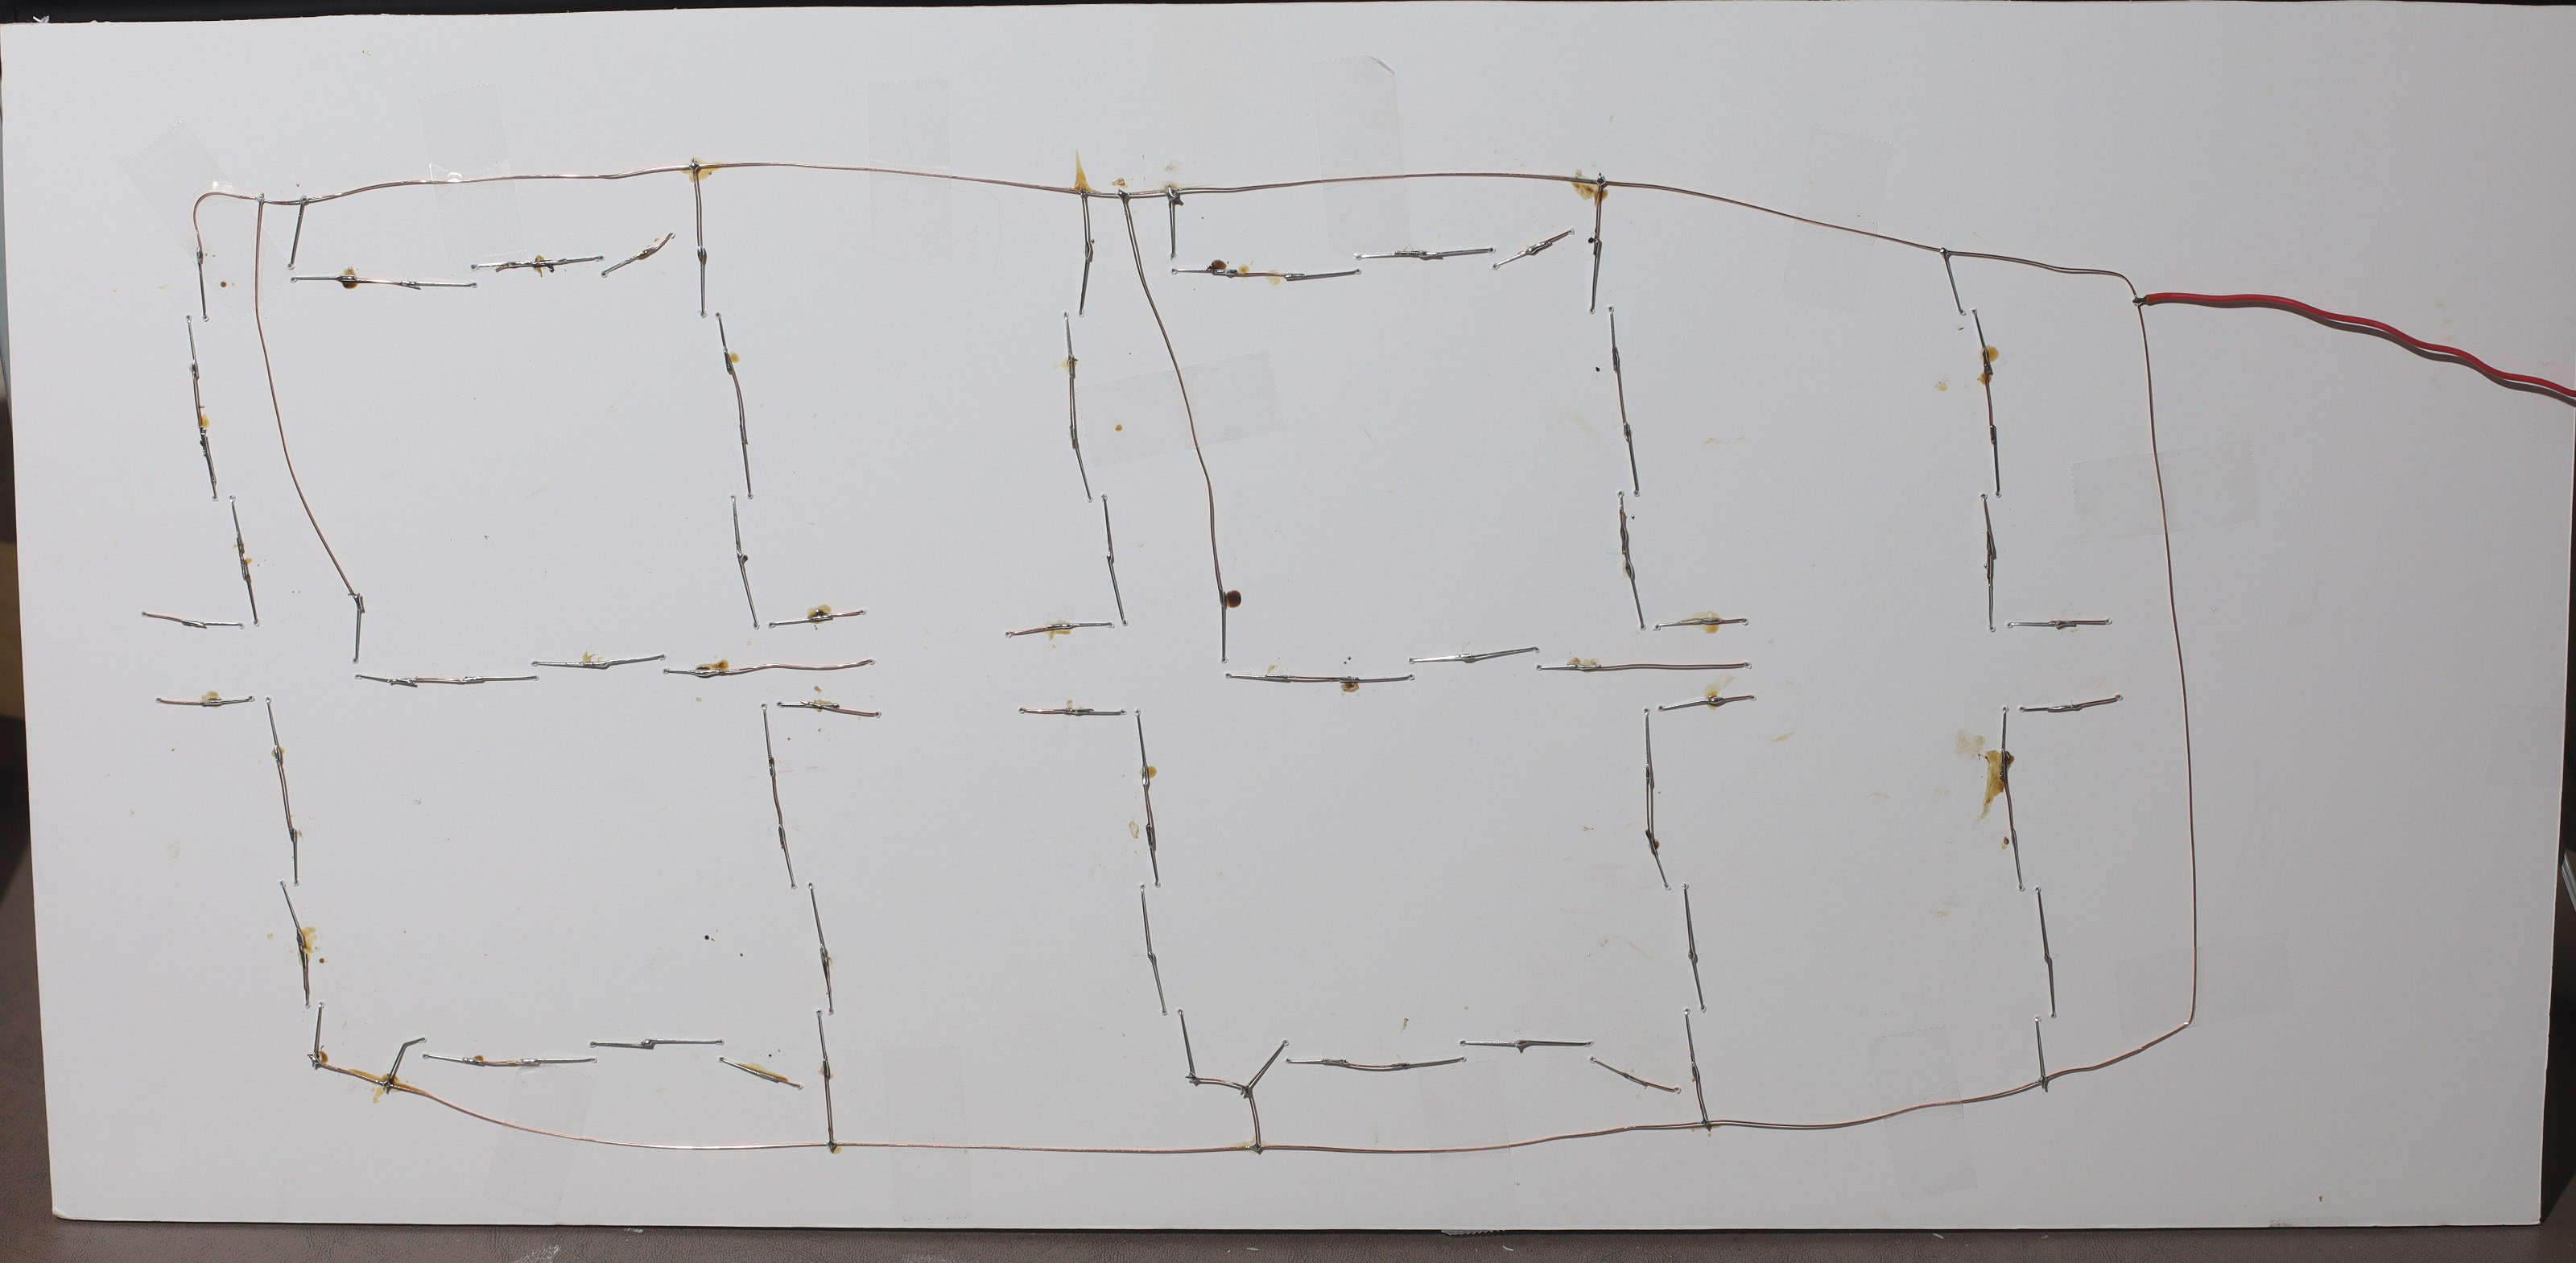
Making 7 segment displays out of hundreds of bare LED's & transistors became somewhat of a drag over time. There are LED strings, for a lot of money.
It was surprising how much humidity varies from 25-50% in the apartment. Taking showers while printing TPU is definitely out. The lion kingdom still has barometer chips from 10 years ago, but Calif* rarely experiences any pressure changes.
-
Wunderground display
07/24/2021 at 06:52 • 0 comments![]()
Since retiring the solar powered weather station & displaying just downloaded temperature from wunderground, the display finally got tested by an outage. Instead of showing a frozen out of date temperature & ceasing logging, it switched to the dashes as programmed & continued logging indoor temperature.
After having nightmares about updating the wunderground URL every 2 months for the next 50 years, it turned out it was Xfinity going down for its annual 48 hour manetenance window. Lions would prefer if Xfinity worked all 52 weeks instead of 51 weeks per year, but at least the lion software worked.
-
Solar panel death
04/03/2021 at 02:46 • 0 comments![]()
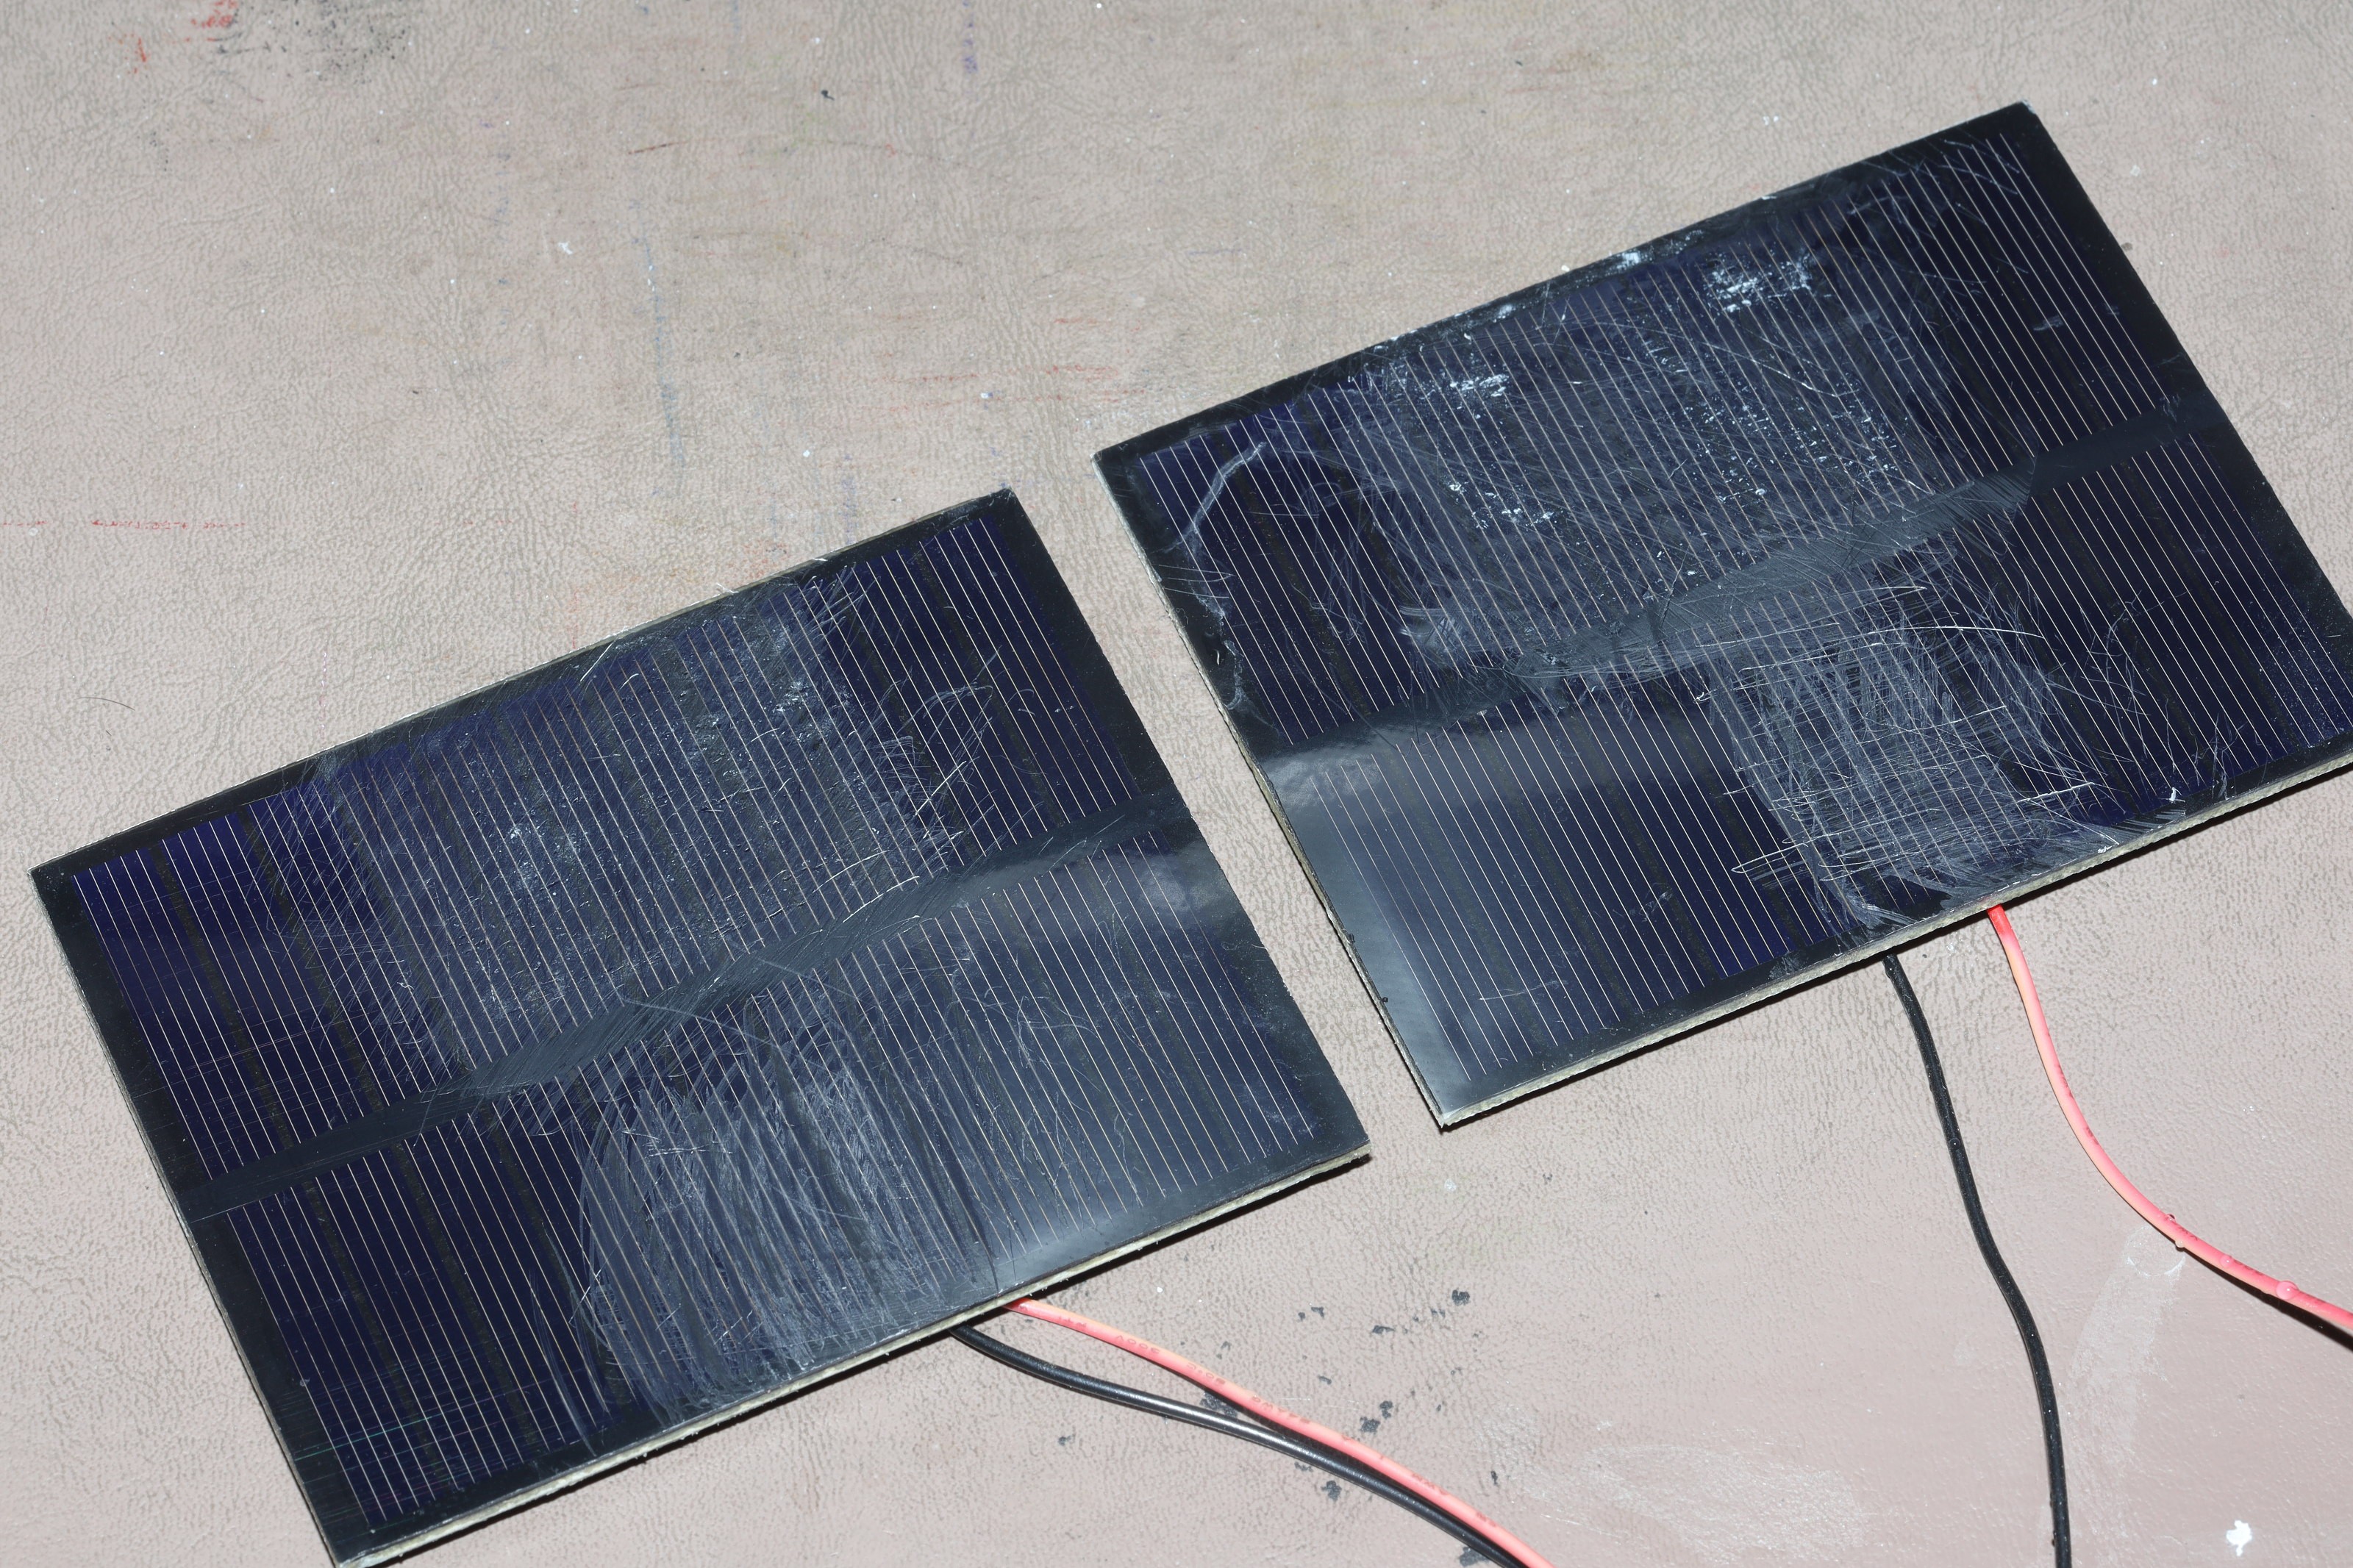
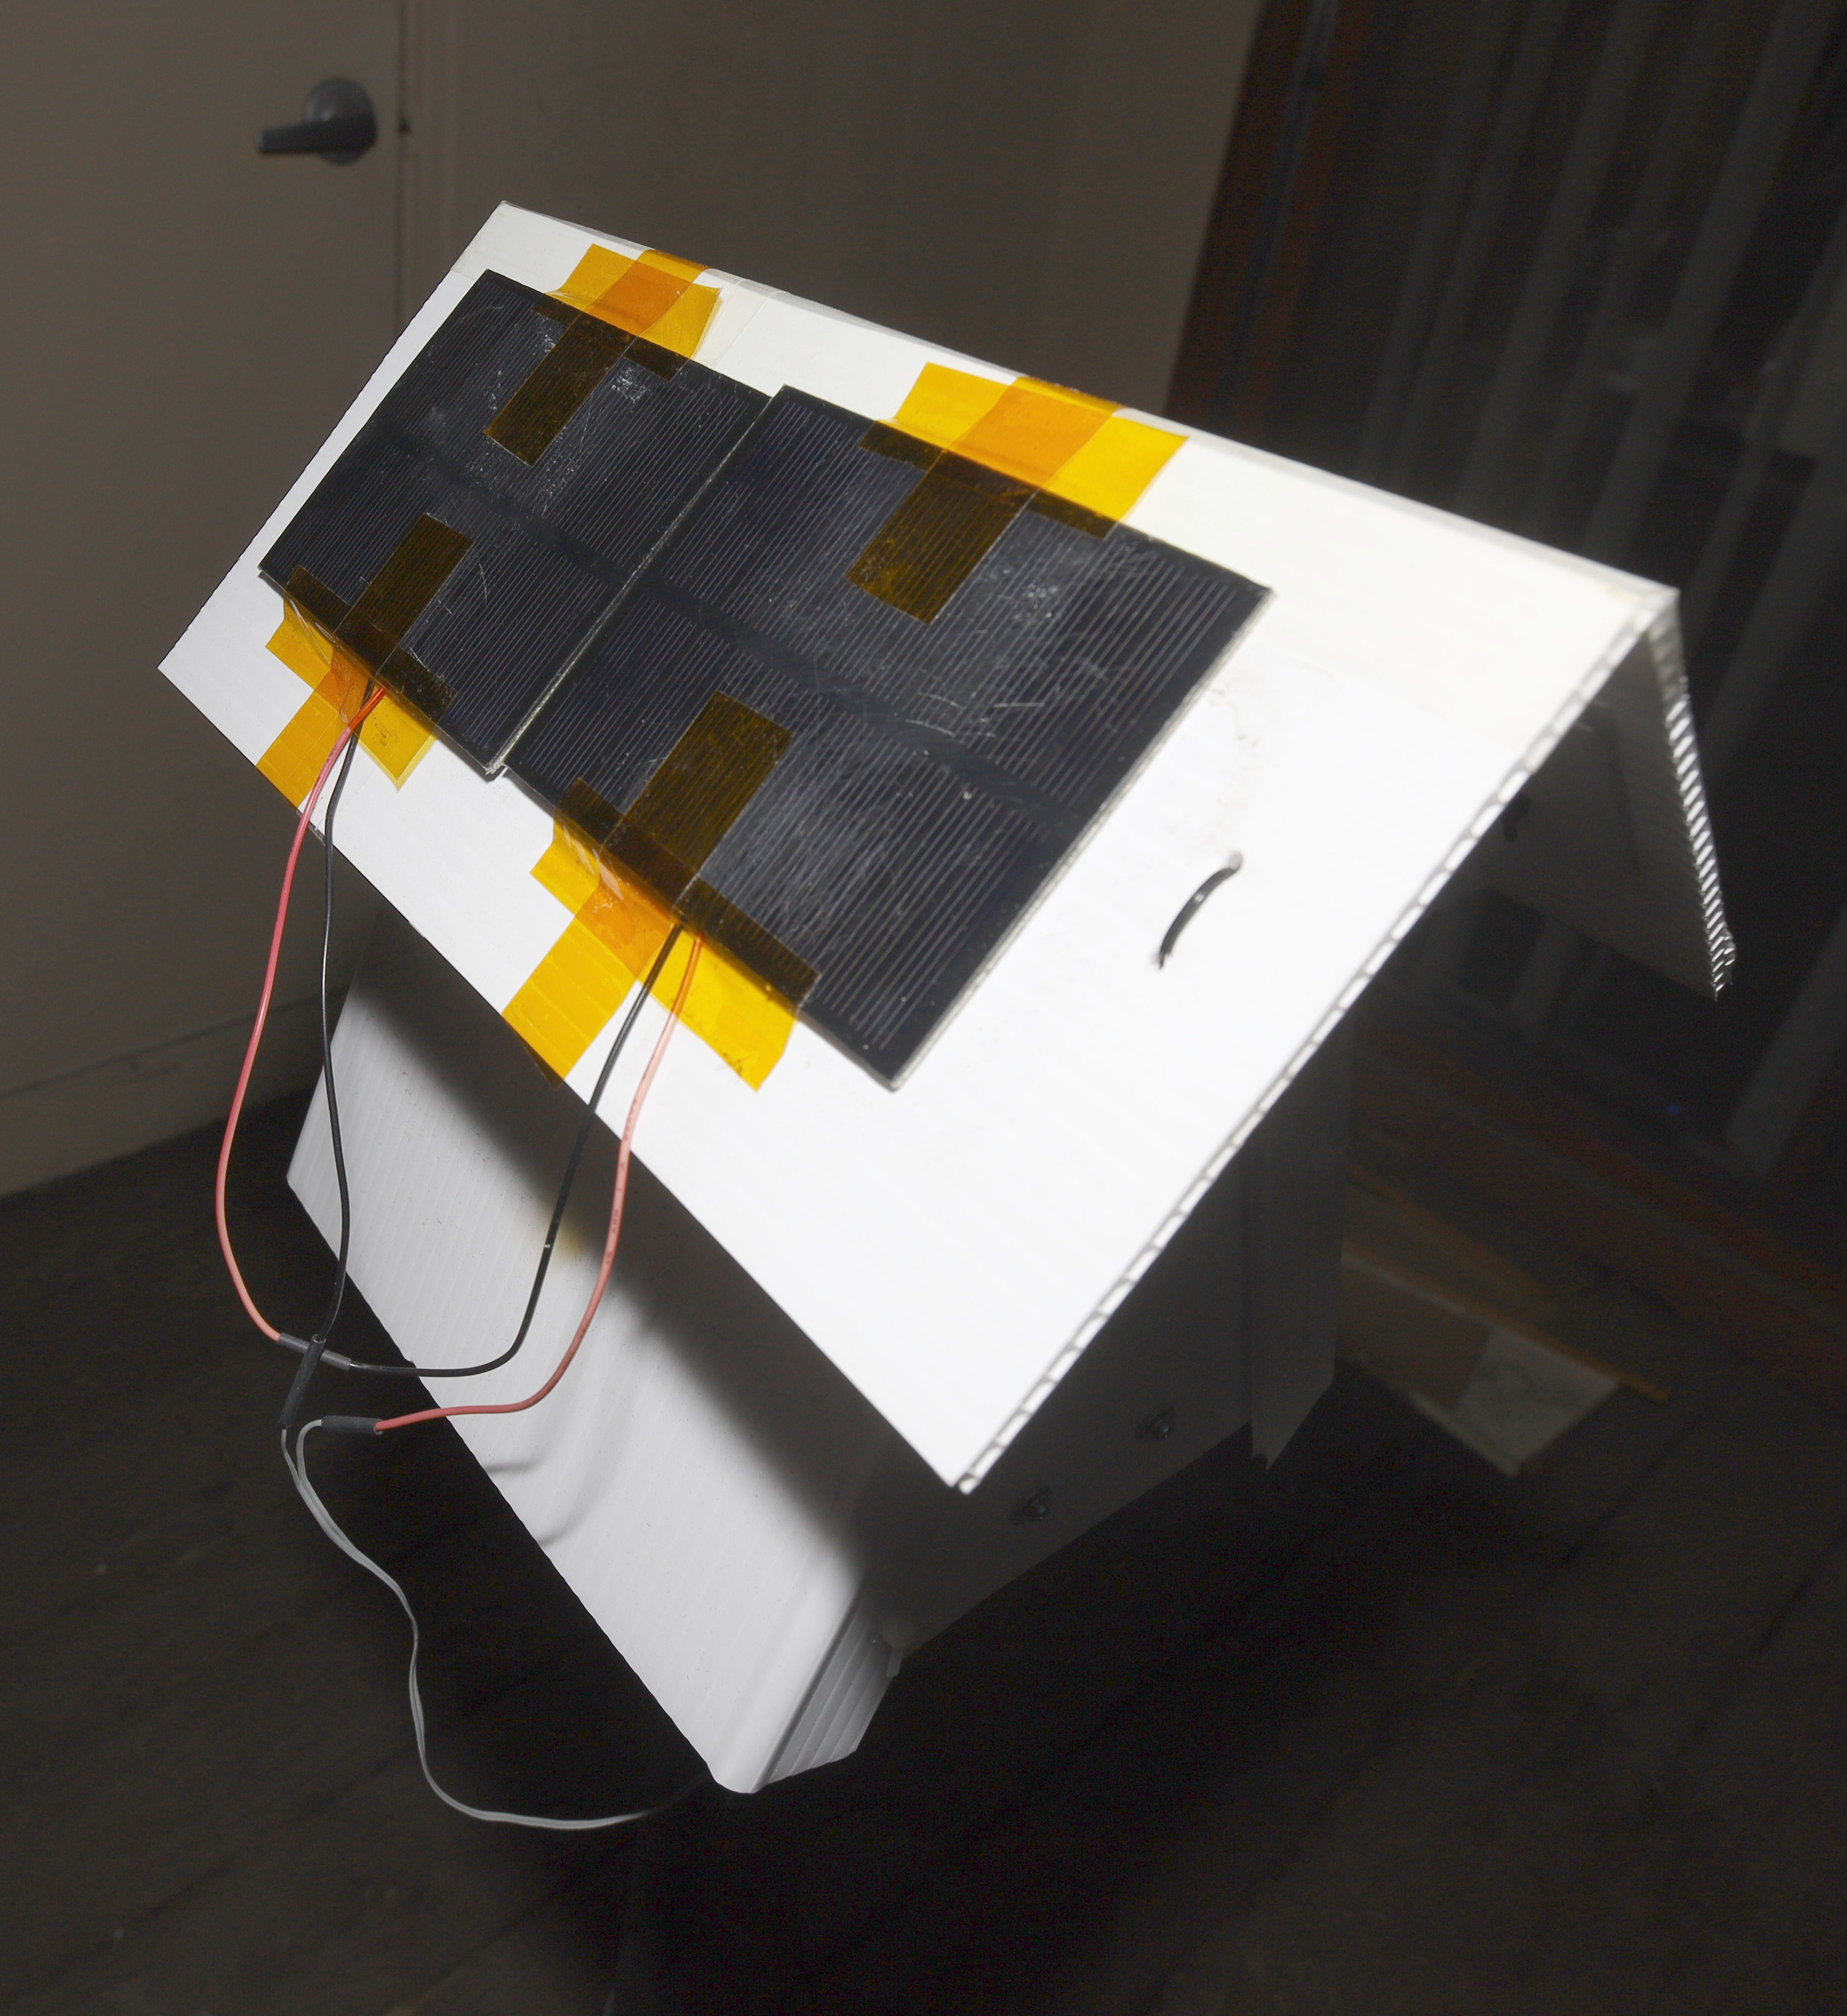
Only 7 months later, the solar panels lay on the floor after their packing tape farsteners decomposed & their hot glue wire harnesses melted.
![]()
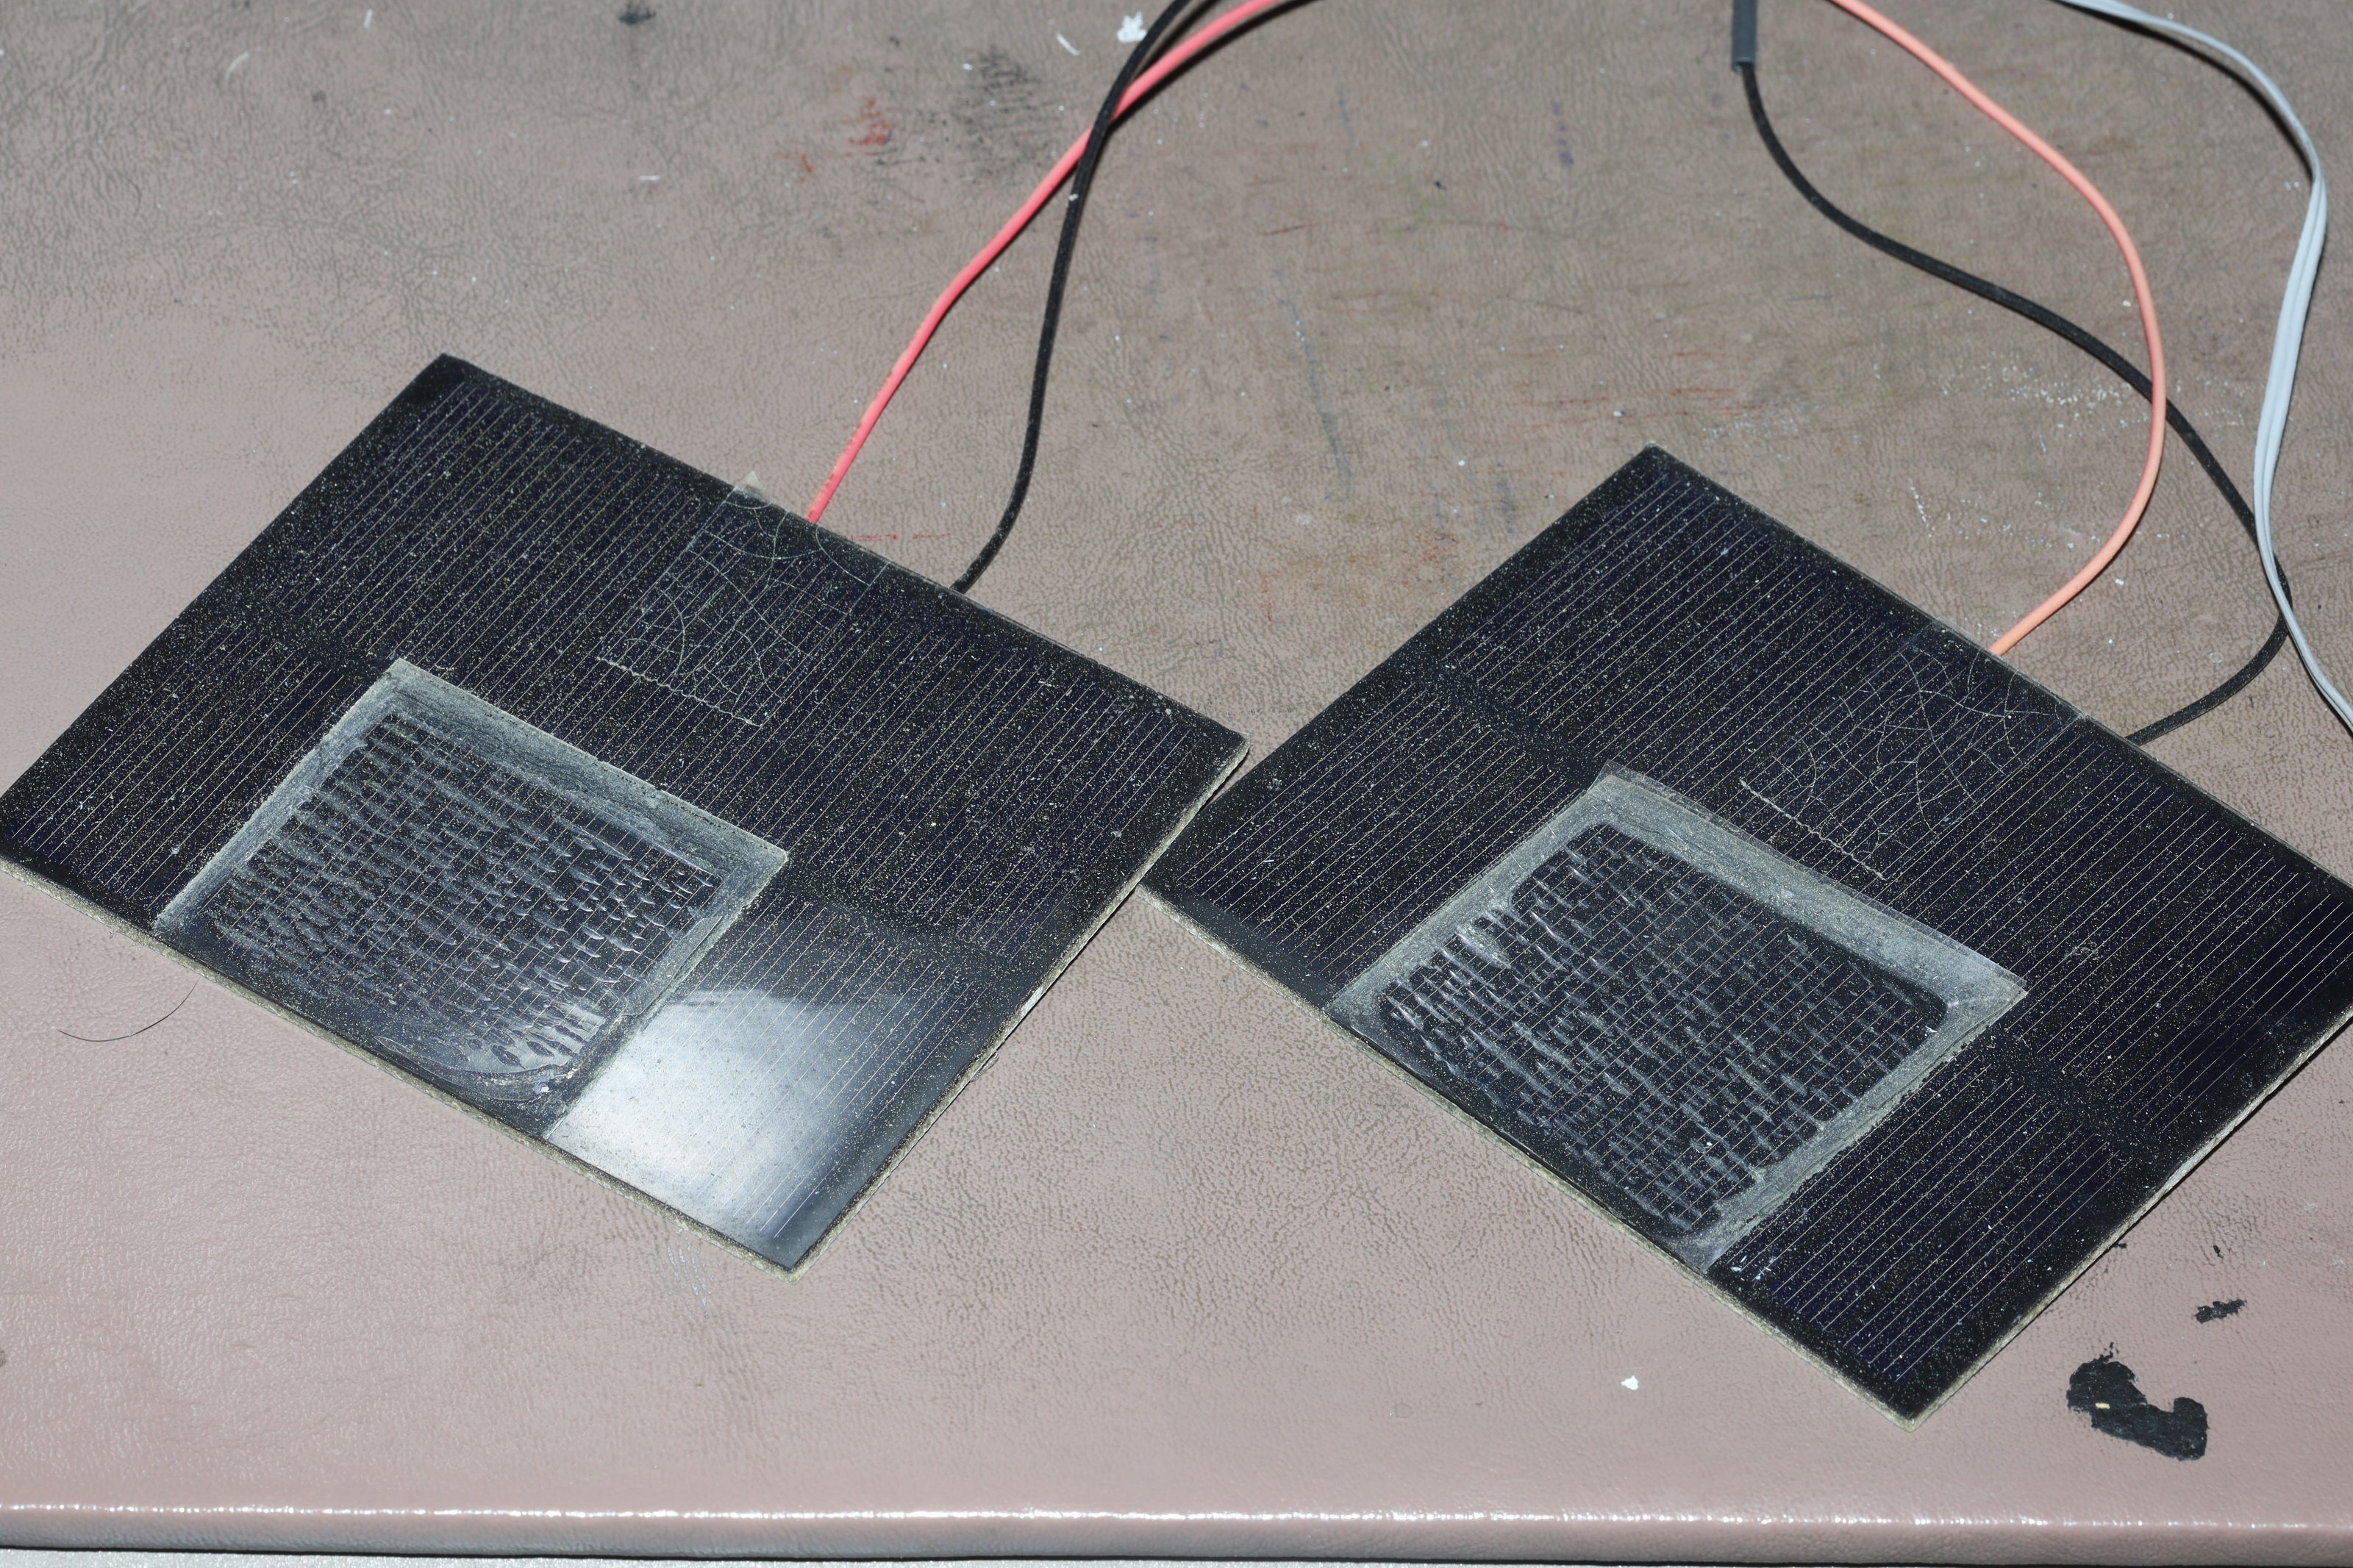
After scraping off the packing tape residue, the panels had bald spots. They weren't glass but epoxy. Scraping off the packing tape scraped off the gelcoat, so they were now less efficient.
So the way the internet farstens solar panels is by putting their wires through holes & hot snotting the holes. Higher end panels are clamped between 2 metal angle rods. Doubt anything besides metal would last.
![]()
Tried captain tape to make a short term solution at the expense of efficiency. It didn't stick at all to the coroplastic. It's amazing that the coroplastic & zip ties fended off the Calif* heat, but they haven't experienced the true fury of summer.
This captain tape bodge with the scratched epoxy actually didn't affect the battery voltage. It must be saturating the NiMH's.
Another idea emerged whereby the panels would be under a sheet of acrylic. The acrylic could have some borders made of PETG to retain the panels. Then, captain tape would farsten the panels to the acrylic from the back. Acrylic too would degrade, but might buy more than 7 months until the lion kingdom decided to risk cutting glass again.
-
TODO
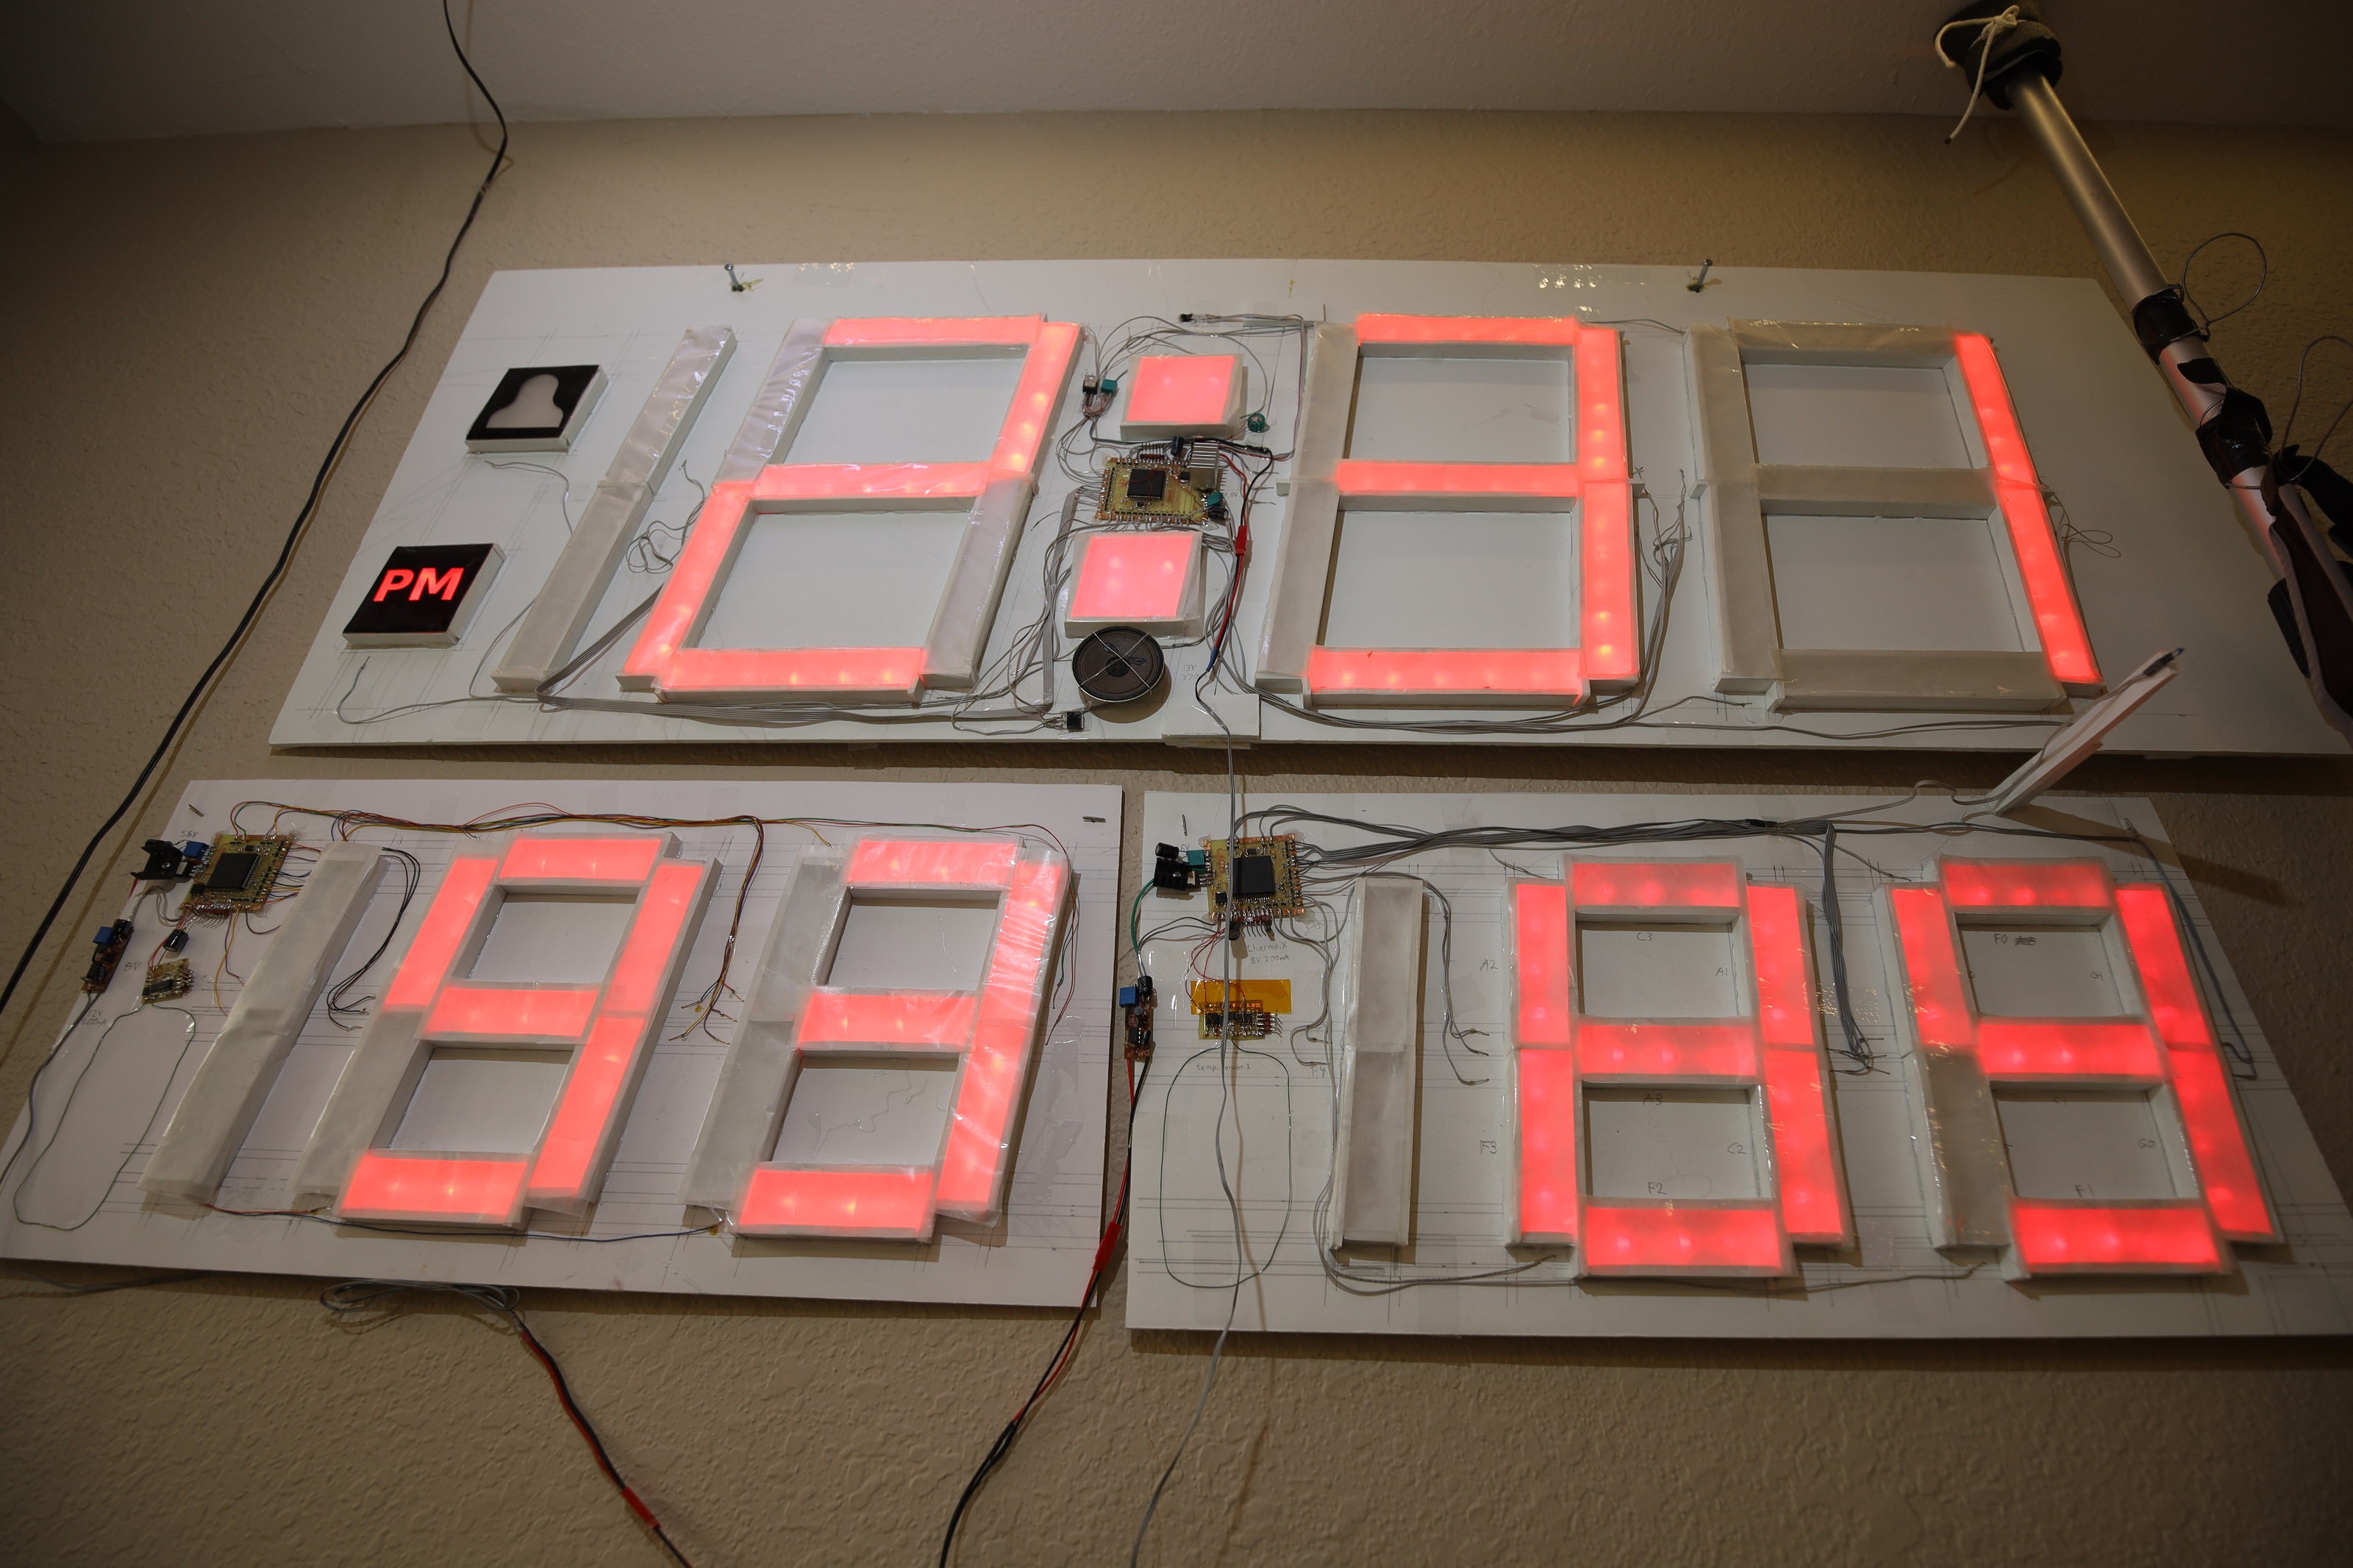
11/02/2020 at 07:10 • 0 commentsAll the lion kingdom's LED displays were made before 3D printing arrived, even the outdoor thermometer. 3D printed white PLA actually could make a good diffuser. The lighting isn't as even as some clocks, but much better than heroineclock II. This guy threw a lot more money at store bought components instead of making everything from scratch. There are individually addressible LED strips which can show different colors, a much more powerful computer which gets time from wifi, a much heavier enclosure which requires a lot more hardware to mount on a wall. His other projects are manely toys, but there are a few good ideas. Lions actually want the time to drift fast instead of precisely track wifi. It could benefit from 3D printed diffusers, but not replacement of the LEDs.
-
New remote arrangement
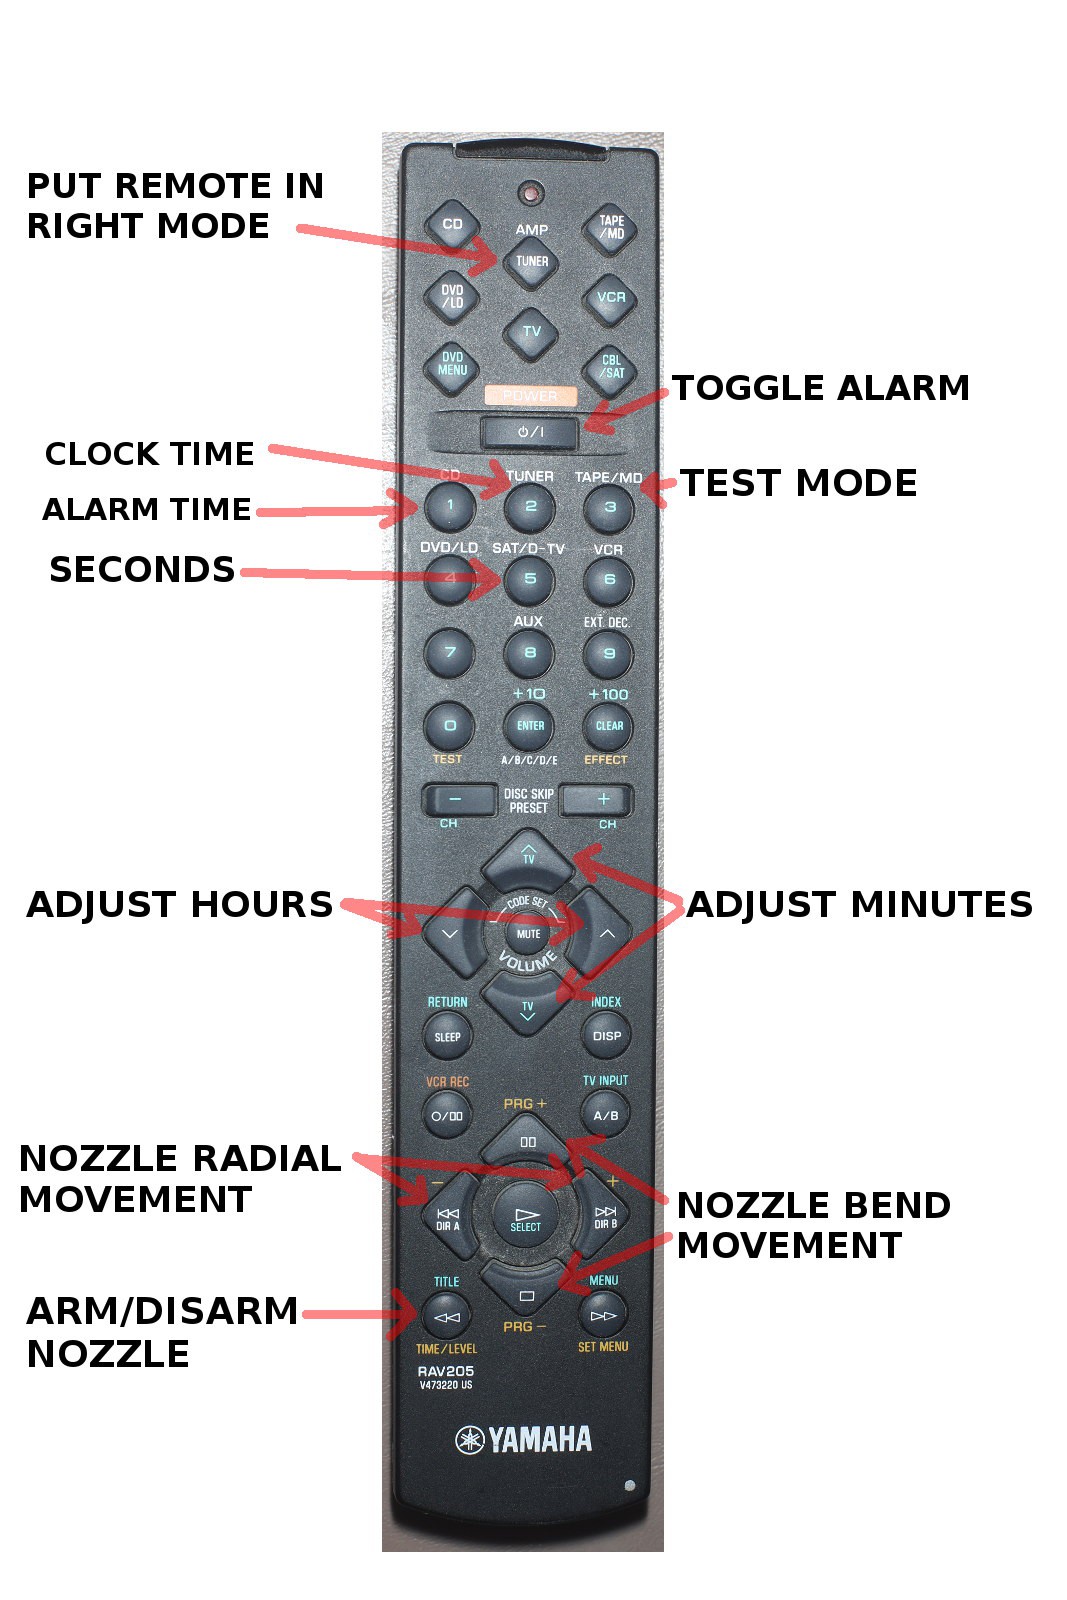
09/19/2020 at 23:34 • 0 commentsWith the addition of seconds & the remote also supporting the robotic air vent, it was time for some adjustments.
![]()
-
Thermometer 3
08/14/2020 at 05:53 • 0 comments![]()
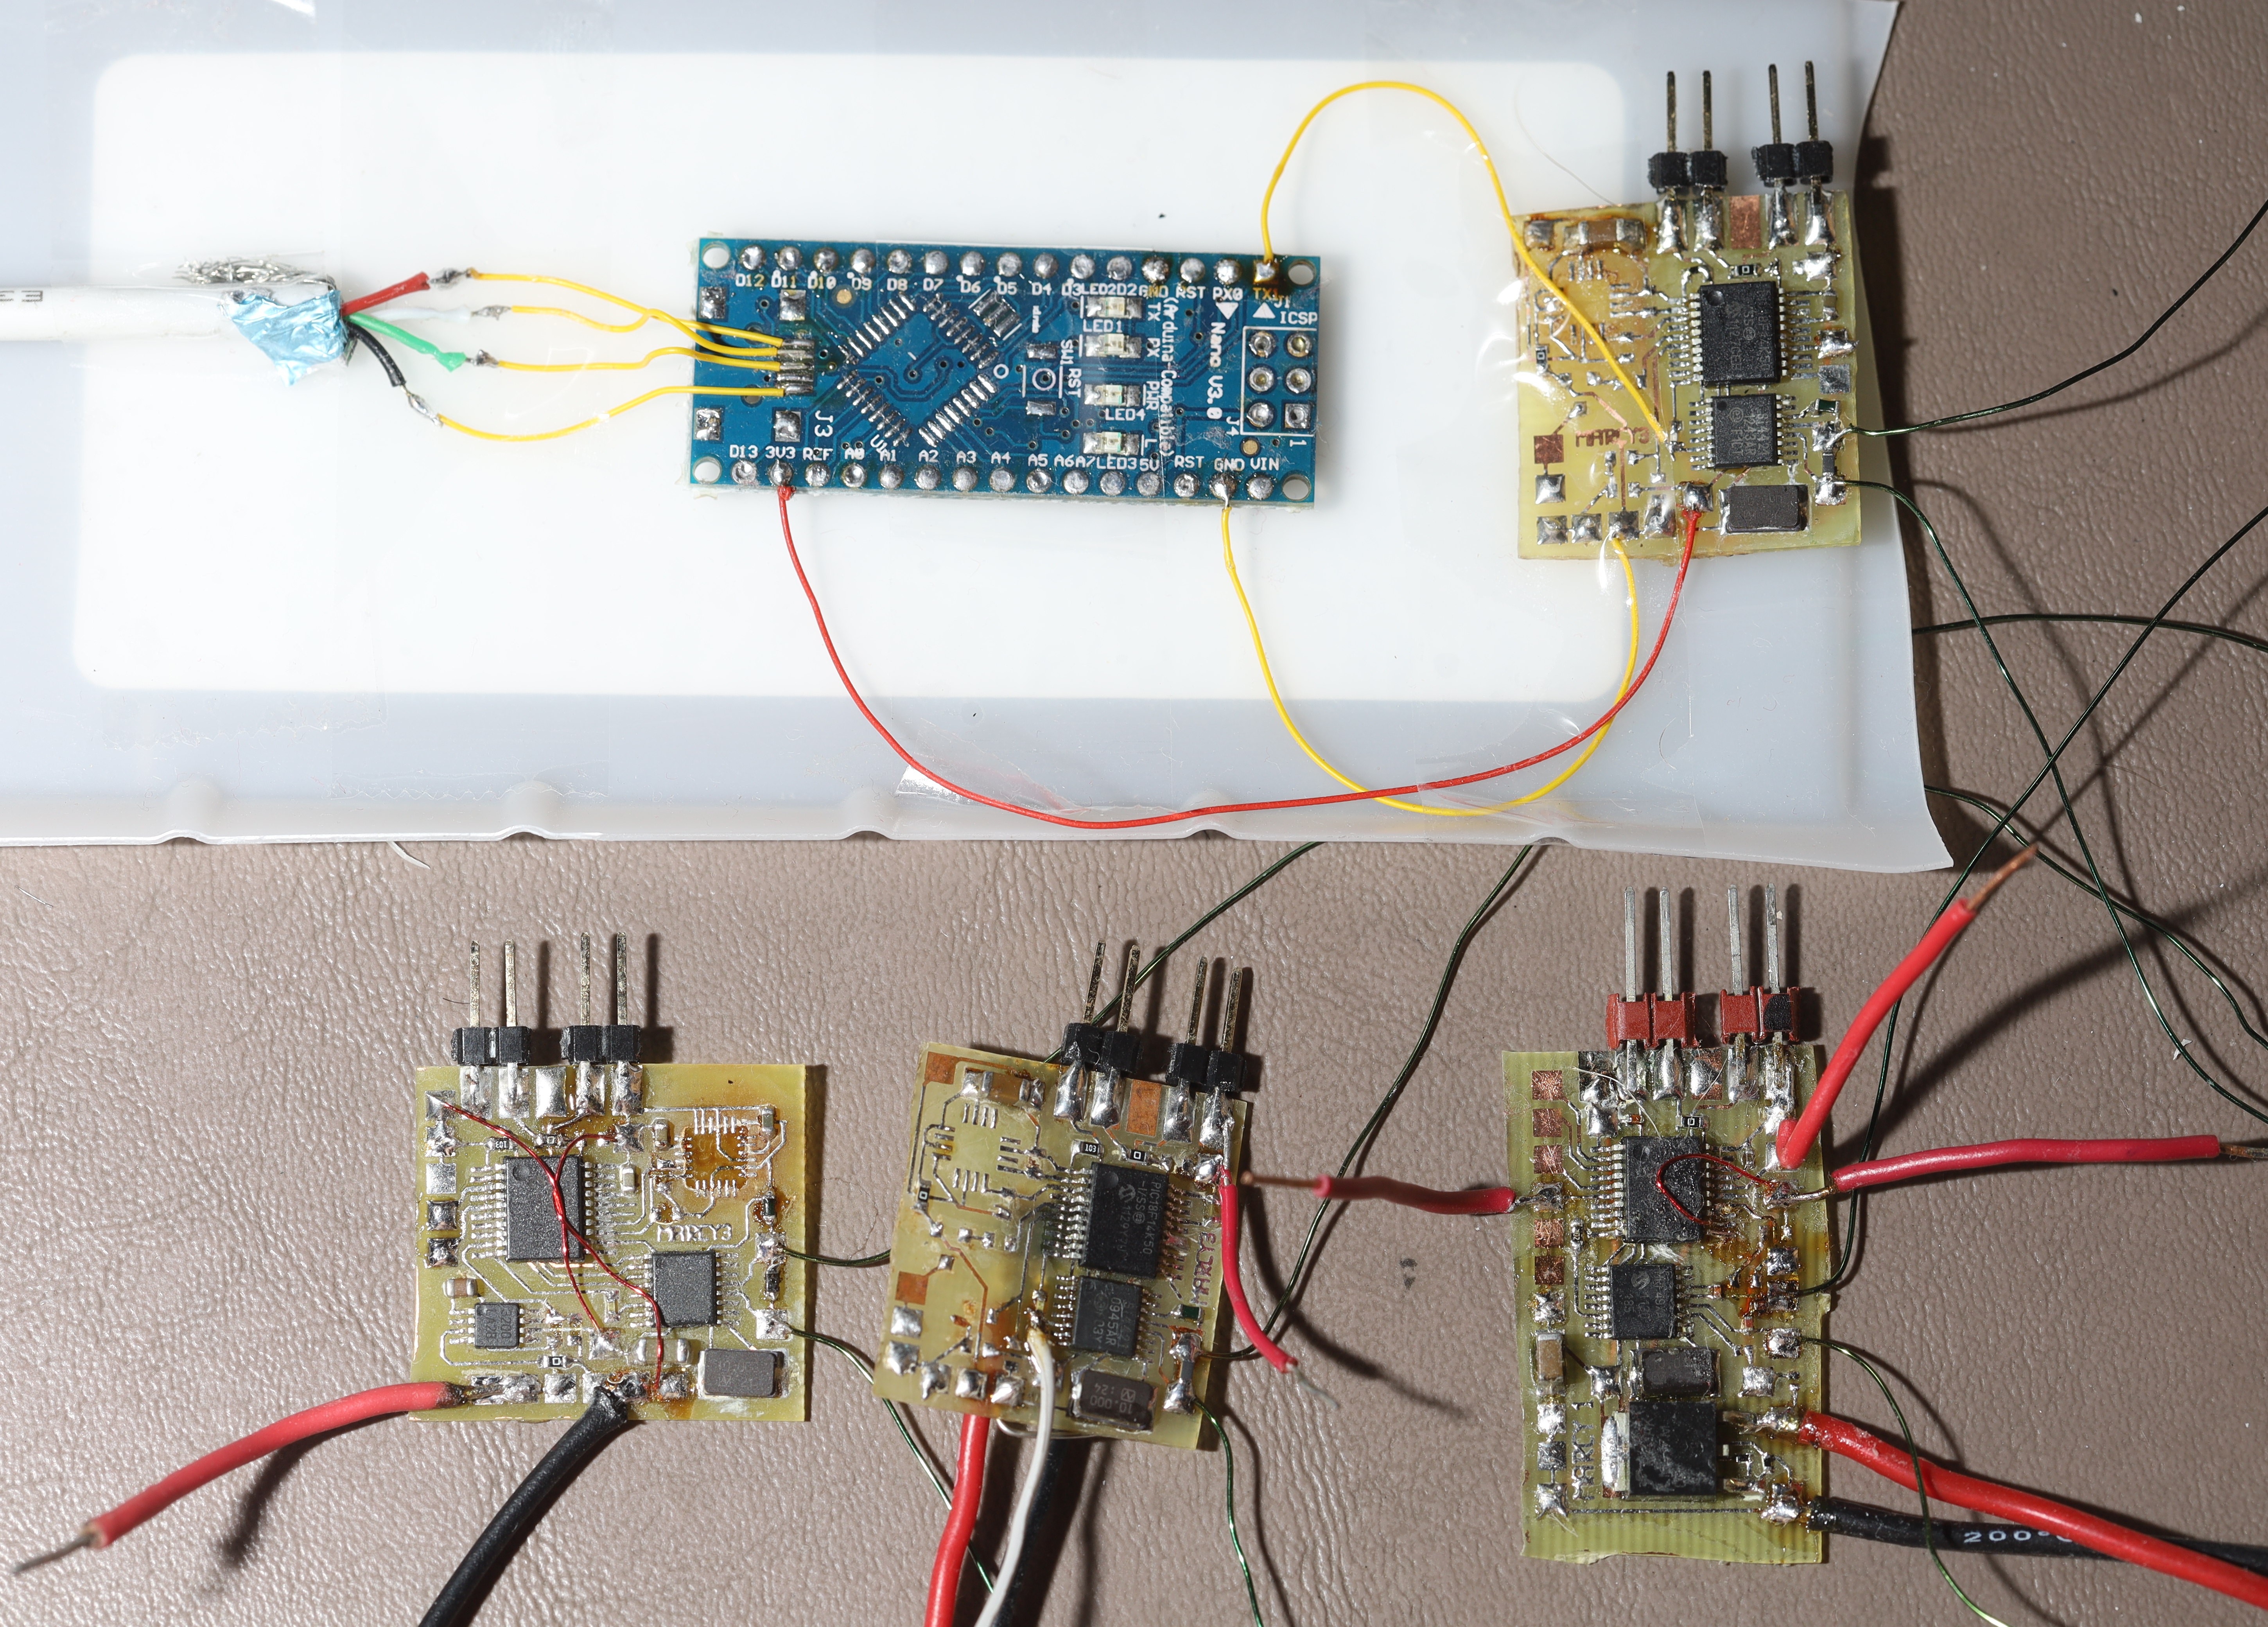
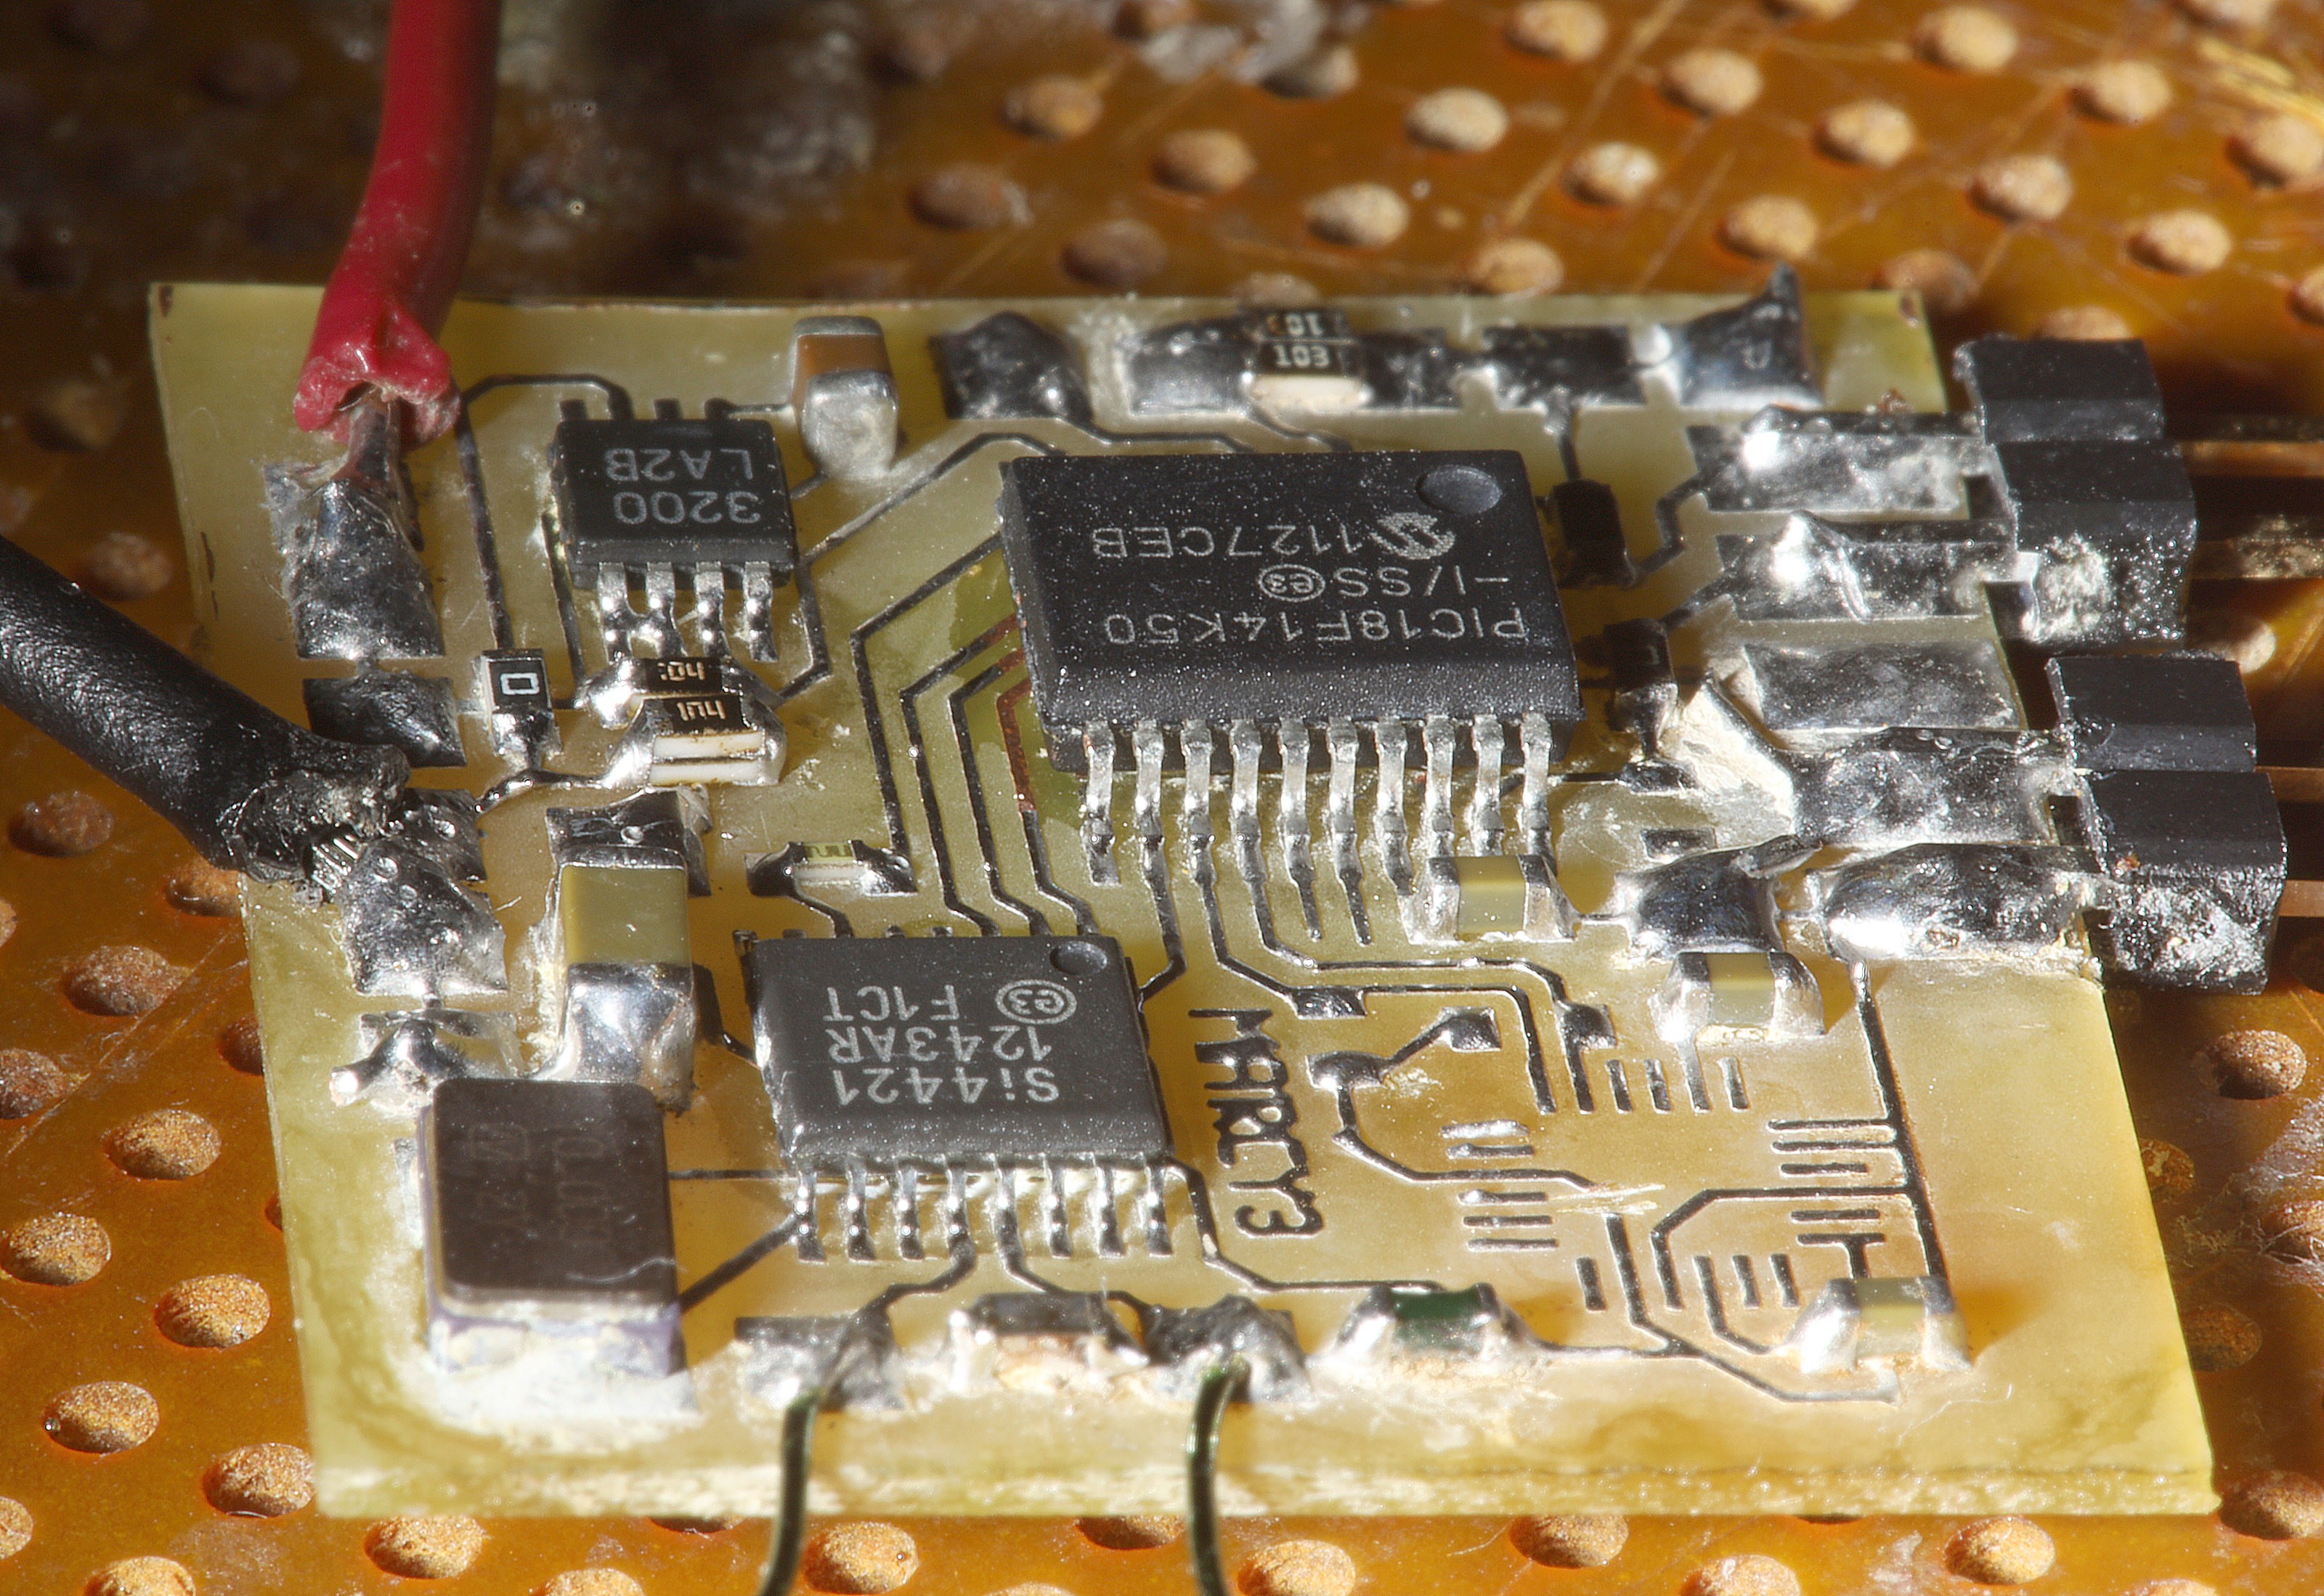
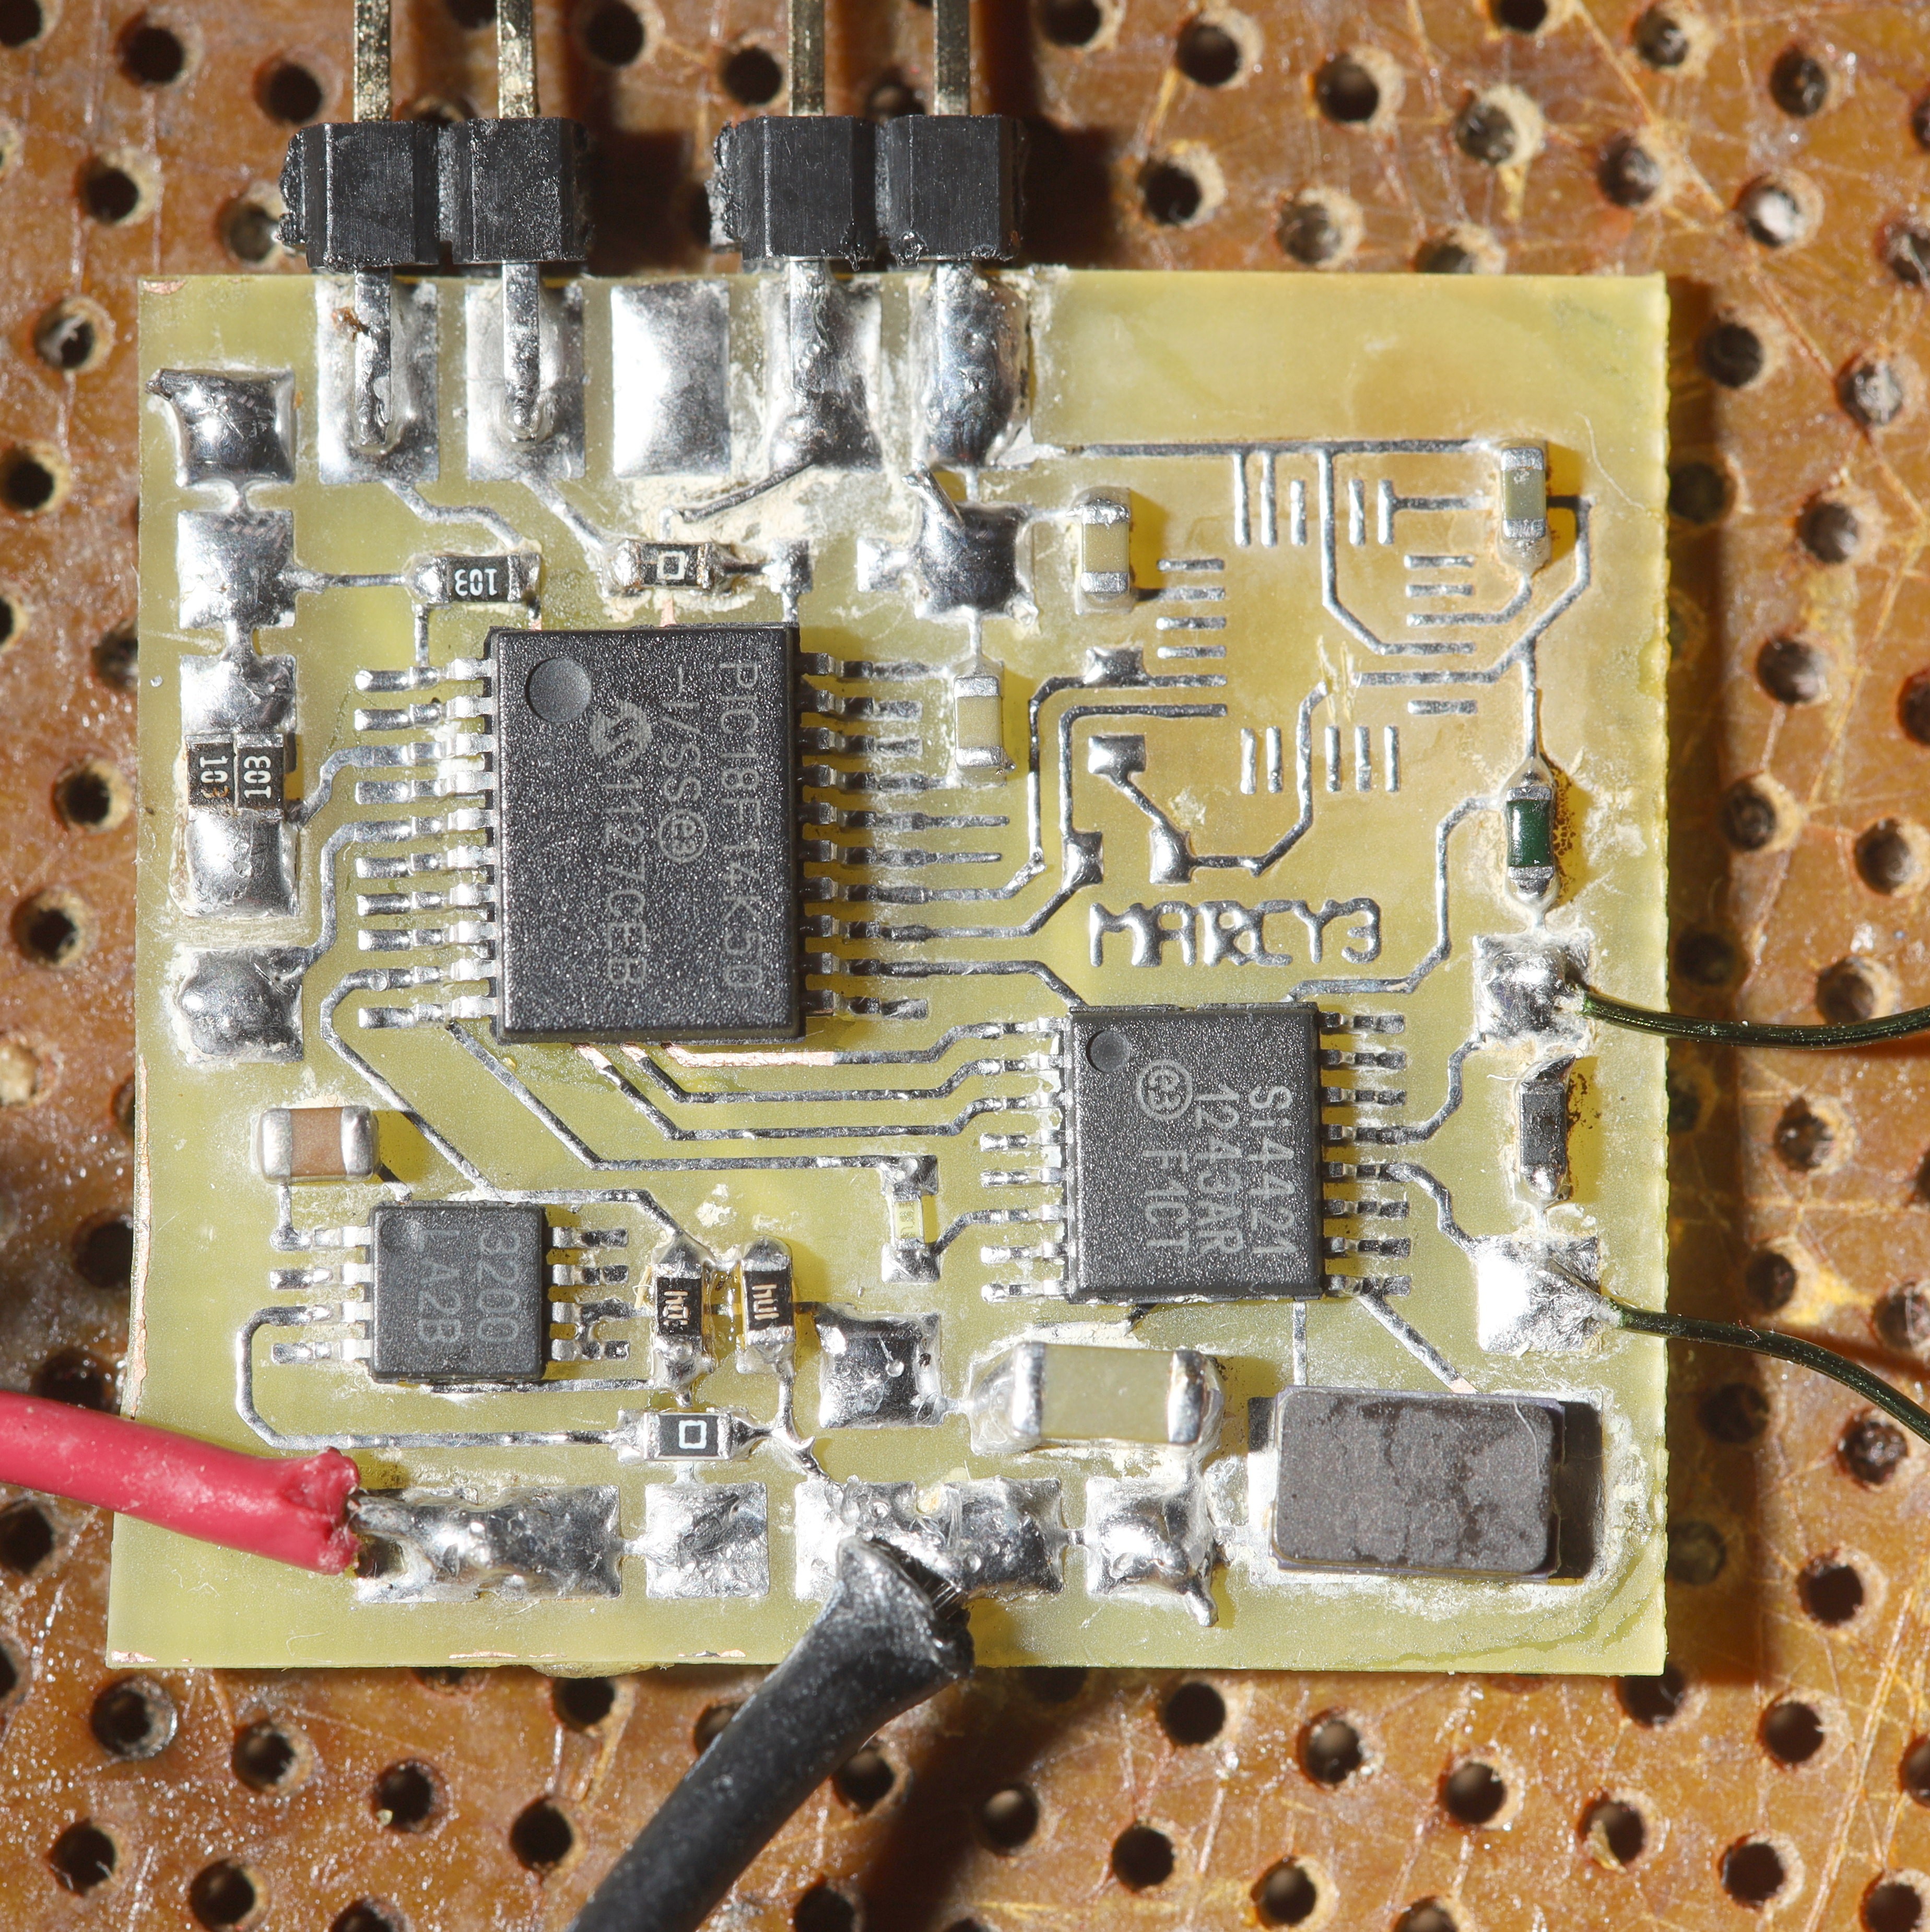
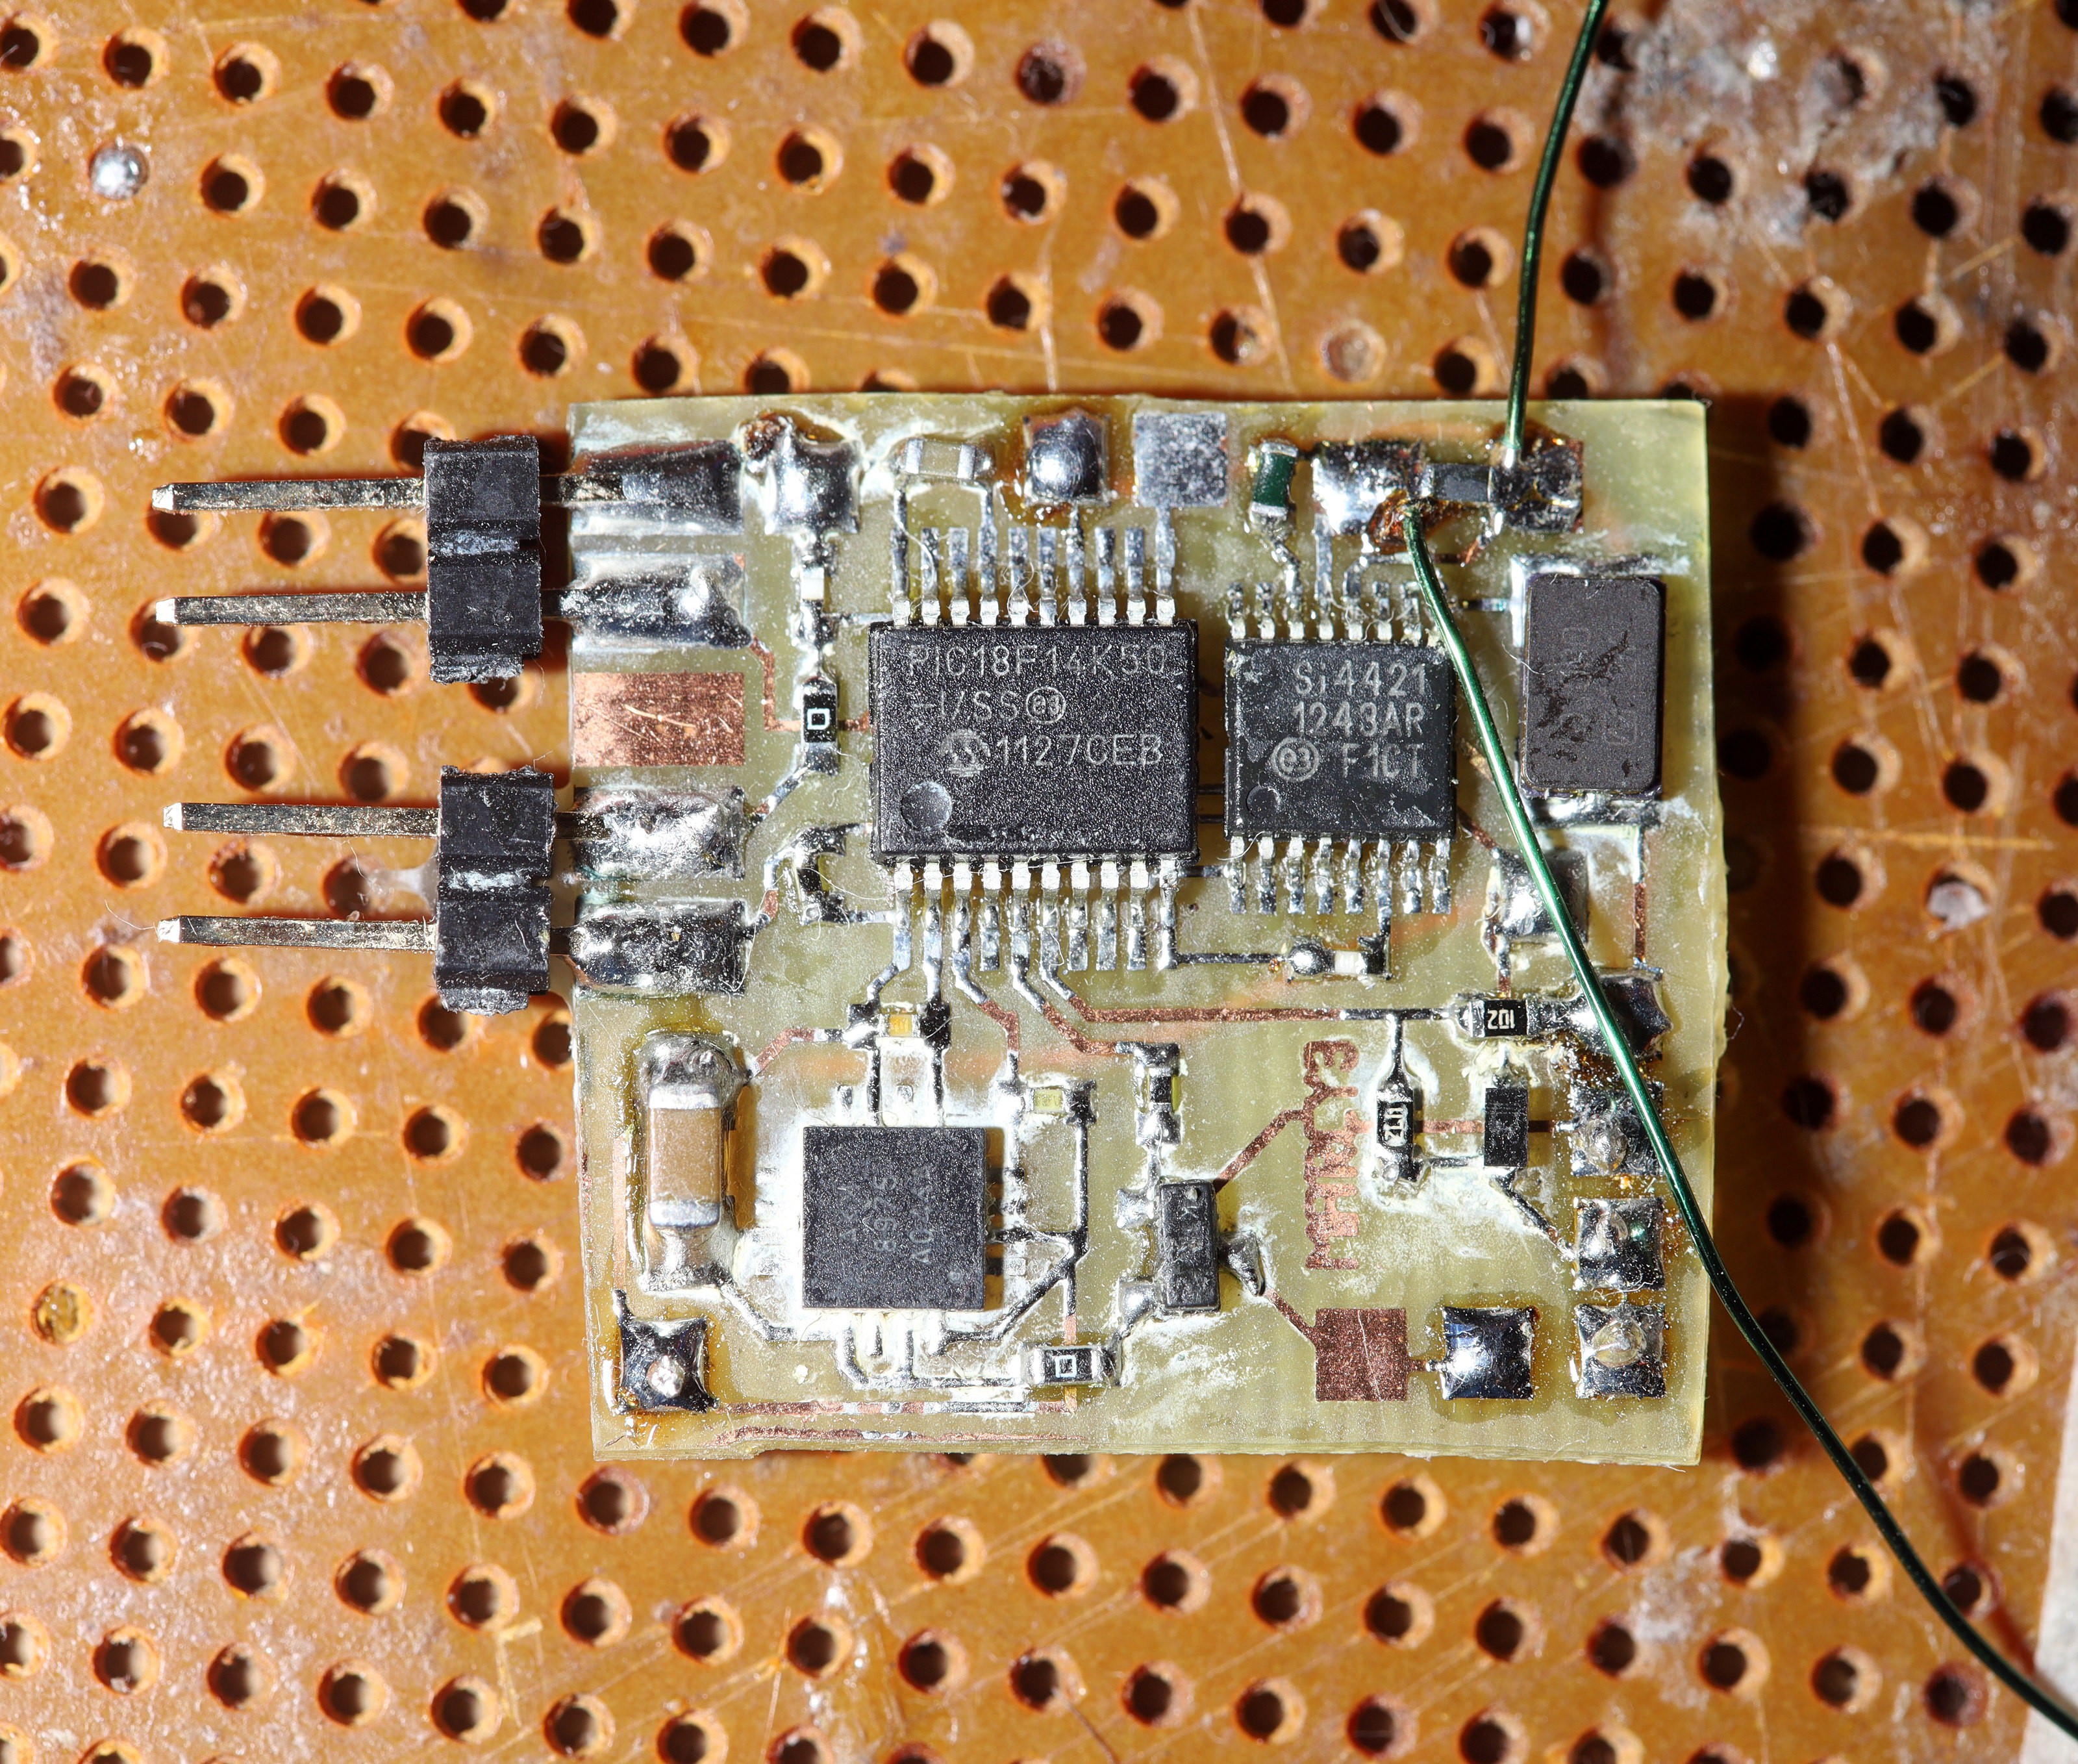
4 reconstituted autopilot boards from 10 years ago were reprogrammed & reworked for their new life as a sensor network.
1 transmitter board transmits the temperature from outside.
1 transmitter board transmits the temperature from inside.
1 reciever board sends the temperatures to the router.
1 receiver board sends the outside temperature to a new LED panel.
The outdoor thermometer runs at 32.768khz. The PIC18F14K50 was found to use 150uA in idle & up to 30mA when transmitting. It needs to transmit for a long time to overcome interference. The easiest error correction is to transmit more data. The PIC uses its maximum baud rate of 8192 baud. The internet said the sleep current is lower when using the watchdog timer instead of idle mode, but this was found to not be true. The watchdog timer can go to 120 seconds, but it would have to take all its ADC readings at the moment of transmitting instead of averaging them over 120 seconds.
The thermometers transmit a 16 byte key to identify themselves, followed by the temperature repeated 4 times. The key & temperature are also repeated 4 times.
![]()
![]()
![]()
The existing thermometer board got a retrofit to transmit temperature to the router. After 16 years of just showing the temperature, giant thermometers could finally record the temperature.
![]()
![]()
After much debate, the outdoor thermometer got a new voltage divider to measure battery voltage. It doesn't need to measure battery voltage over its many years of temperature measurements. It only needs the battery voltage to test the solar panels in its 1st day. The problem is the alternative is to go outside with a voltmeter several times.
Its idle current increased to 200uA & lions rediscovered the ground for the voltage divider can't be a GPIO or it'll sink the high voltage from the battery. When the power usage is this low, the high voltage from the battery raises Vdd.
As bad as the compromises seem, the power usage is actually tiny compared to a modern standards based solution. The modern solutions use an ESP32 & wifi. They have to stay on for a long time to negotiate a wifi connection, which tends to erase any gain from their nano amp sleep current.
![]()
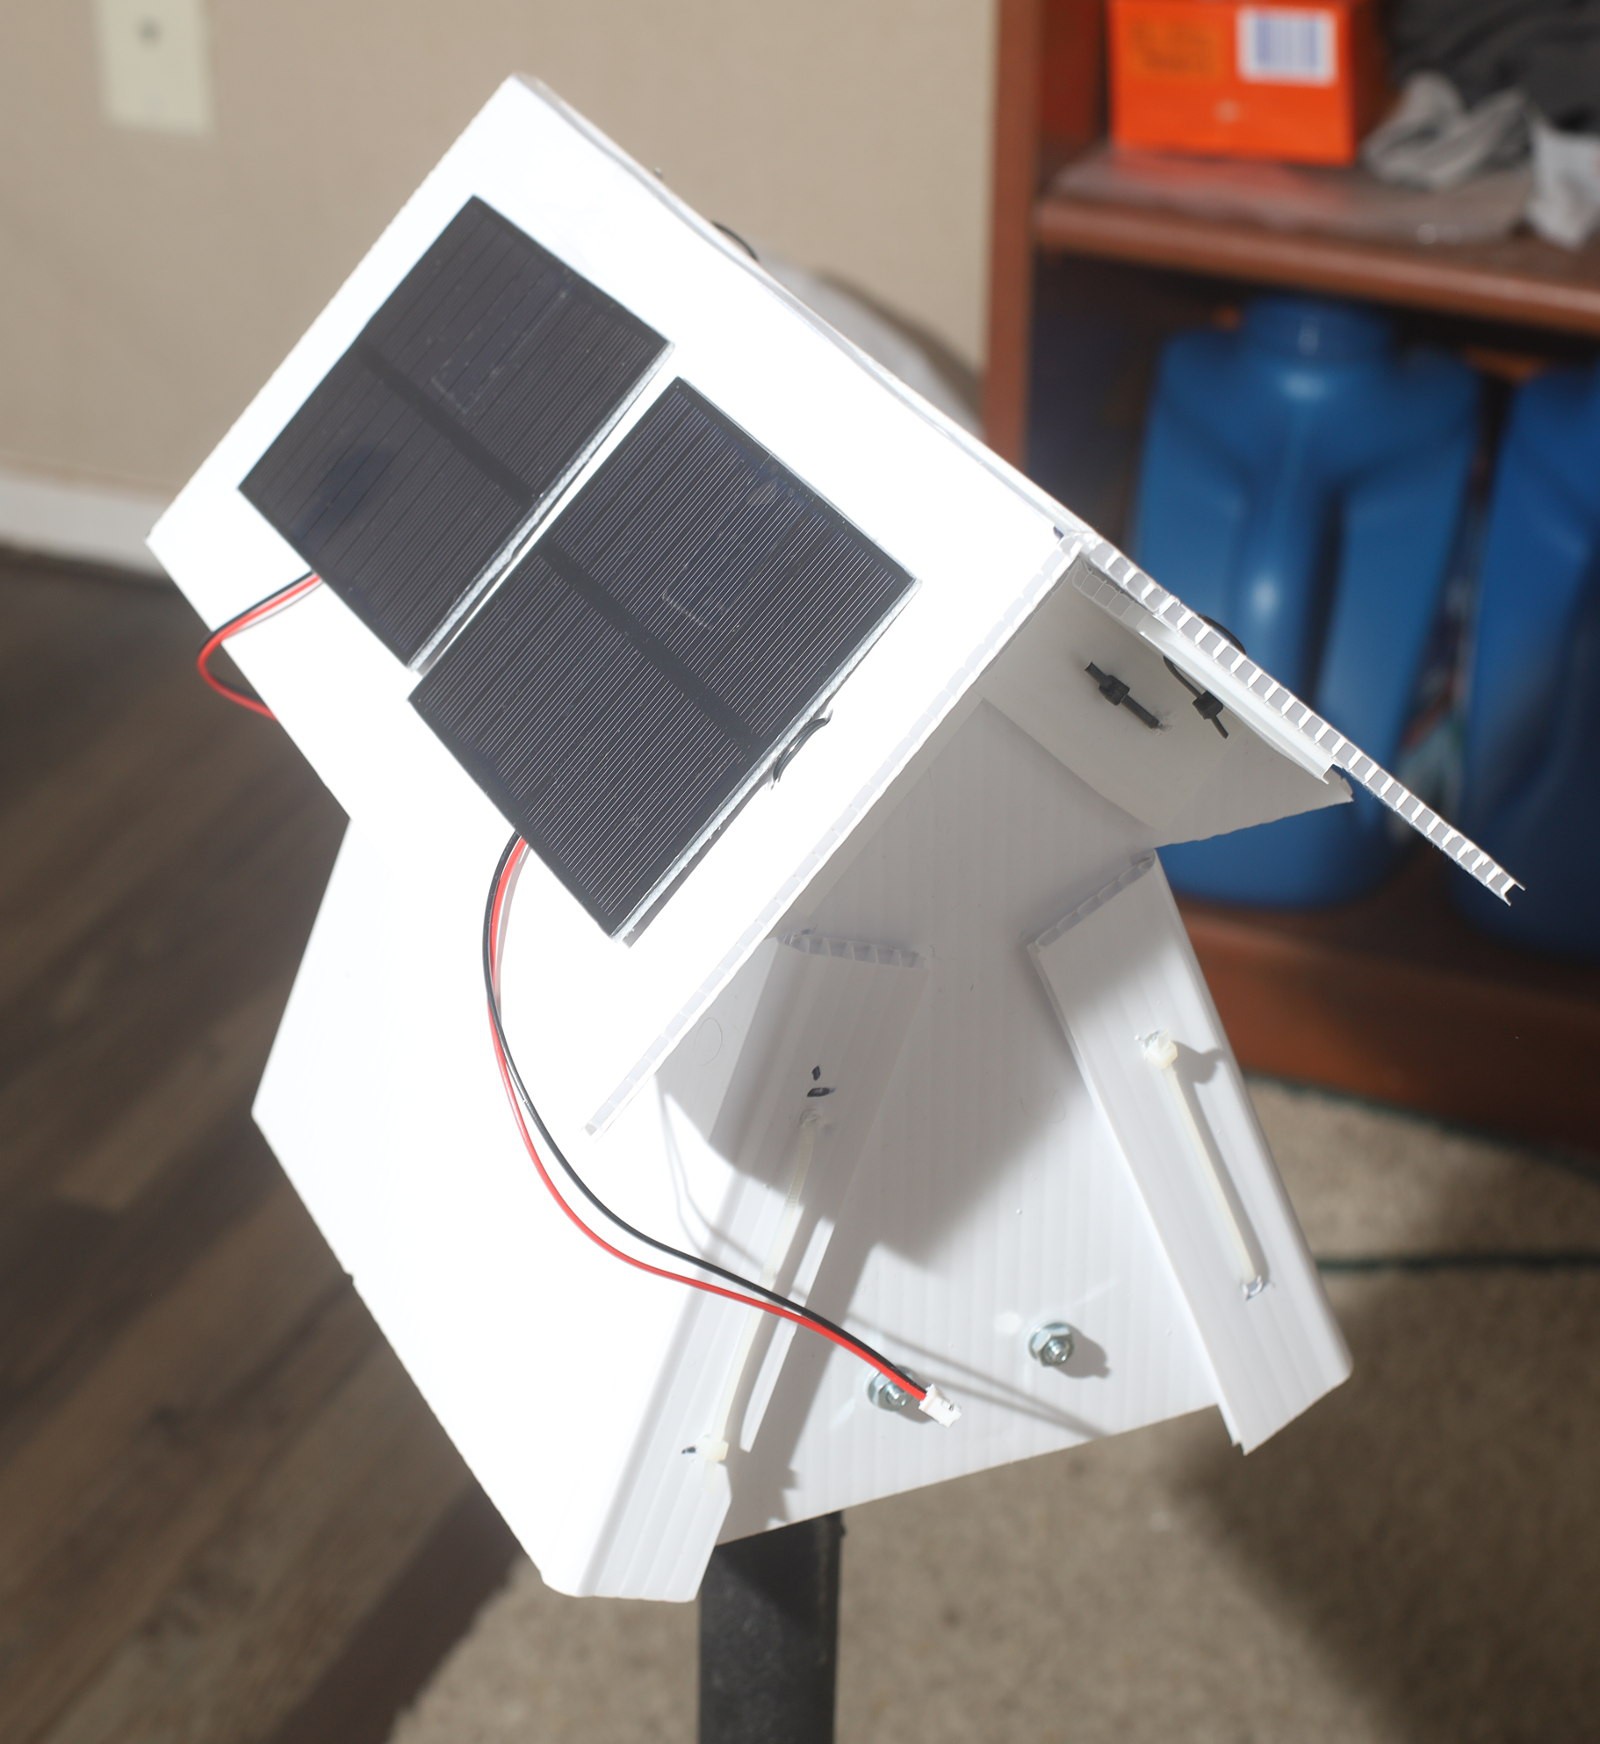
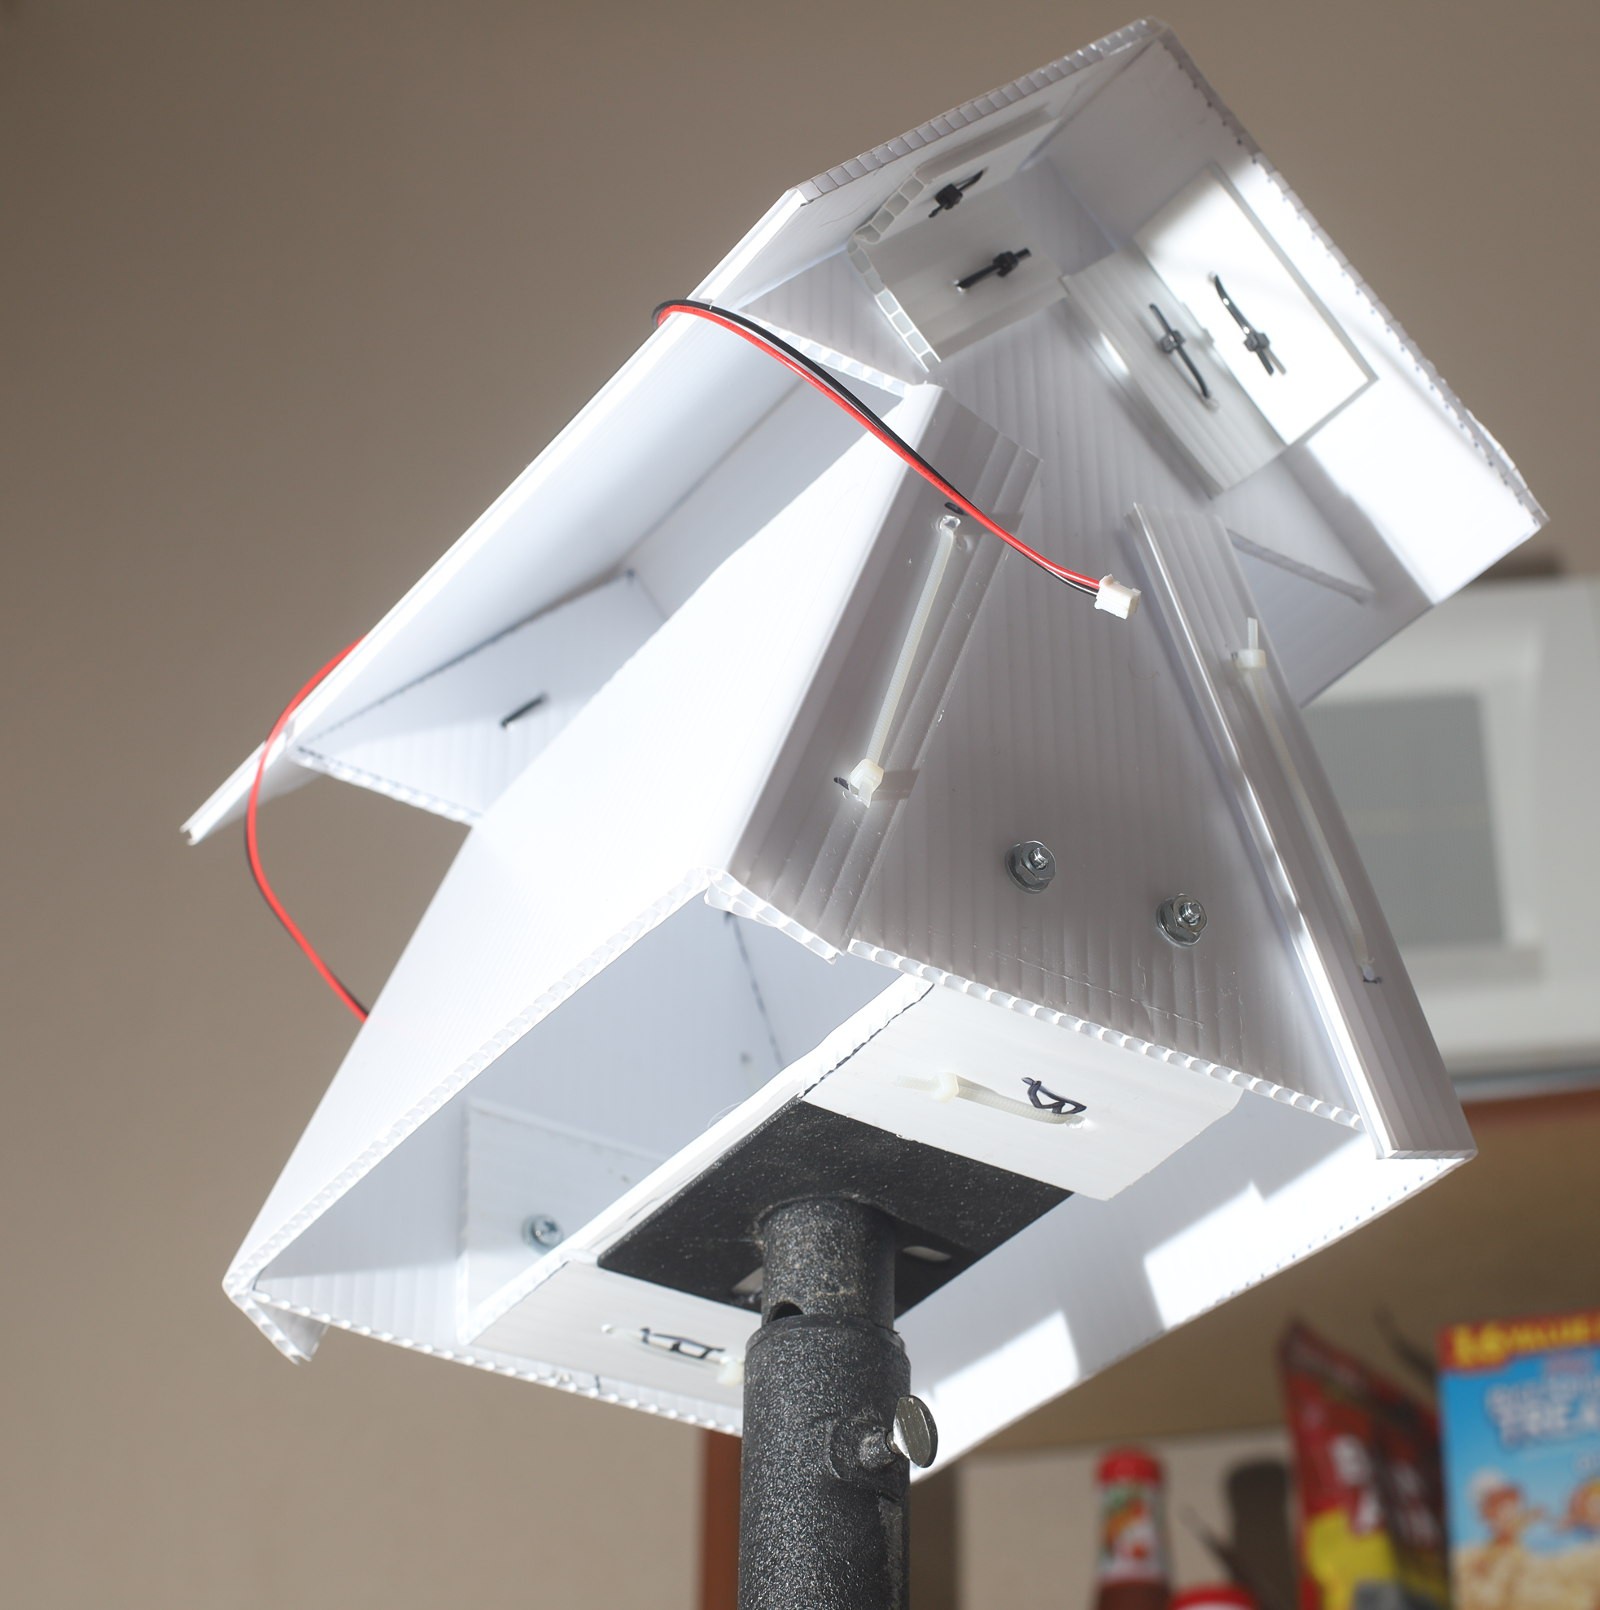
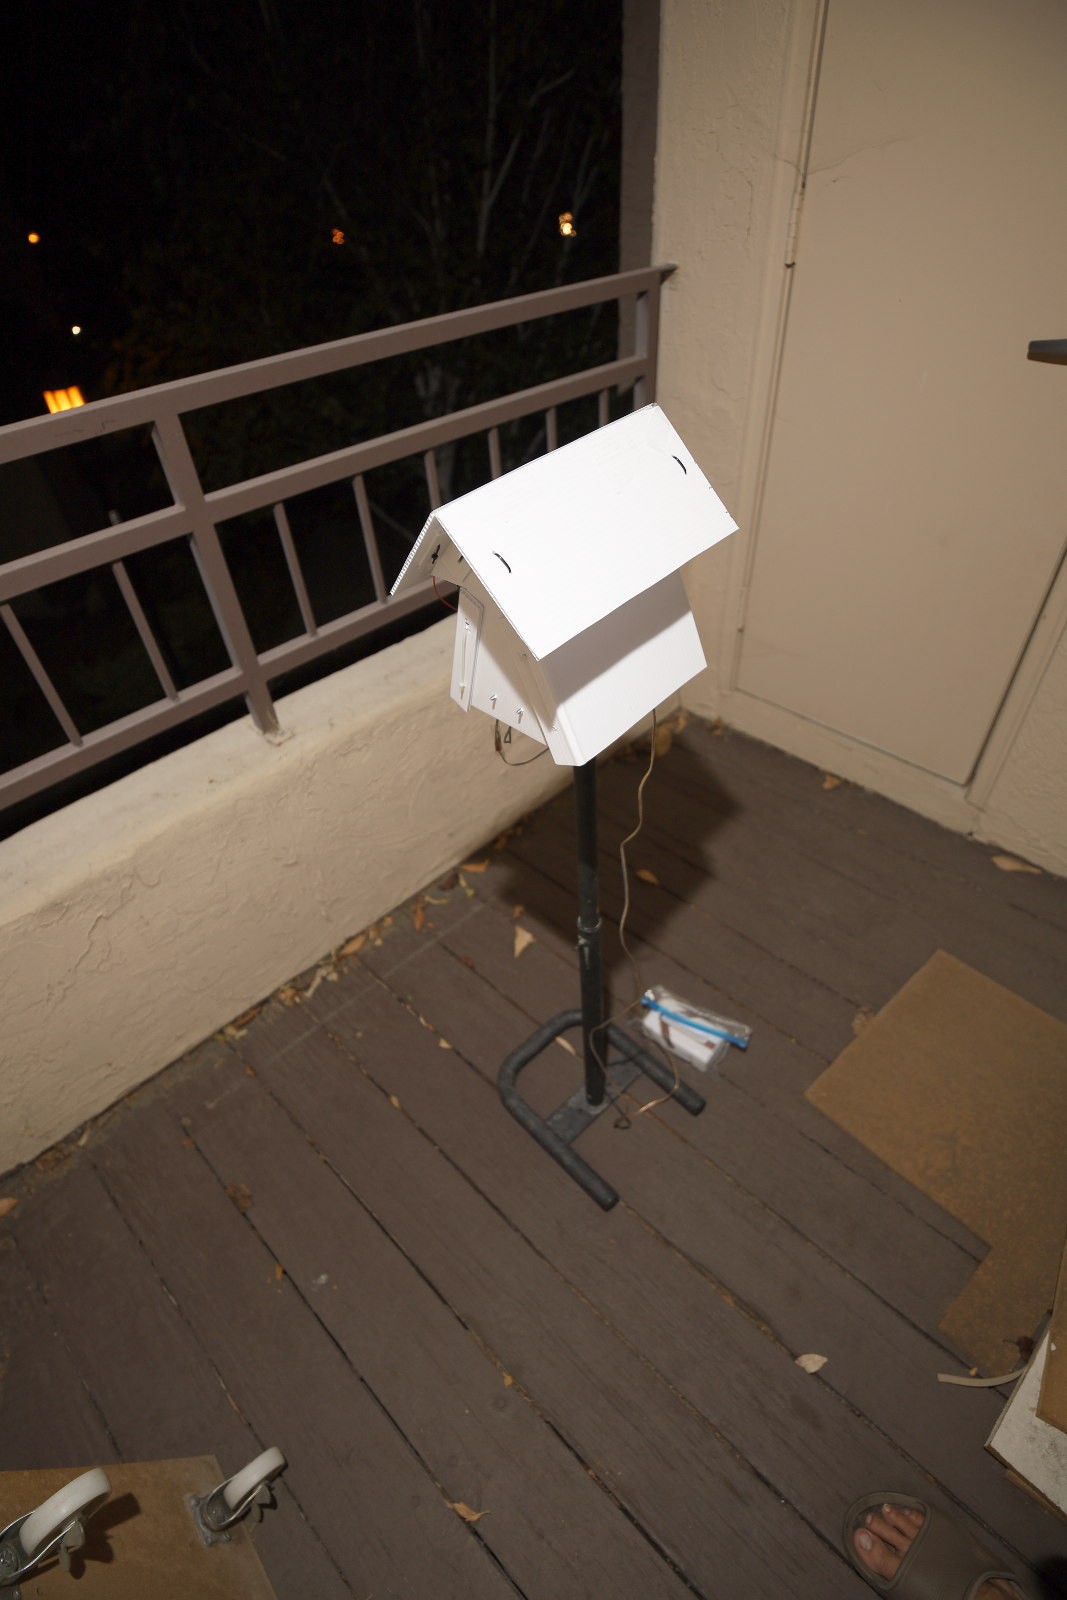
It was frustrating to discover despite being only a temperature sensor in a very suboptimal location, the enclosure still needed to be a proper weather station enclosure to get good results. Much cardboard prototyping yielded something like a bird house with a way to access the innards. Now the lion kingdom knows why it needed to keep around a speaker stand for 20 years. The mane problem is keeping the wind from giving the neighbors a free $90 thermometer. It's cost as much just to get temperature as a full chinese weather station.
![]()
![]()
![]()
![]()
![]()
Thermometer with a smile, you might say.
![]()
Junk NiMH battery from an ECX Ruckus rated for 7.2V.
![]()
Waterproofing the battery.
![]()
Trying to protect the electronicals from condensation.
![]()
Failed attempt to isolate the thermistor from conducted heat.
![]()
The enclosure size was dictated by the solar panels.
![]()
![]()
The electronicals were buttoned up & it was put outside. The thermister was 5 deg higher than wunderground at night & 15 deg high by day . The fluke was 20 deg higher than wunderground at night & bang on by day, despite being in the exact same place inside the enclosure. Location of the thermistor inside the enclosure affected temperature. The area without circulation was much hotter than the area with circulation. When indoors, the thermistor was bang on.
The thermistor:
https://www.digikey.com/product-detail/en/littelfuse-inc/DC103G9G/615-1054-ND/1783432
![]()
![]()
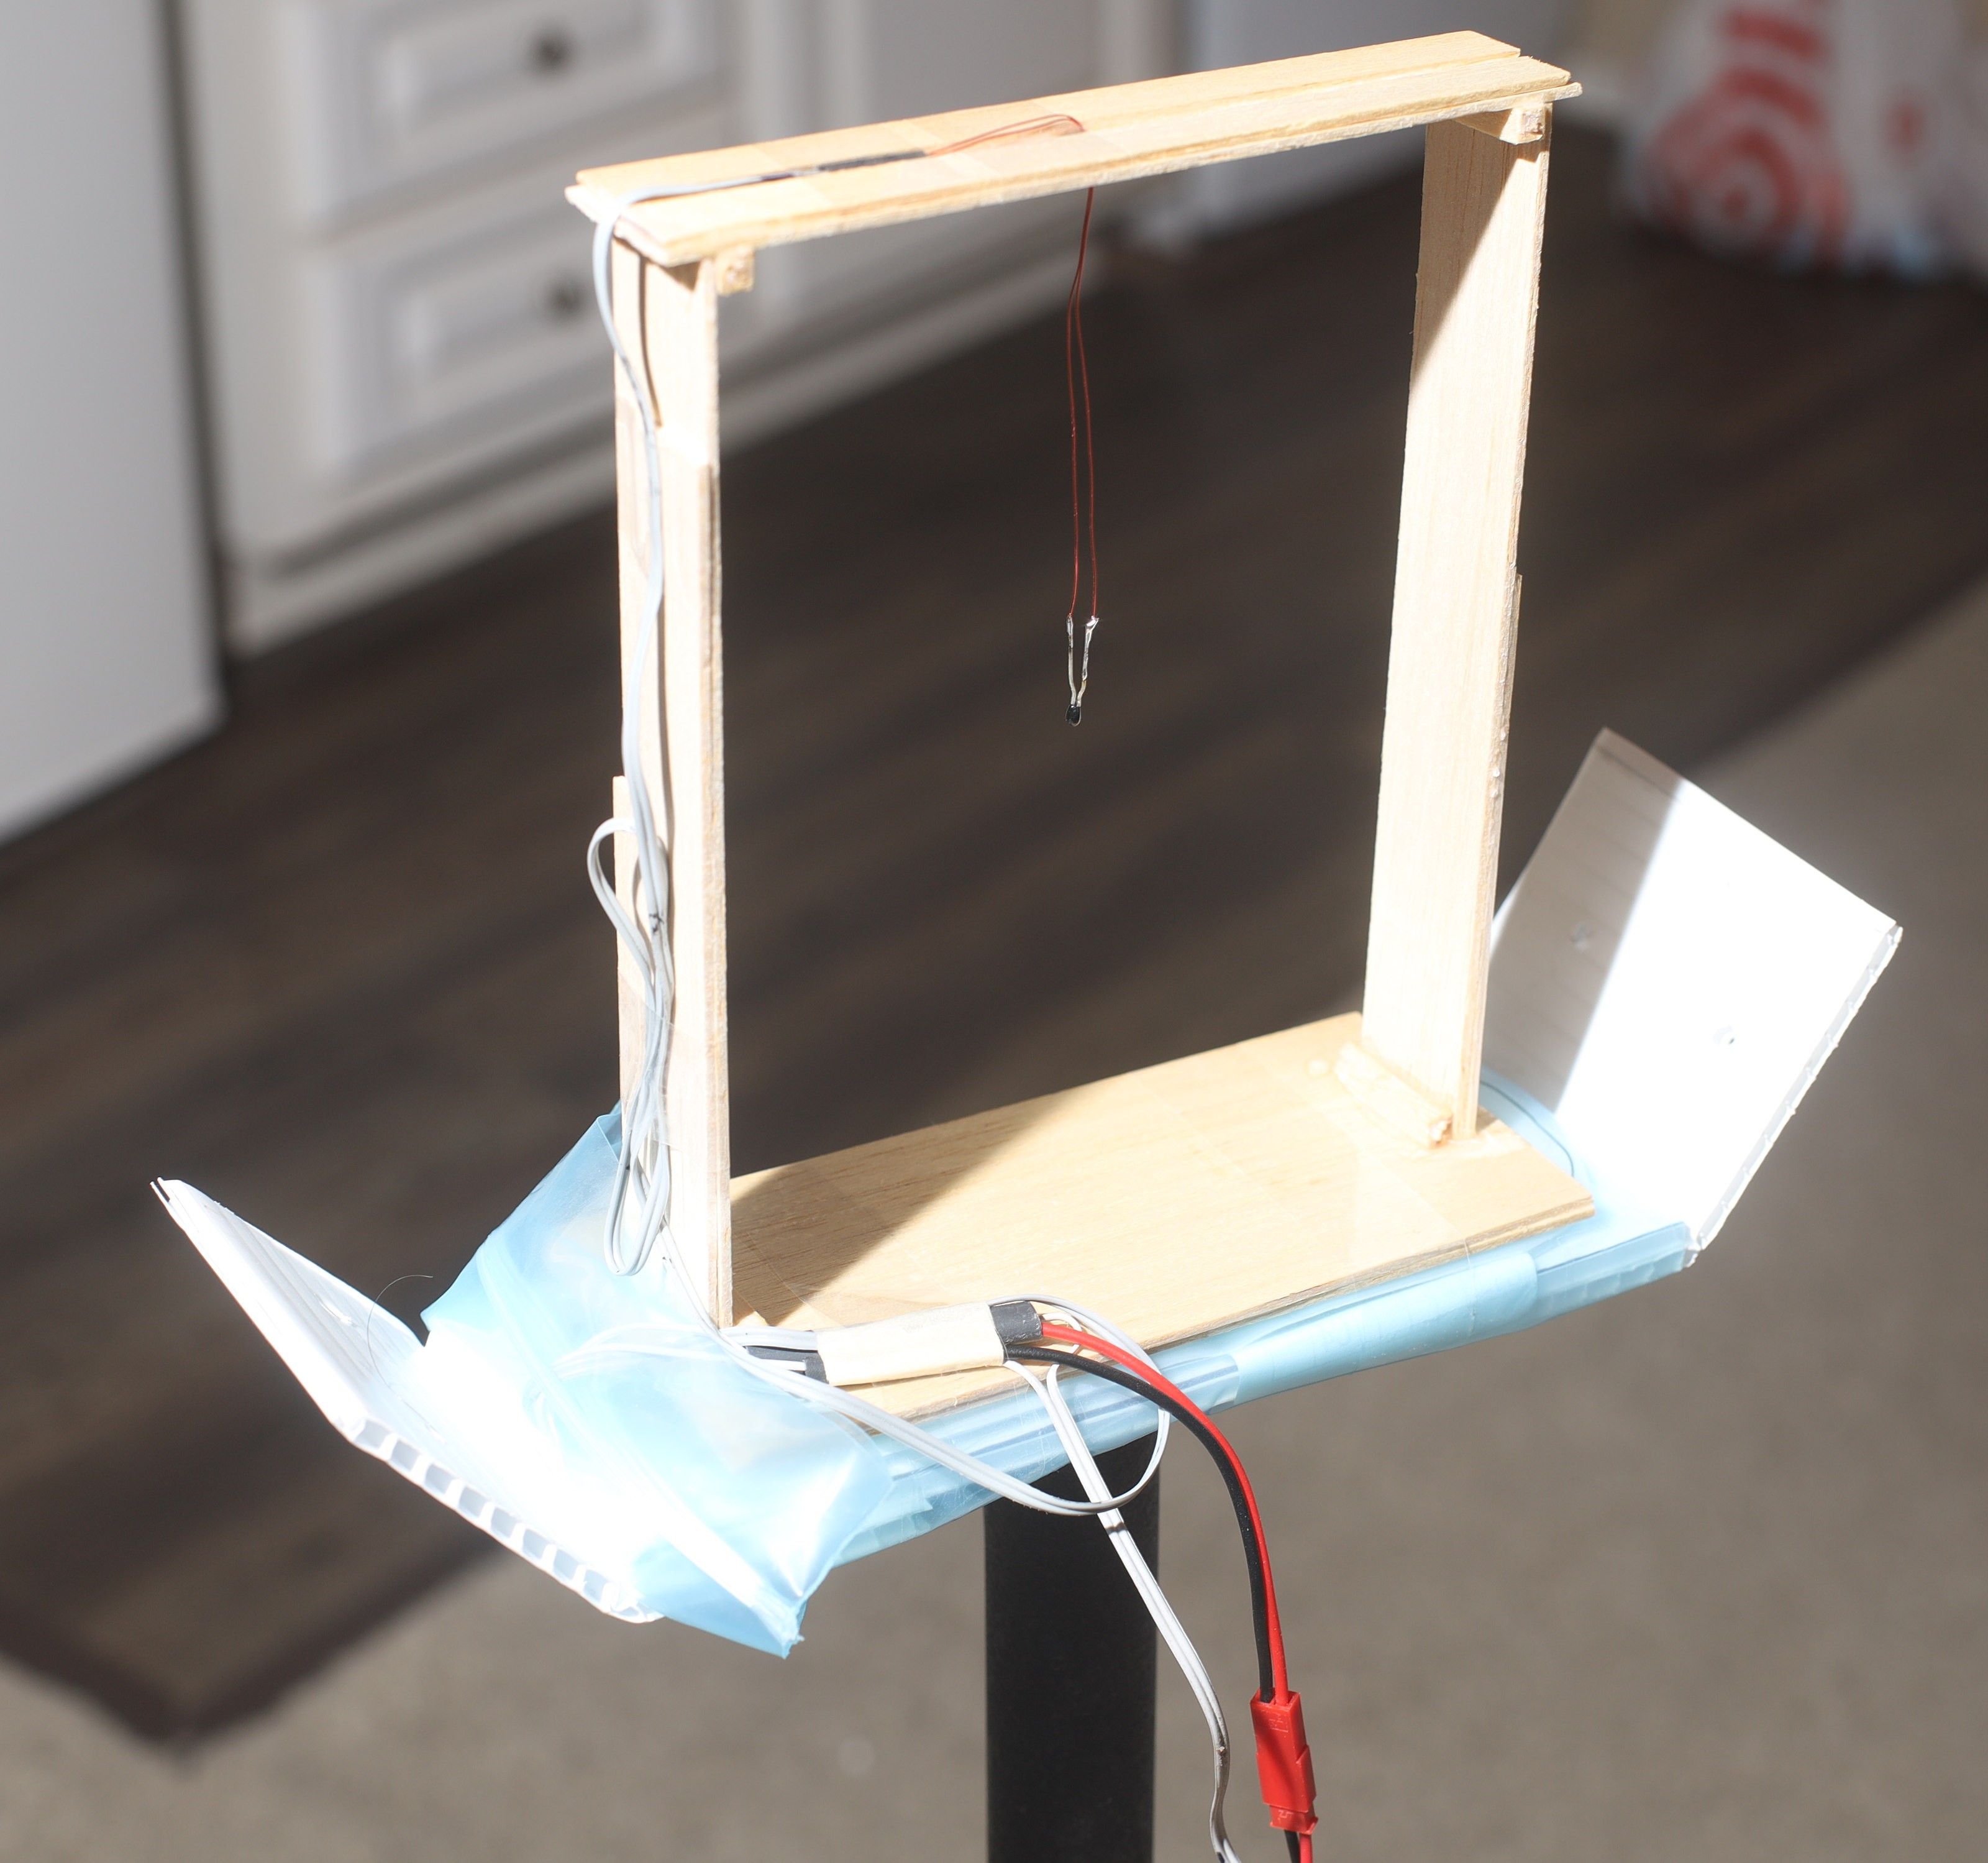
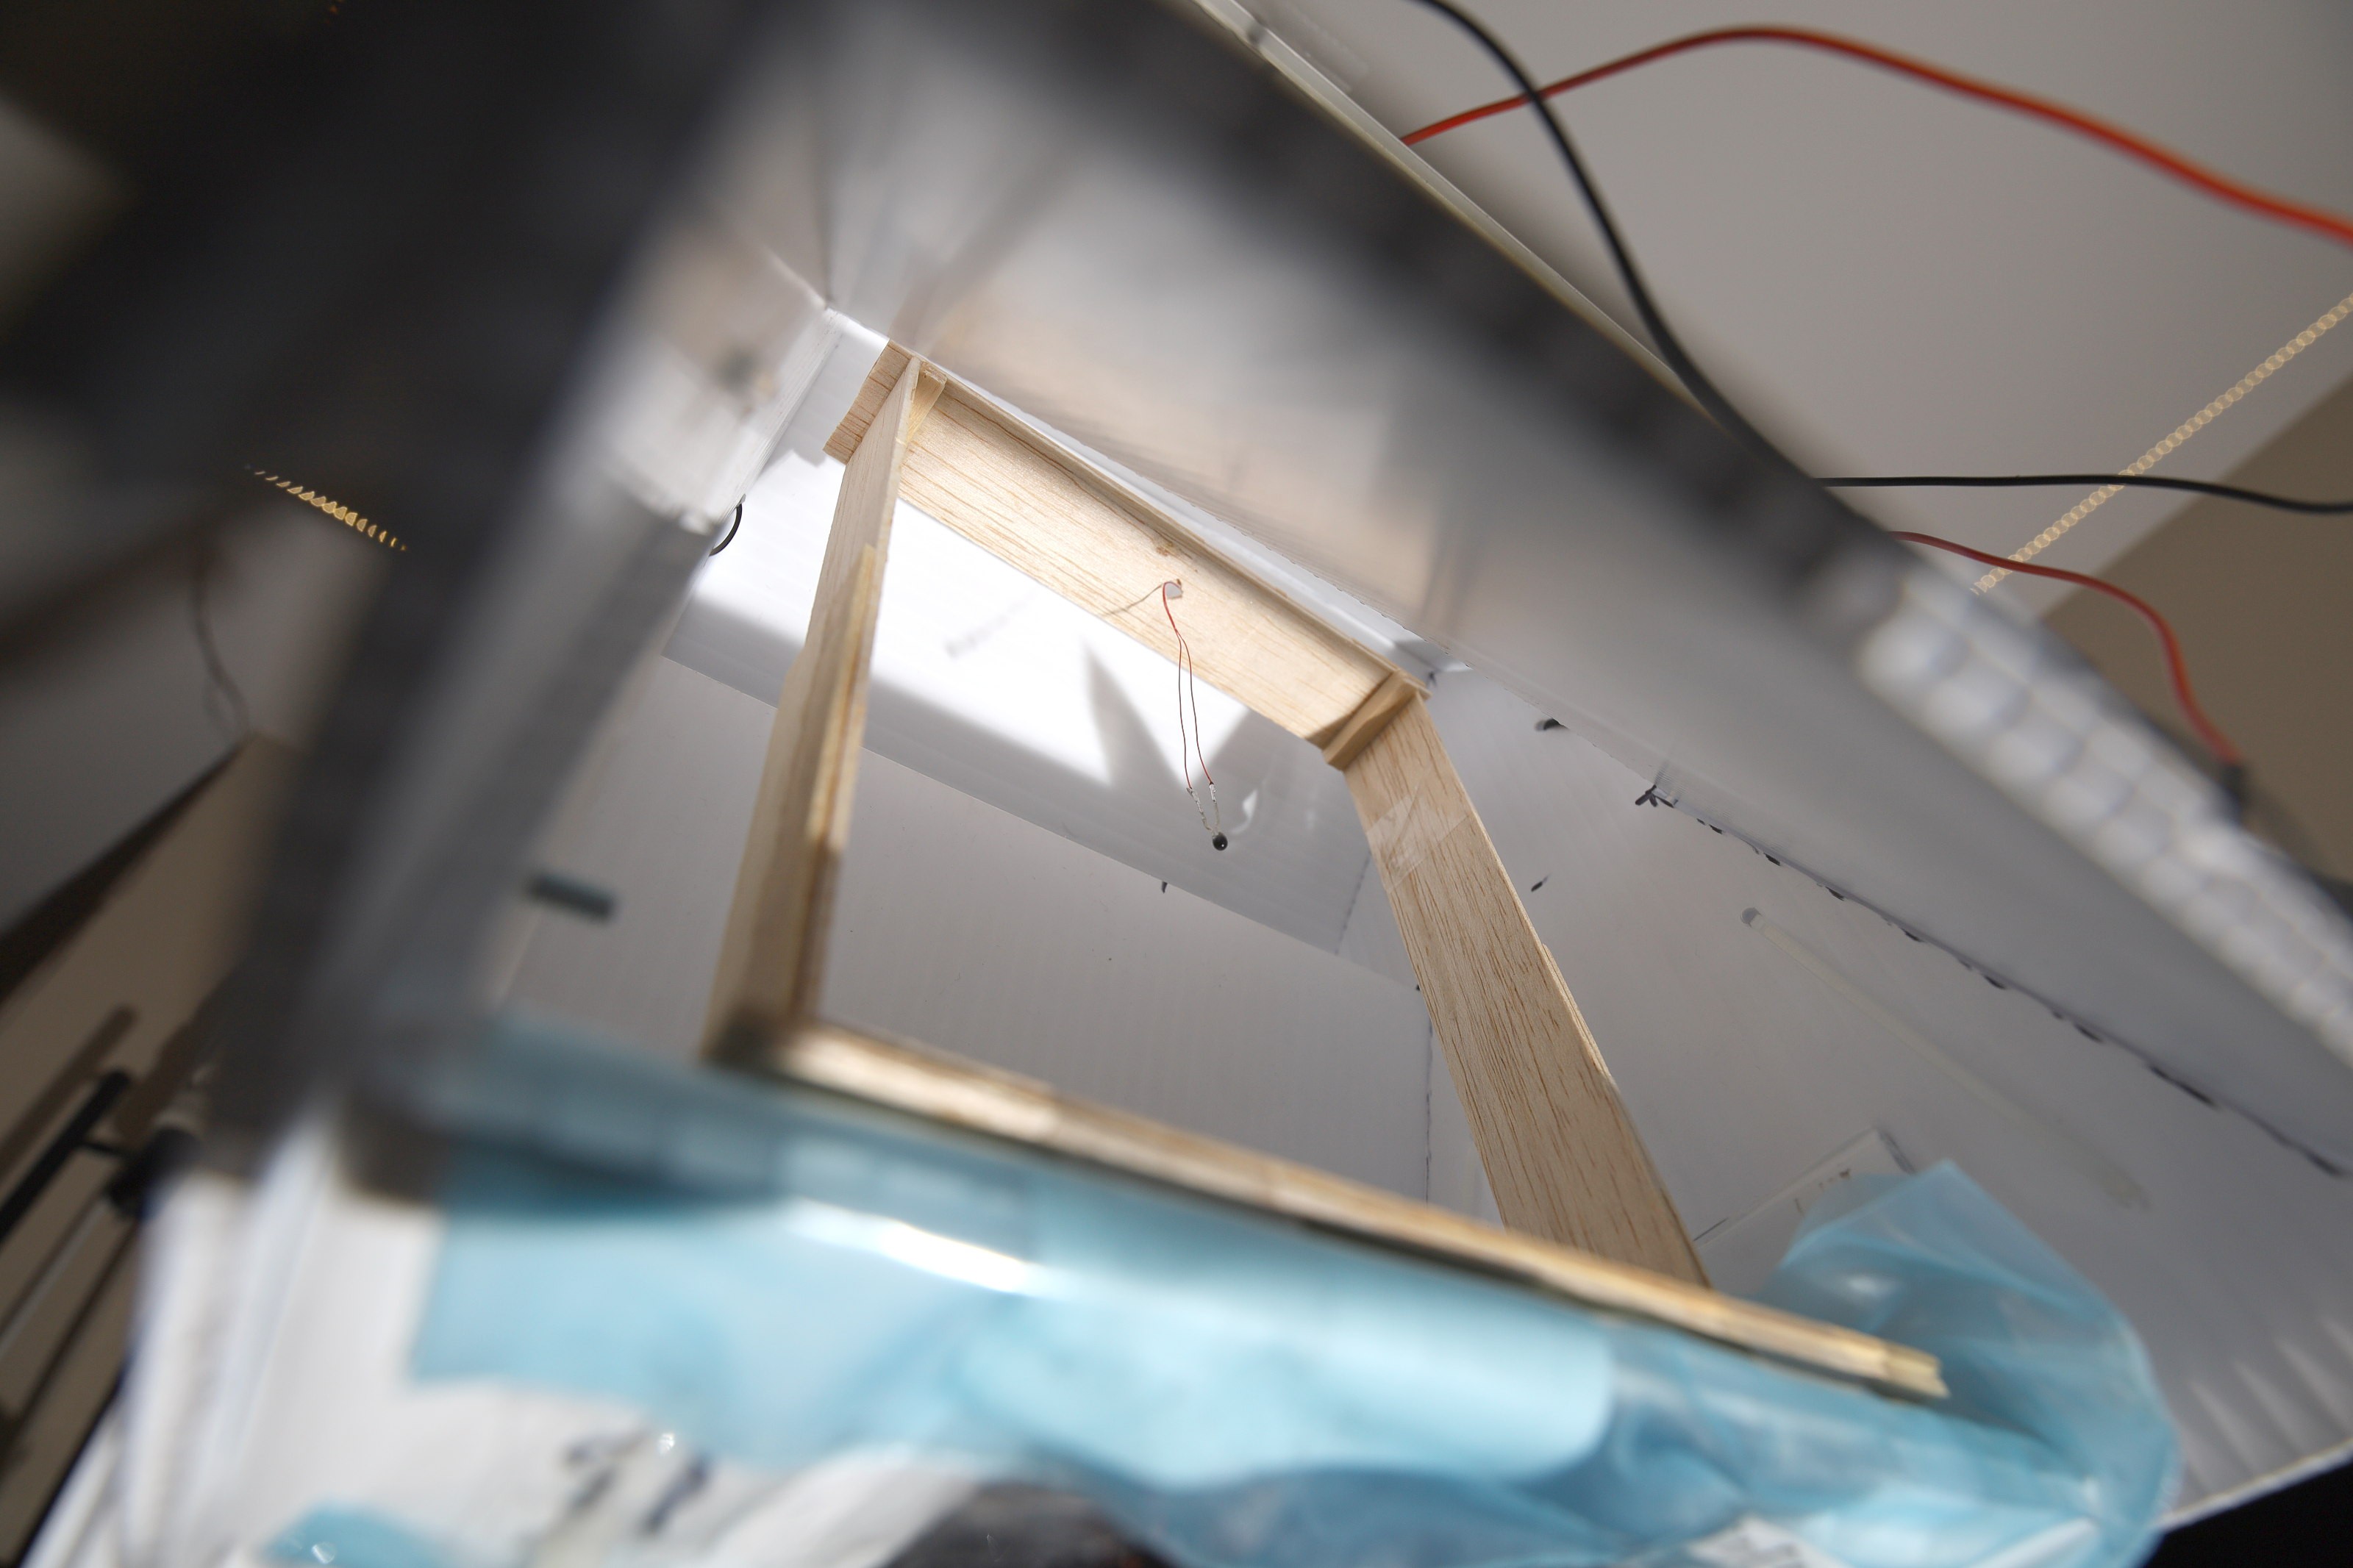
A full day of measurements revealed it suffered from heat conduction. A new assembly made of magnet wire & balsa would conduct less heat from the coroplastic. This was still higher than wunderground by 1 - 3 degrees but much closer. If it was exactly the same as the wunderground stations, it would be a waste of time.
Discovered the best way to check the thermistor is putting the fluke in the HVAC inlet. That shows the thermistor with its magnet wire suspension is within 1 degree of the true outdoor temperature & the outdoor temperature really is a few degrees off of wunderground. It's been surprising how accurate these home made thermometers have been, since they're solving the Steinhart–Hart equation in fixed point math.
The key to measuring air is to overcome the self temperature of the fluke. The fluke's self temperature isn't a problem in its normal task of measuring metal because metal has a higher heat capacity, but it is a problem when measuring air because air has a low heat capacity.
![]()
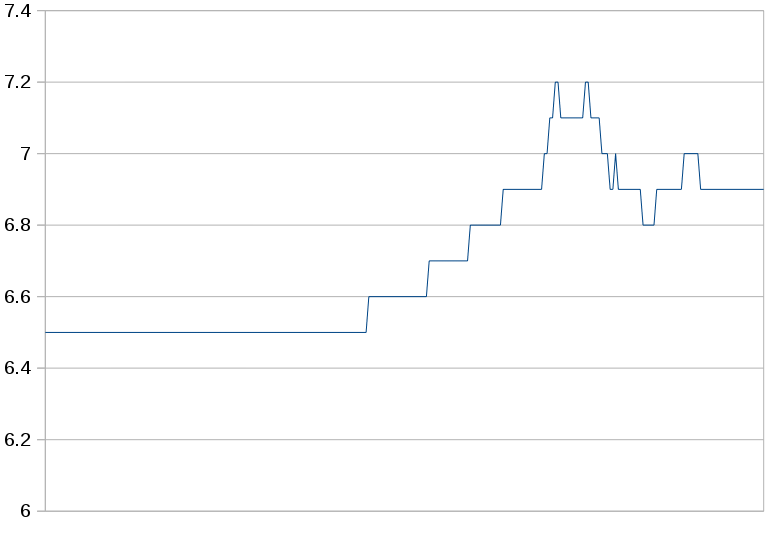
The 1st day of solar charging revealed acceptable results with the radio transmitting every 30 seconds & the ADC sampling every second. It managed to get a net charge without direct sunlight. Only a brief period with direct sunlight got it to 7.2V. It finished the day with higher voltage than yesterday.
It'll never fully charge the battery, but the idea is to have enough reserve capacity to keep the battery from getting hot. Sizing the battery to optimize the used capacity is a long term project.
It uses 2x 1W 8.2V panels in series.
https://www.digikey.com/product-detail/en/seeed-technology-co-ltd/313070005/1597-1418-ND/5488048
![]()
![]()
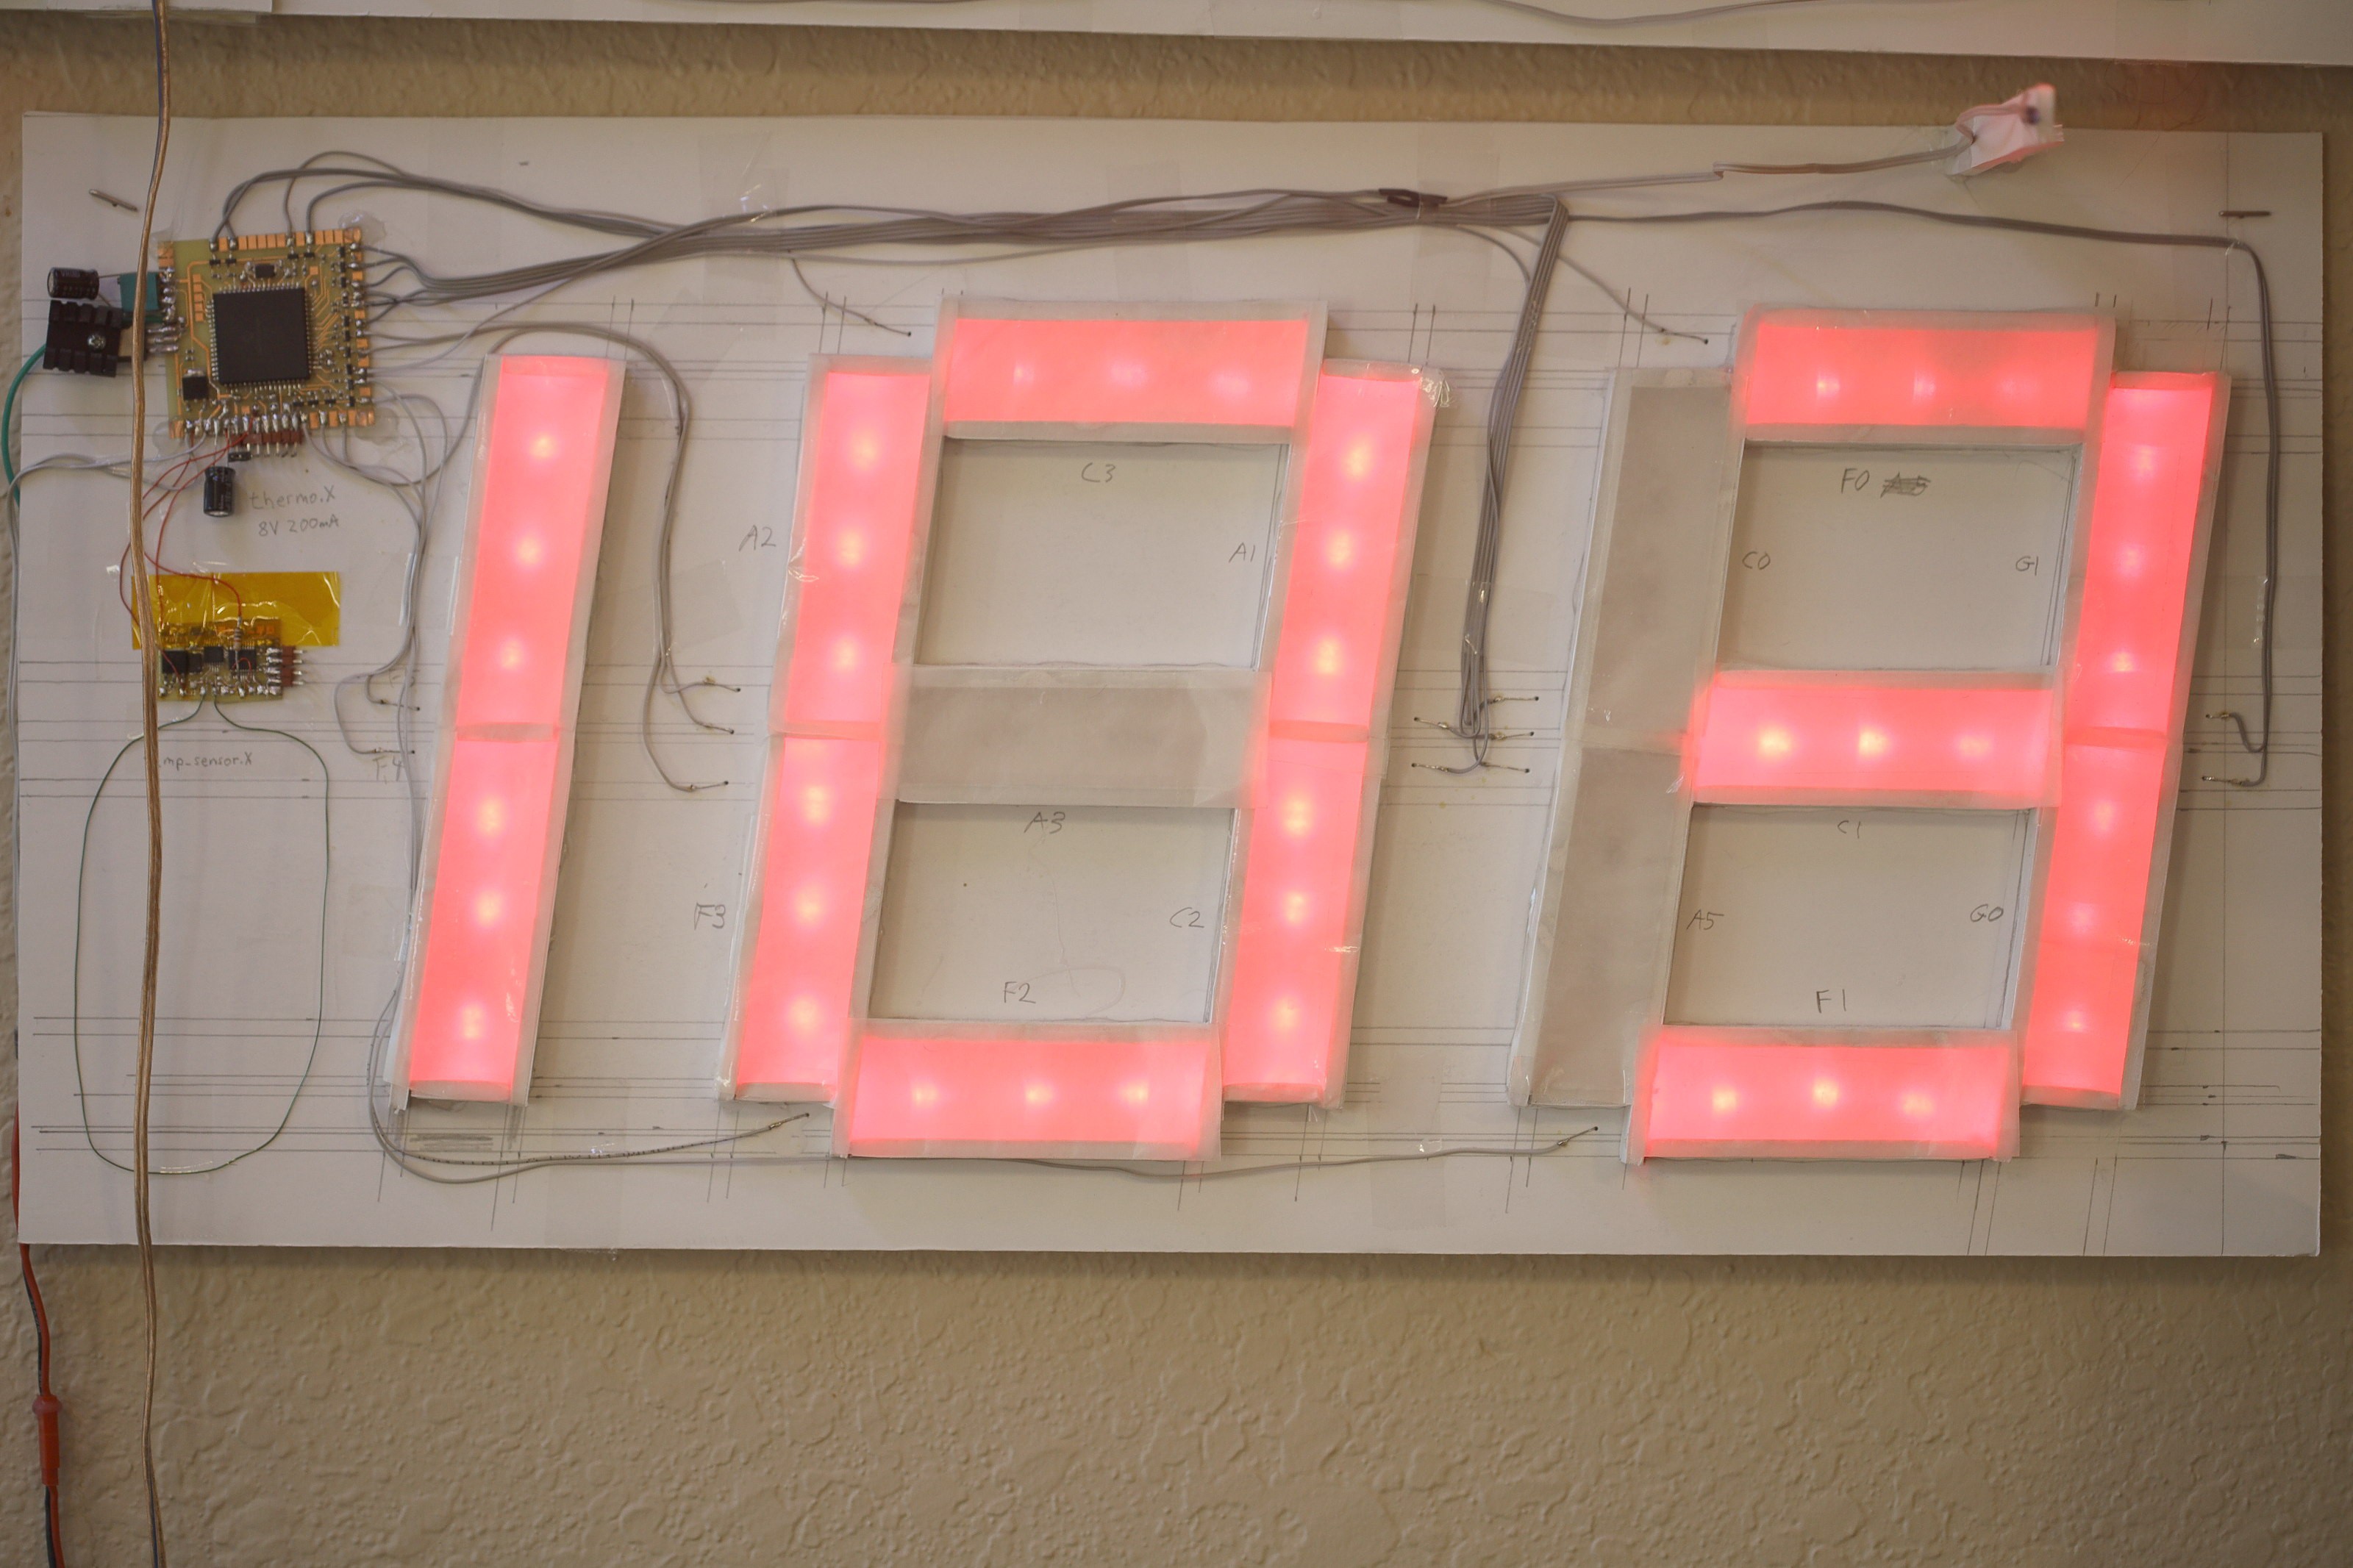
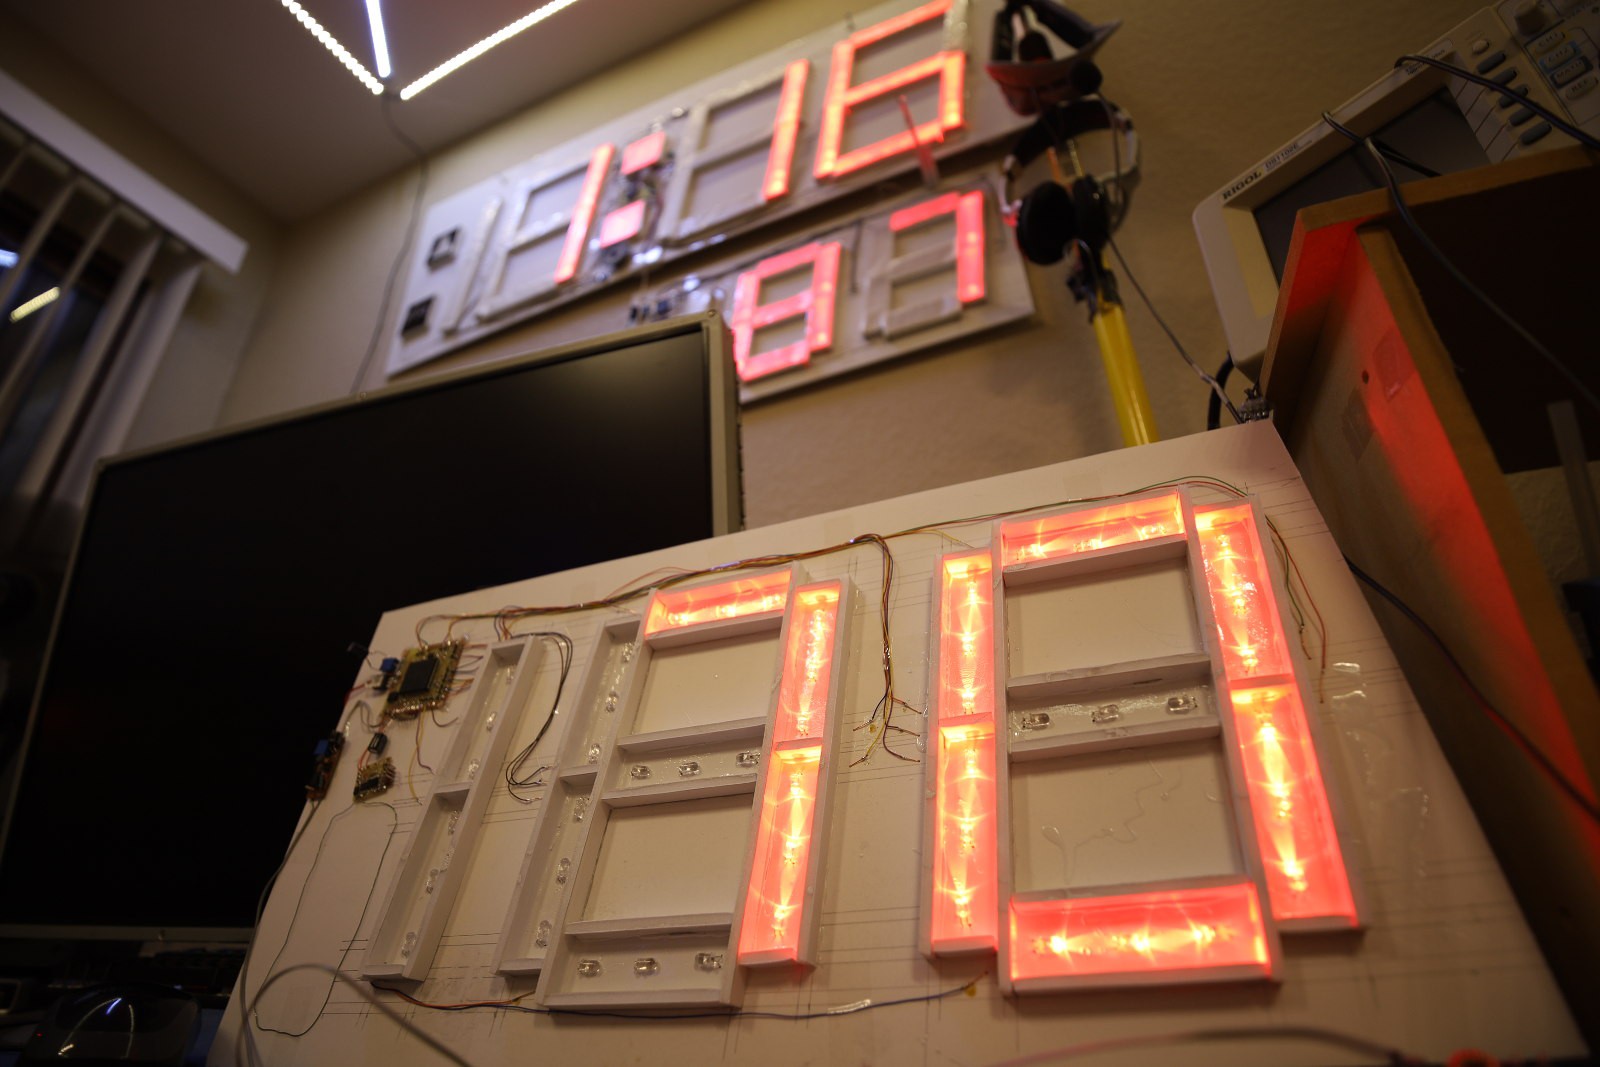
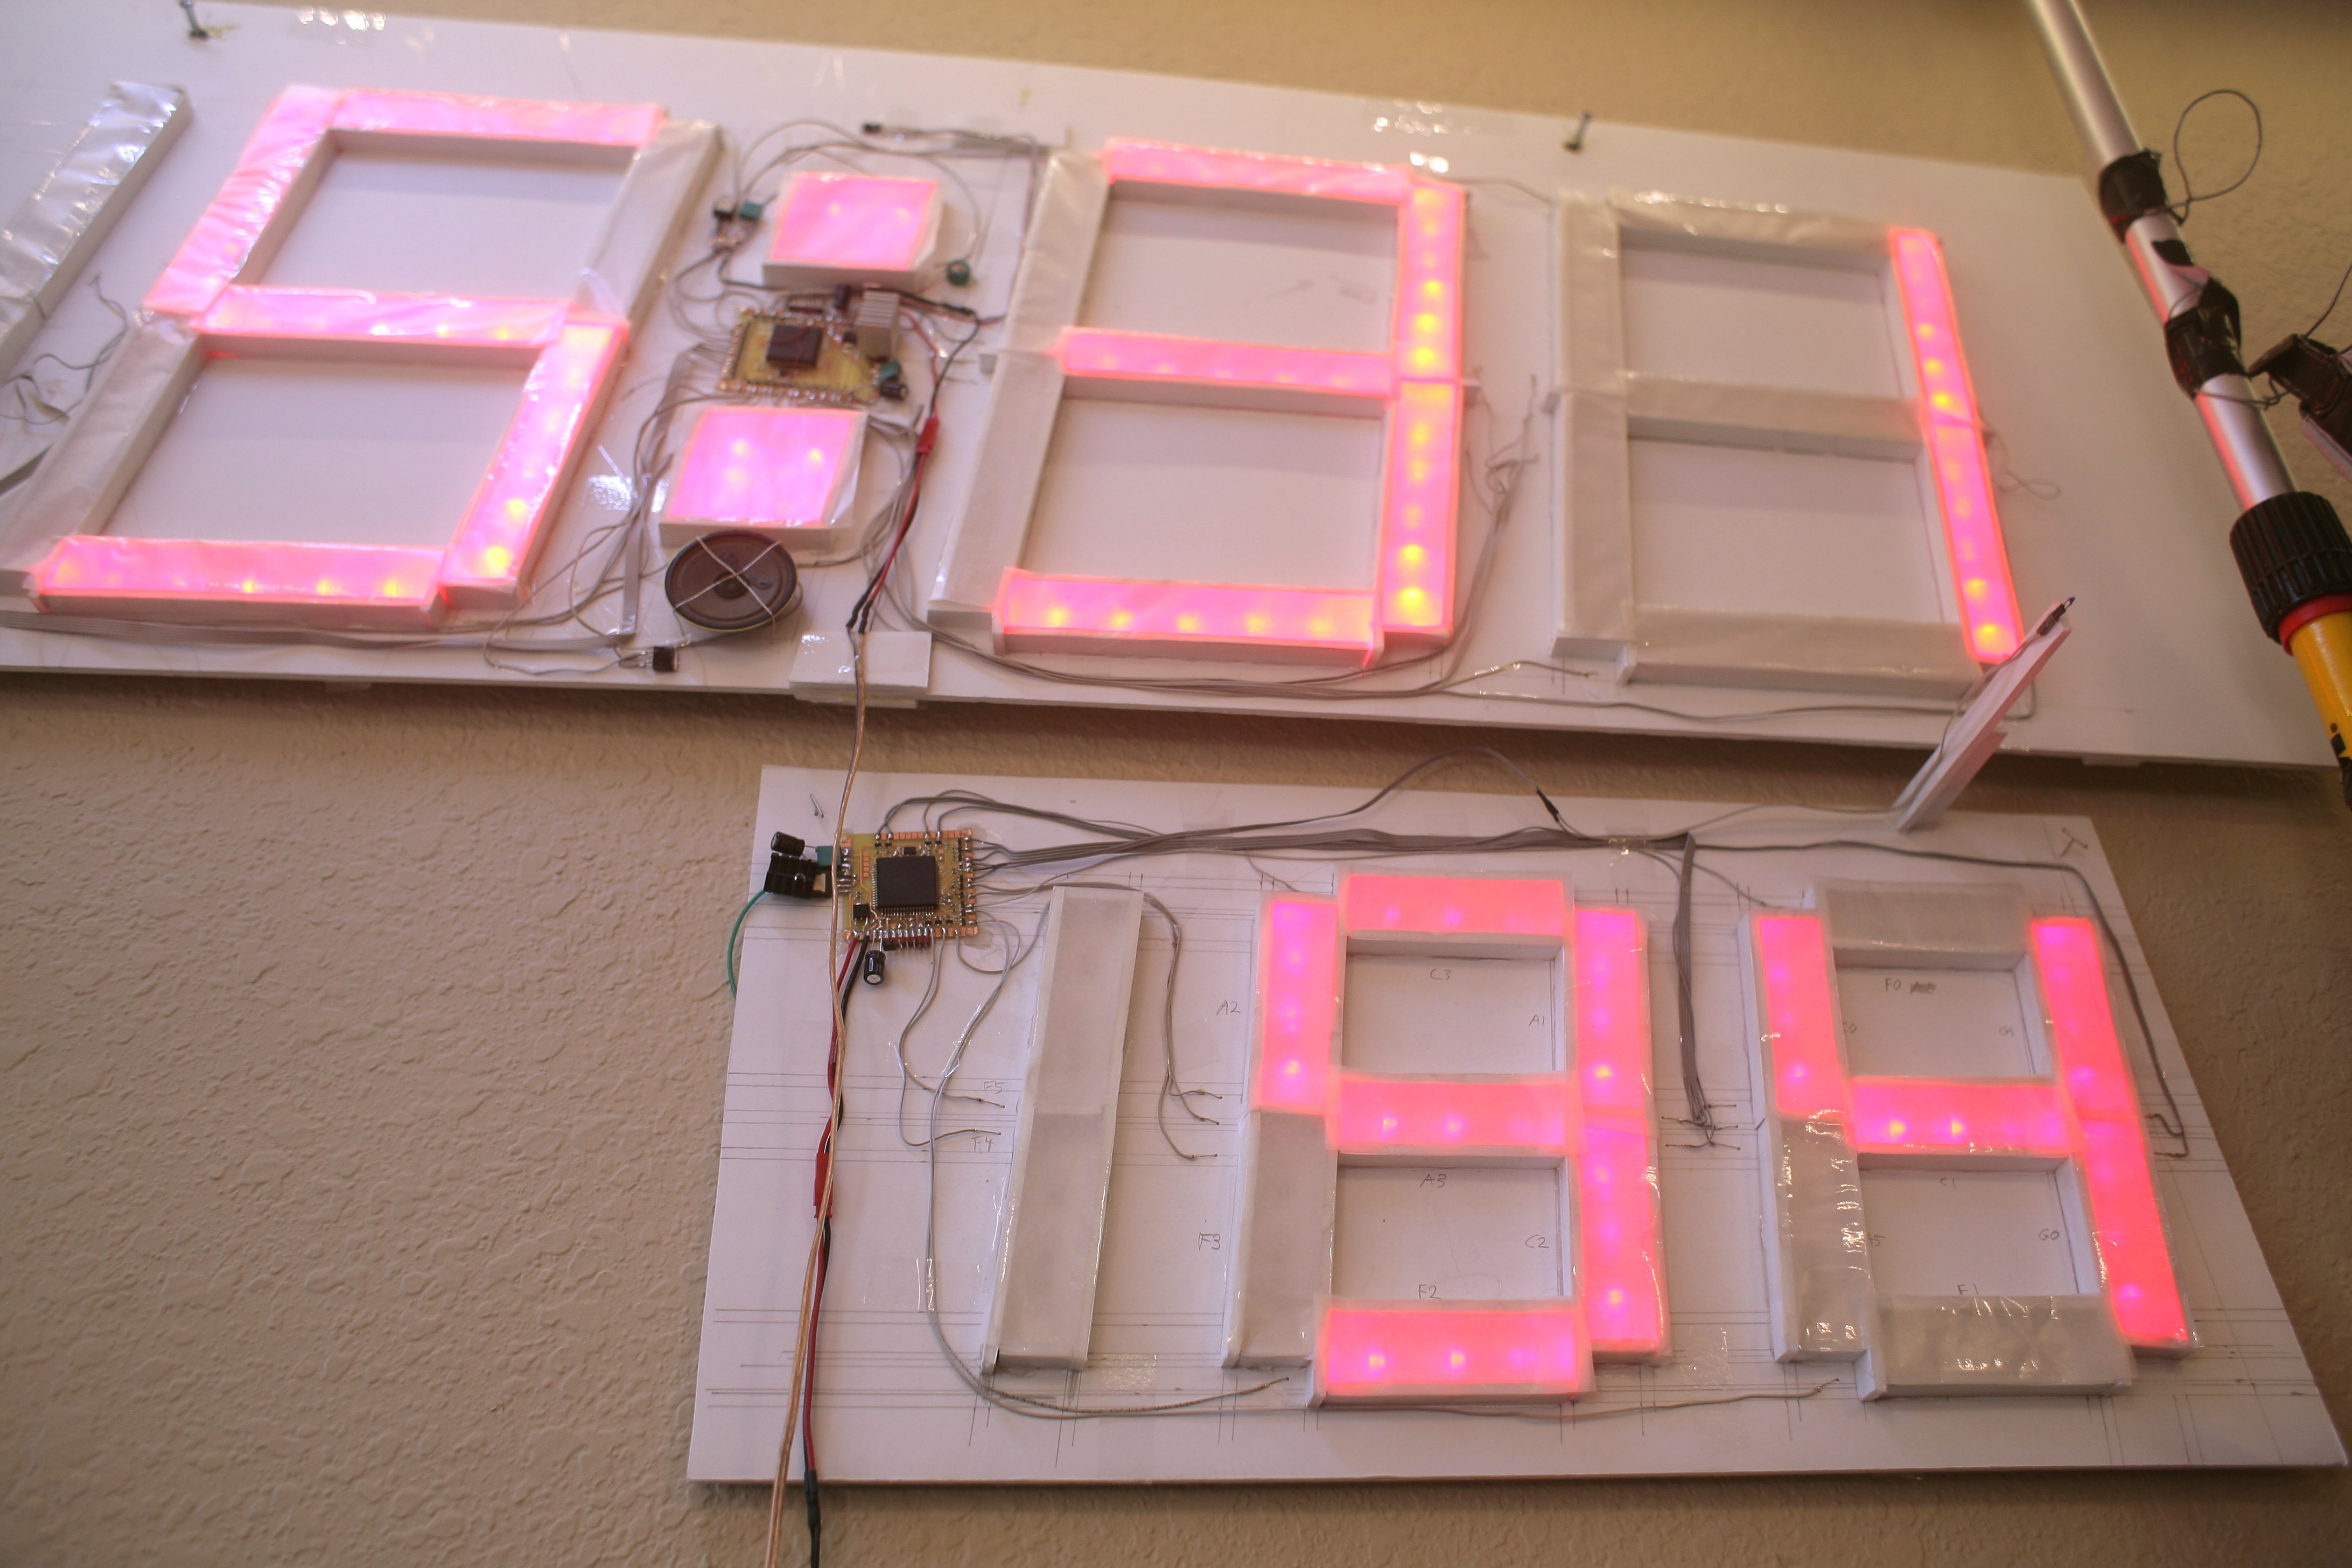
Getting the outdoor panel up to a readable state got the entire 4 radio mesh running. It was the lion kingdom's 1st temperature display which relied on a radio instead of a thermistor directly connected to it. When it doesn't get a packet for 1 minute, it shows an invalid code rather than an obsolete temperature.
![]()
![]()
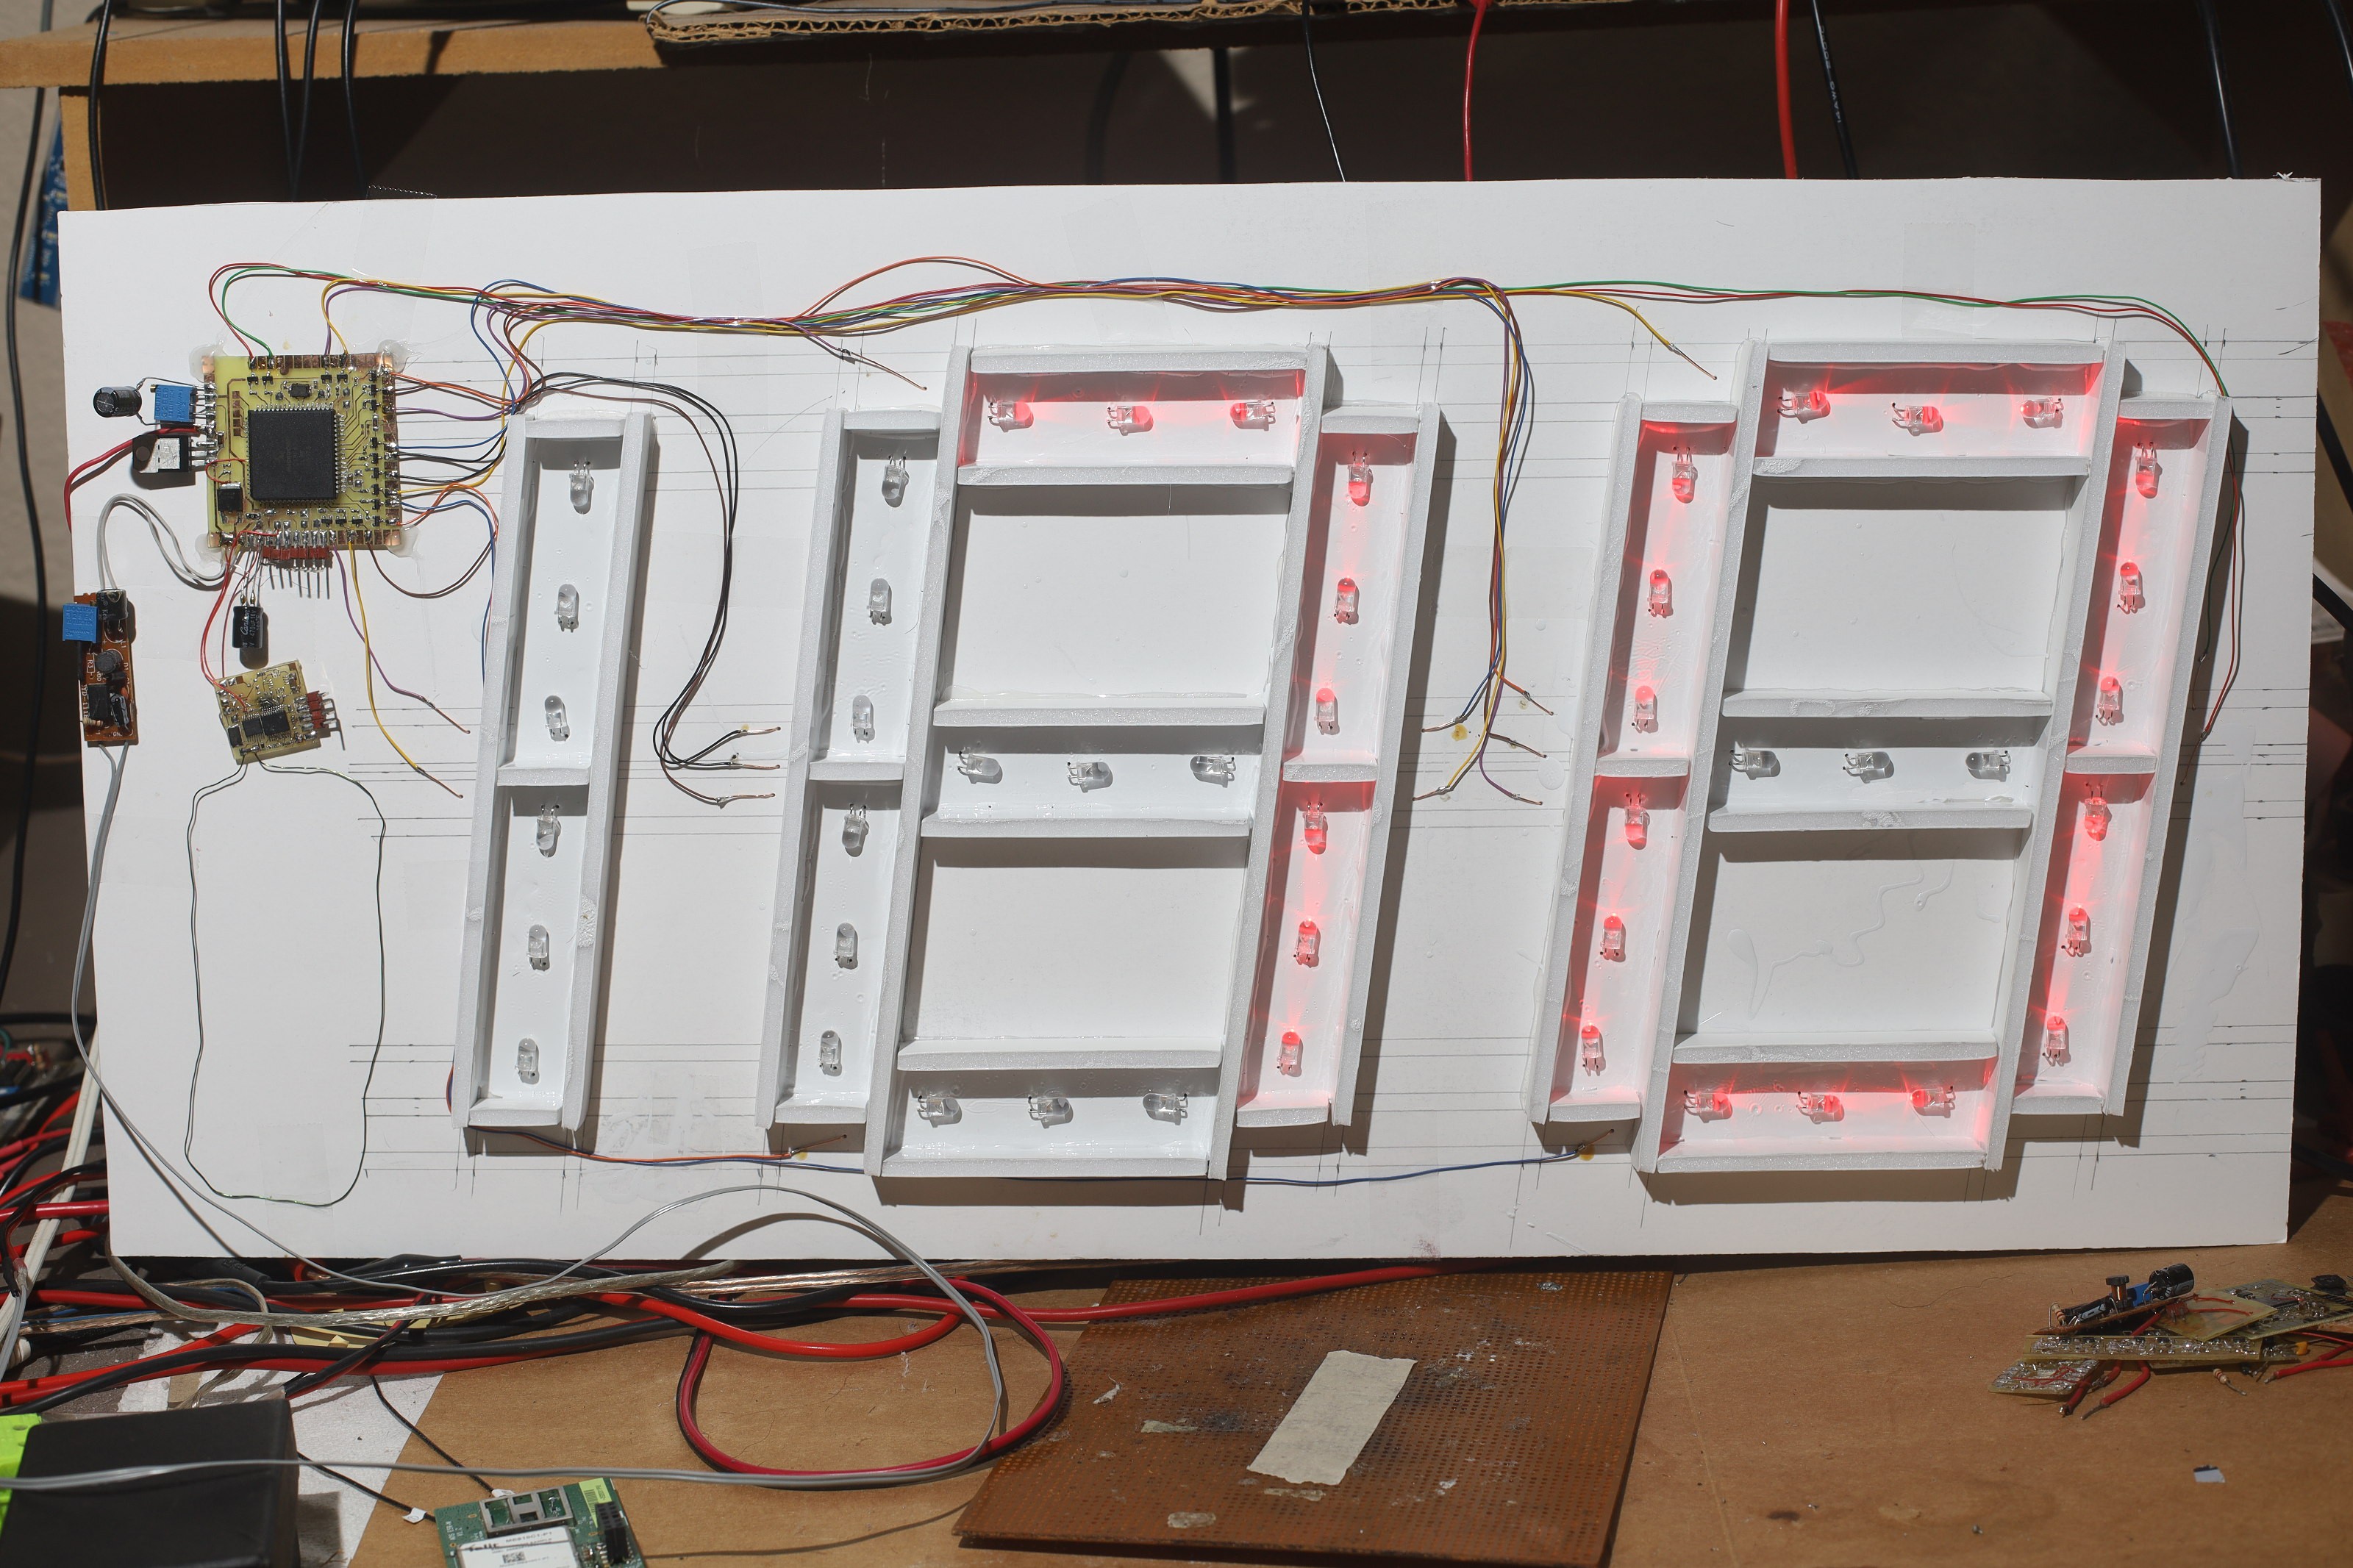
The lion den command center was complete.
![]()
The lion kingdom realized there are better diffusers than wax paper, which would look a lot better. The wax paper dates back to heroineclock 1, which tried to minimize cost. When the solar panel costs $25 & the coroplastic is $20, the diffuser isn't an obstacle anymore.
![]()
![]()
Used wrapping wire instead of ribbon cable for this one & it looked the cleanest. The $1 car USB chargers were finally used as buck converters for the input power. Those are the last of the hackable car USB chargers.
-
Exterior temperature plan
08/10/2020 at 04:42 • 0 commentsWith no need to spend all day commuting, there has been a growing desire to measure outdoor temperature without the grid & recording the indoor temperature. There are a lot of temperature sensors on the internet, using ESP32 & ESP8266 boards, exotic capacitors, lithium phosphate batteries, space grade solar panels, sucking megawatts of power to promote the latest wifi standards. It's all a bit overkill, but representative of a time that emphasizes very suboptimal, off the shelf parts using every multibillion dollar consortium's bloated standard.
The lion kingdom still has a lot of very optimized parts for this task from 10 years ago, when everything was purpose driven & had to be built from scratch. Lions in those days evolved the equivalent of an IOT board out of a PIC18f14k50 & SI4421. It used a milliamp at most when transmitting, & 3.3V. The power consumption was so low by today's standards, it could run on some NiMH batteries & very cheap solar panels. Lions wouldn't use Lithium batteries for this task because of the daily cycling.A small armada of these boards was built 10 years ago for transmitting heading from copters. Today, they would be prized for their remote sensing ability. They could be reworked for transmitting temperature. The home router would have a board for receiving the packets.
![]()
![]()
There isn't enough room to display the outdoor temperature on a wall, but a web page could show it. The temperature display could also receive packets & alternate between the indoor & outdoor temperatures. There's no need to measure anything but temperature in Calif*.
-
Wishlist
07/28/2019 at 00:31 • 0 comments![]()
A lot hotter since the thermometer was installed. Lions have debated adding an exterior thermometer, a seconds display, & temperature logging.
The seconds display is the least likely. It would manely make it easier to wake up as close before the alarm as possible, but it would add a lot more blinking & it would be hard to see.
All enhancements to the thermometer point to a mesh network. The lion kingdom has a supply of XBees, but they use a lot of power. Temperature logging for the indoor thermometer would have unlimited power. Temperature logging outside would require solar power.
Heroineclock II
Giant clock from a PIC18F6585, 135 cheap LEDs, foam core posterboard, hot glue, lots of hot glue