Close
0%
0%

Replacement ThinkPad X201 DC Jack Shell

A replacement for the outer shell of a ThinkPad X201 DC input jack

Similar projects worth following
64 views
0 followers
(For the Repairs You Can Print Contest; I am interested in being considered for Best Student Entry.)

Last week I accidentally knocked my ThinkPad off of my mini fridge in my sleep. I woke up to it on the ground, and afterwards it refused to charge. I opened it up and found the shell for the DC input jack broken into about six pieces. I removed the bits of plastic, and as a temporary work-around plugged the charger directly into the metal bits that make the computer charge.

I'm currently enrolled in a "build a droid" class where we have to create and 3D print parts for a droid, and figured it could be fun to try to design and print my own shell for the input jack.

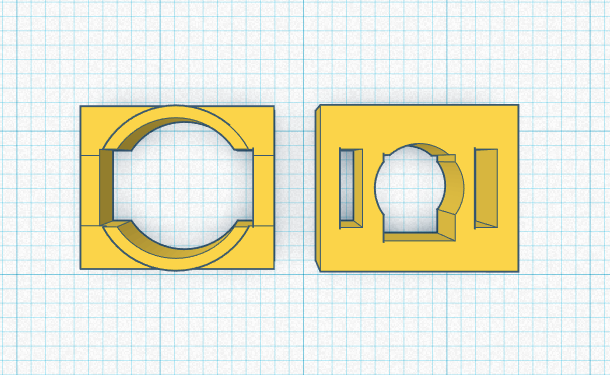
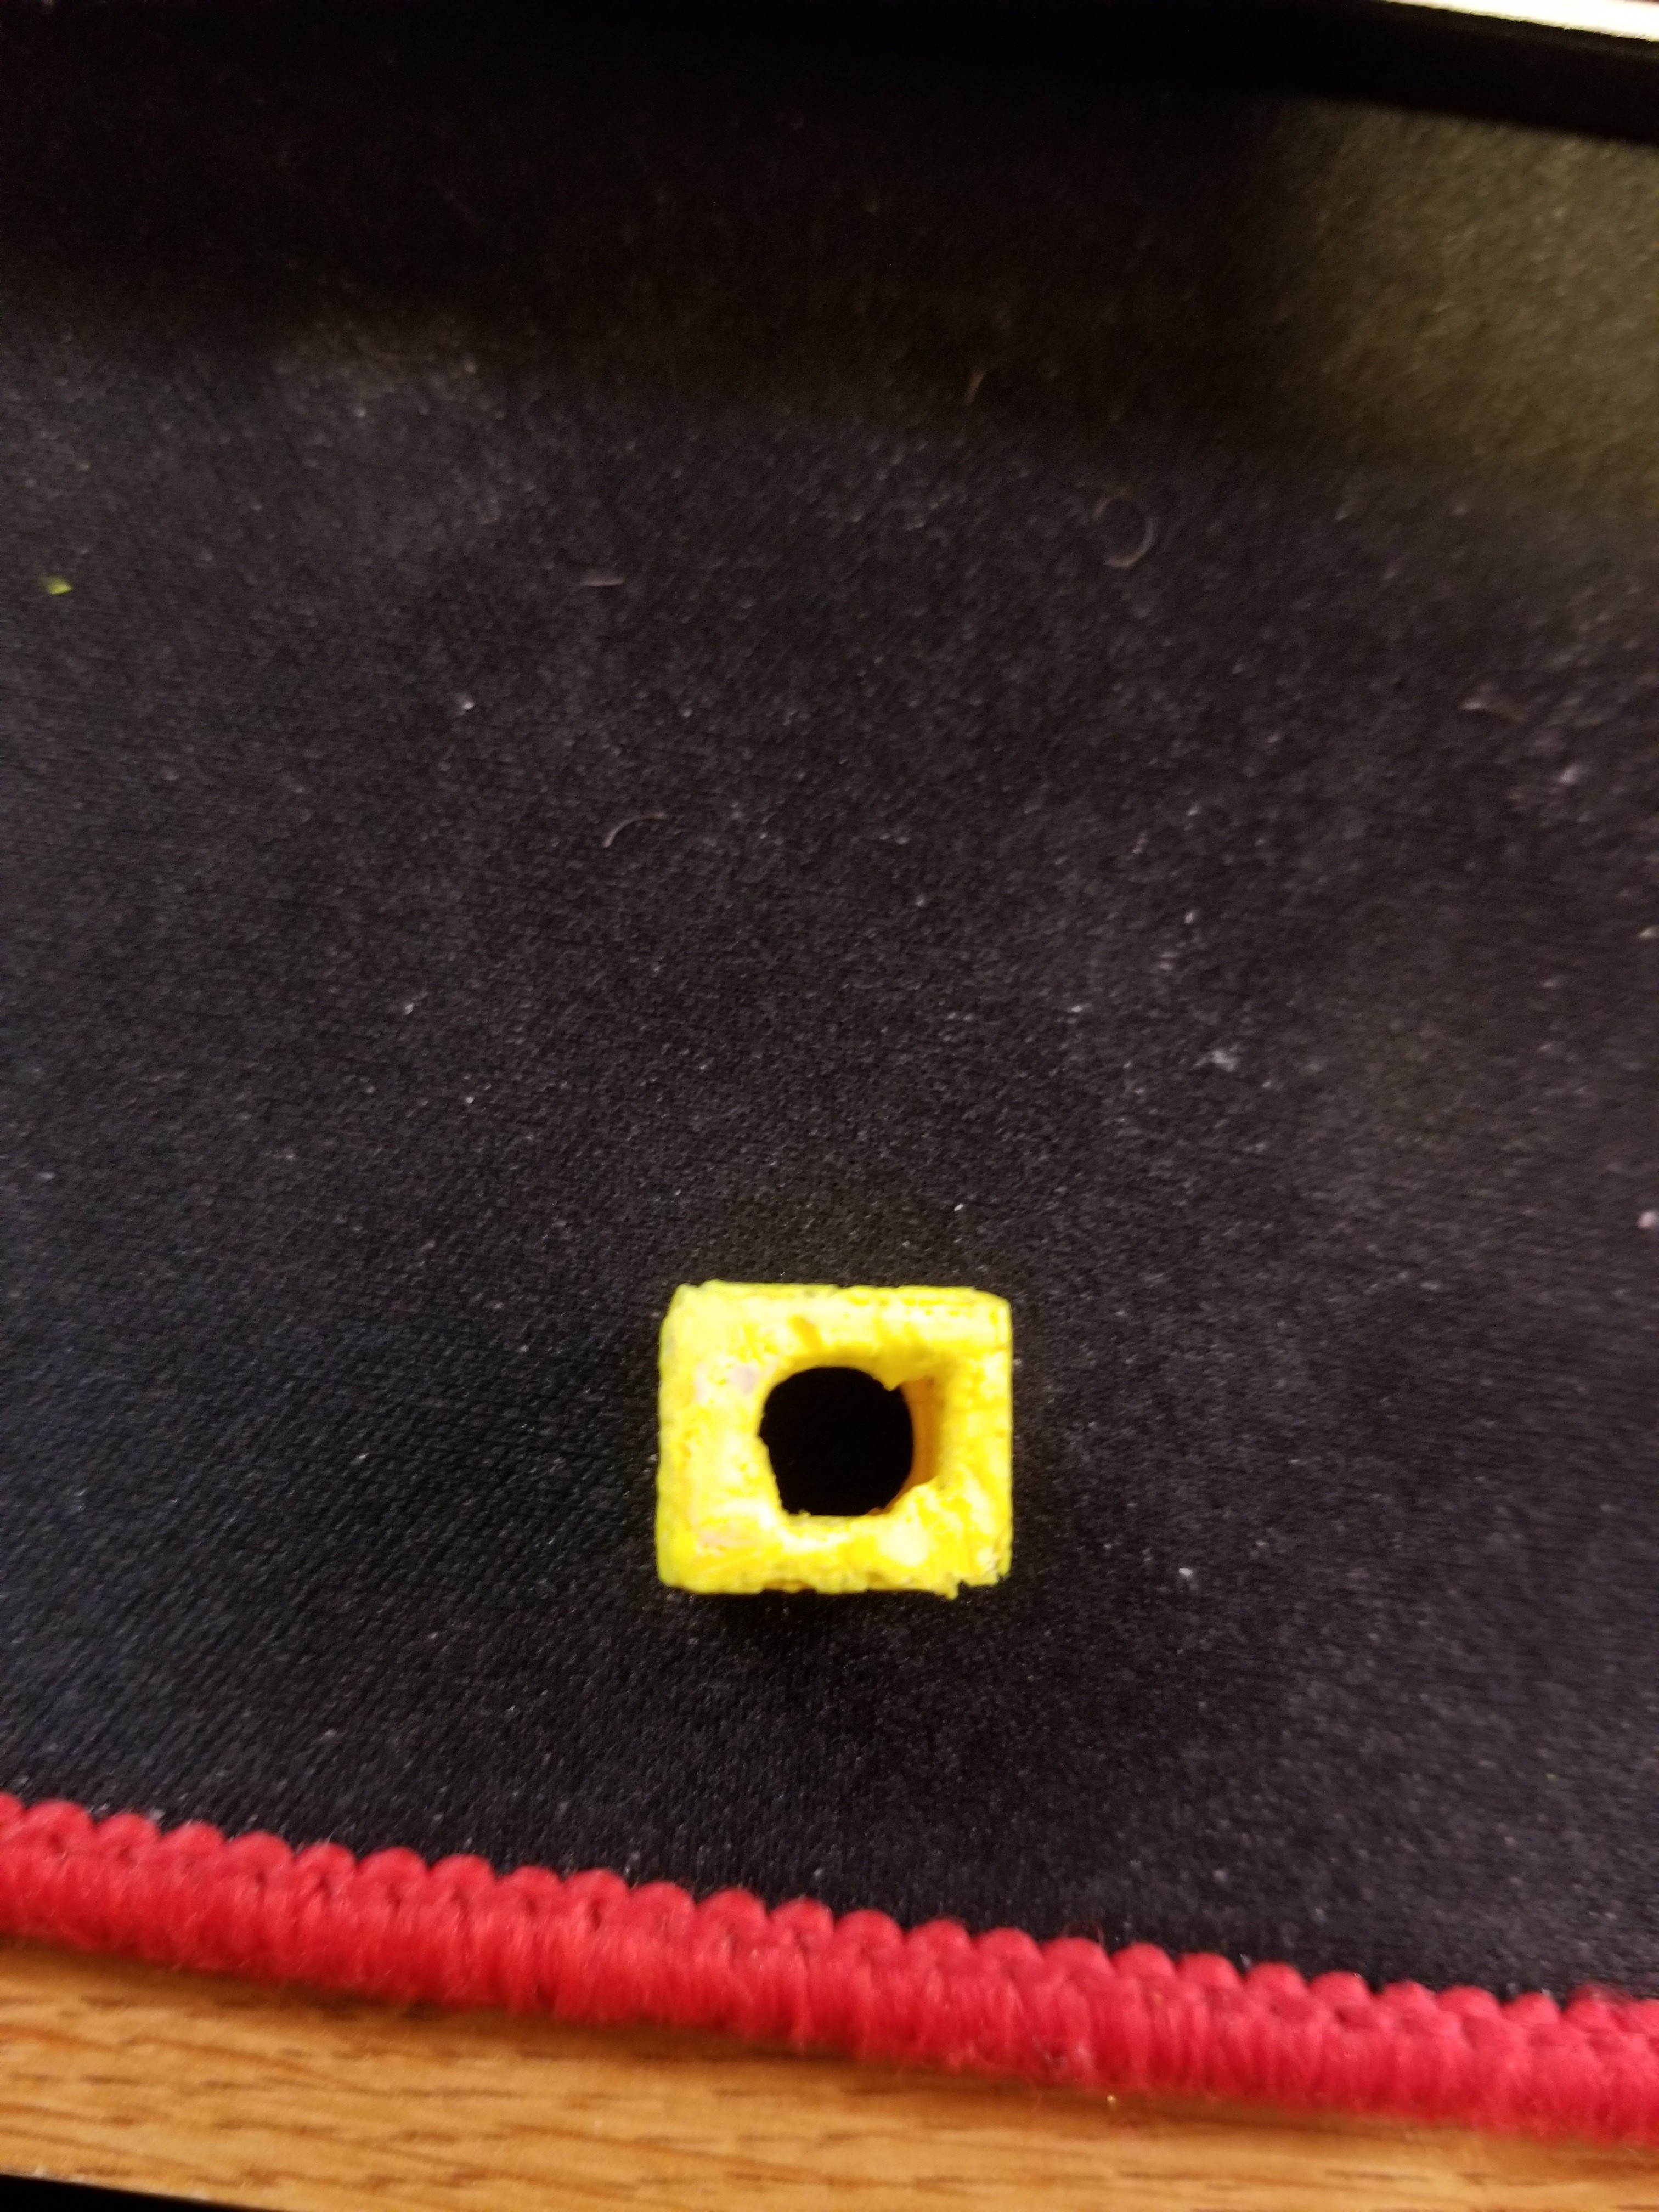
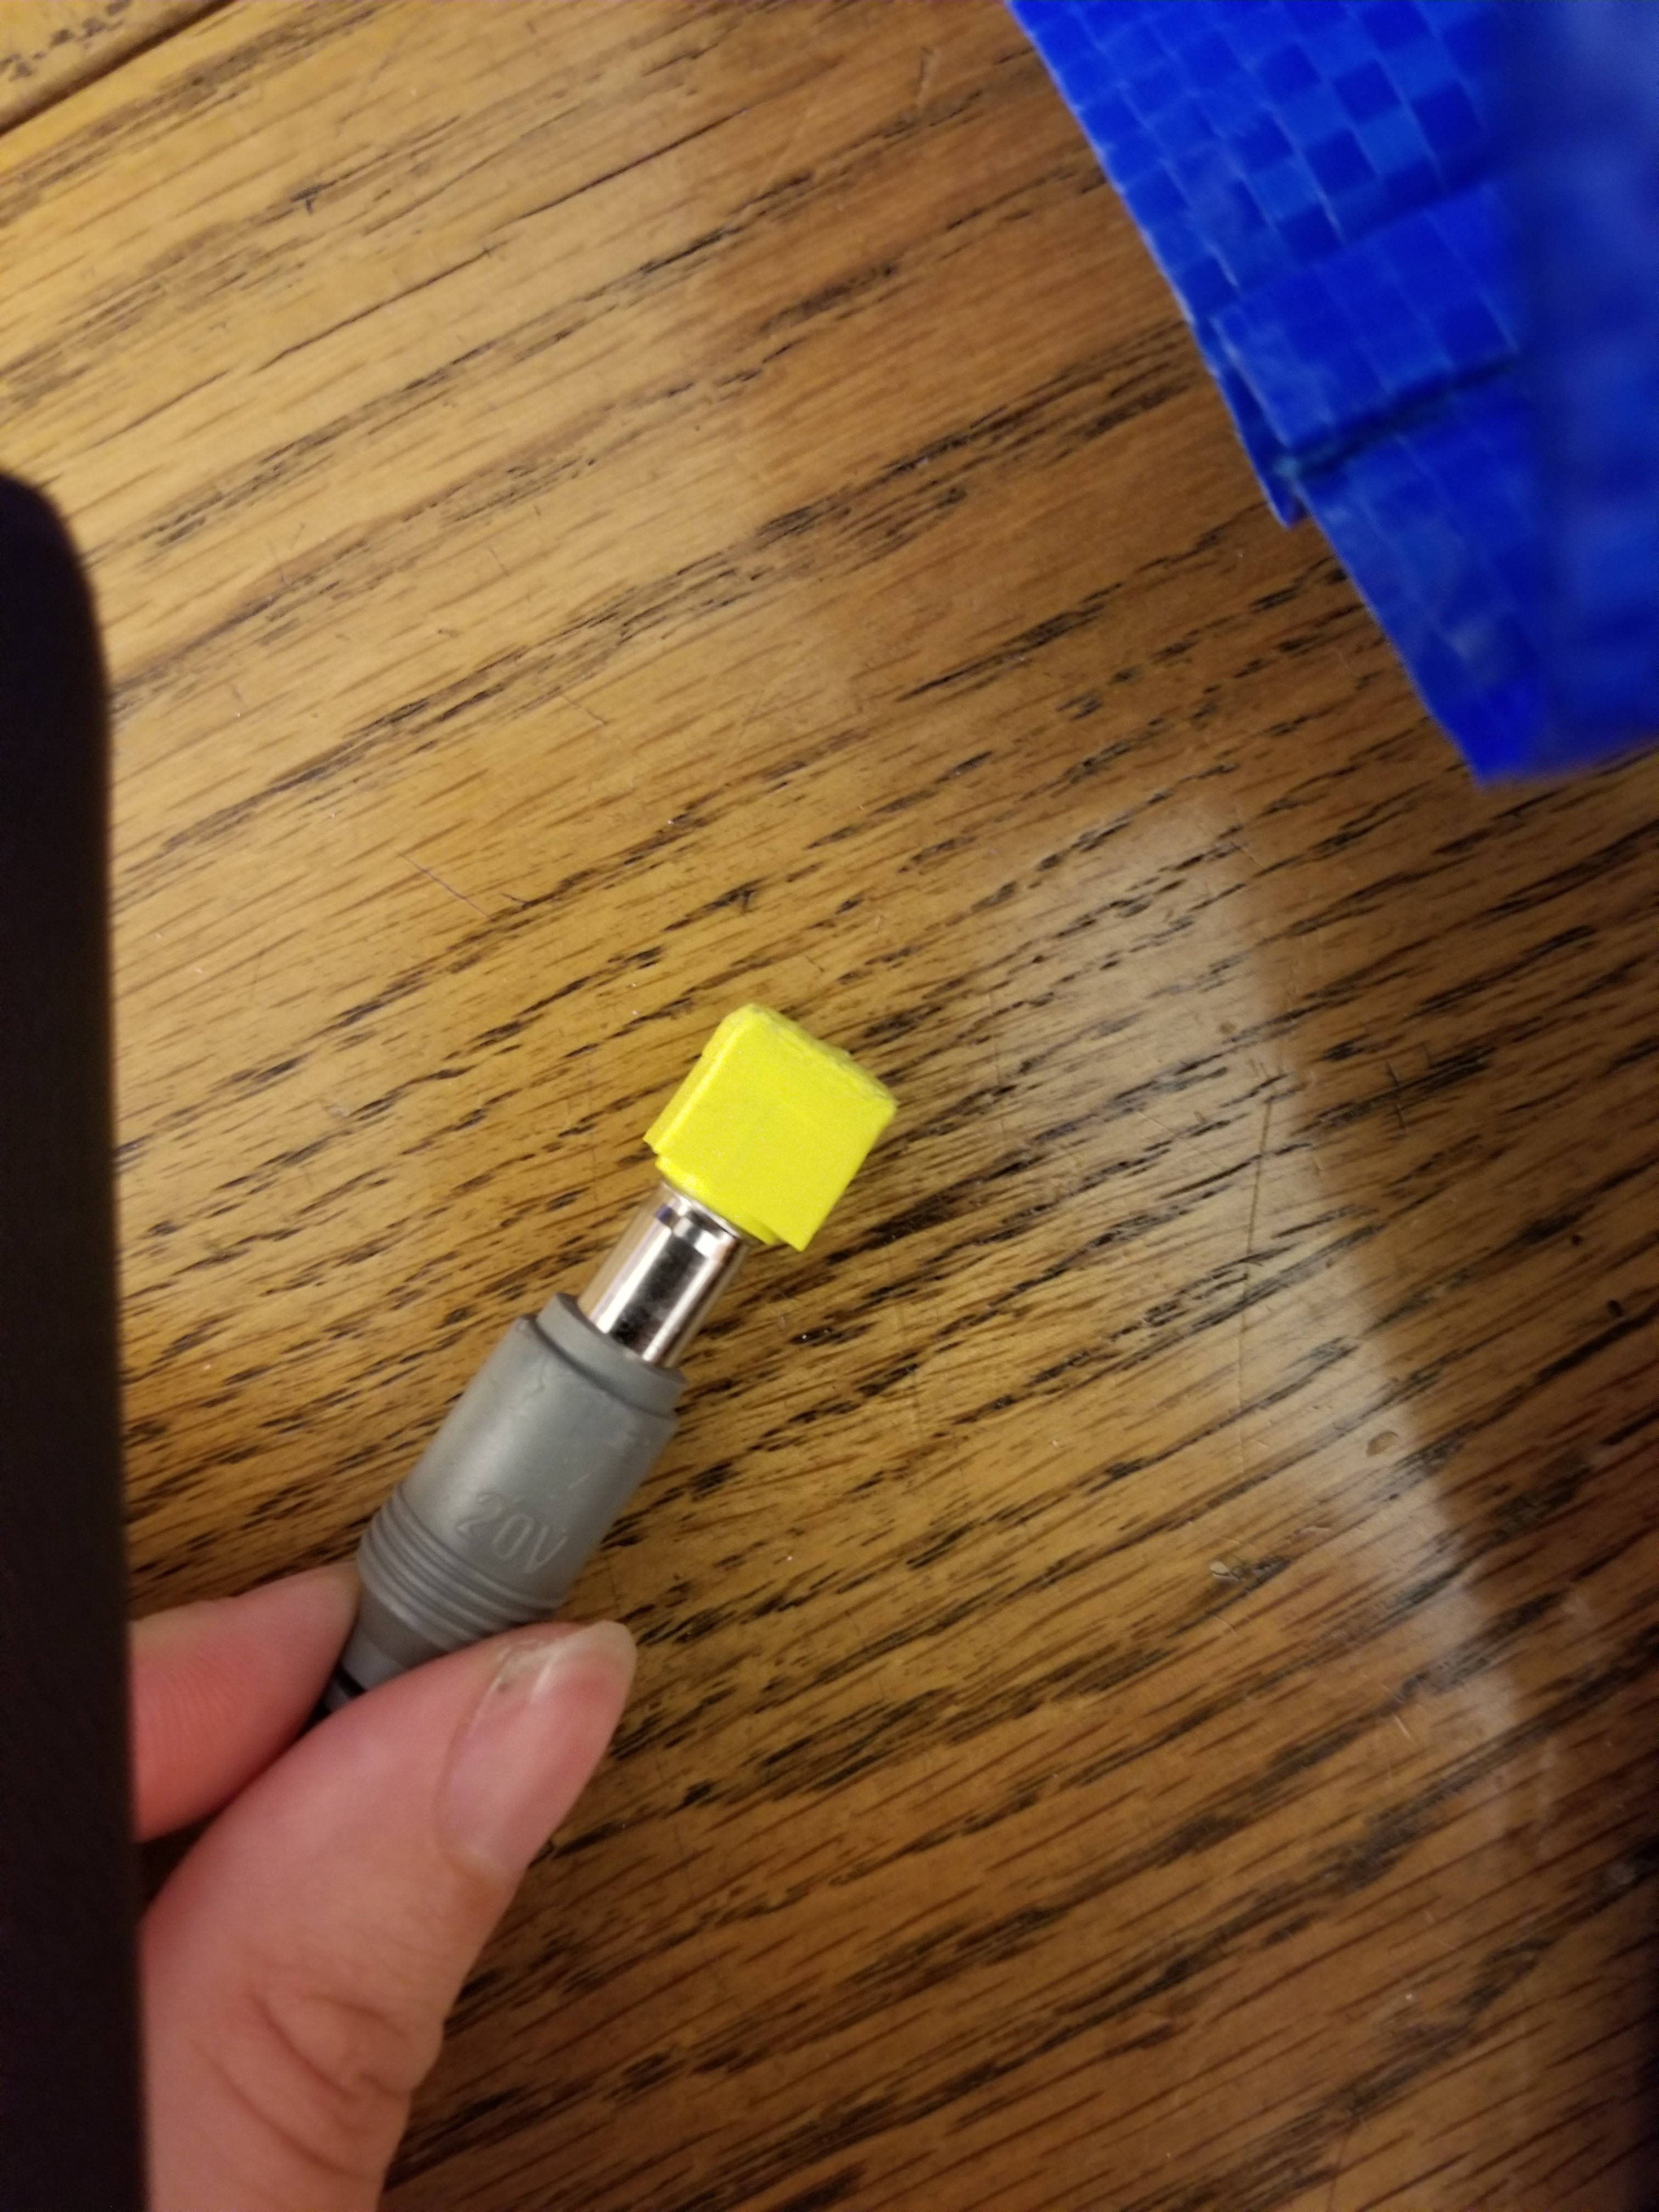
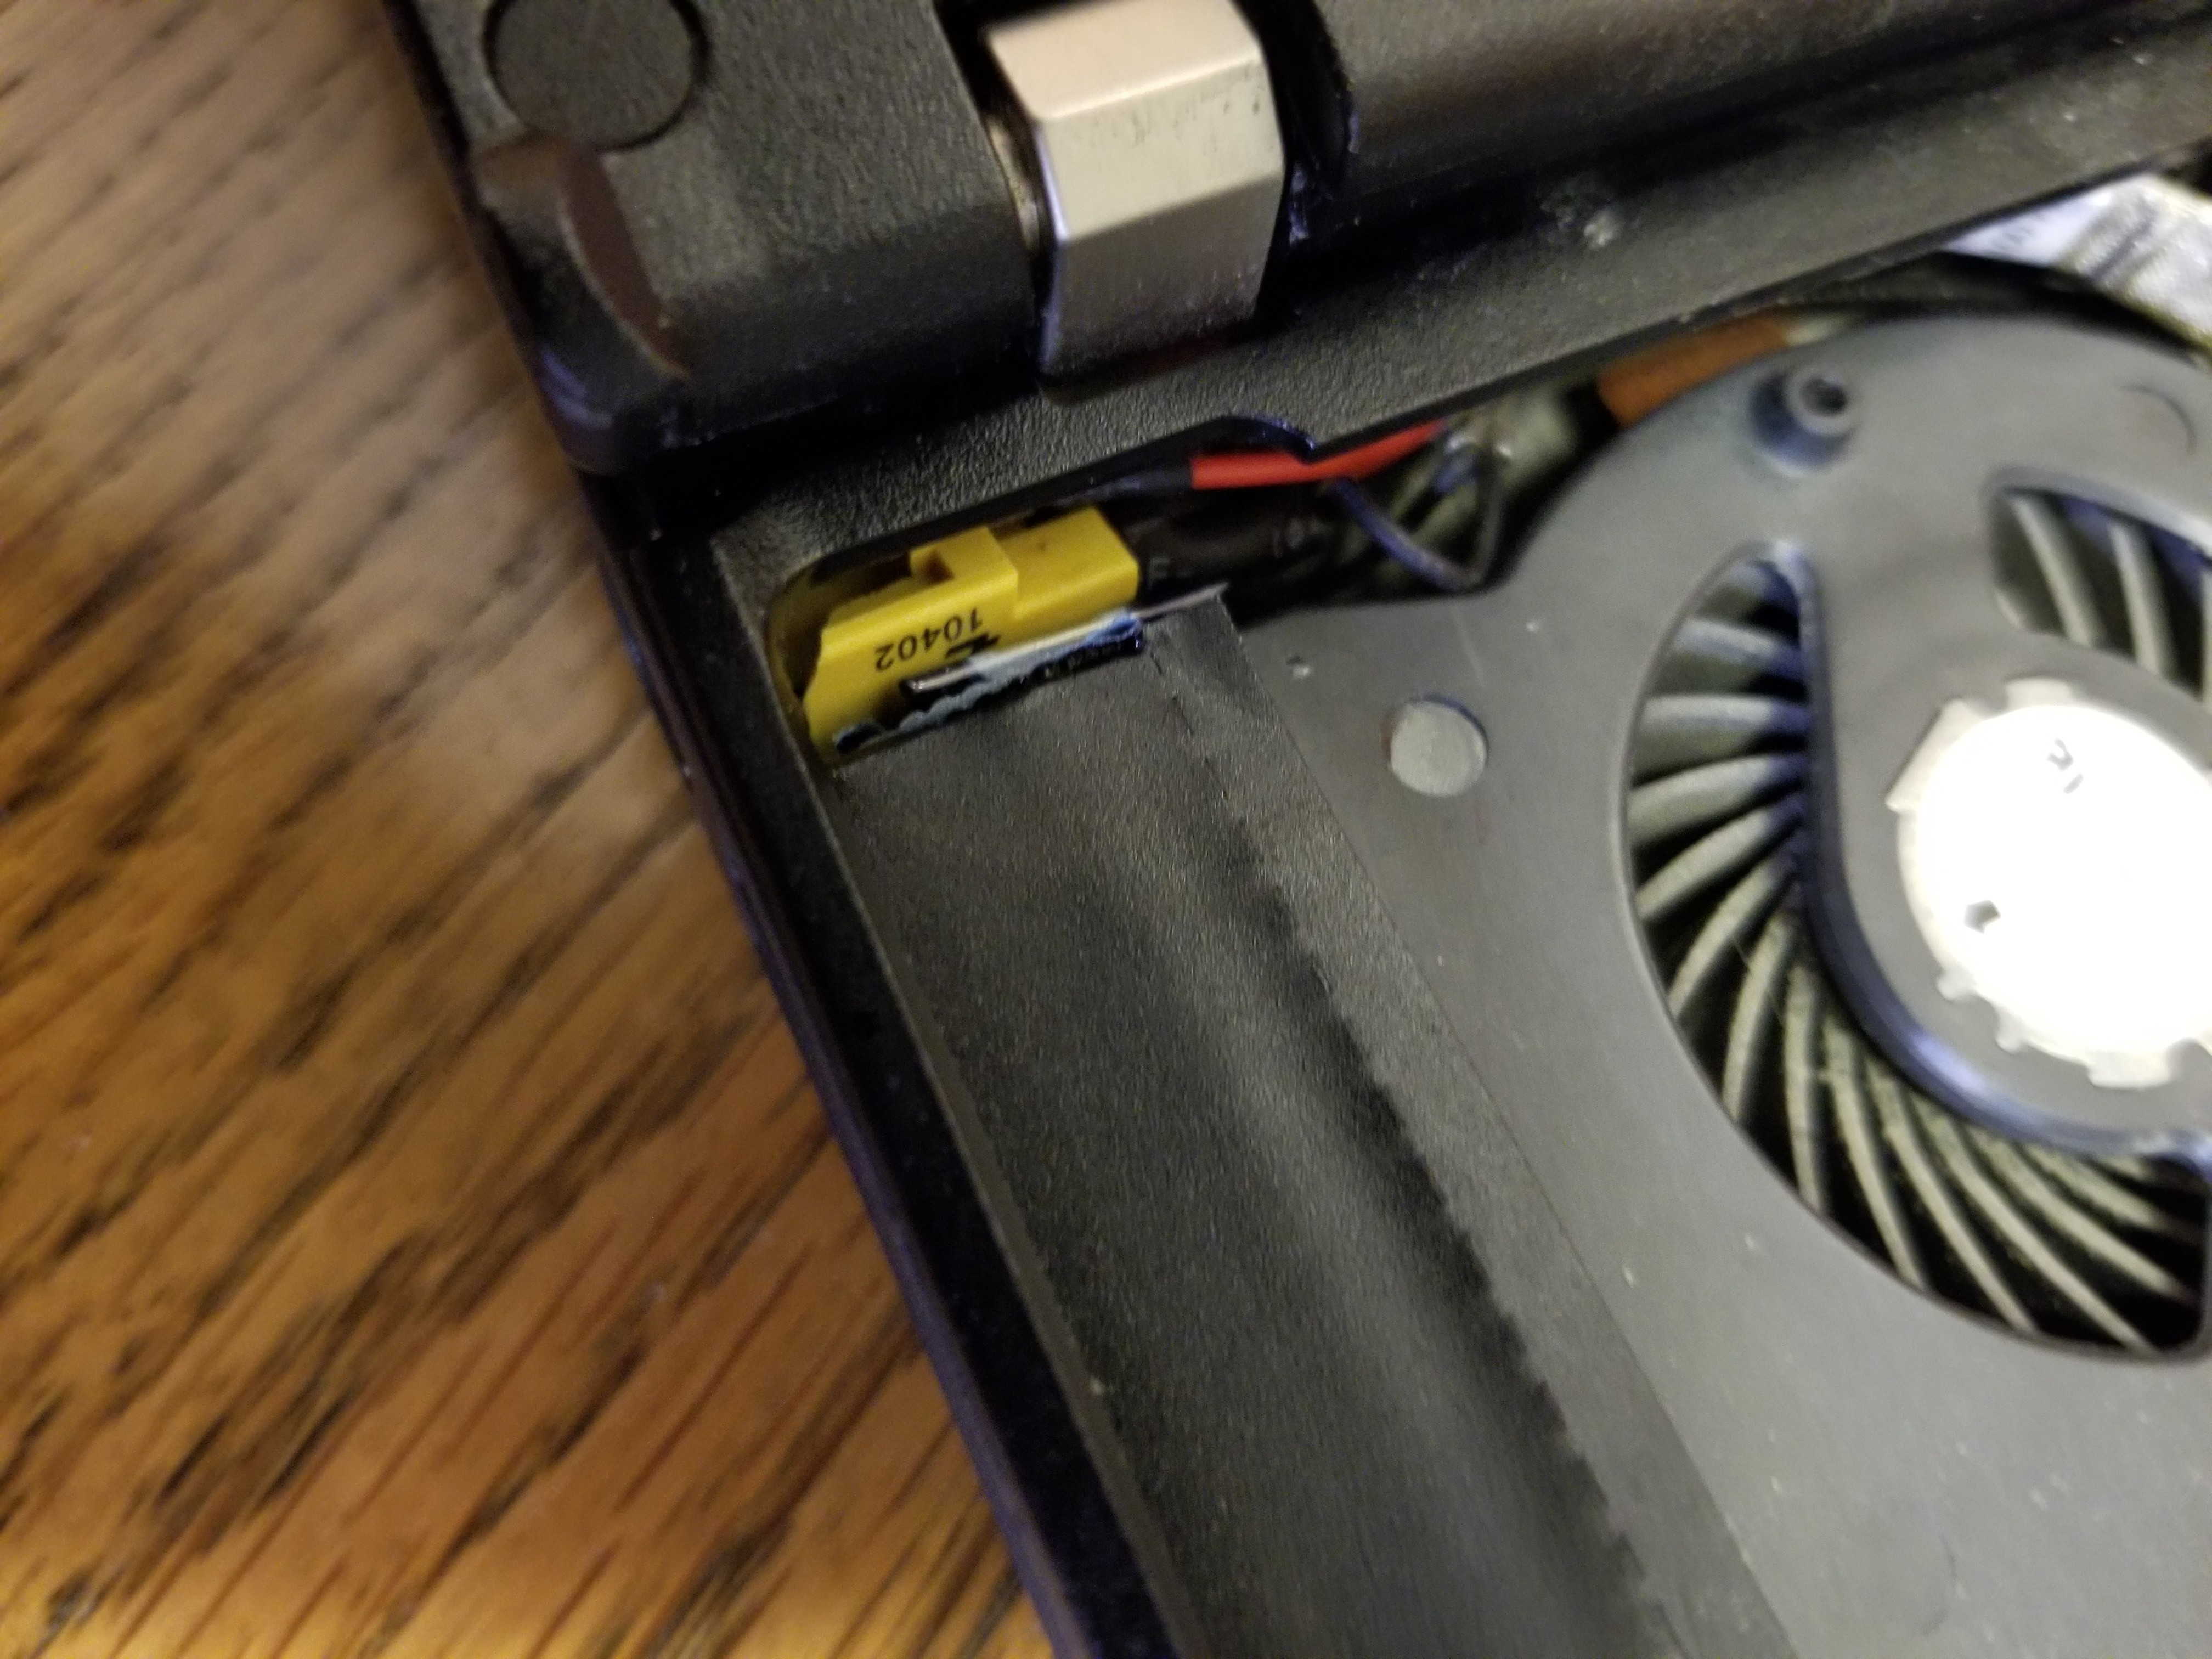
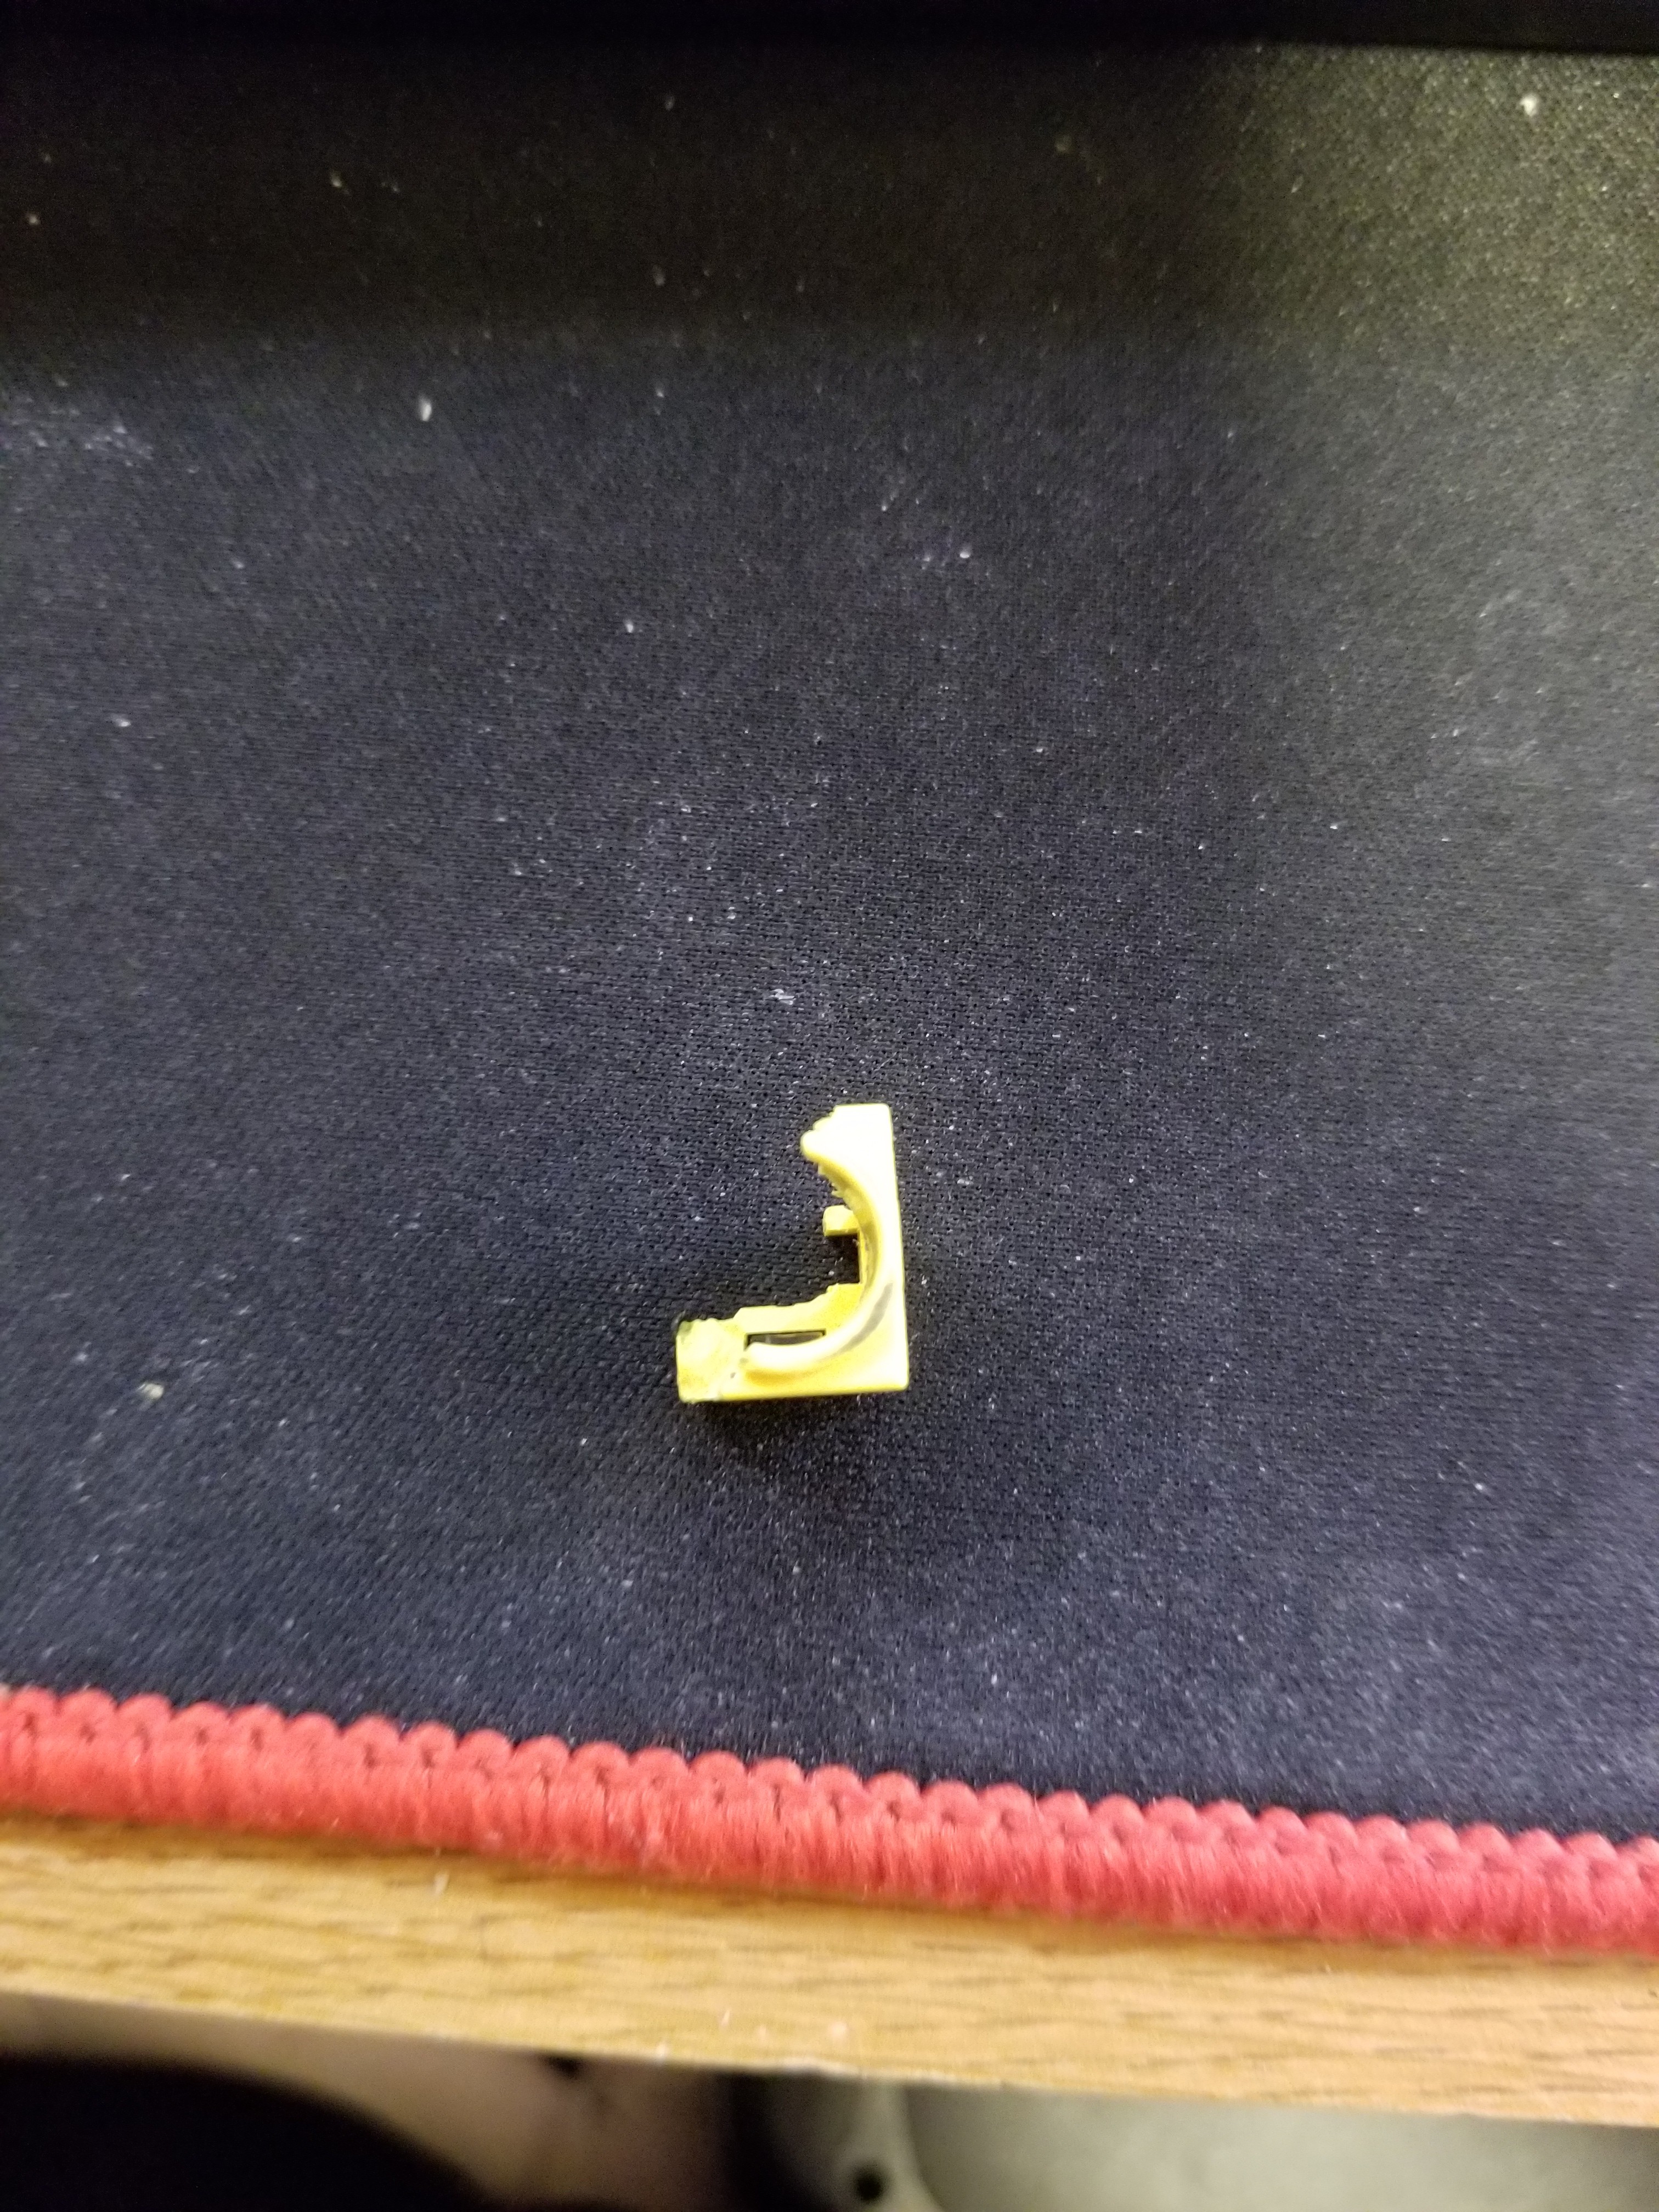
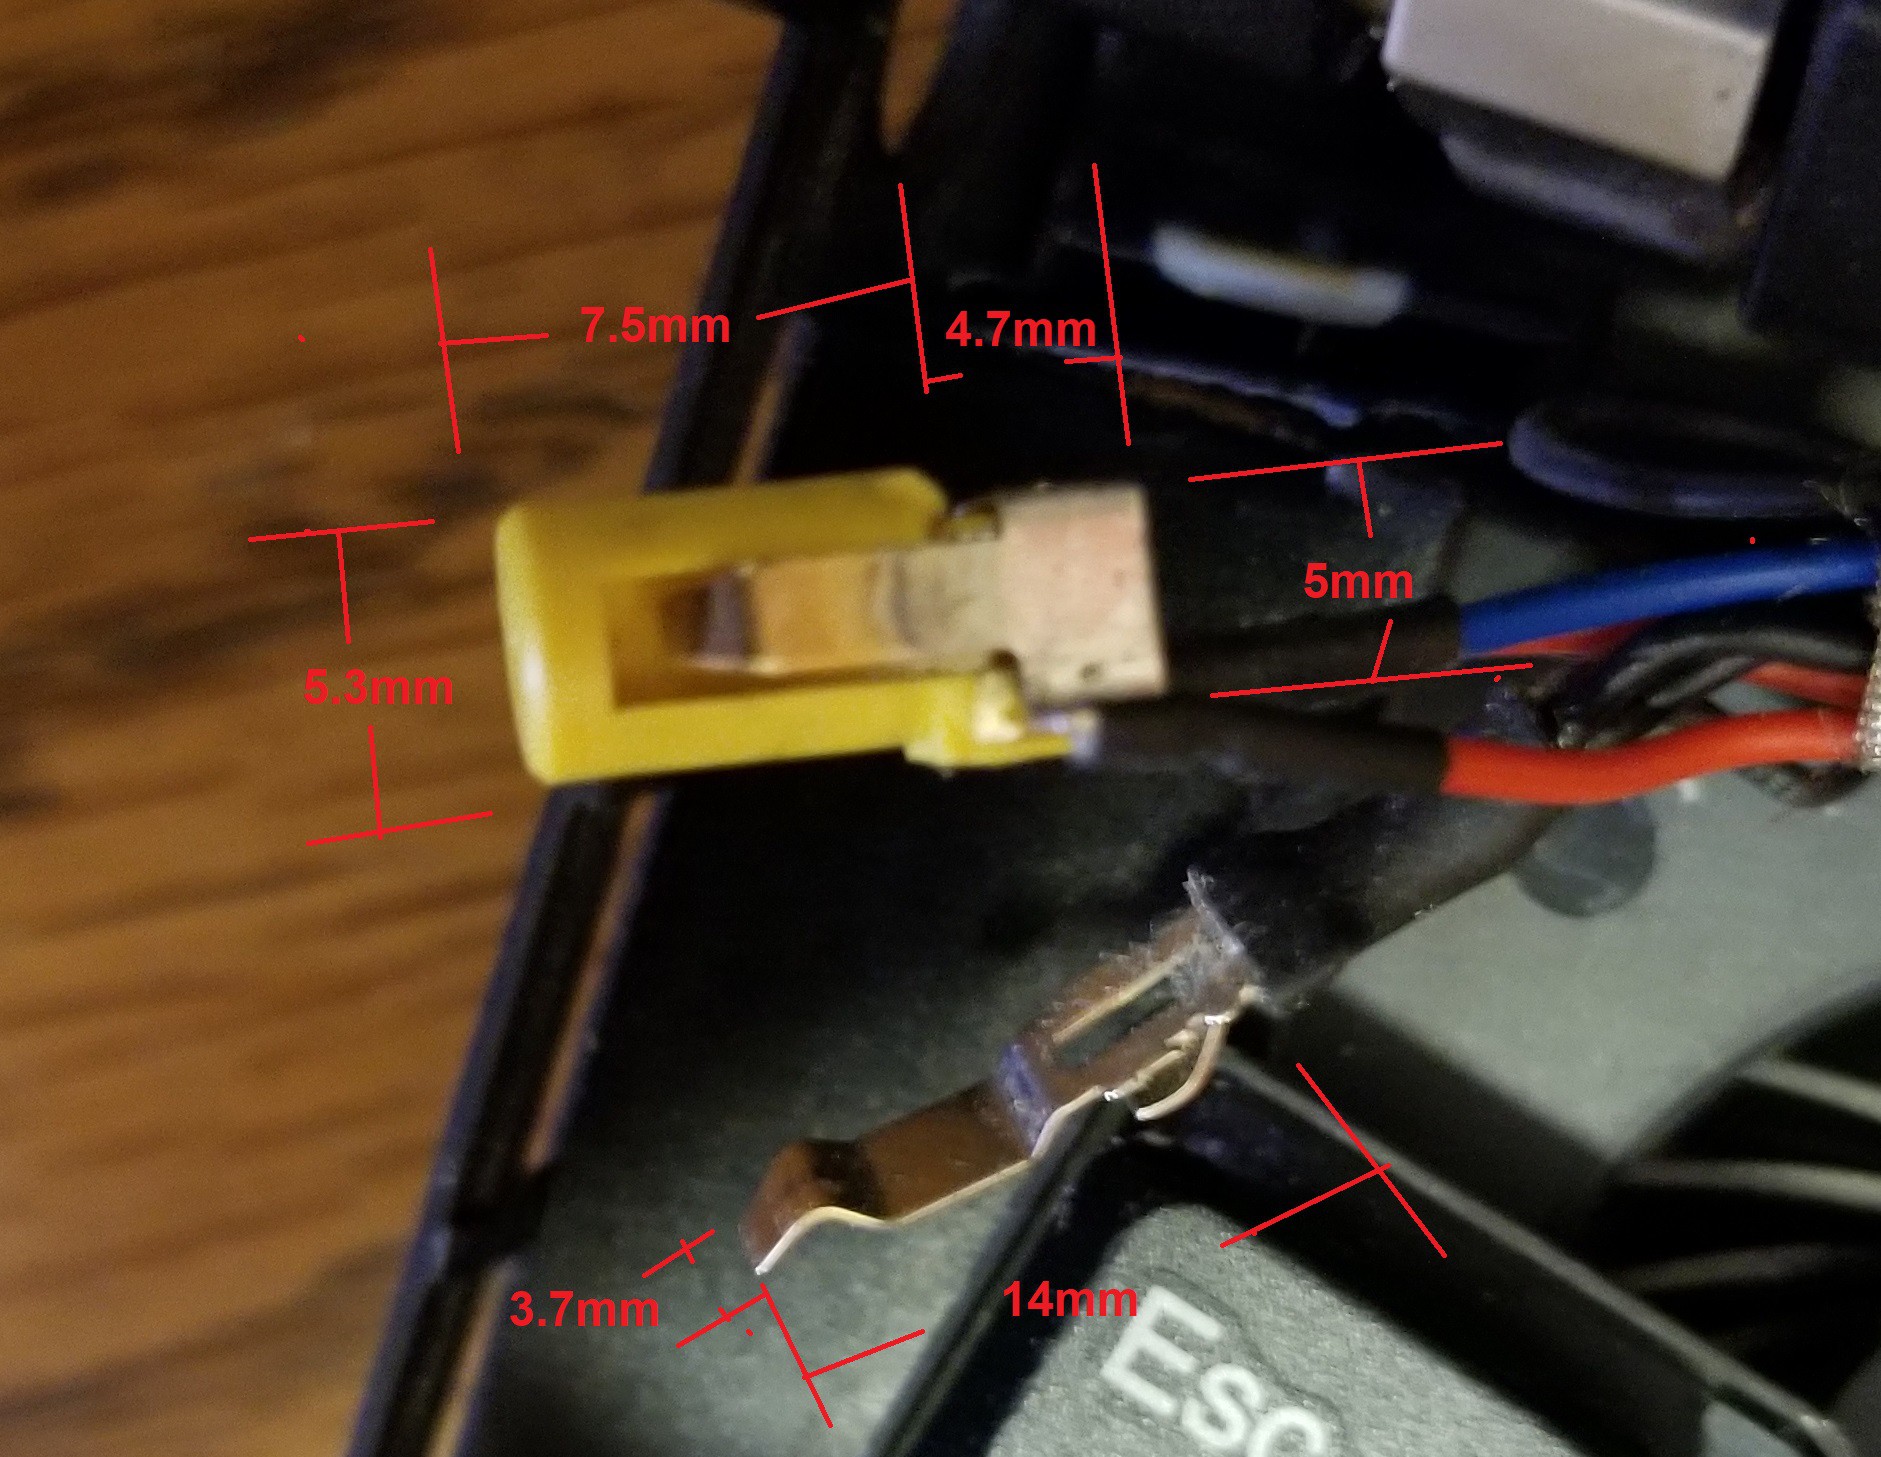
So I did the thing that lots of people without mag-safe chargers do, and I knocked a laptop onto where its charger enters itself. To make matters worse, my other laptop decided to stop turning on, but that's a different story. Anyways, the DC Input on my ThinkPad is ruined, and no combination of shaking it or jiggling the cord was getting it to charge. All of the things to let it charge are intact, but the outer shell that holds those pieces in place was shattered from the fall (well, I guess it was really the landing that shattered it).

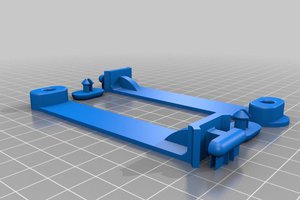
I thought to myself, "Self, I could spend $10 and buy a new one, but then I'd have to take the fan out of my laptop, and I'd have to wait for shipping, and what if it breaks again? This is a common part to break, wouldn't it be nice to have a design file for it so I can replace it when it breaks again?"
To which I replied, "Yes, self, that is not a bad idea. I'll learn stuff too. Who cares if it takes a little longer to design and print than it would be to ship in a new part, it's slightly cheaper, and in the mean time I can always use tape to fix it." And thus this project was born. 

DC Jack 2_ Electric Boogaloo Top.stl

Attempt two at the shell, the top half.

Standard Tesselated Geometry - 20.39 kB - 02/13/2018 at 05:59

Download

DC Jack 2_ Electric Boogaloo Bottom.stl

Attempt two at the shell, the bottom half.

Standard Tesselated Geometry - 12.78 kB - 02/13/2018 at 05:59

Download

DC Jack.stl

Attempt number one on my own outer shell.

Standard Tesselated Geometry - 15.51 kB - 02/11/2018 at 04:53

Download

  • Try number two

    John Westhoff02/13/2018 at 06:07 0 comments

    I went back to the drawing board, and increased the size of everything by a few tenths of a millimeter. I can't go too big, because then the part won't fit in the ThinkPad. I'm hoping that this will let things fit where they should. To solve my issue about support material being hard to remove, I split the design in half. I'm hoping this will allow me to more easily get the raft material off of the bottom of the part near the slots for the tabs, as I won't have to push tools through the entire part to reach the tabs. I plan on gluing the parts together, which may prove futile as the raft may make the surfaces too rough. In that case I plan on sanding it down, or gluing strips of plastic to the sides of both. I may not even need to hold them together at all, as there isn't much room for them to move within the laptop anyways.

  • Lessons Learned

    John Westhoff02/12/2018 at 22:23 0 comments

    So, err, that didn't work. I guess I didn't account for a two big things:

    1. The difficulty of removing support material near thin walls
    2. The fact that the printer doesn't print lines with 0 width

    (1) caused the slots where the ground tap inserts in the back of the shell to be impossible to clean out without destroying the walls that would hold the tab in place. 

    (2) caused the hole for the DC plug to be just about exactly the size of the plug itself rather than 1mm larger, so, um, it didn't quite fit...

    This was cheap enough that I can try and fail a fair number more times before I would have been better off just replacing the part online, so I will revise my design and upload it once I am ready to try another print.

  • Design

    John Westhoff02/11/2018 at 04:53 0 comments

    I removed all of the screws from my ThinkPad. That might have been a little big overkill, but whatever.

    I then removed the keyboard from the laptop by prying it up, and then I detached the plastic molding that covers the hinges.

    I pulled the screen half up and out of the hinges, and removed the broken bits of plastic. I found one to be a diagonal half of the shell, pictured below.

    This seemed like a good place to start, so I measured everything I could with a pair of calipers. 

    That little plastic chip, if it were a complete rectangular prism, would measure 12mm x 10mm x 11.5mm. It seems that the hole the DC plug would go into is 8mm in diameter, and the little circular lip that is part of that solid is 1mm thick. I also measured the inner pieces of the DC jack. 

    The inner cylinder is about 7.5mm long, and has a diameter of about 5.3mm. Behind the cylinder is a 5mm x 4.3mm rectangular prism that is 4.7mm deep and about half a milliliter below center on the cylinder. The ground tab is about 14mm long and about 3.7mm wide. Towards the tip of the tab the bump is about 1.5mm high and towards the back there is a bump that is about 2.5mm high in the opposite direction.

    Then I fired up Tinkercad and started on a model for the outer shell, which is available as one of the project files. I plan on gluing the inner pieces to the completed outer shell once it is printed.

View all 3 project logs

Enjoy this project?

Share

Discussions

Similar Projects

Does this project spark your interest?

Become a member to follow this project and never miss any updates