kodera2t
-
New SDuino family, I would call it "SDuino-Qi"
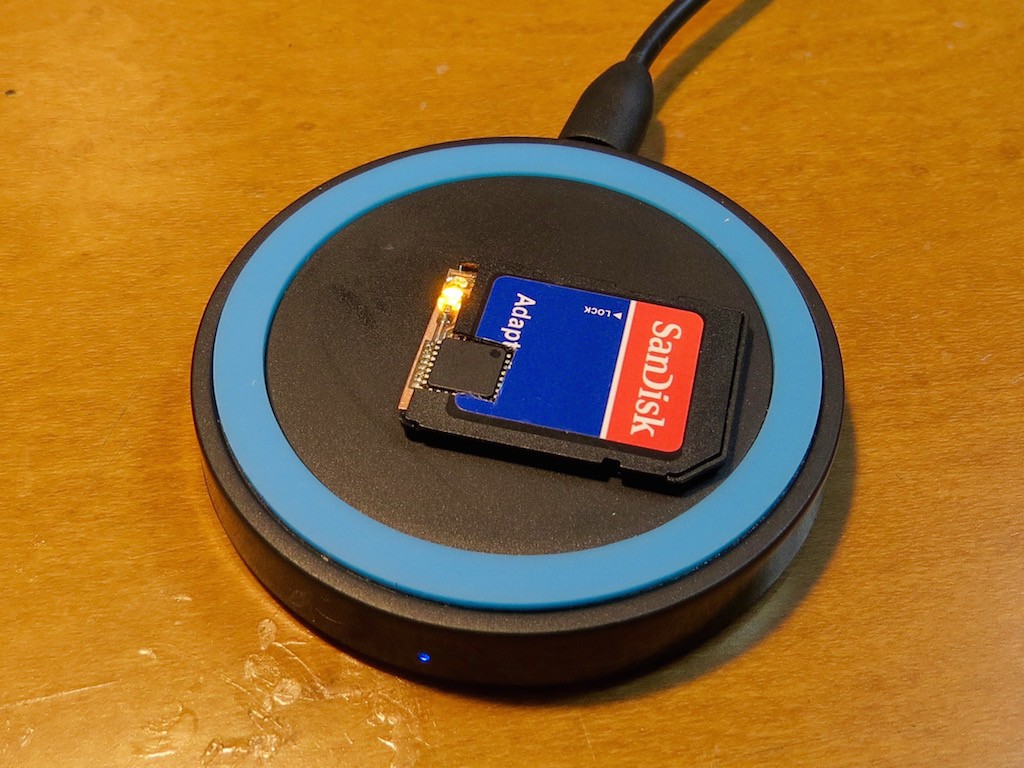
11/07/2015 at 09:48 • 3 commentsHere I would introduce one additional SDuino variant, SDuino-Qi ! Qi is a wireless power transfer system and widely used for cellphone charging. This time, small coil is embedded inside SD card shell with Qi interface card and minimum Arduino compatible. As same as my previous SDuino series, this card can be programmed through SDuino writer (FTDI embedded interface...)
![]()
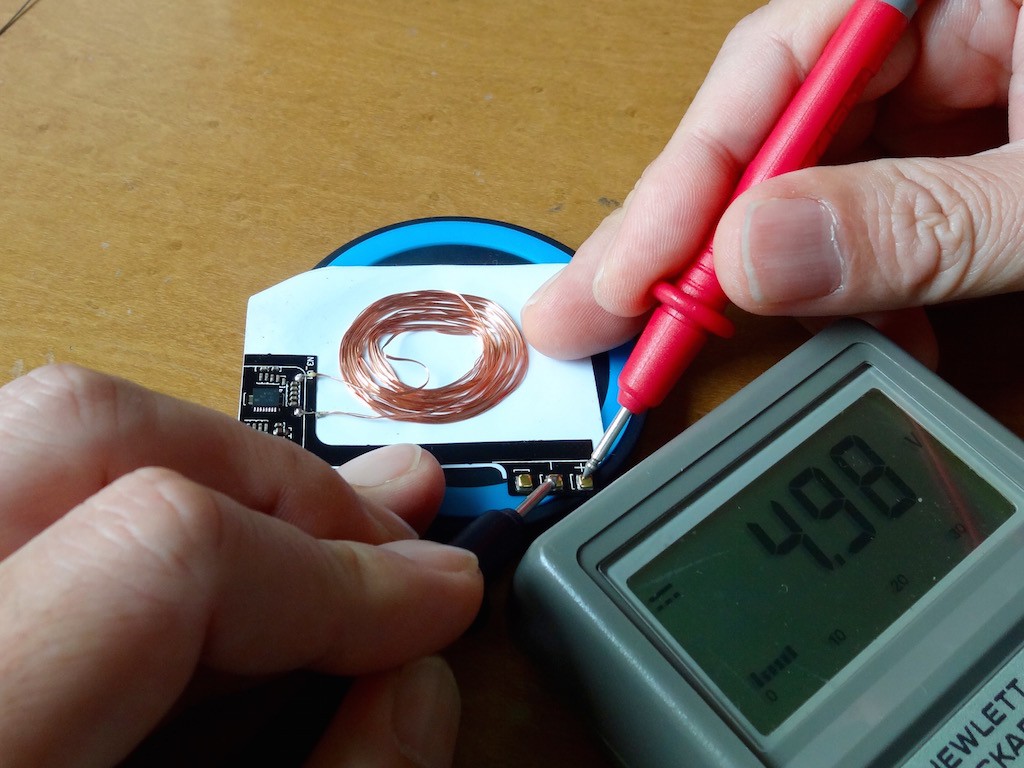
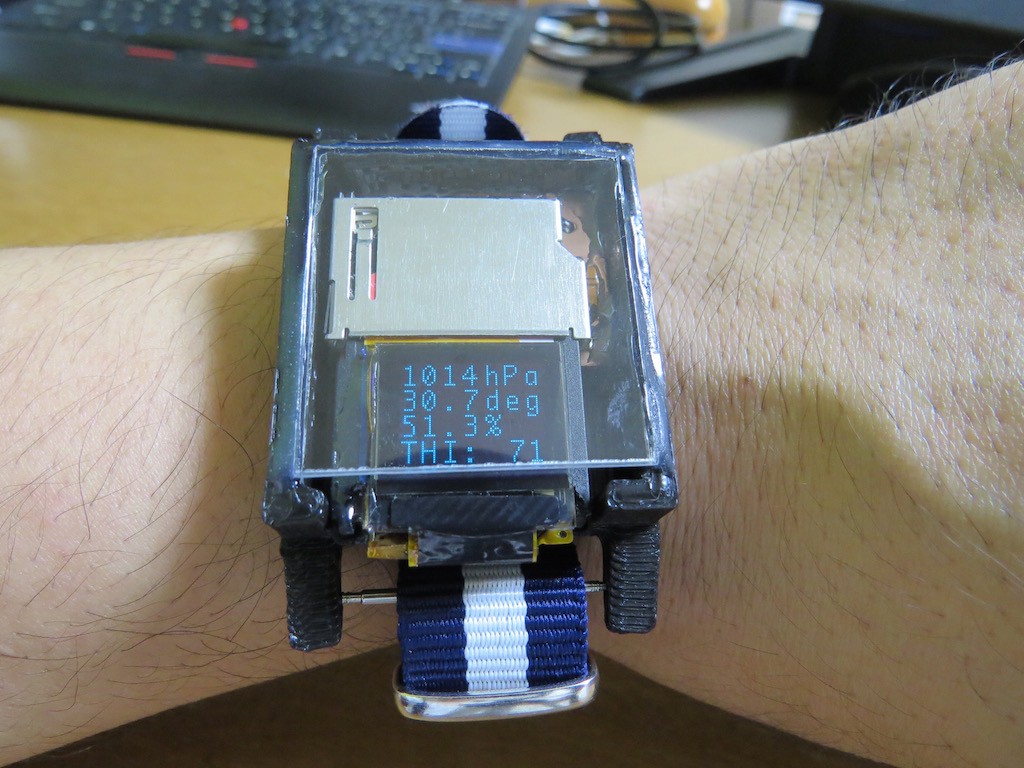
In the another project (color OLED watch), I confirmed that roughly re-winded coil still works as a receiving coil of Qi. As you see, this very rough coil produces 4.98 V !!
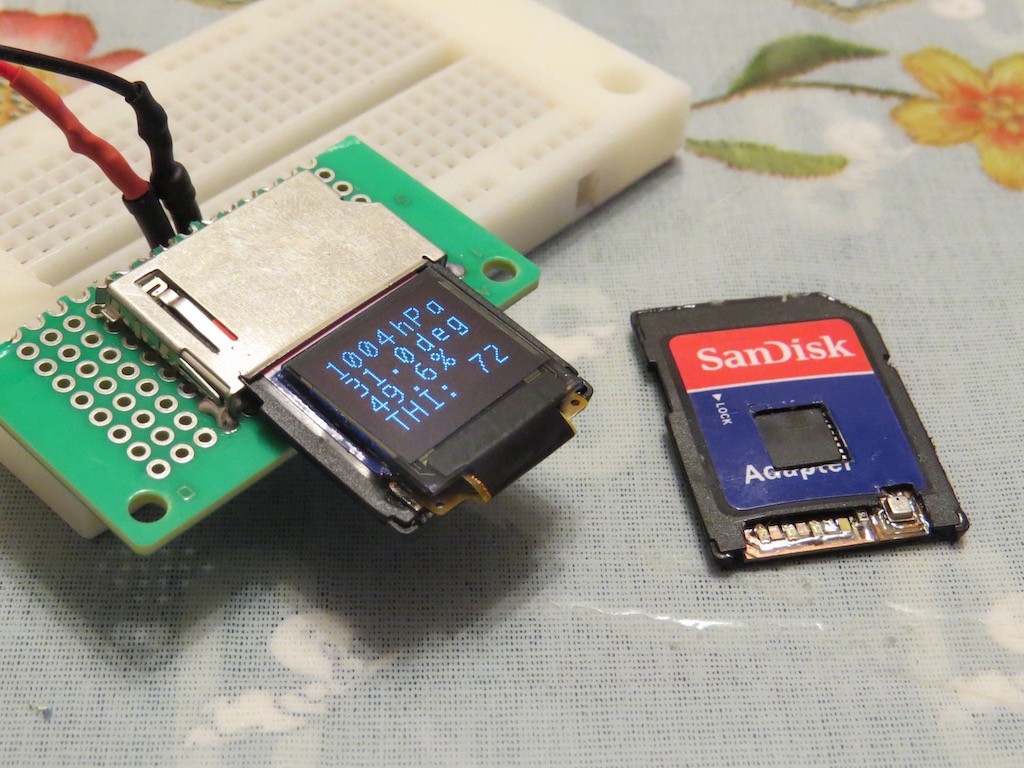
I quickly re-size the coil dimension almost half of original and put it in my small watch connecting with Lipo charging circuit. working perfect!![]()
![]()
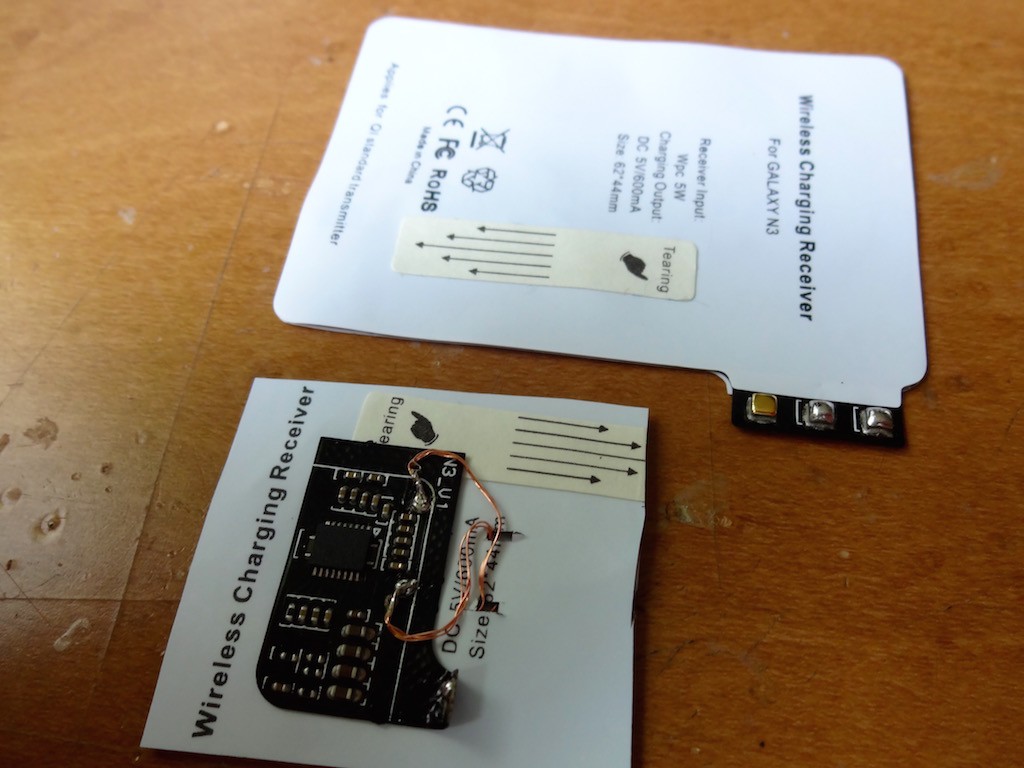
When I see the case of SDuino, it surely requires 3.3 V as power supply. I have been searched "thin battery" can be accommodated inside SD card shell to solve power supply problem, but I could not.. So this time, I have tried to put Qi system inside SD card, and confirmed surely working!!!
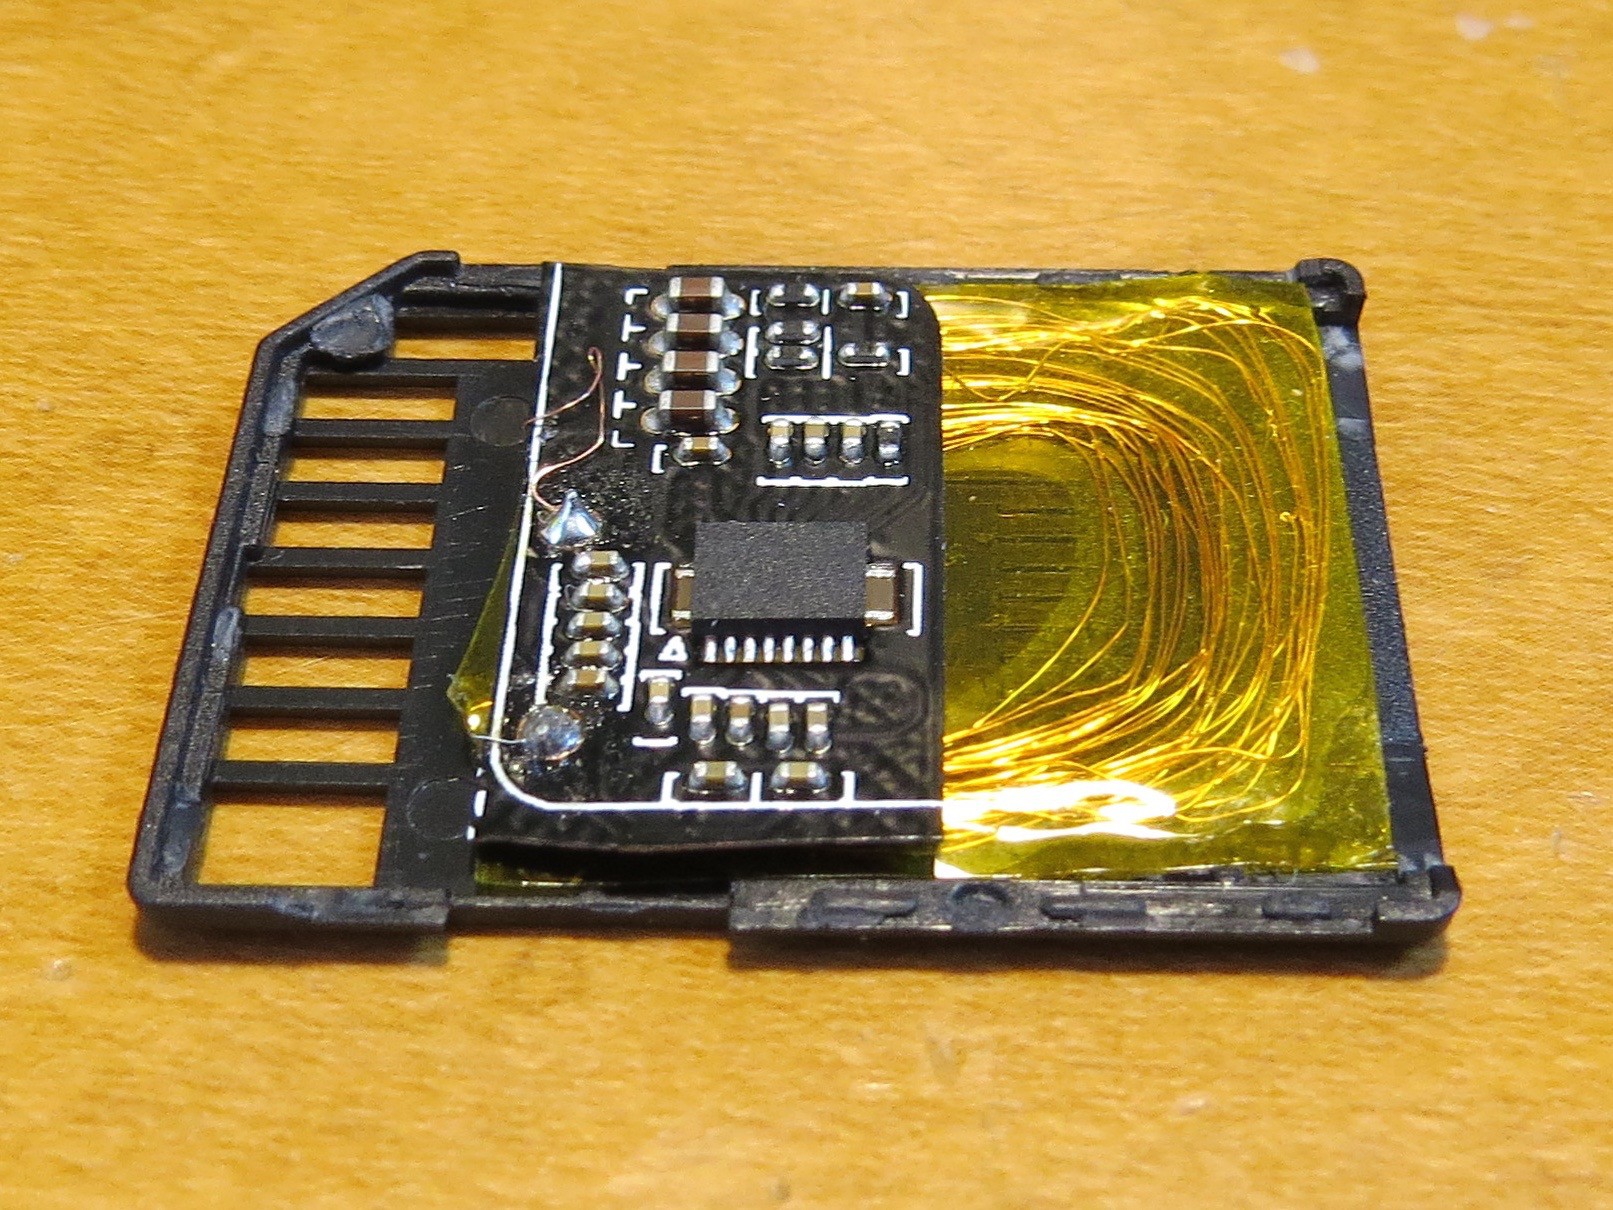
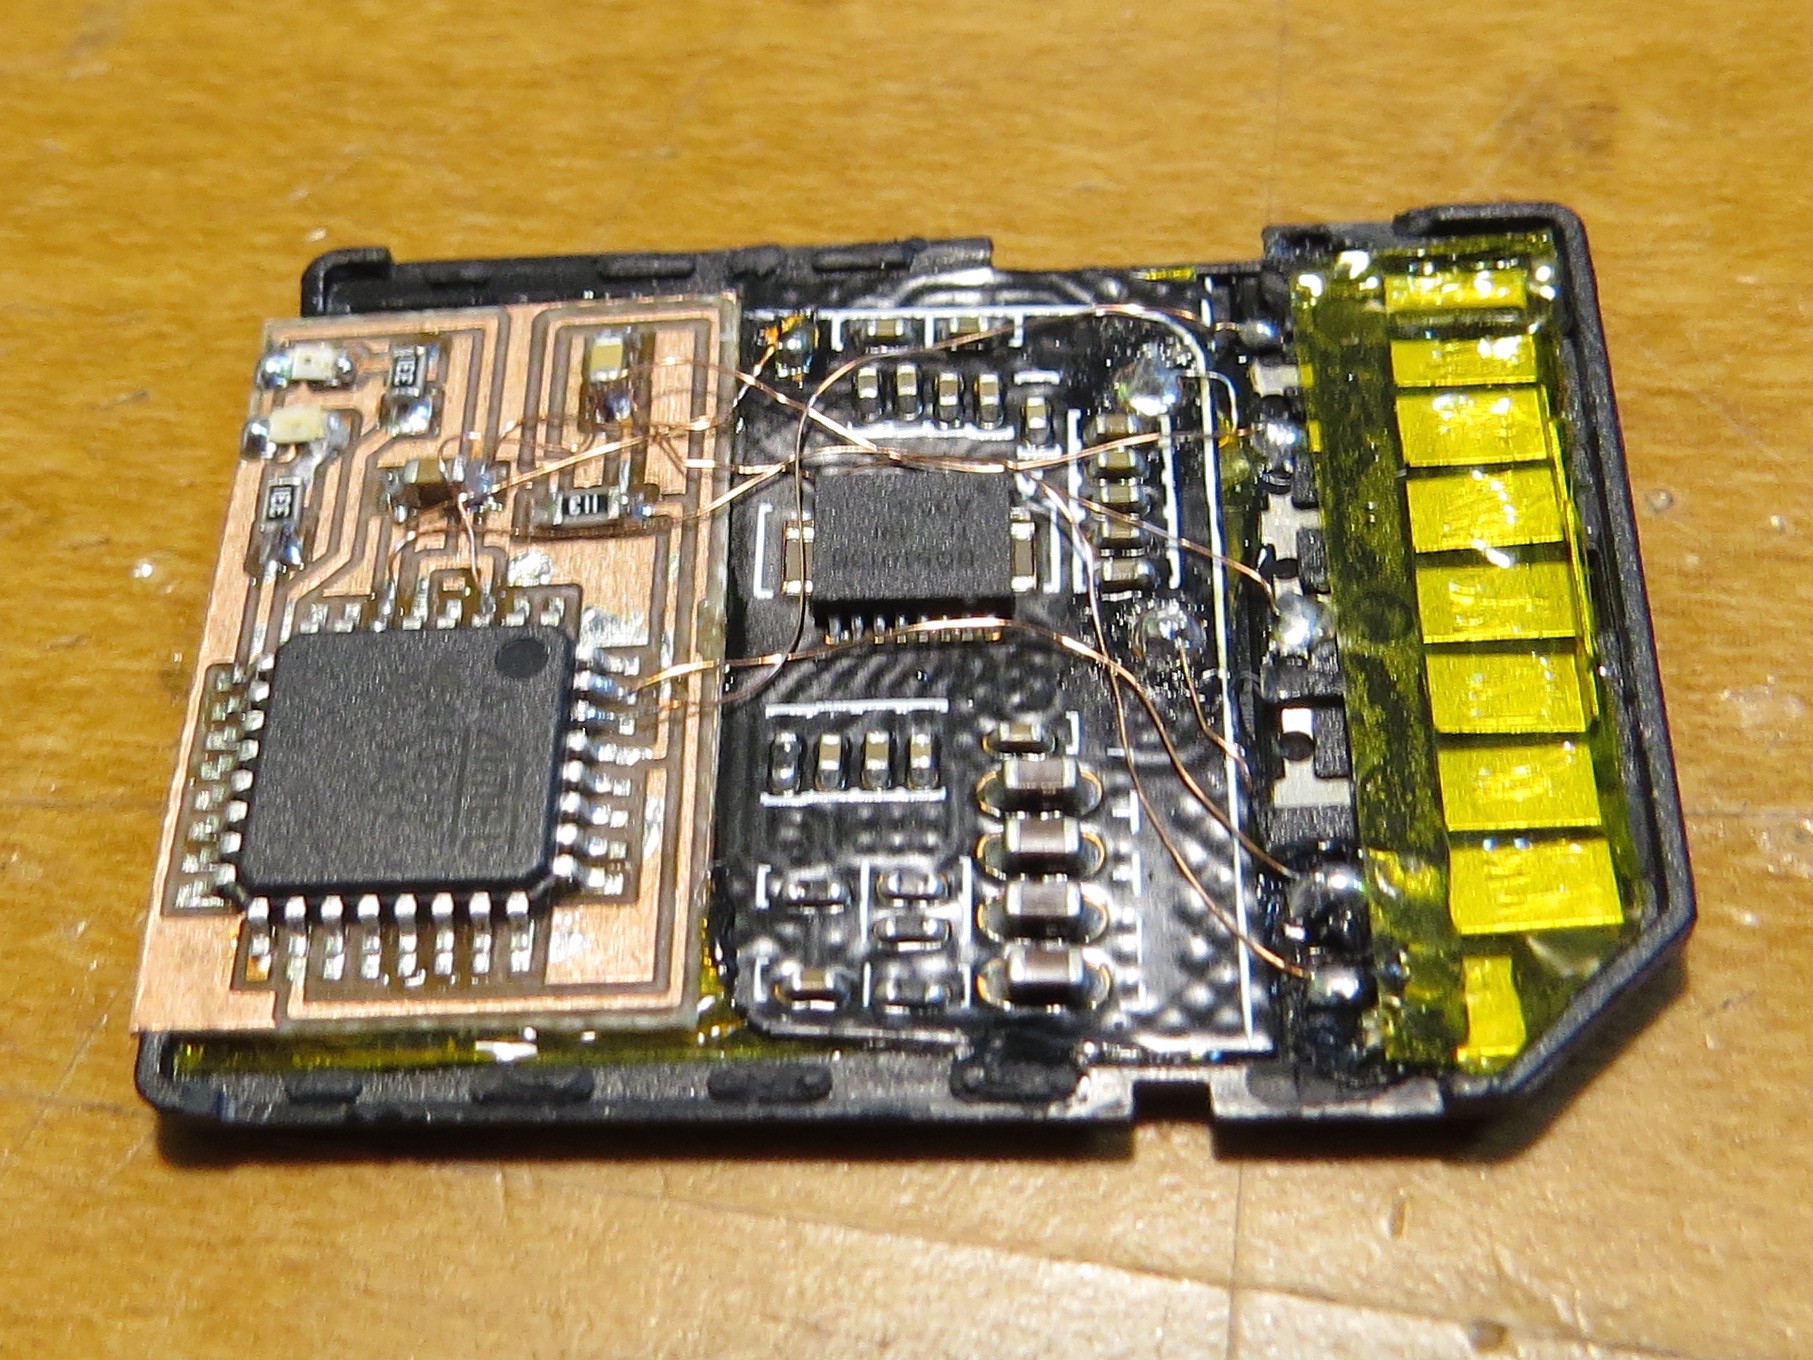
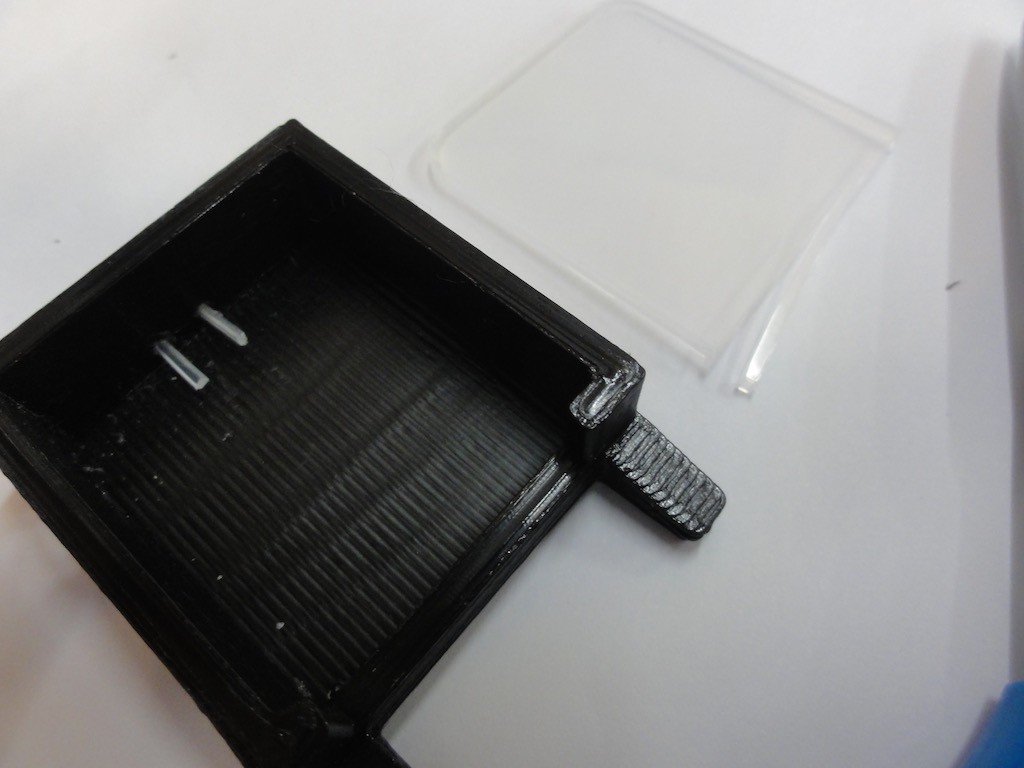
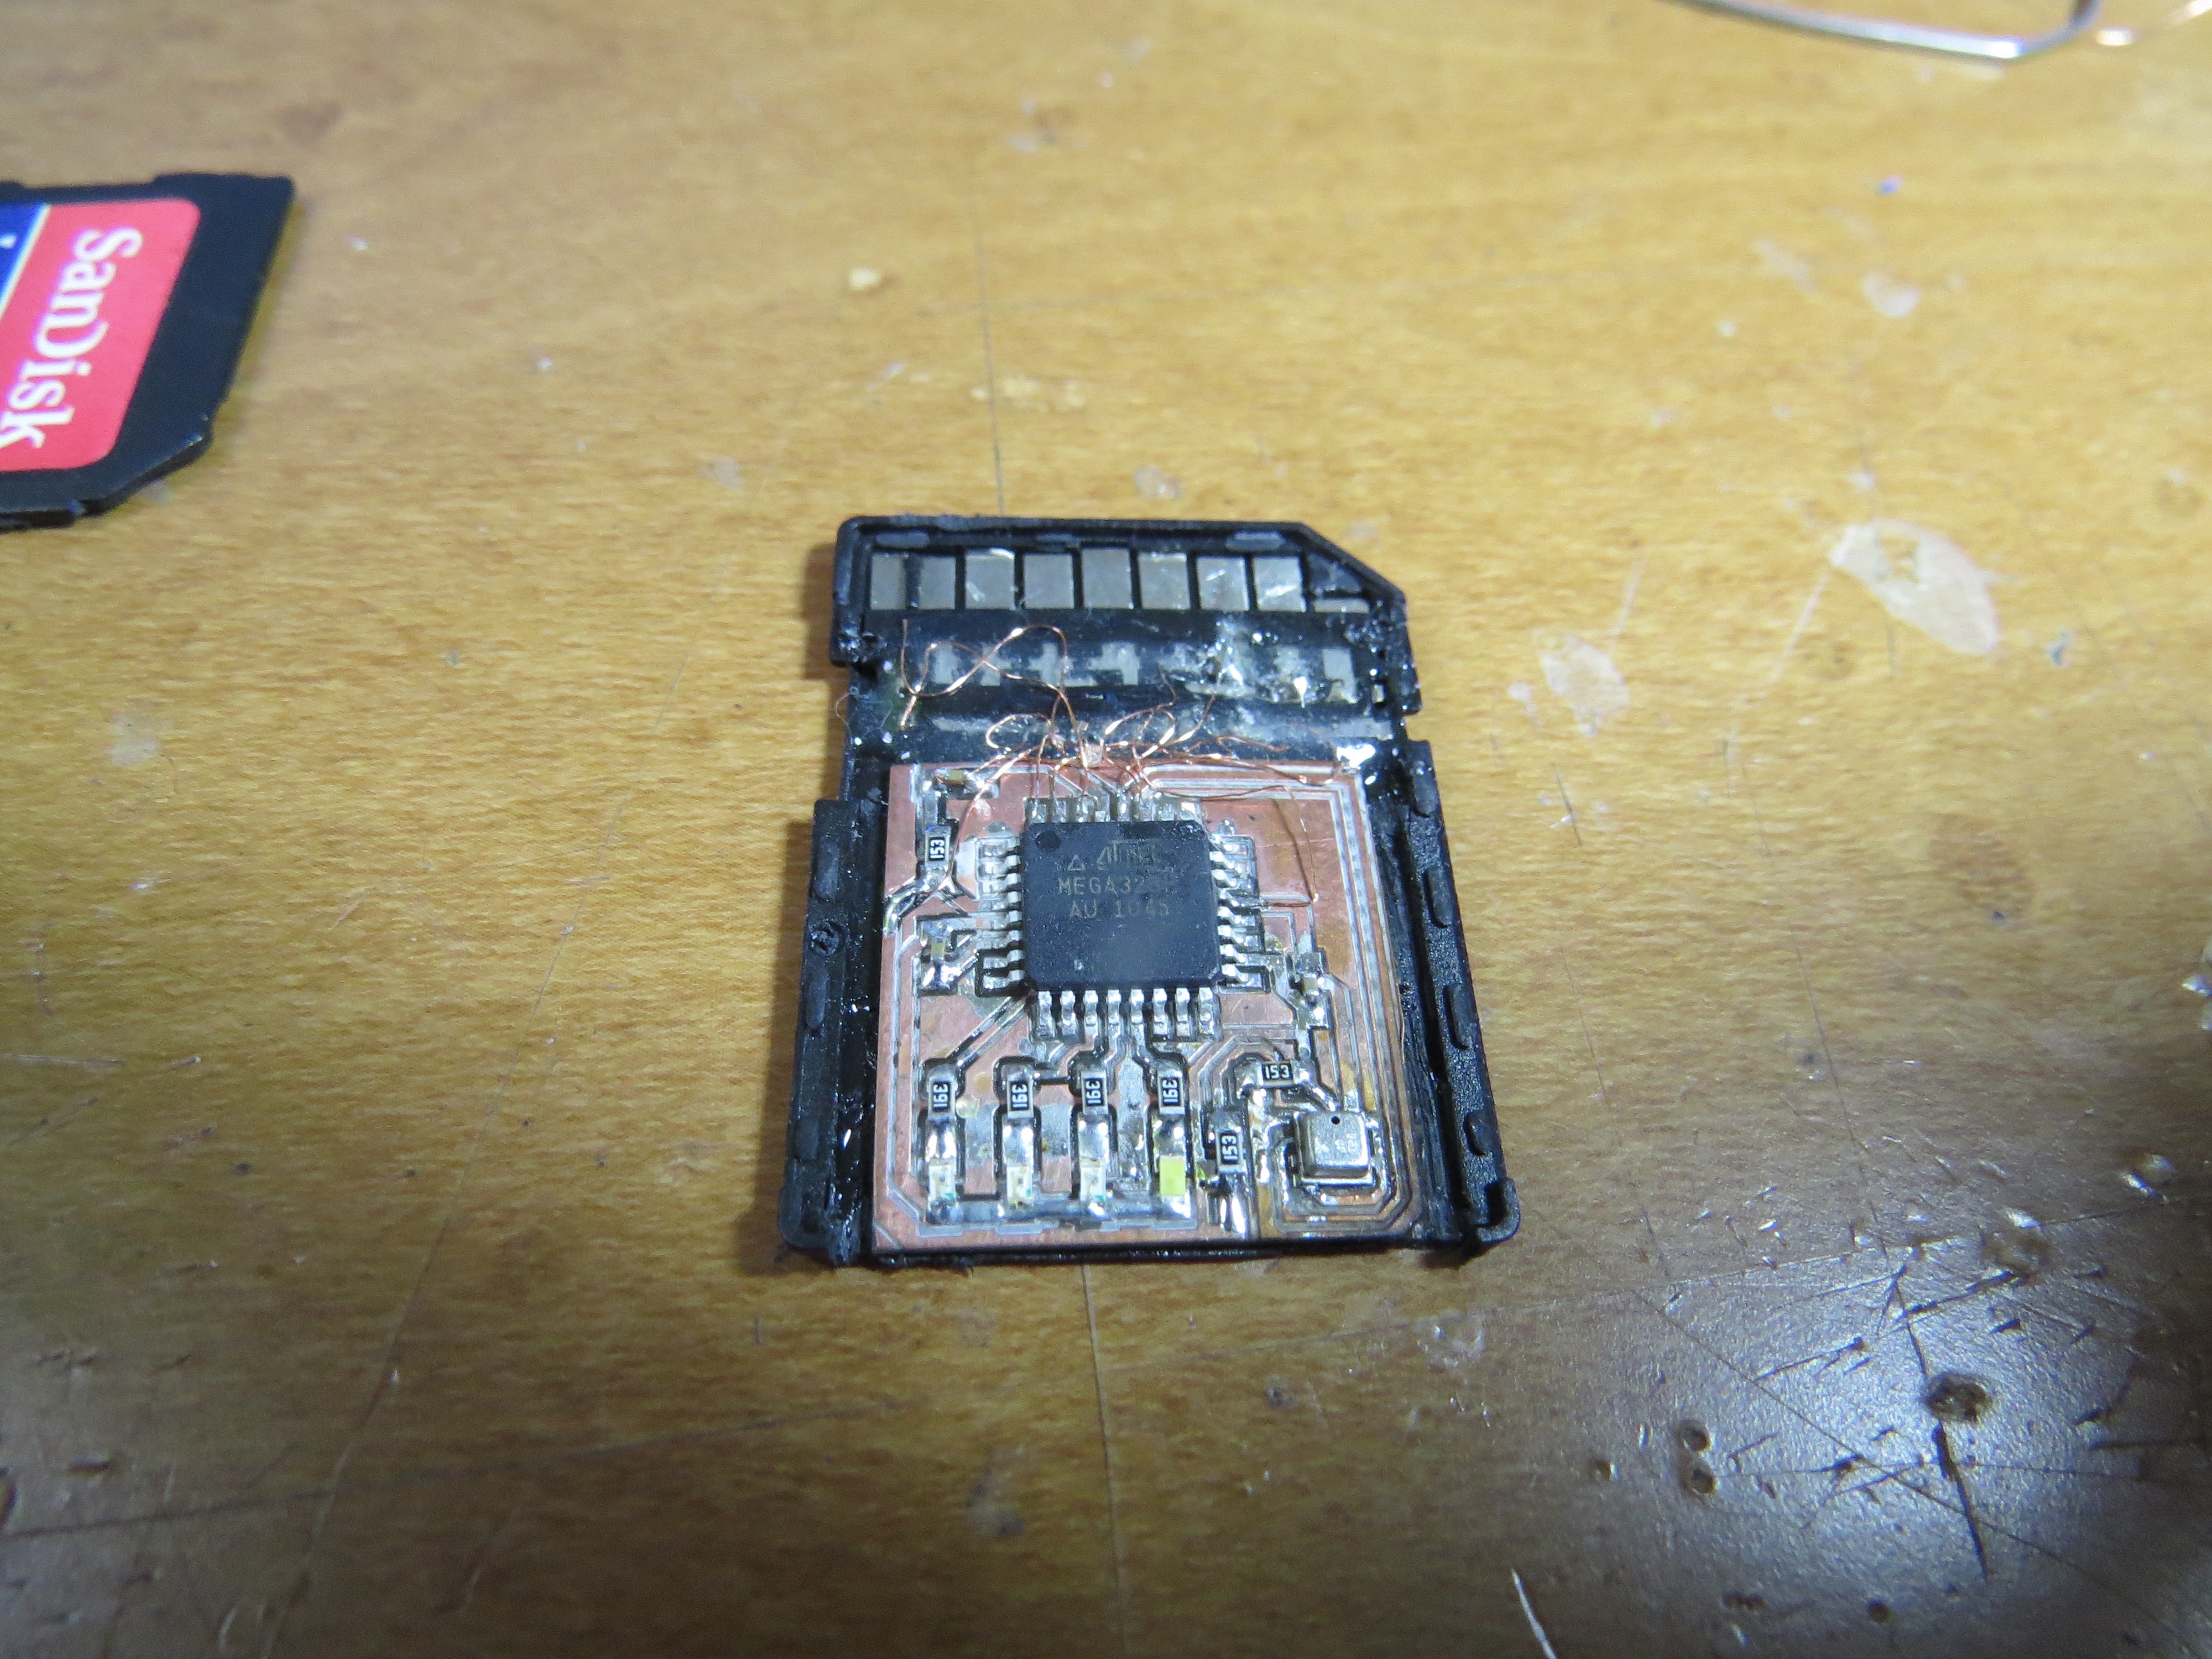
This is the inside view, without Arduino (ATMega328) part. Very rough coil is put bottom of SD card shell, and it is made of thin coated wires inside Kapton® tape. During power transfer, coil will produces some heat and this type of heat-resistant tape is indispensable (Please never try with general Scotch tape). The Qi interface part is simply cut down from Qi cell phone charger in the above picture. Indeed, half of space is occupied by Qi.![]()
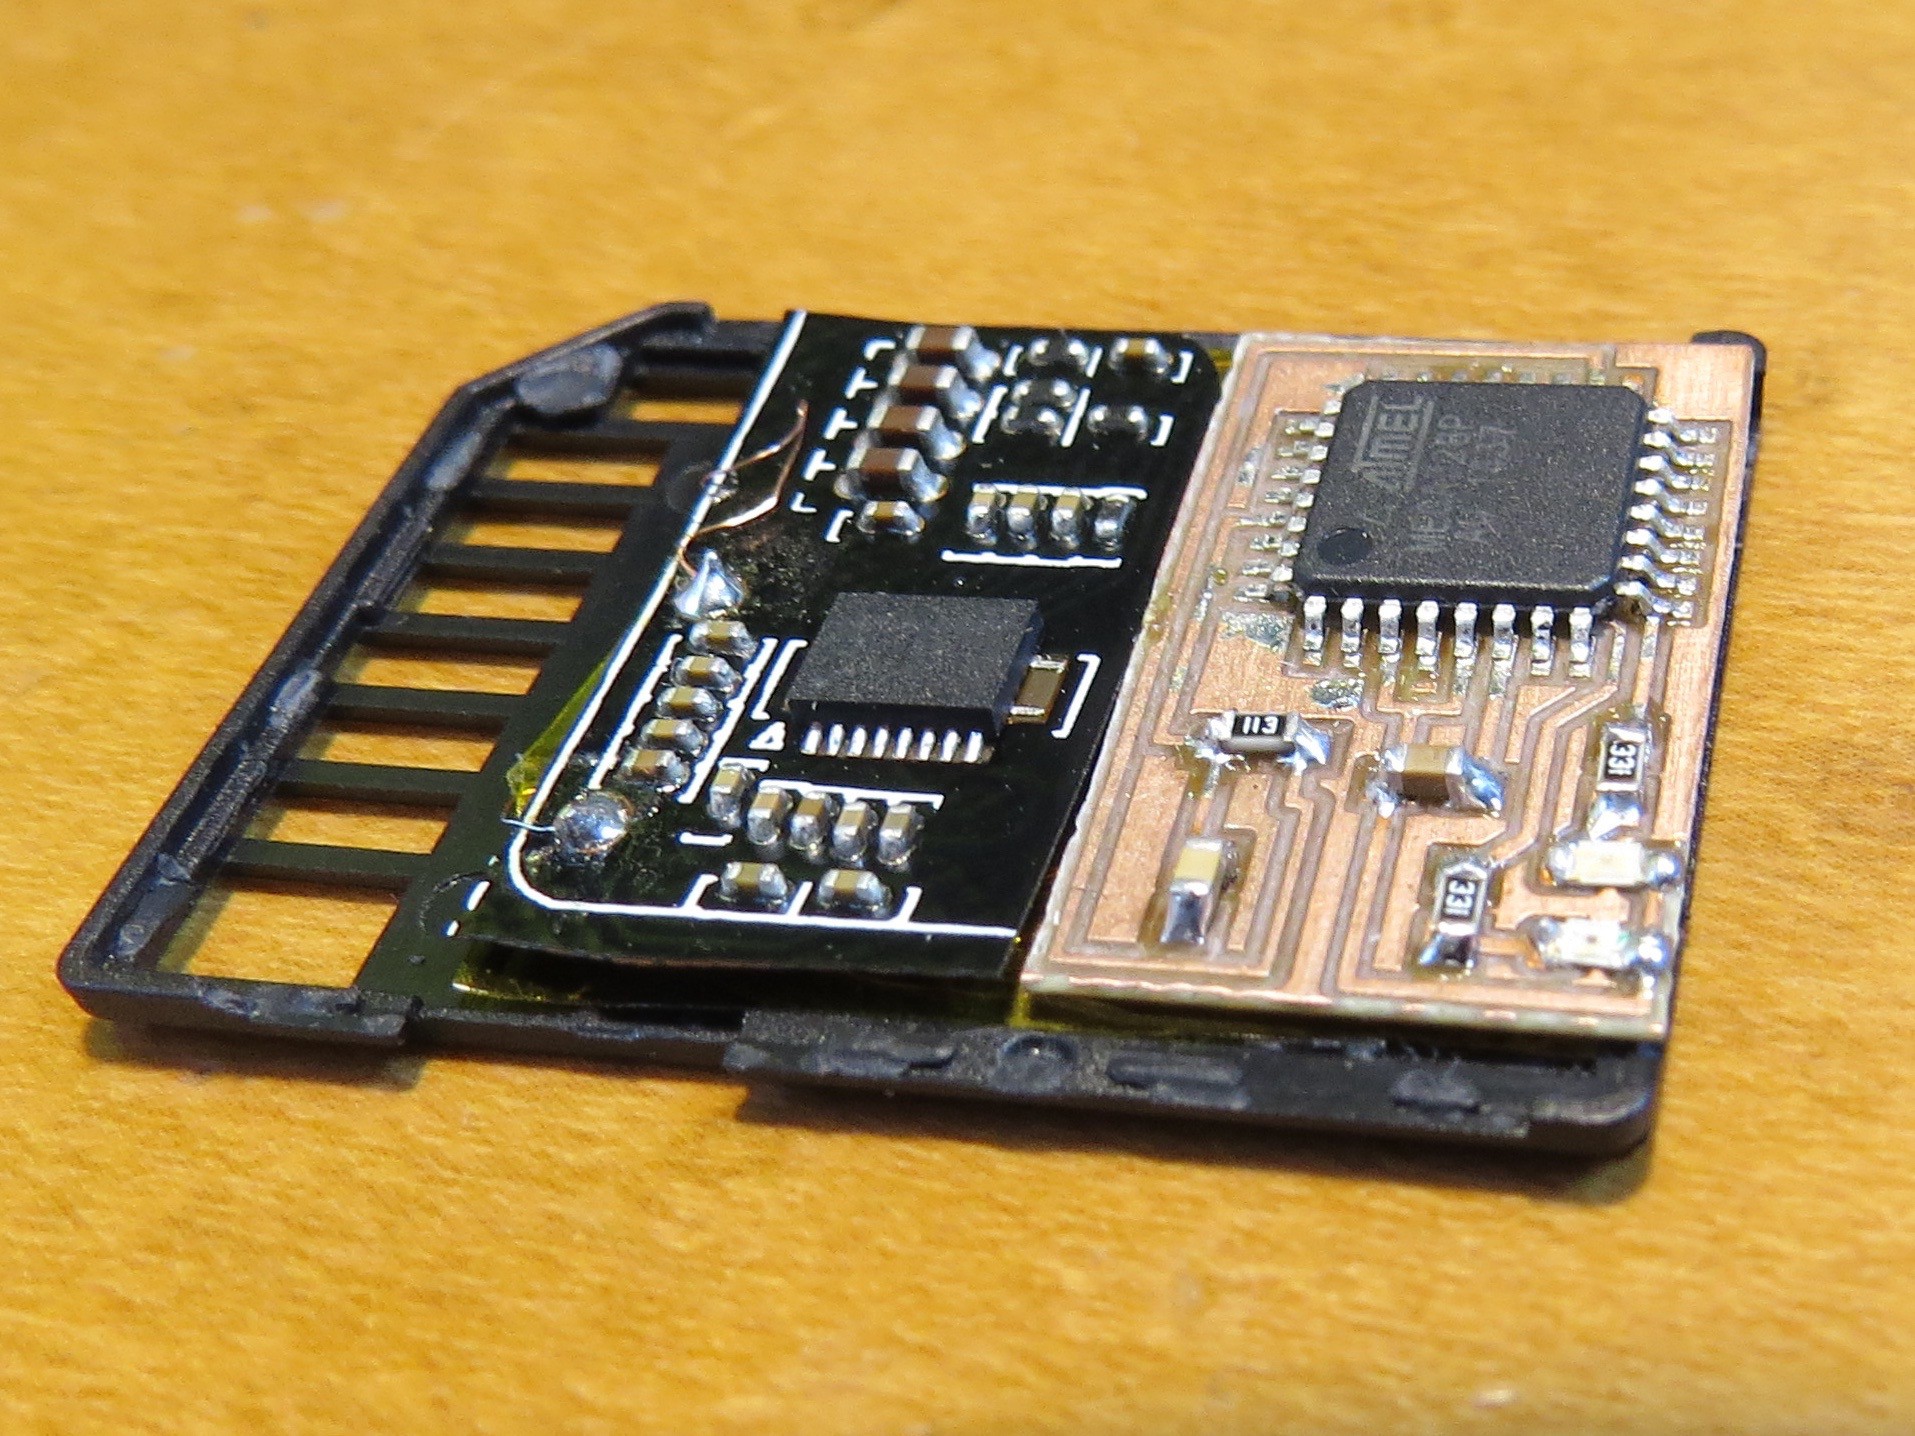
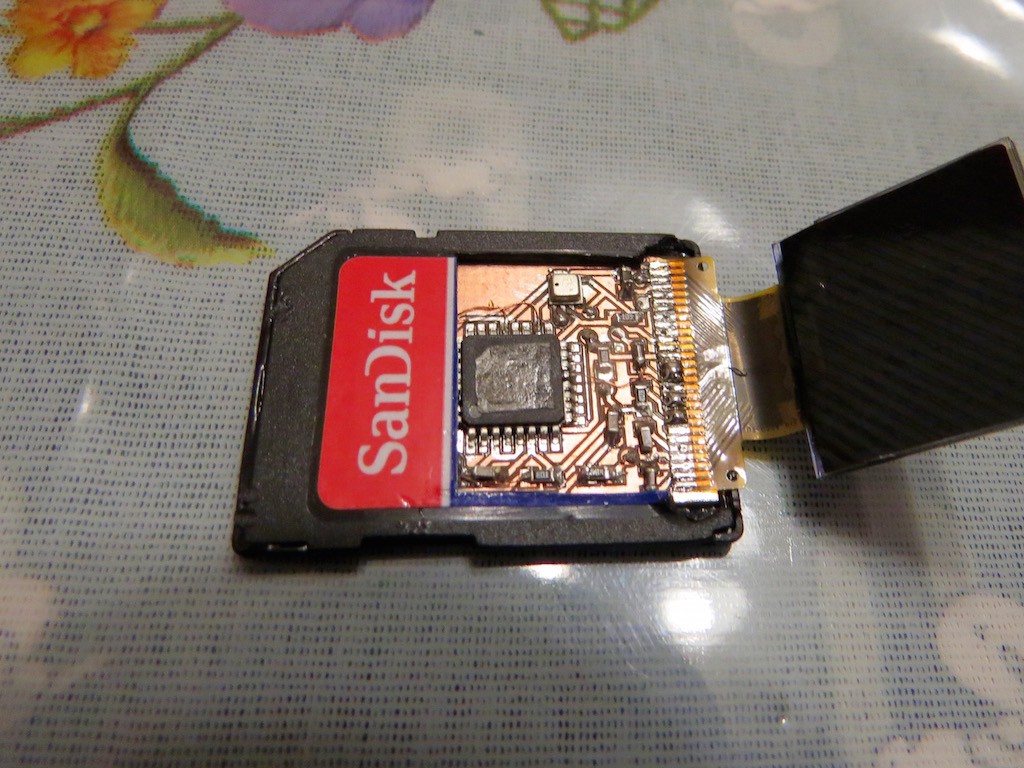
This is the full mounted shape. Very tightly arranged and I have to forget my ambitions to put OLED... ATMega328 part is full compatible with Arduino Pro 3.3V 328 version.![]()
This is the wired state. SD card shell is very weak for heat and need to solder terminals as short time as possible...![]()
And finally SDuino-Qi is working!! Actual operation can be found in the following movie... Have fun!![]()
-
Now it's on right direction
09/14/2015 at 13:16 • 3 commentsThe previous "SDuino on wrist" was a bit hard to read its digit and Nyancat, so this time,,
![]()
I rotate 90 deg to read well !
![]()
The function and circuit is exactly the same (Lipo battery and charging circuit), but
![]()
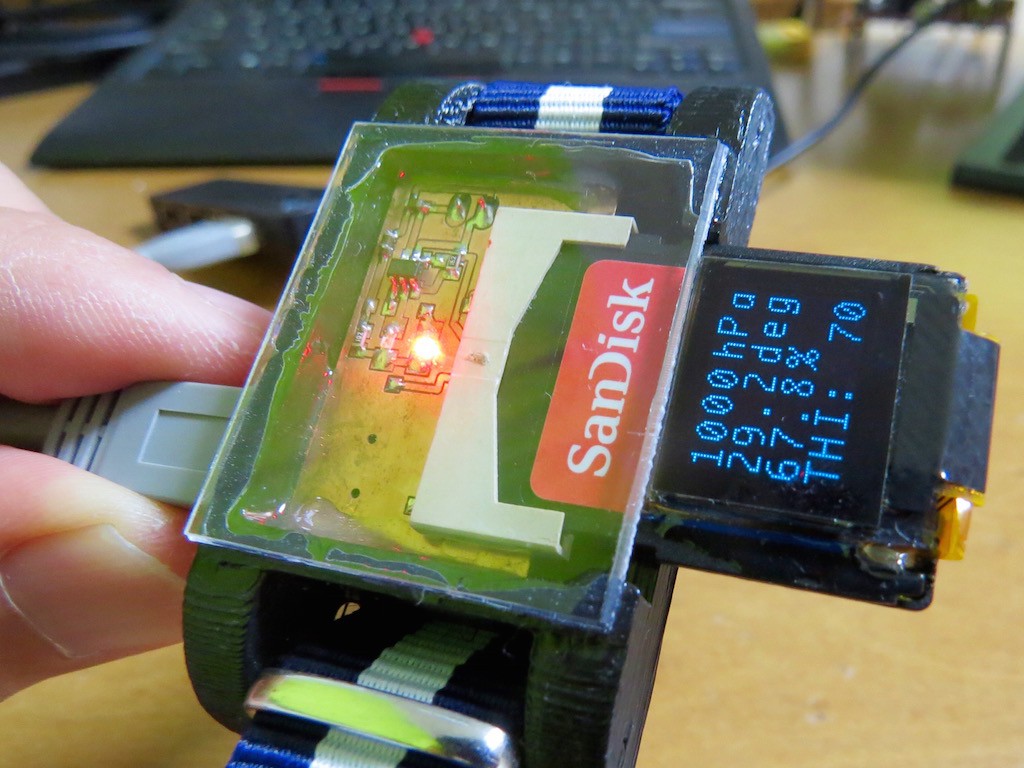
I inserted a string of plastic sheet (actually it is SD card holder cut by scissors...)
and it is working as "very low-efficiency light-wave waveguide". When it turns green, battery inside is full, and will turn red during charging....![]()
-
Now SDuino is on your wrist!
09/10/2015 at 12:09 • 5 commentsNow SDuino can be on your wrist!!
![]()
It is a base unit, consisting of Lipo charging circuit with small LiPo battery.
![]()
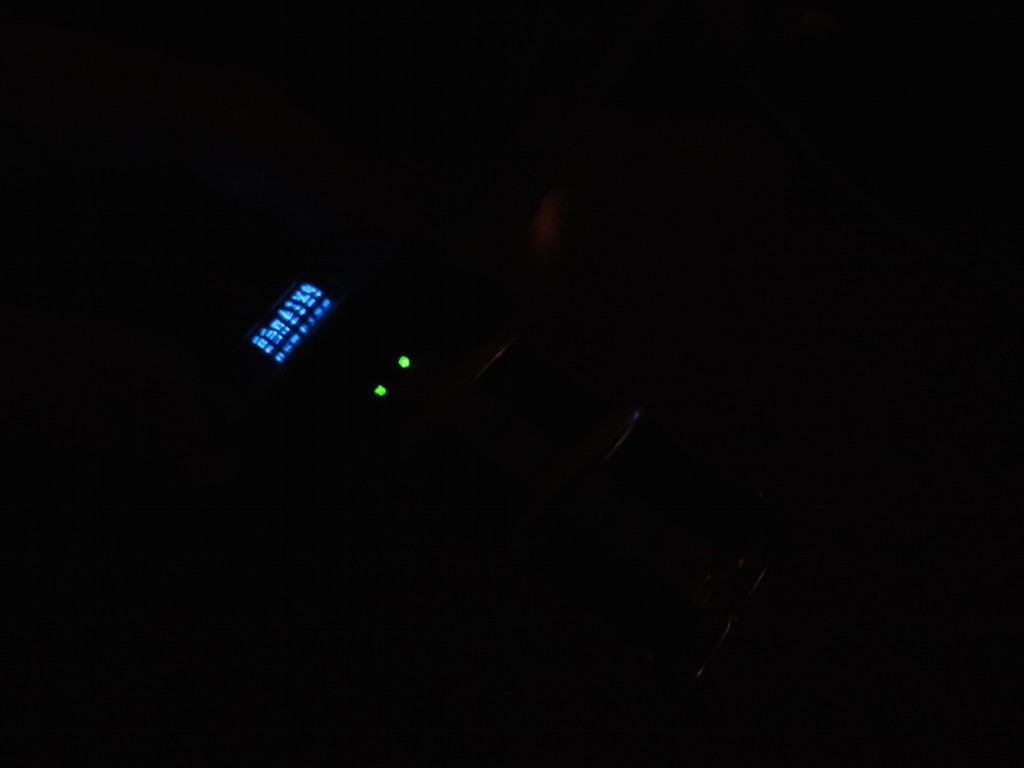
Battery charging is through USB interface, and during charge, red LED turns, and
![]()
After full charge, LED turns GREEN, and charging circuit will stop charging current. Details can be found in the following movie... Have fun!
-
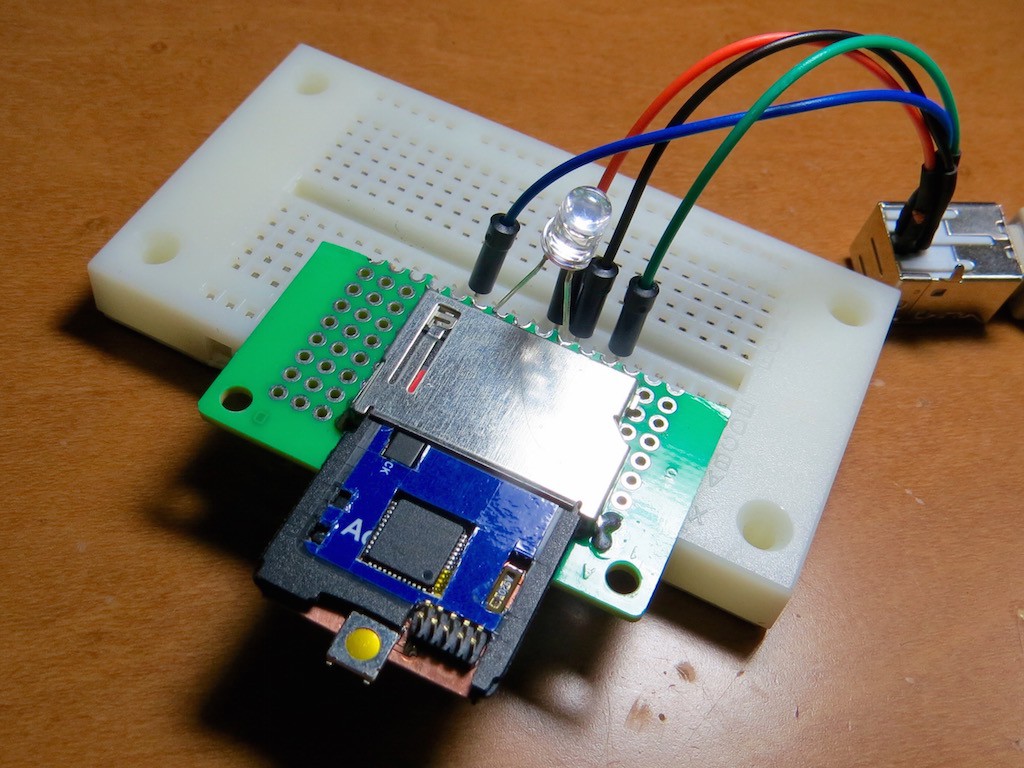
SDuino Zero can drive OLED display!
08/30/2015 at 02:20 • 0 commentsSo I test my SDuino Zero driving OLED display.
![]()
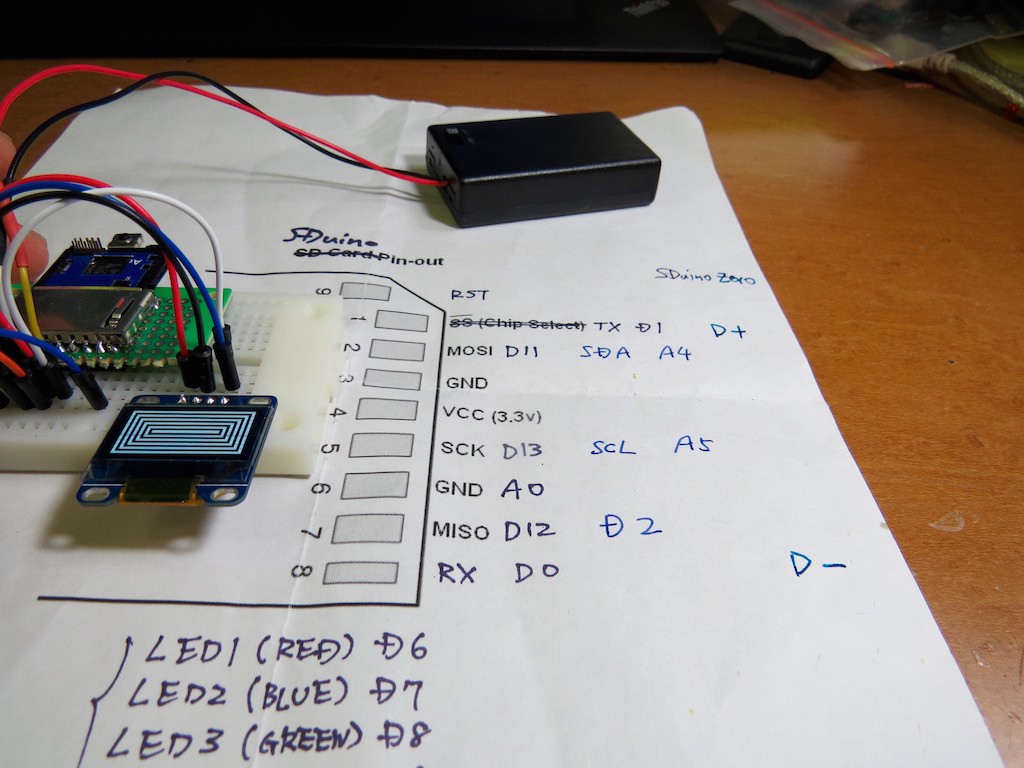
New SDuino Zero does not have serial I/O. Instead, it has
USB interface!
I change the pin assignment Tx to D+ of USB, RX to D- of USB. Except for that, pinout has same as original SDuino, meaning I2C interface.
![]()
I quickly upload the OLED driving test sketch through USB. Just applying voltage, SDuino Zero working with powerful potential. It is 32bit ARM architecture with 256kB flush memory, 32kB SRAM.
Schematic and board information is released on github !
Here you are watching future! Details can be found in the following movie!
Have fun!
-
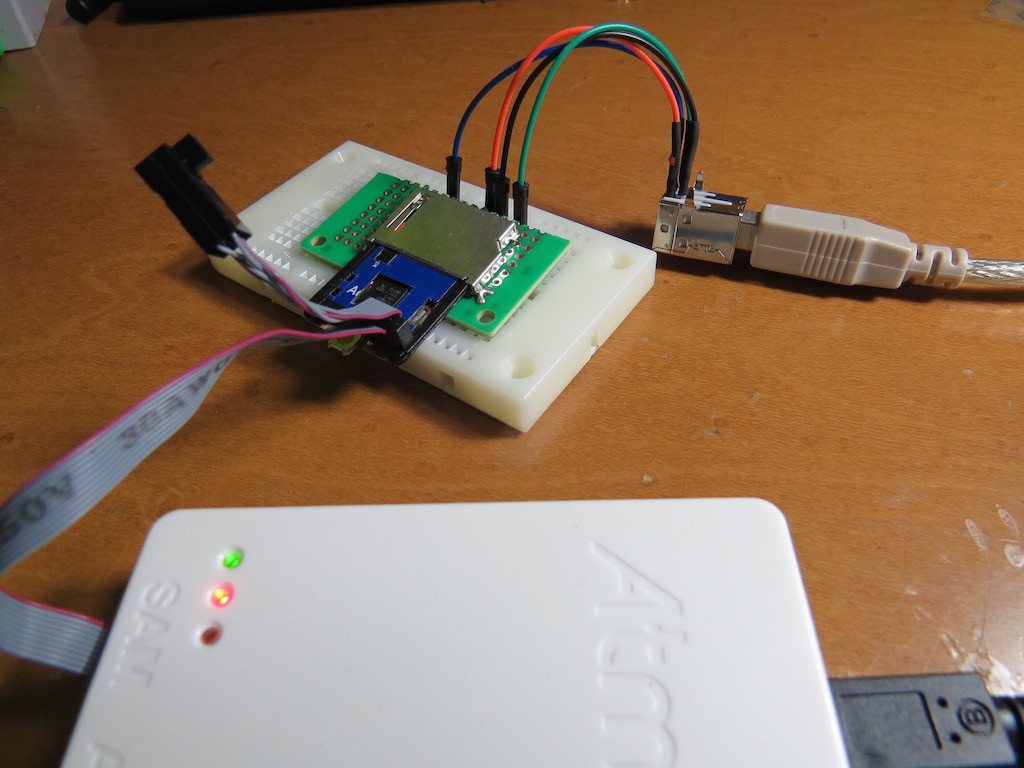
Proudly introducing SDuino ZERO
08/29/2015 at 13:32 • 2 commentsI would proudly present NEW generation of SDuino,
SDuino ZERO
SDuino with Atmel SAMD21G18A, ARM architecture MCU SDuino, which is full compatible to Arduino Zero!!!!!!!
![]()
Before wiring.
![]()
Just before wiring!
![]()
Writing Arduino Zero boot loader by ATmel ICE
![]()
Here you have!!! No need for FTDI anymore, just USB connection is enough to upload your binary!!!!!
-
Hackaday Prize video for semifinal selection!
08/26/2015 at 07:55 • 0 commentsThank you everyone, and I am so glad my SDuino project is selected as "semifinalist of Hackaday Prize"!!! I made a short summary video of SDuino! Have fun!!
-
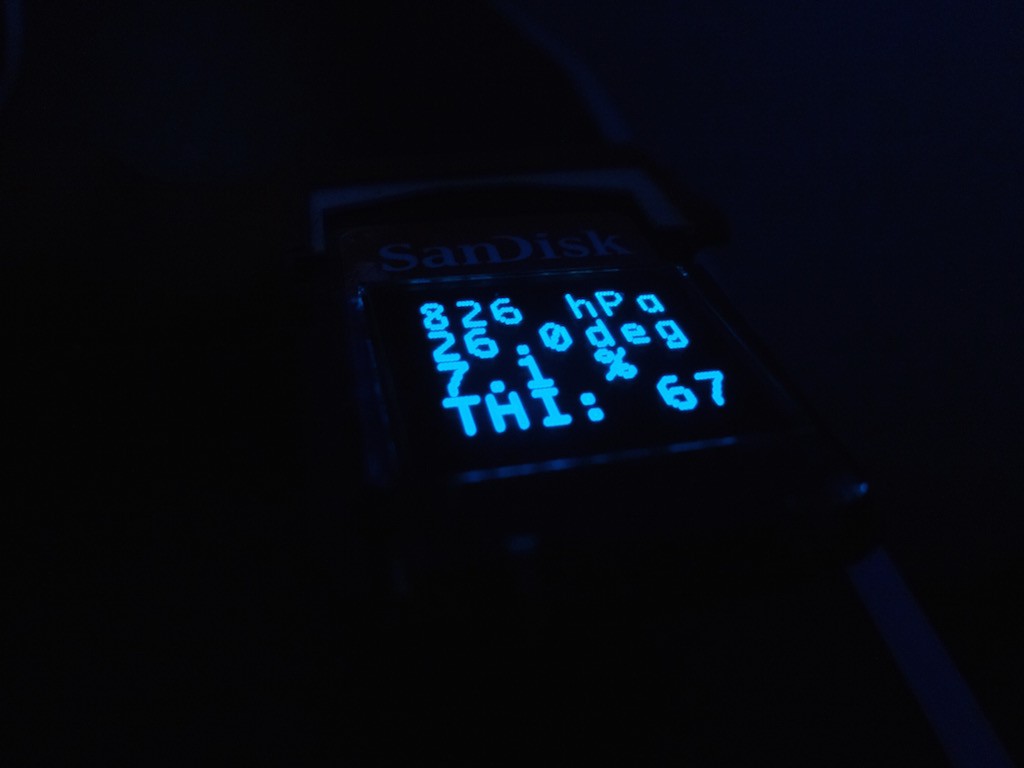
Quick measurement on flight
08/16/2015 at 06:38 • 0 commentsI had a short visit to New York, and during flight acrossing pacific, I measure its atmosphere. (Fortunately inspection at border did not forbid me to bring it, of course no-harmful so it is natural, but ..) As in the following picture, pressure is very low as I had imagined, but humidity is beyond my imagination. Wow!! just 7.1 % !!!!
![]()
-
SDuino Advance: Display embedded SDuino!
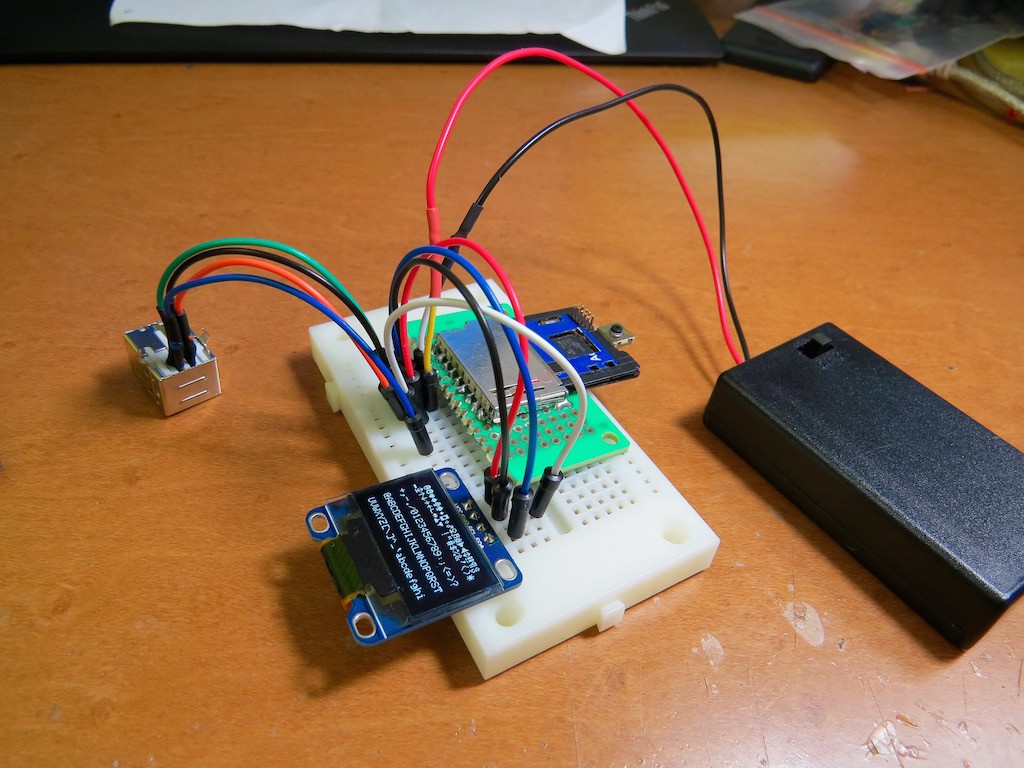
07/22/2015 at 12:49 • 8 commentsFinally SDuino has an embedded graphic display.
![]()
I am not professional of this type circuit, but I would like to say this is very close to professional work (Excuse me, real professional, I know you are far beyond.)
![]()
Previous SDuino case, the computed THI (Temperature, Humidity Index) is presented by simple LEDs, but this time, all the information measured by sophisticated BME280: pressure, temperature, humidity and finally THI in digit is shown in small embedded display!
Of course, this is still Arduino compatible, and you can upload any sketch working with OLED as you wish! (Not limited to atmosphere measuring, for example this can be ultra-small BASIC computer, and ultra-small Bitlash console, and... as you wish, as you imagine!)
Actual operation can be found in the following movie. Have fun!
-
More advanced SDuino, temperature, humidity, pressure!
07/18/2015 at 06:53 • 0 commentsNow my SDuino gained a bit more advanced sensing using very sophisticated sensor module (BME280) by Bosch. In general, humidity sensor is more space-taking one (as well known as BHT-11 ?) but this sensor is even smaller than general pressure/temperature sensor!
![]()
Small square metal can package is BME280, and very small means hard for hand-soldering. In my case, I just do it soldering iron as usual.
By measuring humidity, SDuino can evaluate "discomfort index" ( or temperature-humidity index) by following equation
, where T_d is temperature in deg. H is humidity in percent. Color of blinking LED will change for THI<60: blue (cold), THI<75: green (comfortable), and THI>75 (hot!).
SDuino operation does not need computer and one it is programmed, just applying 3.3 V will show you current index. This type of index is very useful to avoid heatstroke, the fatal disease in summer season!
![]()
Actual operation can be found in the following movie.. have fun!
-
Now SDuino has OLED display
07/16/2015 at 11:04 • 0 comments![]()
The original Sduino had a SPI interface(SCK, MOSI, MISO) and they are useful for boot-loader writing or direct .hex file writing. But it take more wiring than I2C, so I changed its pinout and tried to connect OLED display. Naturally it works!
Actual operation can be found in the following movie... have fun!
SD card sized board, let's say "SDuino"!
Once I was excited to see Intel's announce that they will release "SD card sized computer" but it was not true. This time I made it true!