Close
0%
0%

LED Polyhedron

Charlieplexed LEDs 3D-soldered together to make blinky platonic solids!

Similar projects worth following
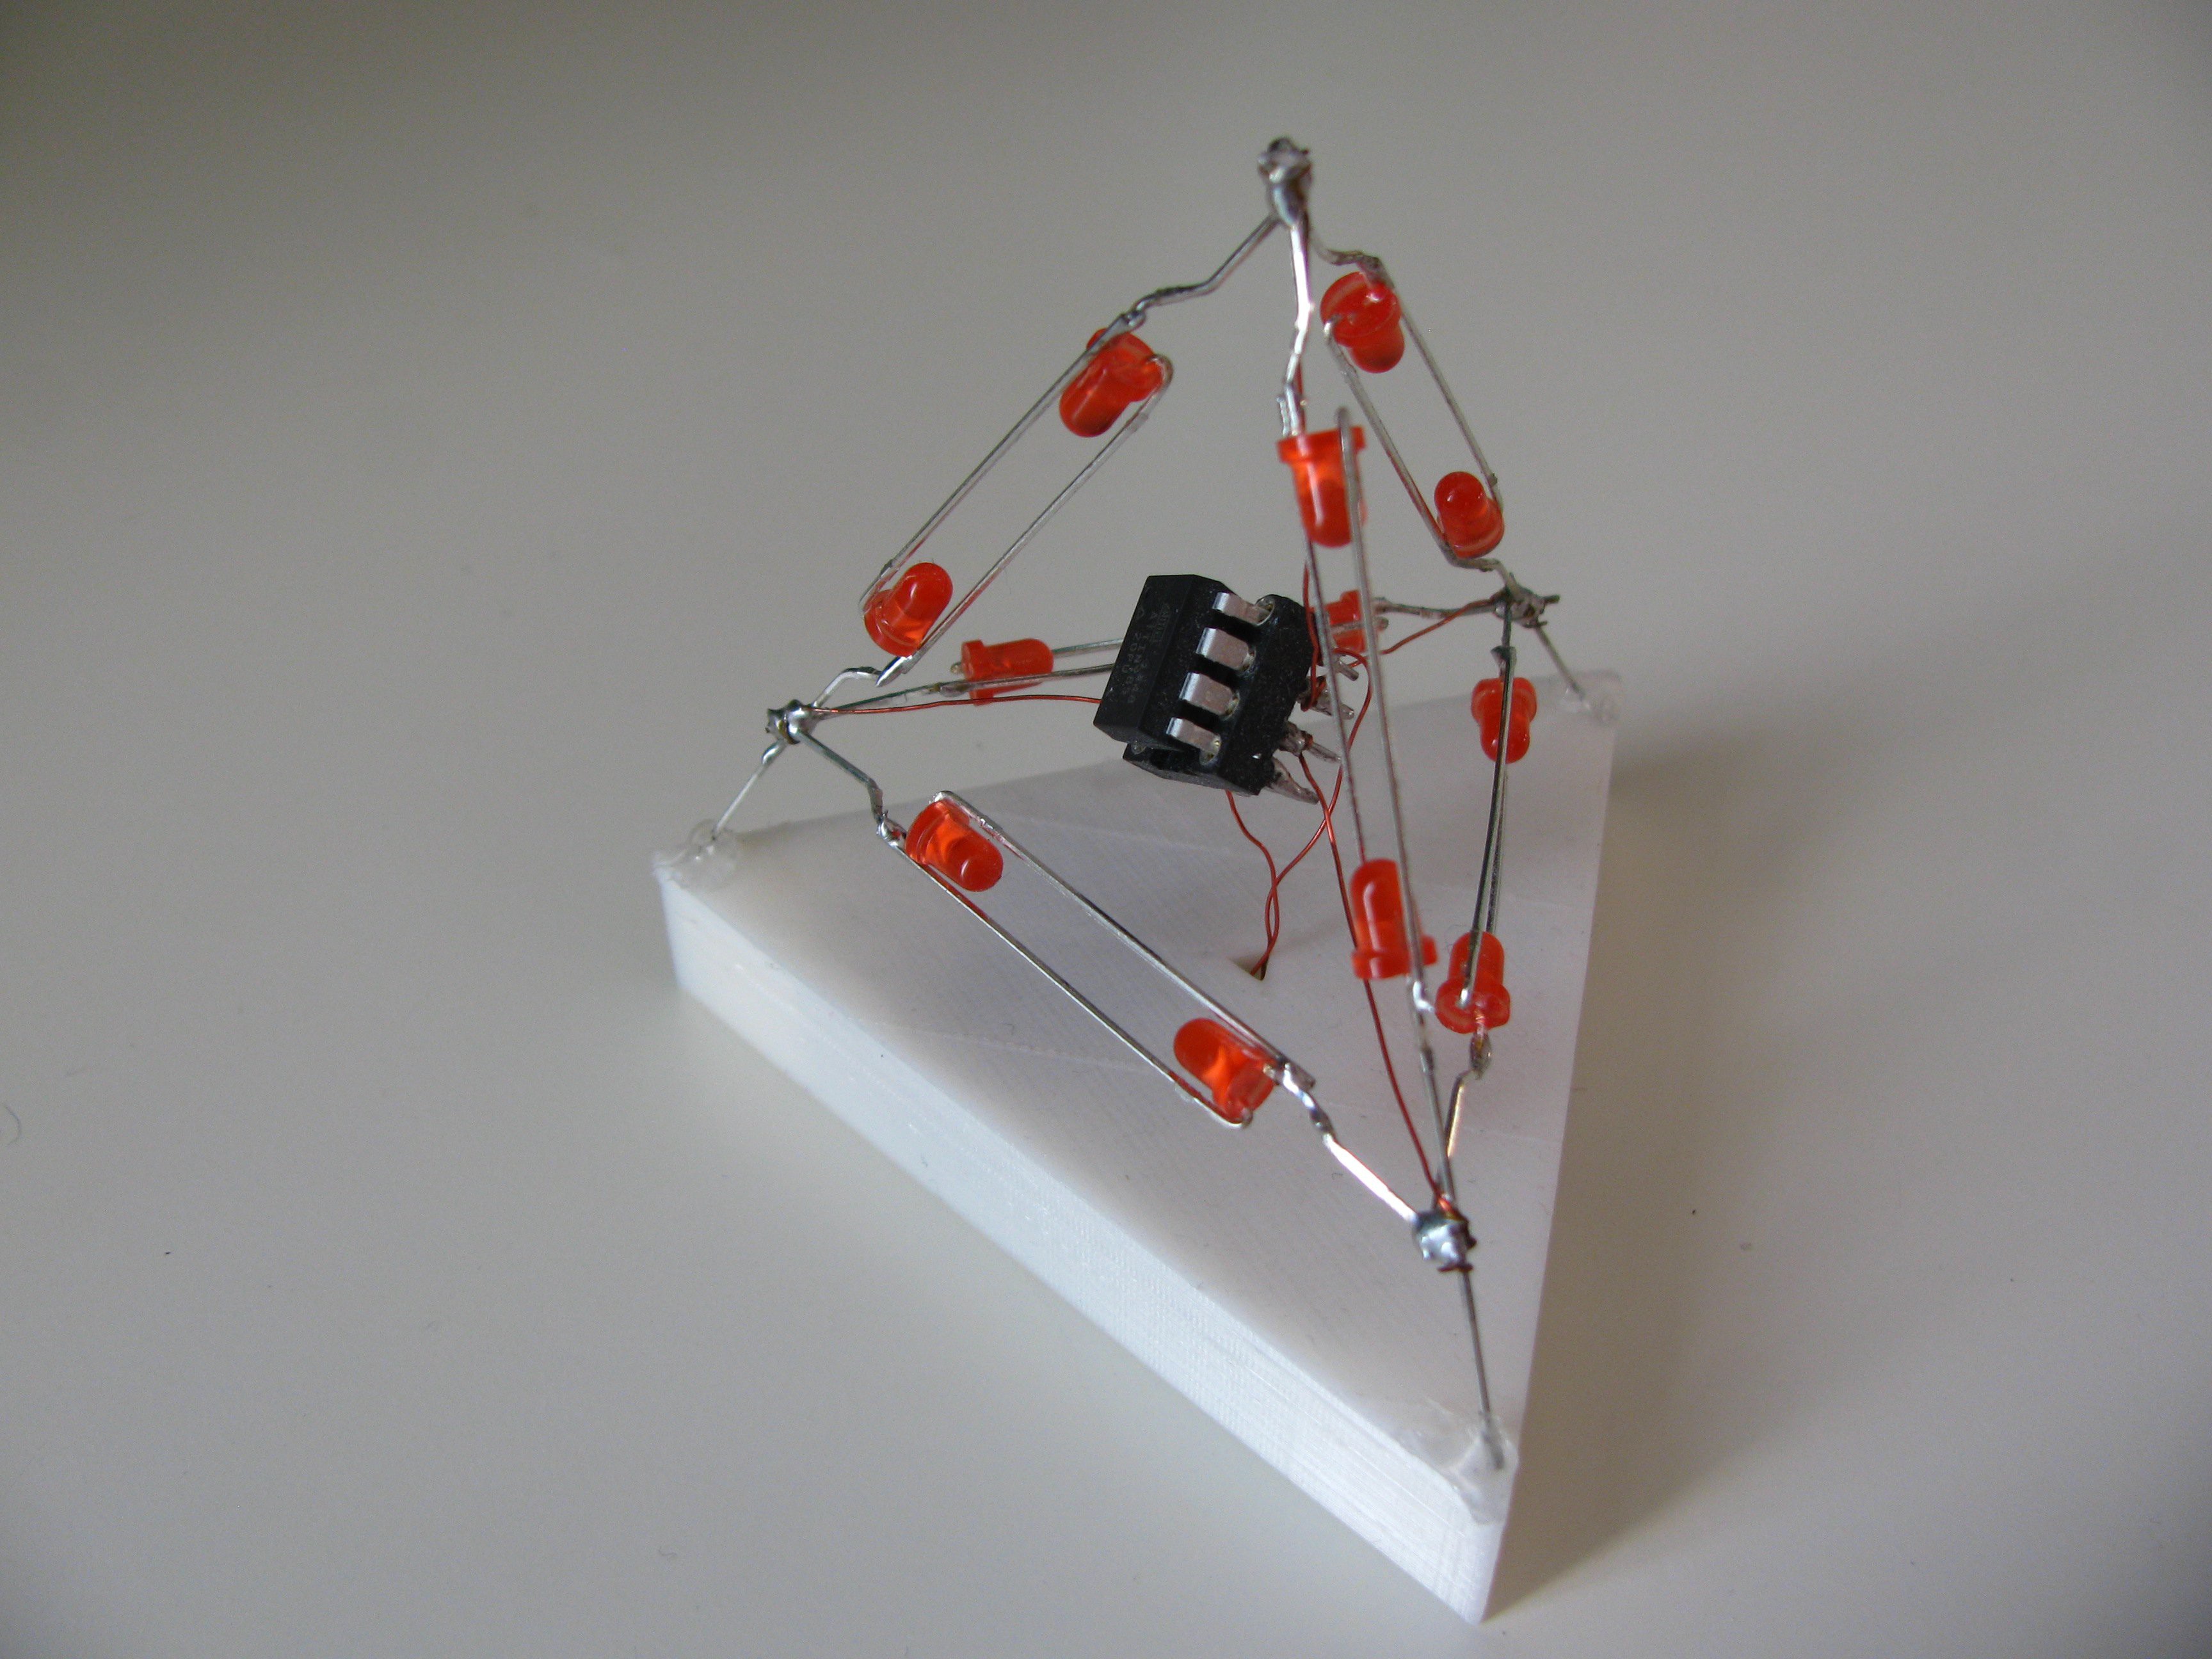
I built a LED tetrahedron with a simple, randomized 'snake' animation during 31C3 in Hamburg.

The hardware is extremely minimal: Only LEDs, a controller, and some wires. The LEDs act as the supporting structure, so not even a PCB is required!

The code is designed to be adaptable to any polyhedron (hopefully), so I encourage you to build a larger one!

*** Description of the software and how to adapt it to larger polyhedra coming as well ***


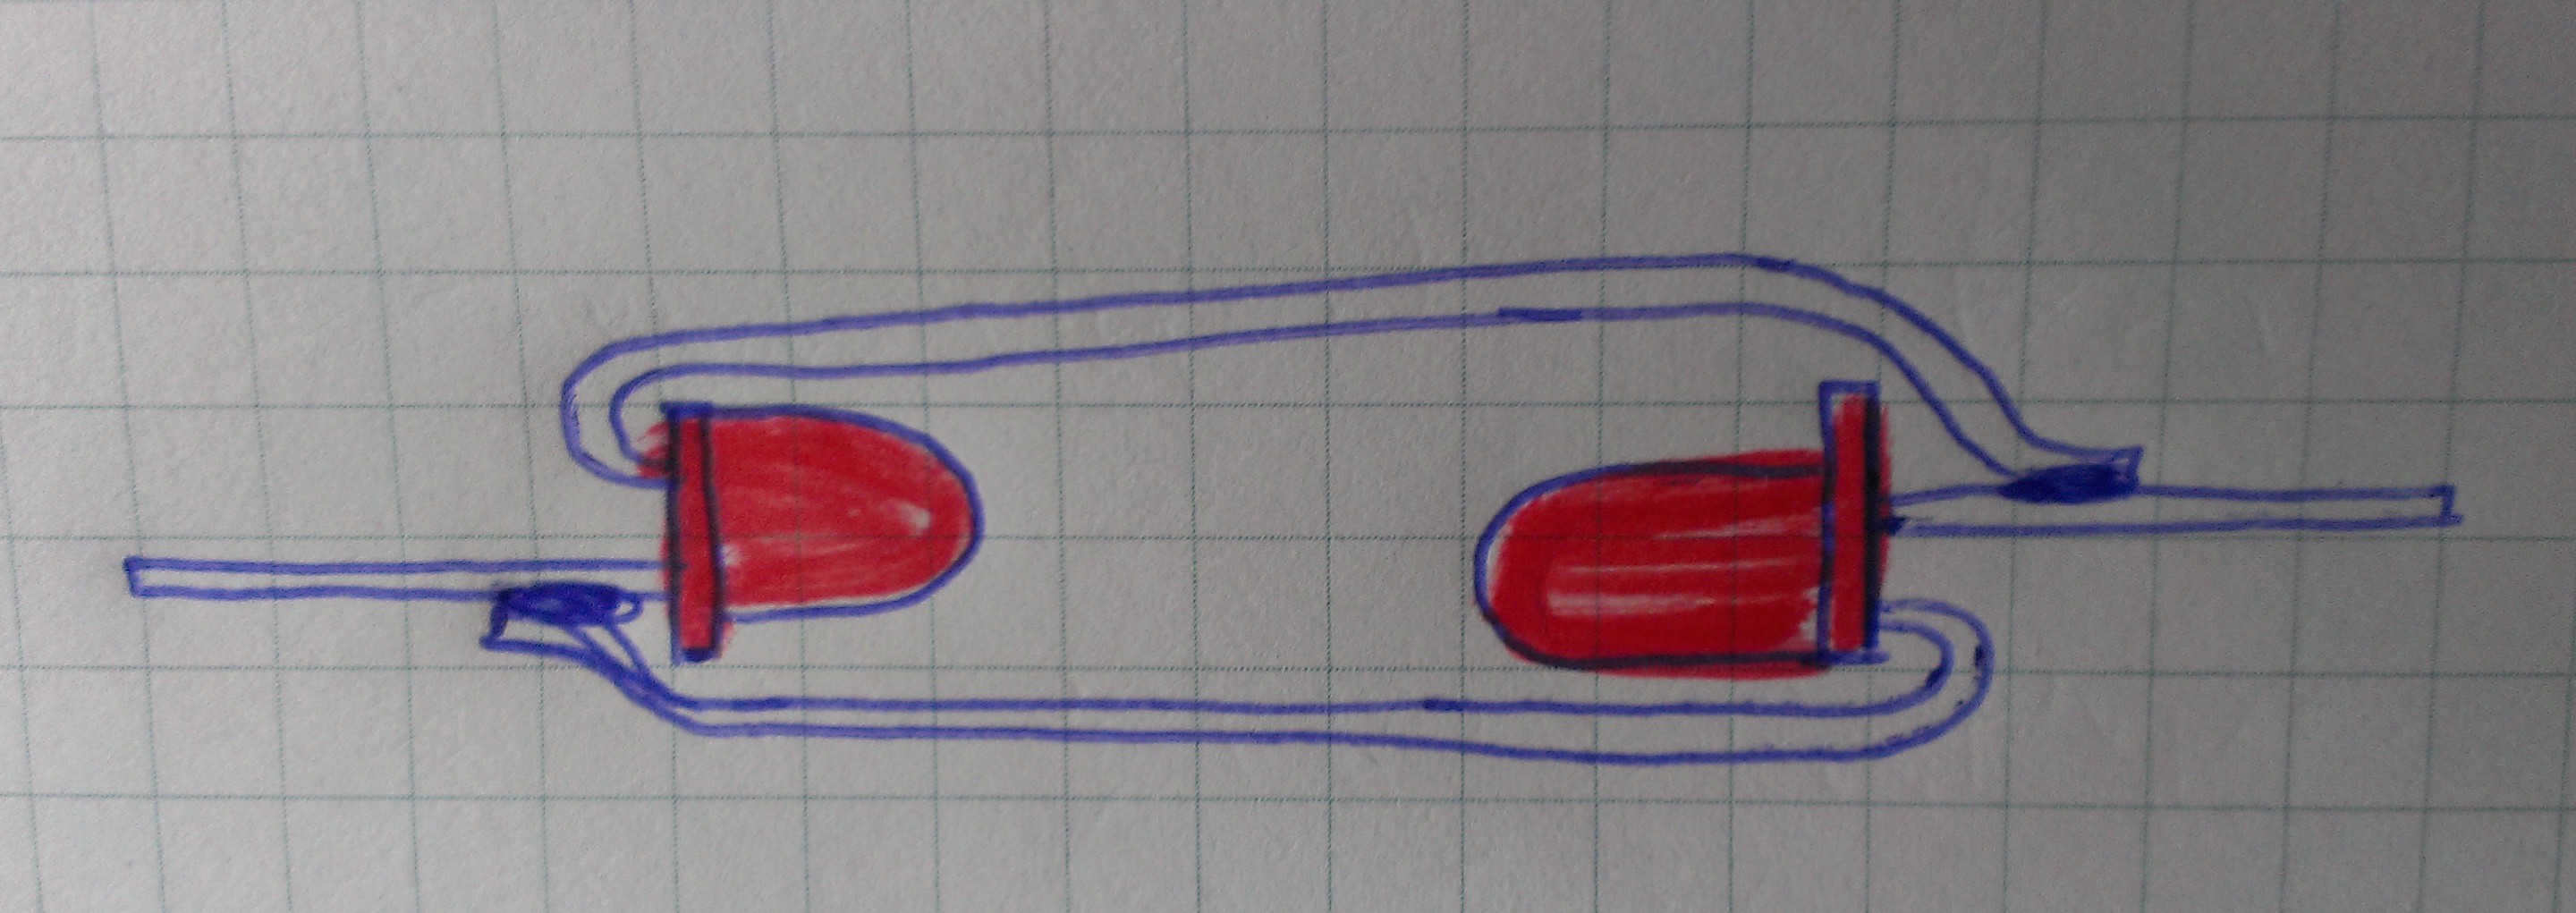
Two LEDs are soldered together in anti-parallel and facing each other, by bending one lead on each by 180º. This unit forms one edge of the polyhedron.

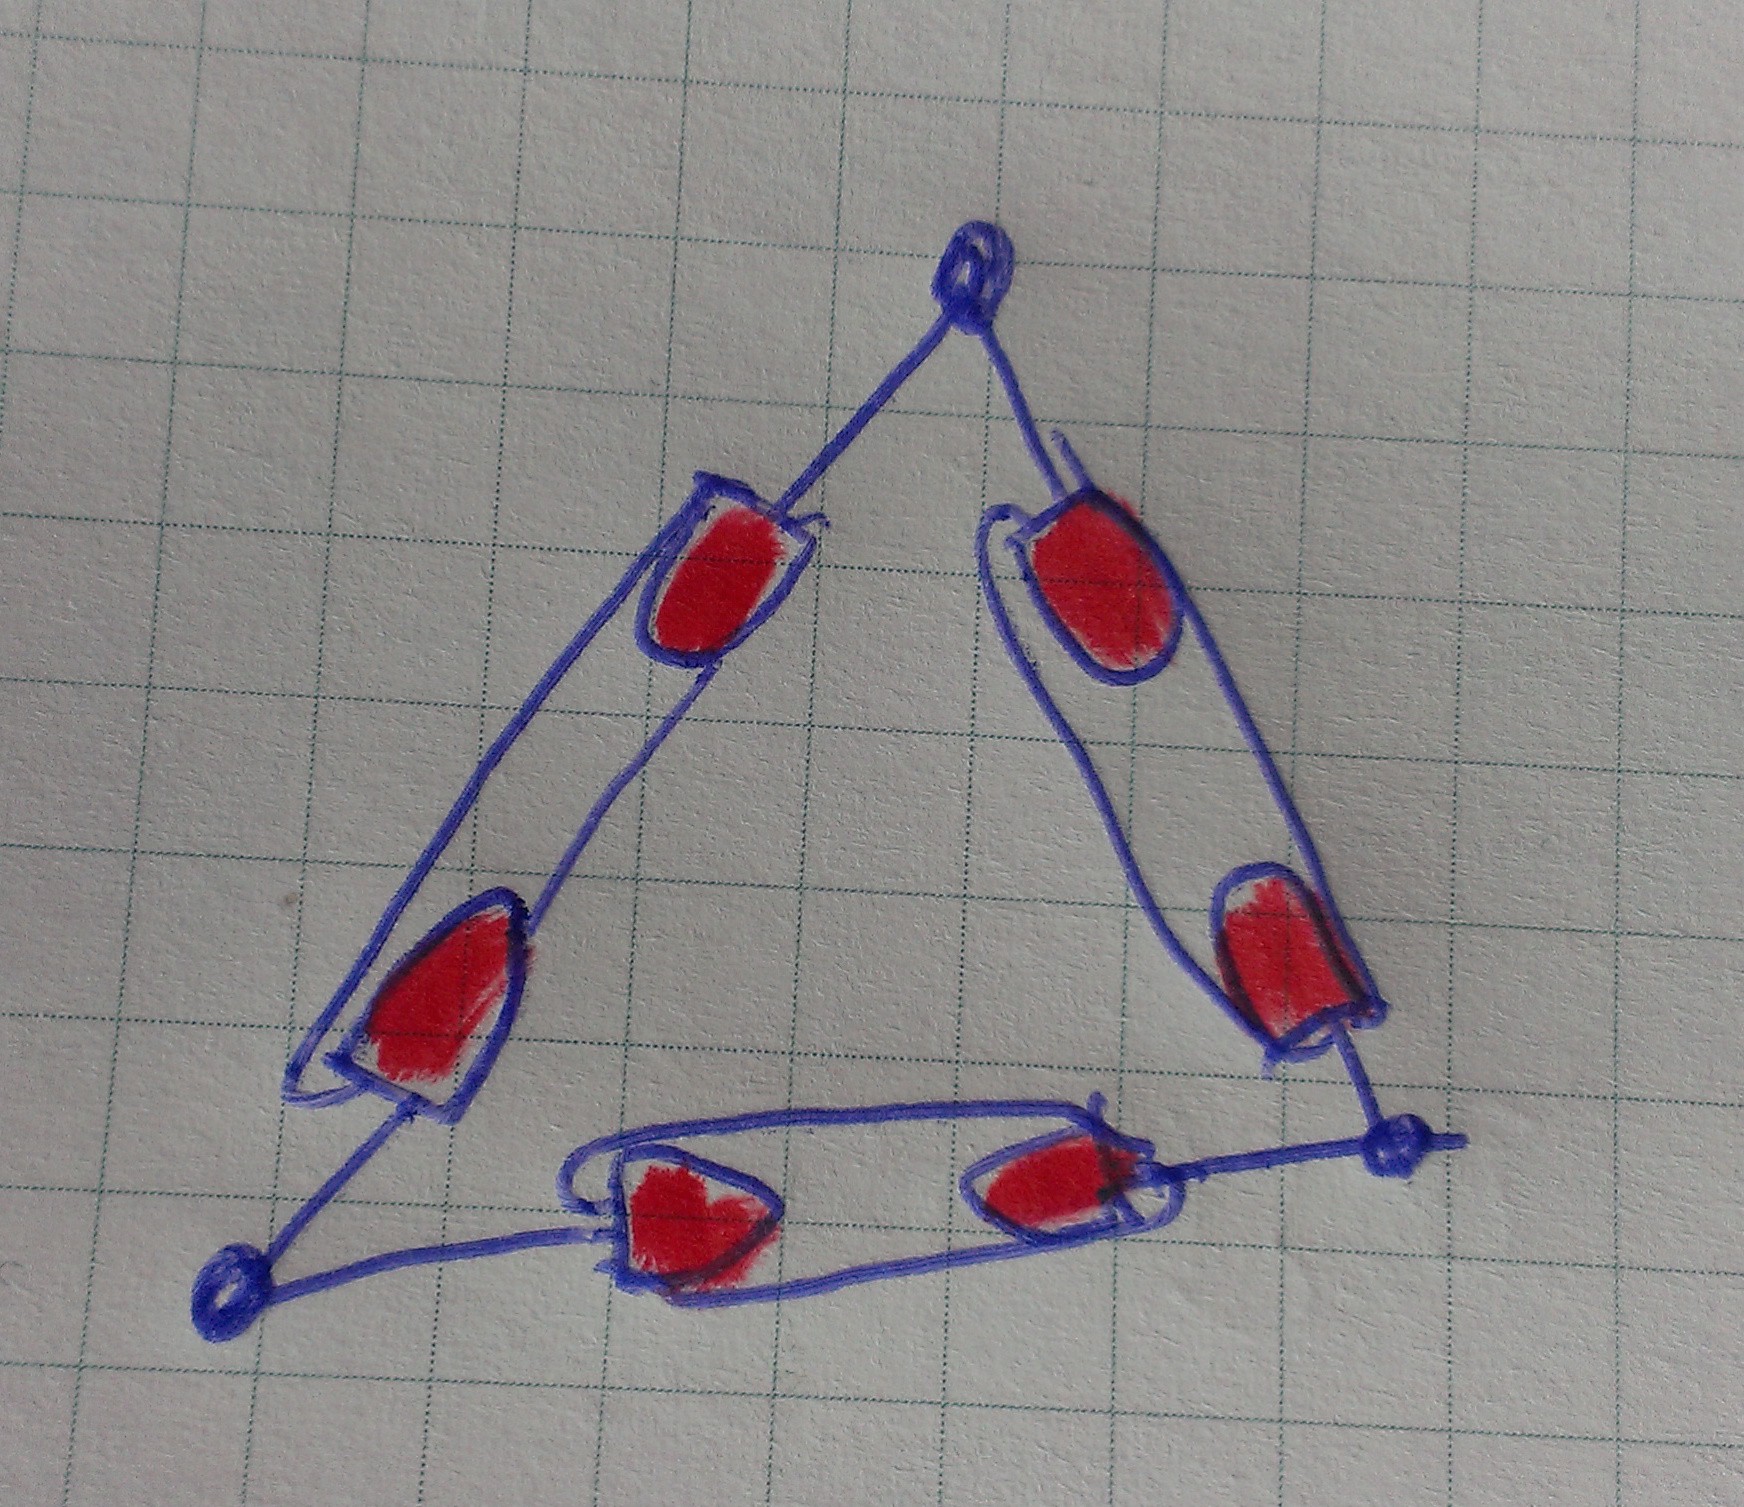
The free leads each form part of a vertex. By building the appropriate number of edge segments and soldering them together, a 3-dimensional polyhedron is created.

The microcontroller is suspended in the center of the shape by attaching each vertex of the polyhedron to one IO pin on the μC using a fine strand of wire.


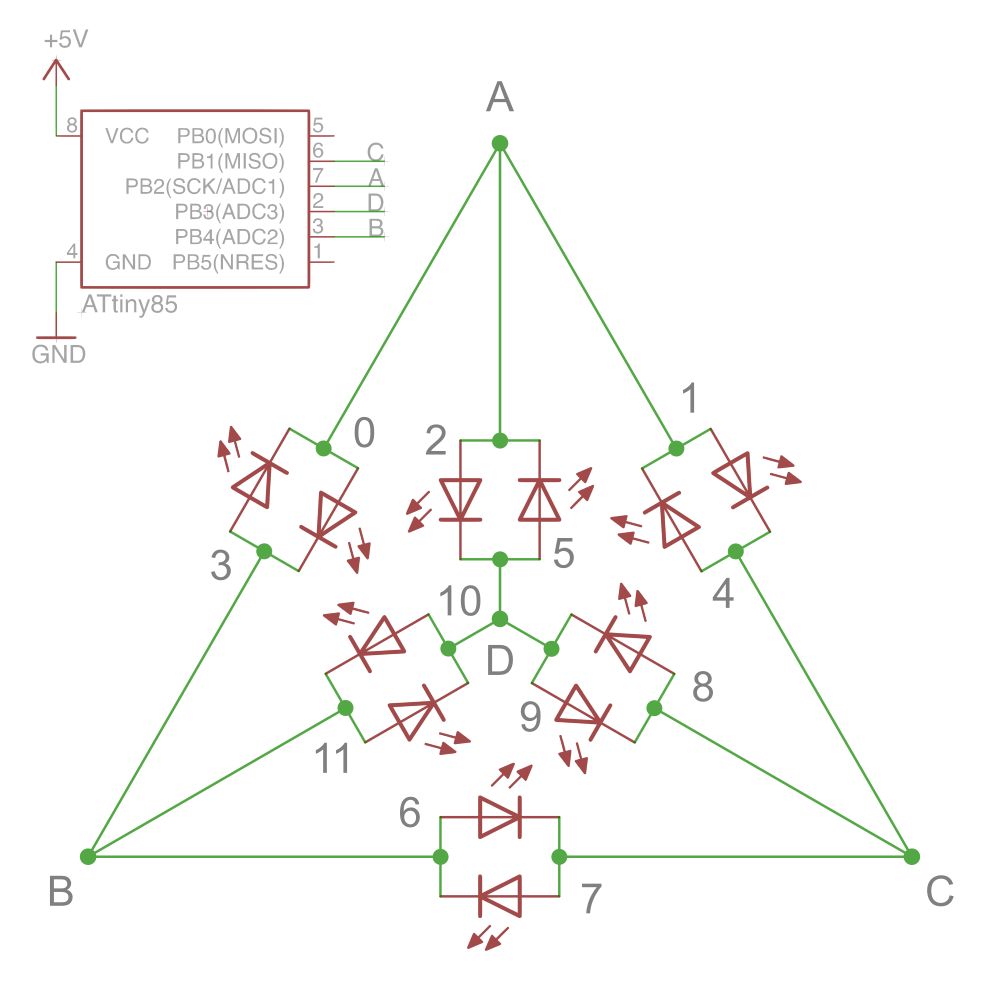
The following schematic shows the arrangement of the LEDs and the IO pin assignments for the LED tetrahedron.
I have only built a tetrahedron (the smallest platonic solid) so far. If you want to try a larger one, here is an overview of what you need:

FacesEdgesVerticesLEDsIOsμC
Tetrahedron464124ATtiny*5
Cube6128248ATtiny*313
Octahedron8126246ATtiny*313
Dodecahedron1230206020ATmega*8
Icosahedron2030126012ATtiny*313

* Source; awesome graphics by DTR, CC BY-SA 3.0


The idea of building this came from JSK during 31C3 in Hamburg, and I set out to build it on the very same day. One night of soldering and programming later, and the tetrahedron was up and blinking :-)

  • 12 × LEDs Two per edge segment
  • 1 × Microcontroller ATtiny45 for tetraheron, probably ATtiny4313 for larger polyhedra
  • 1 × IC socket Optional, to protect the Microcontroller while soldering
  • 1 × Wires to suspend the microcontroller in the center
  • 1 × (Base) Optionally use my parametric 3D-printable base

  • 1
    Step 1

    Build the edge segments

    • Grab two LEDs
    • Bend one leg up by 180º on each
      (the same on both, e.g. the anode = longer leg)
    • Align the LEDs facing each other
    • Solder the bent leg of one LED to the unbent leg of the other, and vice-versa.
      The LEDs are now wired in anti-parallel.
    • Repeat this process for the required number of edges for your polyhedron. (see table)

    * Ensure that the distance between both LEDs is the same for all edge segments you build. A template placed below the LEDs while soldering might help.


    SegmentsLEDs
    Tetrahedron6||||| |12
    Cube12||||| ||||| ||24
    Octahedron12||||| ||||| ||24
    Dodecahedron30||||| ||||| ||||| ||||| |||||
    60
    Icosahedron30||||| ||||| ||||| ||||| |||||
    60
  • 2
    Step 2

    Build the first face

    • Align two edge segments' ends at the appropriate angle, to create the first vertex of the polyhedron. (see table)
    • Solder the vertex
    • Complete the first face by adding more edge segments until a ring is formed
    Face shapeInner angle
    TetrahedronTriangle3x 60º
    CubeSquare4x 90º
    OctahedronTriangle3x 60º
    DodecahedronPentagon5x 108º
    IcosahedronTriangle3x 60º
  • 3
    Step 3

    Build more independent faces

    Depending on the polyhedron you are building, you may be able to build more of these 2-dimensional faces before joining them in 3D space.


    Independent facesSingle edges
    Tetrahedron13| | |
    Cube2□ □4| | | |
    Octahedron4 *△ △ △ △0
    Dodecahedron3 (!)⭔ ⭔ ⭔15 (!)||||| ||||| |||||
    Icosahedron7 (!)△ △ △ △ △ △ △9 (!)||||| ||||

    * The octahedron might be the easiest choice in this respect, as it has four independent faces which comprise all edges. Joining them should be relatively easy. I have not tested this myself.

    (!) I did these calculations in my head without testing. Let me know if you find a mistake!

View all 7 instructions

Enjoy this project?

Share

Discussions

root1310 wrote 05/04/2017 at 05:28 point

Hey.. I want to build this with ATTiny85.
but i dont have & understand duino things, do you have the hex file for the tetrahedron?

  Are you sure? yes | no

fid wrote 12/10/2016 at 00:18 point

Thank you for posting this.  I made one out of some old LEDs.  I had a kick with programming the ATTiny85 for patterns on the tetrahedron.  Now I am thinking of making another with a different number of lights.  I have a much better understanding of CharliePlexing thanks to this project.

  Are you sure? yes | no

Jana Marie wrote 12/10/2016 at 11:29 point

That's nice to hear pal, keep going! :)

  Are you sure? yes | no

zakqwy wrote 12/16/2015 at 19:49 point

Love the free-form soldering. I've got a pile of DIP ATtiny85s lying around along with a few drawers of LEDs--might have to try this!

  Are you sure? yes | no

Similar Projects

Does this project spark your interest?

Become a member to follow this project and never miss any updates