I wanted to play with a ESP32-CAM cheap wifi camera for quite some time and I finally picked one up. My first quest was to find firmware that I could put on it that had support for RTSP. I came across this: https://github.com/rzeldent/esp32cam-rtsp/tree/feature/seeed_xiao_esp32s3 . After a getting familiar with the configuration, I got it working reliably. I do wish though that the firmware had the option for setting a static IP. Once I learned that lowering the number for the JPEG quality setting increased video and image quality, it's not terrible IF there is a lot of light. Even a reasonably well lit room is often not sufficient. If the included ov2640 camera doesn't get lots of light, quality takes a nosedive.
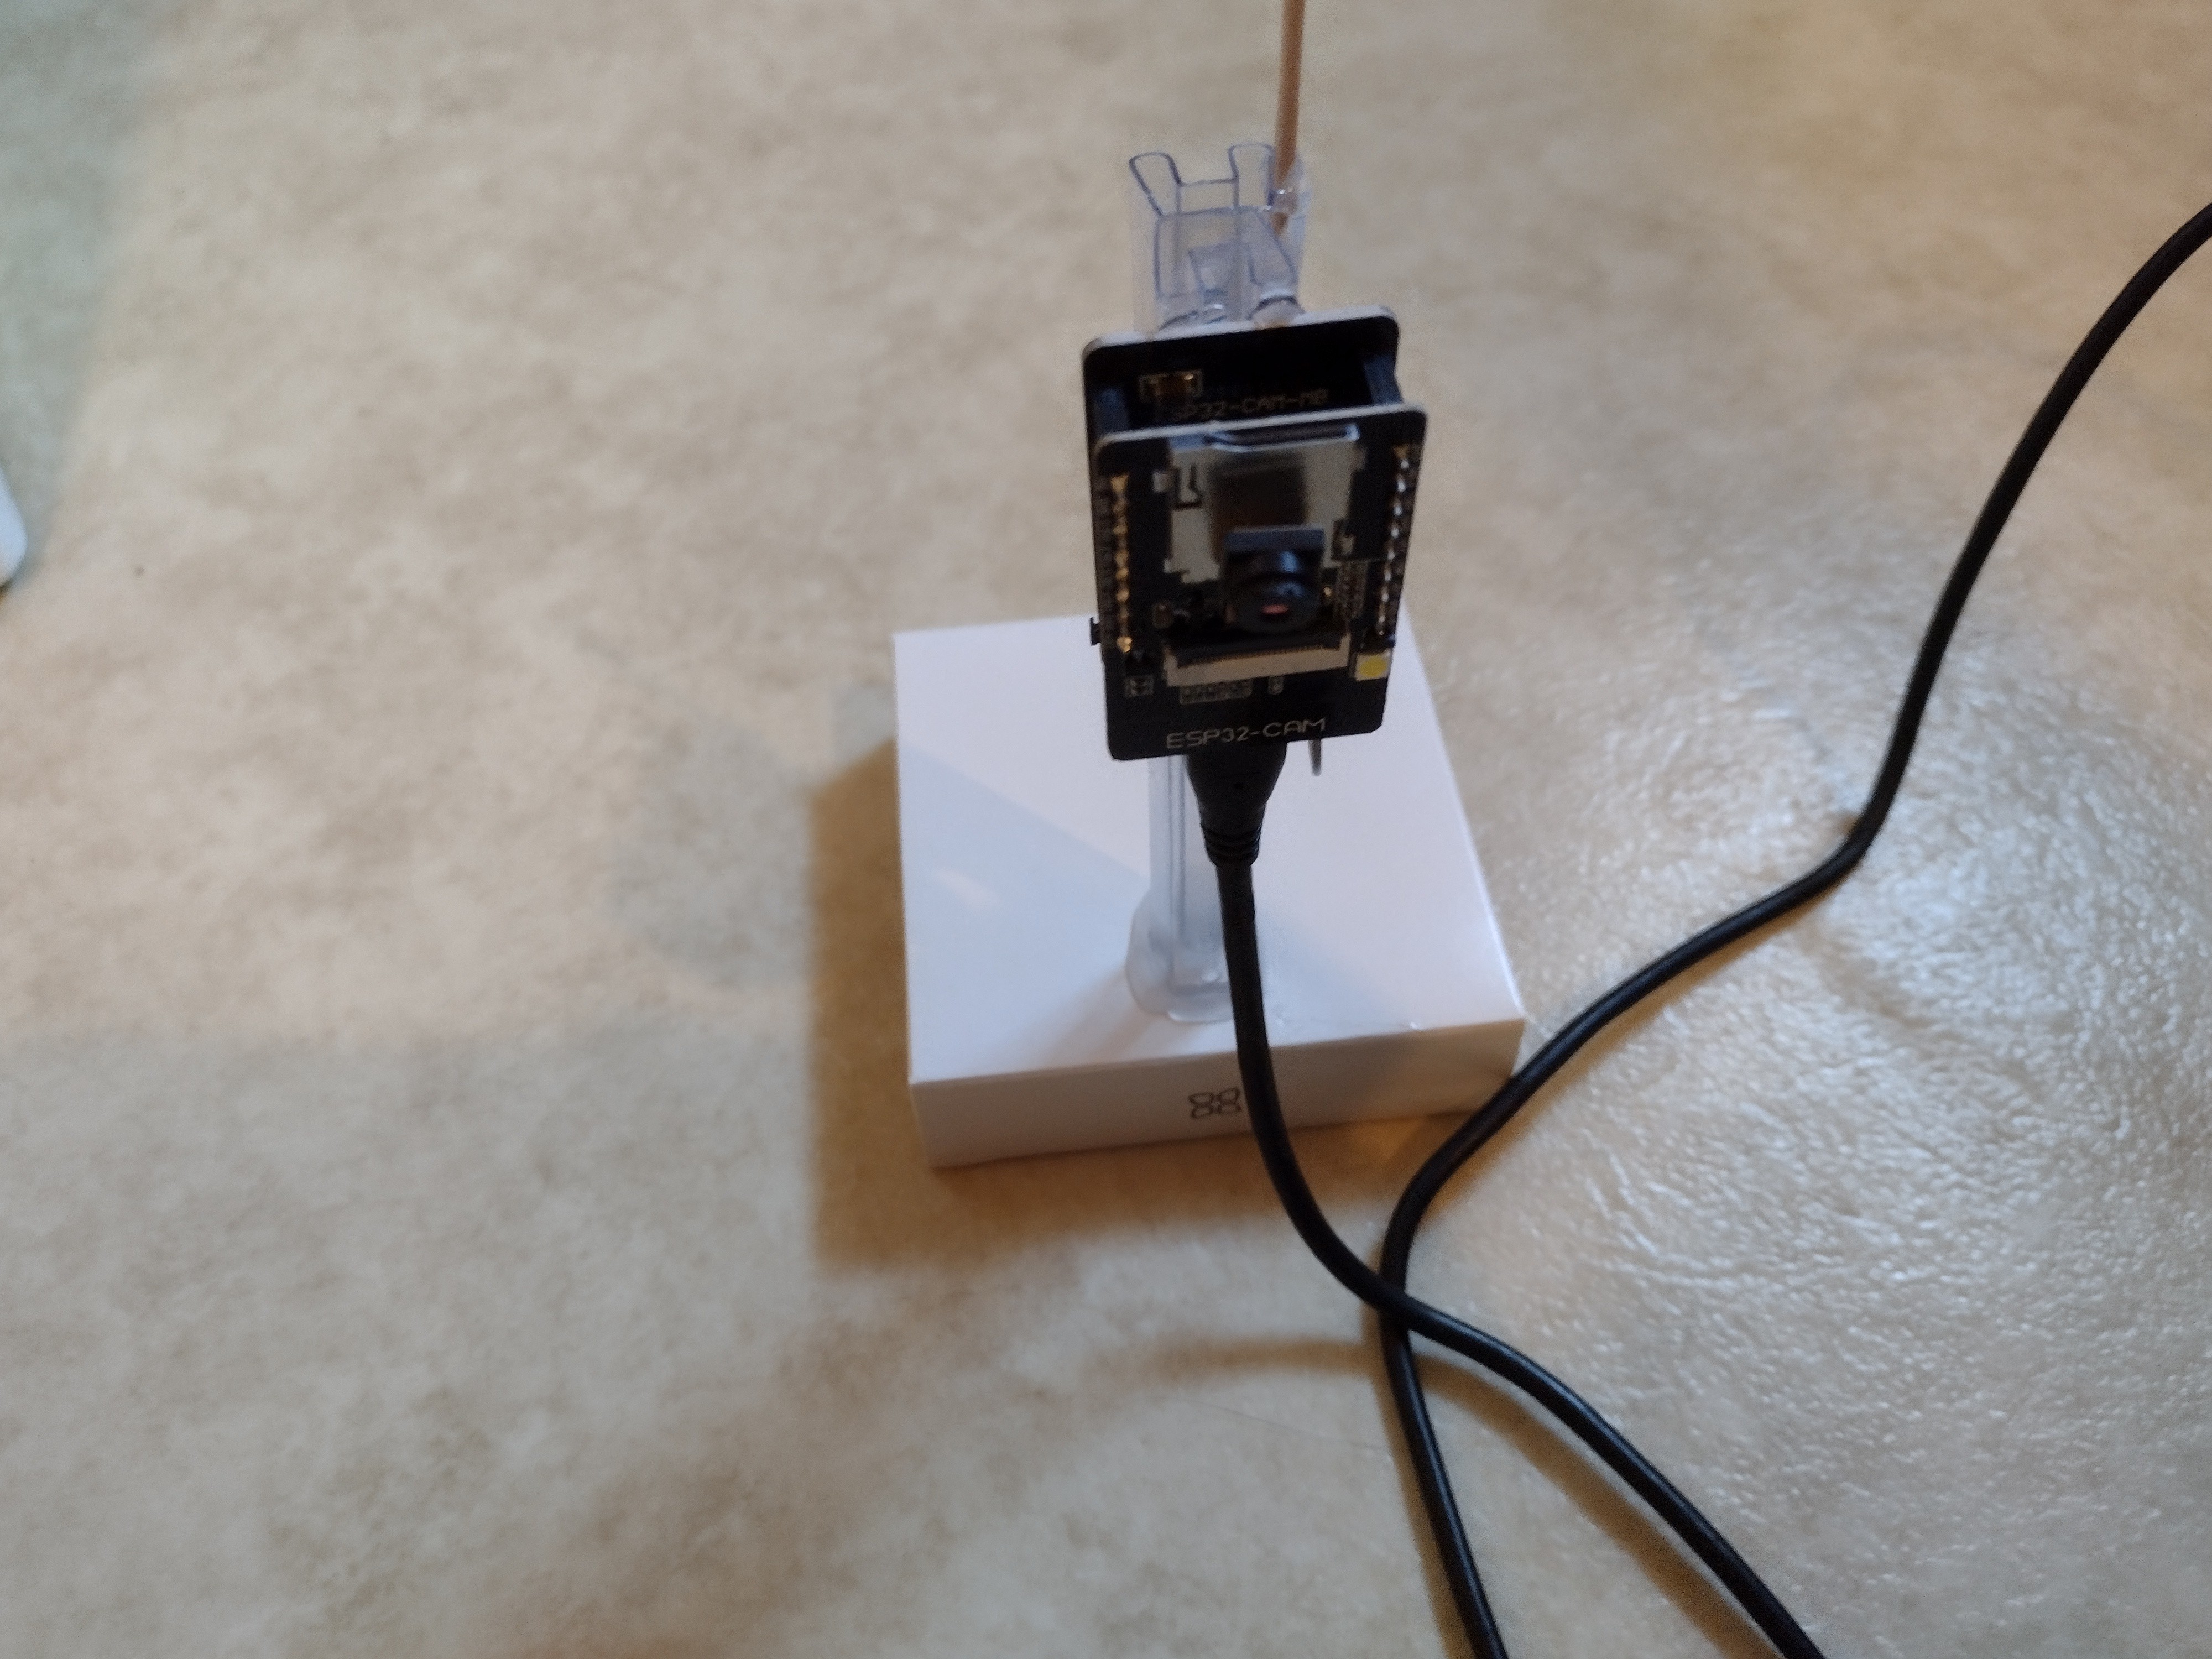
My next step was to create a stand for the ESP32-CAM to keep it at an upright position (it's natural position is to stay on it's back and stare at the ceiling.) I macgyvered one using a box for a base, a fishing weight to weigh the base down, a DIP IC tube to both put the ESP32-CAM above the surface a bit and also to give some room to reduce the strain on the connected USB cable. Some hot snot (hot glue) was used to stick everything together. It didn't come out looking too bad for something made out of mostly junk (see photo below:)
Another issue I came across: frame rate took a nosedive if it was outside of the room that contains the access point it connects to. The integrated PCB antenna serves the ESP8266 and ESP32 well for sending small bursts of data, but not for streaming video. The good news: the ESP30-CAM has a provision to switch to using an external antenna. The challenge: moving a 0 ohm resistor (jumper) to switch from the PCB antenna to the external antenna jack. The challenge had complications that included the resistor being a tiny size, I'd say 0402 and the nearby RF shield being so close.
My first plan was using my hot air station to remove the resistor and re solder it. Removing it wasn't too bad, but the resistor just kept blowing off even at the lowest airflow setting when trying to re solder it. My second plan was to use a soldering iron to solder it on. This is where the RF shield really got in the way of things and ended up getting some solder on the shield itself. The resistor also wanted to stick to any tweezers I used. Out of frustration, I enacted my third plan: be Louis Rossmann. I tinned a section of thin copper wire (scavenged from a transformer), put it across both pads and soldered it in. Since the section of copper wire was much longer than the resistor, it allowed me to both orient it across the pads and hold it in place with one hand with ease and also have a reasonably unobstructed access the area to be soldered. After it was soldered it I simply trimmed off the excess with some side cutters and tested the connection with my multimeter. It's not the prettiest way to do it, but it does the job.
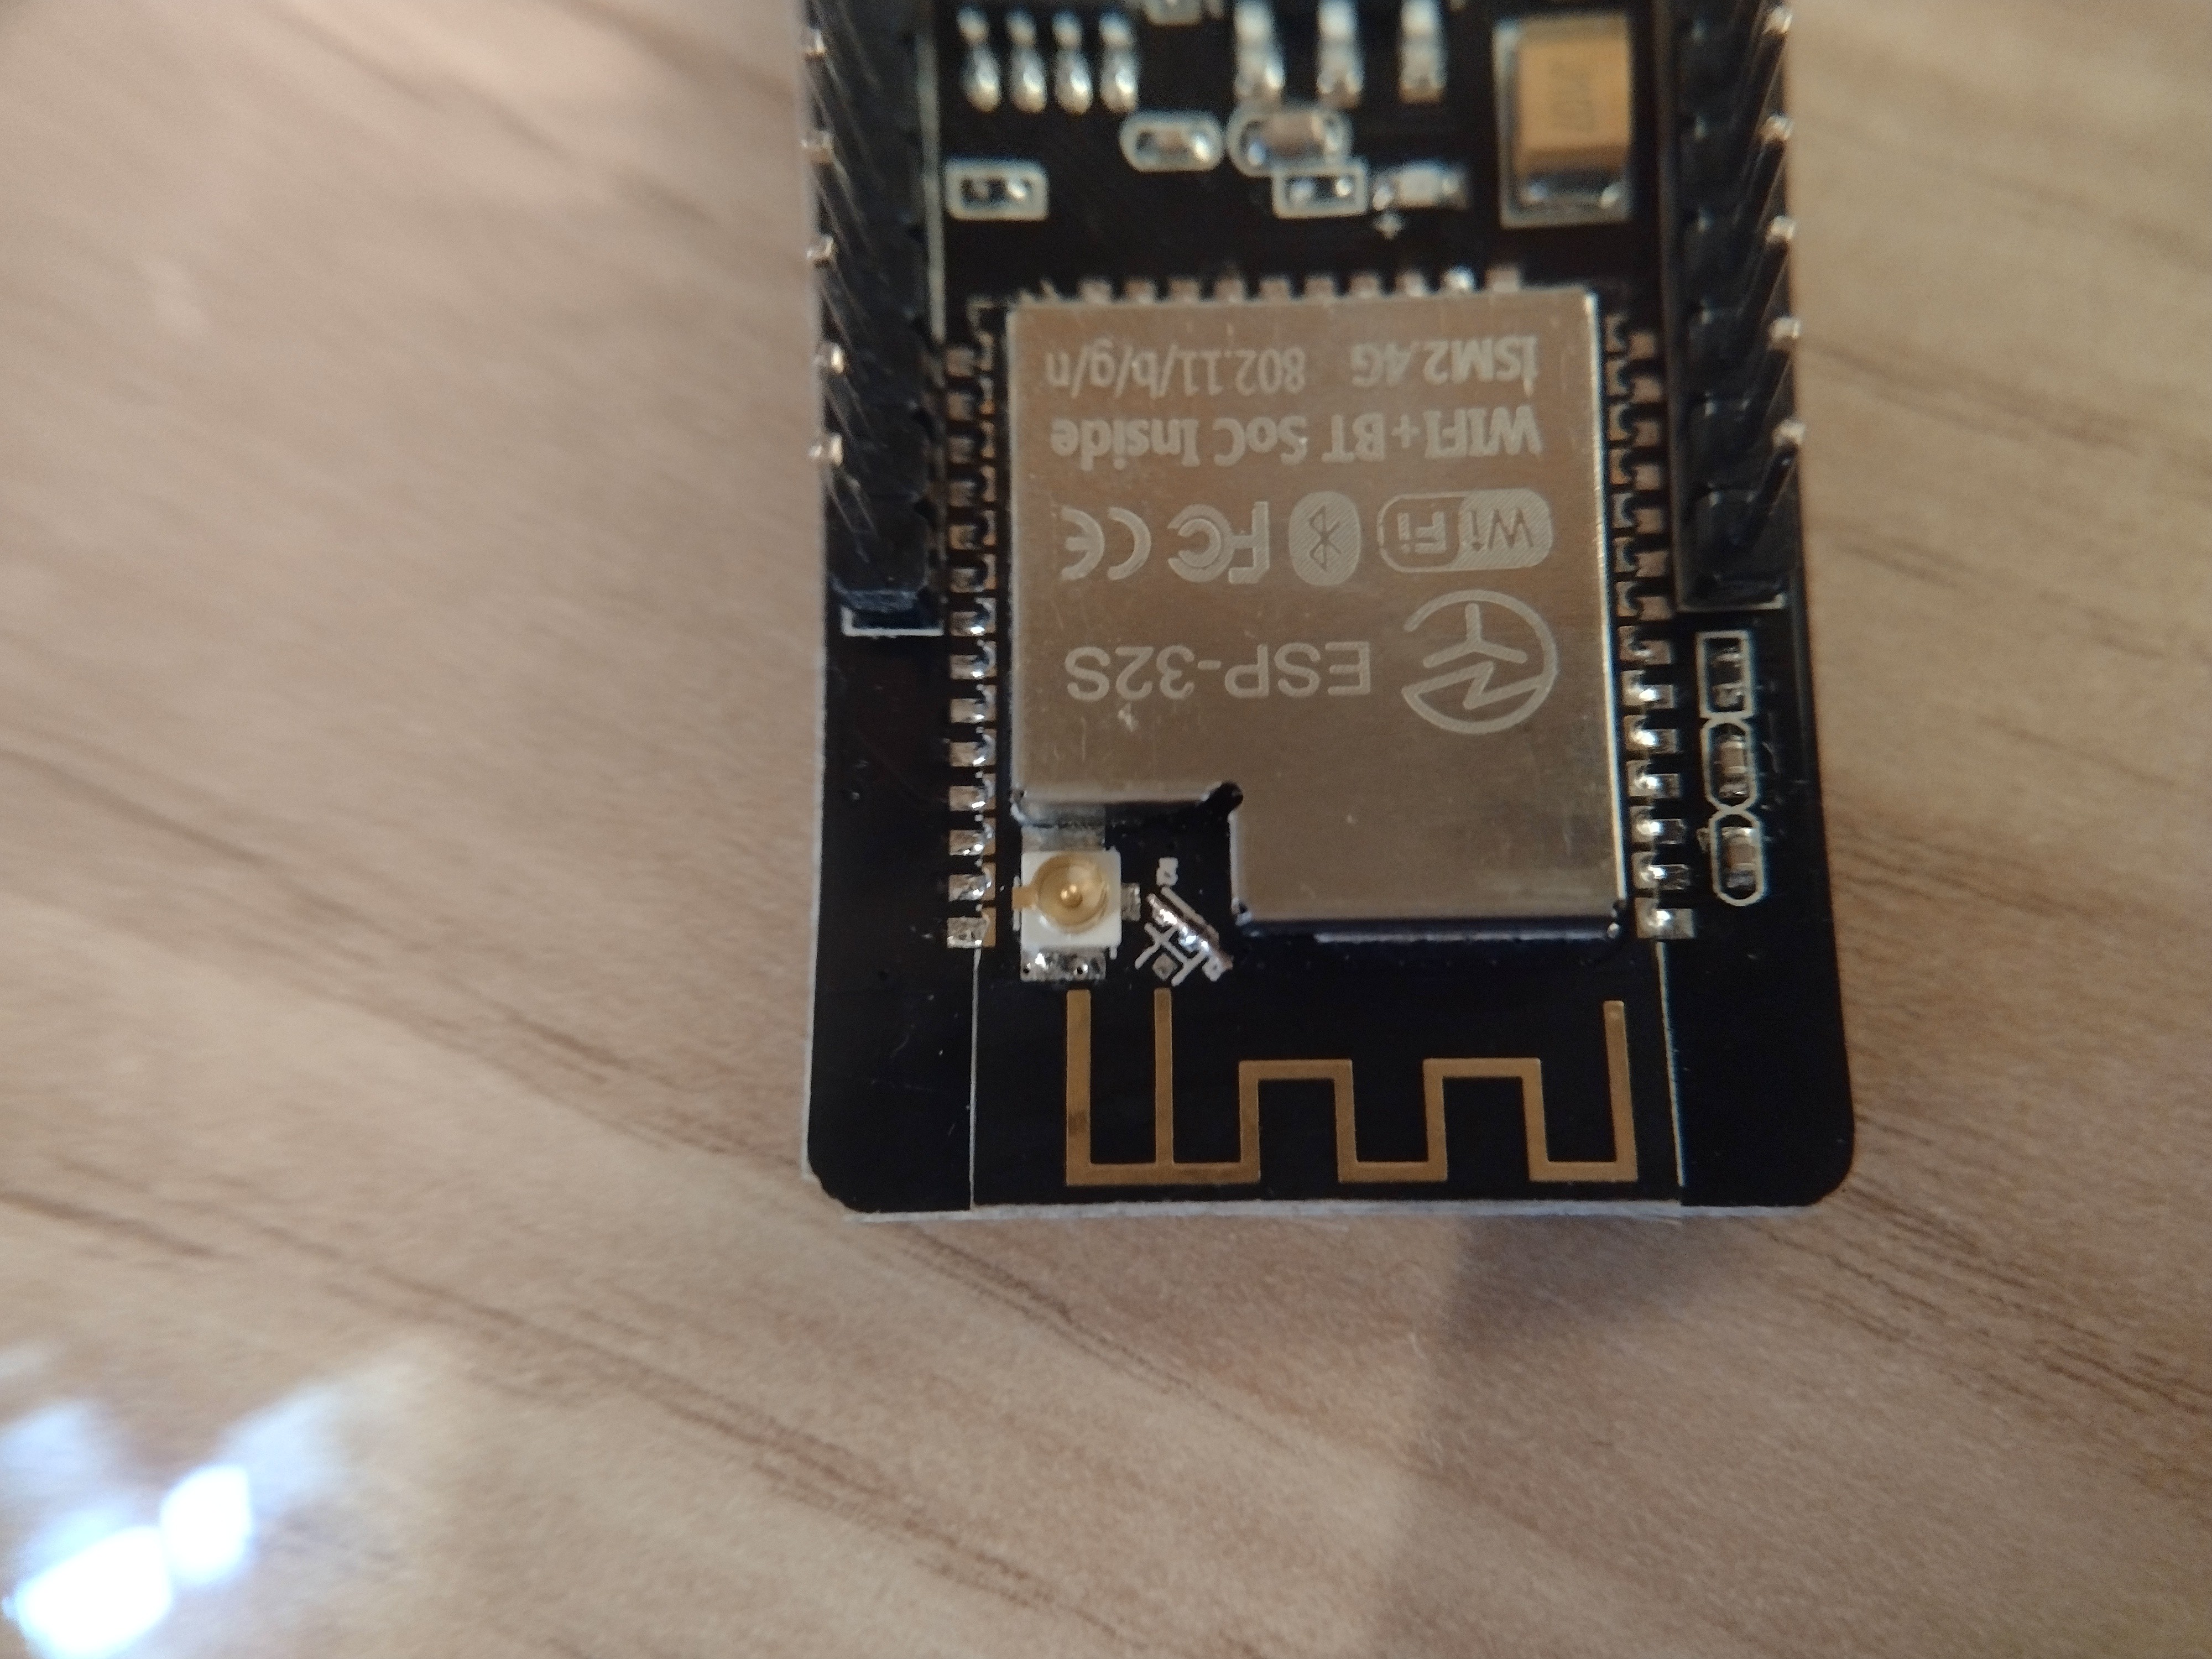
After praying that I didn't kill the ESP32-CAM in the process I attached an external antenna that I store from an ESP8266 an powered it up. It happily worked The external antenna isn't particularly special but it allows for optimal orientation of the antenna which can make a considerable difference. A big problem with the ESP.32-CAM's PCB antenna is that by putting it in an upright position to orient the camera, the antenna becomes (mostly) horizontally polarized. Most access point antennas (including mine) tend to be vertically polarized. Having mismatched polarization results is considerable loss in signal strength. I attached a toothpick as a mast extension and stuck the antenna on it.)
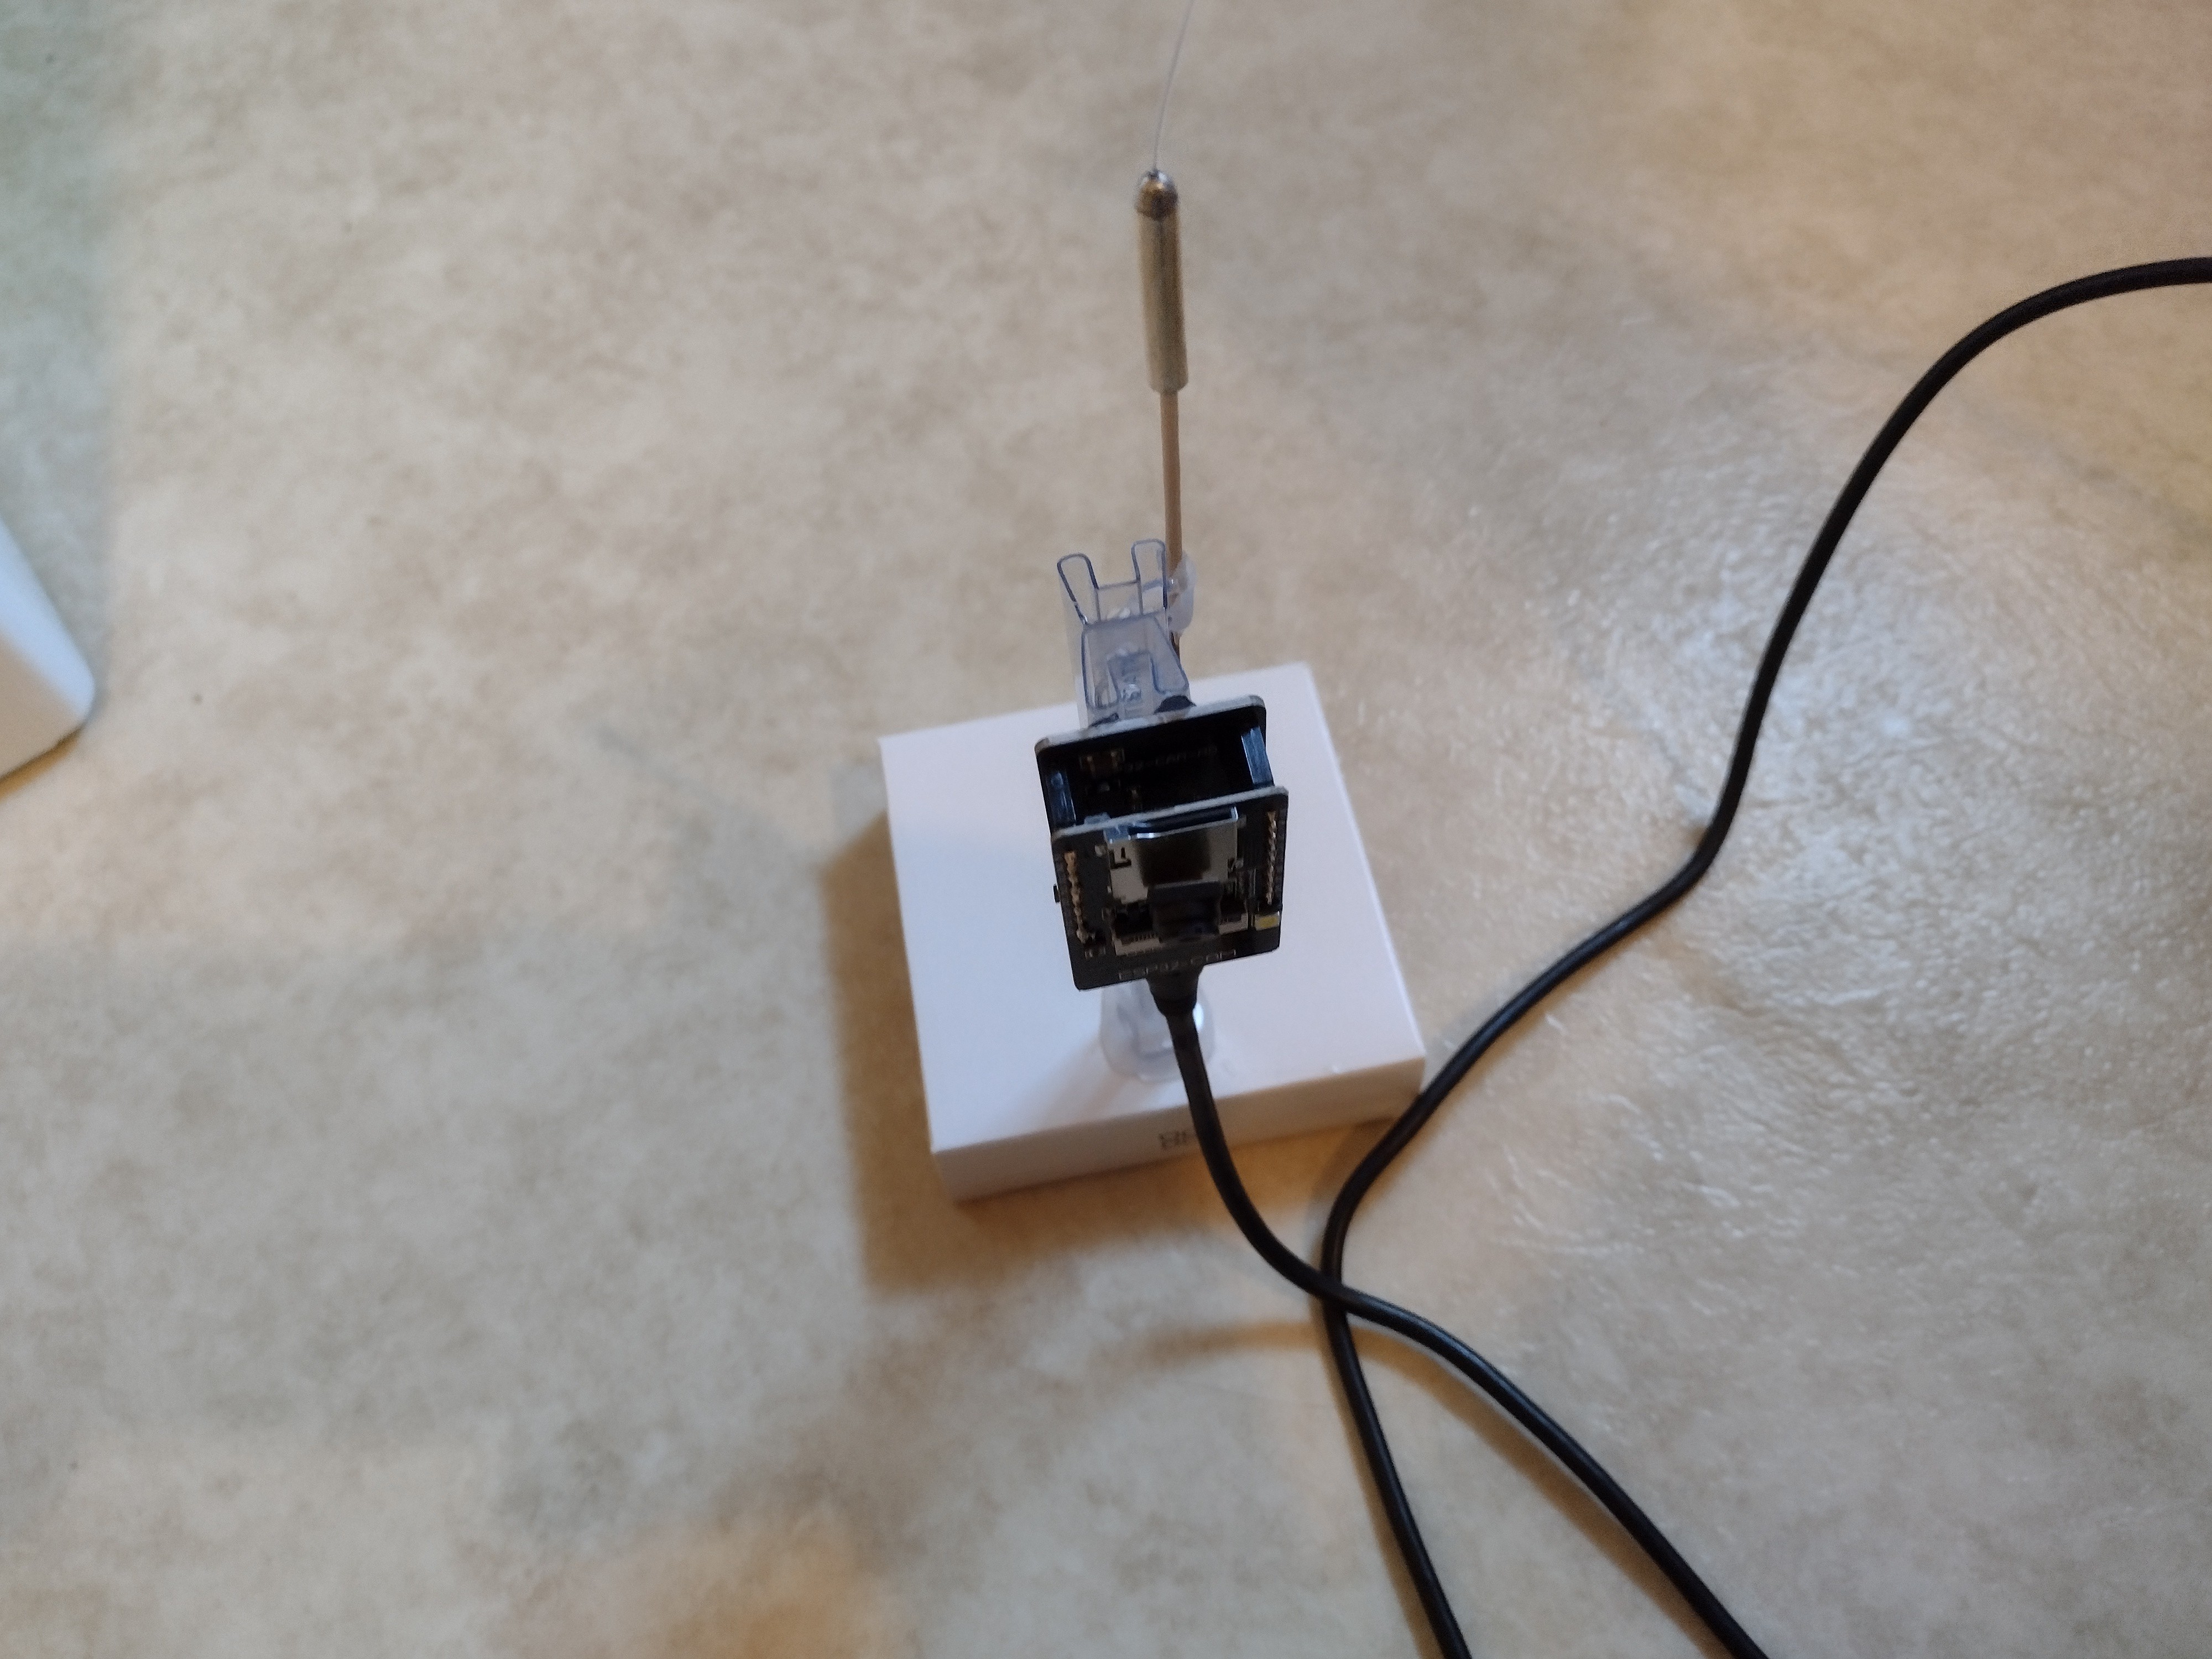
I did a before and after test in signal strength at a particular outdoor location. Measured signal strength with the PCB antenna: -87 dbm. Measured signal strength with an external antenna vertically polarized: -72 dbm. That's a big improvement. Sadly though, even with that big improvement frame rate is still poor at that location. I'd either need to lower the resolution, place an access point closer to it, or lower the resolution from 720p.
It's been a fun journey so far, even though I wish the camera performed a bit better in less than extremely bright conditions and that it have a better range for keeping a good frame rate at a good resolution. I could try upgrading external antenna, but I imagine further gains would be modest at best. It can't compete with my security cameras, but that's not surprising as they costed multiple times of what I paid for my ESP32-CAM (around $11 USD.) I'm sure I'll find some use cases for it, especially considering that I can power it using a USB power bank (which I did in fact do.)
Discussions
Become a Hackaday.io Member
Create an account to leave a comment. Already have an account? Log In.
a few months back, I updated the drivers in my favourite esp firmware, tasmota, for better esp32cam performance (build with v2 drivers). Tasmota provides rtsp, as well as advanced motion sensing, and combined with berry scripting, a robust scriptable framework for a variety of video and image based scenarios.
The updated driver runs everything cam in a separate thread, framerates are significantly improved, and it even supports multiple clients.
E.g. I've been running daylight 1 hour timelapse for months writing to sd card, and with Berry it's easy to send the images to server instead.
Observations: try detuning the cam clock (use 11 rather than the default 10mhz) for reduced WiFi rf interference and faster WiFi speeds.
Watch out for other WiFi users. An iPhone on the same WiFi killed performance.
Amazon has esp32cam with external antennas already configured... also look at esp32s3 with cam for a little added performance...
Are you sure? yes | no
Thanks for the comment and suggestions. I haven't heard of Tasmota before, I'll be looking into it (reading though a tutorial right now, https://cgomesu.com/blog/Esp32cam-tasmota-webcam-server/) the multiple client support sounds impressive.
Are you sure? yes | no
I installed Tasmota on it. It's feature packed. I wished that it enabled AP mode for the first 30 seconds or so like the ESP32CAM-RTSP firmware does, although I'm sure there's a way to do it. Framerates are a bit on the low side, but I did find the v2 drivers you mentioned, apparently developed by you, nice. I'll have to figure it out and experiment.
Are you sure? yes | no