 kodera2t
I've prefered ATmel AVR series from ATtiny to ATMega but especially loved very mighty ATmega 1284P. It is really powerful compared to 328P as summarised,
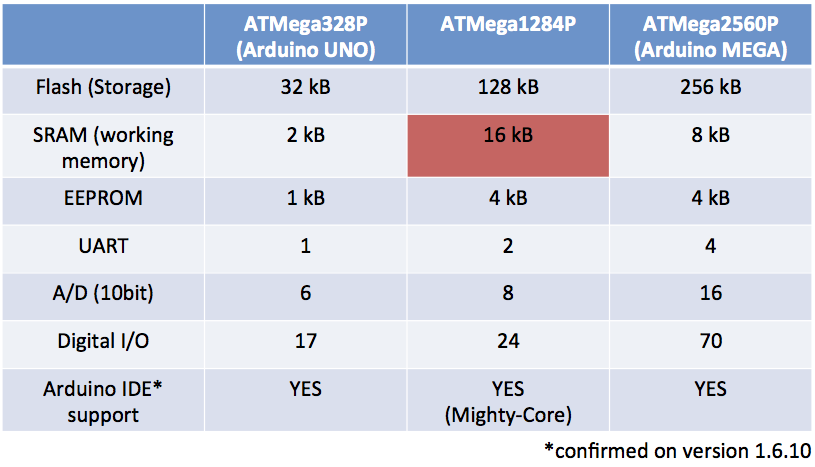
It may not be well-known but SRAM of ATMega1284P is doubled as ATMega2560P in Arduino Mega. This feature is quite useful for memory-demanding application such as image processing and standalone computer project (I love it). Also Flash is four times as ATmega328P in Arduino UNO. Actually, so far, I have never used all of them.
But!, I don't know why (strategic reason?) but no Arduino board was released by arduino.cc (or .org), and handling ATmega1284 is not so easy for beginner and solder less board prototyper.
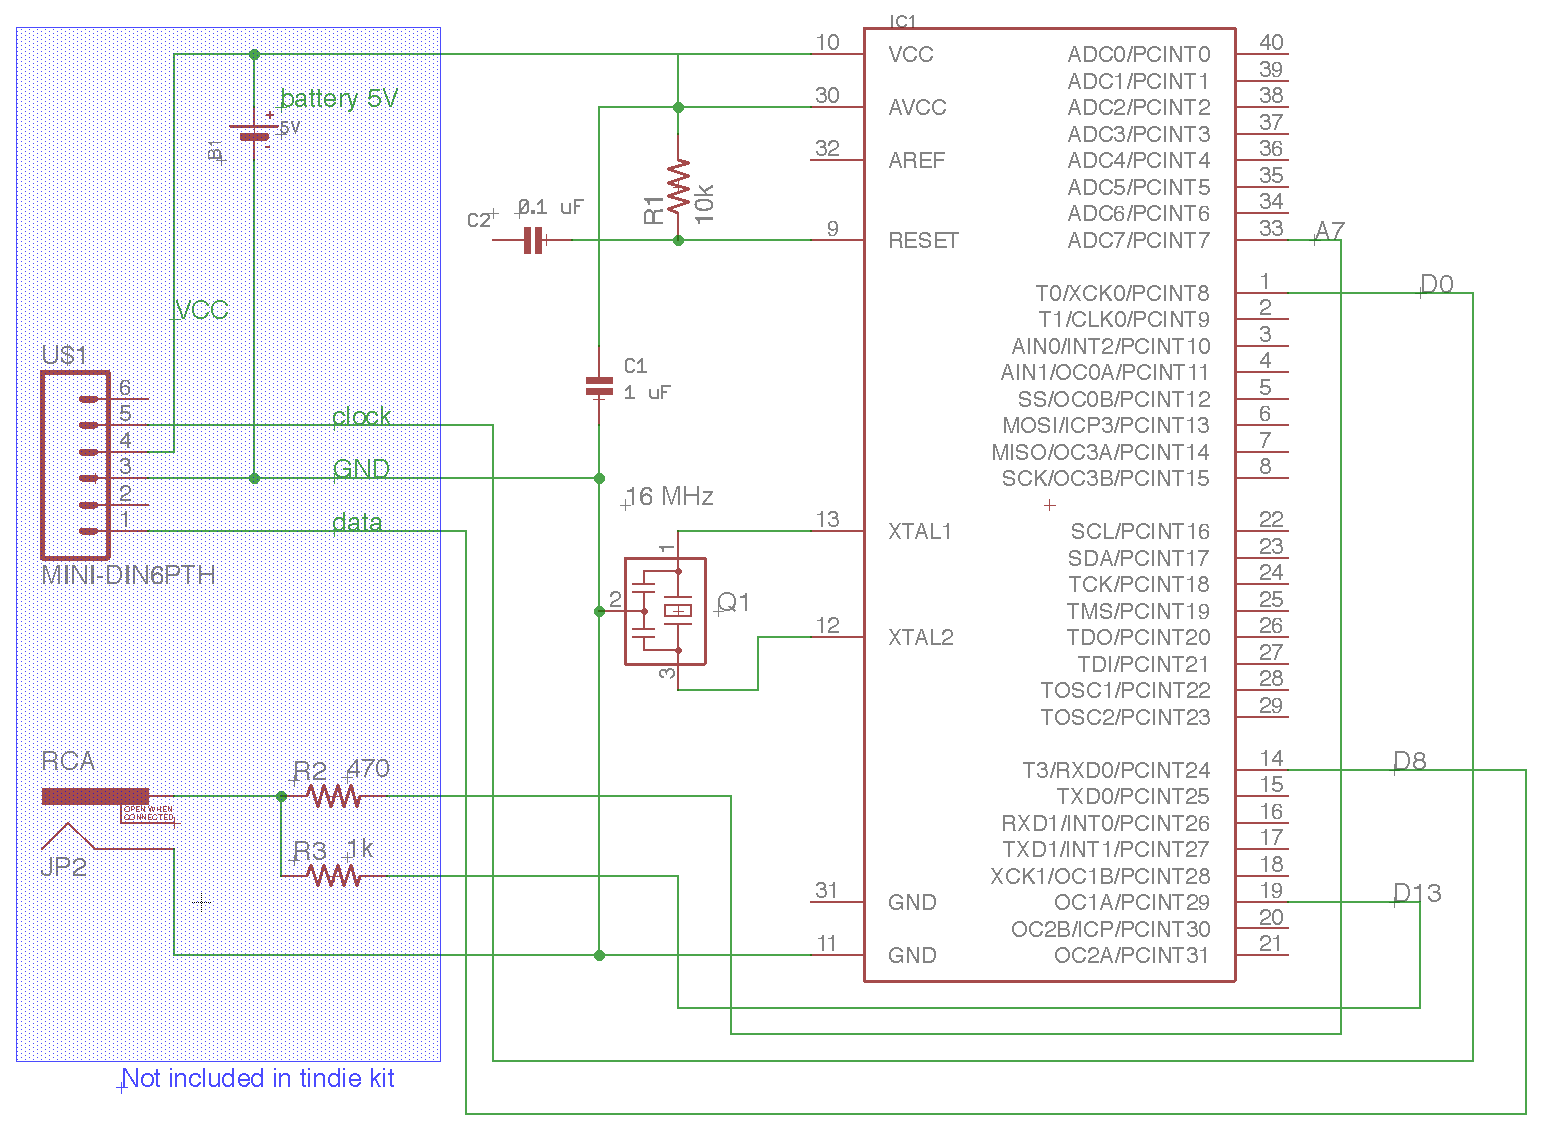
So, this time I made a "mod-chip" based on ATMega1284P. The circuit of this mod chip is as follows:
- How to use it ?
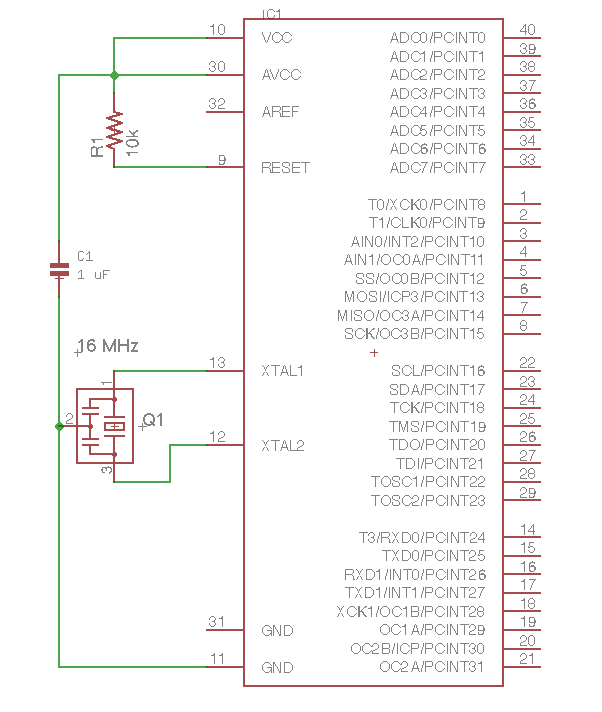
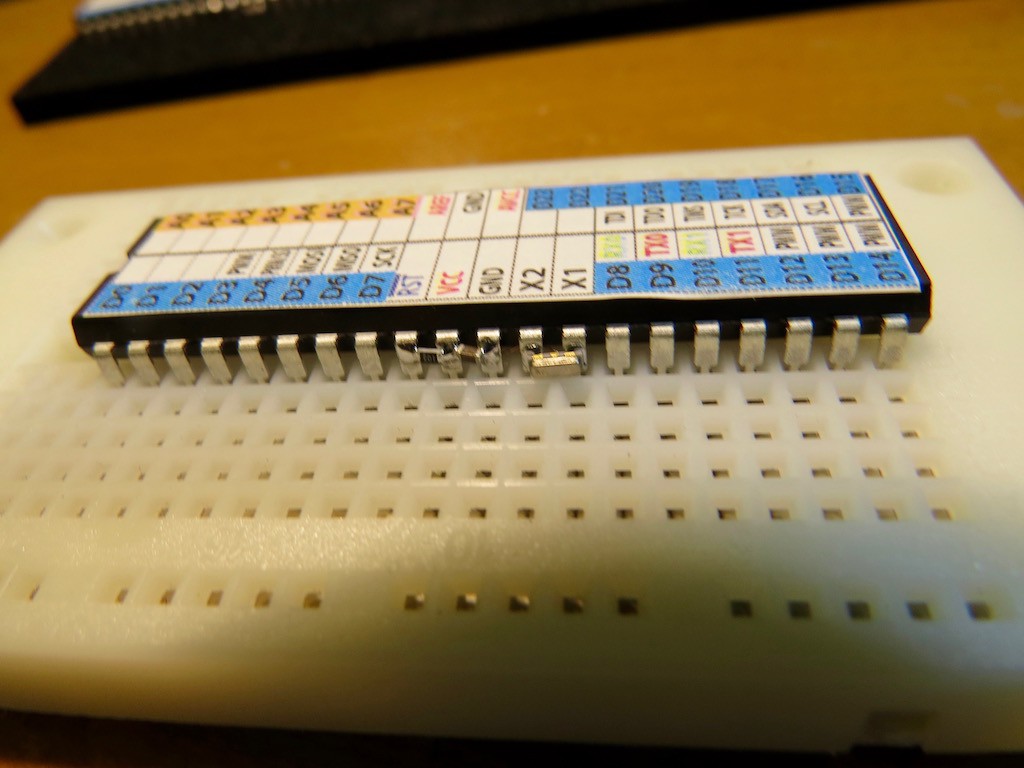
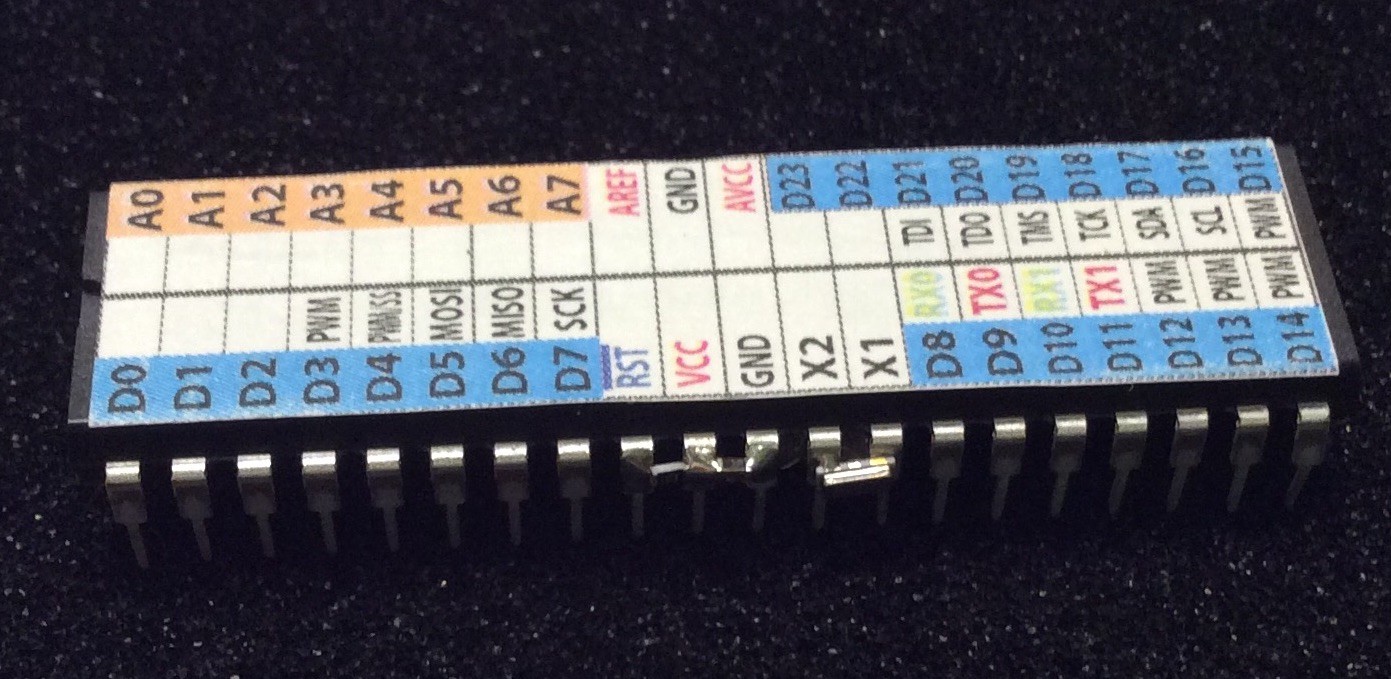
One 16MHz ceramic resonator (which part number is same as Arduino UNO) and capacitor, pull up resonator are directly mounted on DIP package.
You may think connection necessity between 31 pin (GND) and 11pin, but actually these pins are internally connected and I omitted it. (Of course you can connect by additional jumper wire) All of the pin function are indicated on the chip and we don't need to find data sheet and just can focus on programming and prototyping.
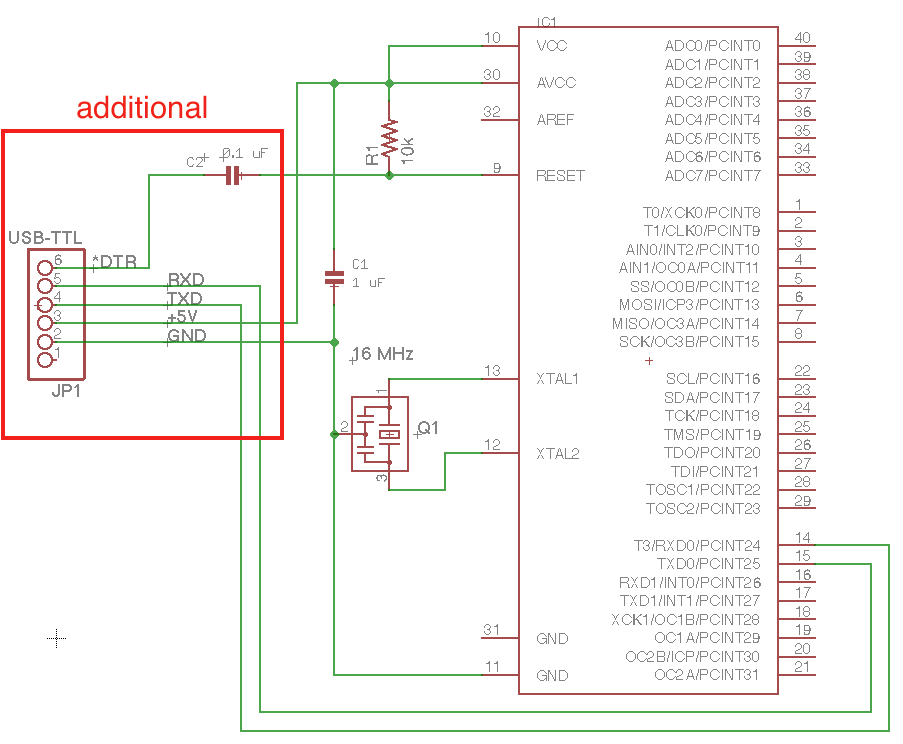
I've upload bootloader and programming by Arduino IDE is quite easy. Just connect USB-TTL interface with this mod chip is all from hard-ware part.
- How to use it in Arduino IDE?
From software viewpoint, installing ATmega1284P information in Arduino IDE is already established by "MCUdude" at github, named "Mightycore"
https://github.com/MCUdude/MightyCoreAs is described in the above github page, we can easily add 1284P board information just by addinghttps://mcudude.github.io/MightyCore/package_MCUdude_MightyCore_index.jsonat board manager preference.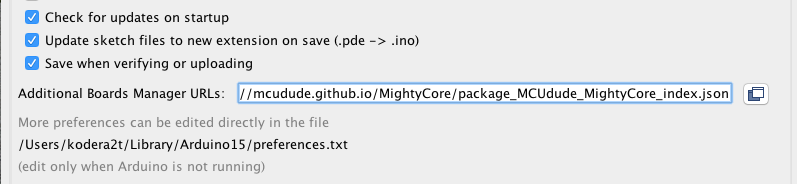
On the board manager, it will appear as
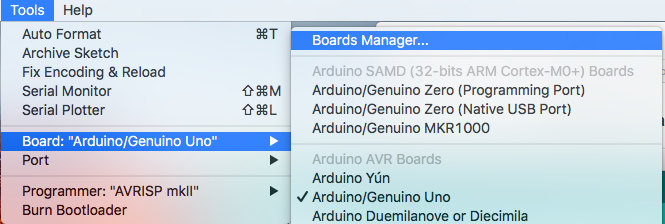

and simply install will do all the job needed!! Wonderful!
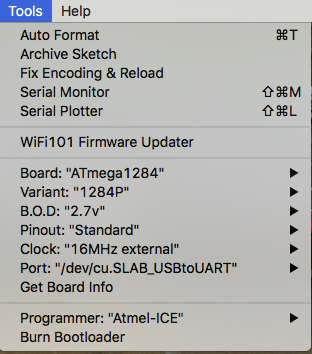
For board selection at tool tab, we can select as above. YES 16MHz external clock!
After finishing wiring between USB-TTL and Arduino IDE setting, we can program as same as UNO and others.
I would, prepare 7 total parts kit and sell it at tindie by $15.
The total parts kit contains
- The "mod-chip", contains boot-loader written ATmega1284P, on it 16MHz ceramic resonator and capacitor and resistors are populated, with clear PIN-assign sticker
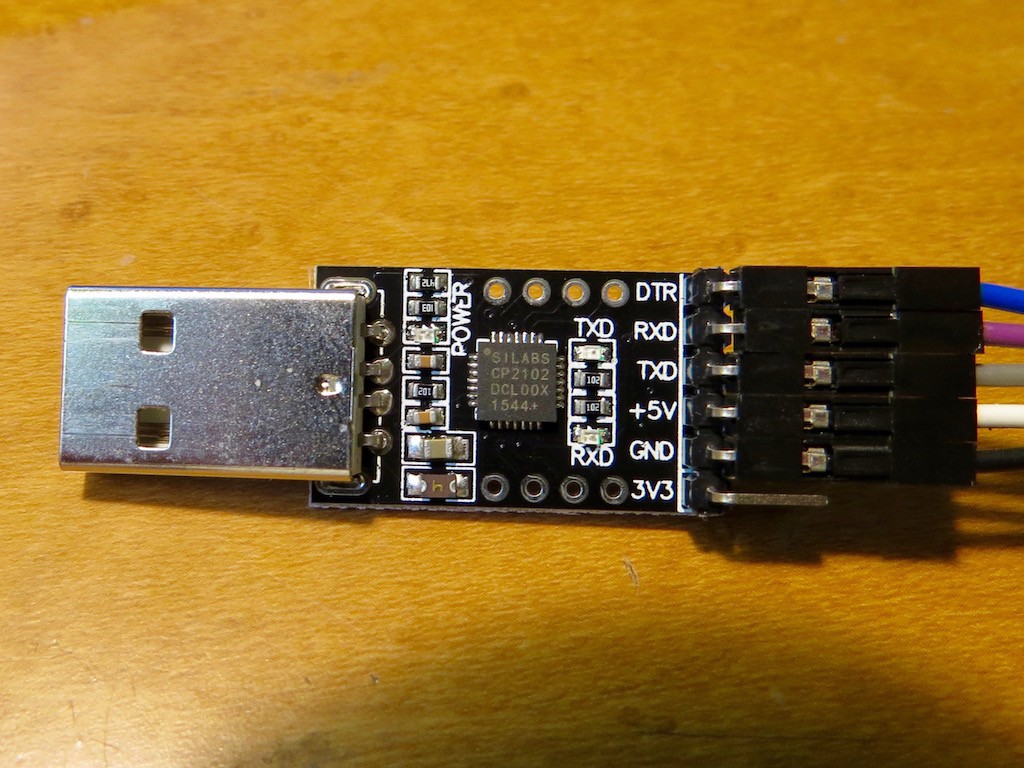
- USB-TTL interface based on Silicon Labs CP2102, fully compatible with Arduino IDE
- Connection wires between USB-TTL interface (socket) and solder-less board (pin)
- 0.1 uF ceramic capacitor for DTR of USB-TTL interface and RST of 1284P connection
- You may have a concern about parts fixing strength?
You may have a concern about parts fixing strength. From image, we can see, ceramic resonator seems to be simply fixed by solder. It should be fragile! Initially I had a same concern so....
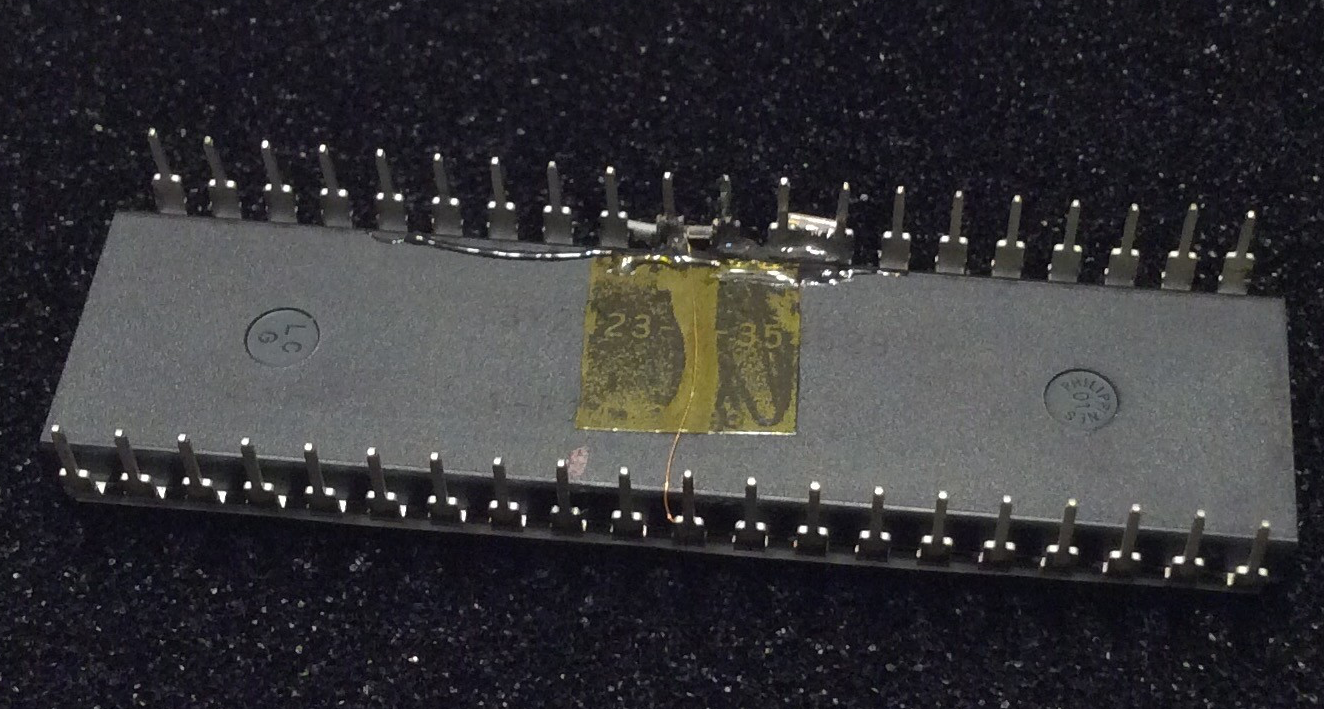
backside of resonator, epoxy glue is filled to enforce the fixing. Of course epoxy glue is put so as not to prevent electro-conductivity. After this care, I think parts fixing is not so fragile and we can handle as same as general DIP package IC (If it is ran over by car, it will be broken, otherwise it works well )


 Dixbit
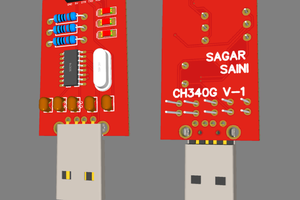
 Lithium ION
 DIY GUY Chris
I have not so much concern about the parts fixing strength as about the parts inherent strength, even with the epoxy backfill. This ceramic parts are quite brittle, especially the capacitors, epoxy is softer. If you really have to use a construction like this, I would recommend to use leaded solder (which is softer) and use the least possible amount of solder, so the solder connection itself can absorb some flexing.
I did similar "3D" constructions, but not on a chip which is supposed to be wedged into and out of a breadboard.