 Andrew Lee
The idea was to have a clock that does everything. The 3 main things I want to integrate in this project are:
1) Connect the clock to a bed shaker so my alarm clock can wake me up discretely without waking up my roommate, but also retain the ability to wake me up in a super noisy fashion by playing an alarm tone through my speaker system for when I really need to wake up.
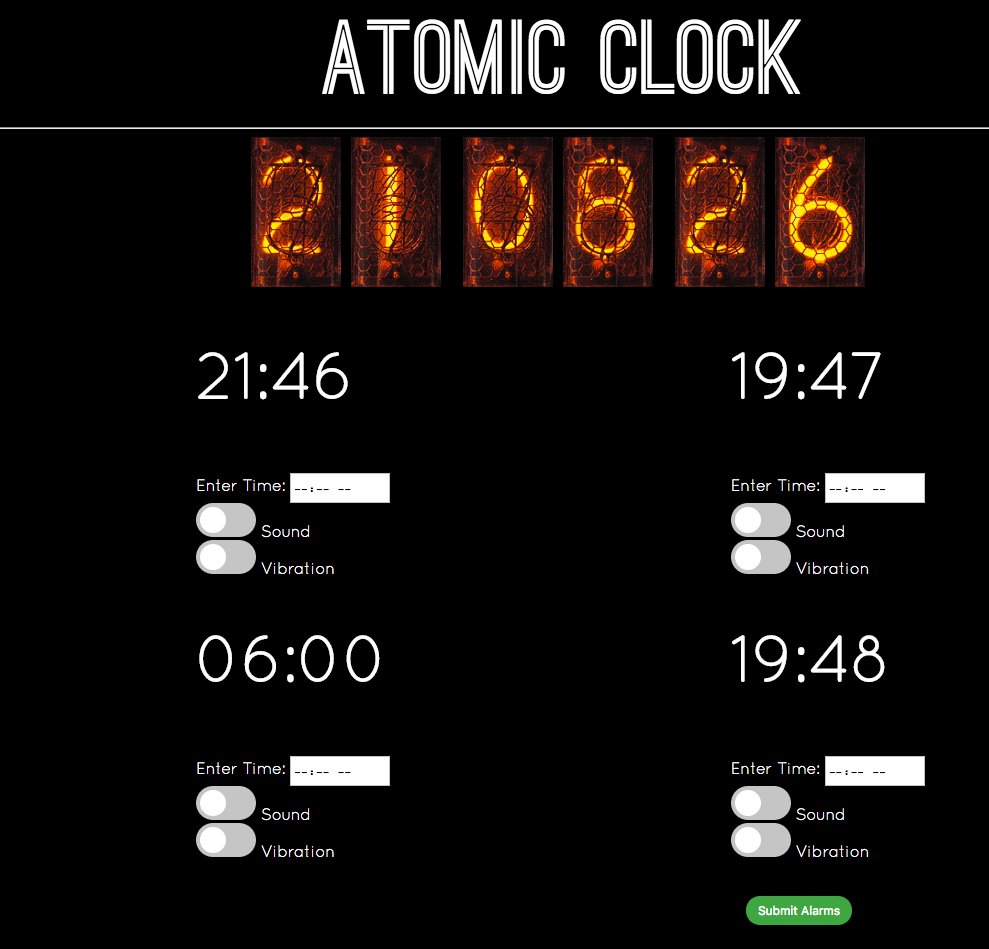
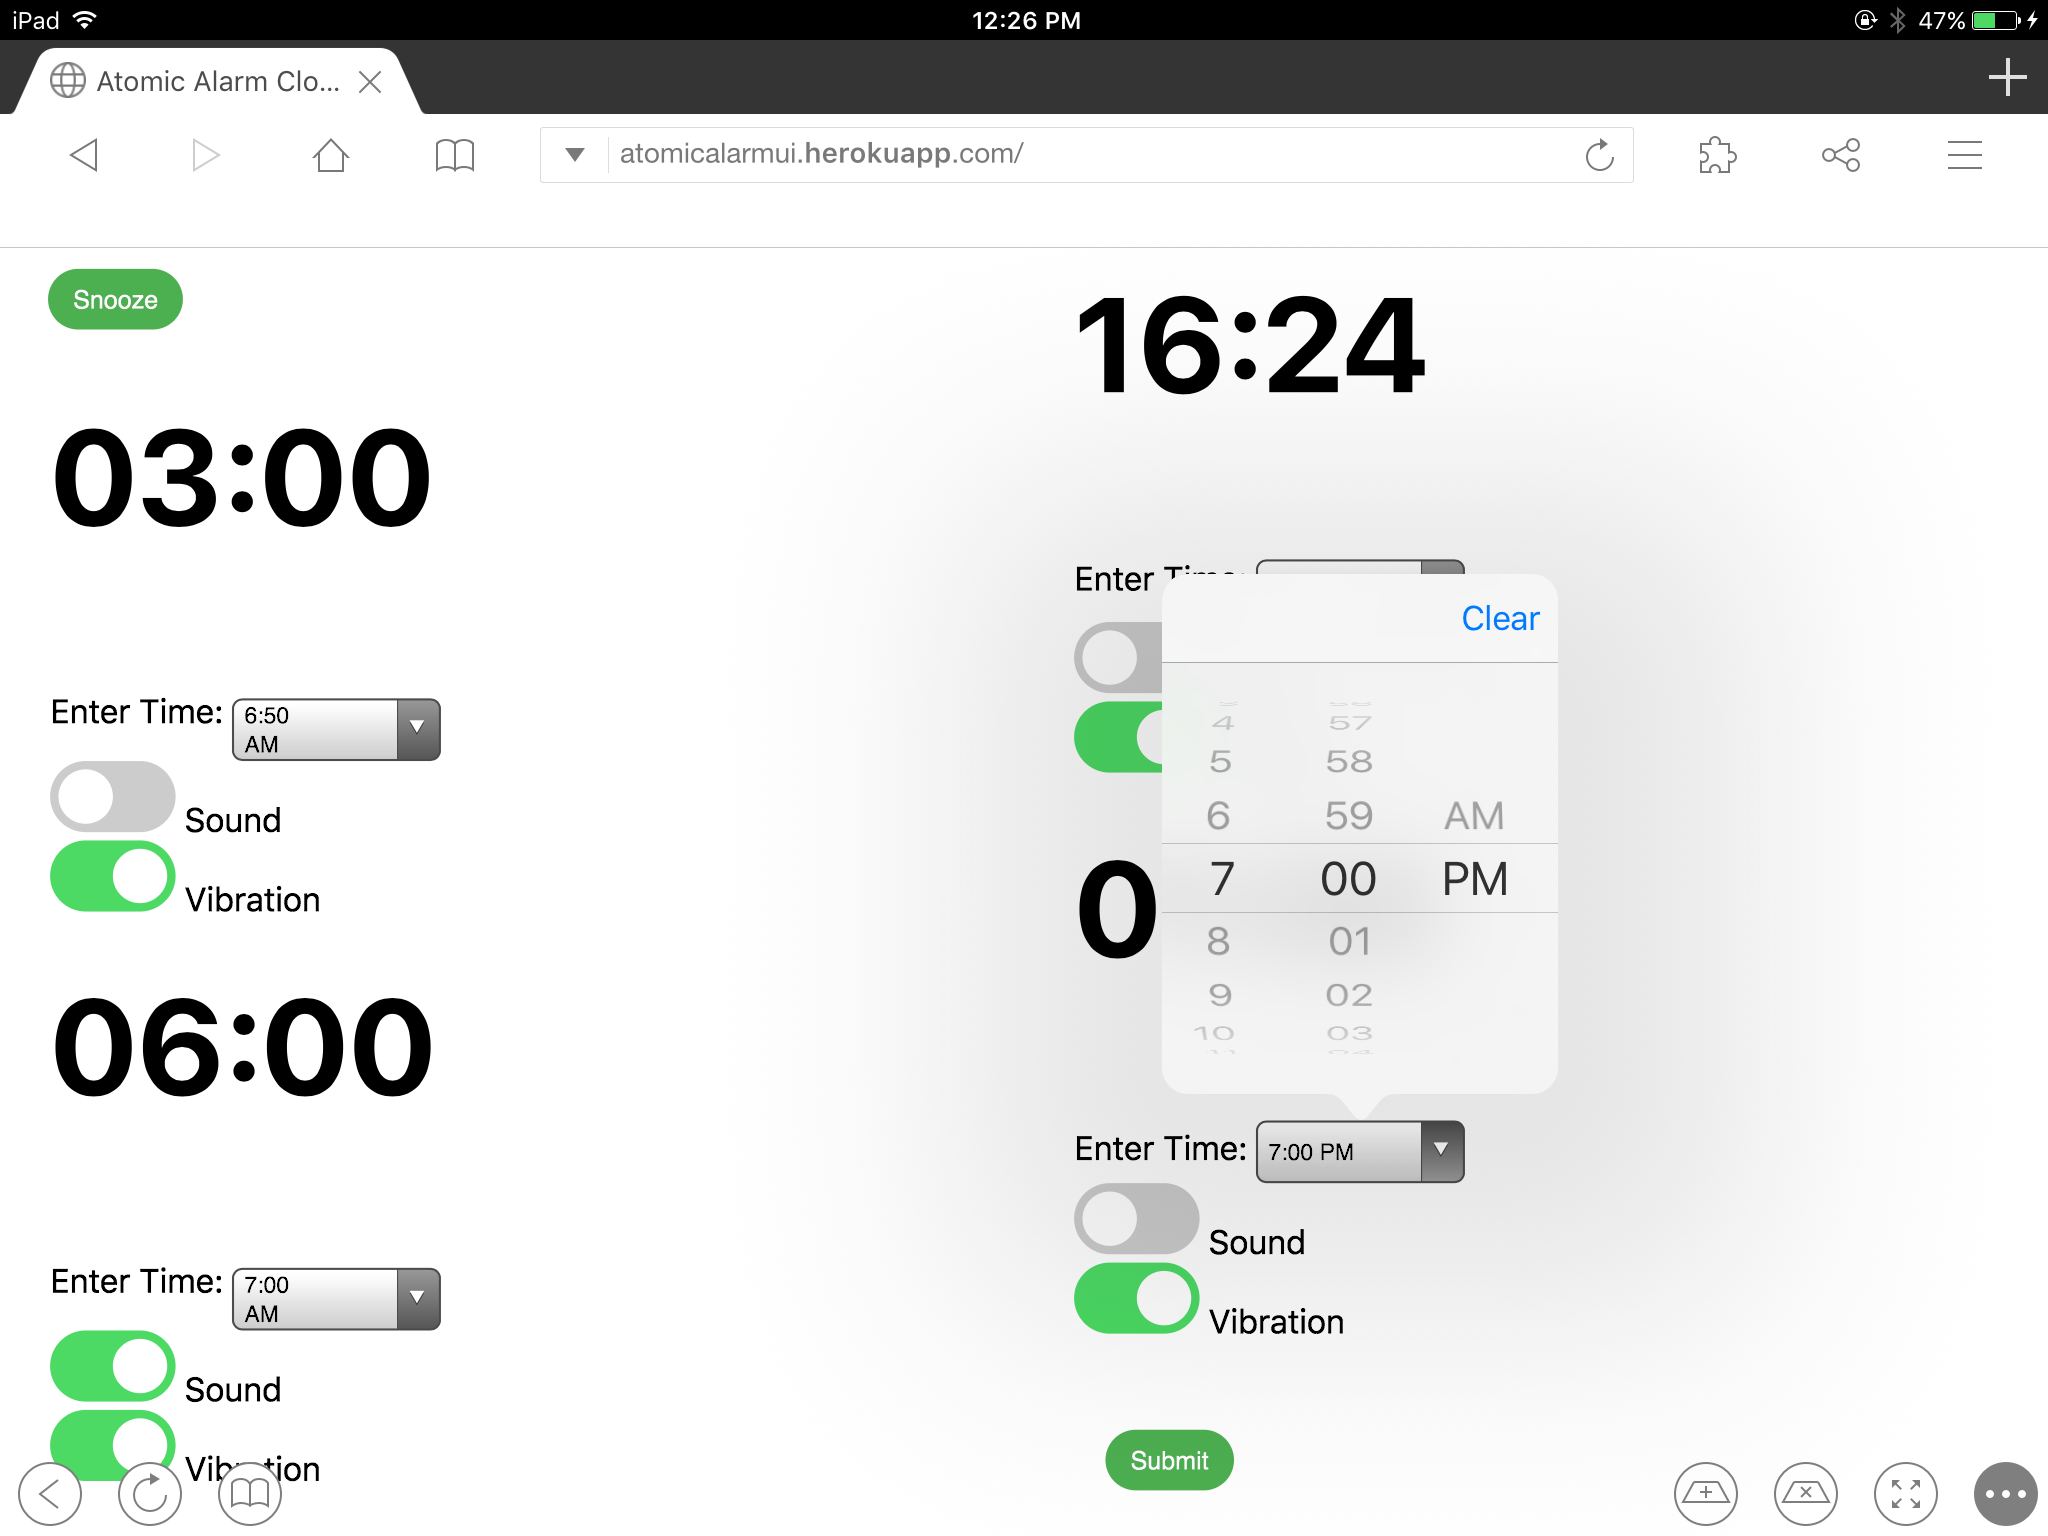
2) A way to set the alarm via my phone, iPad, or Browser through a polished and intuitive web user interface.
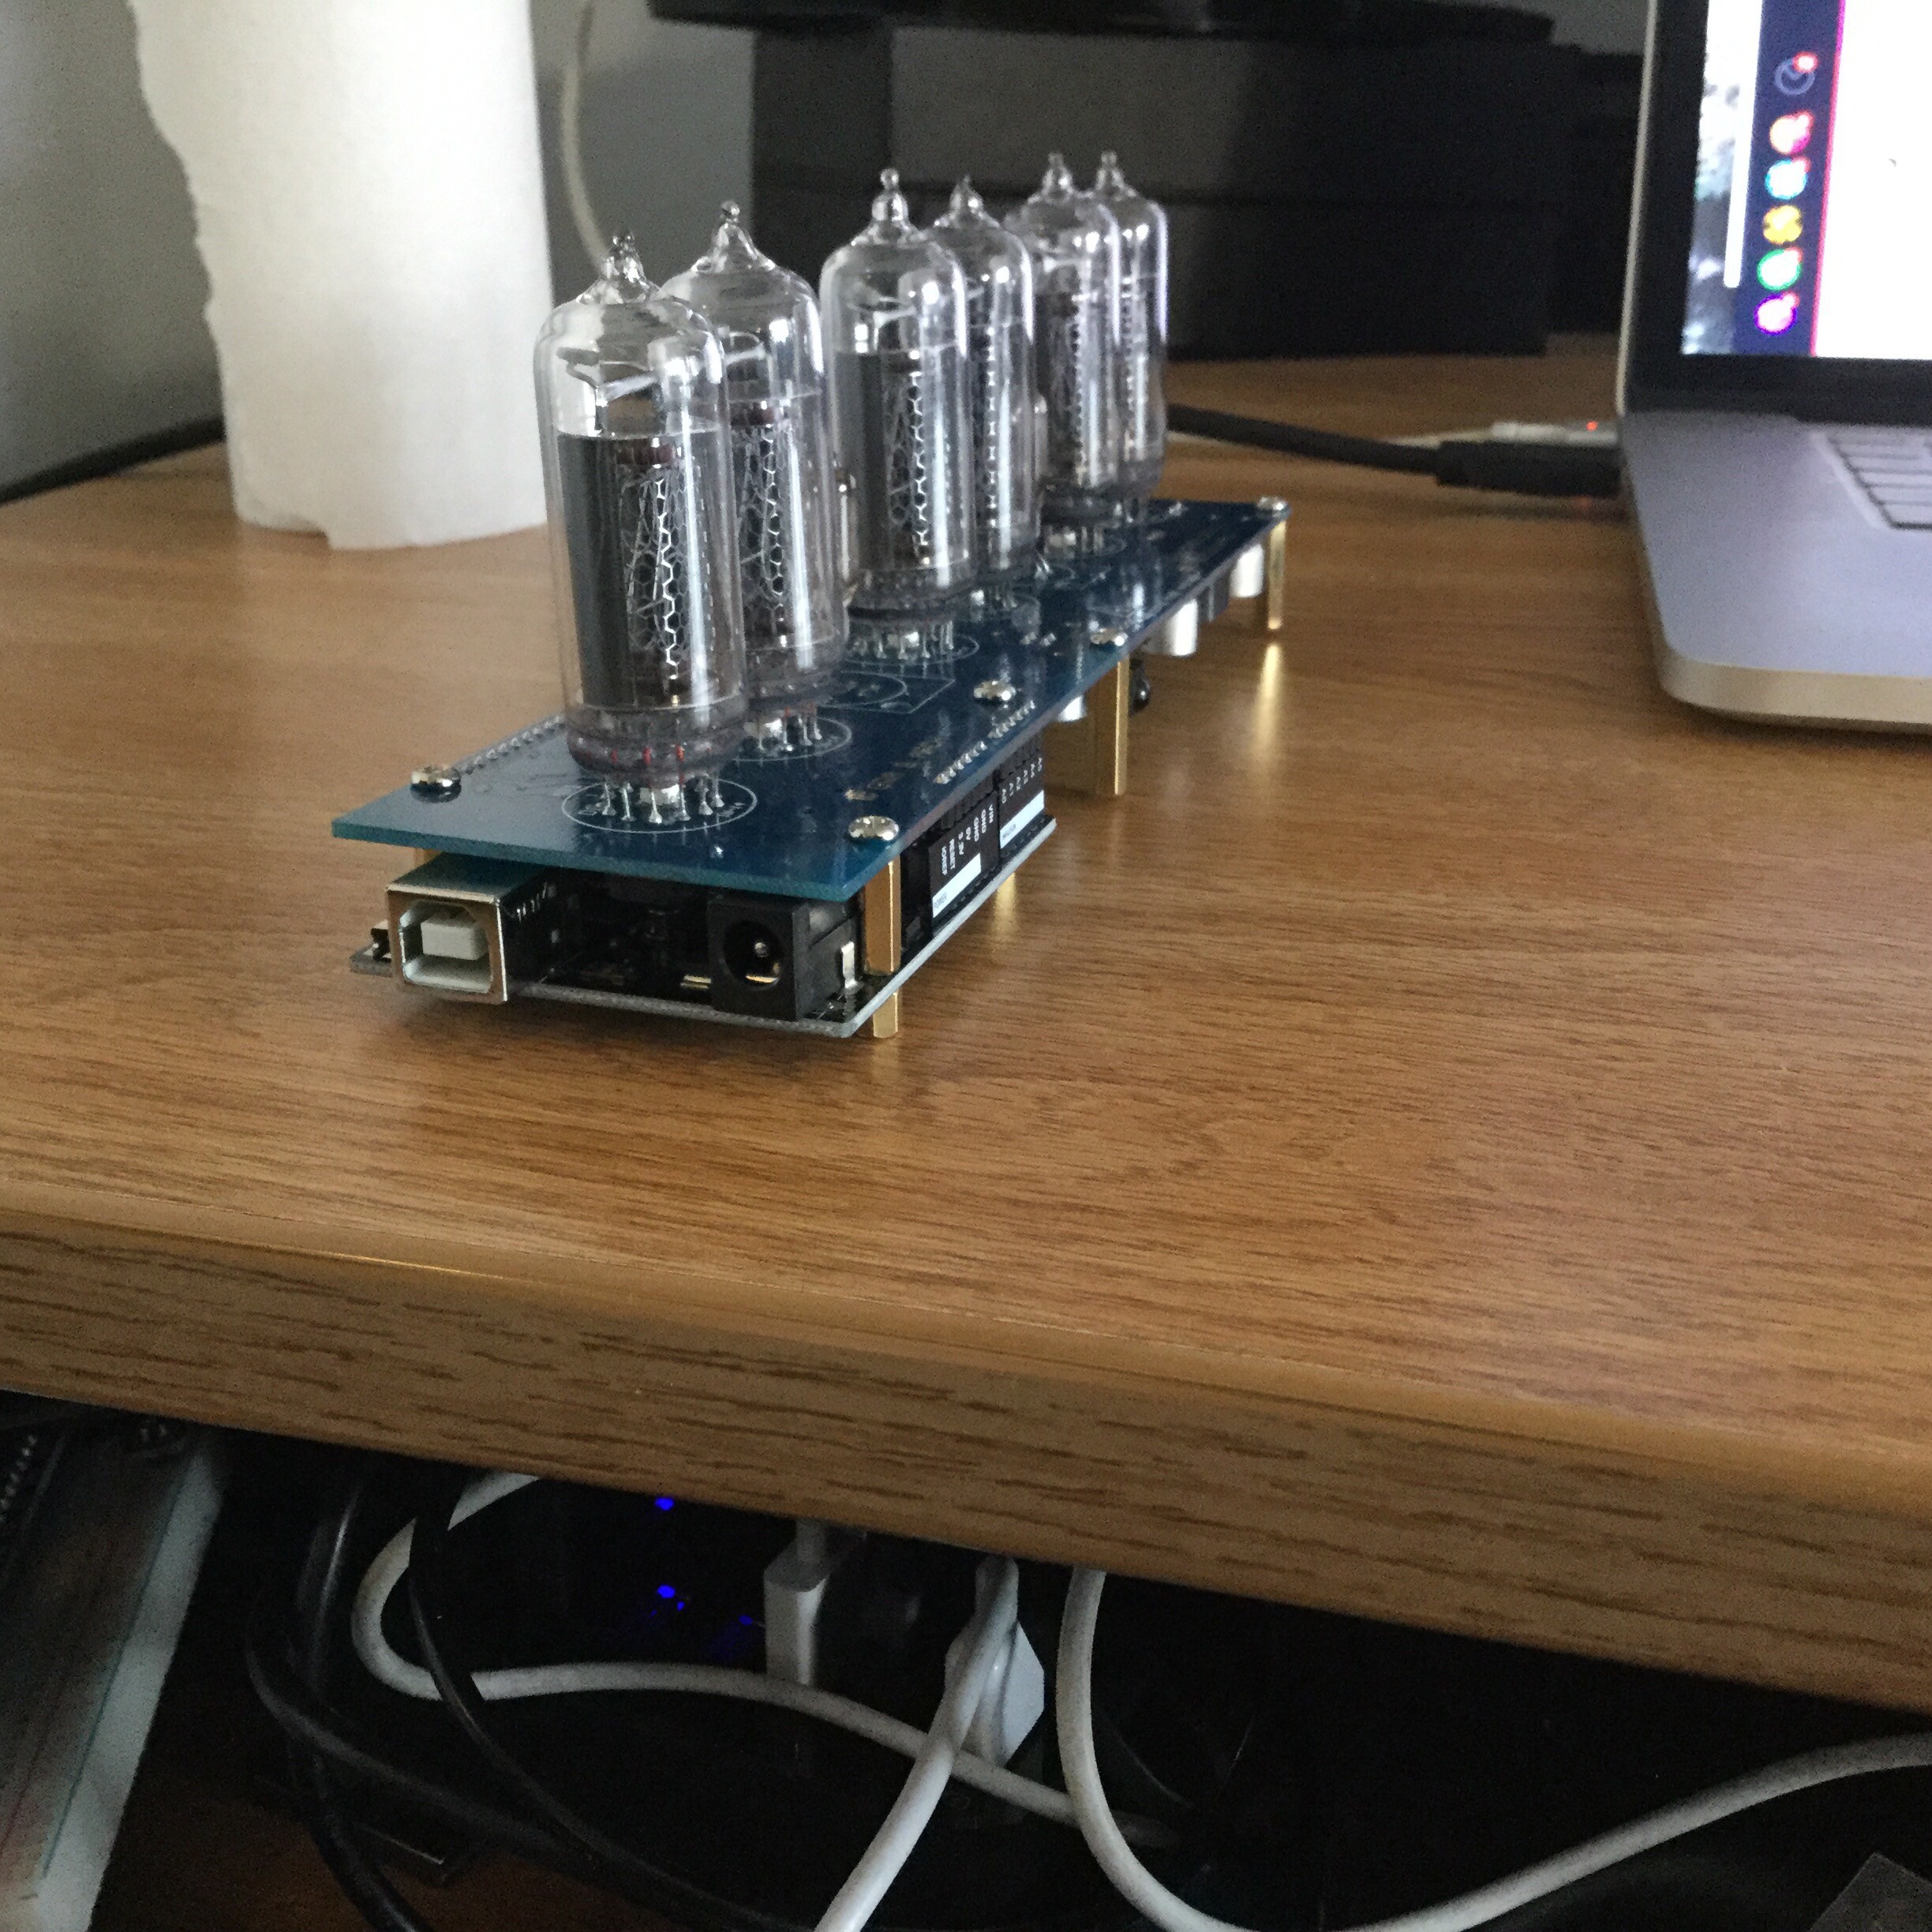
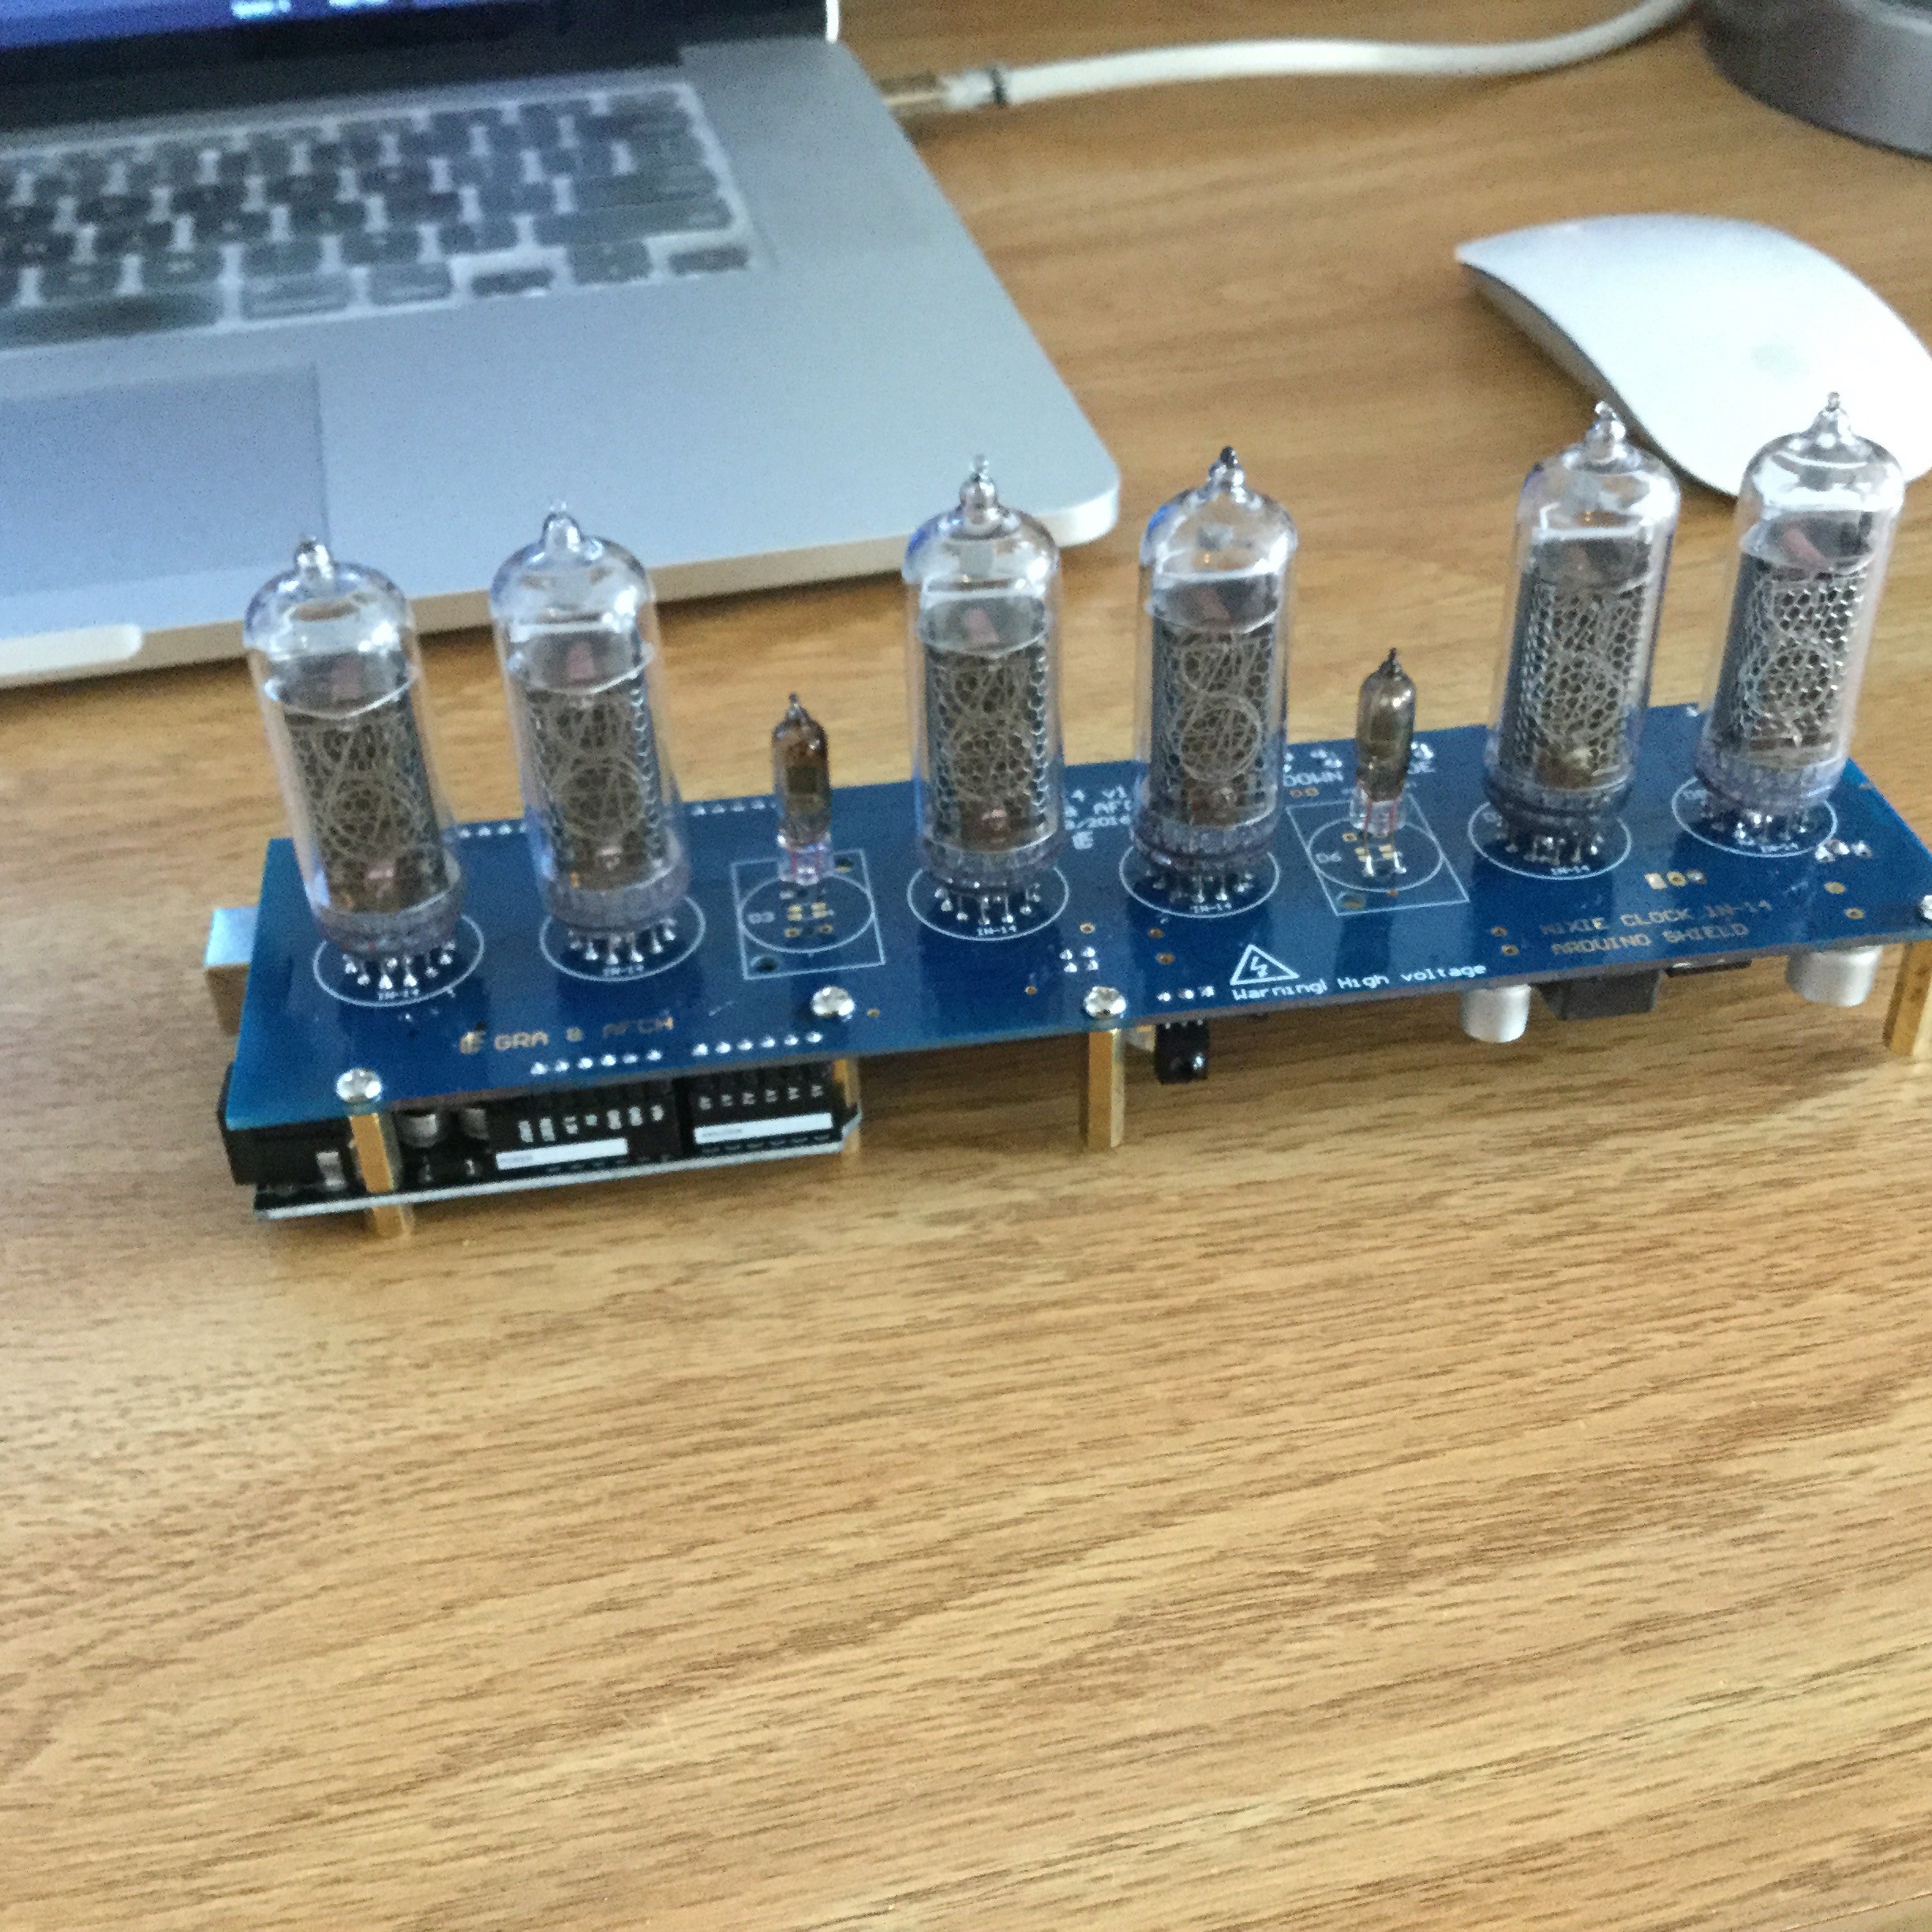
3) Display time using nixie tube displays.
Implementation
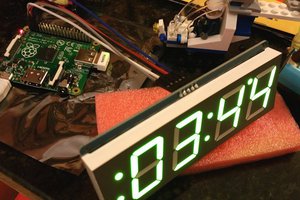
hberg32 successfully implemented code and wiring for a similar project. My project however, will add a full RESTful web server as the control mechanism for the alarm clock, JSON files to store the configuration of the alarms, and nixie tubes to display the time.
Prometheus Program
The UI portion of this project consists of a Golang web server running on the Raspberry Pi which can be accessed on any internet capable browser. The web server serves up the intial index.html page at the site root (e.g. 111.111.111:3000 where 111.111.111 is the wlan0 IP of the Raspberry Pi). Through heavy use of Vue.js, this page acts as a SPA (single page application). It makes heavy use of the AJAX post requests for the switch buttons, file uploads, and time form submit. It populates the values of the alarm times, sound, and vibration buttons with the values stored in alarms.json which holds the configuration data for the 4 alarms. When the user submits the form, the Golang web server handles the request as a put request, reads the data, changes the internally stored values for the 4 alarms, and writes back the values into alarms.json. The only button on the page that requires a hard refresh is the snooze button at the top because the web server needs to compute the value of +10 minutes on the currenly running alarm.
A working demo of the web interface can be found here: Link
When the requested the root, it will expose the public folder containing an index.html file (which browsers automatically load), it loads configurations from the alarm configurations from the file alarms.json. It also loads other configuration details like the name of the sound file, LED enable/disable setting, LED color setting, IP change email notification enable/disable setting, IP change email address destination setting, and the enable/disable custom sound card setting.
Vue.js is used to obtain and parse these values from the client side browser when the page is loaded (and incorporated into the Vue instance's data to to populate the page). Other features of Vue such as two way data binding is used inconjunction with AJAX asynchronous POST to ensure the page doesn't have to reload unless necessary.
In addition to serving the user interface, the main program also controls the hardware interfaces (bed vibrator and speakers) for the alarm. The main logic for when to start running an alarm is a cron task that runs once a minute: if an alarm time configuration matches the current time, then run the relevant waking methods (i.e. vibration/sound).
More specific implementation information is written here.
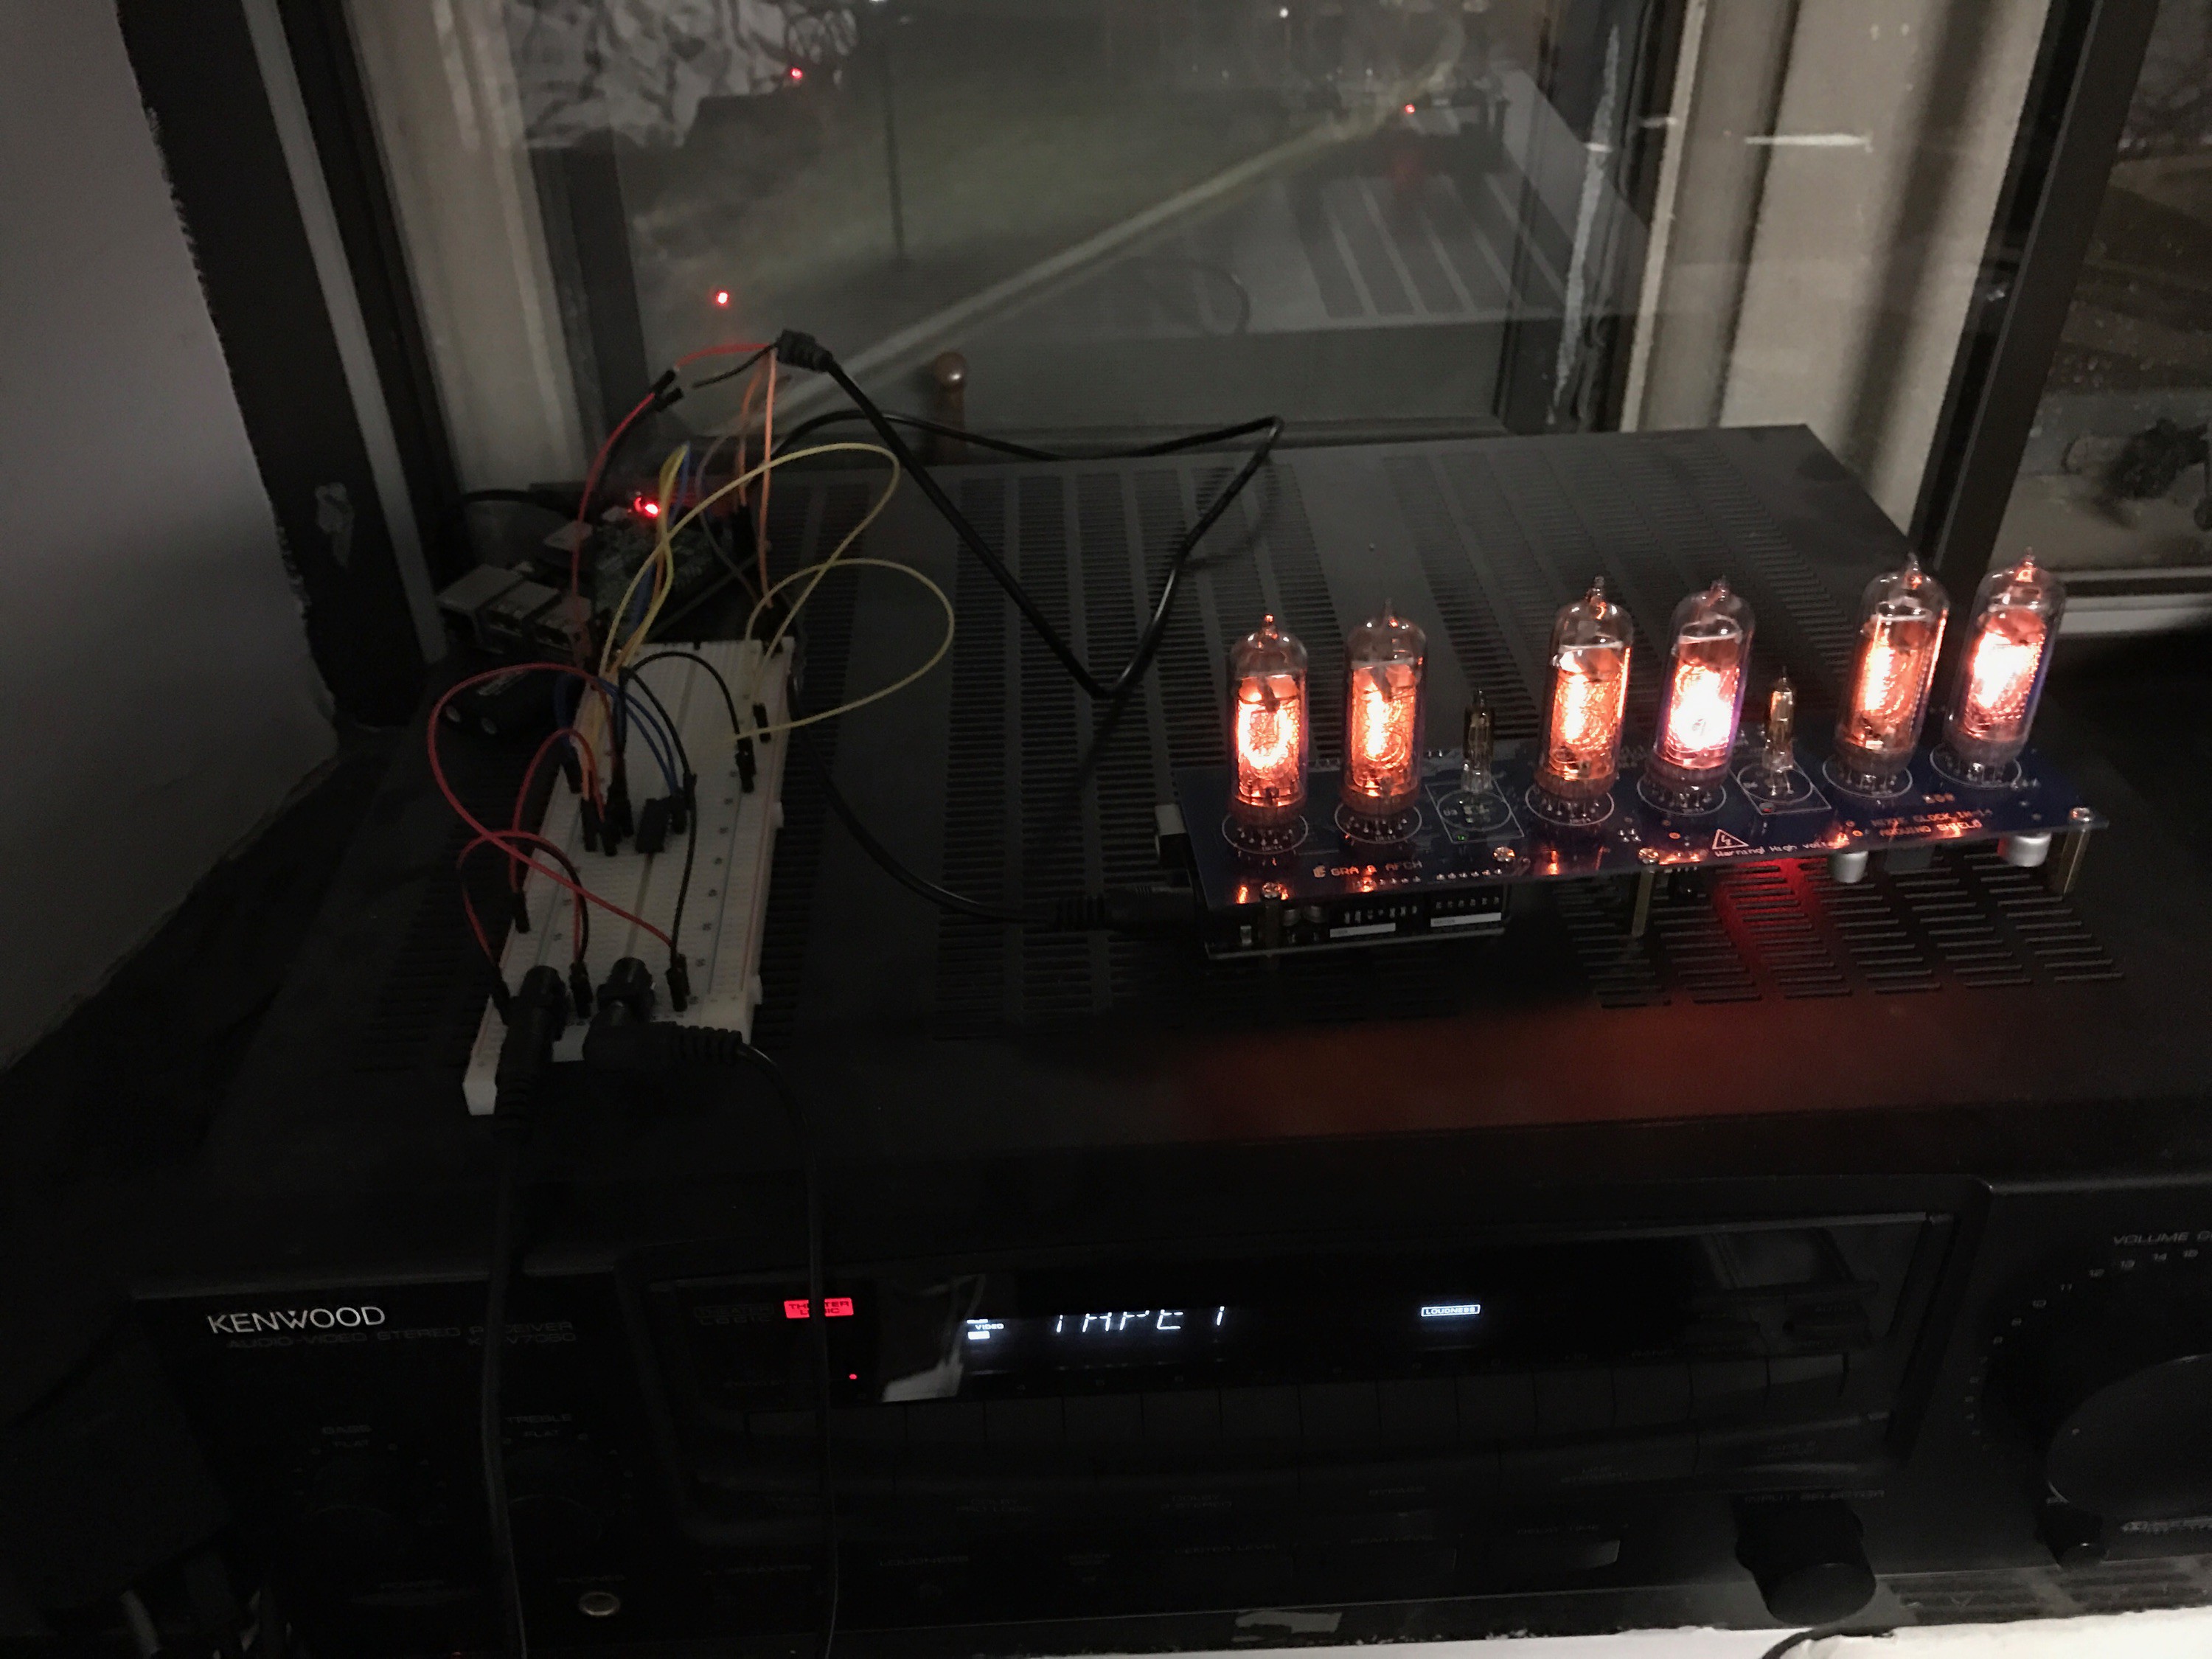
Hardware Implementation
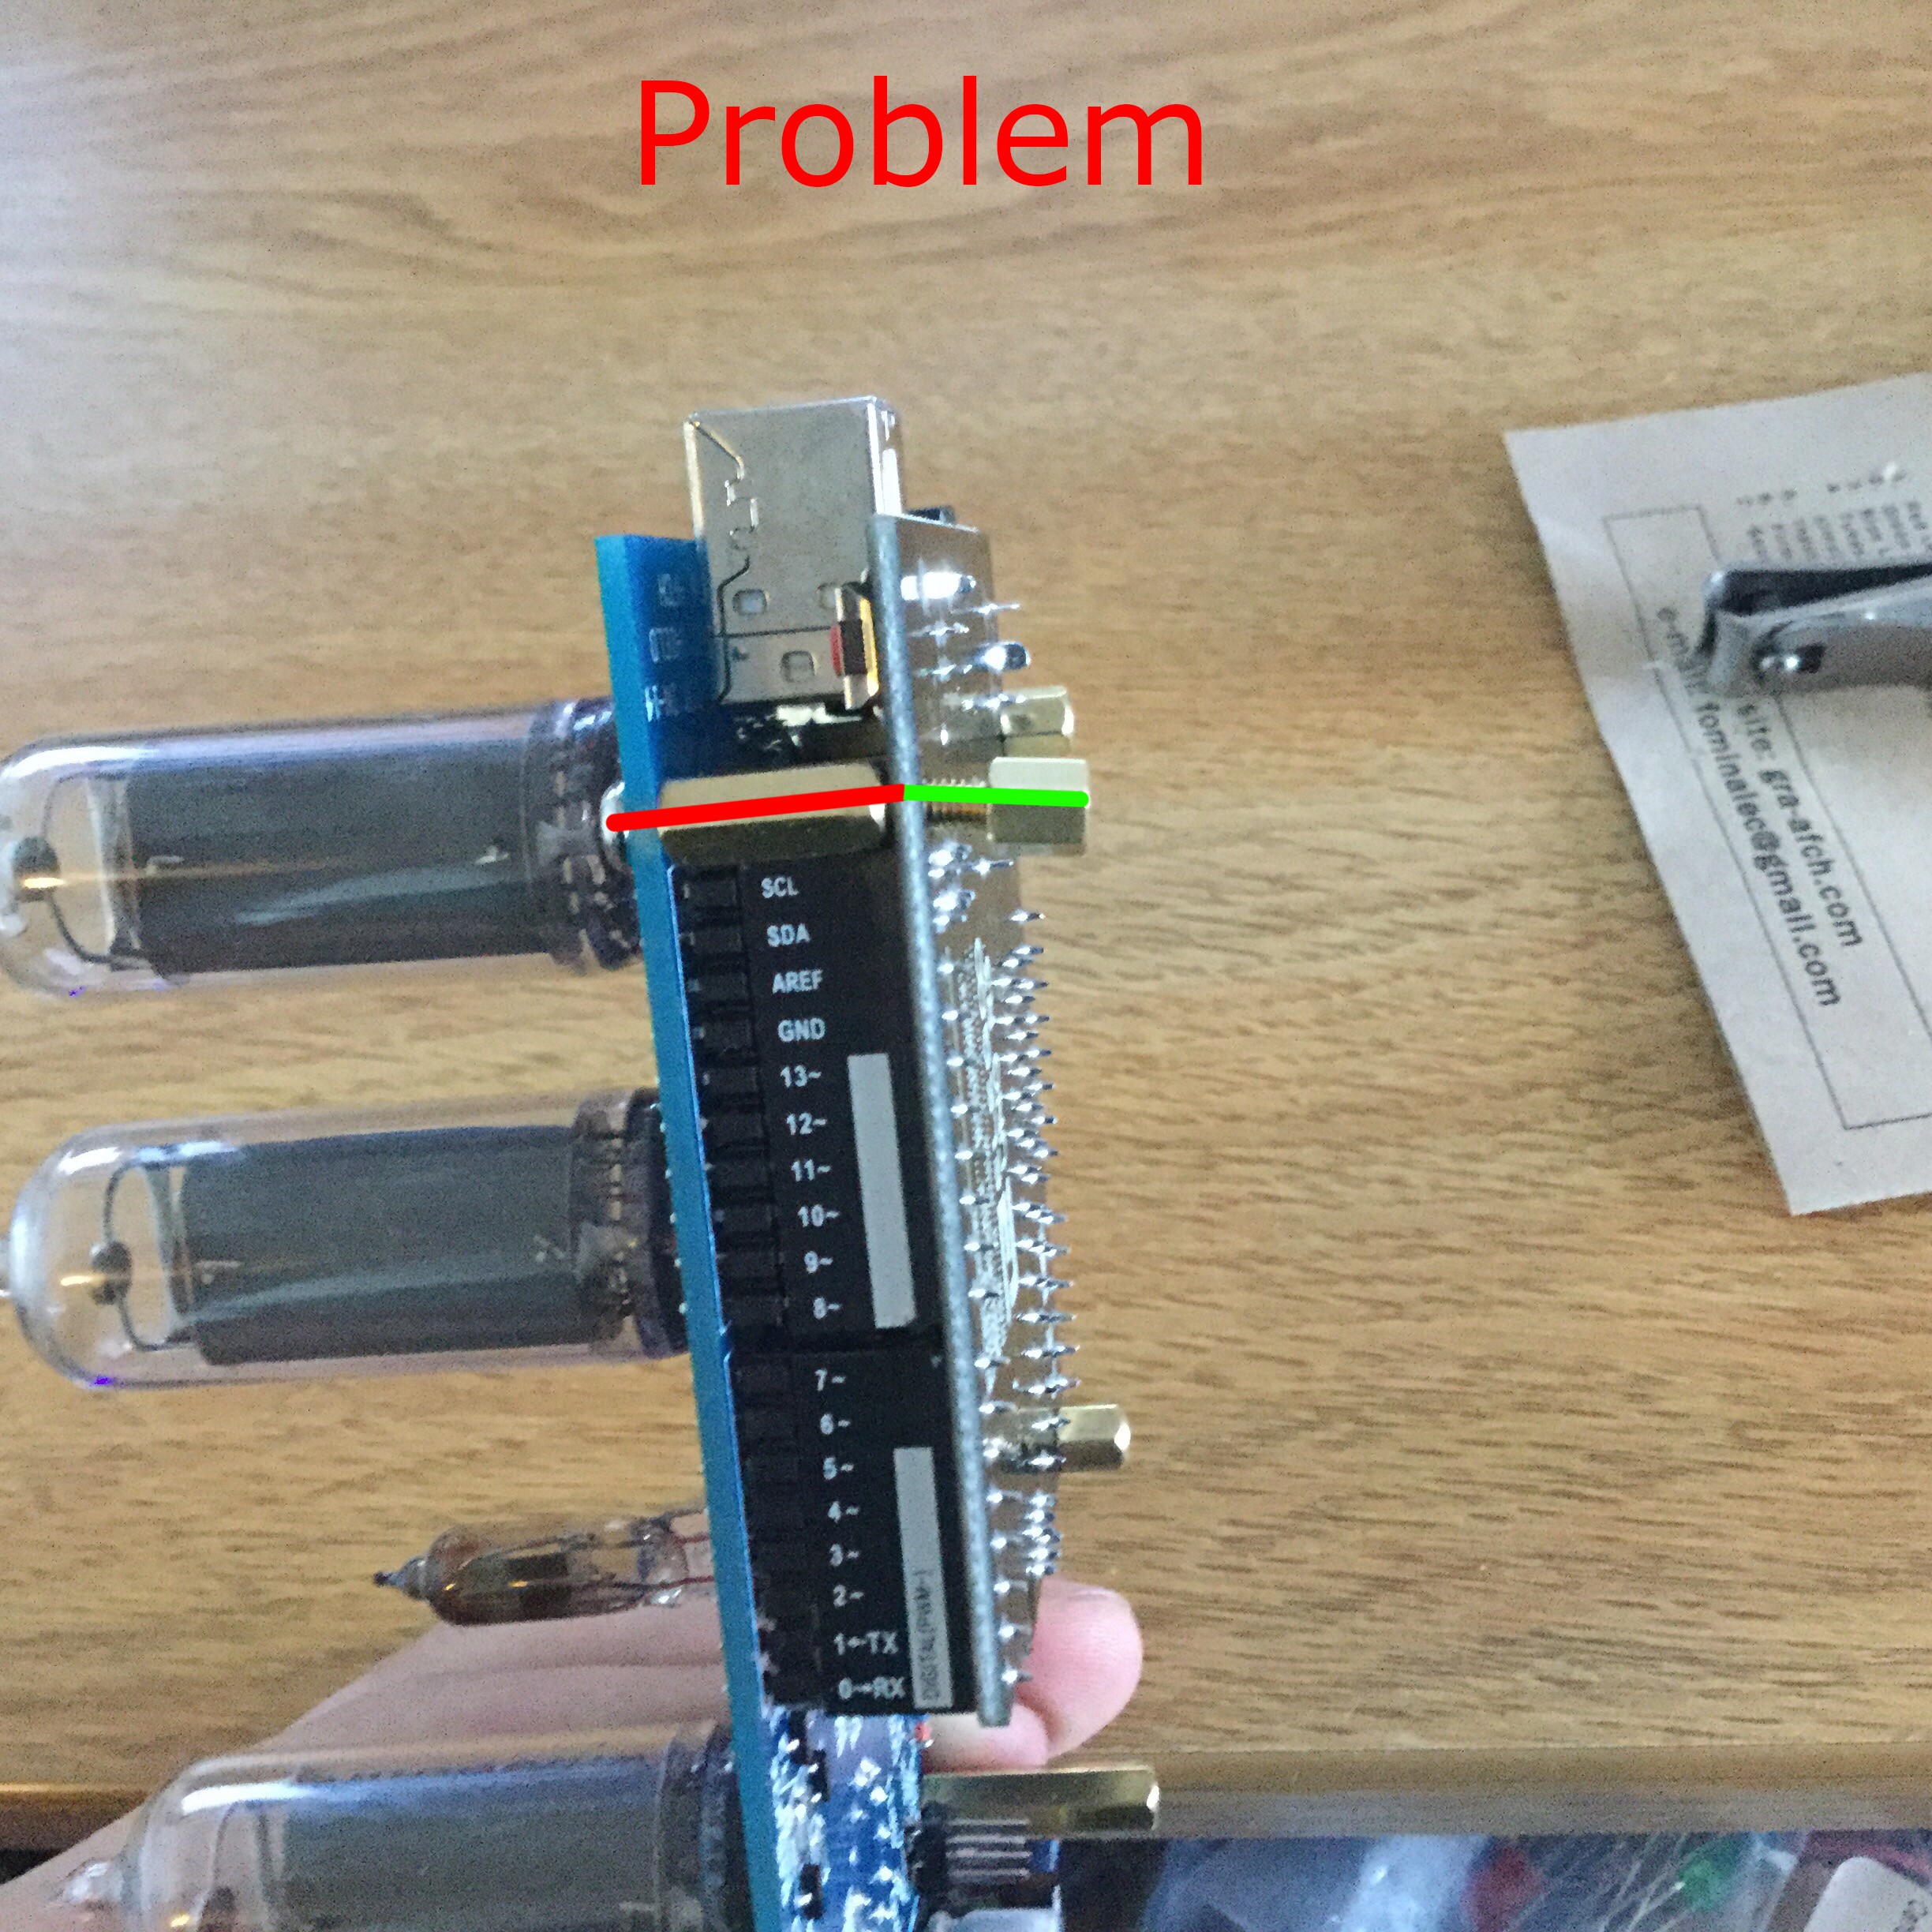
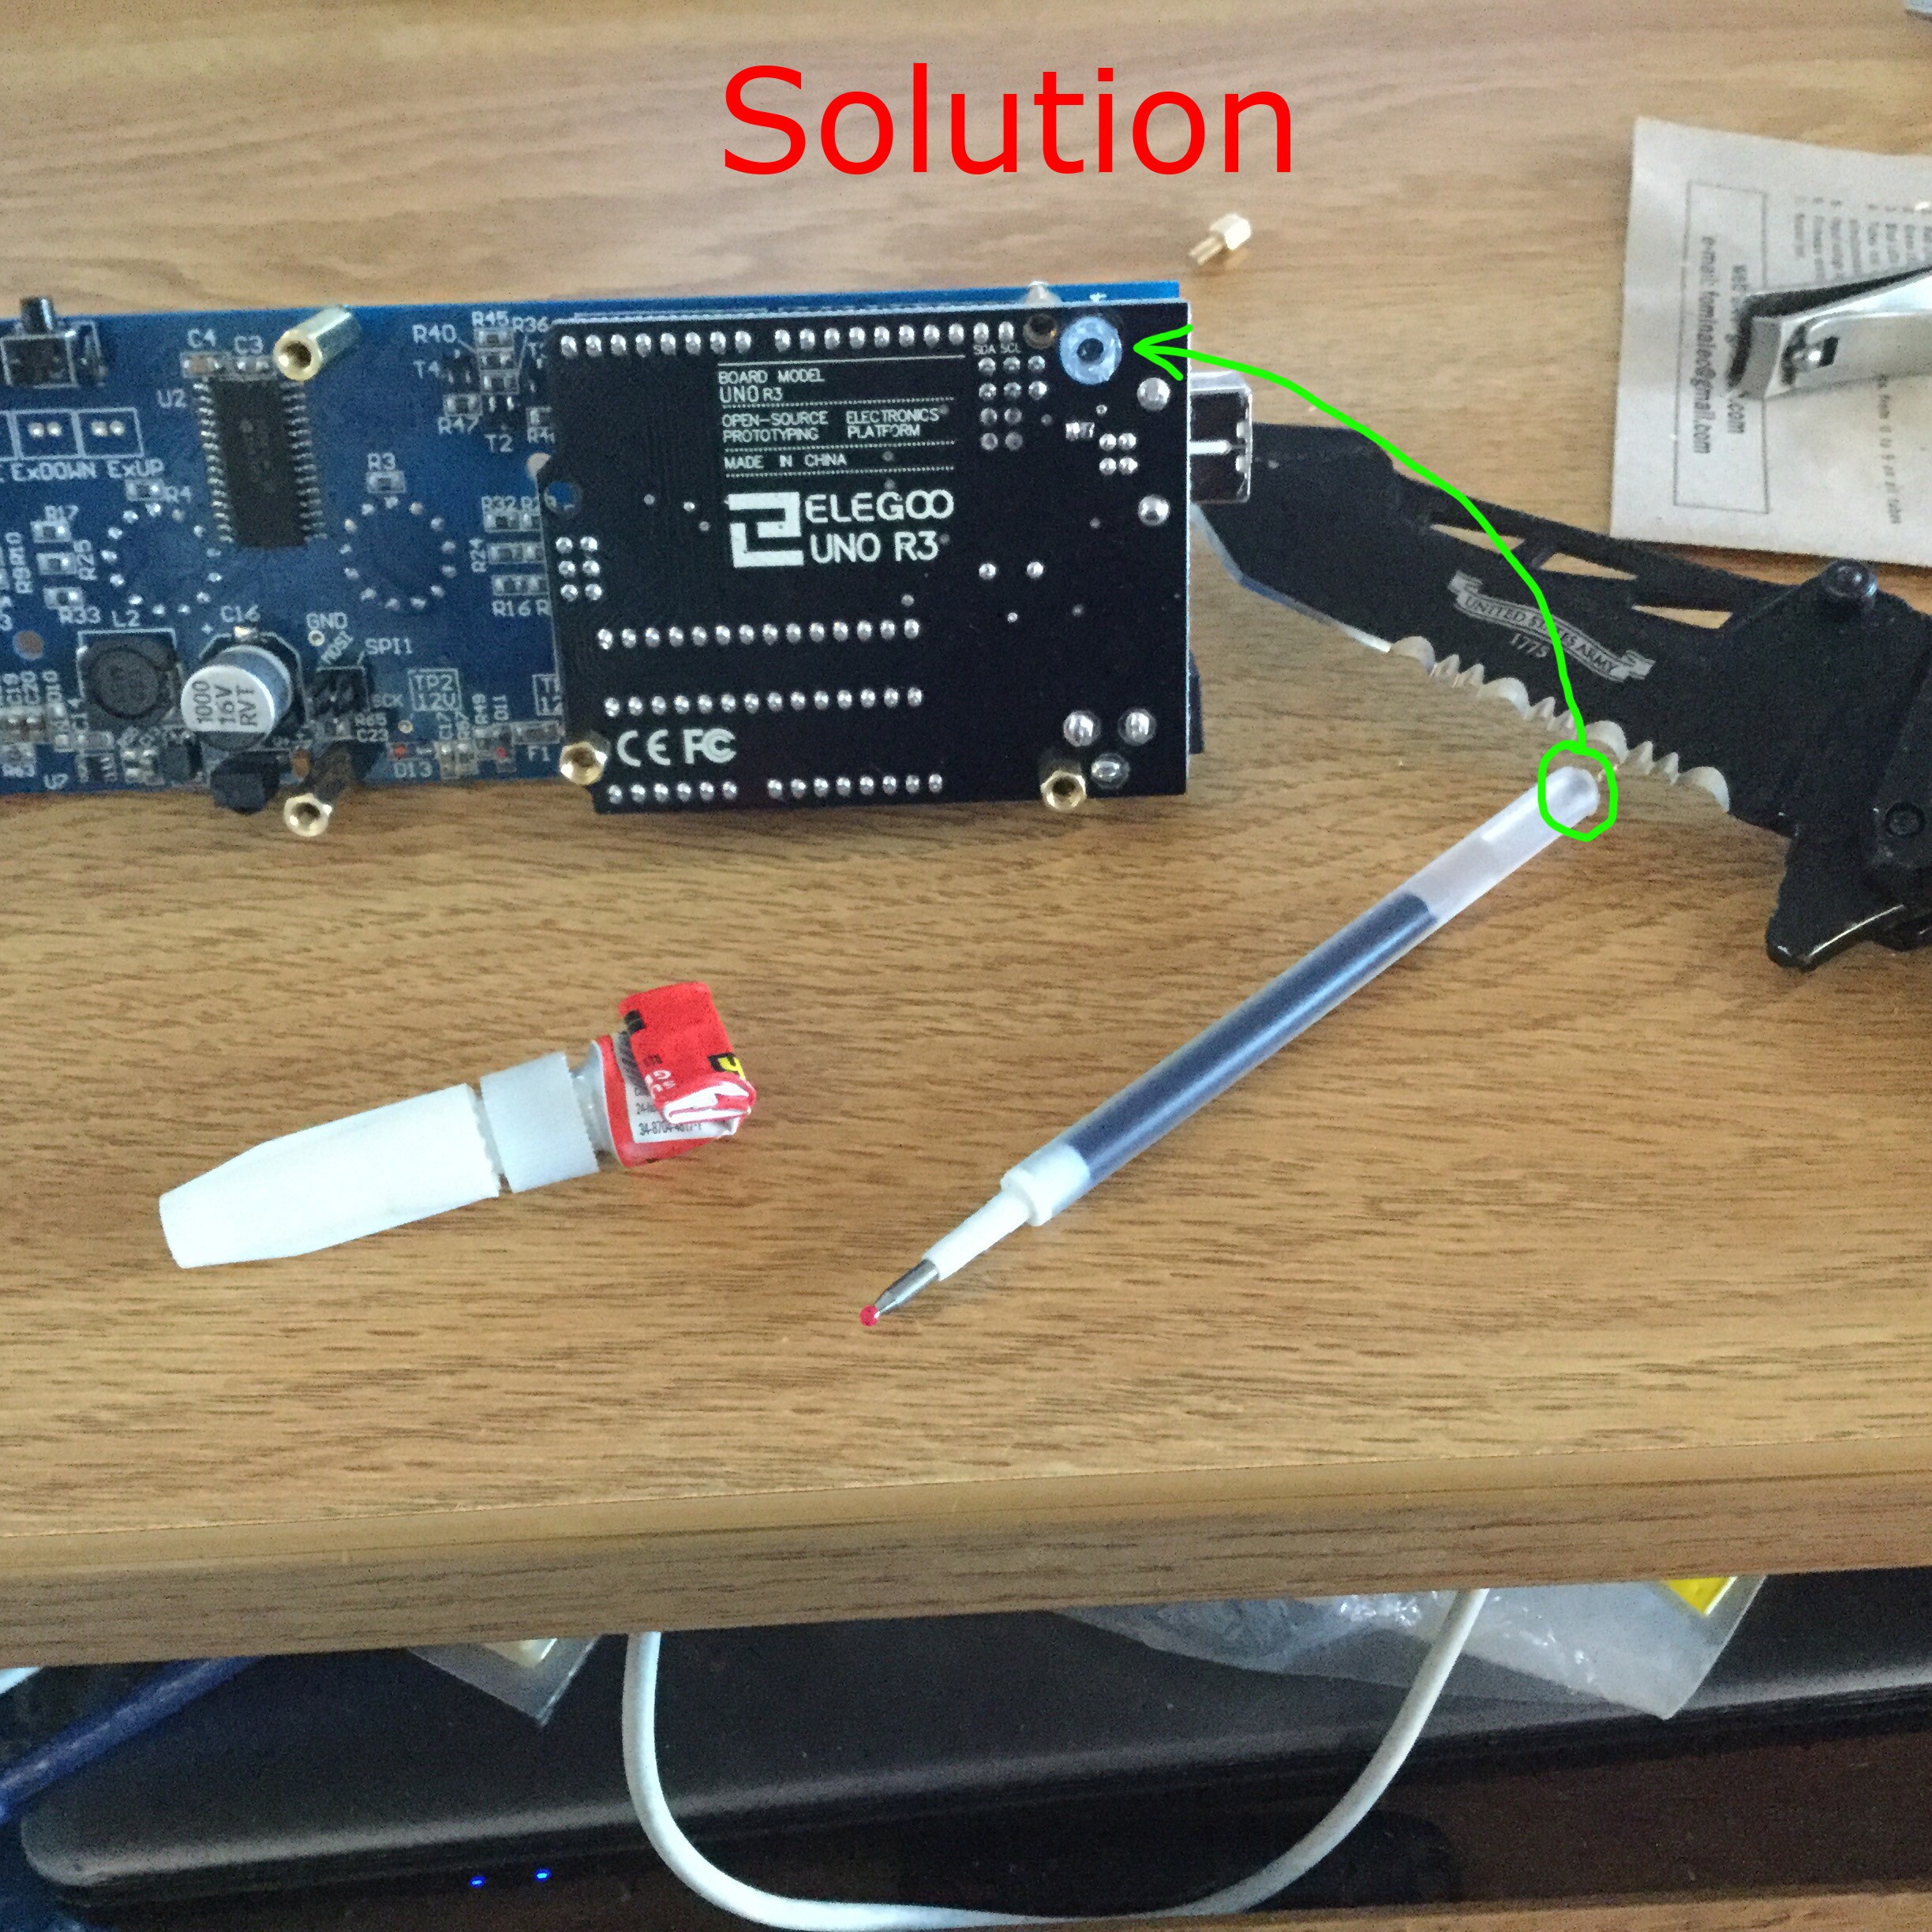
For nixie cathode display portion, I decided to purchase the NCS314 kit from GRA and AFCH from Ukraine. They post their source code to Github, and had a good track record of helping people with the software they wrote. Since I was concentrated on the alarm portion of the project, I decided I did not want to get bogged down in the complex details of how to construct a clock display using dated technology. Their clock definitely did the job. However, in using the clock for an extended period, I realized that the RTC module they used is highly inaccurate and the clock time drifted more...
Read more »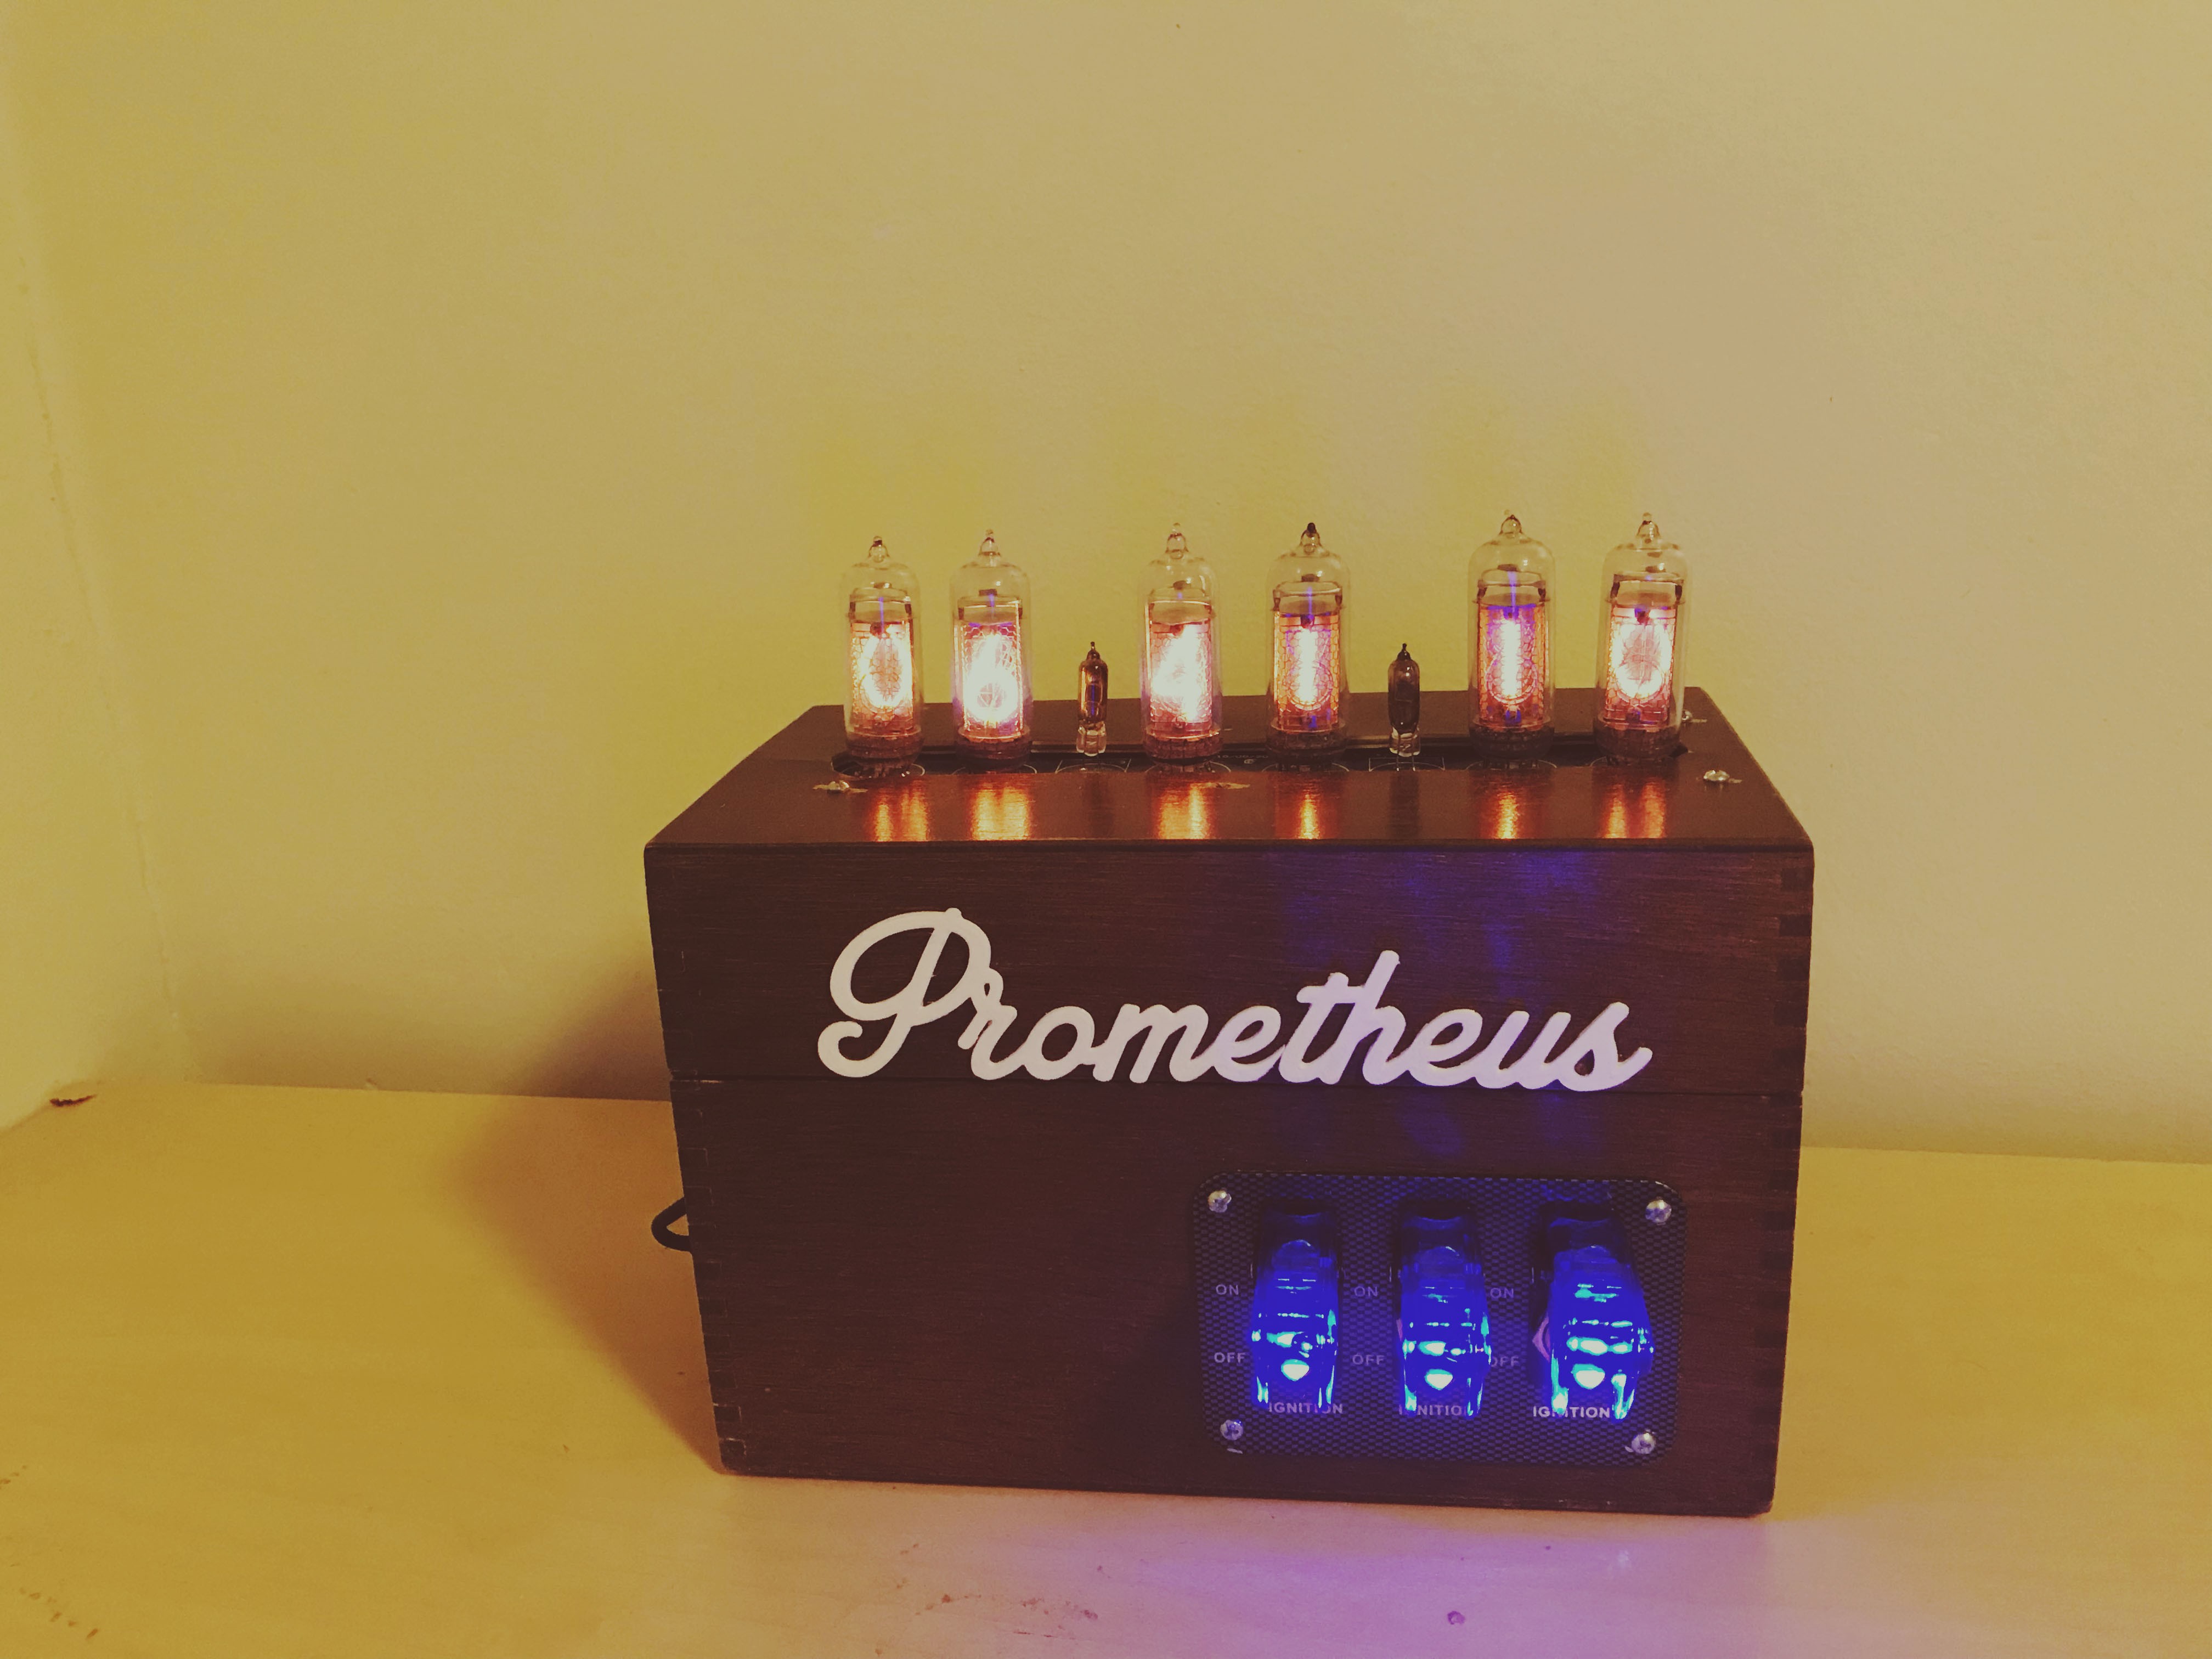

 DeckerEgo
 Phil
Phil
 Thomas Snow
 Nick Sayer
Looks good man, congratulations!