 Meaghan Creed
This design fits into our colony caging (Allentown NextGen) while on the rack, for different caging you may have to modify the 3D design.
Version 2: A homecage-fitted apparatus for automated, photobeam-based detection of licks in a two-bottle choice task.
Already have an account? Log in.
To make the experience fit your profile, pick a username and tell us what interests you.
This design fits into our colony caging (Allentown NextGen) while on the rack, for different caging you may have to modify the 3D design.
Sipper-053122.zipUpdated code with sleep enabled to get more battery life, more accurate sensing, and better control over outputs. Also fixes SD card bug with older Adafruit SAMD board definitions.x-zip-compressed - 10.77 kB - 05/31/2022 at 19:47 |
|
|
SipperLibraries102420.zipLibraries to use with Sipper-102420Stable codex-zip-compressed - 4.09 MB - 08/24/2021 at 19:05 |
|
|
Sipper base.stl3D design file for the main pieceStandard Tesselated Geometry - 319.22 kB - 07/16/2019 at 12:08 |
|
|
Sipper cover.stl3D design file for the coverStandard Tesselated Geometry - 38.56 kB - 07/16/2019 at 12:08 |
|
|
Mini sipper tube holder.stlMini single tube holderStandard Tesselated Geometry - 67.66 kB - 08/11/2019 at 04:39 |
|
We updated the Sipper firmware (see files area for Sipper-102420Stable.zip)! The new features/changes are:
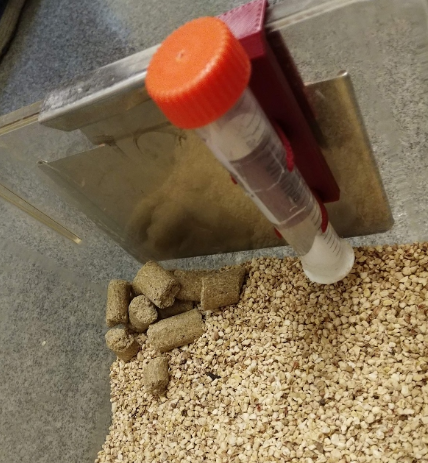
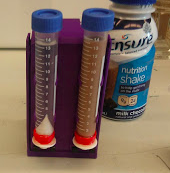
For a different project we needed a simple tube holder to fit in a cage without a wire rack. The sipper design was perfect, and we printed this small part of it:
This hangs over the cage edge like this:, providing a simple way to use a sipper tube as a water bottle, or for simple manual measurement. STL in the files area!
The 3D design was developed in TinkerCAD and an editable design is available here:
https://www.tinkercad.com/things/gPan0GUSNkd
Please don't judge us! This device went though a very iterative design process so the current design build is a bit complicated. We'll hopefully re-design this more simply and update in the future (or if someone does this please let us know so we can post better design files!).
This log is about troubleshooting. I'll add to it as we identify troubleshooting issues. Please leave a comment if you know of any others!
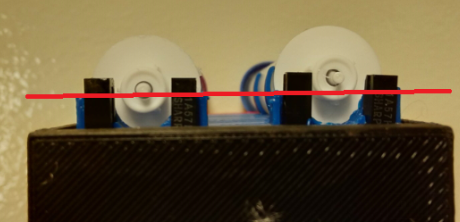
1) Sipper position
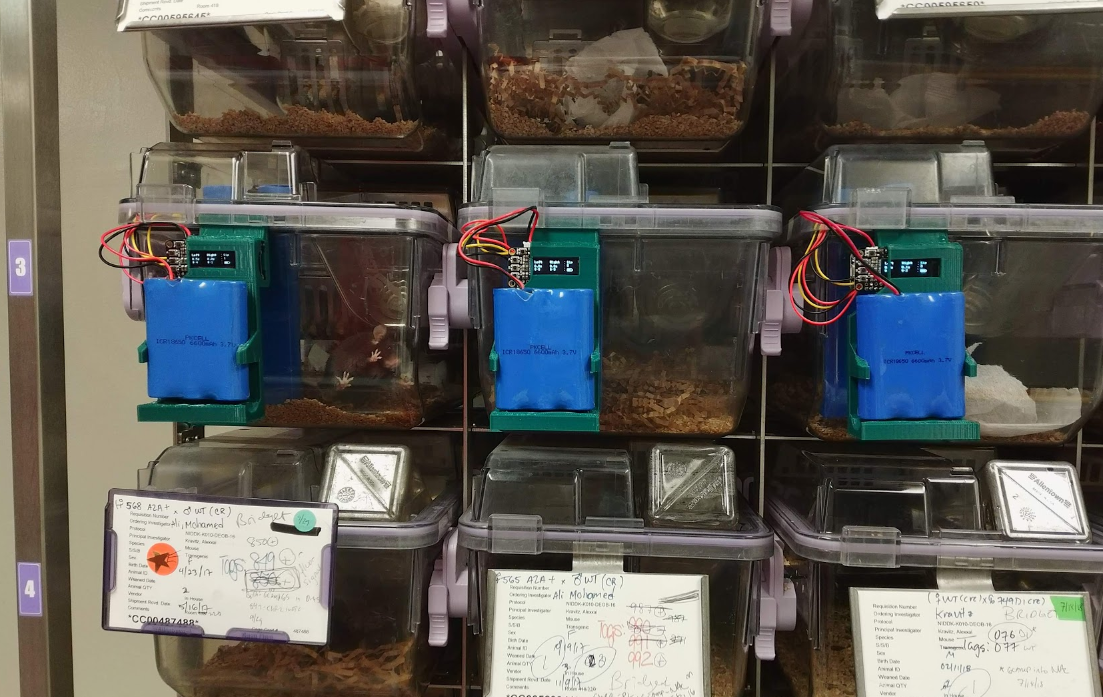
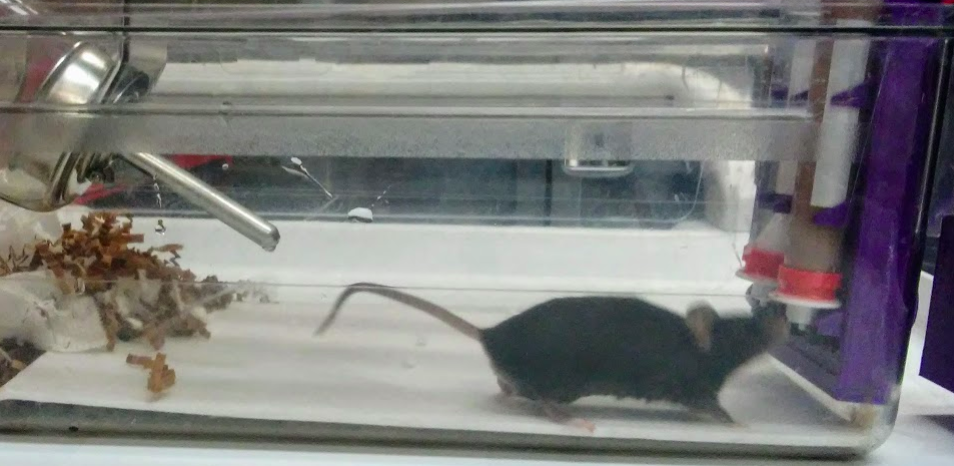
While the electronics on the sipper device are pretty much bulletproof, we have noticed the position of the sipper tubes can shift a bit, so these should be checked carefully. Specifically, it's possible for one tube to move out of the detection beam, which obviously introduces error into the experiment. Here's an example, with the red line estimating the position of the detection beam. The sipper on the right is positioned too far from the detection beam.
We're working on updating the 3D design to reduce this possibility, but either way it's a good idea to check this before putting them in with mice!
Quick video of sippers in action, showing water vs. chocolate
We are getting closer to a finalized design for use with rats v2.0. Hope to upload it all here by the end of the month. This version has a much smaller footprint compared to the previous version. We are just working on finalizing the mounting via suction cups and the code for the volume measurement. Stay tuned!
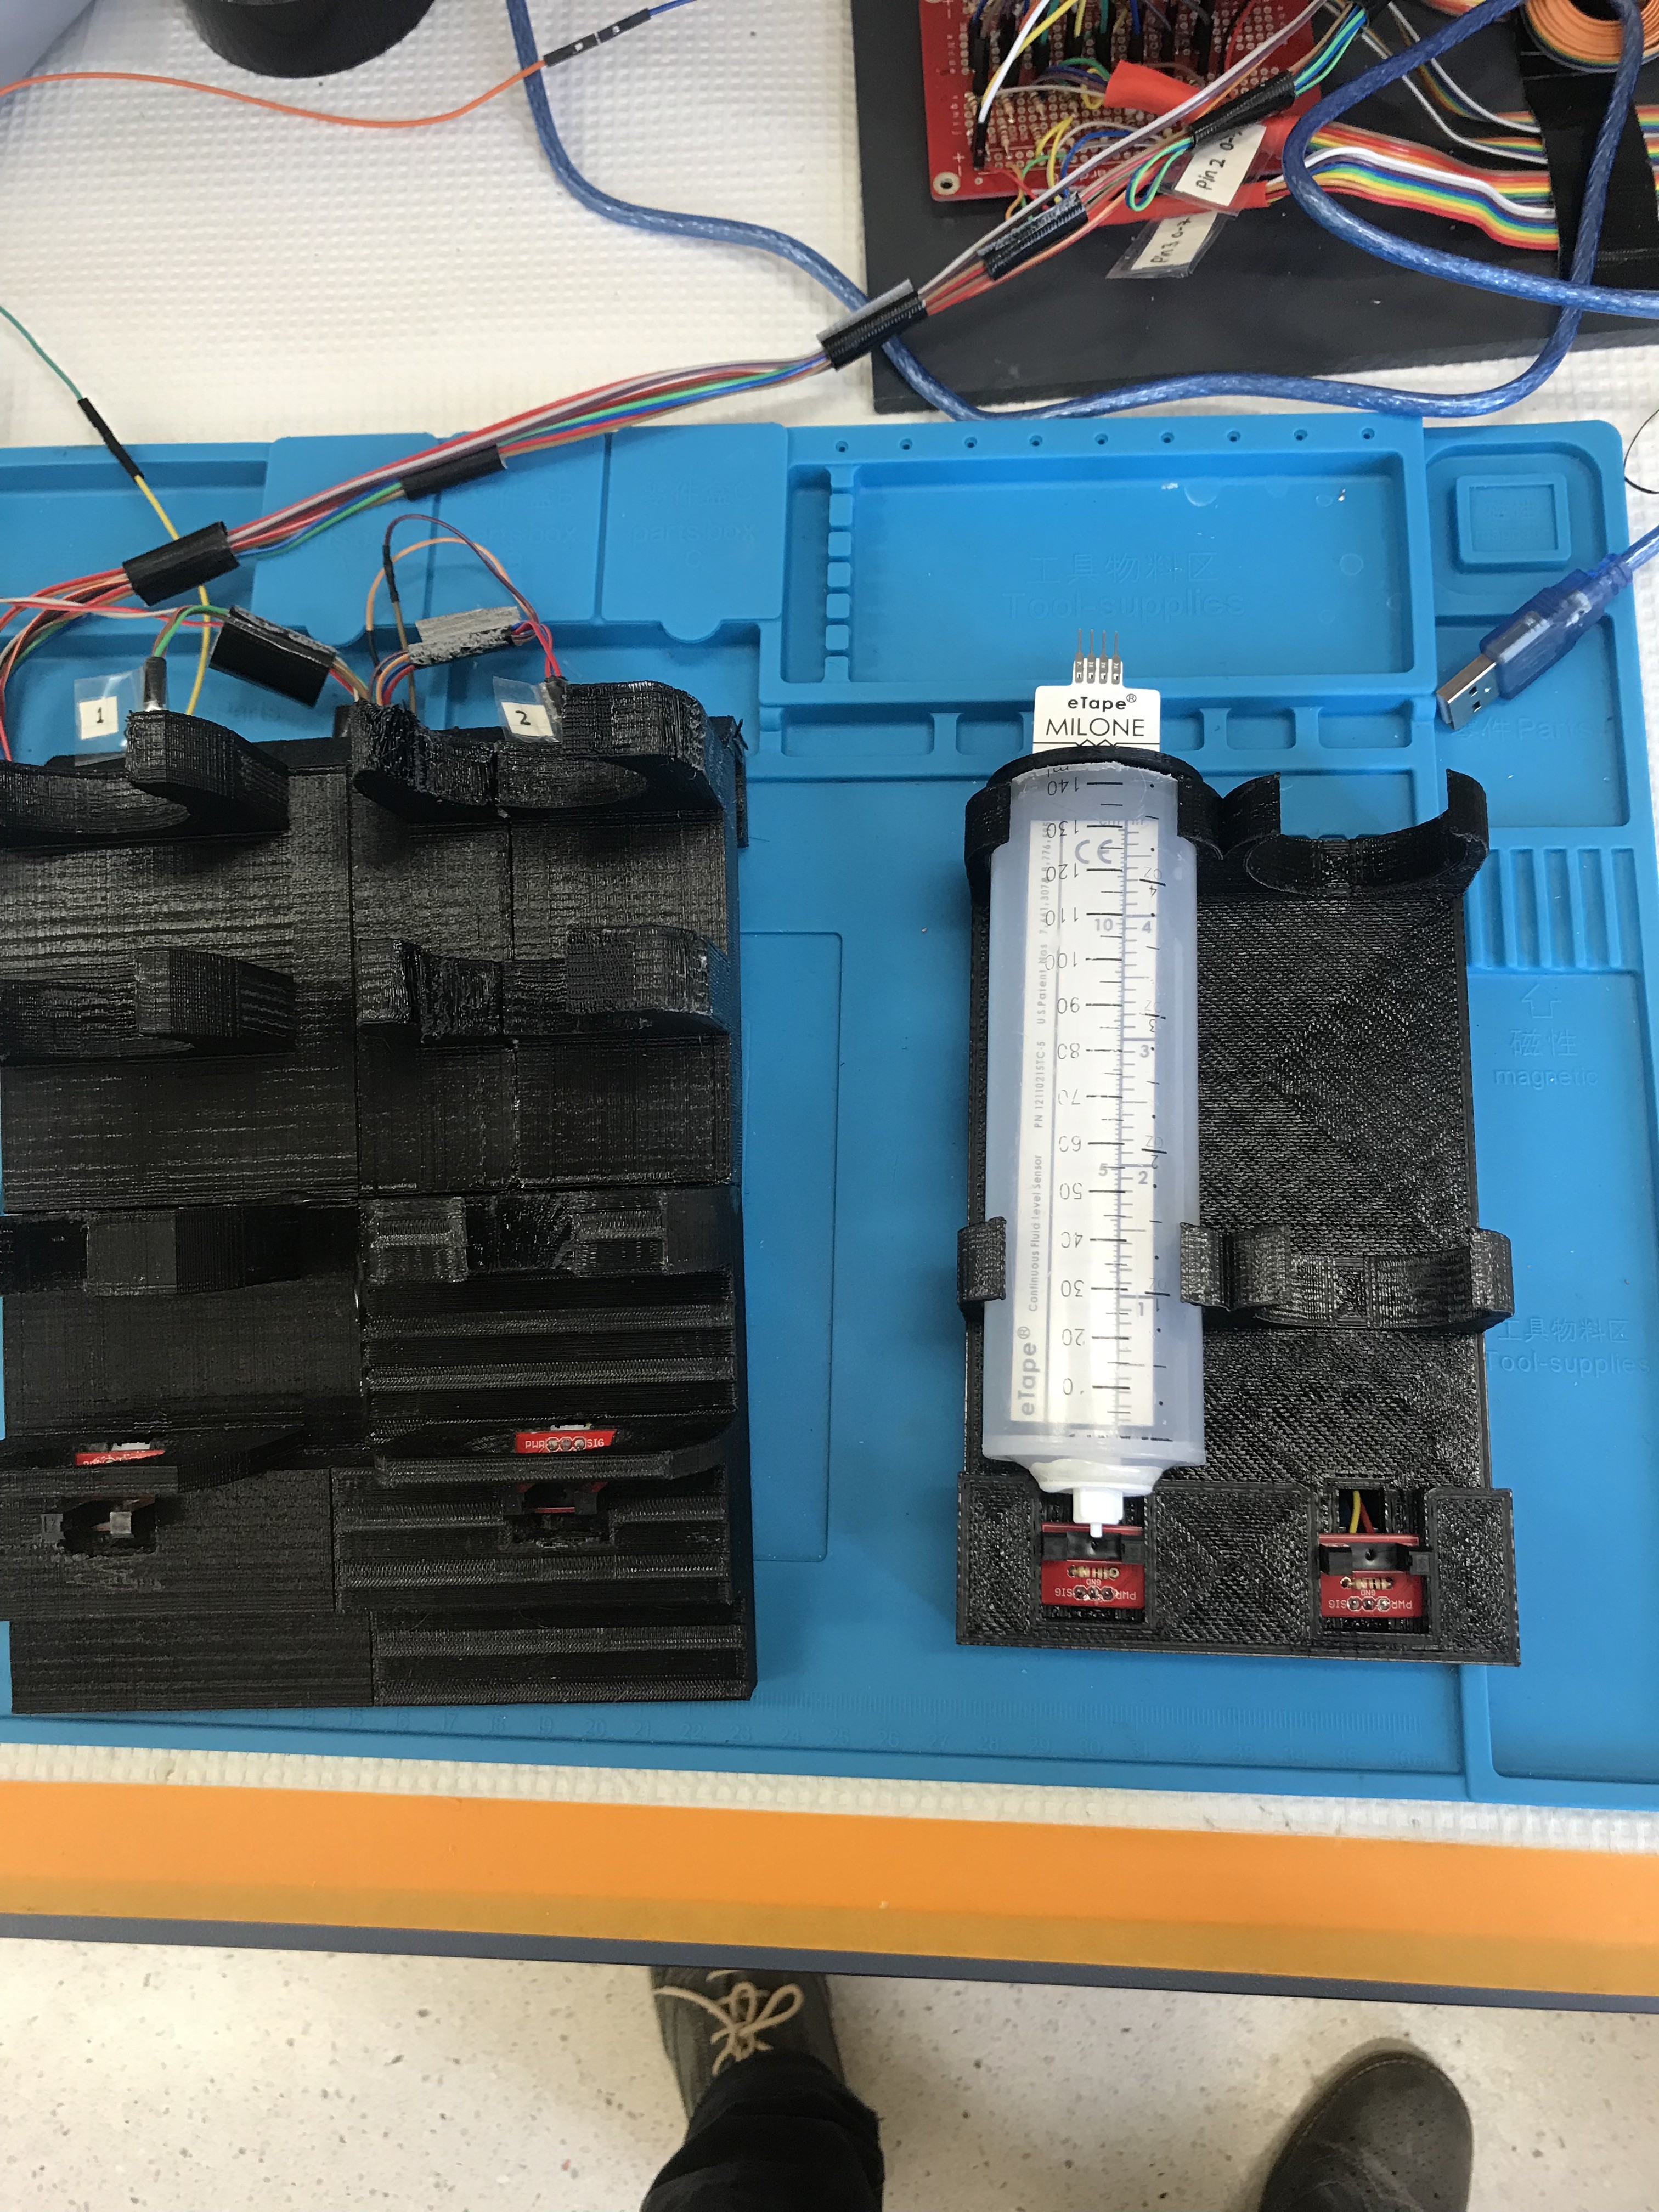
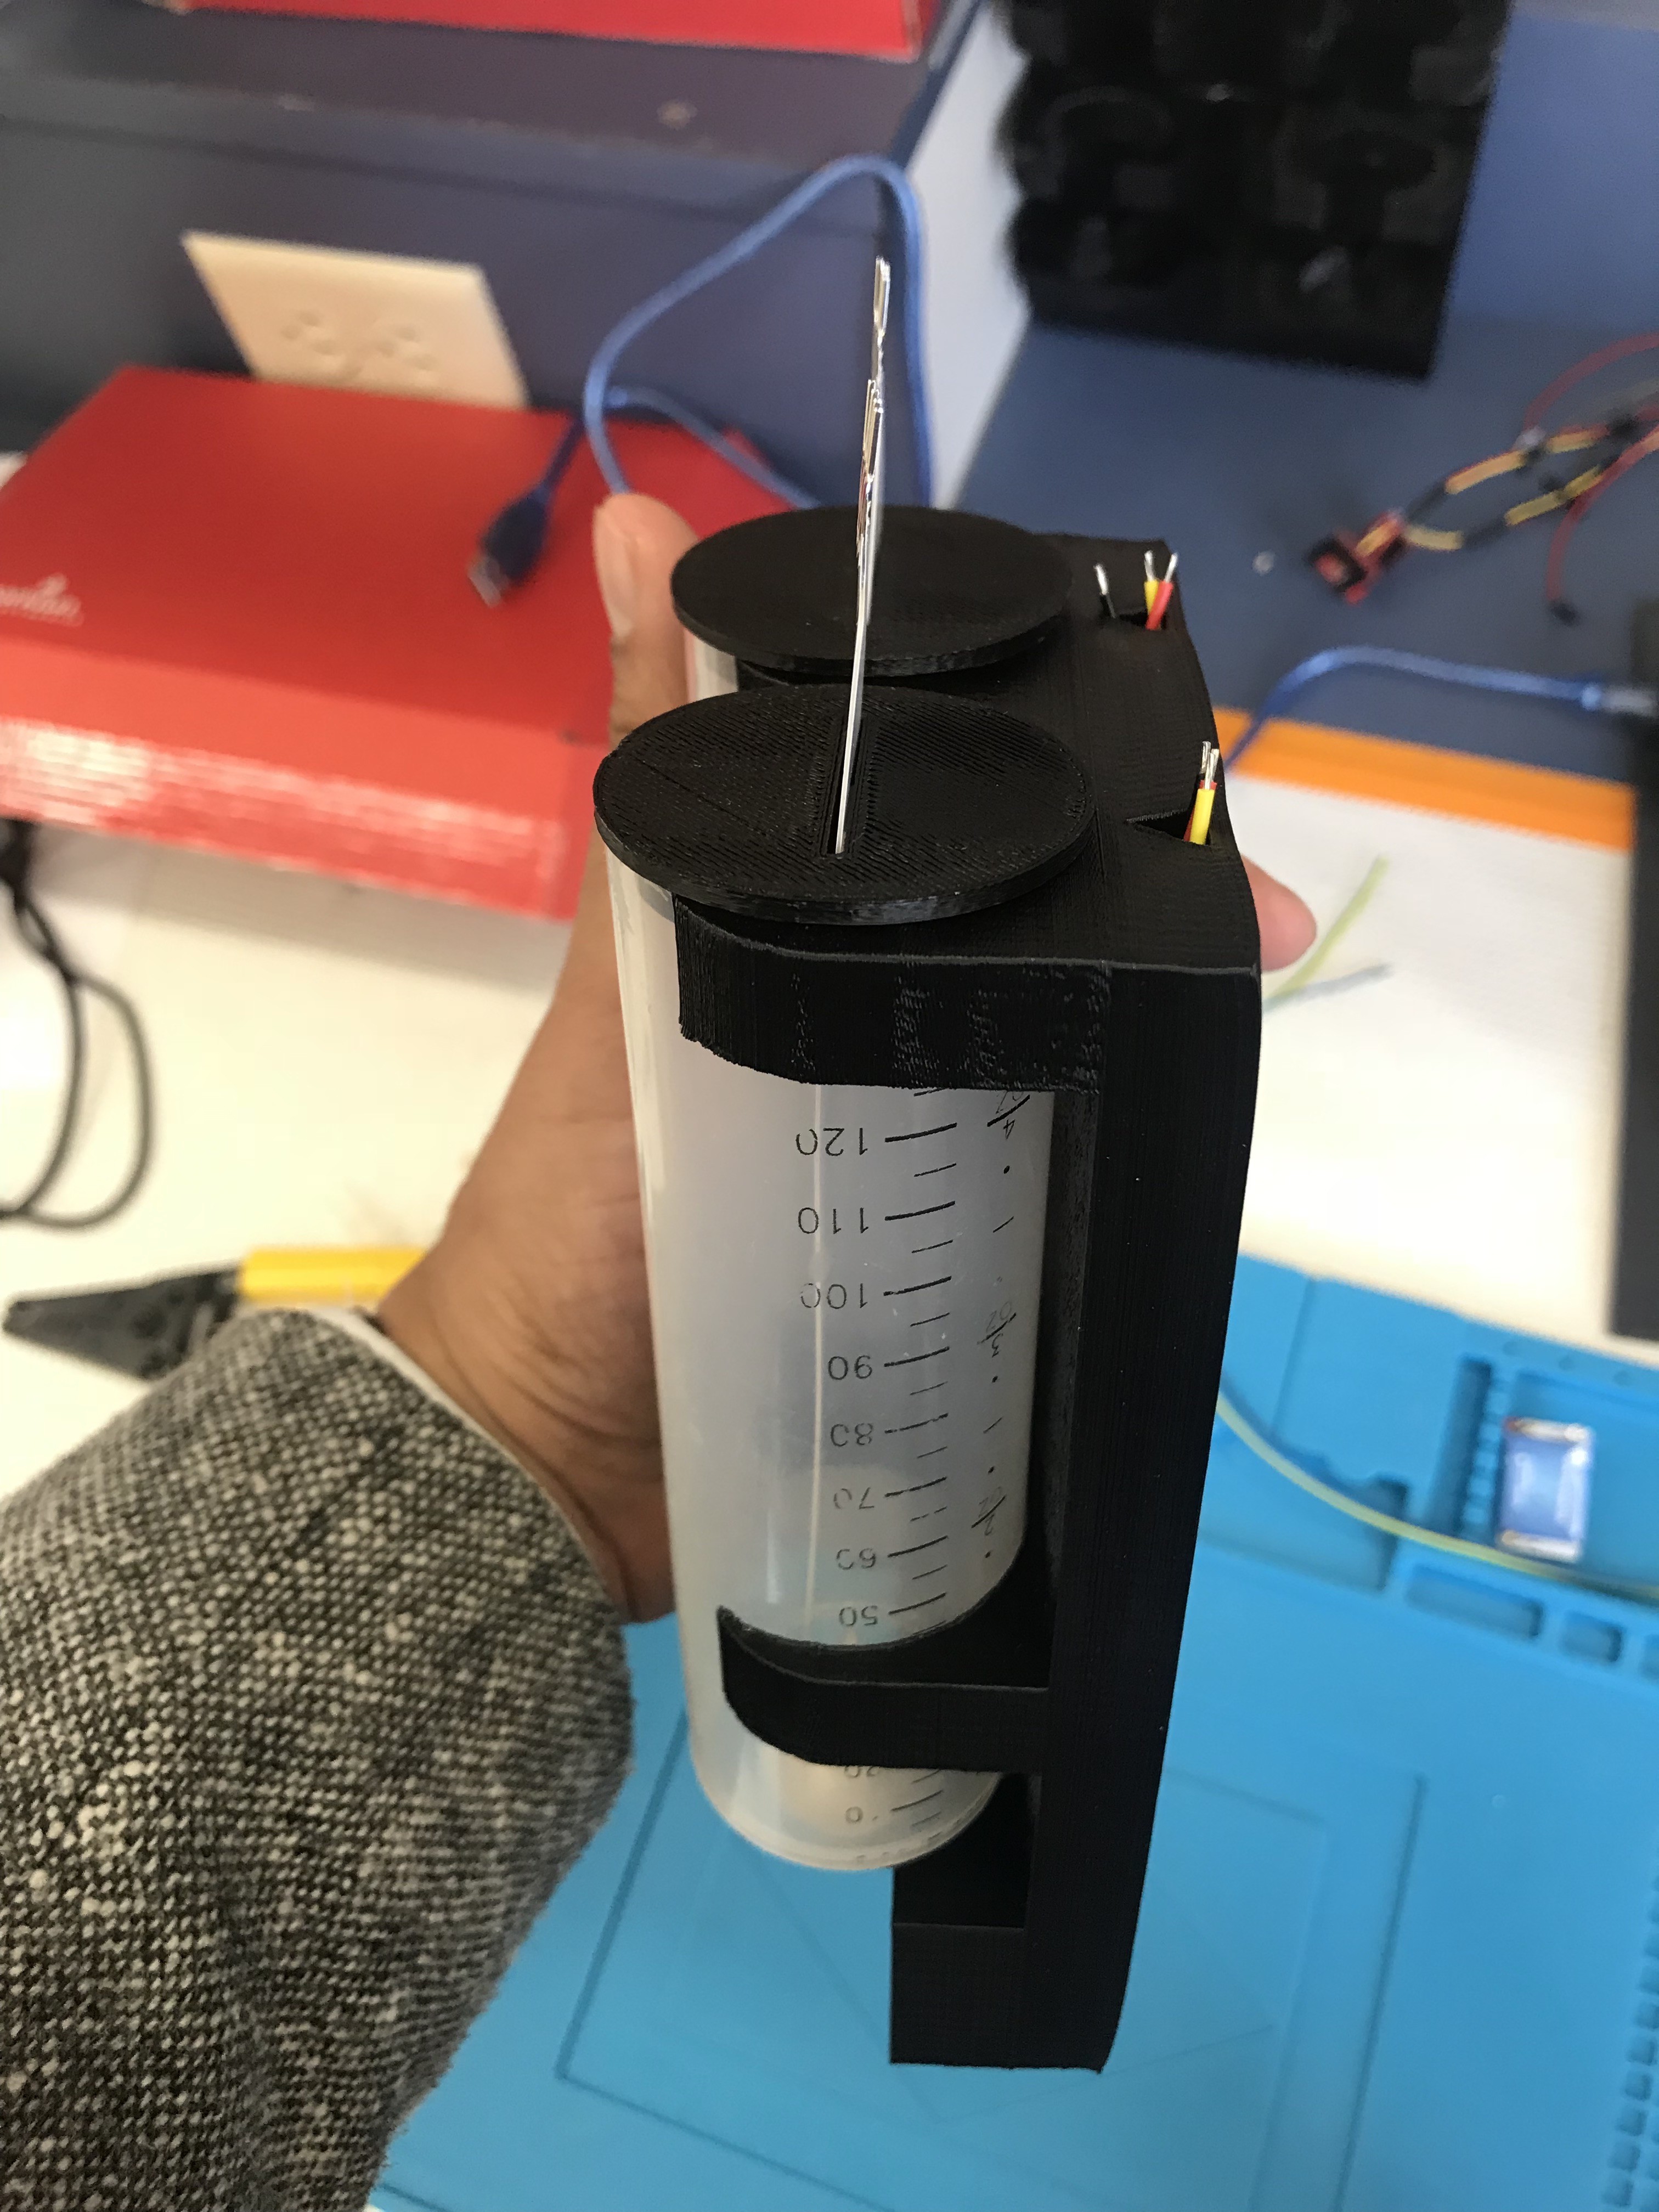
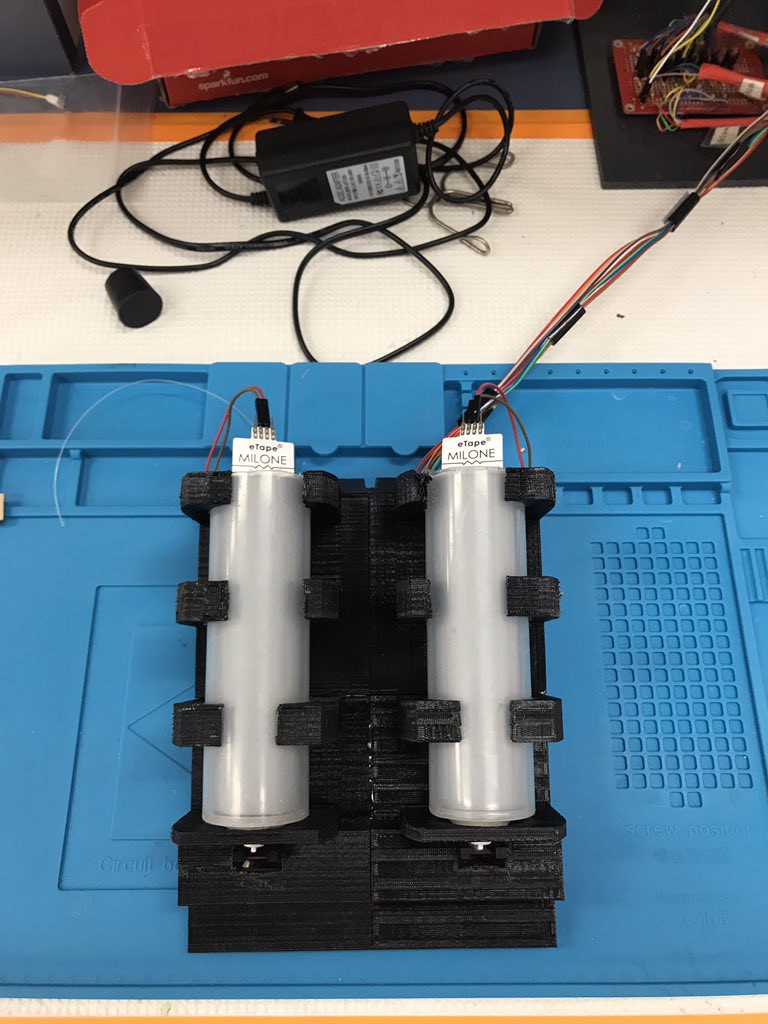
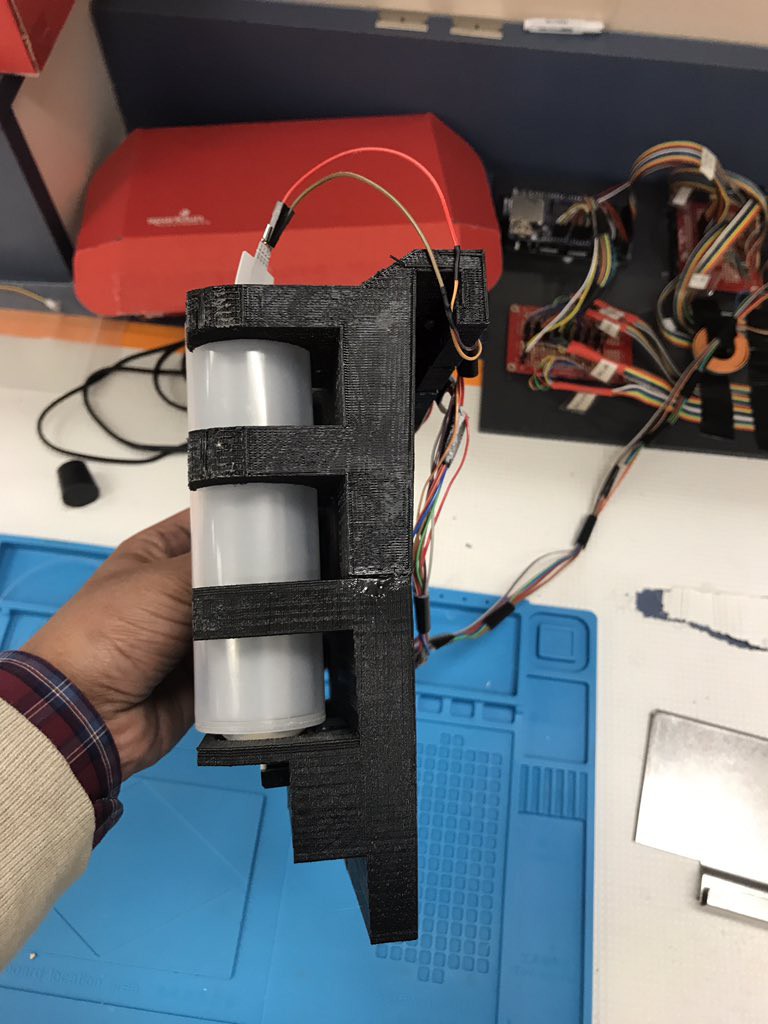
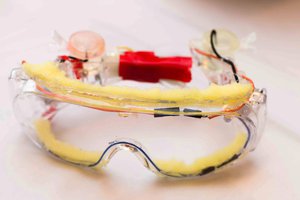
Dr. Jibran Khokhar at the University of Guelph has modified this sipper device to measure liquid intake in rats. Really cool! He also added an eTape liquid level monitor to measure actual intake as well as the number of interactions with the sipper. He plans to put the full design online soon, but in the meantime here are some photos!
We made a slight update to the code and design to give the sippers 2 TTL output connections that can sync sipper interactions with external equipment such as a fiber photometry or ephys recording system. There is now an optional step in the instructions for which pins to solder these BNC connectors (to A1 and A3), and an update to the code to enable these pins as outputs.
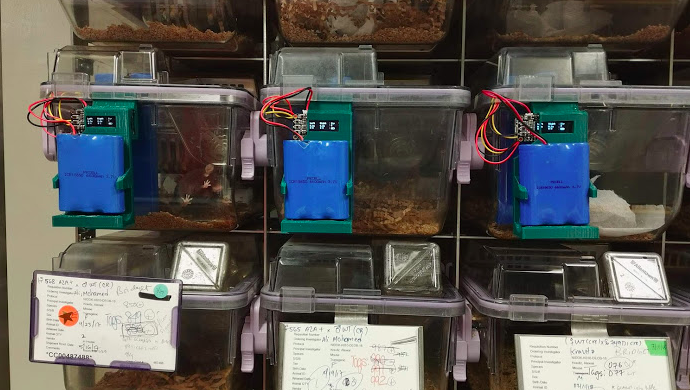
We made some tweaks to the 3D design to allow the sipper device to mount onto rack-mounted vivarium cages. This will allow for higher-throughput experiments.
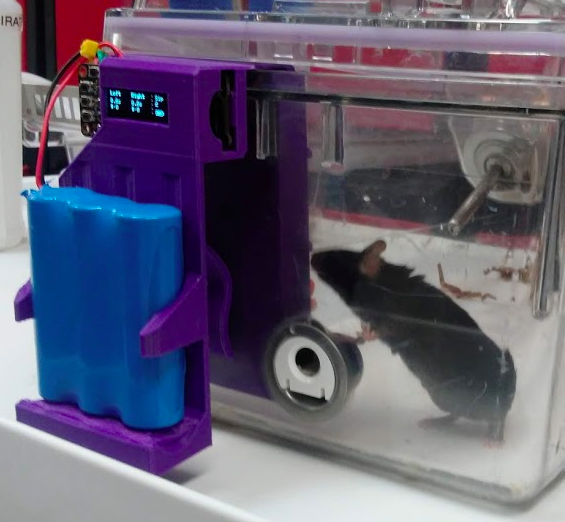
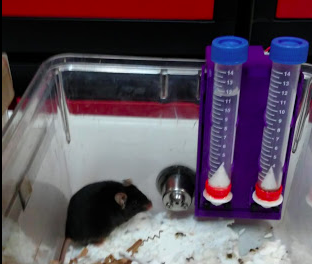
Earlier this week we assembled a sipper device and filled one tube with water and the other with diluted (1:2) chocolate ensure. We placed it in a mouse cage overnight.
Some glamour shots of the device in a mouse cage:
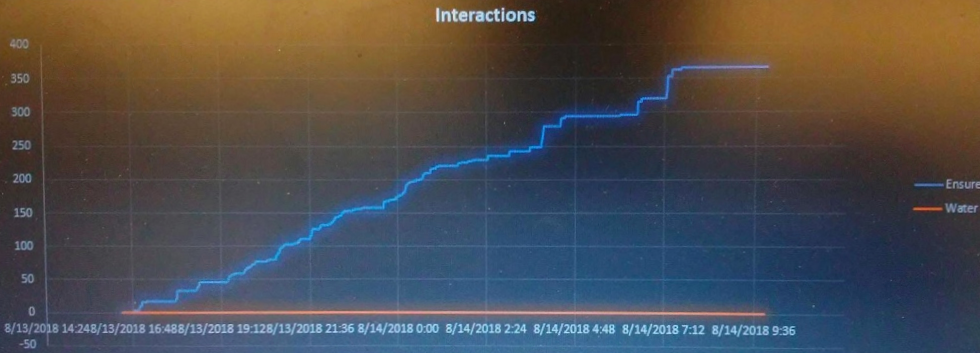
The next morning, guess what?? One tube was completely empty... the other untouched
First data!
Before starting with building anything you should make sure your computer can communicate with the Adalogger M0 board and that you can flash sketches to it. This should reduce frustration later. Start by installing the Arduino IDE.
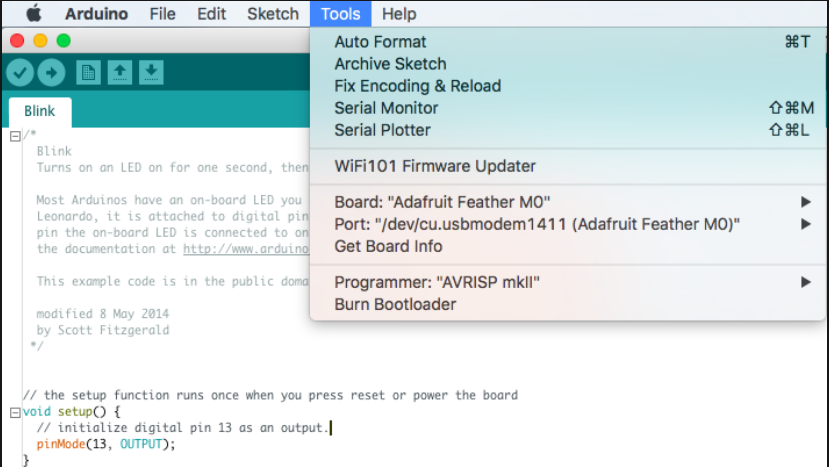
The Adafruit M0 Adalogger board is not natively supported by the Arduino IDE. Follow instructions here to install support for this board in the Arduino IDE. After completing these steps make sure you can flash the example sketch "Blink" to the Adalogger board before continuing. To do this, open the Blink example in File>Examples>Basic>Blink.
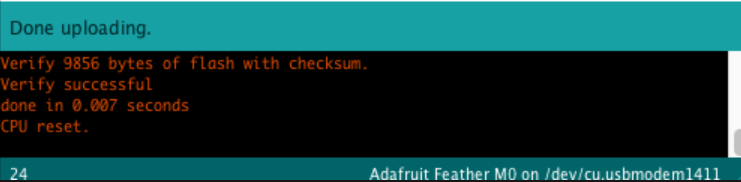
"Double-click" the small physical button on the Adalogger board to put it in bootloader mode, set Board to "Adafruit Feather M0" and port to the correct COM port and click upload (the right arrow at the top of the Arduino IDE). You should see "Upload complete" in the bottom feedback window and the red LED on the board should blink once per second.
Congratulations, you have configured your Arduino IDE and uploaded a sketch to the Adalogger!
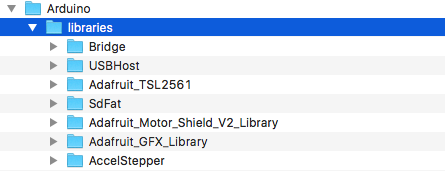
The Sipper device requires the following libraries:
#include <Adafruit_SSD1306.h>
#include <Wire.h>
#include <RTCZero.h>
#include <SPI.h>
#include <SdFat.h>
#include <Adafruit_GFX.h>
#include <TimeLib.h> //include the Arduino Time library
#include <stdio.h>  // include the C++ standard IO library
These are available for download as a single zip file from the files area, or you can search for them online. Download the zip file and extract into your Arduino/libraries directory. When you're done it should look something like this:
If this doesn't work, or you'd prefer to install libraries a different way there are instructions here for how to manually add libraries.

Hello,
I am hoping to use the sippers in conjunction with an infusion pump. Is it possible to use the BNC test lead capability to pair a lick to an infusion in a fixed ratio - e.g. 1 lick = 1 pump of infusion?
Thanks so much :D

Hello,
I'd like to use the sippers for 20-minute choice tests in water-restricted mice. Has anyone done anything like this before?
To train mice to consume their daily fluid intake within the 20 min window, I water-deprived them for 24 hours and placed them in an arena with just the sipper for 20 minutes. However, none of my mice drank during this habituation trial. Should I do overnight habituation in the home cage first?
Another question:
I tested the sippers by poking the valves with a rod, and I noticed that sometimes a drop of water was released by my poke but the contact was not registered. I'm concerned that some sippers may have differential sensitivity on the left and right sides, which would interfere with the result. Do you have any tips for making the detection more reliable?
Thanks!
Hello,
I've noticed that mice tend to first be anxious around the device so habituation to it seems necessary to me to get reliable results. I place the device in their home cage 1hour per day for a week before starting running tests. I've noticed that females "burry" the device with bedding the first 3 or 4 habituation sessions which is why I do at least a week. But one or two overnight sessions could totally work.

Hi,
I'm having a similar "Check SD card!" issue as users below. I've downgraded to 1.5.5 Adafruit SAMD package, am using the most recent Arduino SAMD package, and am using a SanDisk 64GB microcard. I couldn't find the "Check SD" code in the default library as a previous user suggested. I don't actually want to store licking data on the card and am planning on using the device with a fiber photometry recording system (neurophotometrics FP3002). Any suggestions would be greatly appreciated. Thanks!
Hello!
What type of plastic are you printing with? The PLA we're trying to use is too jagged. We were suggested to find someone to print with resin, but it's way more expensive and I wanted to see what you all printed with before I tried to order another prototype with a different plastic.
Thanks!

Hi all,
First awesome design set up! Thank you for making this available for all. I'm building my first set of these for our lab and had a quick question bout the one of the connectors. Adafruit seemed to have the right one (2.0mm Pitch 3-pin Cable Matching Pair - JST PH Compatible), though you would have to by the connecter from them as well. I was wondering if anyone has tired this? We have way to many hoops to jump through to order from new suppliers and if I can use the one Adafruit with out issues I would like to get it from them. Any thoughts on this? Much appreciated for any discussion.

hi folks,
thanks for putting this design out in the open!
I had some trouble 3D printing the current model and also changing the design... so I took a bit of time and tried to make an almost 1-to-1 copy of your design, but with less blocks and also in a way that it is easier to 3D print untested design (printing the first model now) here https://www.tinkercad.com/things/bckWmv0TgYV
Hi! Great Project! I´d like to know how to make the device check the sippers every second instead of every 10 seconds. How Should I set the code up?

Hi, I am trying to make these electronic parts for 2BC choice, and I have some problems.
1. I can see 'press to start' on the screen, but I cannot press ABC to change the date set
2. when I press A to start, I can see 'left and right,' but they did not count; I am not sure the problem is because the soldering parts are wrong or the lines connected to the two photo-interrupters is incorrect. I am wondering whether I can get some instructions for the electric lines connection between M0 to 2 photo-interrupters.
Appreciate!
The proper contact for the valves is this very nice person:
Tiffany Dunmire
Operations Coordinator
Tiffany.Dunmire@AvidityScience.com
Hydropac, LLC
1361 Brass Mill Road, Suite J
Belcamp, Maryland 21017
o:
+1-410-306-6345;3001
e:
Tiffany.Dunmire@AvidityScience.com
w:
www.AvidityScience.com
So, official update to the previous:
1. Used 1.5.5 Adafruit SAMD package and most recent Arduino SAMD package
2. Used hackaday library paired with appropriate stable version of code
3. Used a SanDisk 4GB card
Everything worked in this configuration.
If you're not sure about the problem and getting the Check SD card! message, run the "Check SD" code from either the default library or the updated one, and use the serial COM port output window to see what happens. Even if your SD card is formatted in FAT16 (<4GB) or FAT32 (>4GB), it might not work, as I found to my annoyance. If the Feather isn't recognizing the card architecture in CheckSD, it won't recognize it in Sipper.
I'm having the "Check SD card!" issue as well. Installed the most recent stable version of SipCounter using SAMD version 1.5.5, 1.5.1, as well as the most recent SAMD build (1.7.5) using an SD card formatted using FAT32 as well as FAT16. I upload SipCounter to the Feather M0, attach the OLED, and... all it does is flash the LEDs and tell me to check the SD card. Any thoughts?
Update: I can flash the SetClock and it shows a time display, and "Reflash sipper code." When I reflash the sipper code, it goes back into "Check SD card!" This is somewhat frustrating.
Update 2: So... Don't buy off-brand microSD cards. The SanDisk 4GB card worked straight out of the box.

Hey Michael - this stuff is frustrating but we can figure it out. You should use the latest Arduino SAMD boards package, with version 1.5.5 for the Adafruit SAMD package. For the library versions you can use the versions in the files area. https://hackaday.io/project/160388/files

Hello. I am using the latest version and a SanDisk 8GB card and I am getting the check SD card error. Could you please help? I tried the older version and a different SD card and it still didn't work. It goes away when I load the clock but once I reflash the program, it goes back to check sd card.
Update: I downgraded the board to version 15.5 and it worked!
Our mouse cages aren't exactly compatible with this design. Does anybody have a version that's editable with Solidworks? TinkerCAD gives me hives.
Our version was designed in TinkerCAD so that's all I have, if you find one in a different format please post it back here!
When I get some time I can try to replicate the whole design in SolidWorks.
Hi. I am currently trying to implement the two bottle choice test using the hydropac drinking valves in our lab for a preference sucrose test. However all the valves connected to the Falcon with the sucrose are eaten by the mice in one night. Would you have a solution? Many thanks
Hi unfortunately no, we have not experienced this and we use them for many weeks straight. We use C57Bl6 mice, is it a strain thing?

Amazing project!!!
We are running a homemade lickometer at the lab too!
But I am having some trouble to analyze the bouts and so, are there any tips? Should I make the dataset binary so I can make those nice "barcodes" graphs?
@Taylor Woodward *Yes, here the mice eat the plastic from everywhere, eventhough their cages are enriched
Cool! For analyzing the data from these sippers check out SipperViz! https://github.com/earnestt1234/SipperViz

Great project! I'm trying to troubleshoot to see if I have a hardware or some other problem. When the unit was fully assembled, the number in the #: line start incrementing really quickly for both sides, even without the photo detector unit connected. I ended up desoldering all of my connections, but even without any attachments the #: line on both left and right sides increment very quickly (several per second). I am assuming that with no inputs there should be nothing incrementing from that side, am I right? Thanks!
Hi wakabayashi-kt! If the photo interrupter is not connected it will register as being "triggered", as these photointerrupters register HIGH when they are open, and LOW when closed. So if you disconnect the photointerrupter (or if it's wired up incorrectly) it will act like it's always being triggered. So your experience is what I'd predict. Hope this helps!
Great project! Thank you for these directions!
I need help troubleshooting: Everything went well until I plugged in the battery. Nothing showed up on the screen at all, but there is a blinking red light and a blinking green light coming from the feather. Nothing appears on the screen when I press A, B, or C buttons, but the reset button pauses the light. I am pretty sure I soldered the wires into the right places according to the instructions given. Any suggestions?

Hi - what happens when you flash the time-setting code (SipCounter-SetClock)? Does it have a problem with the screen not showing anything after flashing that?
The blinking red and green lights suggests it could be an SD card error...(although usually the code would tell you that on the screen "Check SD Card!") You could ensure you're using the libraries here on the hackaday page.

I'm currently working on trying to implement these in our lab- have you had any issues with mice chewing on the plastic while they were housed continuously in the home cage? My animal care facility was wondering.
Follow up: I realized this was in the paper actually. In our experience they chew the hydropac valves a bit, but it wasn't insane especially if the epoxy was extended to the edge of the valve lip.
Thanks for the tip! While some mice are prone to chewing (we've observed this to be a trait of some individual mice), we've had the majority of mice in our study successfully drinking out of the same tubes for multiple consecutive weeks, without chewing or otherwise destroying the valves.
really useful project. Im having trouble getting the sd card to work. all I get is "check sd card"
on the screen. all files were good all uploads are successful ? Please any help appreciated.
Hi - sorry for the delay. If you've had the issue with multiple SD cards, it could be an issue with the Adafruit SAMD Boards package, which you install in the Boards Manager. When Adafruit released version 1.5.6 something changed in how the Adalogger communicates with the SD card. You can work around it by downgrading your Adafruit SAMD Boards package to 1.5.5. To do this, go to the boards manager, find the "Adafruit SAMD Boards" package and click on the "Select version" drop down menu. Then choose 1.5.5 and install that. You should probably re-start the Arduino IDE after that, and then see if you can flash the code. Can you post back if that solves it?
This suggestion is from @Lex Kravitz, who confirmed that versions including 1.5.5 and below work with his code, while versions including 1.5.6 and above do not (Adafruit is on version 1.6.0 currently). He posted on the Adafruit forum about this but so far we haven't figured out why this is happening.
Hi there, I'm also having this issue but I've triple checked that my Adafruit SAMD Boards package is version 1.5.5. and the unit is still presenting the "Check SD Card" error when I connect it to battery. It says that it's successfully flashing the programs to the Adafruit board, so do you have any other suggestions for resolving the "Check SD Card" error? I would love to get this to work because it seems like a really great behavioral apparatus!

I am having the same problem. I have version 1.5.5 but I still get "Check SD Card" when I flash the sipper code. Thanks.
Did this work? If not please send me an email and we can try to work it out over email. It could be a library issue, did you try installing the Arduino libraries from the files area?
Yep, I'm having the same issue as all of the people below.
Very cool project! I didn’t see this in the components list - what is the red part between the falcon tube and the supper valve?
Sorry for the delay - that was a little 3D printed ring we were using early on. It's not necessary so it's not in the components list. We found the best way to attach the valves to the sipper tube is hot glue - just melt it all around and push the valve into place!


 spandana.cheruvu
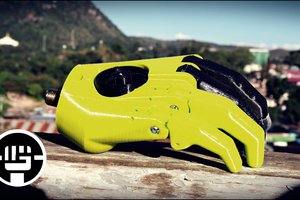
 Jason Bender
 Arthur Admiraal
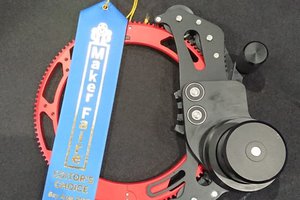
 Shushanik Khachaturian
Hello,
I keep having sippers randomly turning off or resetting themselves during the experiment... If anyone as a clue on why is that happening and how to fix this that would be really helpful
Thanks :)