Close
0%
0%

ST-Link V2 clone Security Key

Cheap and DIY alternative to commercial security keys such as Yubikey using ST-Link V2 clone dongle

Similar projects worth following
The idea is to repurpose the omnipresent st-link v2 clone dongles as a FIDO2/U2F/WebAuthn key. While commercial options exist, I like the idea of being able to build your own with mostly available hardware. Moreover, this allows for cheap/rapid prototyping. Finally, the idea is to add a feature not widely found on existing commercial options, which is an embedded OLED display and two hardware buttons. This allows to visually confirm authentication attempts and select available credentials. Ultimately, the hardware component of this project can be easily re-used for other purposes.

On the software side, this project leverages existing open-source implementation of other FIDO2 devices. The idea is to port this to the NuttX RTOS, which includes many features already. Furthermore, this development would actually mean that the software could be easily ported to other hardware platforms.

Hardware

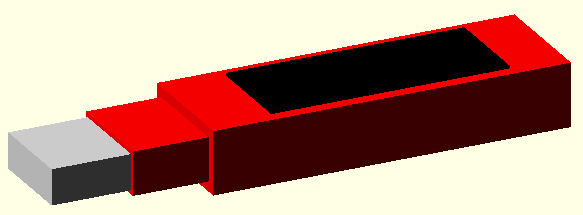
The following are targeted features for the hardware:

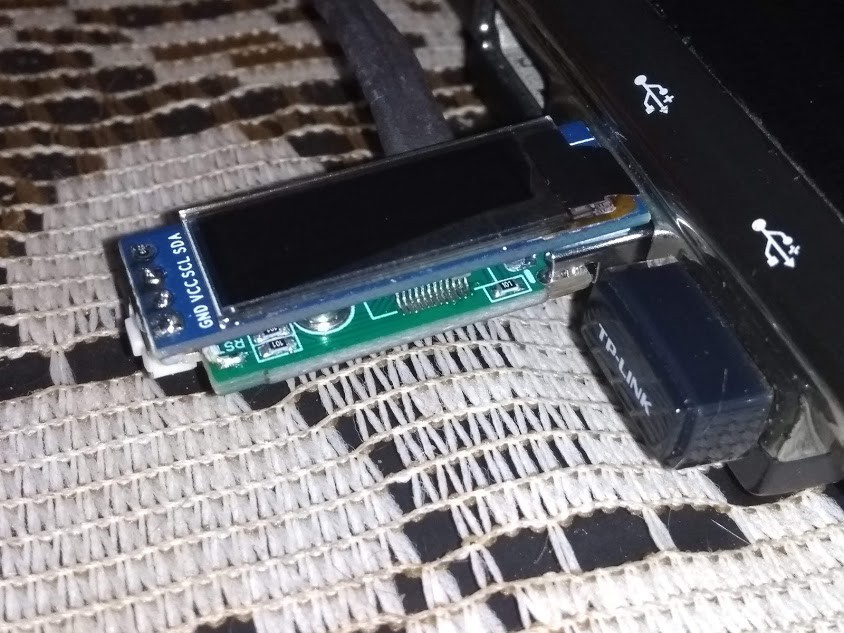
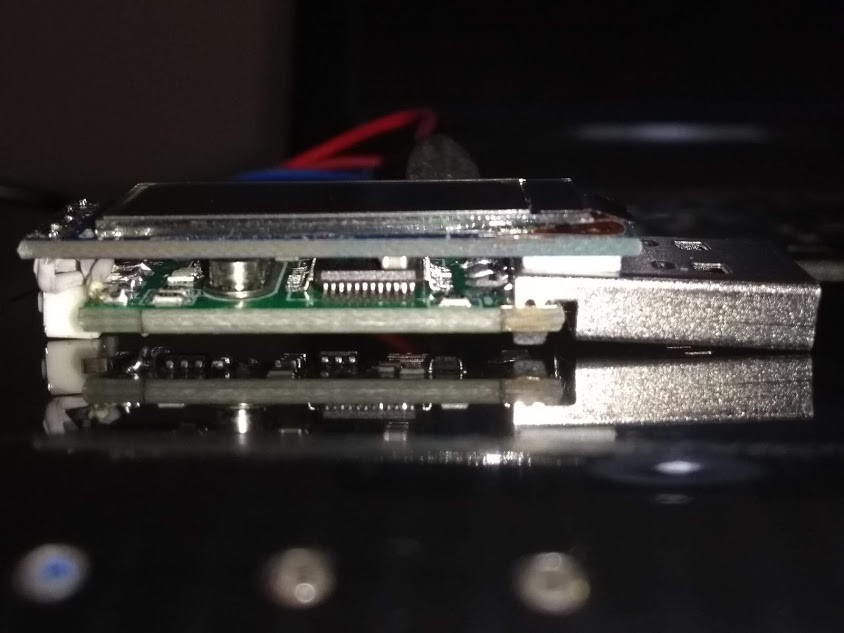
  • Based on ST-Link V2 dongle (considering the variants found in the wild)
  • Two hardware push-buttons
  • Embedded OLED display (128x32, 0.91', I2C)
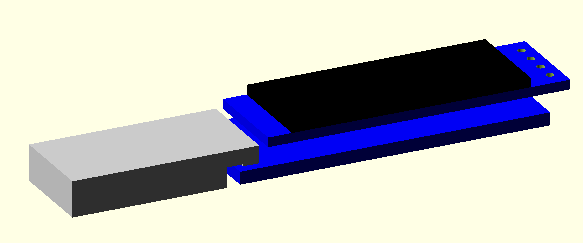
  • 3D printed case, including hole for carrying around in your keychain

Software

  • Based on SoloKey FIDO2 open-source firmware, ported to NuttX RTOS.
  • Store secret keys on on-chip flash

  • Repurposing?

    Matias N.04/02/2020 at 18:17 0 comments

    While this project passed the proof of concept stage, I lost interest due to the high effort in modifying the code for this to work.

    Now, while on quarantine at home due to COVID, I'm wondering if I could re-use the hardware (st-link clone + oled + button) to do something interesting or amusing, yet simple. I thought about a simple desktop notification which would show stuff there and could be dismissed with the button, however it seems awkward to use it for that. Maybe some other funnier or simple idea? What do you think?

  • First succesful test

    Matias N.04/19/2019 at 23:04 0 comments

    Last week I've been slowly advancing on the NuttX port. The main difficulty is mostly the reduced SRAM of the STM32F103 (20Kb). The solo firmware requires some considerable RAM, given that some data structures are a bit big, and there are large arrays of these. For testing, I started reducing all these to minimal working sizes. On the other hand, I disabled lots of stuff on the NuttX (no NuttX shell, for example) and played with the stack size. Using the Solo firmware test scripts, I was able to slowly tackle memory issues and pass more and more tests.

    At the moment I'm not passing all tests, since they're a bit memory demanding. The main difficulty is that the CTAP protocol is supposed to handle multiple pending assertion requests, which can later be retrieved. Since I had to reduce memory, I'm not passing tests related to this functionality.

    I later realized that with the achieved functionality, it should at least be sufficient to use one of the online WebAuthn tests. And, indeed, it is working!

     
    I was able to register and login. It seems automagical since I just press login and that's that.  However, I know that there's lots of stuff working correctly for this to work.

    I will add support for reading the push-button (for know, this is disabled and does not wait for confirmation) and the LED, to display the request and get user attention. I'm not sure if in the end it will be a reasonable hardware platform to use, but at least it may be enough for playing around.

  • Prototype Built

    Matias N.04/09/2019 at 02:19 0 comments

    So after playing a lot with OpenSCAD I decided to simply go ahead and build a prototype without a case and later worry about case. Moreover, I was trying to think how would I solder two buttons since there isn't really much space and I/O pins are well distributed on the back of the board. So, I decided to go ahead with just one button, which will be enough for confirming an action or not. Going into menus and options would be possible by holding down the button, but it feels annoying. At the moment I will just use the OLED to display current request which will also make it really simple to program.


    I must say the prototype looks really good since it feels like it is all custom made. I soldered the OLED to the SWIM and NRST pins, which nicely map to I2C pins. 3.3V and GND are also available at the top side. On the bottom side, I soldered the button between 5V and SWDIO, which makes it readable on PB14. Finally, there's a LED at PA9. I used very short cable for the display and placed some tape to hold the screen in place and also provide some separation/cushion to the board.

    I have the (internal) SWD pads soldered so that I can flash it with (another) ST Link. The first thing was to unlock the flash (it usually comes locked) and then use openocd to write a DFU loader (I use generic binary with LED on PA9 from STM32duino project). Then, I used the arduino IDE with the STM32_Arduino package.

    With this I could blink the LED and read the button (requires an input pull-down to read correctly). You can see the result here:


    Moreover, I could use the SSD1306 library from Adafruit (modified for STM32). Since I made a mistake and soldered SCL with SDA and viceversa (I will fix it tomorrow) I had to resort to  SoftWire, which allows me to swap SCL and SDA pins:


    I will now continue porting the Solo code to NuttX. I think this will eventually require porting some of this upstream since the project appears to be very active.

  • Playing with OpenSCAD

    Matias N.04/04/2019 at 01:57 0 comments

    So I've continued my attempts to create a 3D case for the device being designed. I still haven't completely decided how to place the two buttons but they will most likely go at the back. Here you can see the dongle with the OLED:

    The OLED is (supposedly) positioned as low as it can (the crystal on the dongle limits the height. The buttons will go in the back, slightly increasing the length, but not by much.

    The case so far looks something like this:

    The idea is to have a cutout for the OLED. The case should be split in two parts for printing and assembly. However, the insides of this are really difficult to get right. I have to provide space for the boards and consider extra space for the components beneath the dongle. Moreover, it should be possible to slide the device in, which I don't think is really easy.

    Since I'm just learning to do this I'm thinking I will simplify things initially. I only really need a case to hold the buttons, since I don't see a way of soldering them in place in the back. I will rethink this and try to simplify this stage and leave it for future improvement.

  • Initial progress

    Matias N.04/02/2019 at 20:54 0 comments

    The last few days I've starting the porting process of the SoloKey firmware to NuttX RTOS. The first step was to actually add a raw HID USB driver to NuttX, which is the underlying transport for CTAP, the FIDO2 standard protocol. This is currently working (with nothing fancy) so I guess I can tick that item off.

    The next step (currently working on this) is the porting of the actual logic of the SoloKey firmware to a NuttX application. Luckily, the guys from SoloKey did things right and defined a very simple interface which should be implemented by the target platform. Thus, I need to provide implementation for this interface while at the same time write my own main function. At the moment I managed to build everything without exceeding FLASH size limit (currently at around 81K of the 128K) and there's still room for reduction by disabling unrequired NuttX features. However, I'm currently struggling with the required stack size. For this I had to reduce some internal buffers used by the SoloKey firmware.

    Currently I need to finish the implementation of the interface, which mostly involves dealing with the on-board flash as storage for the secret keys and other non-volatile data. There's also the crypto implementation which will be purely done in software. I will simply re-use everything provided with solo and later see what I can take from NuttX instead.

    Regarding the hardware side, I already have available a pair of ST-Link dongles (one for programming, the other will be the victim) and the 128x32 OLED, which I must say is the perfect size for this. I'm also trying to see how this would fit along two buttons inside a case, which I think is perfectly doable.

View all 5 project logs

Enjoy this project?

Share

Discussions

S. Garcia wrote 01/14/2020 at 00:52 point

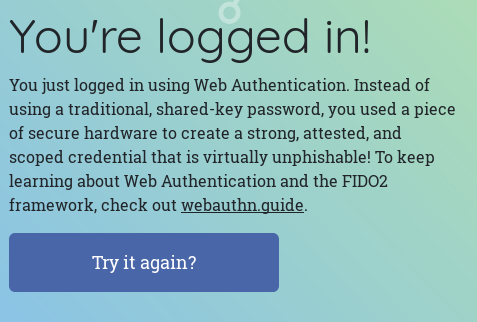
Great project, I tried the firmware from https://github.com/gl-sergei/u2f-token with a Blue Pill and works fine, but its only FIDO 1.0

I also have another blue pill with a Gnuk token I am testing out.

  Are you sure? yes | no

Similar Projects

Does this project spark your interest?

Become a member to follow this project and never miss any updates