Close
0%
0%

Dorsch 40k Keyboard

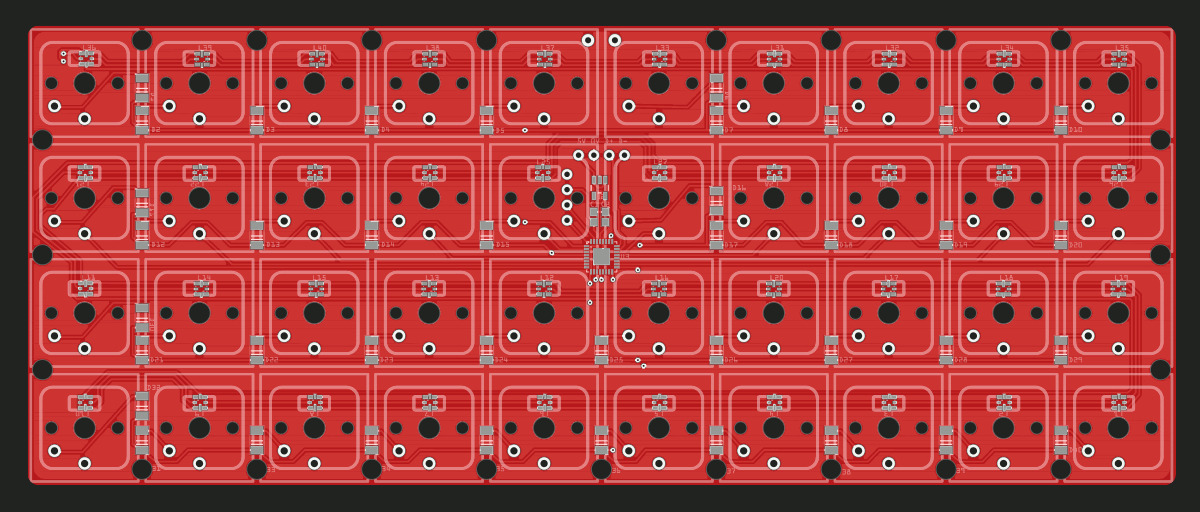
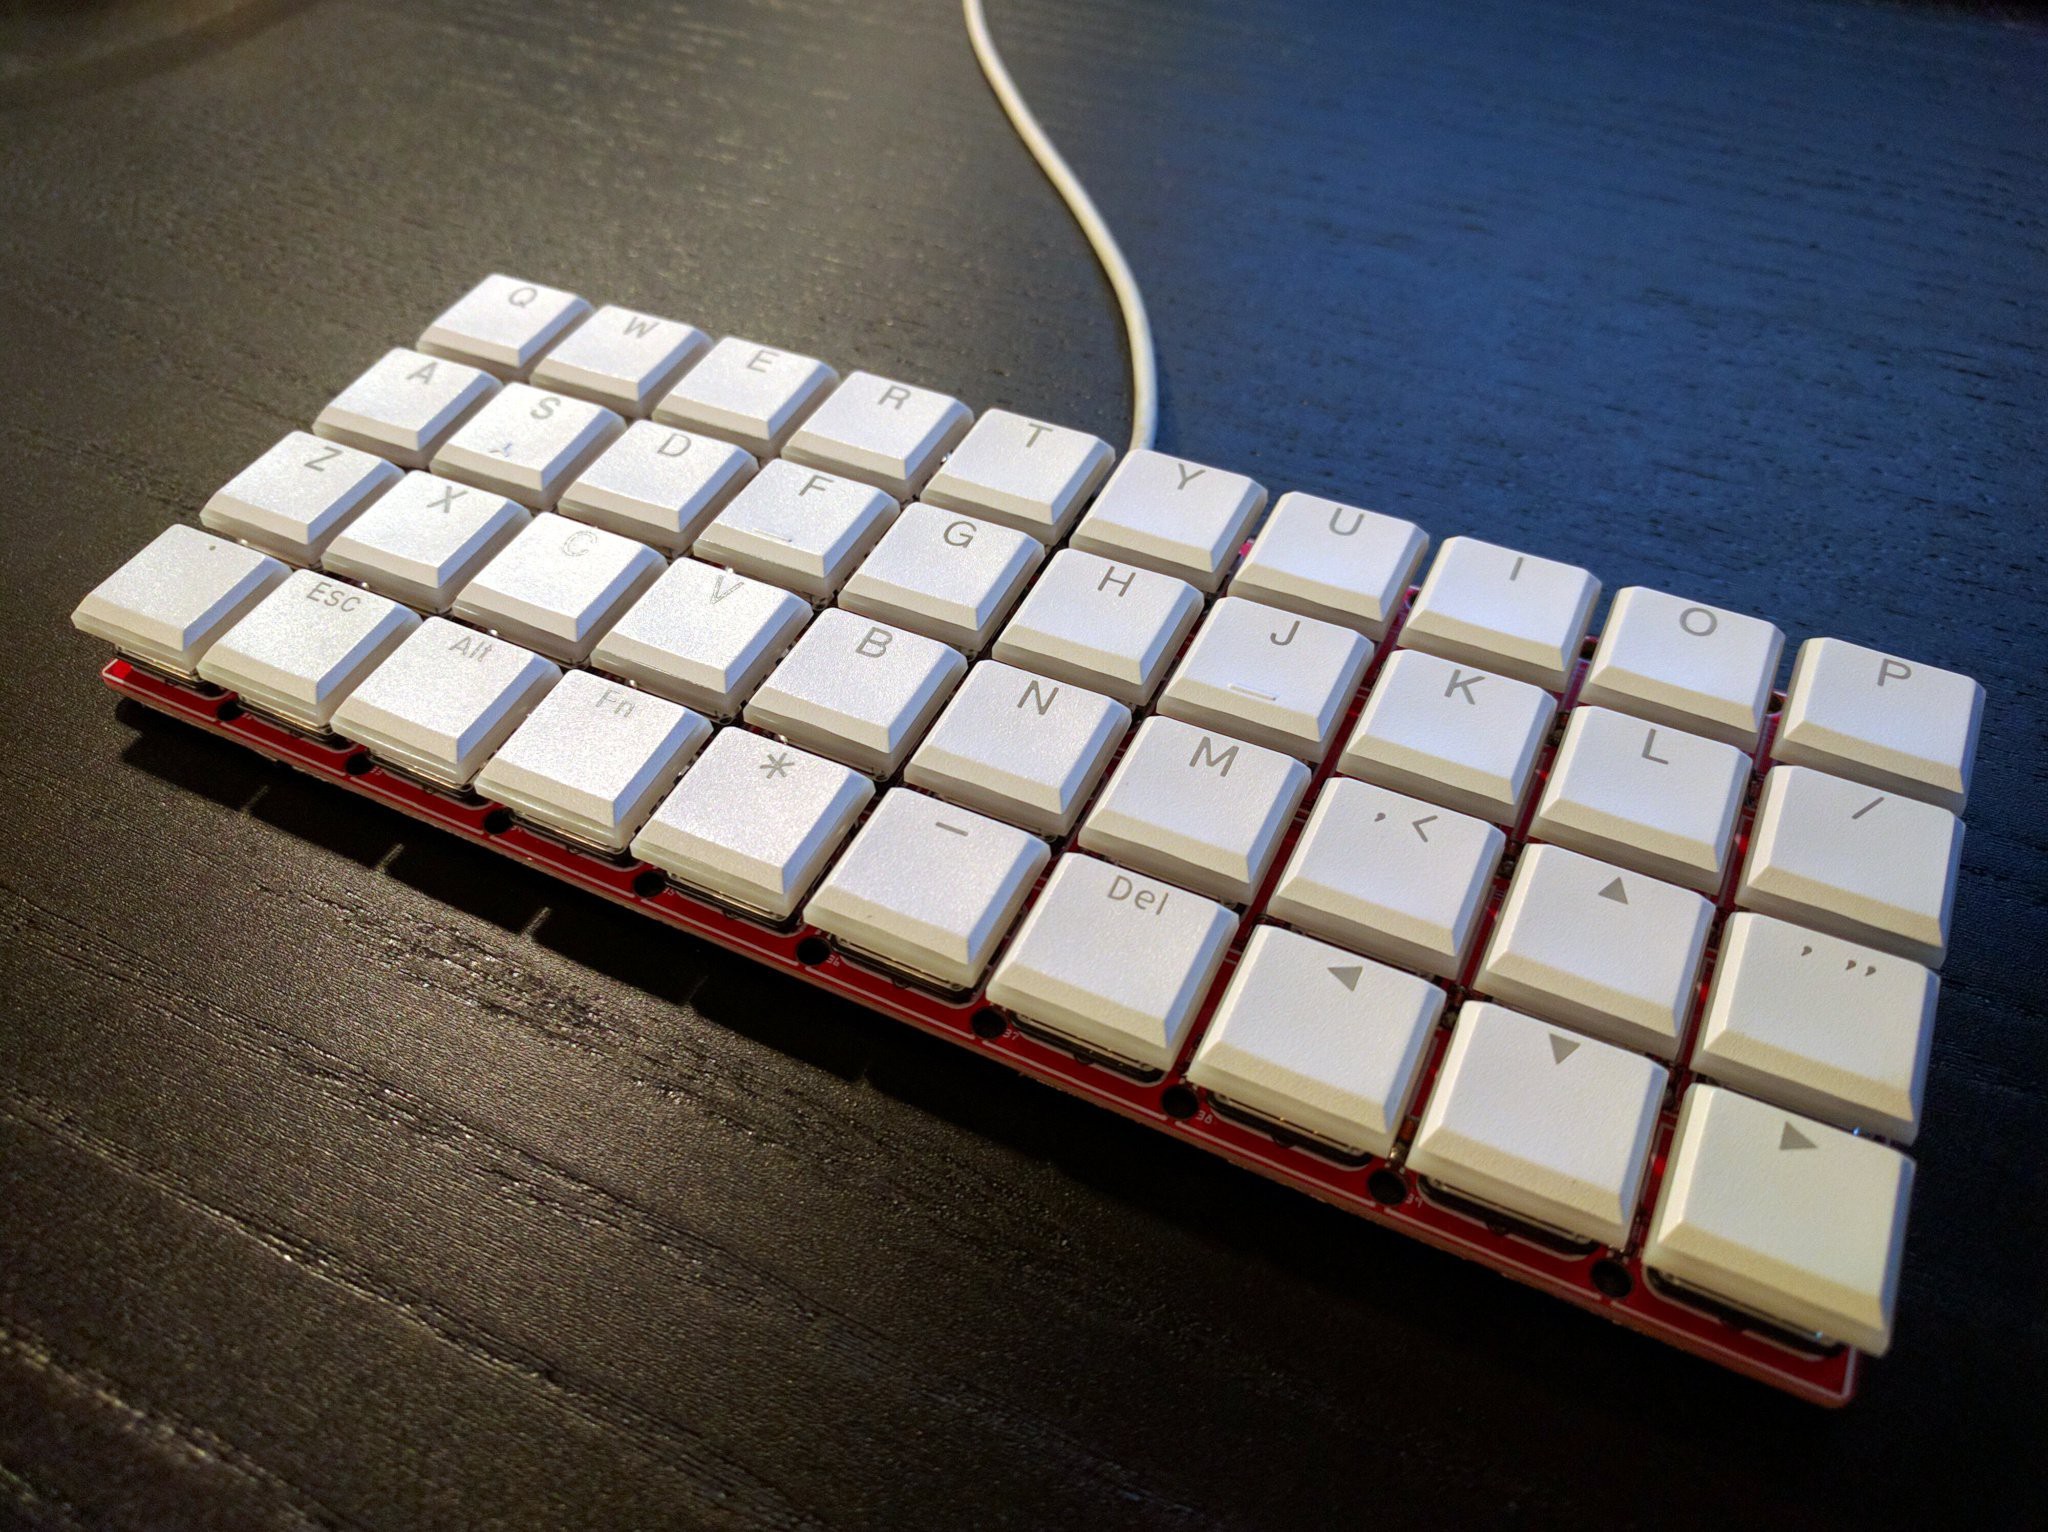
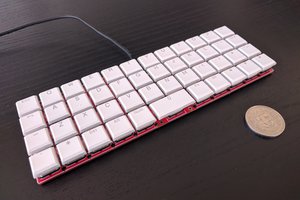
A 40-key chocolate-bar mechanical keyboard.

Similar projects worth following

Continuing my quest for a usable low-profile mechanical keyboard. After making #Flounder Keyboard I learned a little bit more, so this time I won't make the same mistakes:

  • the sunken Kailh choc switches have really bad feel, I will use regular choc switches this time,
  • no more messing with key spacing, use standard 0.75" key spacing this time,
  • smaller and cheaper by only having 40 keys,
  • no long keys, no problem with stabilizers,
  • grid layout, so all keys can use same size key caps,

But I wouldn't be myself if I didn't also use that opportunity to experiment a bit, so I'm going to use an experimental hold/tap system for the modifier keys.
dorsch40k-v3.zip

gerbers with LEDs

Zip Archive - 841.43 kB - 09/21/2020 at 11:29

Download

dorsch40k-v3.fzz

fritzing design with LEDs

x-fritzing-fzz - 424.58 kB - 09/21/2020 at 11:29

Download

dorsch40k-v2.fzz

fritzing design

x-fritzing-fzz - 316.79 kB - 08/12/2020 at 15:58

Download

dorsch40k-v2.zip

gerbers

Zip Archive - 800.59 kB - 08/12/2020 at 15:58

Download

  • 1 × ATSAMD21E18A-MU microcontroller
  • 1 × AP2112K-3.3TRG1 low drop-out voltage regulator
  • 2 × 1µF 0604 capacitor
  • 1 × USB cable
  • 40 × Kailh chocolate switch

View all 8 components

  • Shiny New Code

    deʃhipu07/24/2021 at 23:07 0 comments

    I fished this keyboard out of the proverbial drawer to try the new CircuitPython on it, with some of the new fancy features that have been added.

    First of all, there is now a keypad module for scanning the key matrix in C — since it does it in the background using interrupts, it frees the Python code to display the LED animations much more smoothly.  And it will never miss a key stroke.

    Second, there is the new fancy way of enabling and disabling USB devices in boot.py, which means I can by default hide the CIRCUITPY drive and the serial console, and only show them if the upper left key was pressed while the keyboard was being connected. This makes it much easier to tweak the layouts and the code.

    Finally, I decided to also test the new custom USB HID descriptors — in particular a descriptor for a "bitmap" keyboard, that lets you report any number of pressed keys, so called NKRO (n-key rollover). I will not lie, I'm not smart enough to come up with my own descriptor, so I copied it from the example generously provided by Jeff Epler. The boot.py file looks like this:

    import board
    import digitalio
    import storage
    import usb_cdc
    import usb_hid
    
    
    bitmap_keyboard = usb_hid.Device(
        report_descriptor = (
            b'\x05\x01\t\x06\xa1\x01\x85\xffu\x01\x95\x08\x05\x07\x19\xe0)\xe7\x15'
            b'\x00%\x01\x81\x02\x95\x05u\x01\x05\x08\x19\x01)\x05\x91\x02\x95\x01u'
            b'\x03\x91\x03\x95xu\x01\x15\x00%\x01\x05\x07\x19\x00)w\x81\x02\xc0'
        ),
        usage_page = 0x1,
        usage = 0x6,
        in_report_length = 16,
        out_report_length = 1,
        report_id_index = 7,
    )
    
    row = digitalio.DigitalInOut(board.MOSI)
    col = digitalio.DigitalInOut(board.A6)
    col.switch_to_output(value=1)
    row.switch_to_input(pull=digitalio.Pull.DOWN)
    
    if not row.value:
        storage.disable_usb_drive()
        usb_cdc.disable()
    
    row.deinit()
    col.deinit()
    
    usb_hid.enable((bitmap_keyboard, usb_hid.Device.CONSUMER_CONTROL))

    And the relevant piece of the keyboard handling code looks like this:

        def send_nkro_report(self, pressed_keys):
            """Sends the USB HID NKRO keyboard report."""
    
            report = bytearray(16)
            report_mod_keys = memoryview(report)[0:1]
            report_bitmap = memoryview(report)[1:]
            for code in pressed_keys:
                if code == 0:
                    continue
                if code & 0xff00:
                    report_mod_keys[0] |= (code & 0xff00) >> 8
                if code & 0x00ff:
                    report_bitmap[code >> 3] |= 1 << (code & 0x7)
            self.keyboard_device.send_report(report)

    That's it. That's all it takes to make an NKRO keyboard in CircuitPython now.

    Further research is required to automatically switch to the traditional HID keyboard when the host doesn't support the bitmap HID device — like, for example, when you go to your BIOS settings. But there are some promising prototypes for this already.

  • Macros

    deʃhipu10/09/2020 at 11:56 0 comments

    Over the last weekend I worked a little bit more on the code, cleaning it up and making it a library. I also added the ability of sending keys with modifiers, and media keys. And that means I have everything I need to turn this keyboard into a macro keyboard.

    I programmed the bottom row to be numbers (for quickly switching things in games), then there are the function keys, the media keys (volume up/down, play/pause, next, prev, etc.), some of the rarely used keys (PrintScr, Pause and ScrollLock) and the top row switches my workspaces.

  • Simple Effect

    deʃhipu10/03/2020 at 18:29 0 comments

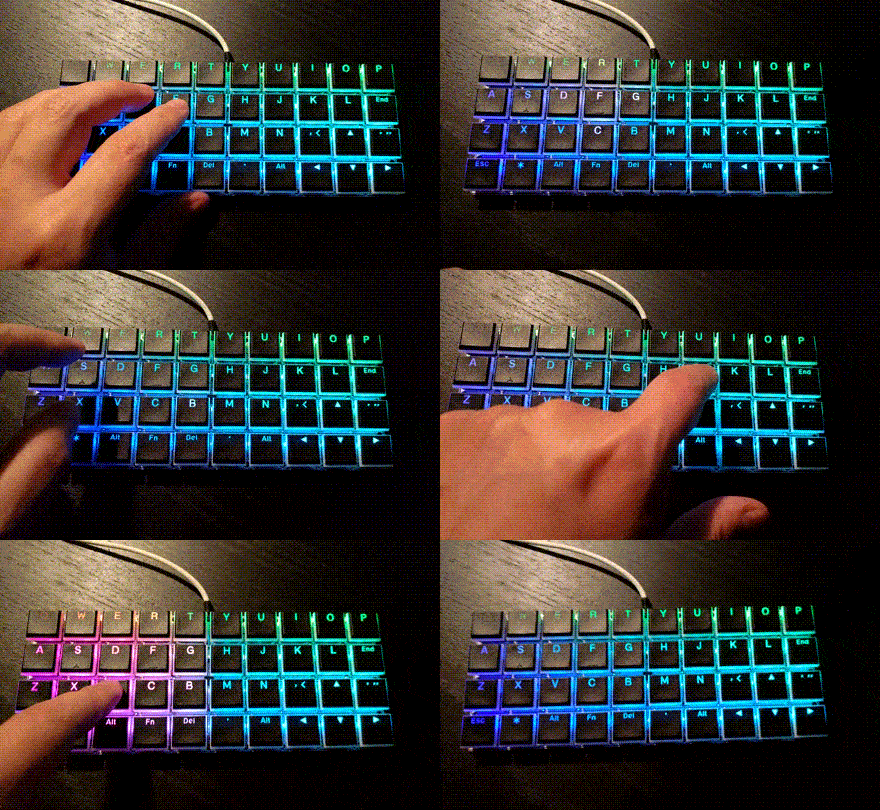
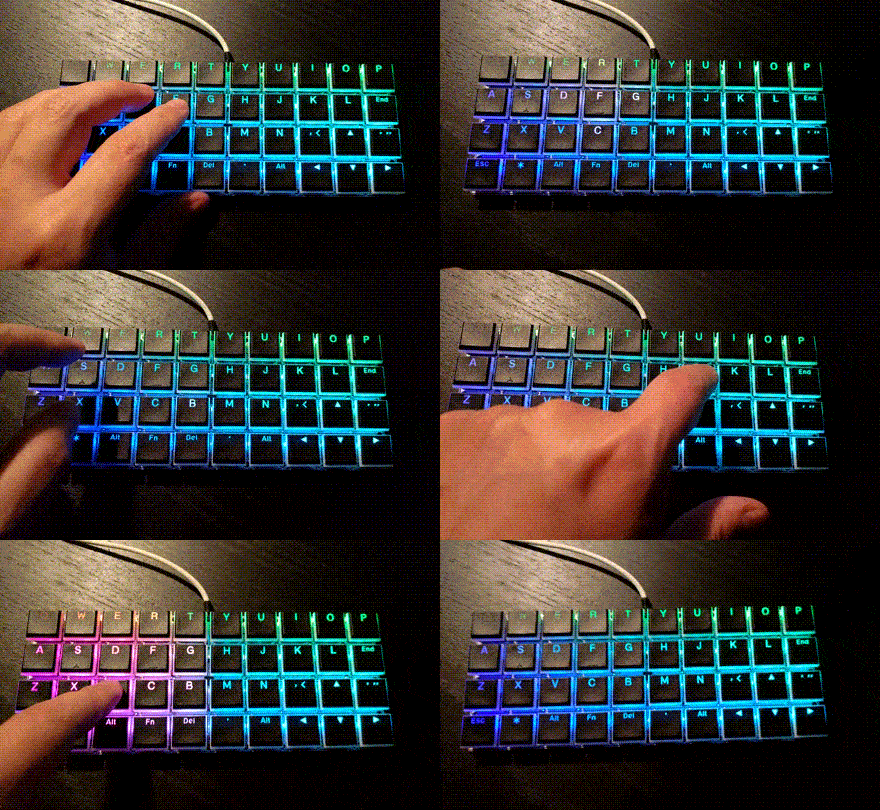
    Finally got some time to program the most basic keystroke effect:

    The code for it is rather simple:

        def update_lights(self):
            i = 0
            y = 0
            dt = time.monotonic() - self.key_time
            for x in range(10):
                self.leds[i] = self.light(x, y, dt)
                i += 1
            y += 1
            for x in range(9, -1, -1):
                self.leds[i] = self.light(x, y, dt)
                i += 1
            y += 1
            for x in range(10):
                self.leds[i] = self.light(x, y, dt)
                i += 1
            y += 1
            for x in range(9, -1, -1):
                self.leds[i] = self.light(x, y, dt)
                i += 1
            self.leds.show()
    
        def light(self, x, y, dt):
            r2 = (x - self.key_x) ** 2 + (y - self.key_y) ** 2
            c = 255 - min(255, r2 * 30 + (dt * 10) ** 2)
            return c, x * 25, min(255, y * 50)
    

    The key_x, key_y and key_time are getting saved in the matrix scan routine when a key is detected to be pressed.

  • DotStars

    deʃhipu10/01/2020 at 22:24 0 comments

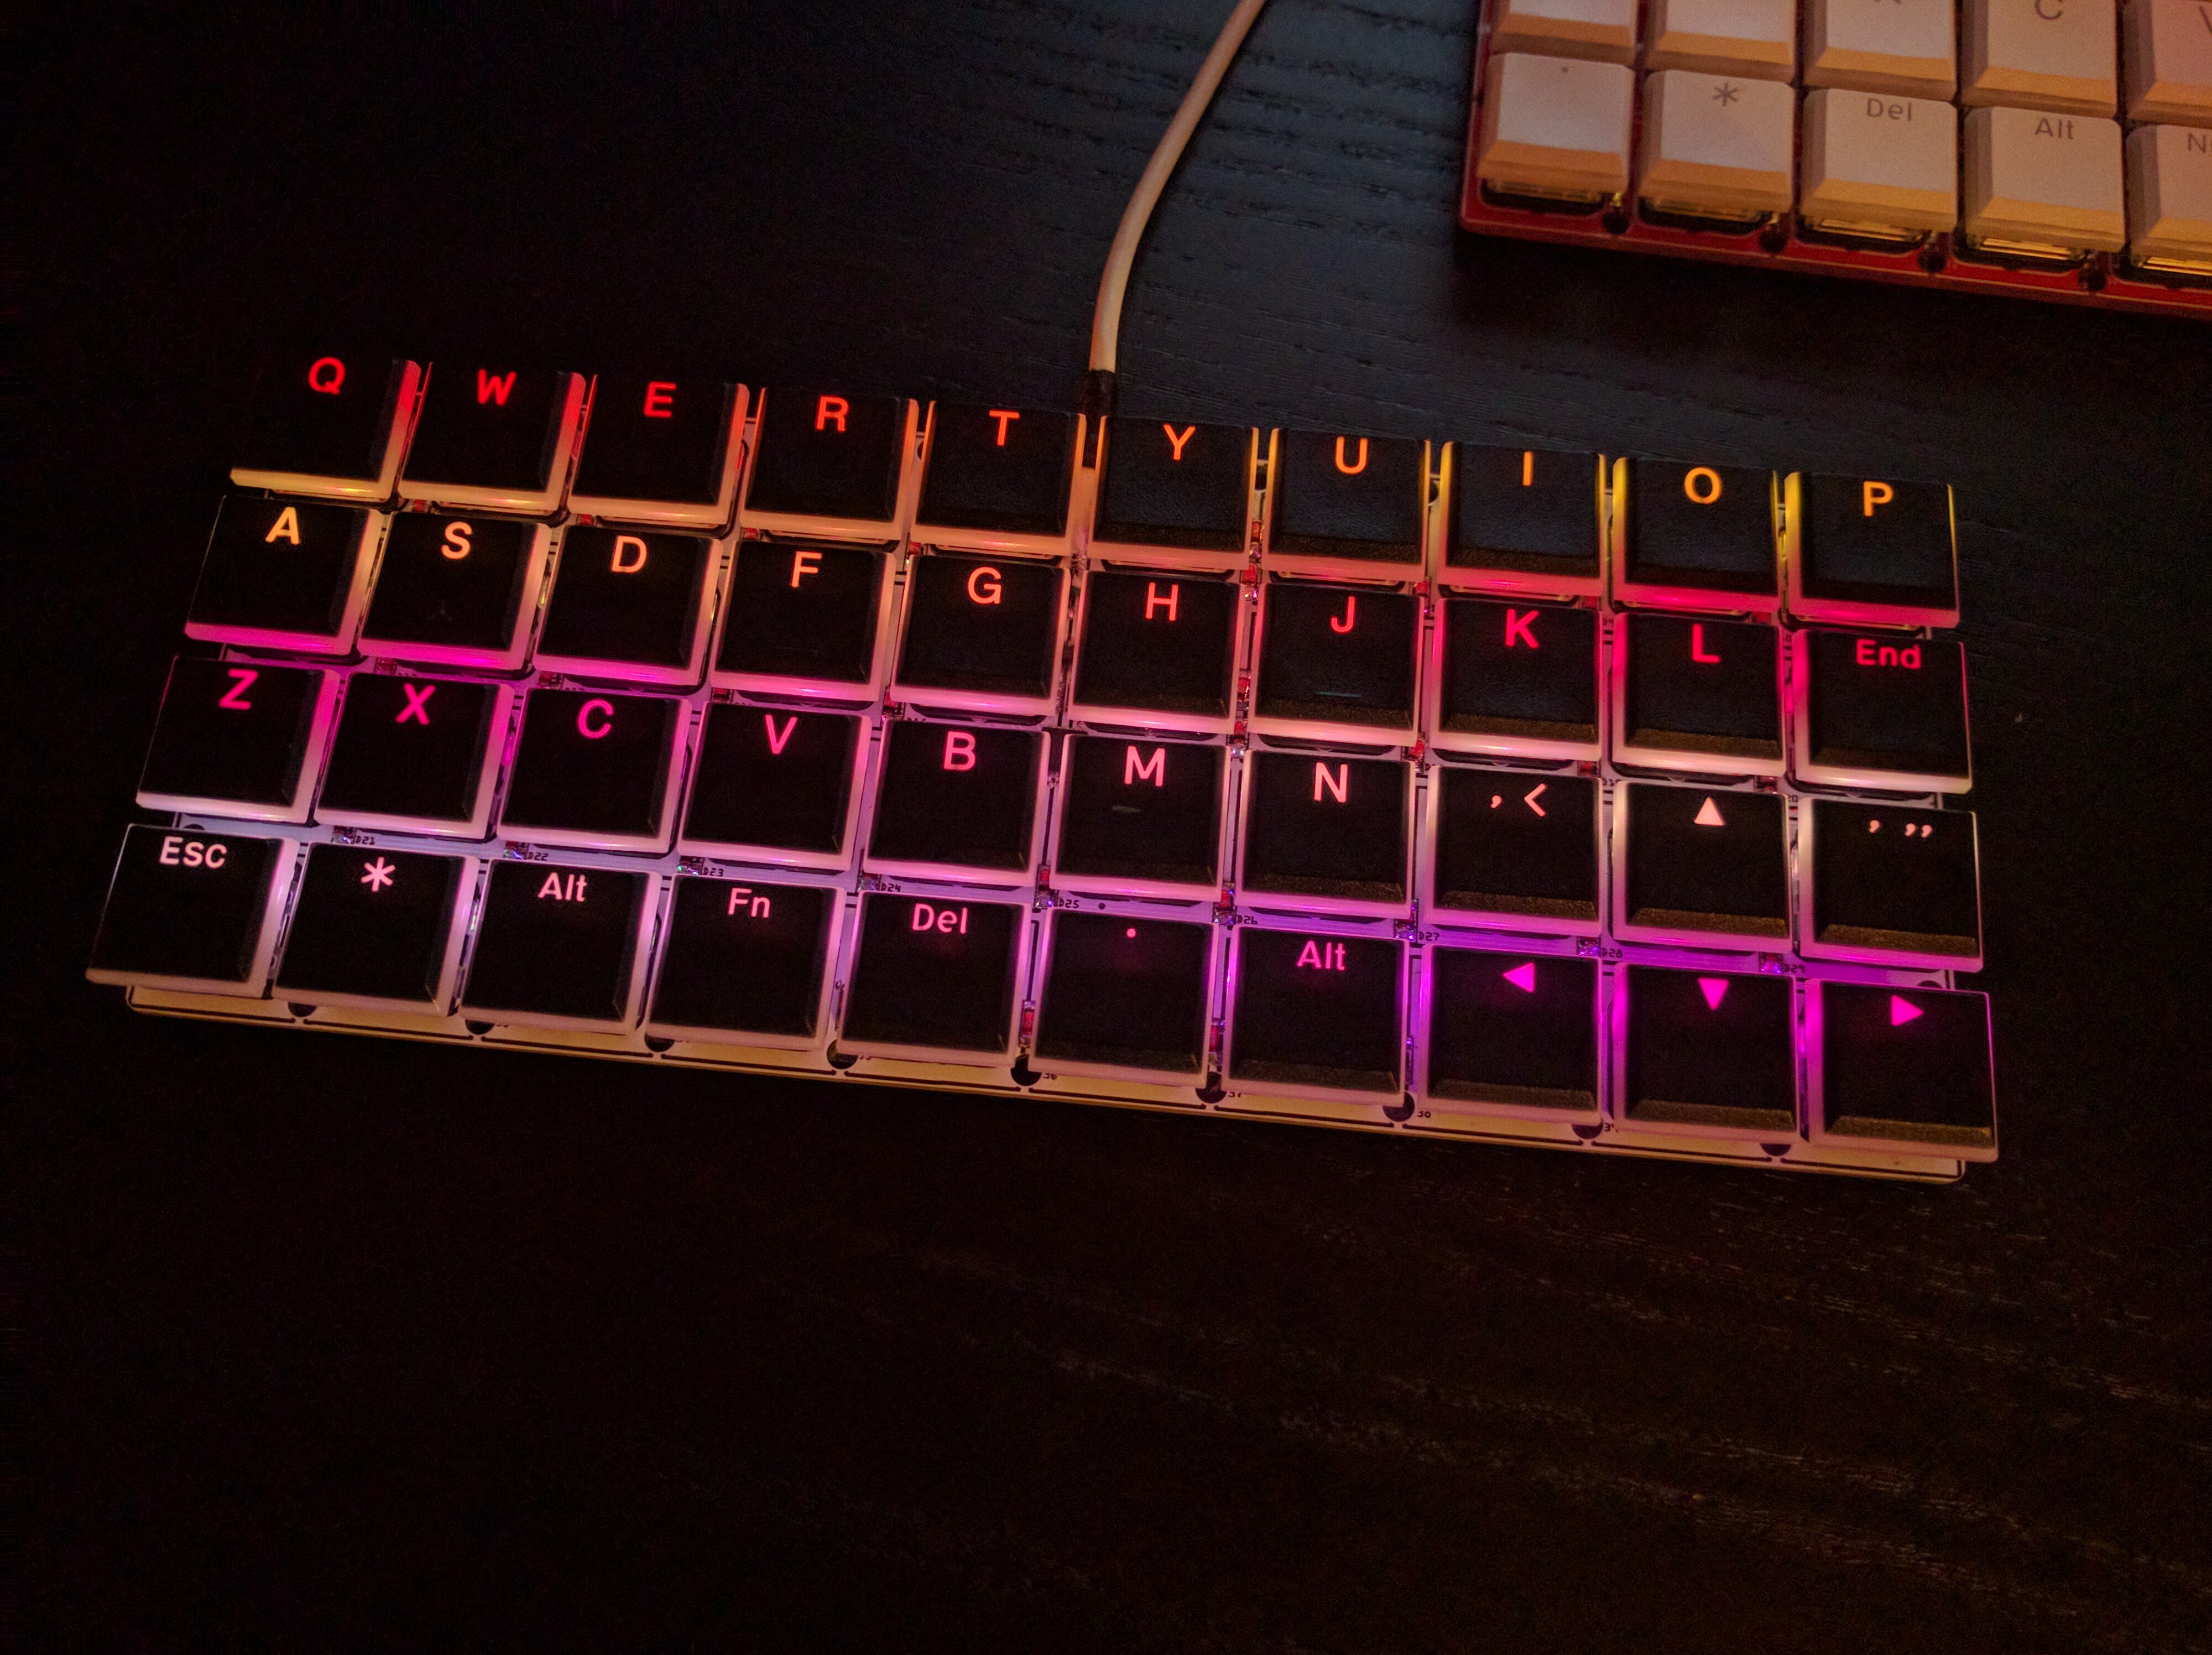
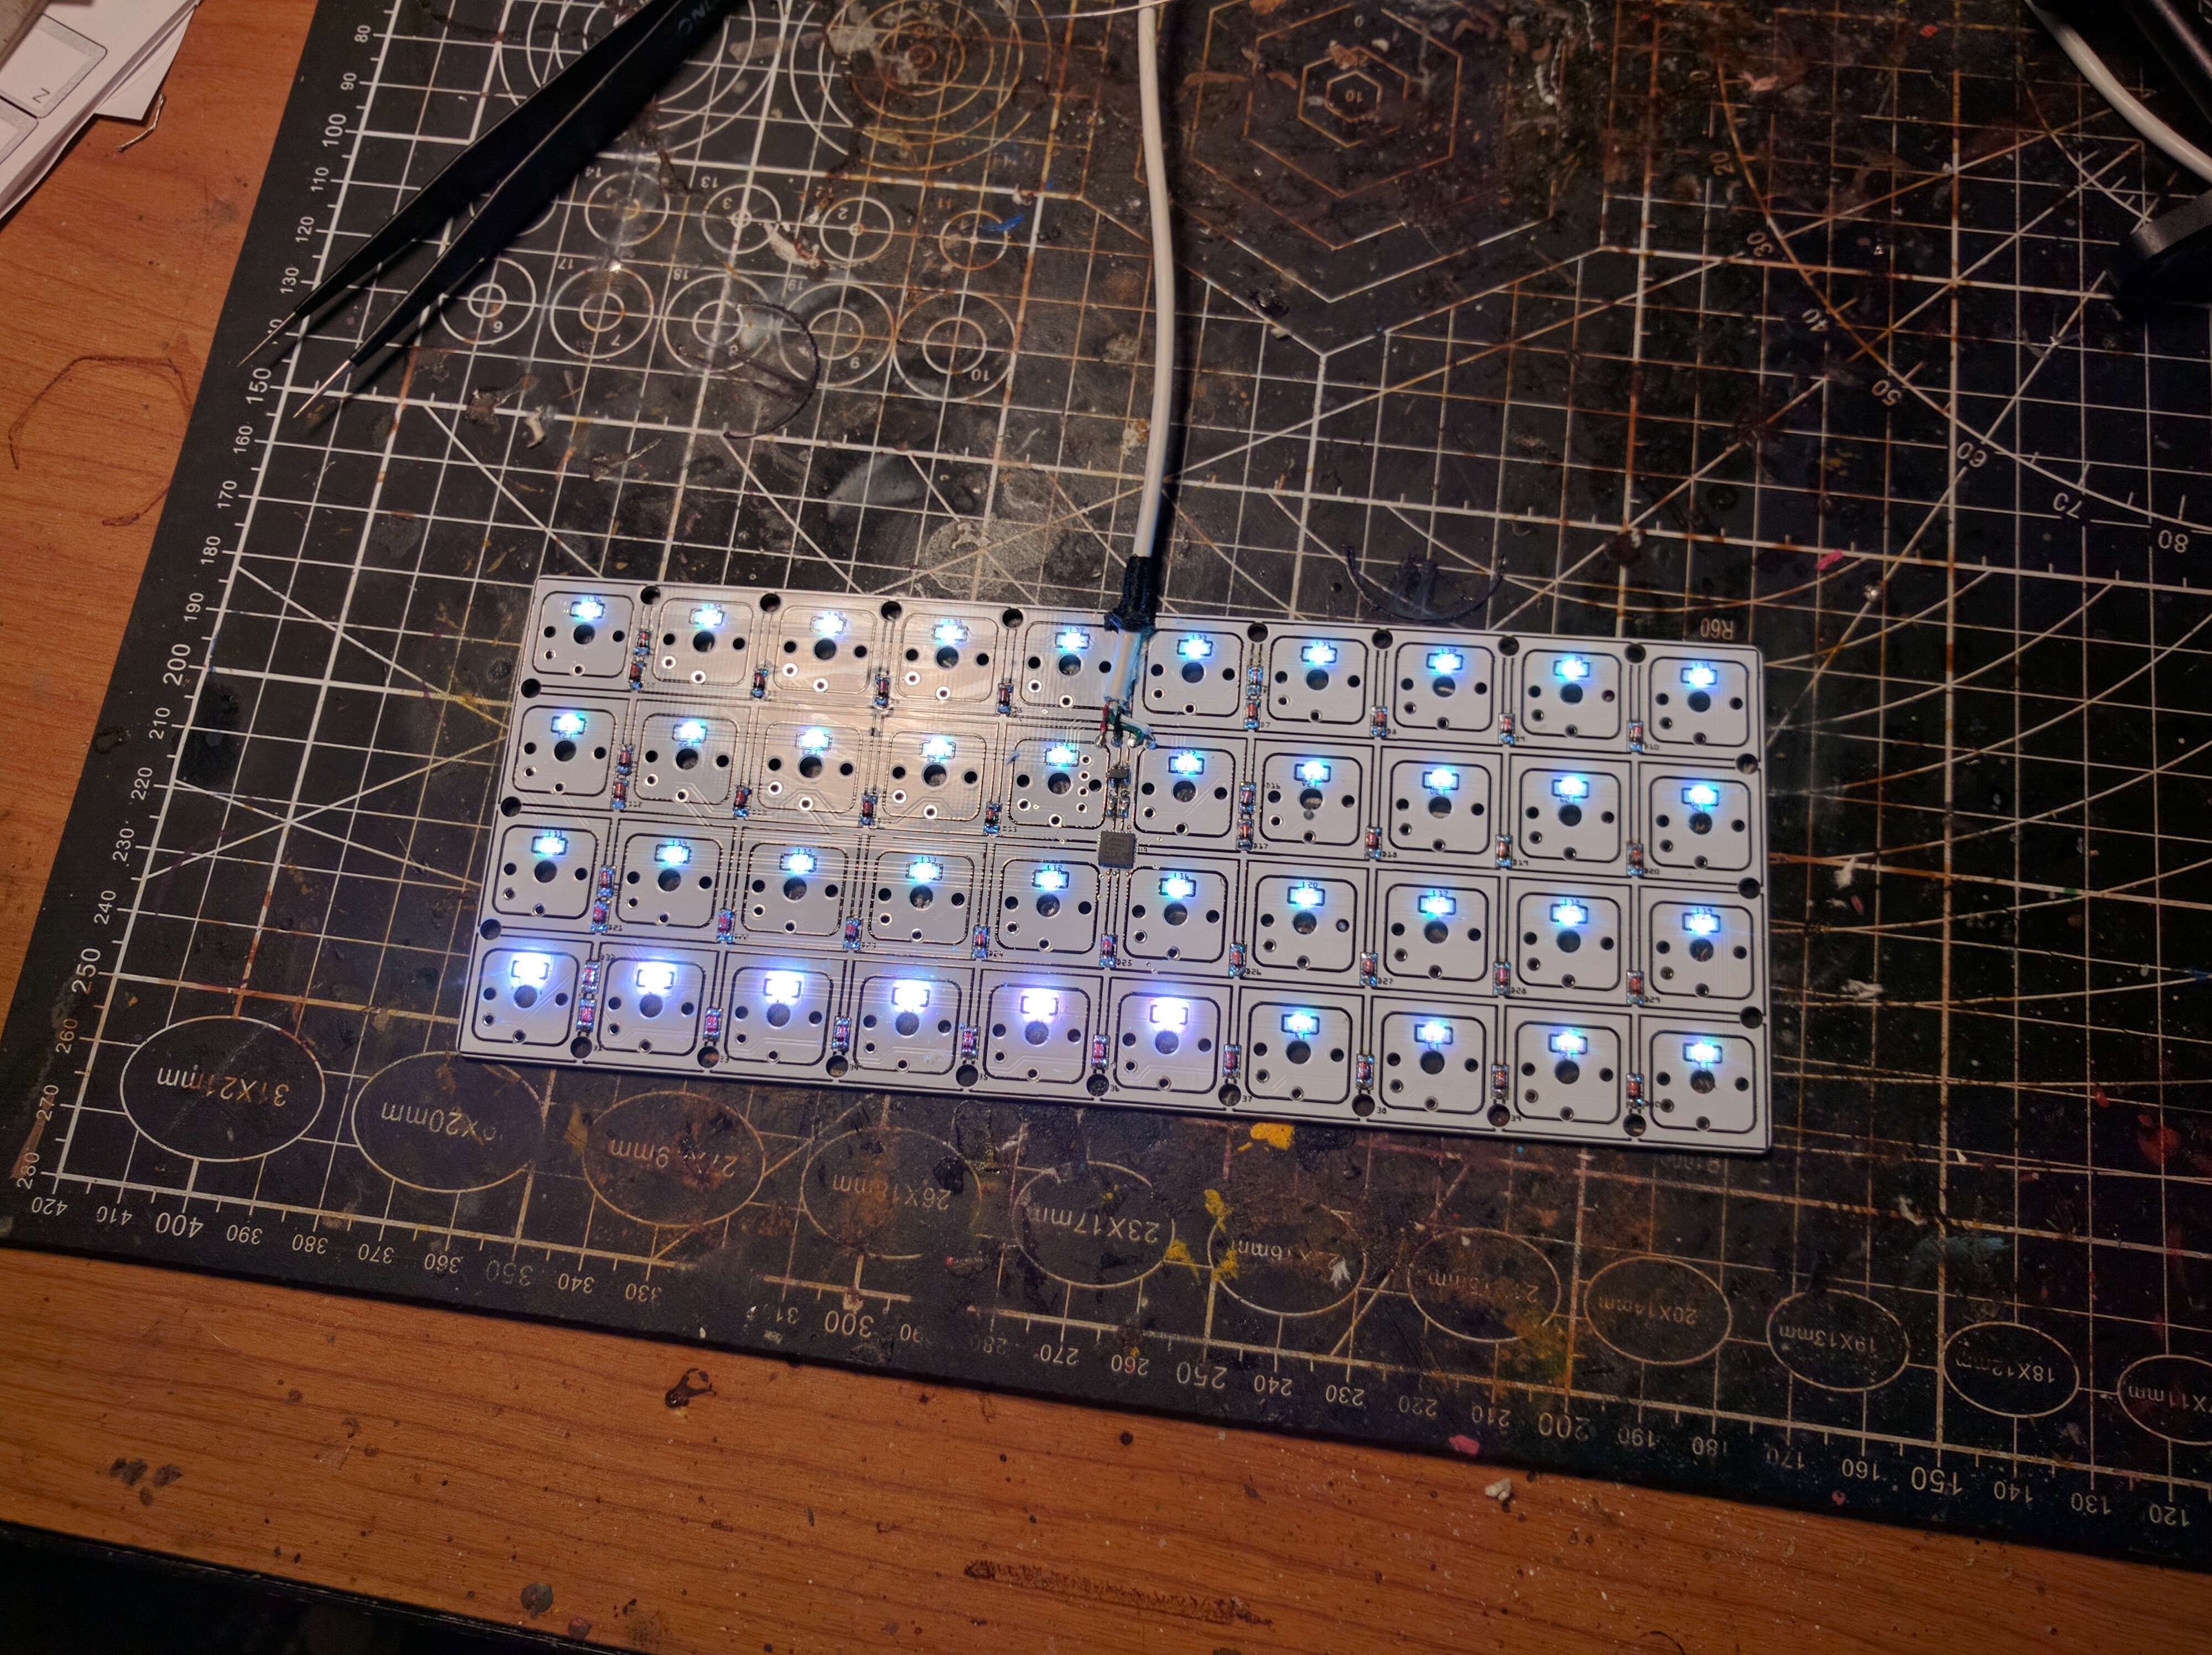
    Finally tonight I took a look at the lights on this keyboard. The Adafruit's DotStar library handles them very well, but for some reason the last 6 in a chain had different colors. After some experiments, I desoldered the switches, removed that LED, put a different one in its place and the problem magically disappeared.

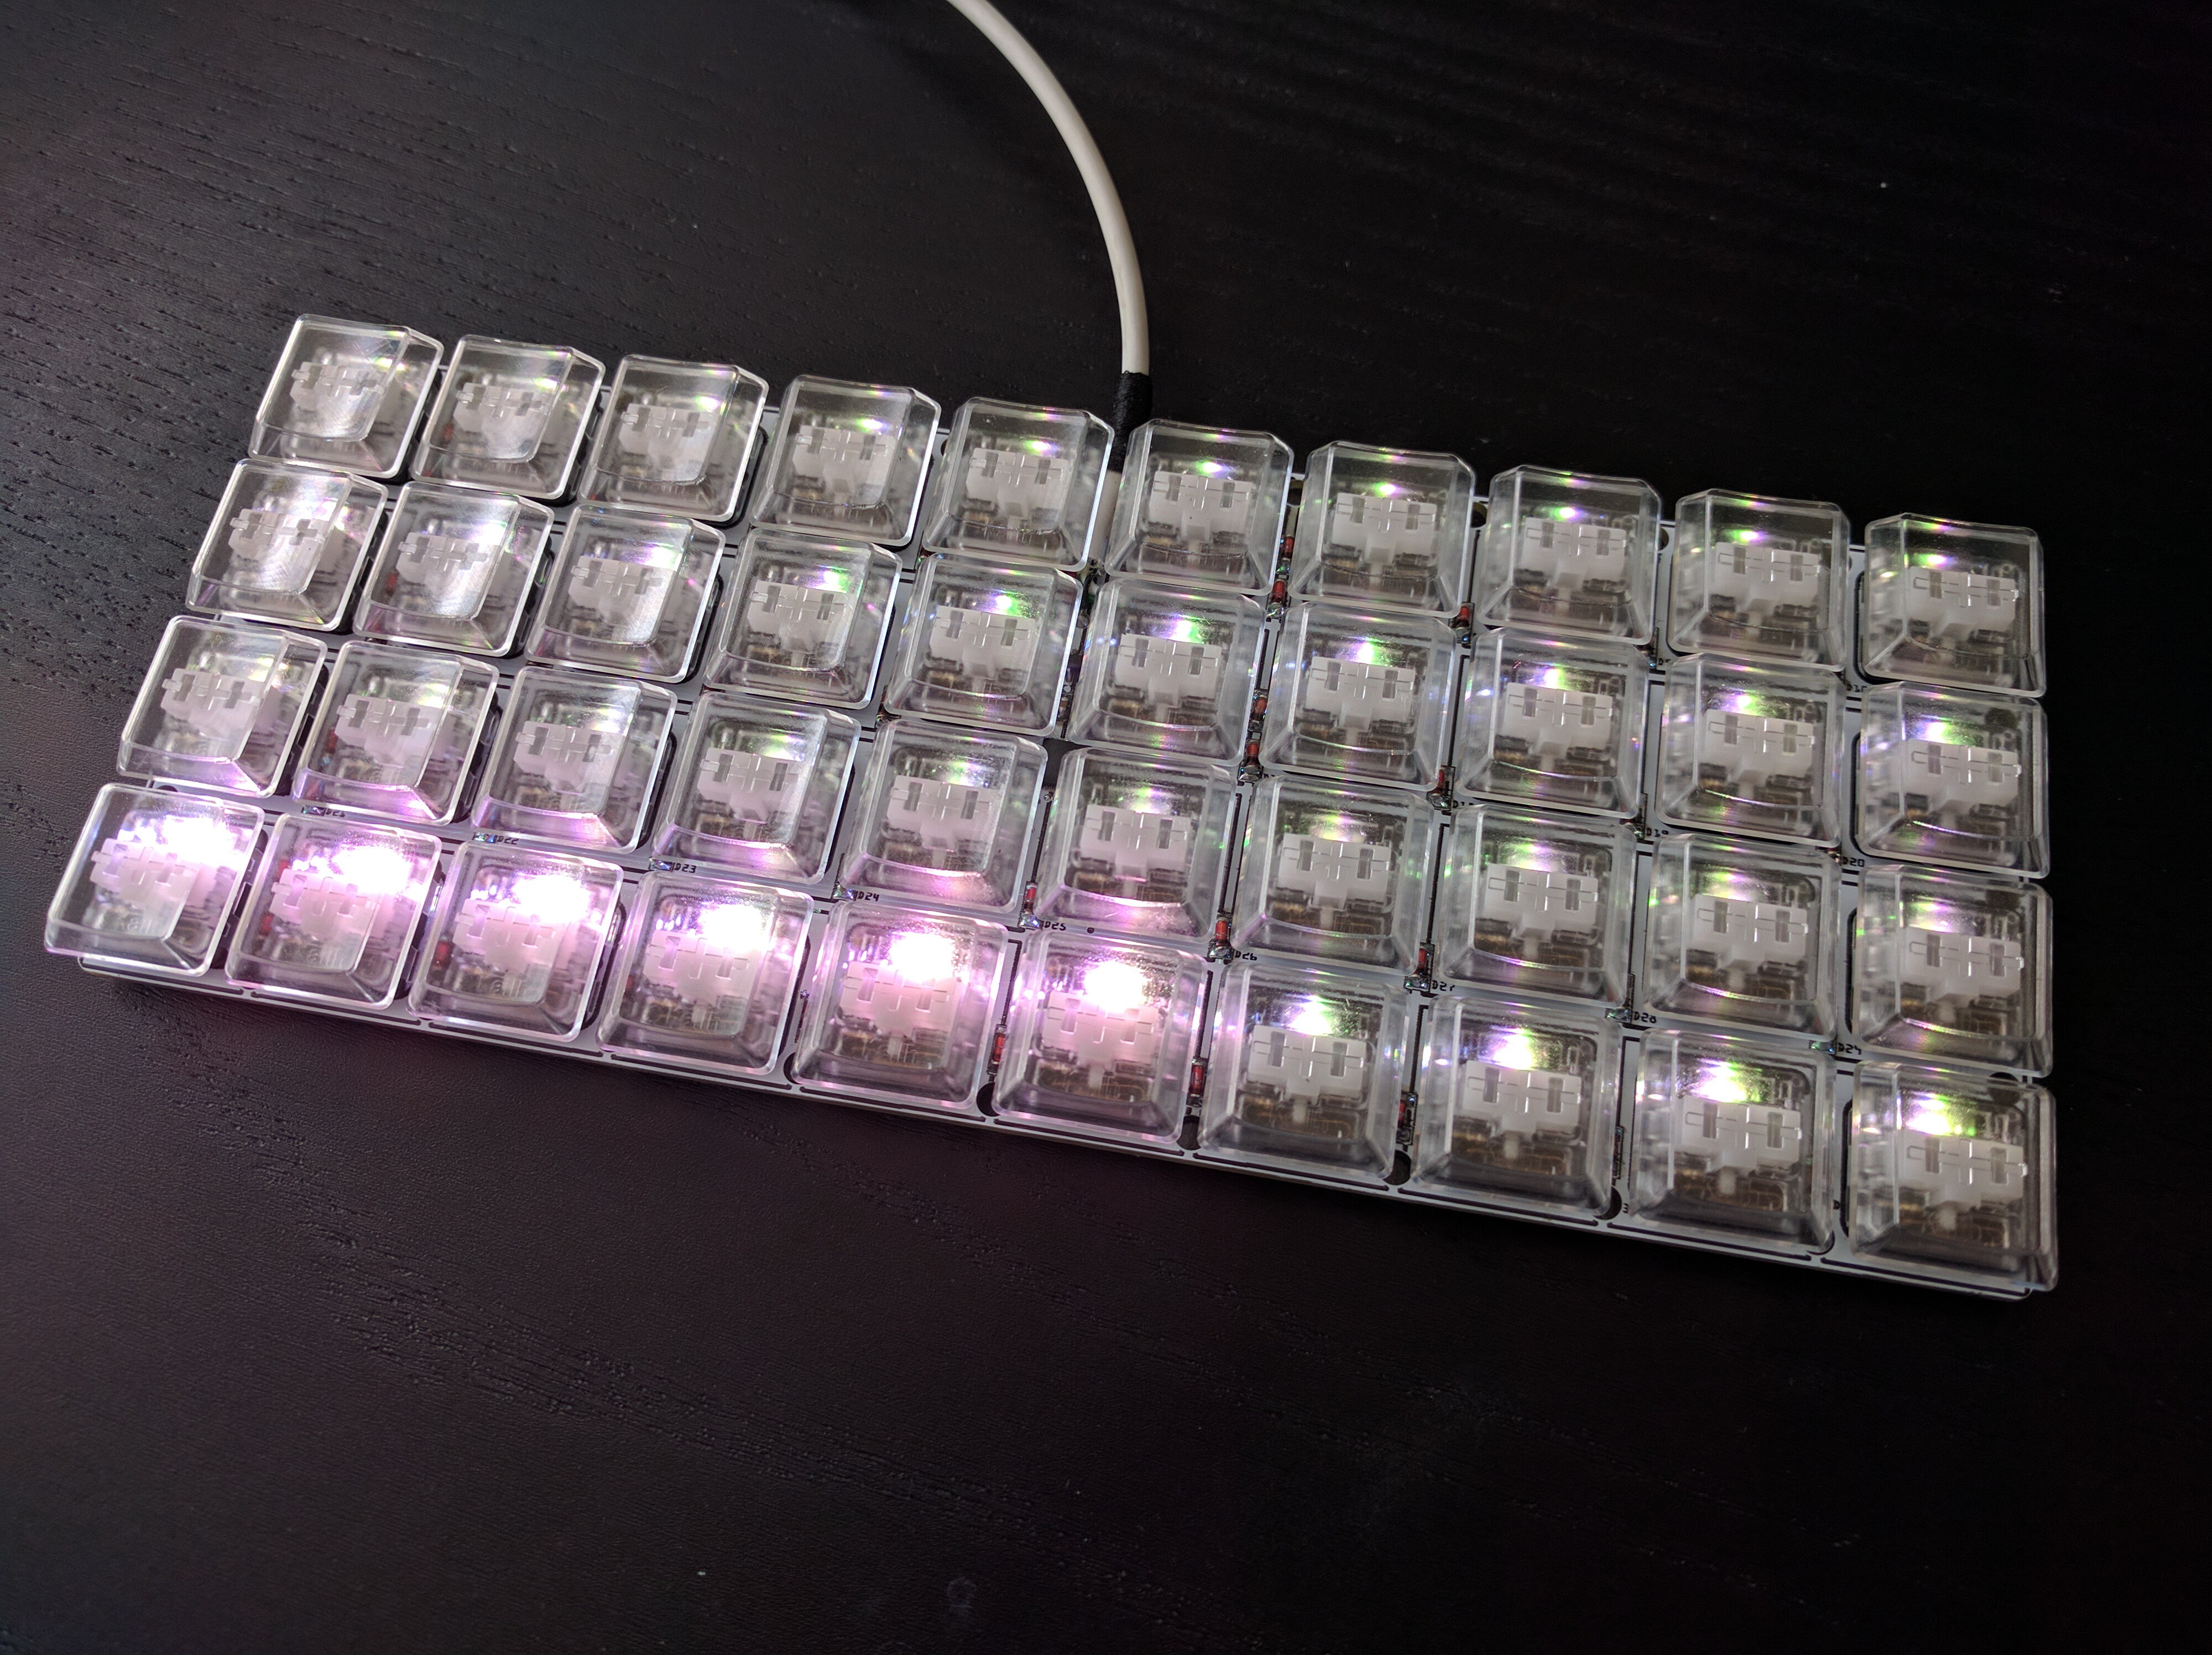
    I also wrote some very simple code to make a pretty gradient. Static for now. I'm going to call it a day, but tomorrow I will probably try to make some nice effects, like a water ripple on each keystroke, or something like that.

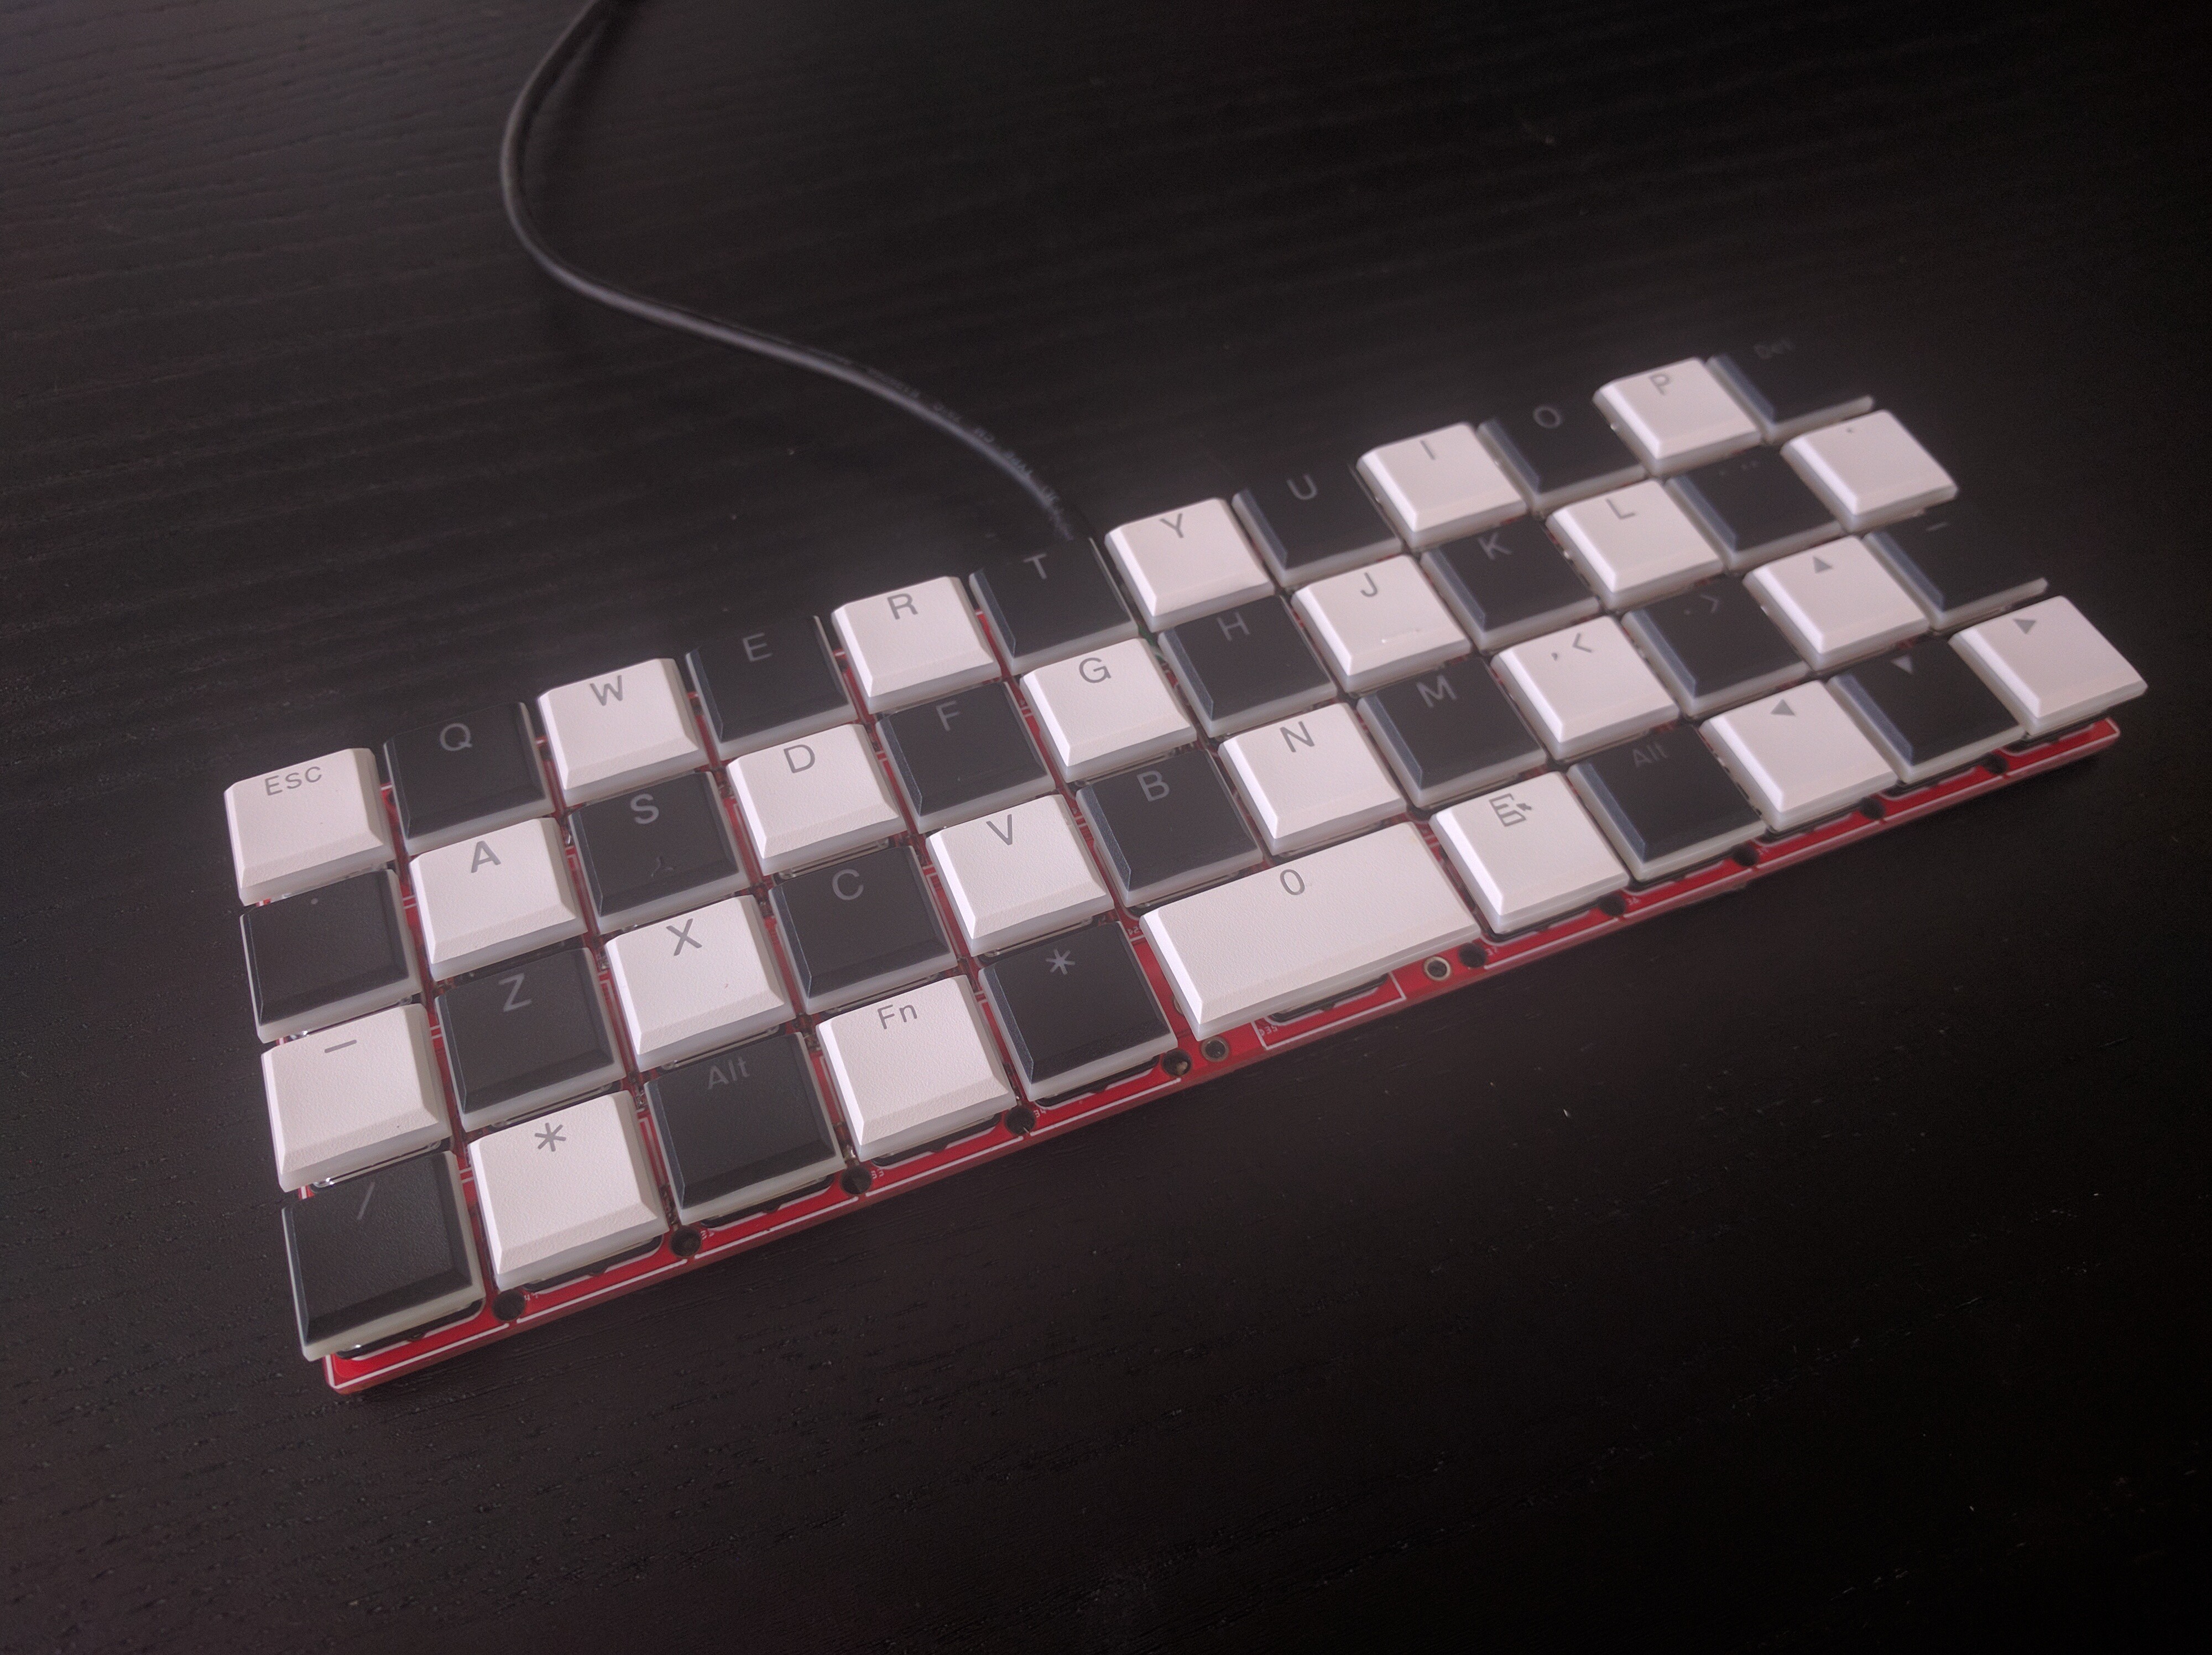
    Oh, right, because both #Flounder Keyboard and #Turbot Keyboard are now dead and buried, I took the black double-shot key caps from them. I think they look quite pretty with the backlight.

  • Fork

    deʃhipu09/21/2020 at 11:32 0 comments

    I moved the 48k (actually 47 keys) version to #Dorsch 48k Keyboard because it has a different bill of materials and code.

    I also just uploaded the design files of the 40k version with LEDs here.

  • How Thicc is your Keeb?

    deʃhipu09/17/2020 at 12:12 0 comments

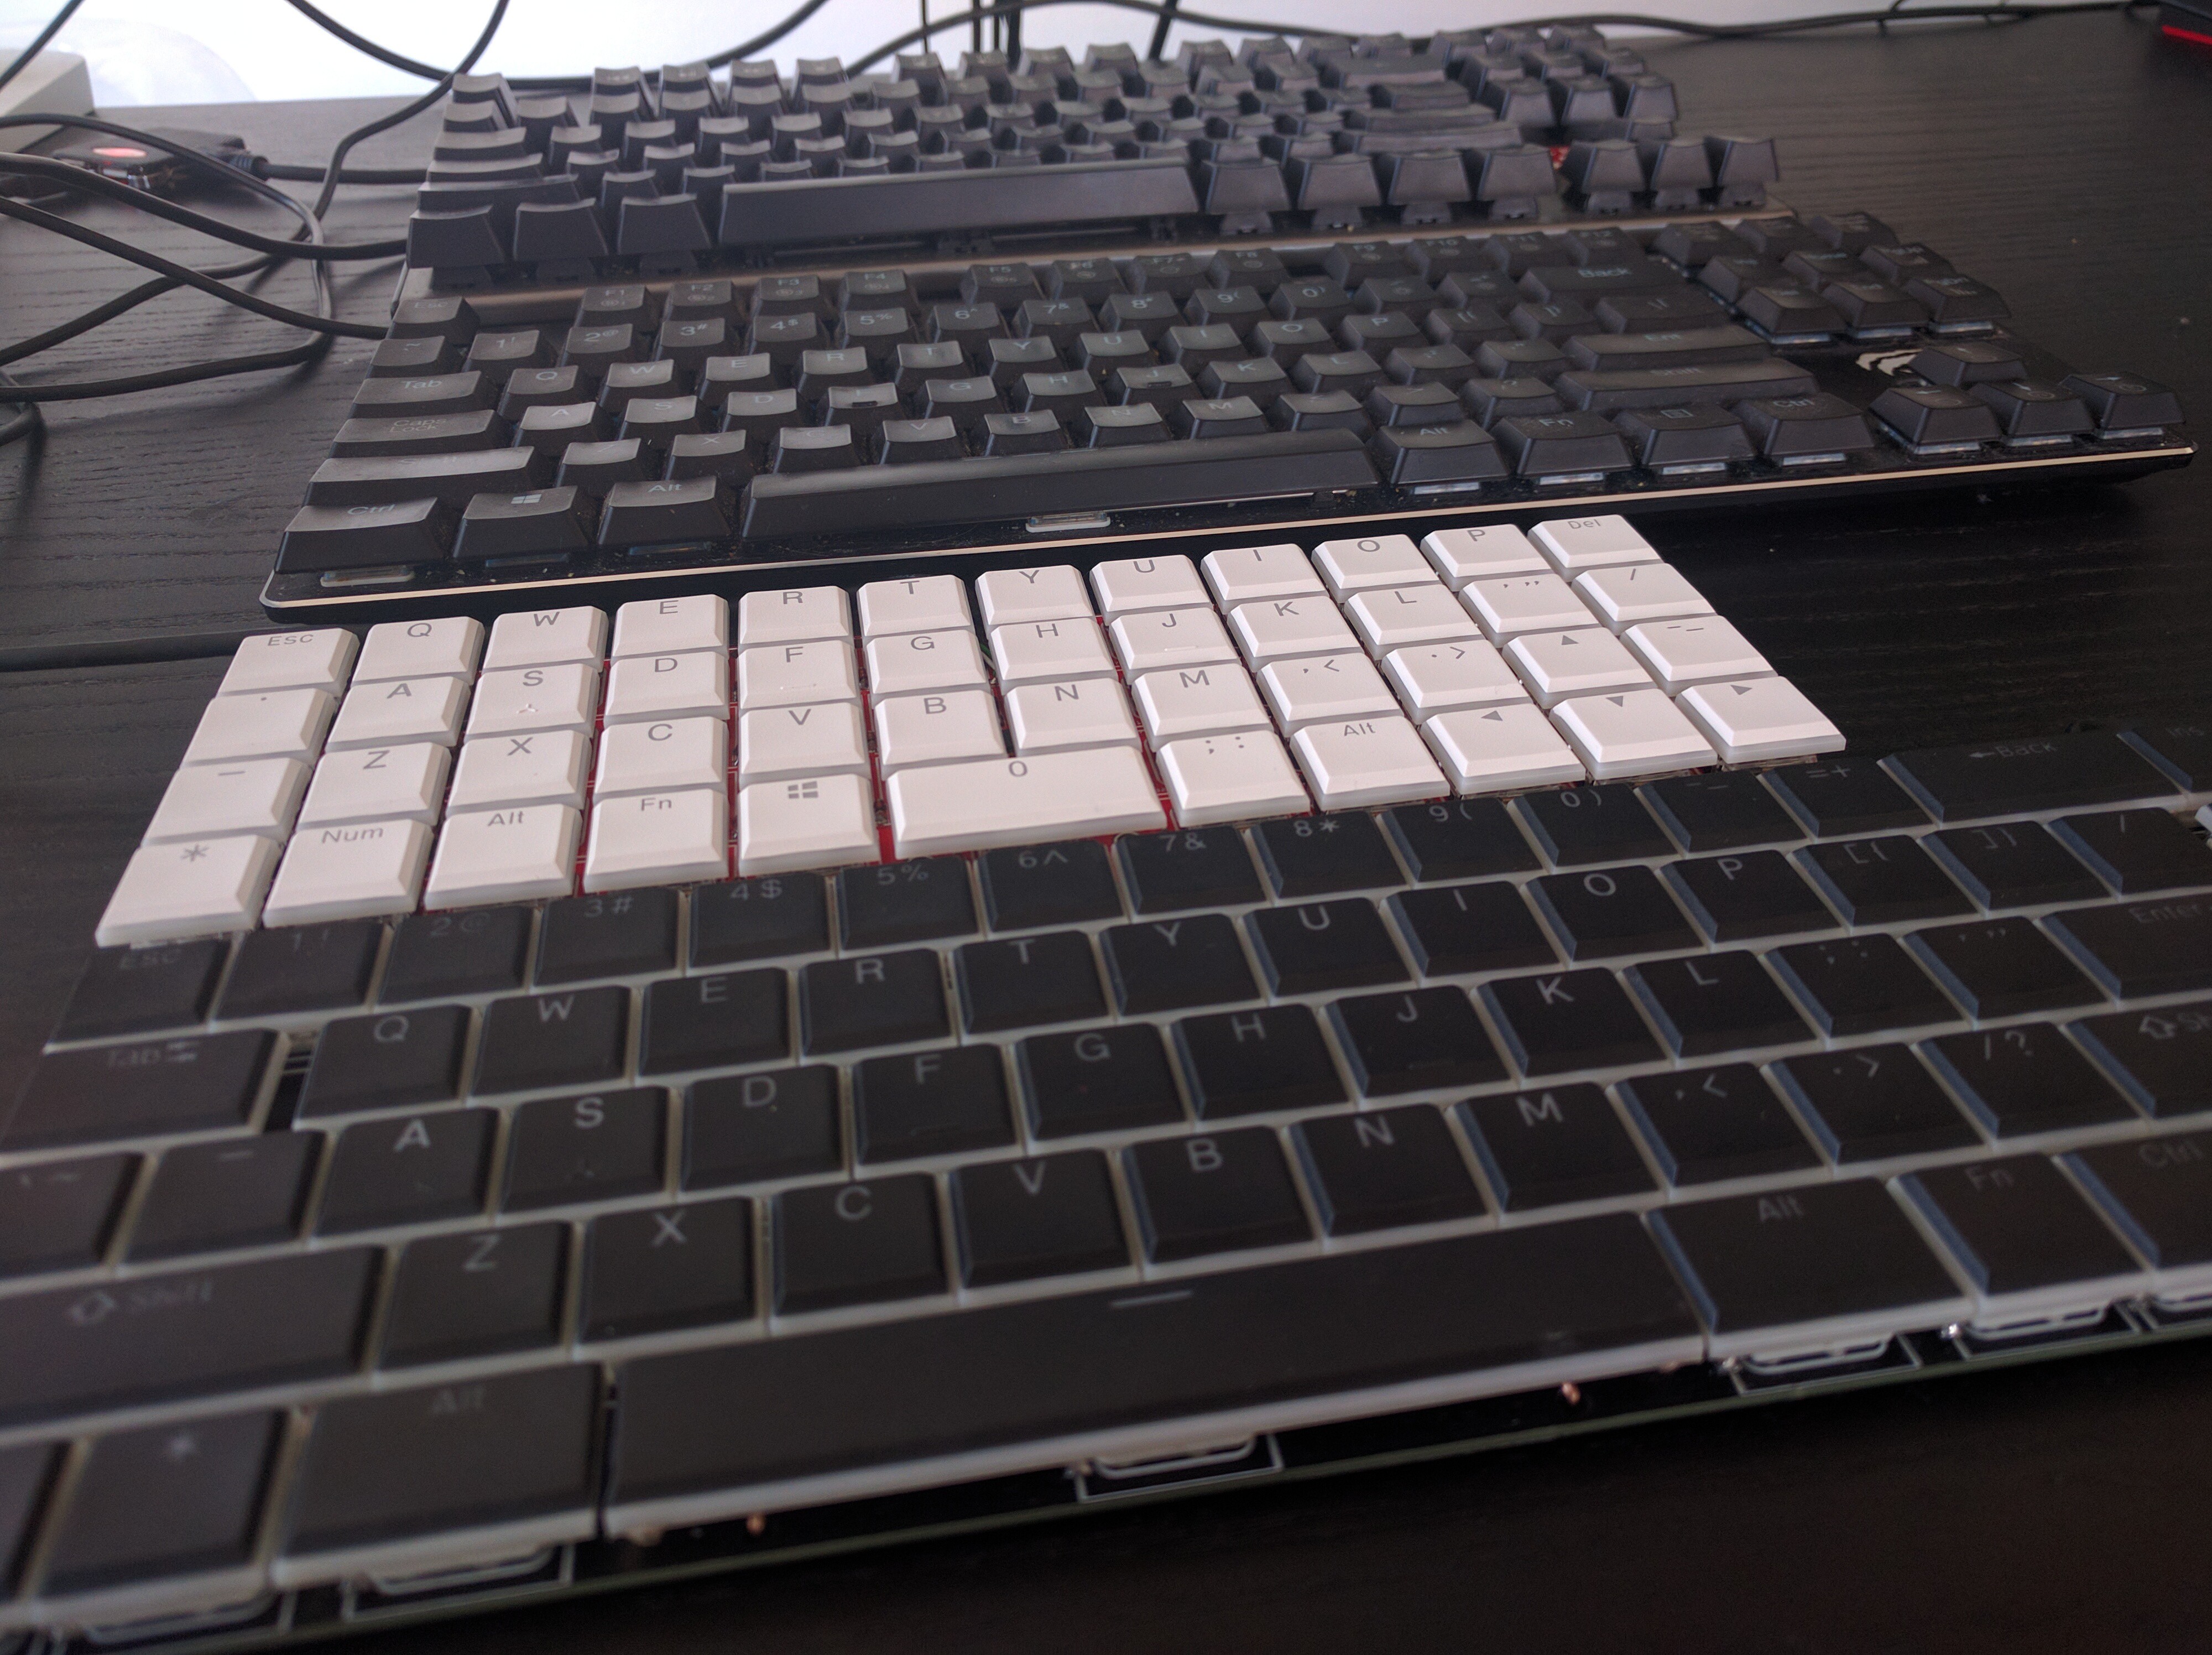
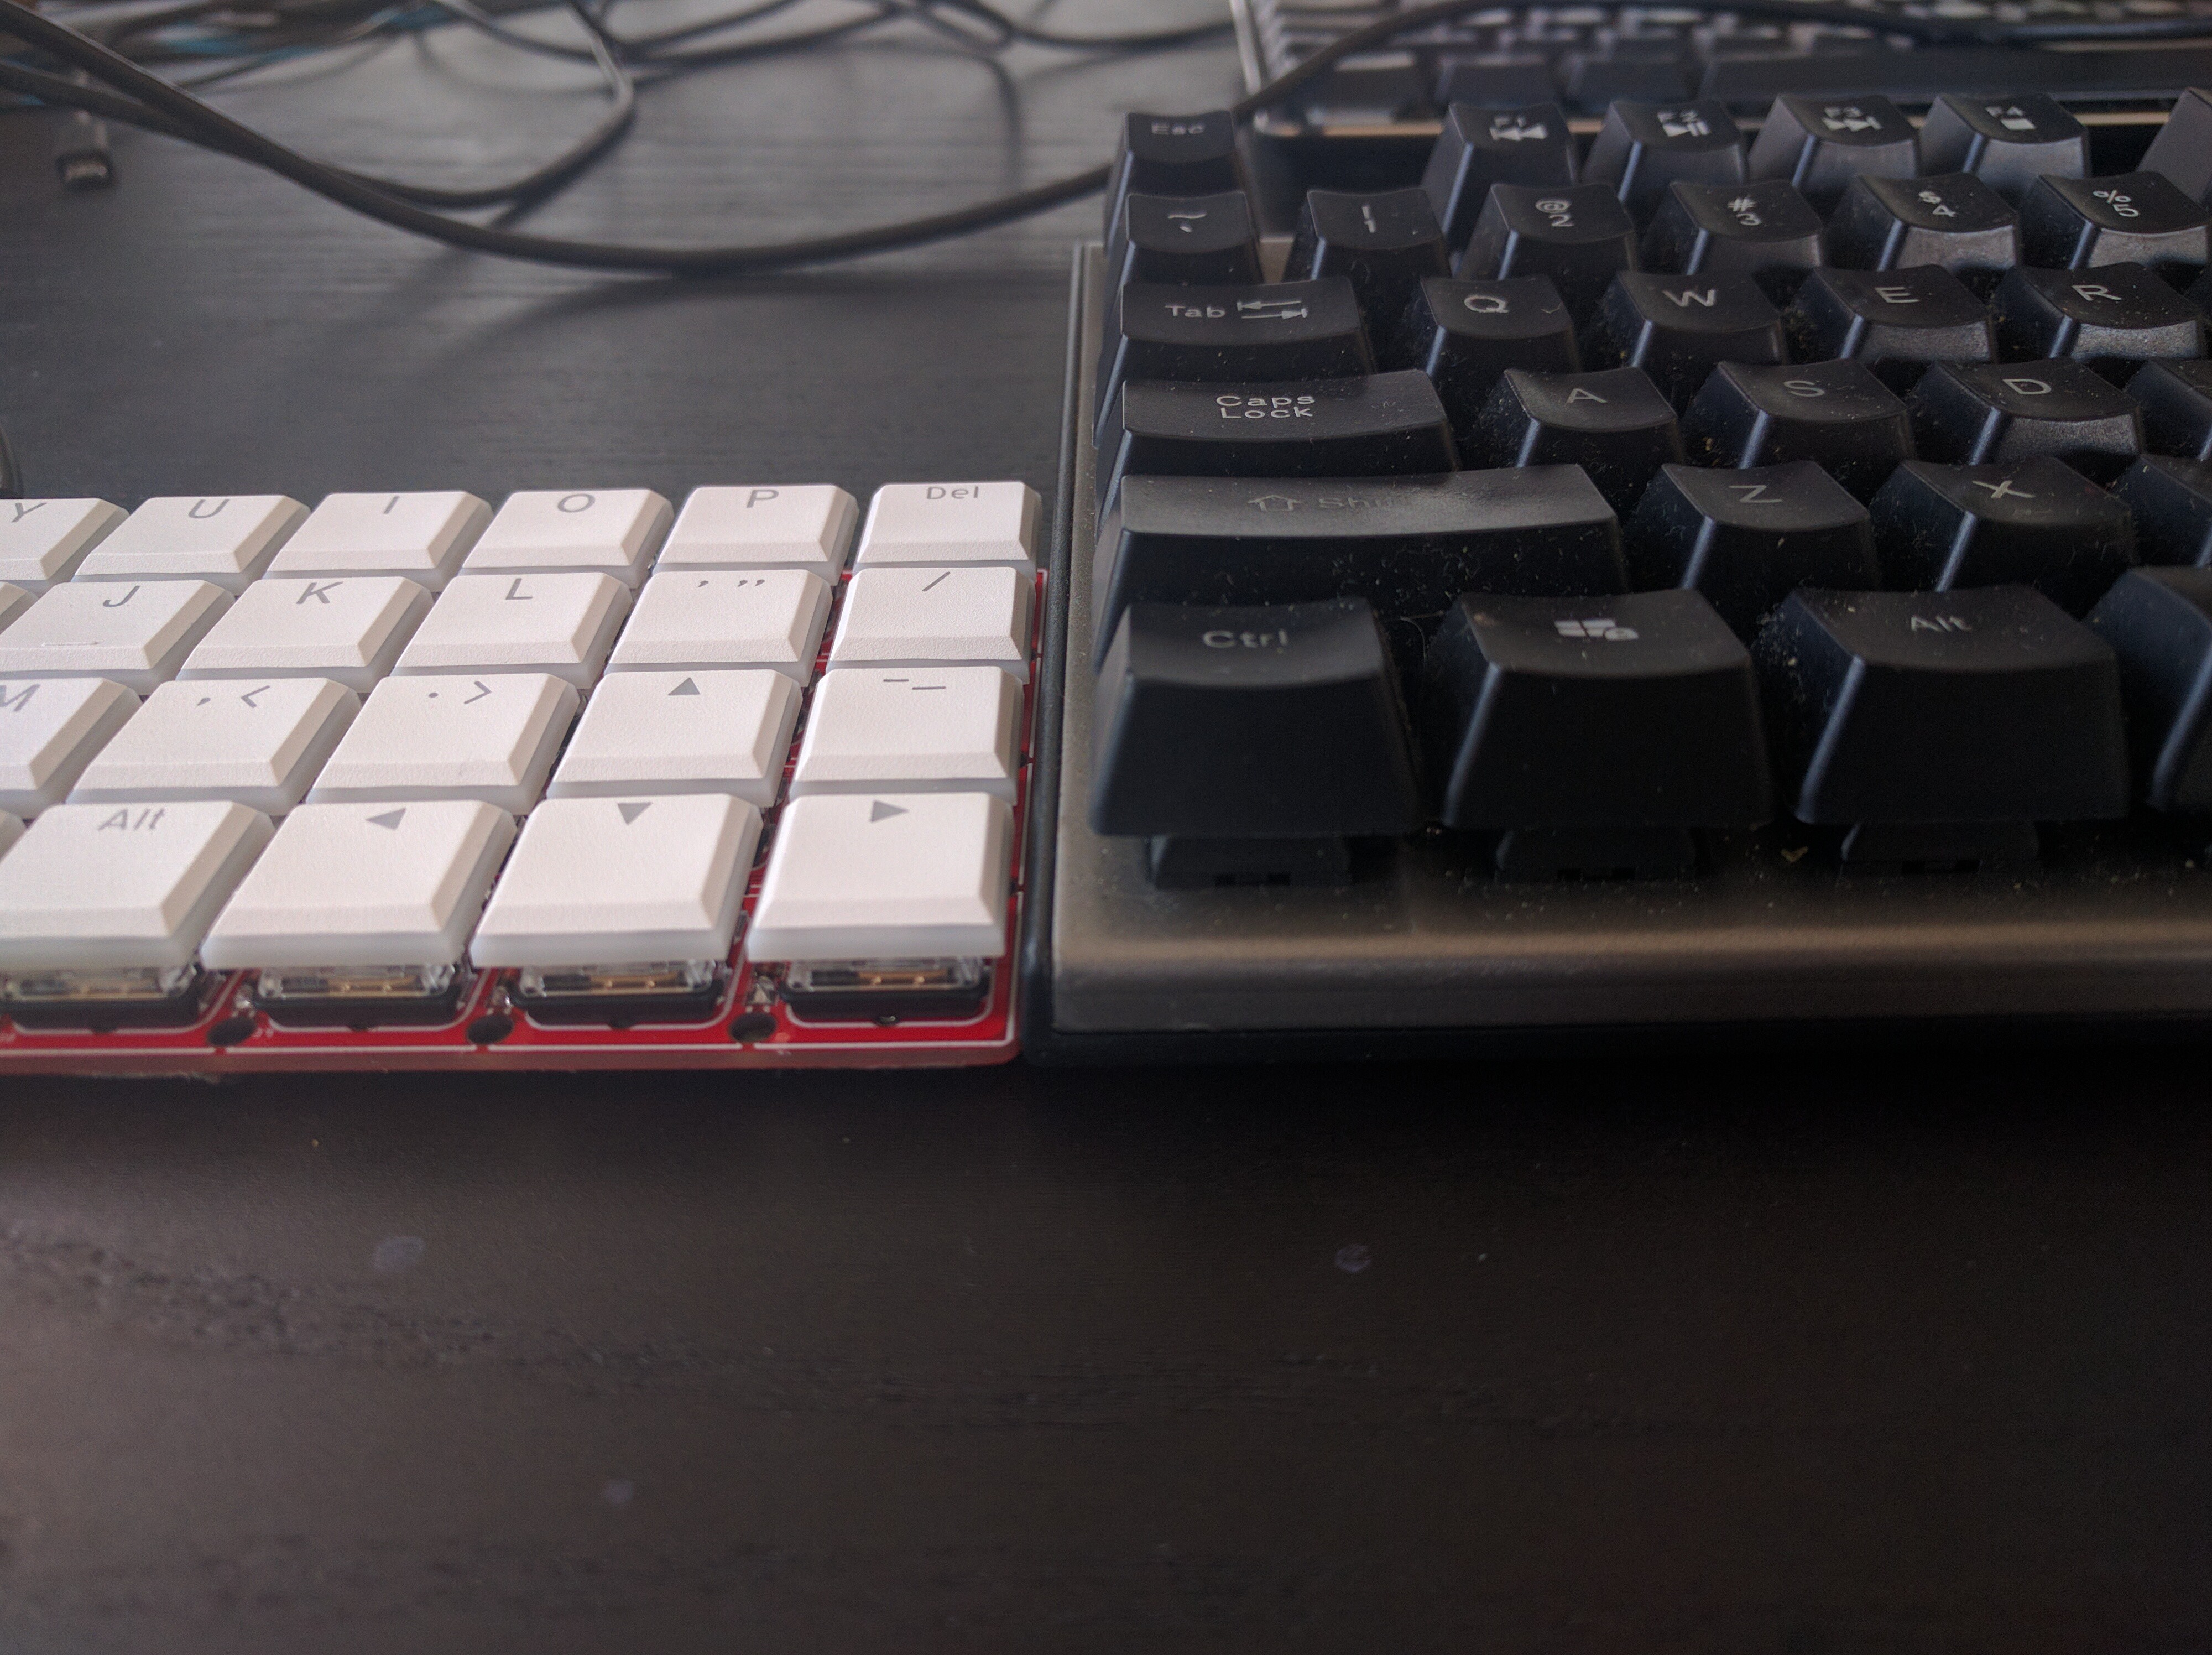
    I also decided to shoot some thickness comparison photos:

    From back to front:

    • your standard mechanical keyboard
    • low-profile mechanical keyboard from a shop
    • Dorsch 48k
    • Flounder

    And a close-up of comparison with a standard mechanical keyboard:

    So yeah, I think there is a definite improvement.

    Why do I need a low-profile keyboard, though? It's simple. Ergonomics. You really don't want the heels of your hands to be pressing down on the table, leading to RSI, CTS or a number of other TLAs. With a low enough profile, your hands can just lie flat on the table without any special wrist rests or other contraptions, and be flat enough that it's the palms that bear the stress and not the heels.

  • Revisions

    deʃhipu09/17/2020 at 11:41 0 comments

    After using the keyboard for a few weeks (and getting much better at touch-typing in the process) I got very much used to it, so I was hesitating if I should scavenge it and rebuild it with the new PCBs that just arrived. And if I should, then which one?

    In the end I decided to do it, and also to scavenge the #5plit Keyboard Clone, so that I can build both versions. The 48-key version went first:

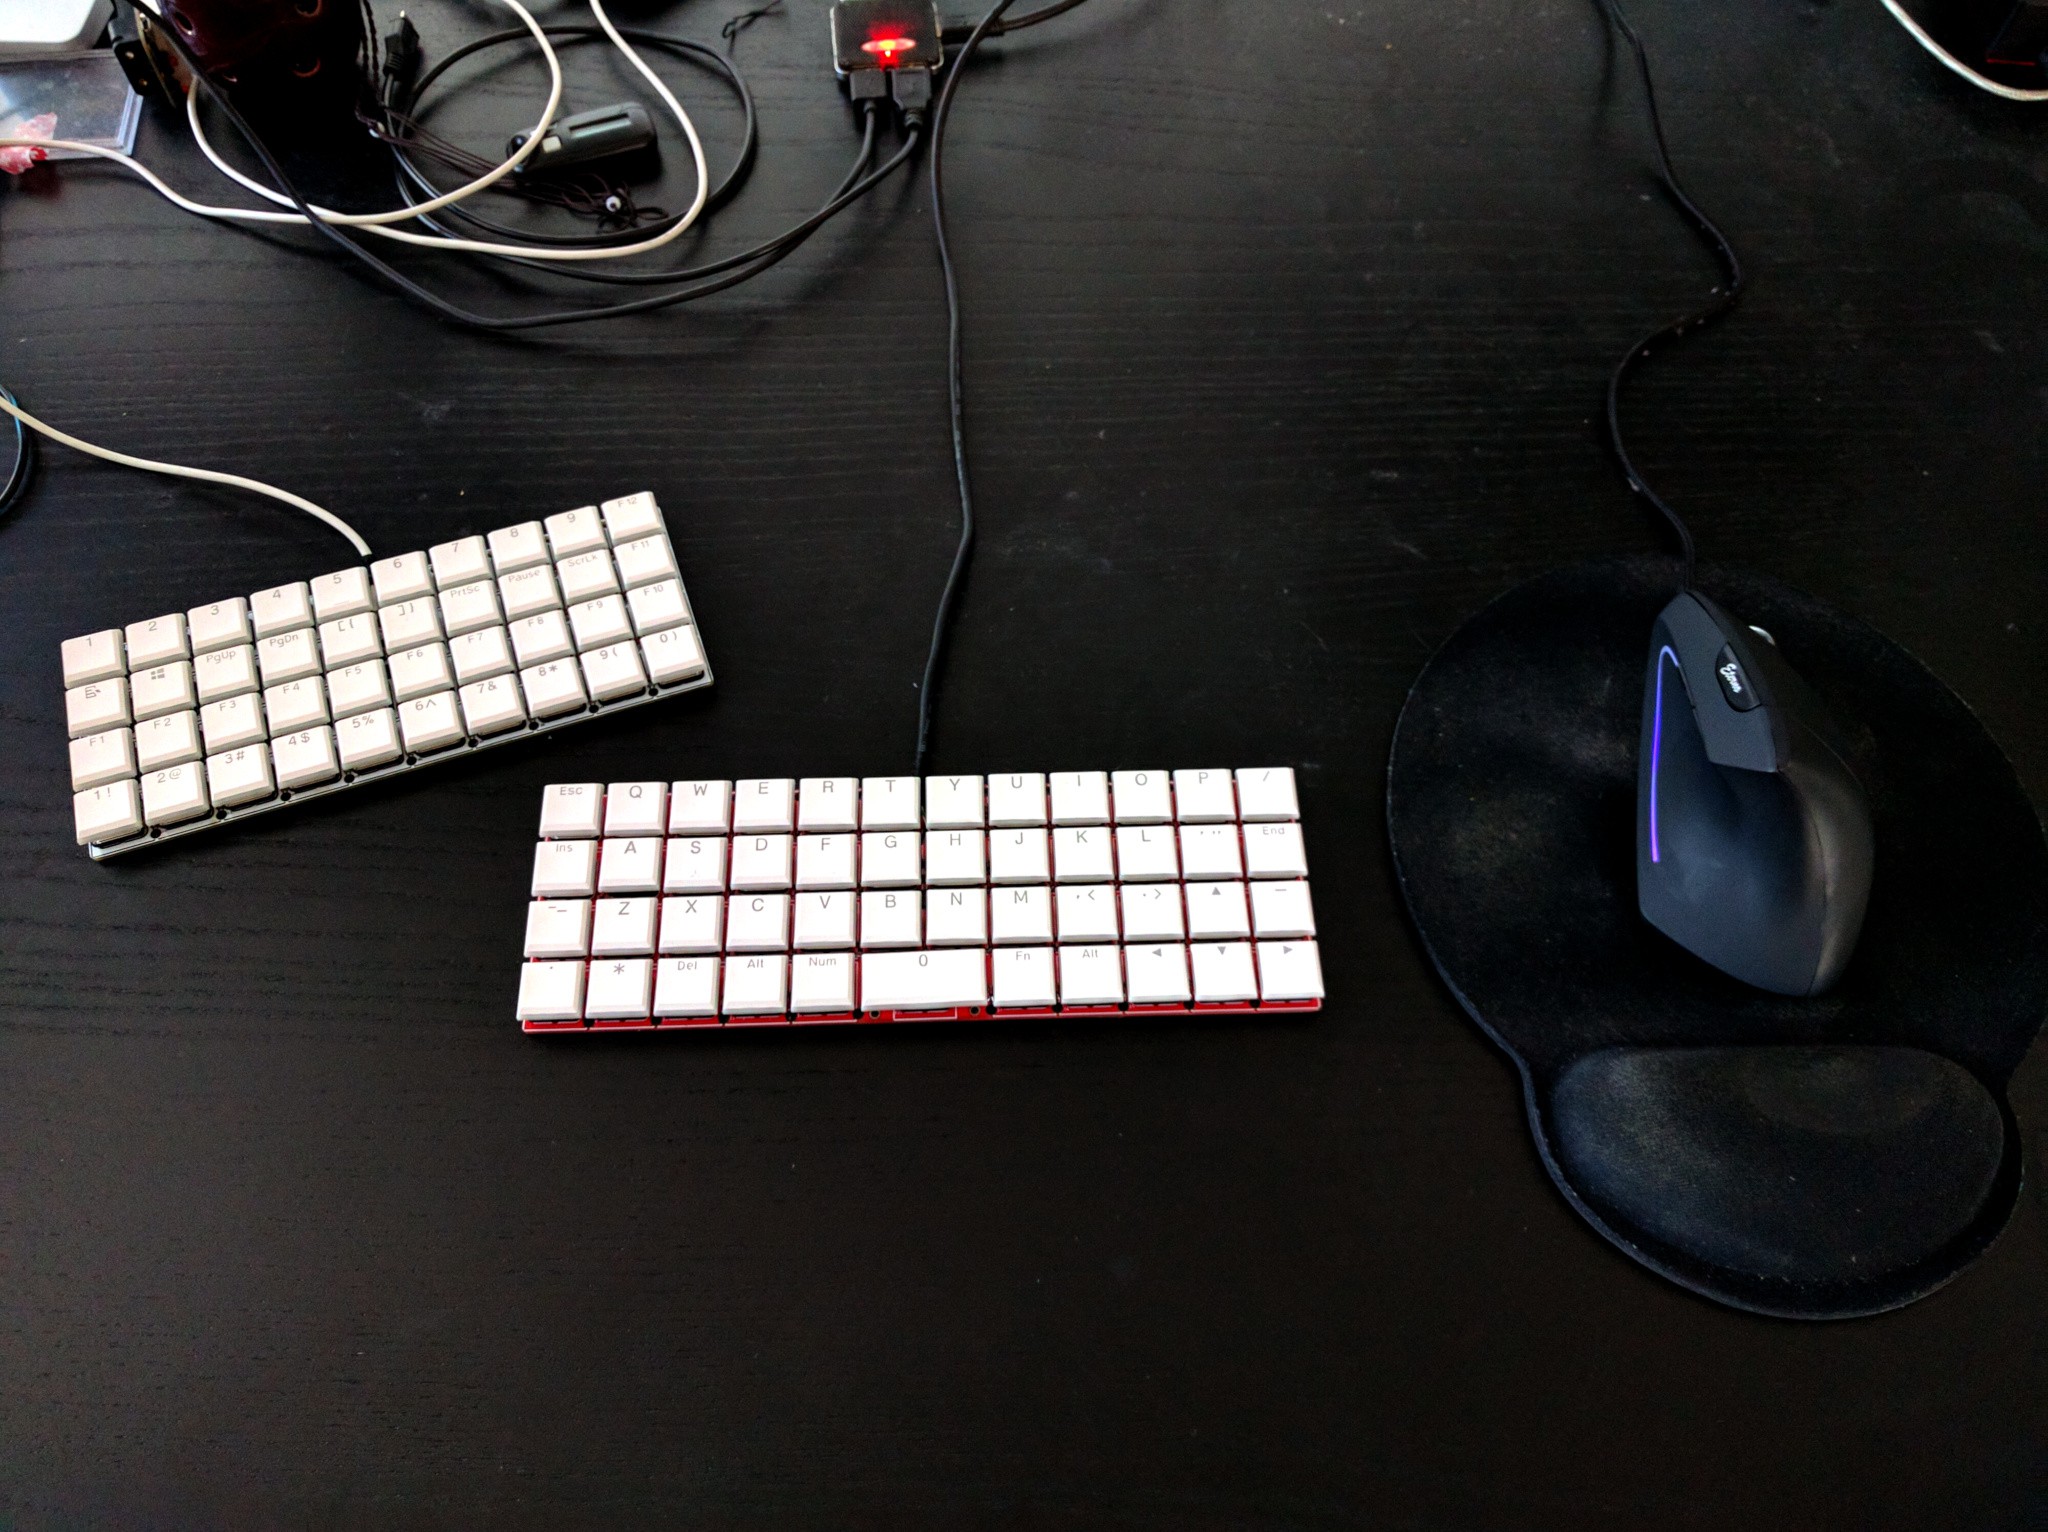
    Nothing surprising in here, I just had to edit the layout matrix to include the two extra columns, and it just works. I'm using it right now, and it works great for me. It's definitely a keeper. I didn't even need to add a stabilizer under the space. Oh, of course I reversed the D+ and D- labels for the USB cable, but that's easily fixed.

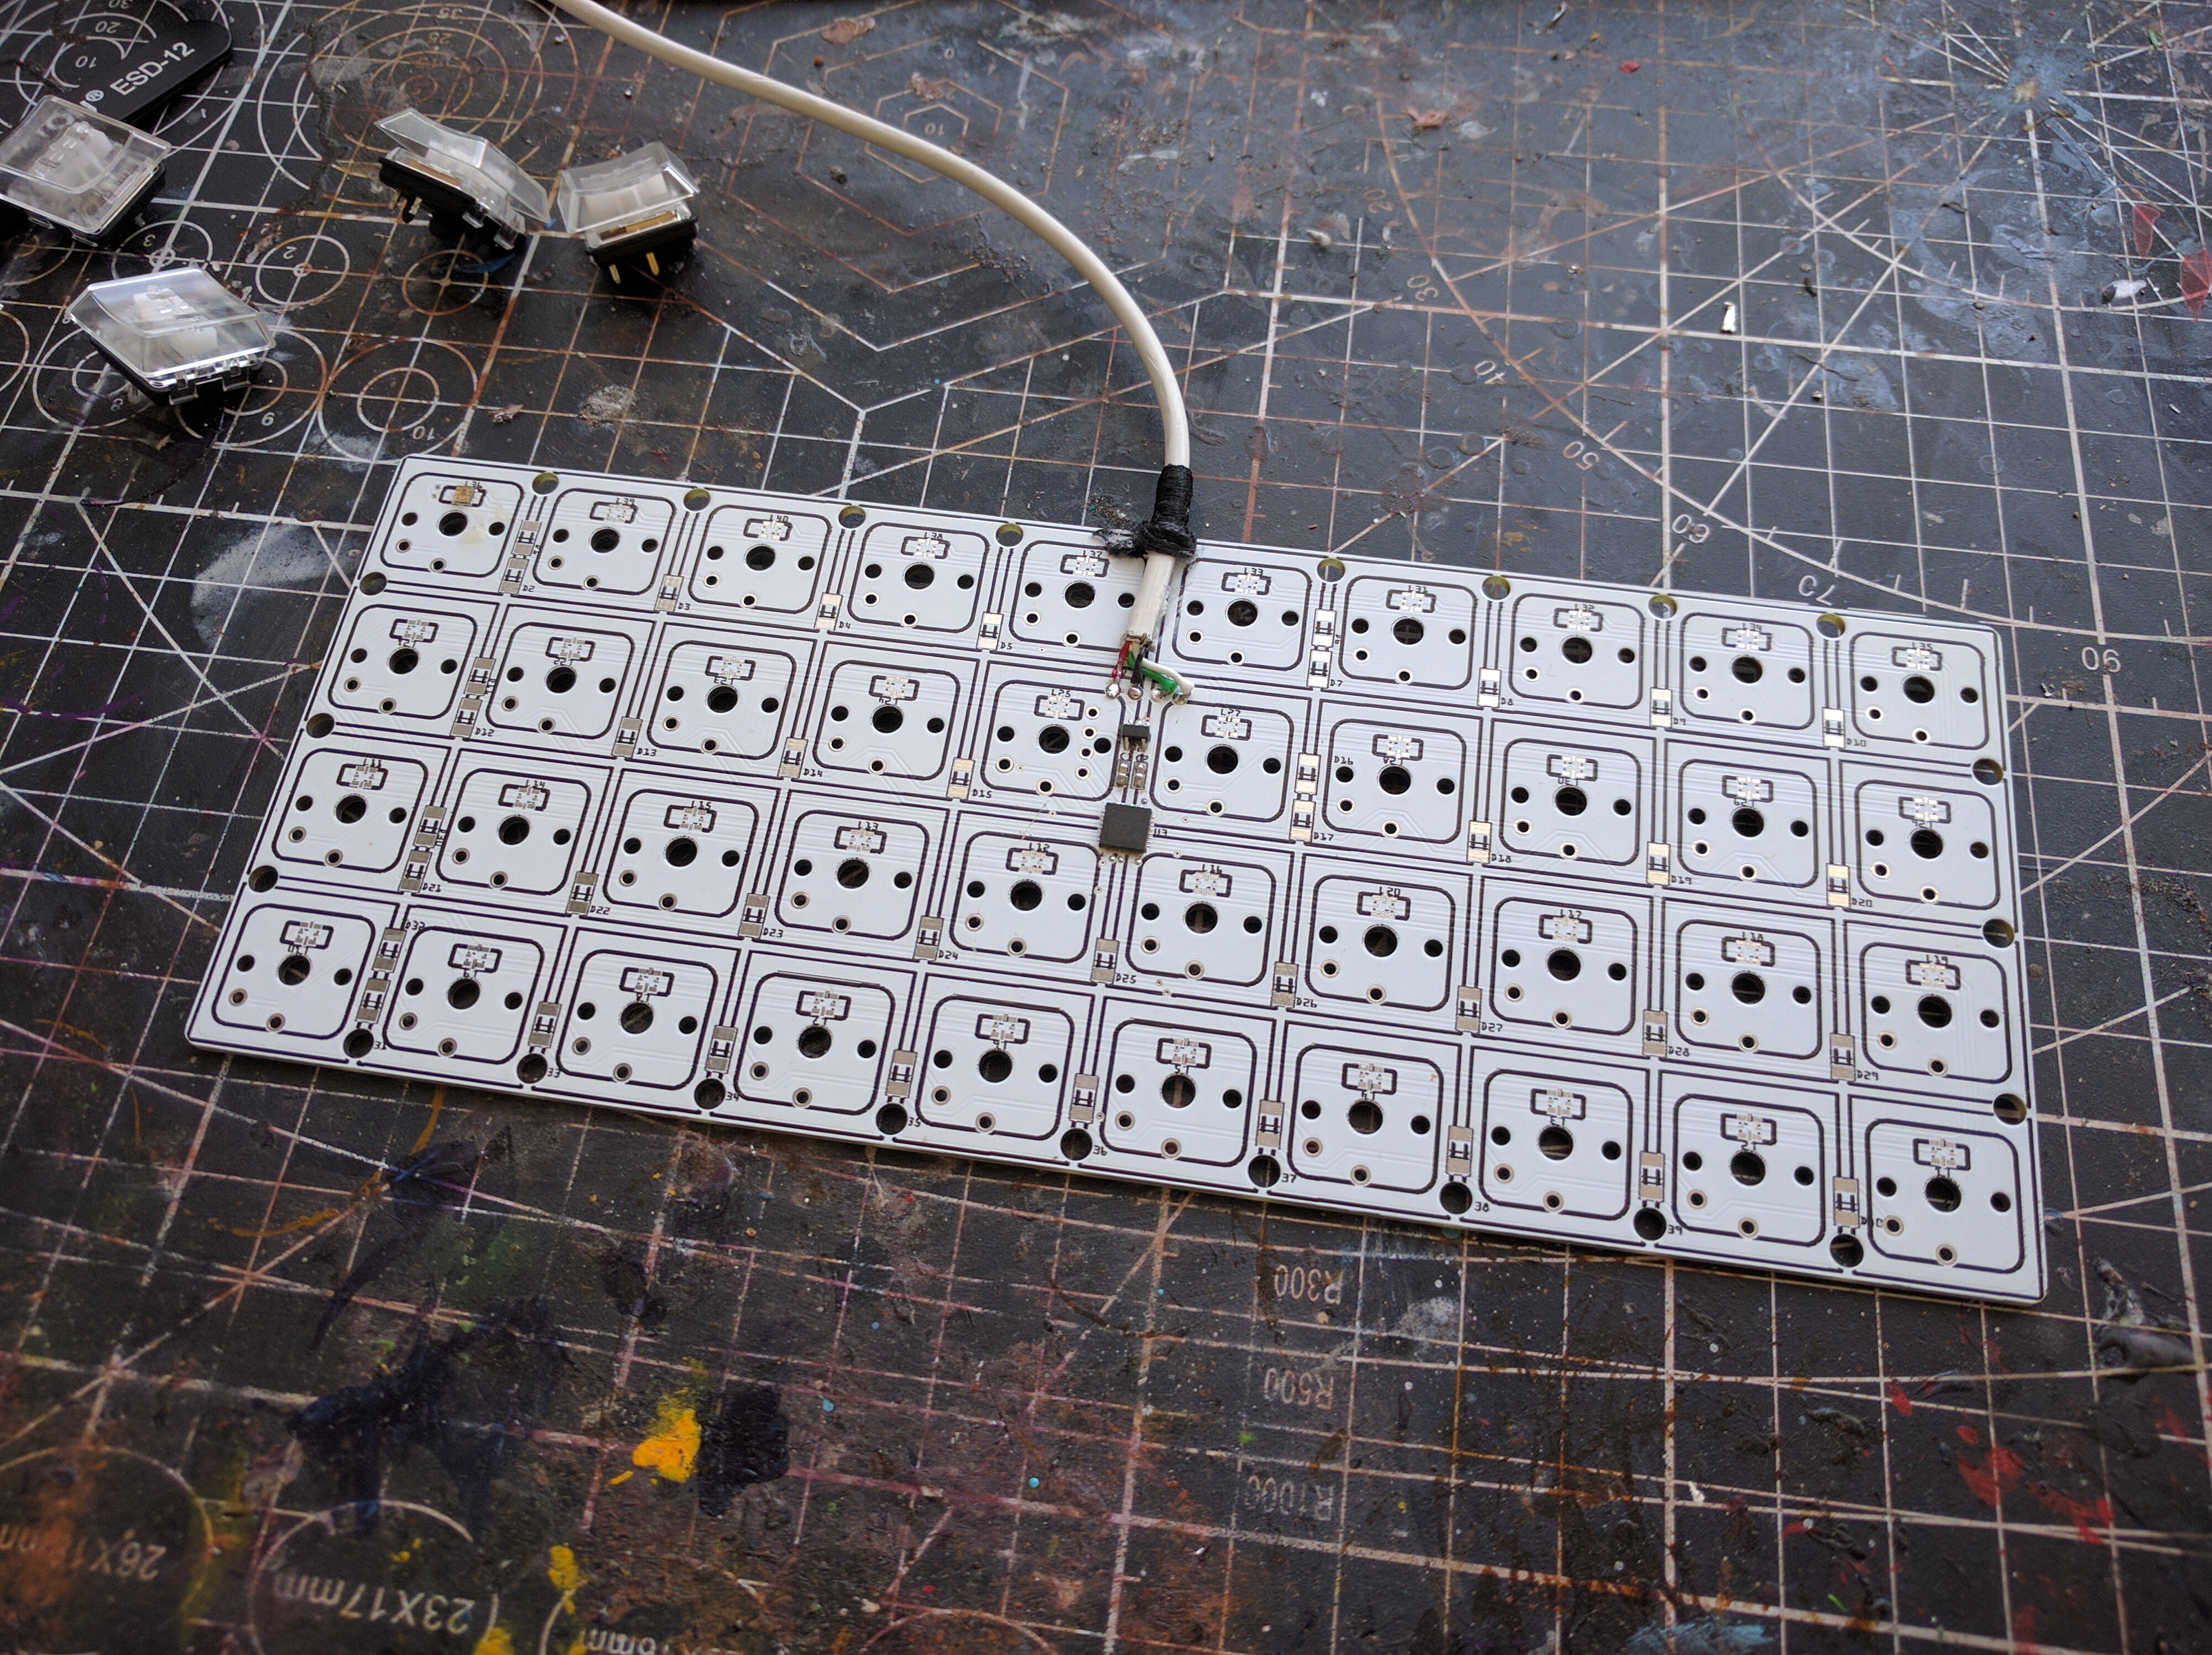
    Then I came back to the smaller one, but with LEDs. Turns out that soldering by hand a string of 40 SMD APA102 LEDs is more work than I anticipated:

    After several hours of looking for shorts, re-soldering, fixing bad joints and generally having a bad time, I finally got them all to light up:

    And no, I have no idea why the last 6 of them are brighter. Probably a glitch in the matrix. You get it? Hahahaha. Anyways...

    Adding the switches and some transparent key caps was just a formality:

    Right now I left it with the keyboard code, but I'm thinking I could use it as a macro keyboard instead, with each key just sending a unique key combination when pressed. And of course with some fancy LED animations. But that's just all code.

    I was considering putting those PCBs on Tindie as kits, with all the elements except switches and cable already soldered, but after debugging the LEDs, I think I will pass on that. I might do it with the bigger one without the LEDs, though. I wonder if there would be any interest in that?

  • Final Code

    deʃhipu09/11/2020 at 15:17 0 comments

    In the process of moving the shift keys around, I have simplified the code somewhat, made it better at handling some corner cases, and fixed some bugs. Just in case someone wants to make a similar build, I'm putting it below. In the future it might grow into a proper CircuitPython library perhaps – then it will get its own repository.

    Read more »

  • Better Shifts and More Variations

    deʃhipu08/30/2020 at 22:23 0 comments

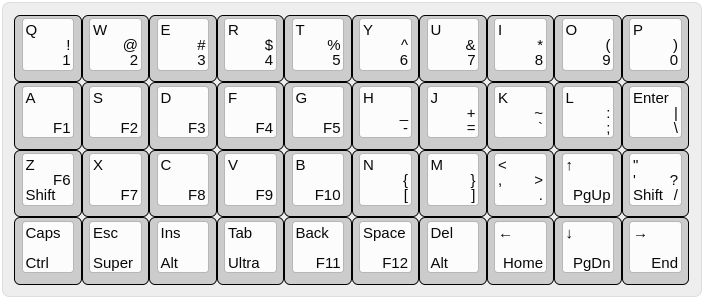
    I'm using this as my main keyboard now, and there are still three issues that I struggle a bit with. The first one is with the shift key — it's too low and only one, which means it's awkward to press it with certain key combinations. Second problem is with the Ctrl key not being in the corner, and the last with the Backspace being in a completely wrong place, next to the Space. I managed to solve the first two today by remembering that I can do hold/tap with any key, not just the bottom row, and by moving the Shift to the Z and Quote keys, moving Ctrl to the freed place, and adding a Super key. The new layout now looks like this:

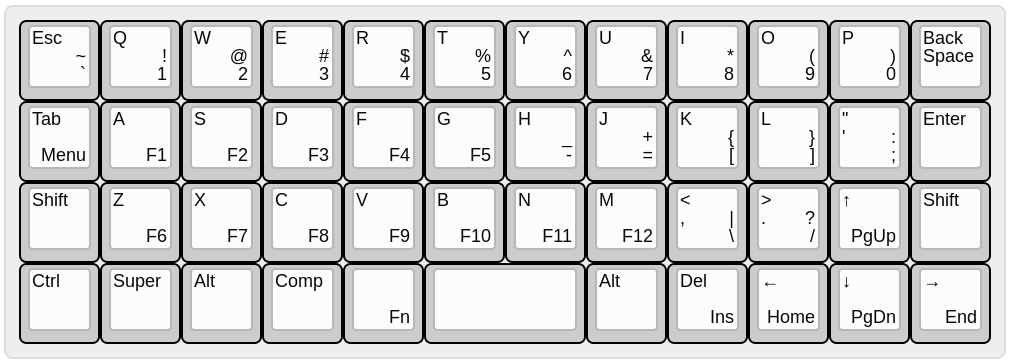
    But before I came up with this, I tried to fix it by adding two more columns for the shifts and other control keys, arriving at something very similar to the Planck layout:

    Note that this keyboard no longer needs the hold/tap mechanism, as it has enough keys for modifiers to have their own dedicated keys. Anyways, I designed and ordered a PCB for this new layout, so I might be trying it later this year:

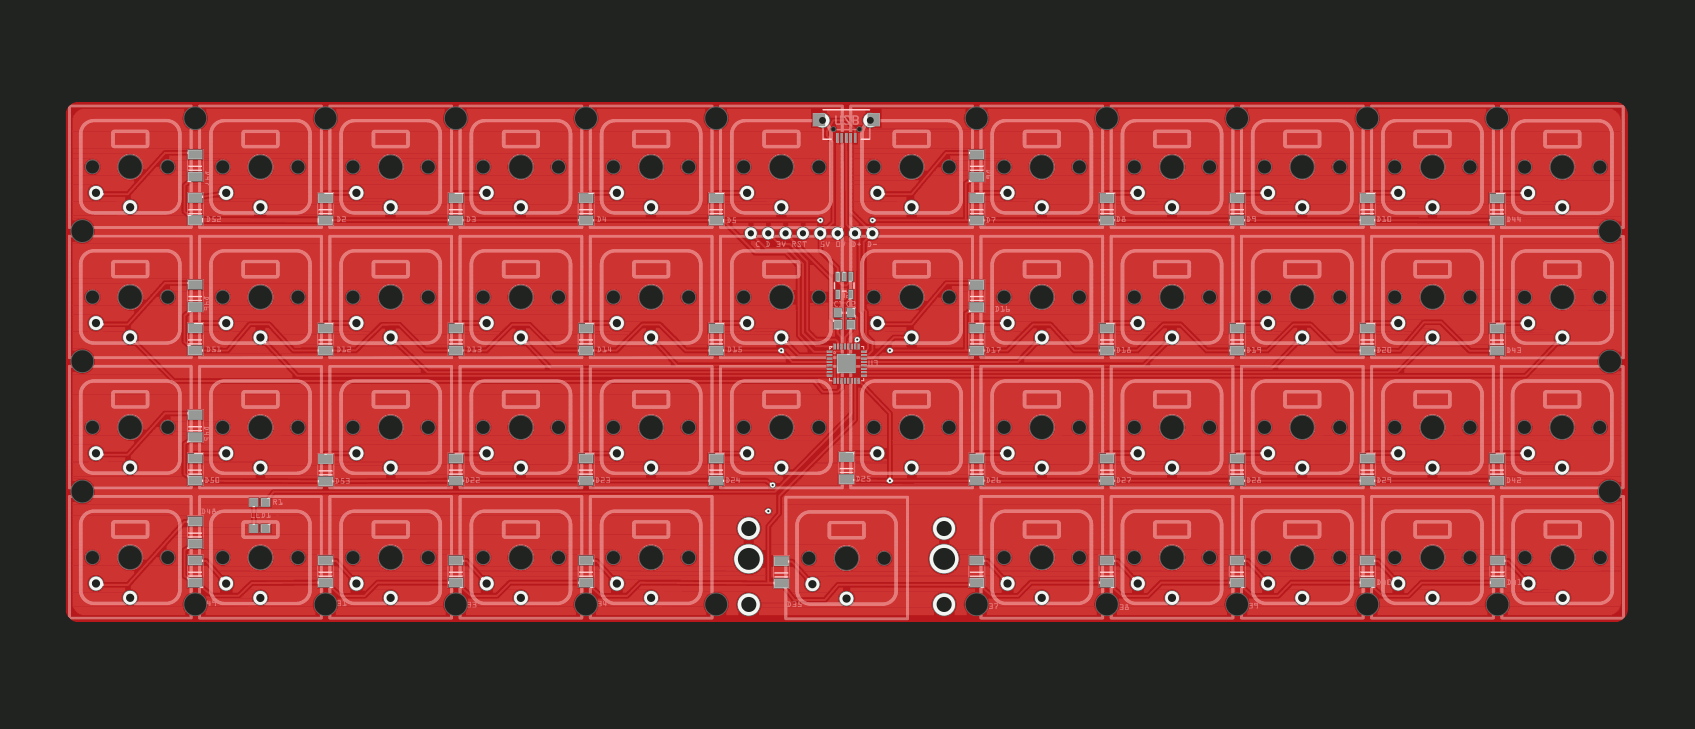
    Another alternative design for this keyboard (which I designed but didn't order yet) is a version with RGB LEDs under every key. Someone observed on Twitter that it would be nice to have a Python-programmable keyboard with lights that you could control with your own program.

    It was a bit of work to fit that string of 40 APA102s on there, but I managed. I'm not sure if I want to actually build that version myself, though — I guess I don't enjoy keyboard lights so much, I'm a boring person. Maybe if it was programmed as a MIDI device, which is perfectly doable with CircuitPython…

  • Small Fixes

    deʃhipu08/28/2020 at 20:38 0 comments

    After using the keyboard for a little bit, I added a few little fixes. I already mentioned moving some of the symbols keys to make them easier to access — the apostrophe is more common in English than the question mark or slash, so it makes sense to make it its own key. I also played a bit with key caps, just to make it a little bit nicer:

    The second fix is the ability to use modifier keys with your mouse. Previously, when you held down a top/hold key, it wouldn't do anything until you released it or pressed any other key with it — then it would decide whether to send the modifier key code or the regular key code. But that makes it impossible to use this keyboard for things like ctrl-clicking or shift-dragging with your mouse. I initially tried to add a timeout to the hold function, but that didn't work very well — too slow for fast mouse clicking. Finally I made it so that it sends the modifier key as soon as you press the hold/tap key down, but if it turns out that you meant to tap it, it will release the modifier key before sending anything else. That way you get some extra spurious modifier key presses, but they normally do nothing, so it should be fine.

View all 17 project logs

Enjoy this project?

Share

Discussions

danjovic wrote 08/08/2021 at 22:18 point

Have you considered used LED colour to indicate which alternate function is active ?

  Are you sure? yes | no

deʃhipu wrote 08/10/2021 at 21:58 point

Yes, switching layers changes the color of all LEDs.

  Are you sure? yes | no

agilum wrote 08/02/2021 at 07:41 point

Hi, keypad module is not in CP7alpha5 for samd21. How did You get it in for Your keybord ?

  Are you sure? yes | no

deʃhipu wrote 08/02/2021 at 08:01 point

I compiled it from main, and made sure to enable it in my board definition.

  Are you sure? yes | no

agilum wrote 08/02/2021 at 08:51 point

is there any instructions available on Adafruit/Discord/CP.org ?

  Are you sure? yes | no

deʃhipu wrote 08/02/2021 at 08:57 point

Sure, the instructions for compiling are here: https://learn.adafruit.com/building-circuitpython/

I use the fluff_m0 board as the base, add CIRCUITPY_KEYPAD = 1 to https://github.com/adafruit/circuitpython/blob/main/ports/atmel-samd/boards/fluff_m0/mpconfigboard.mk  

  Are you sure? yes | no

[deleted]

[this comment has been deleted]

deʃhipu wrote 09/11/2020 at 12:42 point

A dla mnie jest w sam raz, własnie dlatego, że mała wielkość uniemożliwia mi przesuwanie rąk i wymusza poprawne pisanie.

Twoje pomysły są bardzo dobre, na pewno będę je brał pod uwagę kiedy tylko będę pisał własny nowy system operacyjny na dedykowany własny komputer — wtedy będą jak znalazł.

  Are you sure? yes | no

AVR wrote 08/30/2020 at 22:03 point

love your concept of low profile mech keyboards, these will be great for all the open source laptops and luggables people have been building. Also that PCB layout is tight and clever, great work!

  Are you sure? yes | no

deʃhipu wrote 08/30/2020 at 22:27 point

Thank you. I was actually considering using this in a "cyberdeck" build, but then it turned out to be so comfortable that I actually use it as my main keyboard now.

  Are you sure? yes | no

AVR wrote 08/30/2020 at 23:13 point

I like the sound of that! Might have to order a board and solder one up myself.

  Are you sure? yes | no

deʃhipu wrote 08/31/2020 at 08:00 point

It might be just me, but being ortholinear and having no number row helps me practice touch-typing.

  Are you sure? yes | no

danjovic wrote 08/08/2020 at 00:13 point

Nice arrangement !

  Are you sure? yes | no

Similar Projects

Does this project spark your interest?

Become a member to follow this project and never miss any updates