Ben Steer
What’s in a lab?
I had to make some decisions as to what tools and components would be crucial to making this thing as useful as possible. There are quite a few tools that are versatile enough to be a part of any laboratory, and there are some great lists out there, such as EEVBlog’s guide to putting together a cheap lab. However, I’ll tailor some of the components specifically for robotics.
Here’s a summary of the key bits and pieces that will go into the lab:
- Powered tools: Soldering station, multimeter, PC-based oscilloscope, variable-voltage power supply, Li-ion battery charger, flexible LED lamp.
- Hand tools: Cutting/crimping tools, tweezers, screwdrivers, calipers, strippers, solder/desolder accessories, safety glasses.
- Components: Resistors, capacitors, LEDs, op amps, transistors, motor controllers, stepper drivers, regulators/bucks, fasteners, perfboards, breadboards, wire, microcontrollers, etc.
This sounds like a recipe for a really good time. But how will we fit all this into a suitcase without making a complete mess?
Laboratory layout
Our lab-in-a-box will consist of three main compartments: a chest of drawers for electrical components, a big wall to attach tools with velcro straps, and a shelf with a powerboard for the bigger equipment. The compartments will be hinged together, so they can open out from each other like doors, and will look a little something like this:
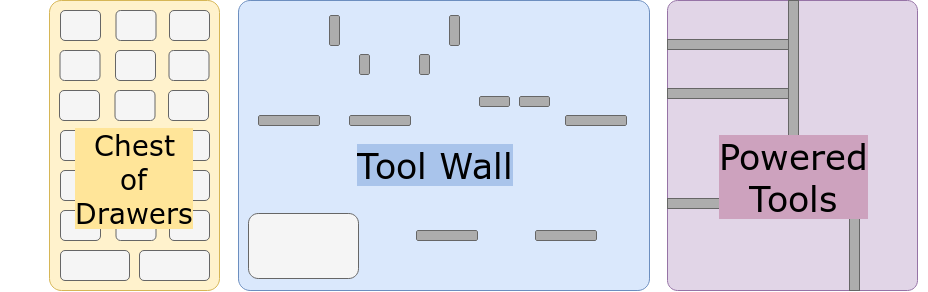
Drawers in the left door, tools in the back, power in the right door. Sounds like a plan.
Building the boxes
After buying all the tools and components, I took some measurements, did some arranging and worked out the best dimensions for the lab boxes in order to keep them small.
In case I ended up buying completely new tools or wanted to rearrange them, I decided to house the tools/components on insertable backboards. These would screw into the back panel of the lab boxes using some threaded inserts (I’ll show you what these look like in a second).
Cutting it up
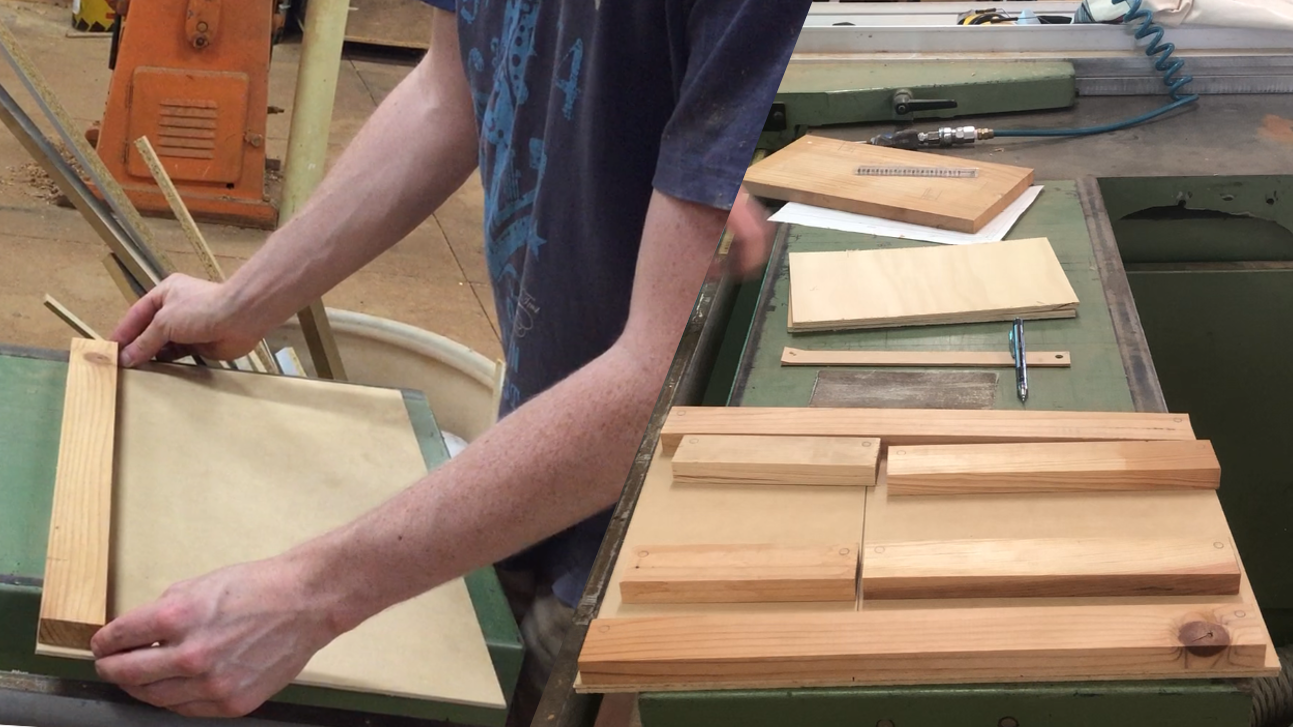
Time to hit the wood shop! The panels comprising the box were cut mostly from plywood, with some solid pine strips on the back panels for additional strength, and to house the threaded inserts. I used a vertical arm saw to make the cuts, which was ideal for the job.
Glue and screw

With all the pieces cut, the next step was to predrill, glue and screw our pine strips to our back panels. I used PVA glue and a cordless drill for the job. Sometimes you can avoid needing to clamp your glued pieces for hours if you screw them tightly together!
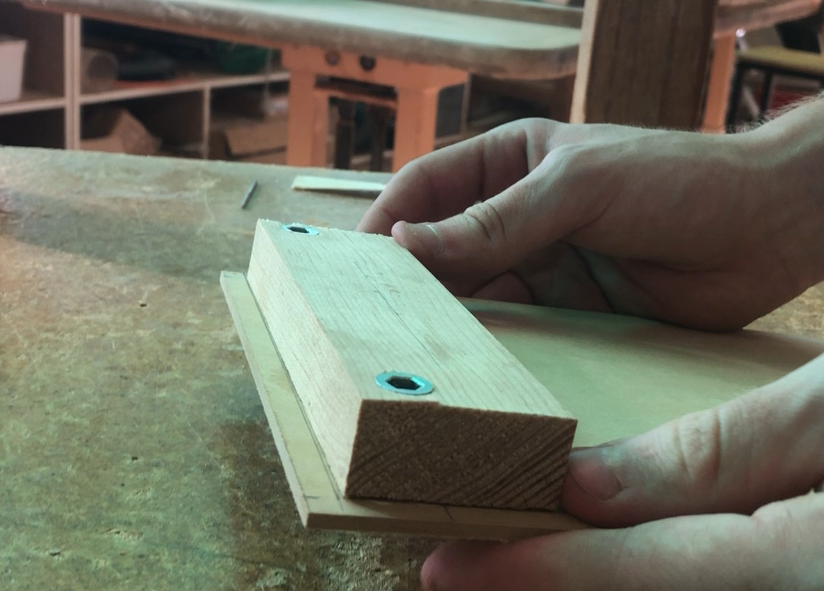
In the picture above, you can see the M6 threaded inserts (sometimes called “screw-in” inserts for timber) in the pine blocks, which I installed before attaching them to the back panel. These simply require a predrilled hole, which you then screw the insert into.
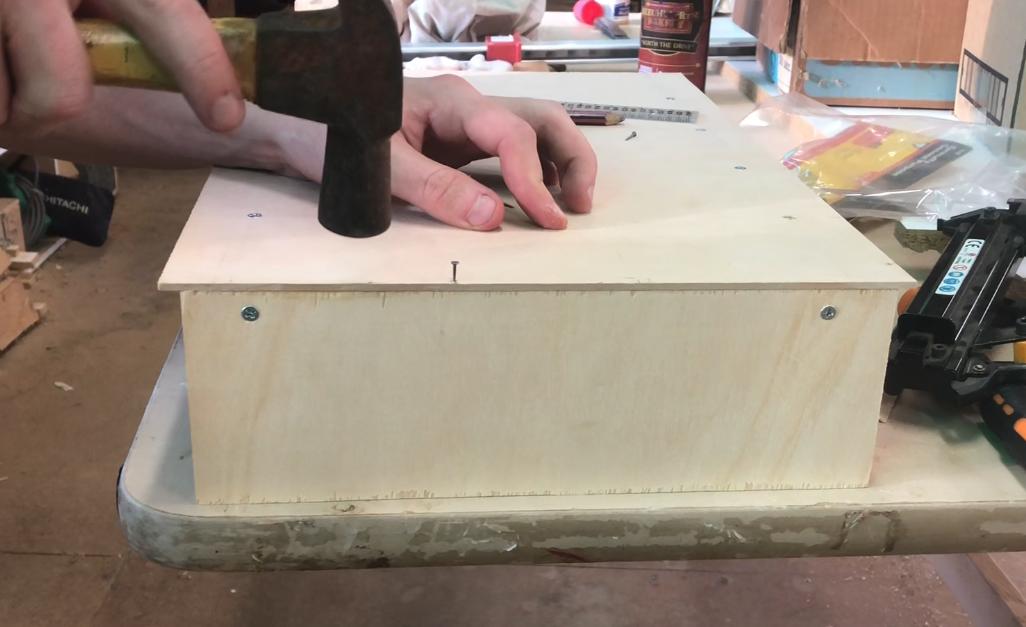
With the backboards finished, I then glued and screwed the side and top panels of each box. These were screwed into the pine blocks from the side, and fastened to the thin back panel with small tack nails.
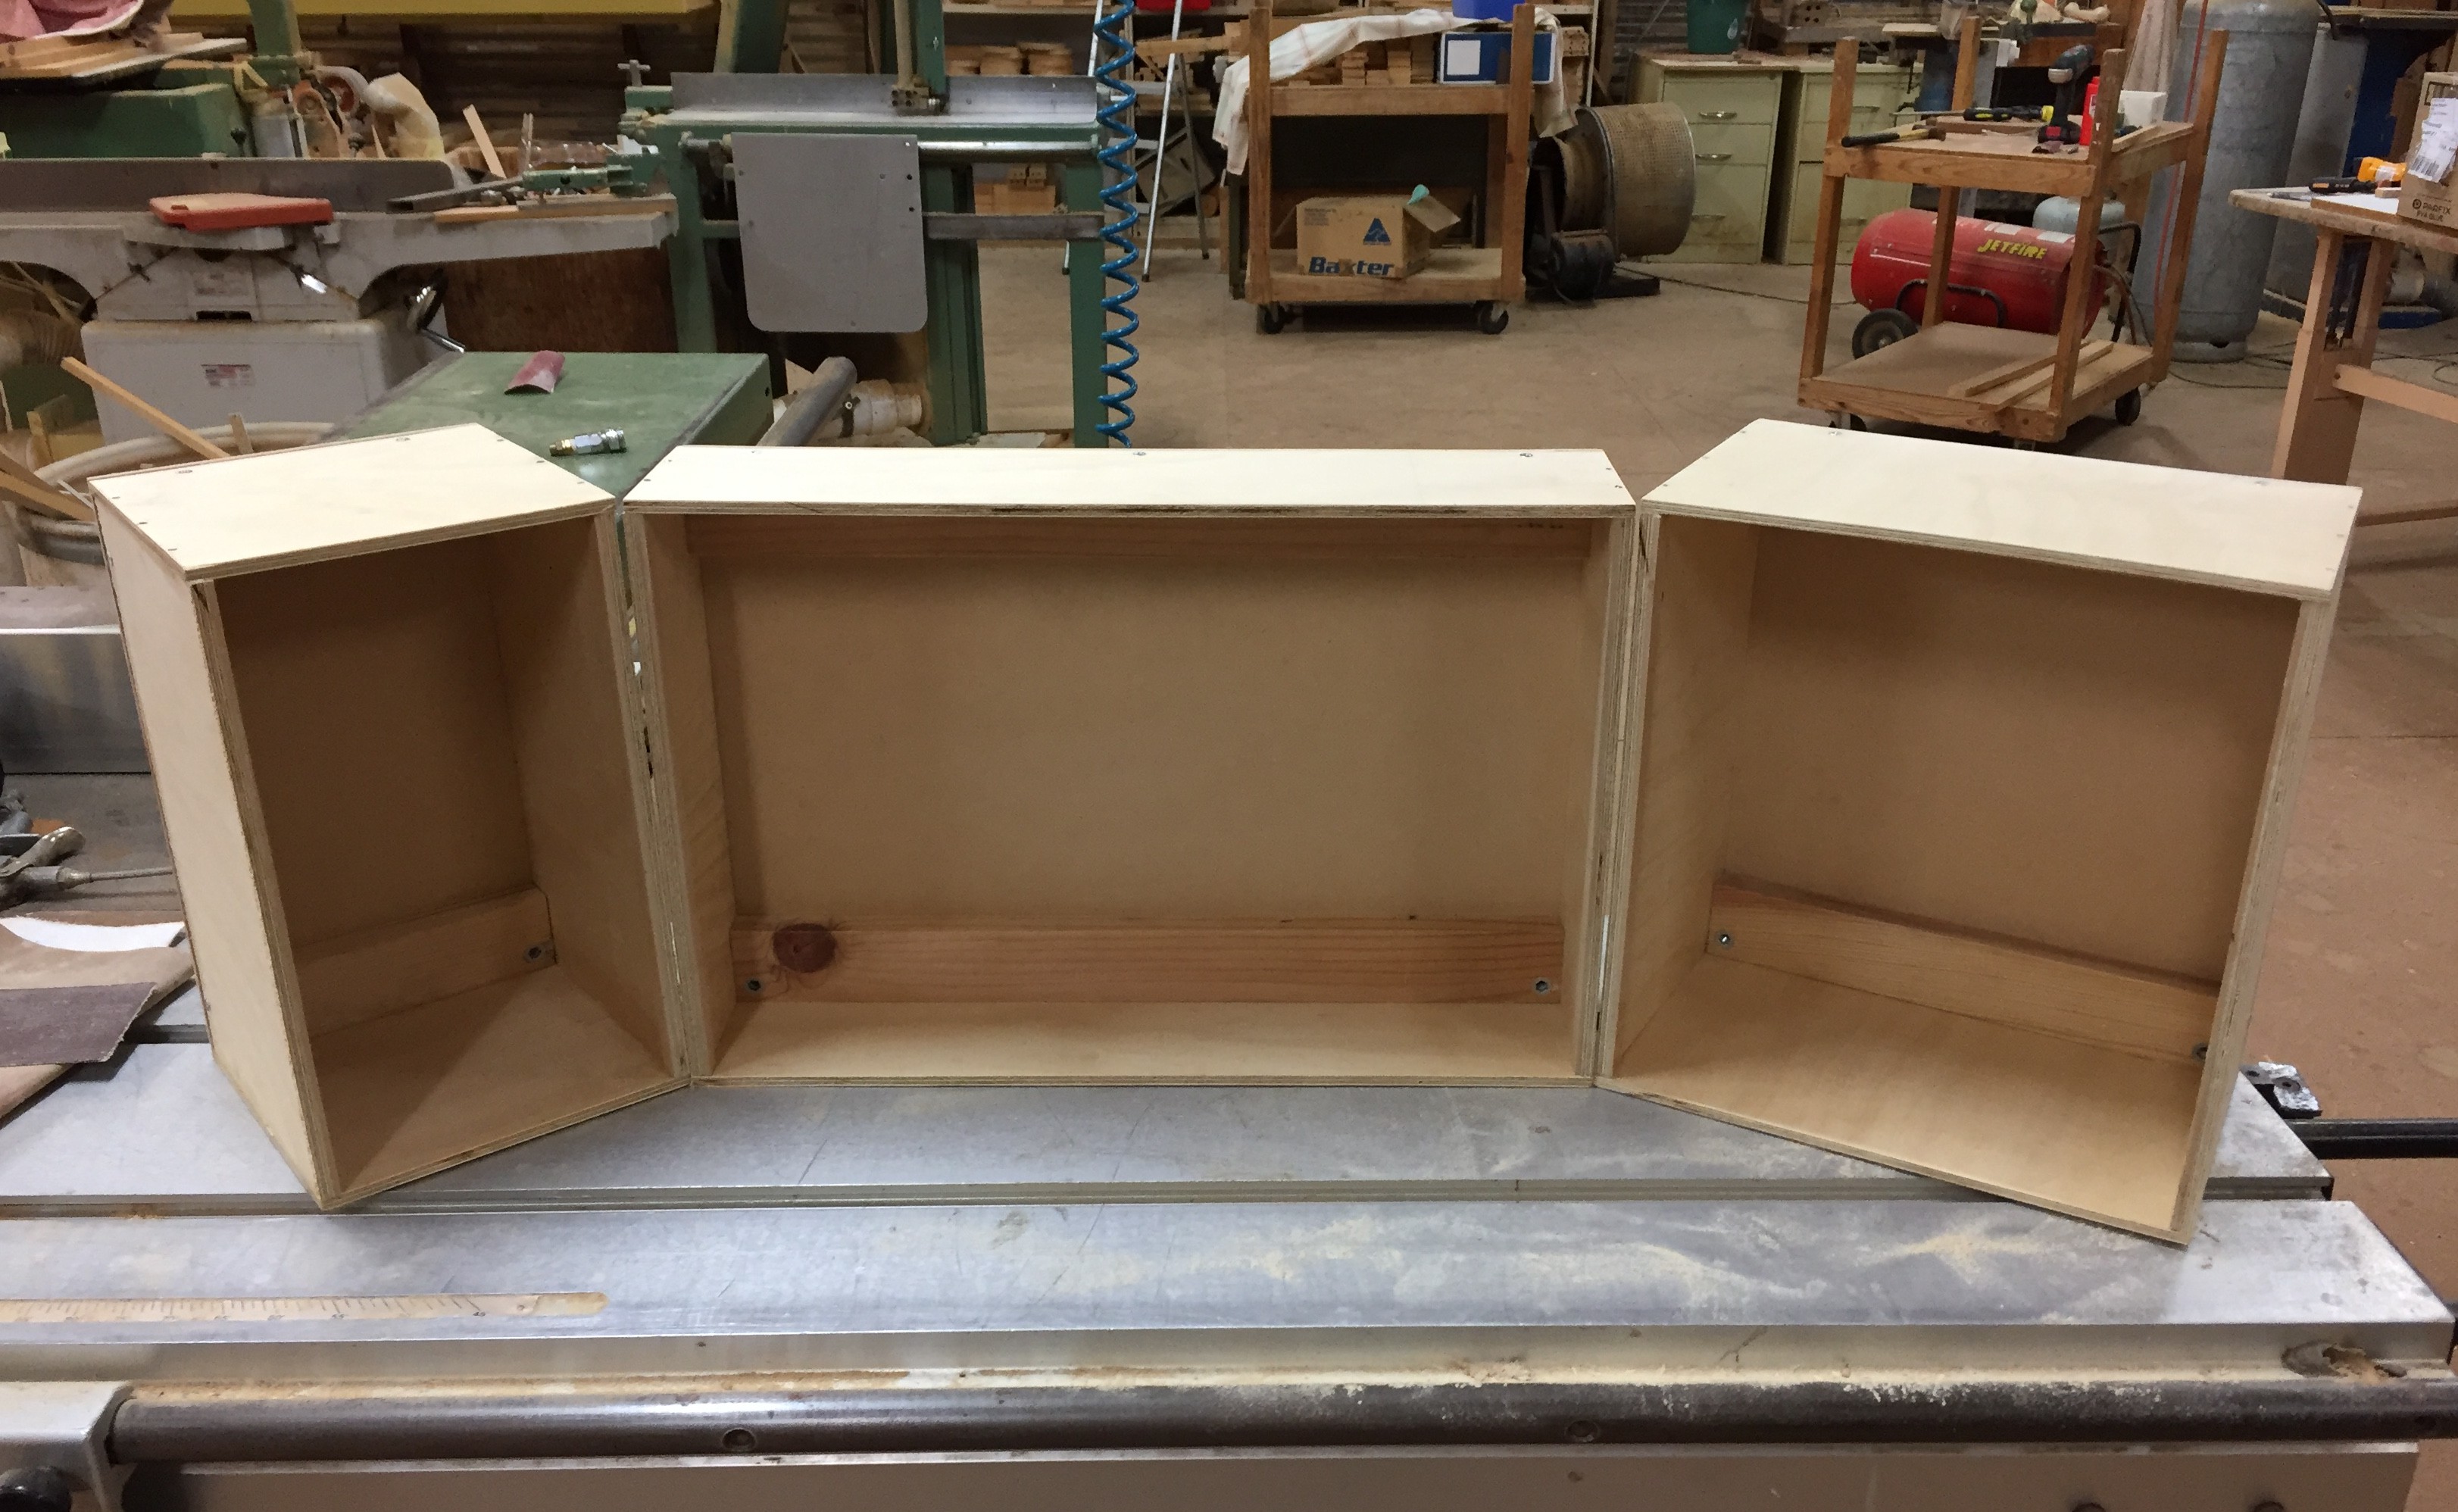
There you have it, three boxes, ready to be turned into one! However, before we get carried away with installing hinges, let’s improve the look.
Focusing on aesthetics
As much as we all like wooden boxes, I think they leave a bit to be desired in the aesthetics department. I decided to give it a vintage look, and upholster it with some brown vinyl (faux leather).
Making patterns
If you’ve ever wrapped a birthday or christmas present, then you’ll be at least a little familiar with what this process involves. I am most definitely an amateur at upholstery, but there’s not much on the line here.
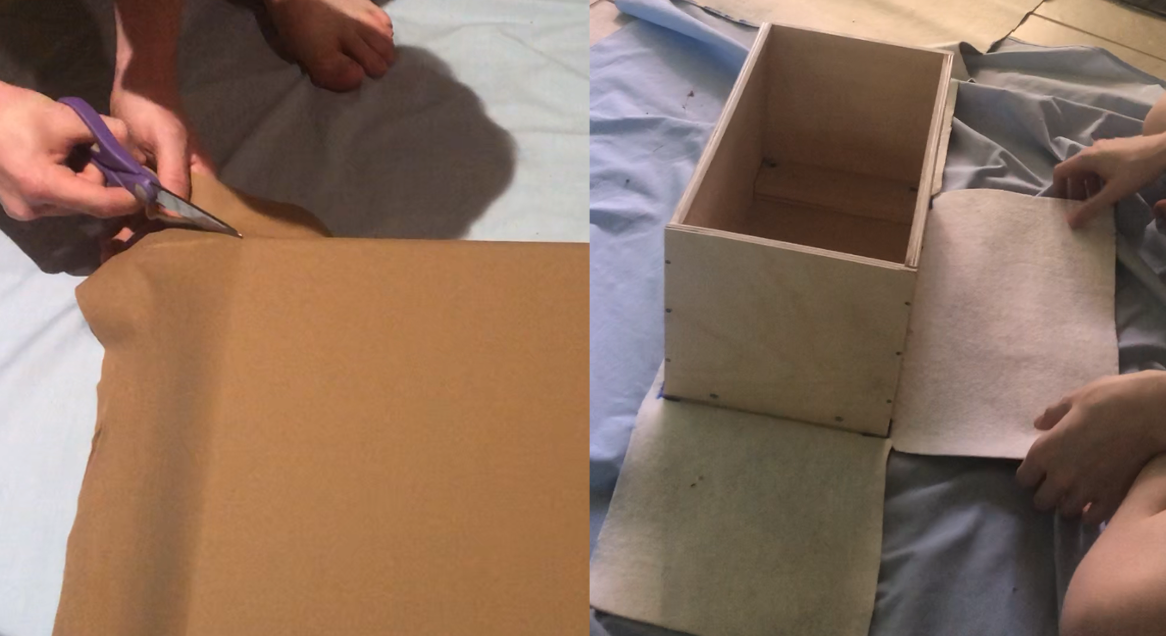
I went ahead and cut out some squares of vinyl, allowing a little excess size around the border so I could fold the edges back over themselves later. Folding the vinyl at the edges tends to look better, and in my case, hides the fluffy, white underside of the material. I also cut squares out of the corners; otherwise the material...
Read more »
 Paul McClay
 johnowhitaker
 CriptasticHacker