 Philip Ian Haasnoot
Tools used to produce this solar generator:
- Battery Spot Welder Setup:
- Welder: Sequre SQ-SW1
- Power Source: 11.1V 80C LiPo Battery Pack
- XT90 Connector
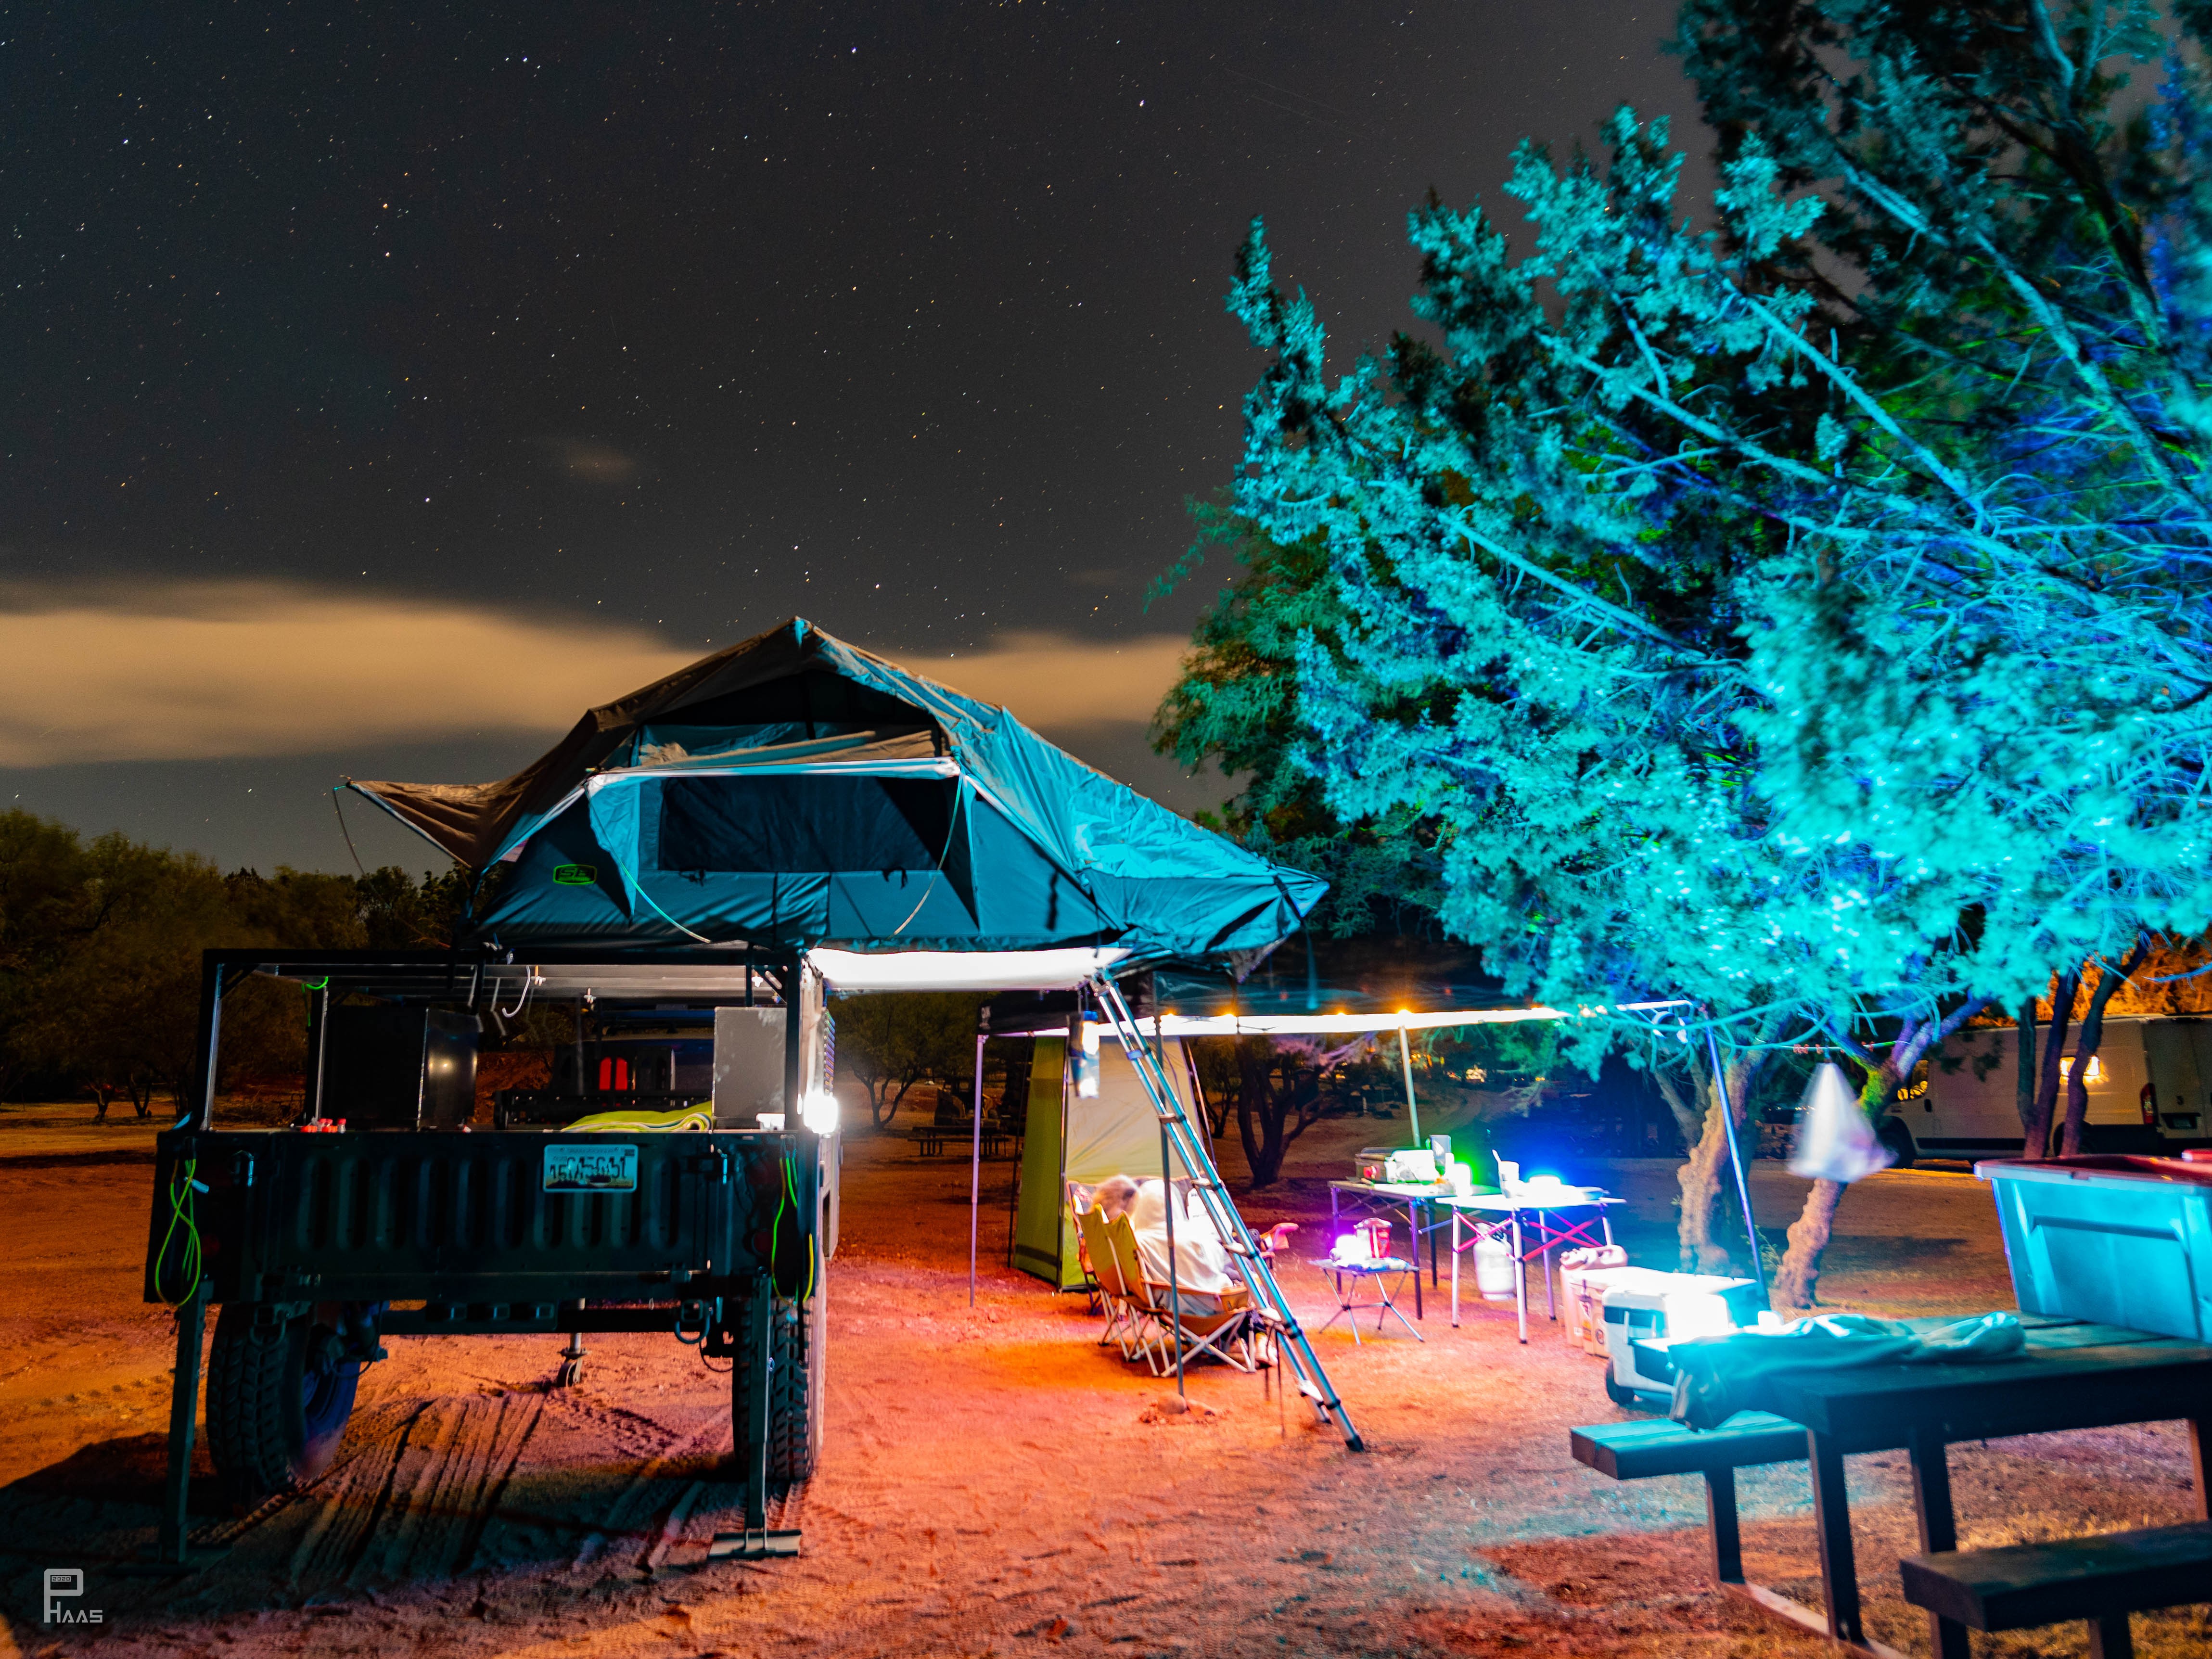
A 2.5kW solar generator designed for overlanding and outdoor adventures in mind.
Already have an account? Log in.
To make the experience fit your profile, pick a username and tell us what interests you.
Tools used to produce this solar generator:
I know most of the Solar generator builds test their rig with some type of high current draw heat lamp or space heater, but being in Arizona I didn't have access to a space heater. I do have access to some heavy equipment and while the generator was not able to start the table saw, it was more than capable of running the 1 hp drill press.
For a low voltage test I brought the solar generator up to Sedona for our most recent camping trip. No issues charging camera/drone gear, running lights, and powering the diesel tent heater. After 3 days and 2 nights of camping we were sitting at 85% charge, although I am curious to do some extended testing with the diesel heater to see how many nights this generator will be able to keep us warm and toasty.
I've always been an avid outdoorsman drawn to camping and nature; After moving from NY to Arizona I fell in love with the night sky and began venturing deeper into the wilderness to capture it as best as I can. Keeping my gear charged on extended camping trips was usually done with a small foldable solar panel, but as my equipment list grows so does my need for off-grid energy. Chasing meteorite showers, eclipses, wildfires, and the occasional blooming cactus has been very therapeutic. I'm excited to begin taking deep-sky nebula photos now that I have this solar power station along for the ride.
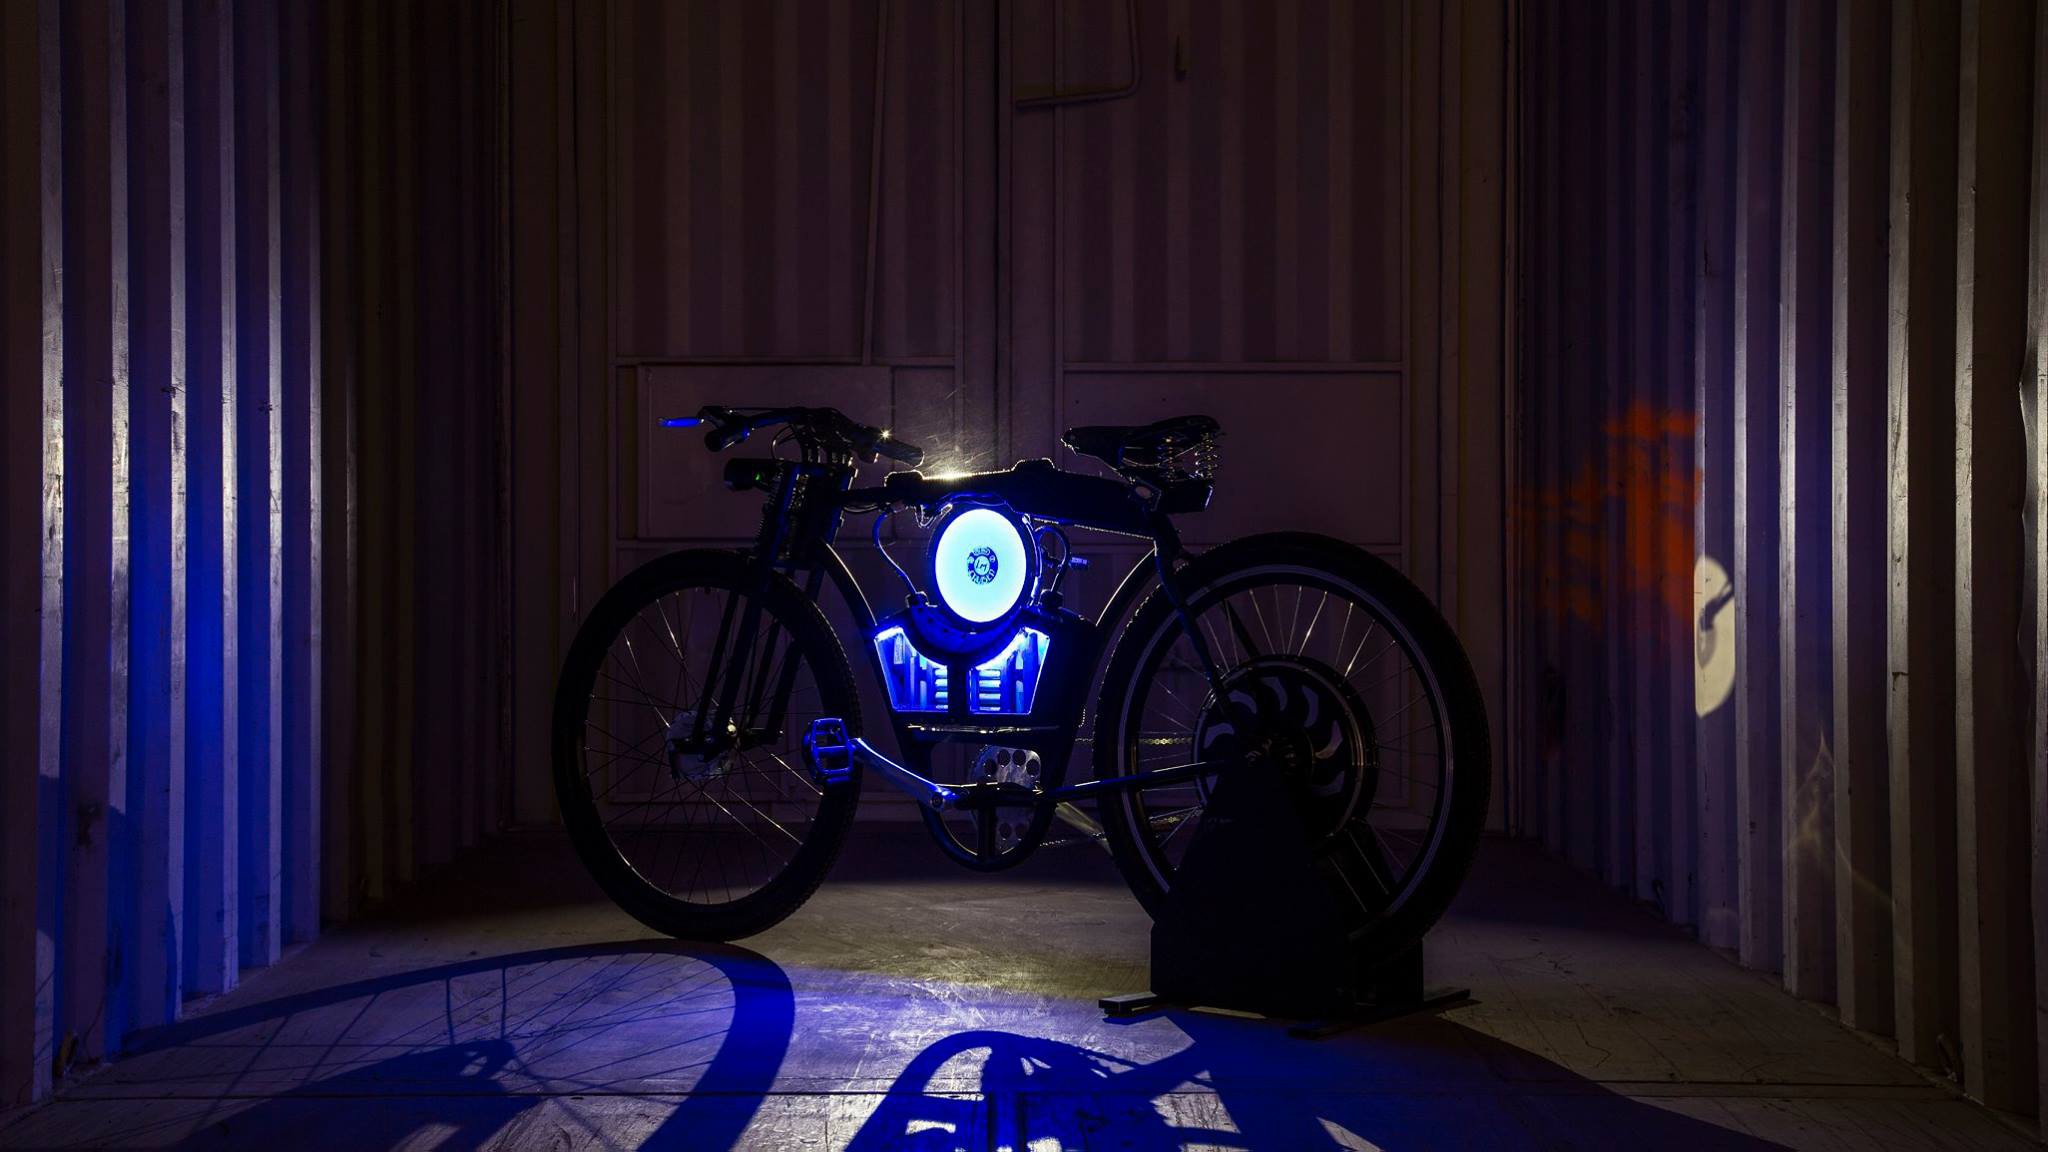
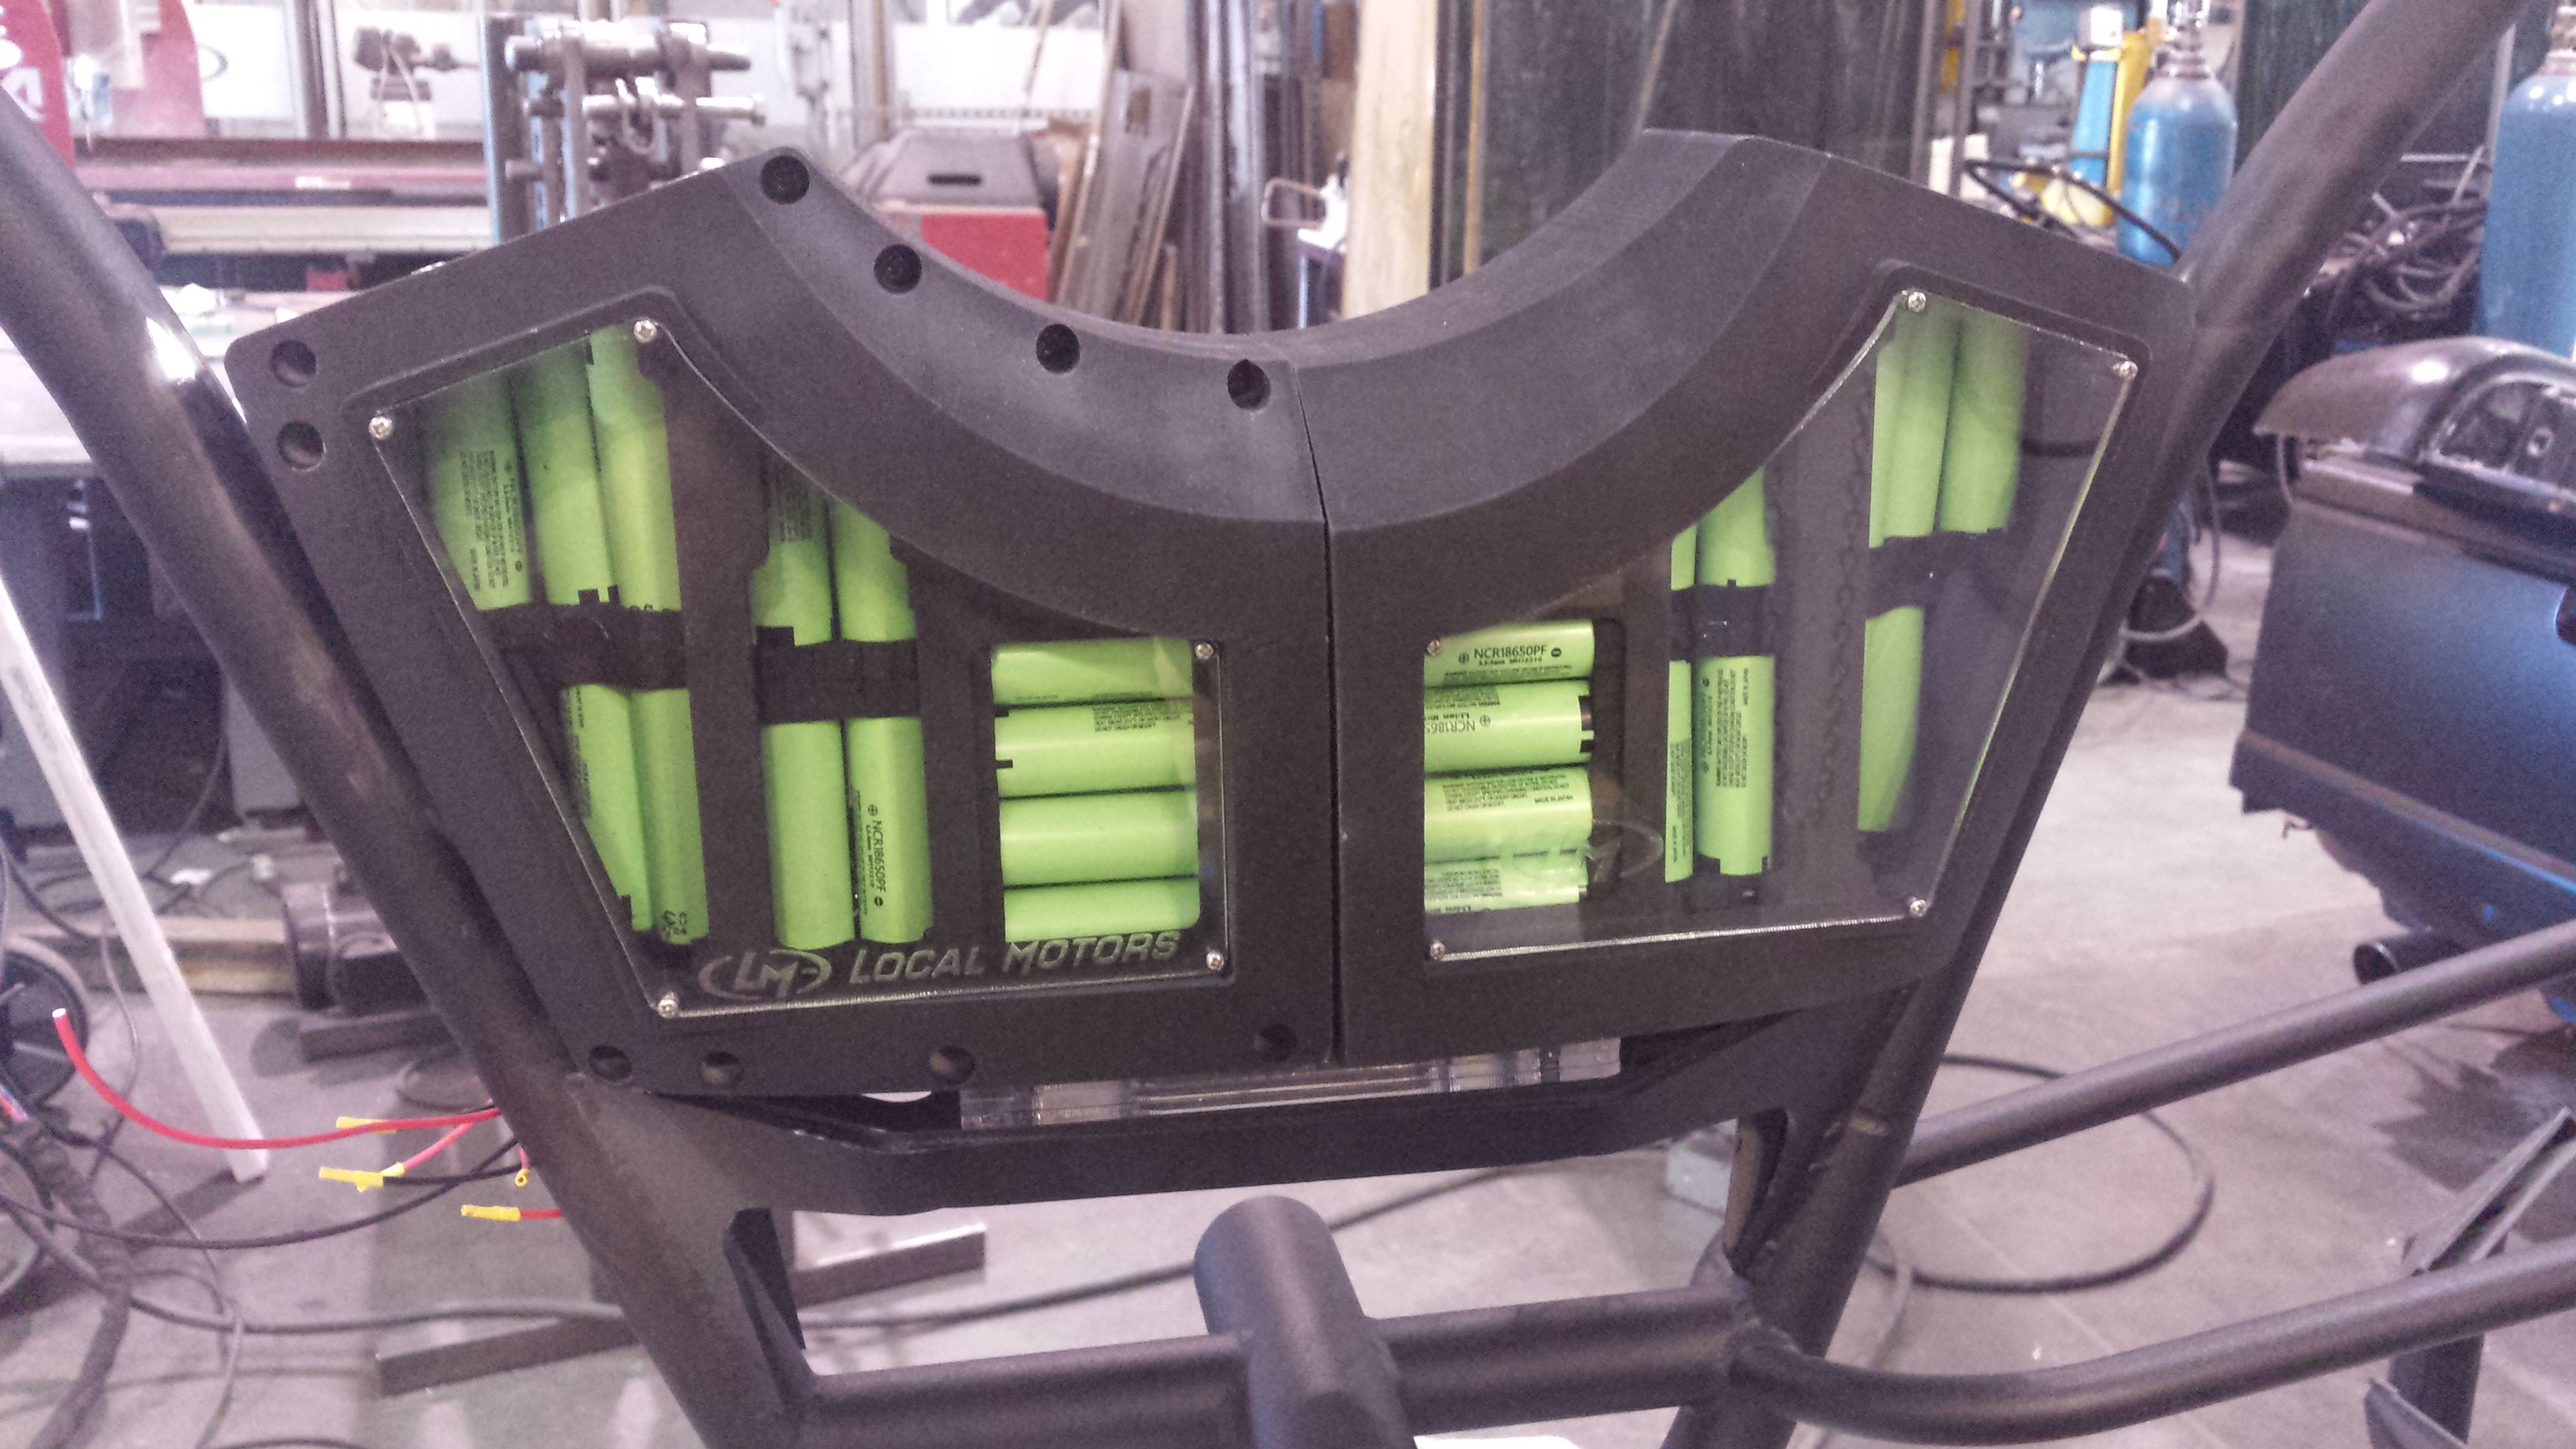
The first company I worked for when I moved out to AZ won't be named because frankly I don't have anything nice to say about them. However one of the projects I was tasked with was putting together an E-bike version of what they called the "Cruiser." (Huge marketing budget as you can tell by the name). That involved designing a lithium pack that would fit within a predefined bike frame, the convoluted pack was shoehorned into a very expensive SLS case. The batteries were soldered to the nickel strips as we discovered far too late that the battery spot welder we had purchased would just not cut it. It was ready in time for SEMA that year but it was such a painful process I did not built another pack based on 18650s for a looooong time.
Bear with me while I organize files and add build-logs and steps for Gen 1 of this project.
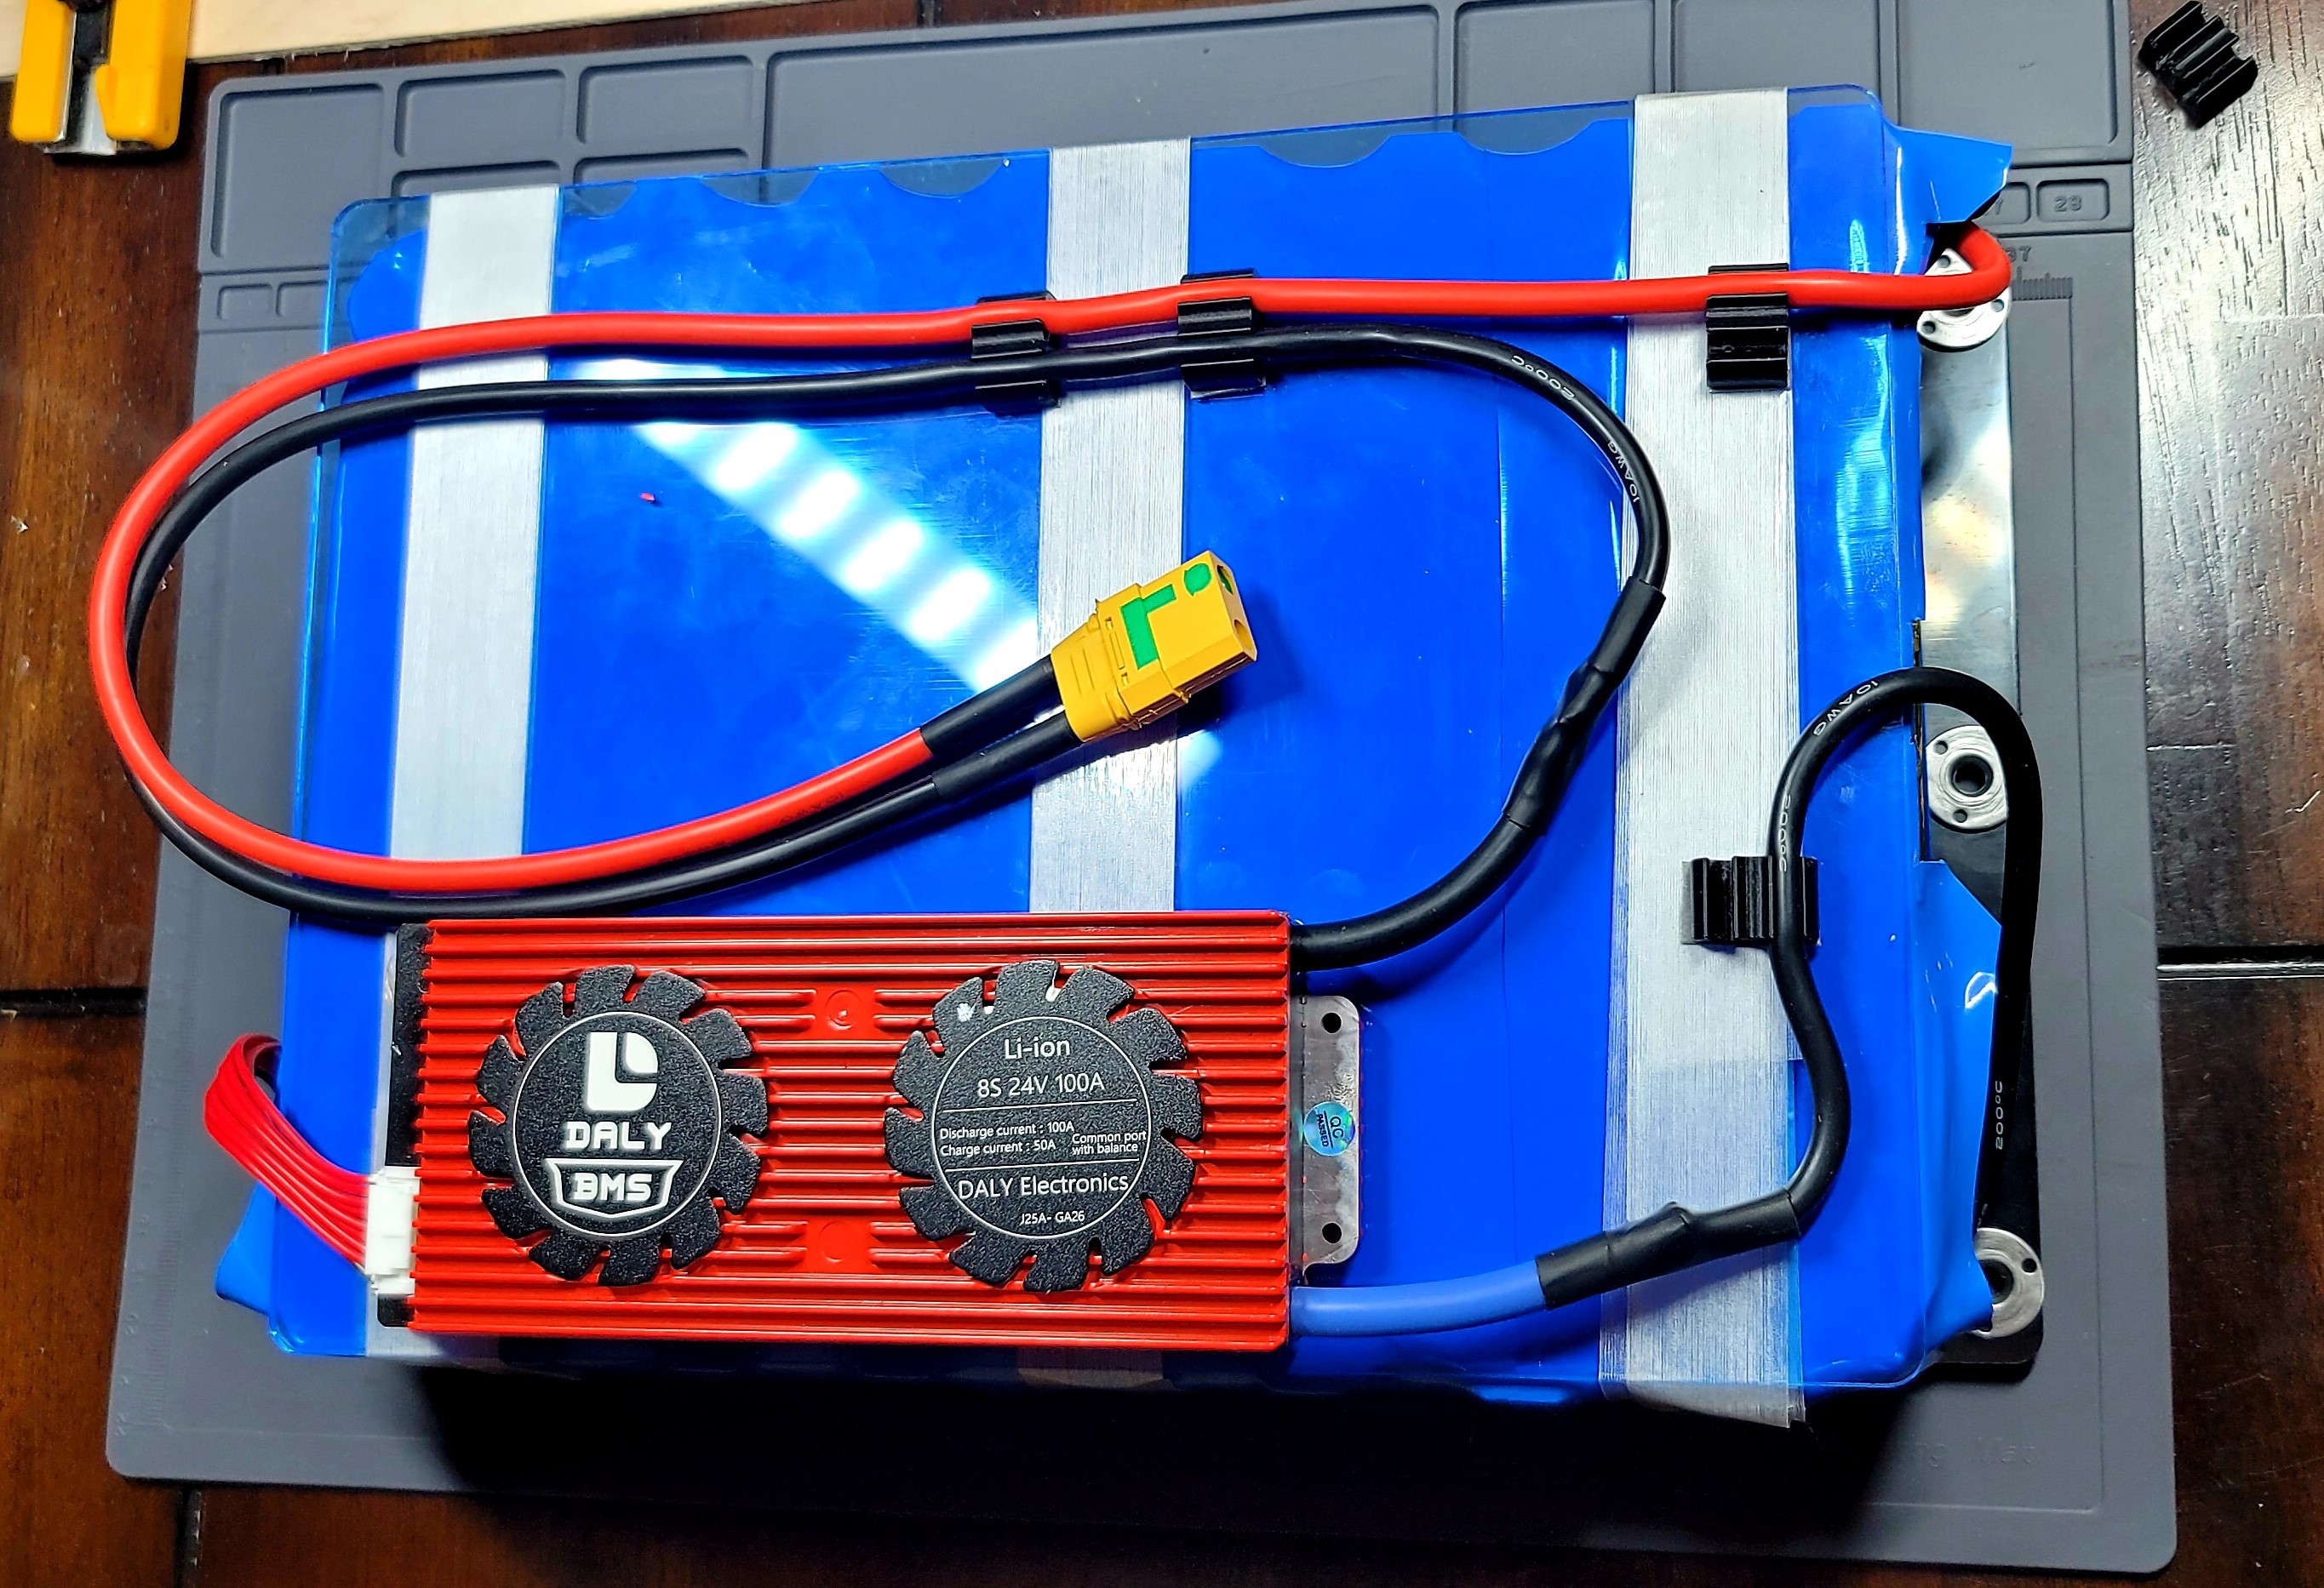
Before starting a pack build yourself I would highly recommend you finish all of your ongoing projects that you can, because this will take a huge percentage of your focus. First a finished pack photo because I know many of you won't read to the end:
I sourced my cells from used modem batteries for the prototype (From Battery Hookup), at $0.40 per cell for 2200mAh cells it was an economical way to test the platform and work my way up to the full 2.5kW pack with custom electronics. Most of the cells I salvaged came in at 2000-2100mAh so the prototype pack is around 1.7kW currently. Any cell that tested below 2000mAh was put to the side for future projects. If you aren't in a mad dash to build one of these I would keep an eye out on the following websites for a good deal on new cells. The time it takes to separate the modem batteries, charge each cell, and test each cell adds up very quickly; While I love the idea of repurposing used laptop or modem batteries, getting your hand on used cells can be expensive with groups catching on to their use. I had a few companies offer to let me buy used laptop batteries by the pound, others charge you per cell.
Battery Hookup: https://batteryhookup.com/
Power to Spare: https://www.power2spare.net/
For the next pack I am planning to jump back up to 8S 30P with cells testing ~3000mAh, which will bring the pack to 2.5-2.6 kW.
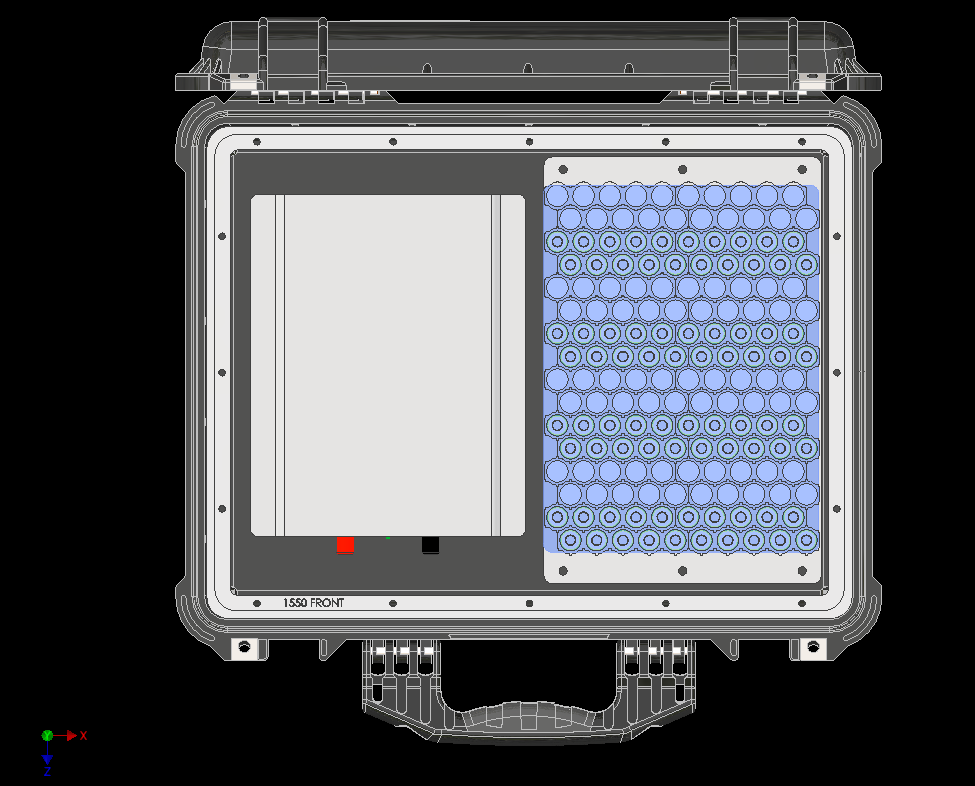
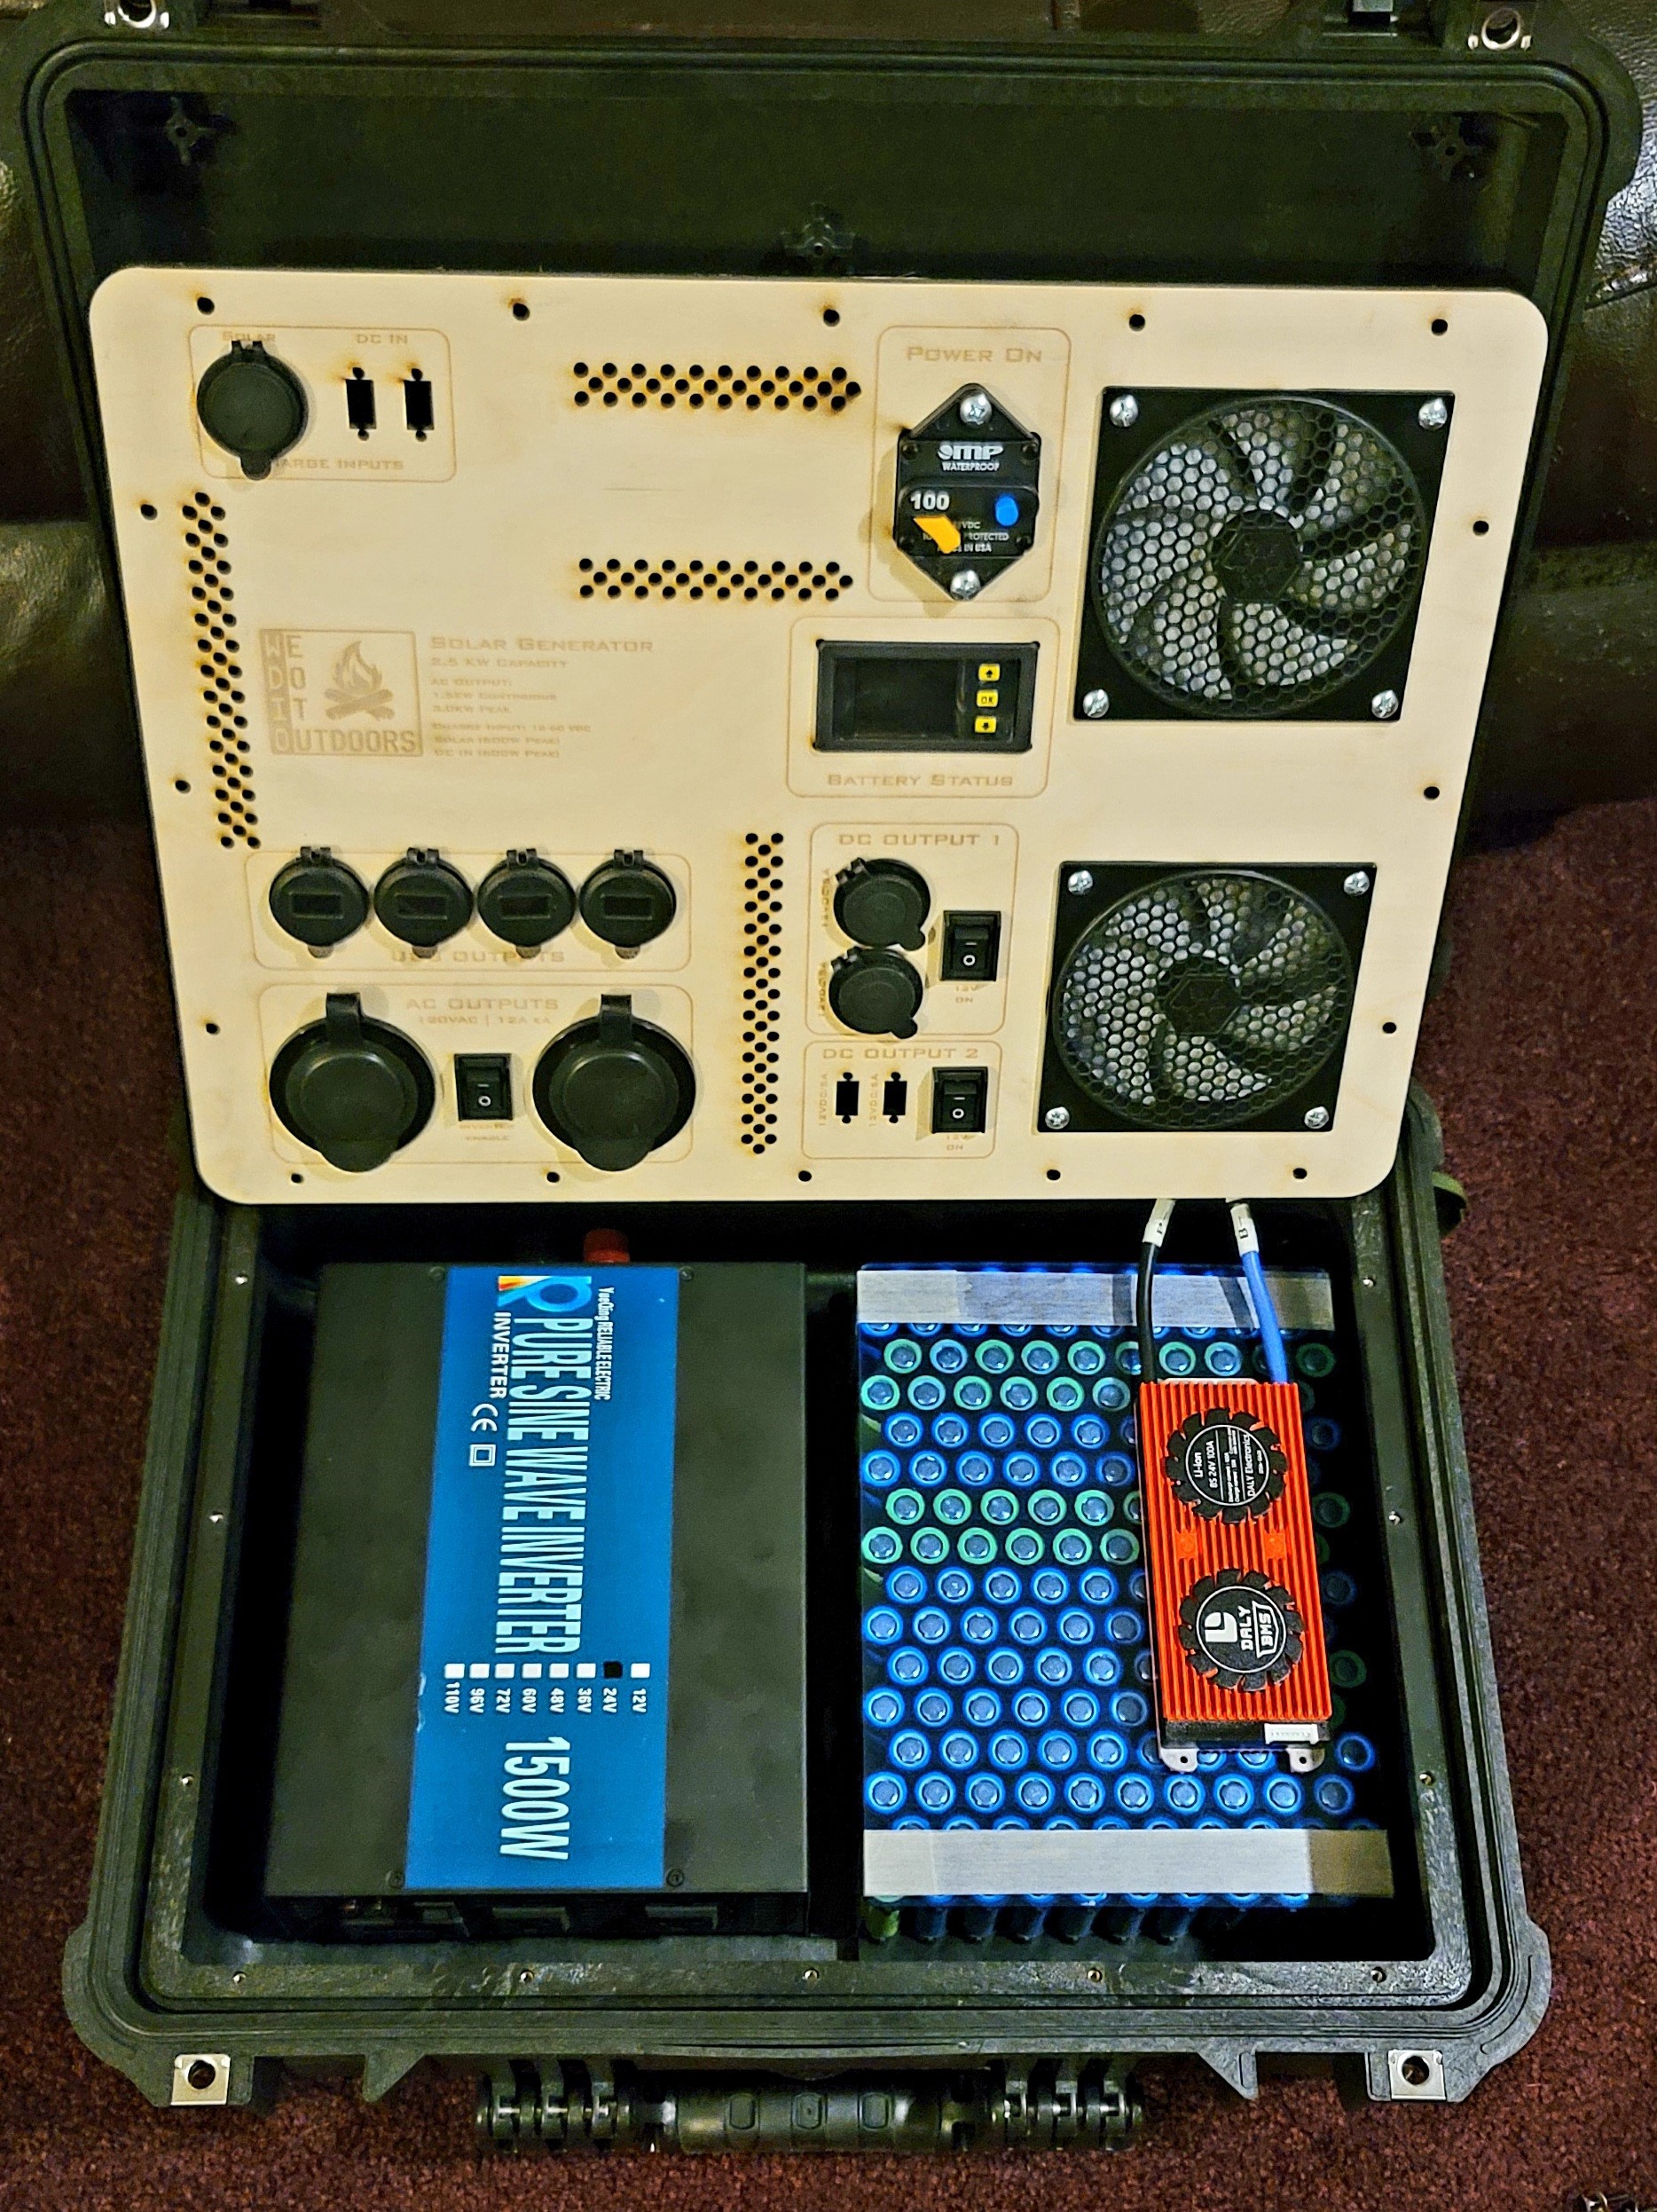
First step was to design the battery pack in CAD using a Pellican 1550 case model to ensure it would fit alongside the 1500W Inverter:
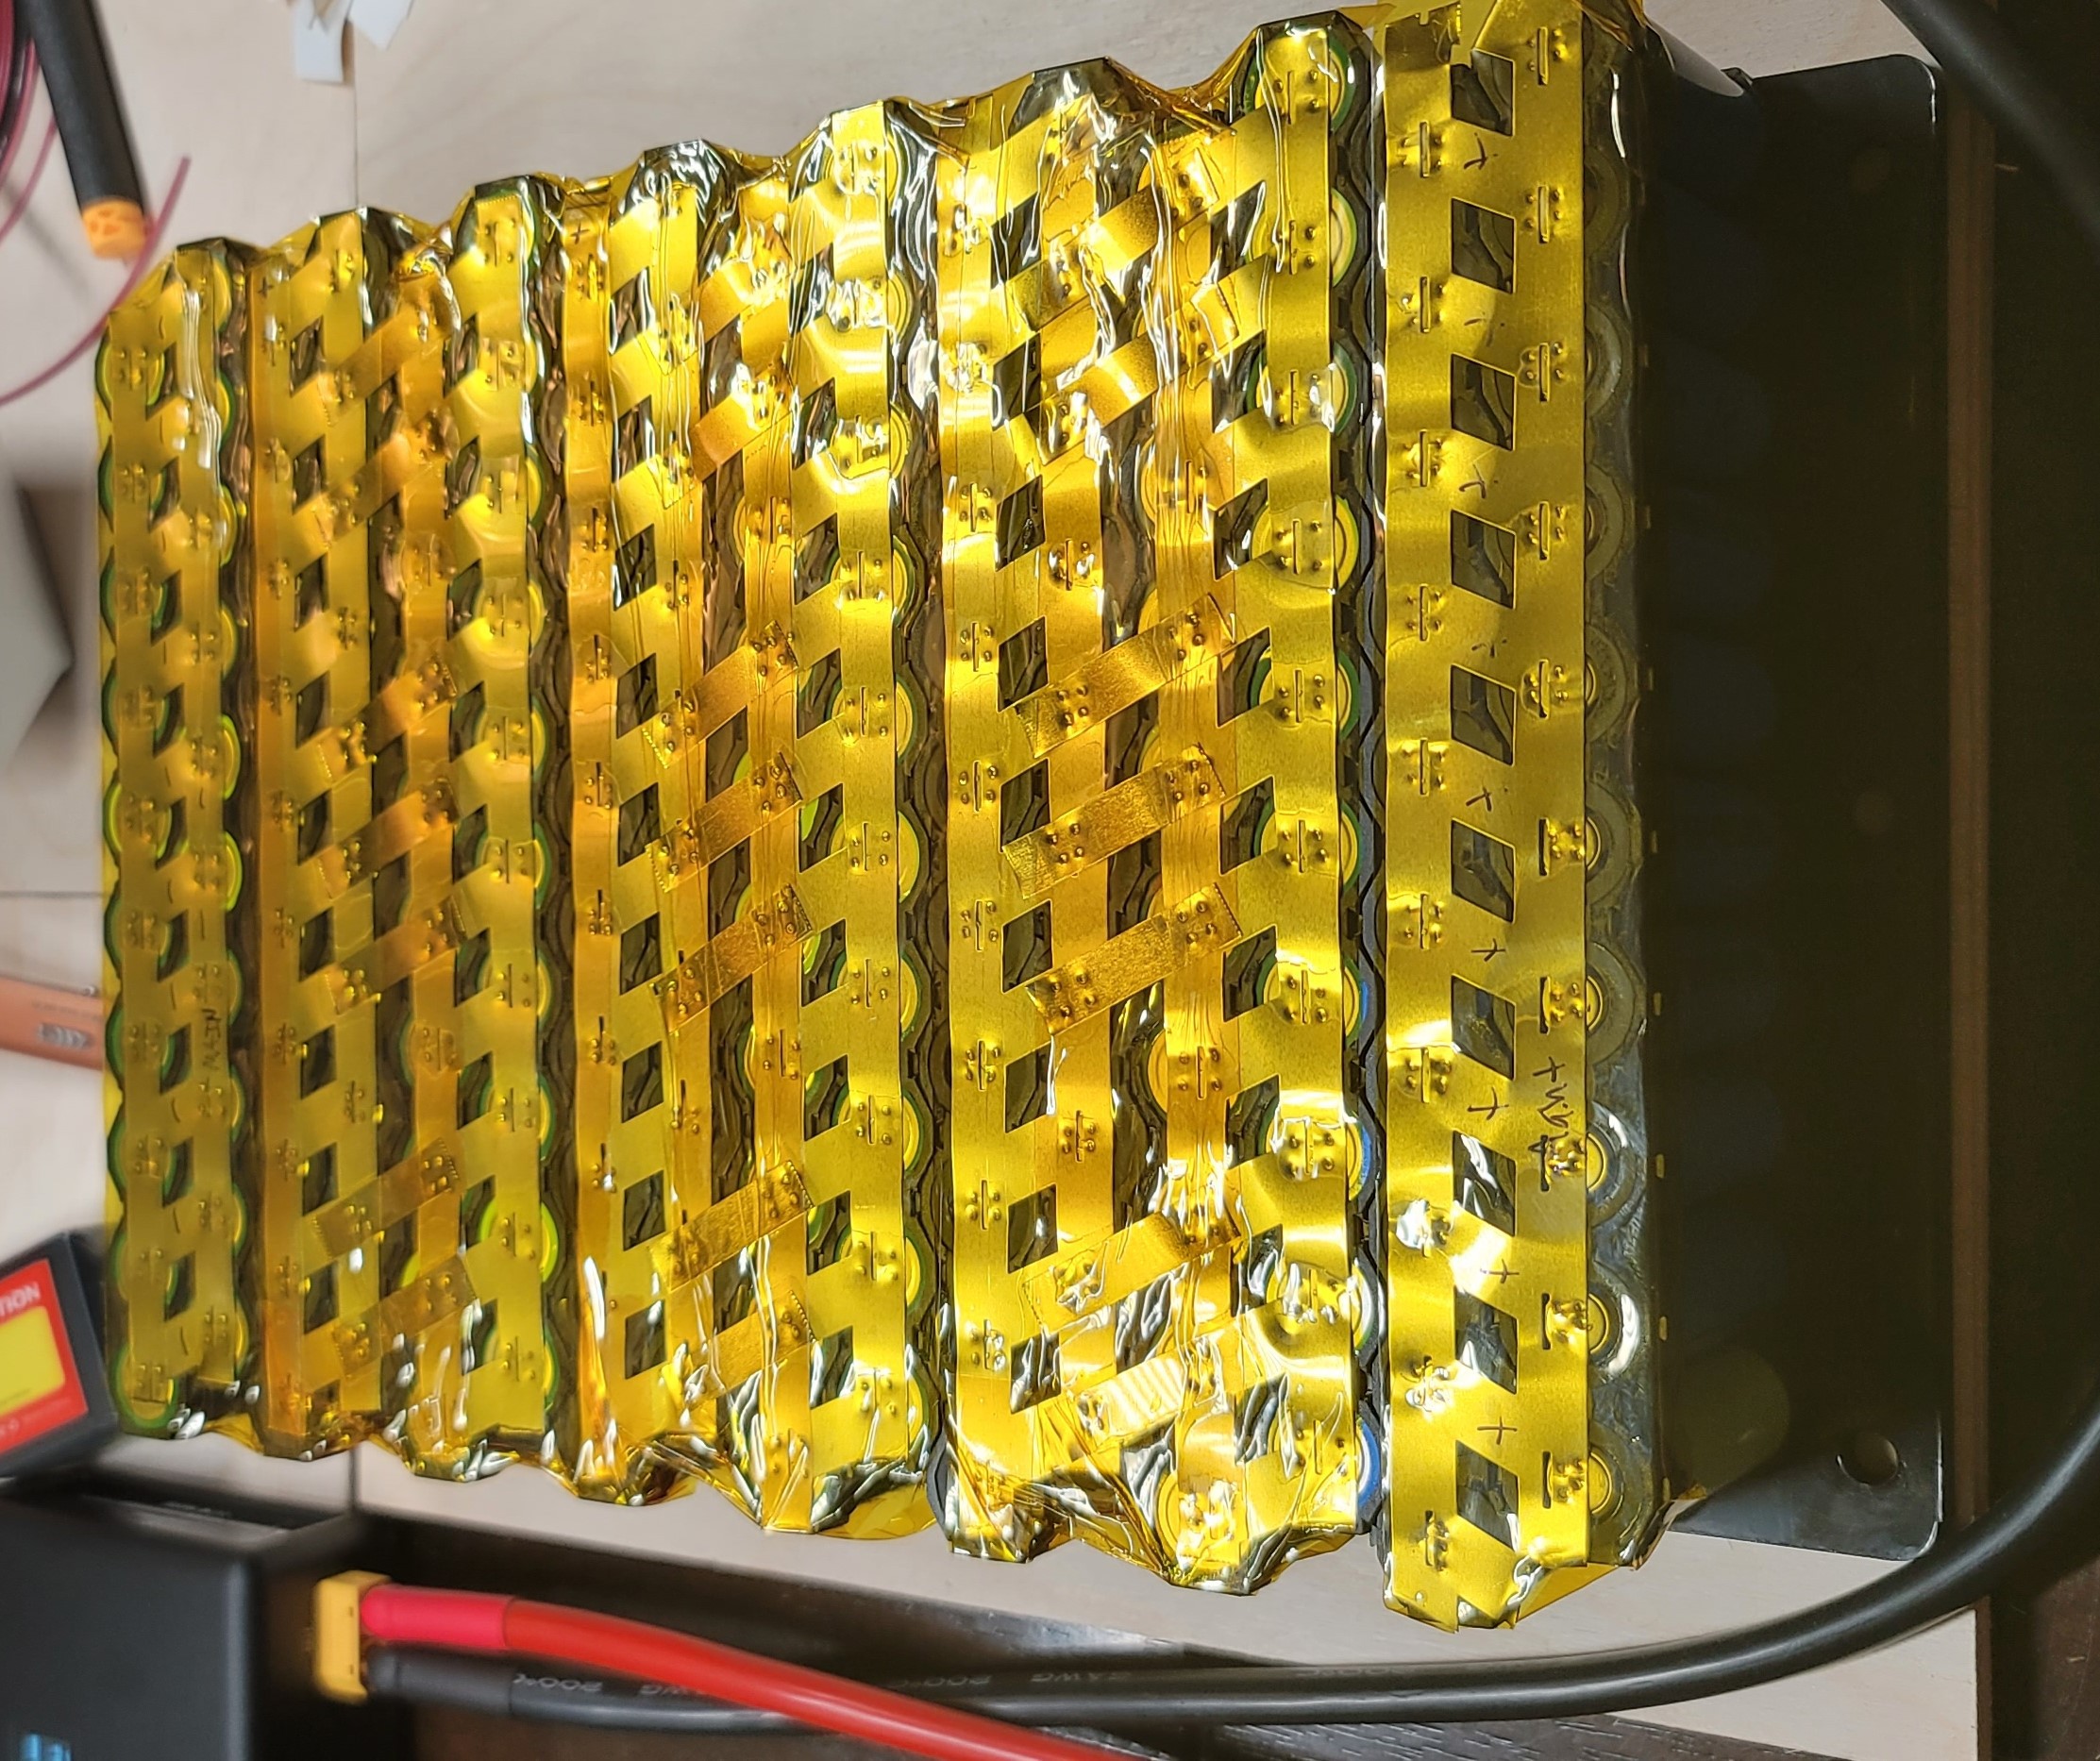
The pack is a fairly straightforward construction using honeycomb cell holders and 2P nickel strips (more on that below). I was not content with using something like VHB tape to mount the pack to the pelican case, or wedging it in since this pack will live in either the back of my Jeep or in my overlanding trailer on trips; and is going to get a bit jostled around. I decided instead to laser cut a top cover and bottom base, then attached them to the pack with fiberglass reinforced strapping tape.
If you fall down the 18650 pack building rabbit hole on Youtube you'll get varying opinions on spot welders. There are plenty of options out there but I opted for a lithium powered miniature spot welder (See Details section).
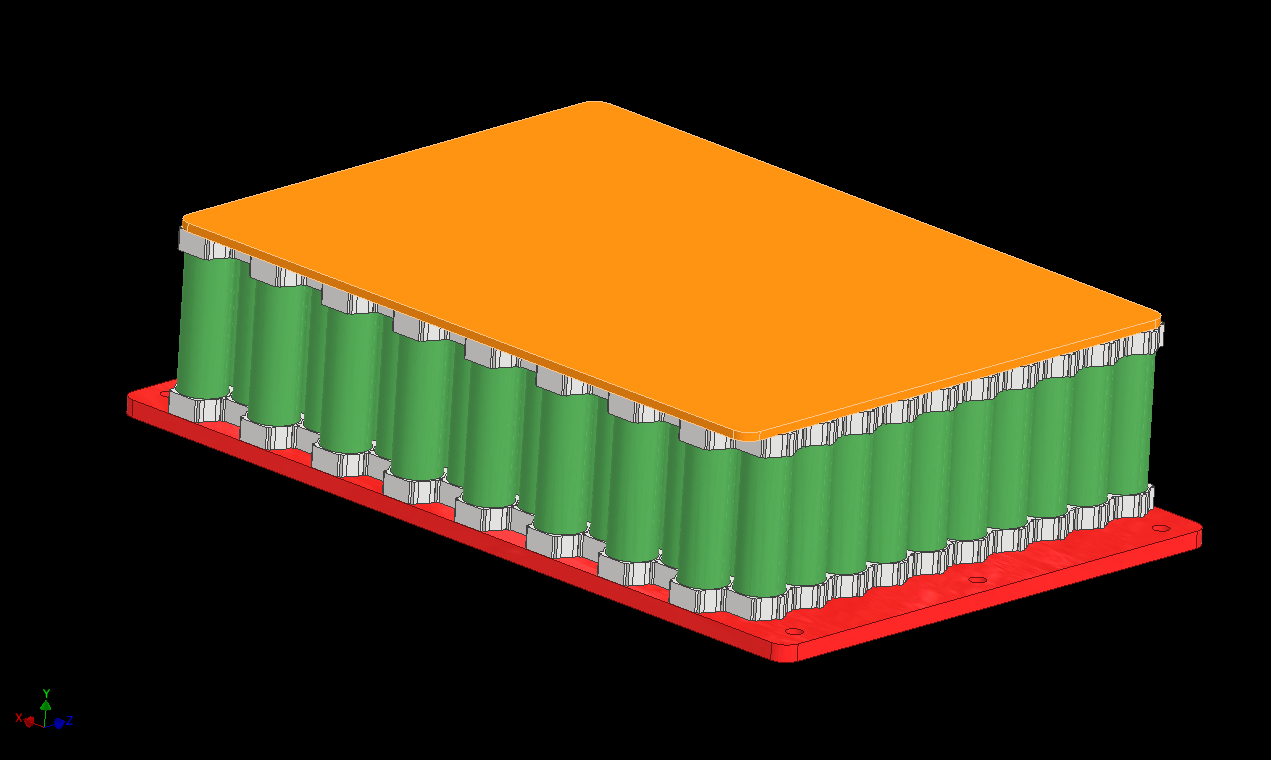
Here is a photo of the pack with the top/bottom plates. The bottom plate is ABS and designed to accept 1/4-20 Barrel nuts for mounting to the Pelican case.
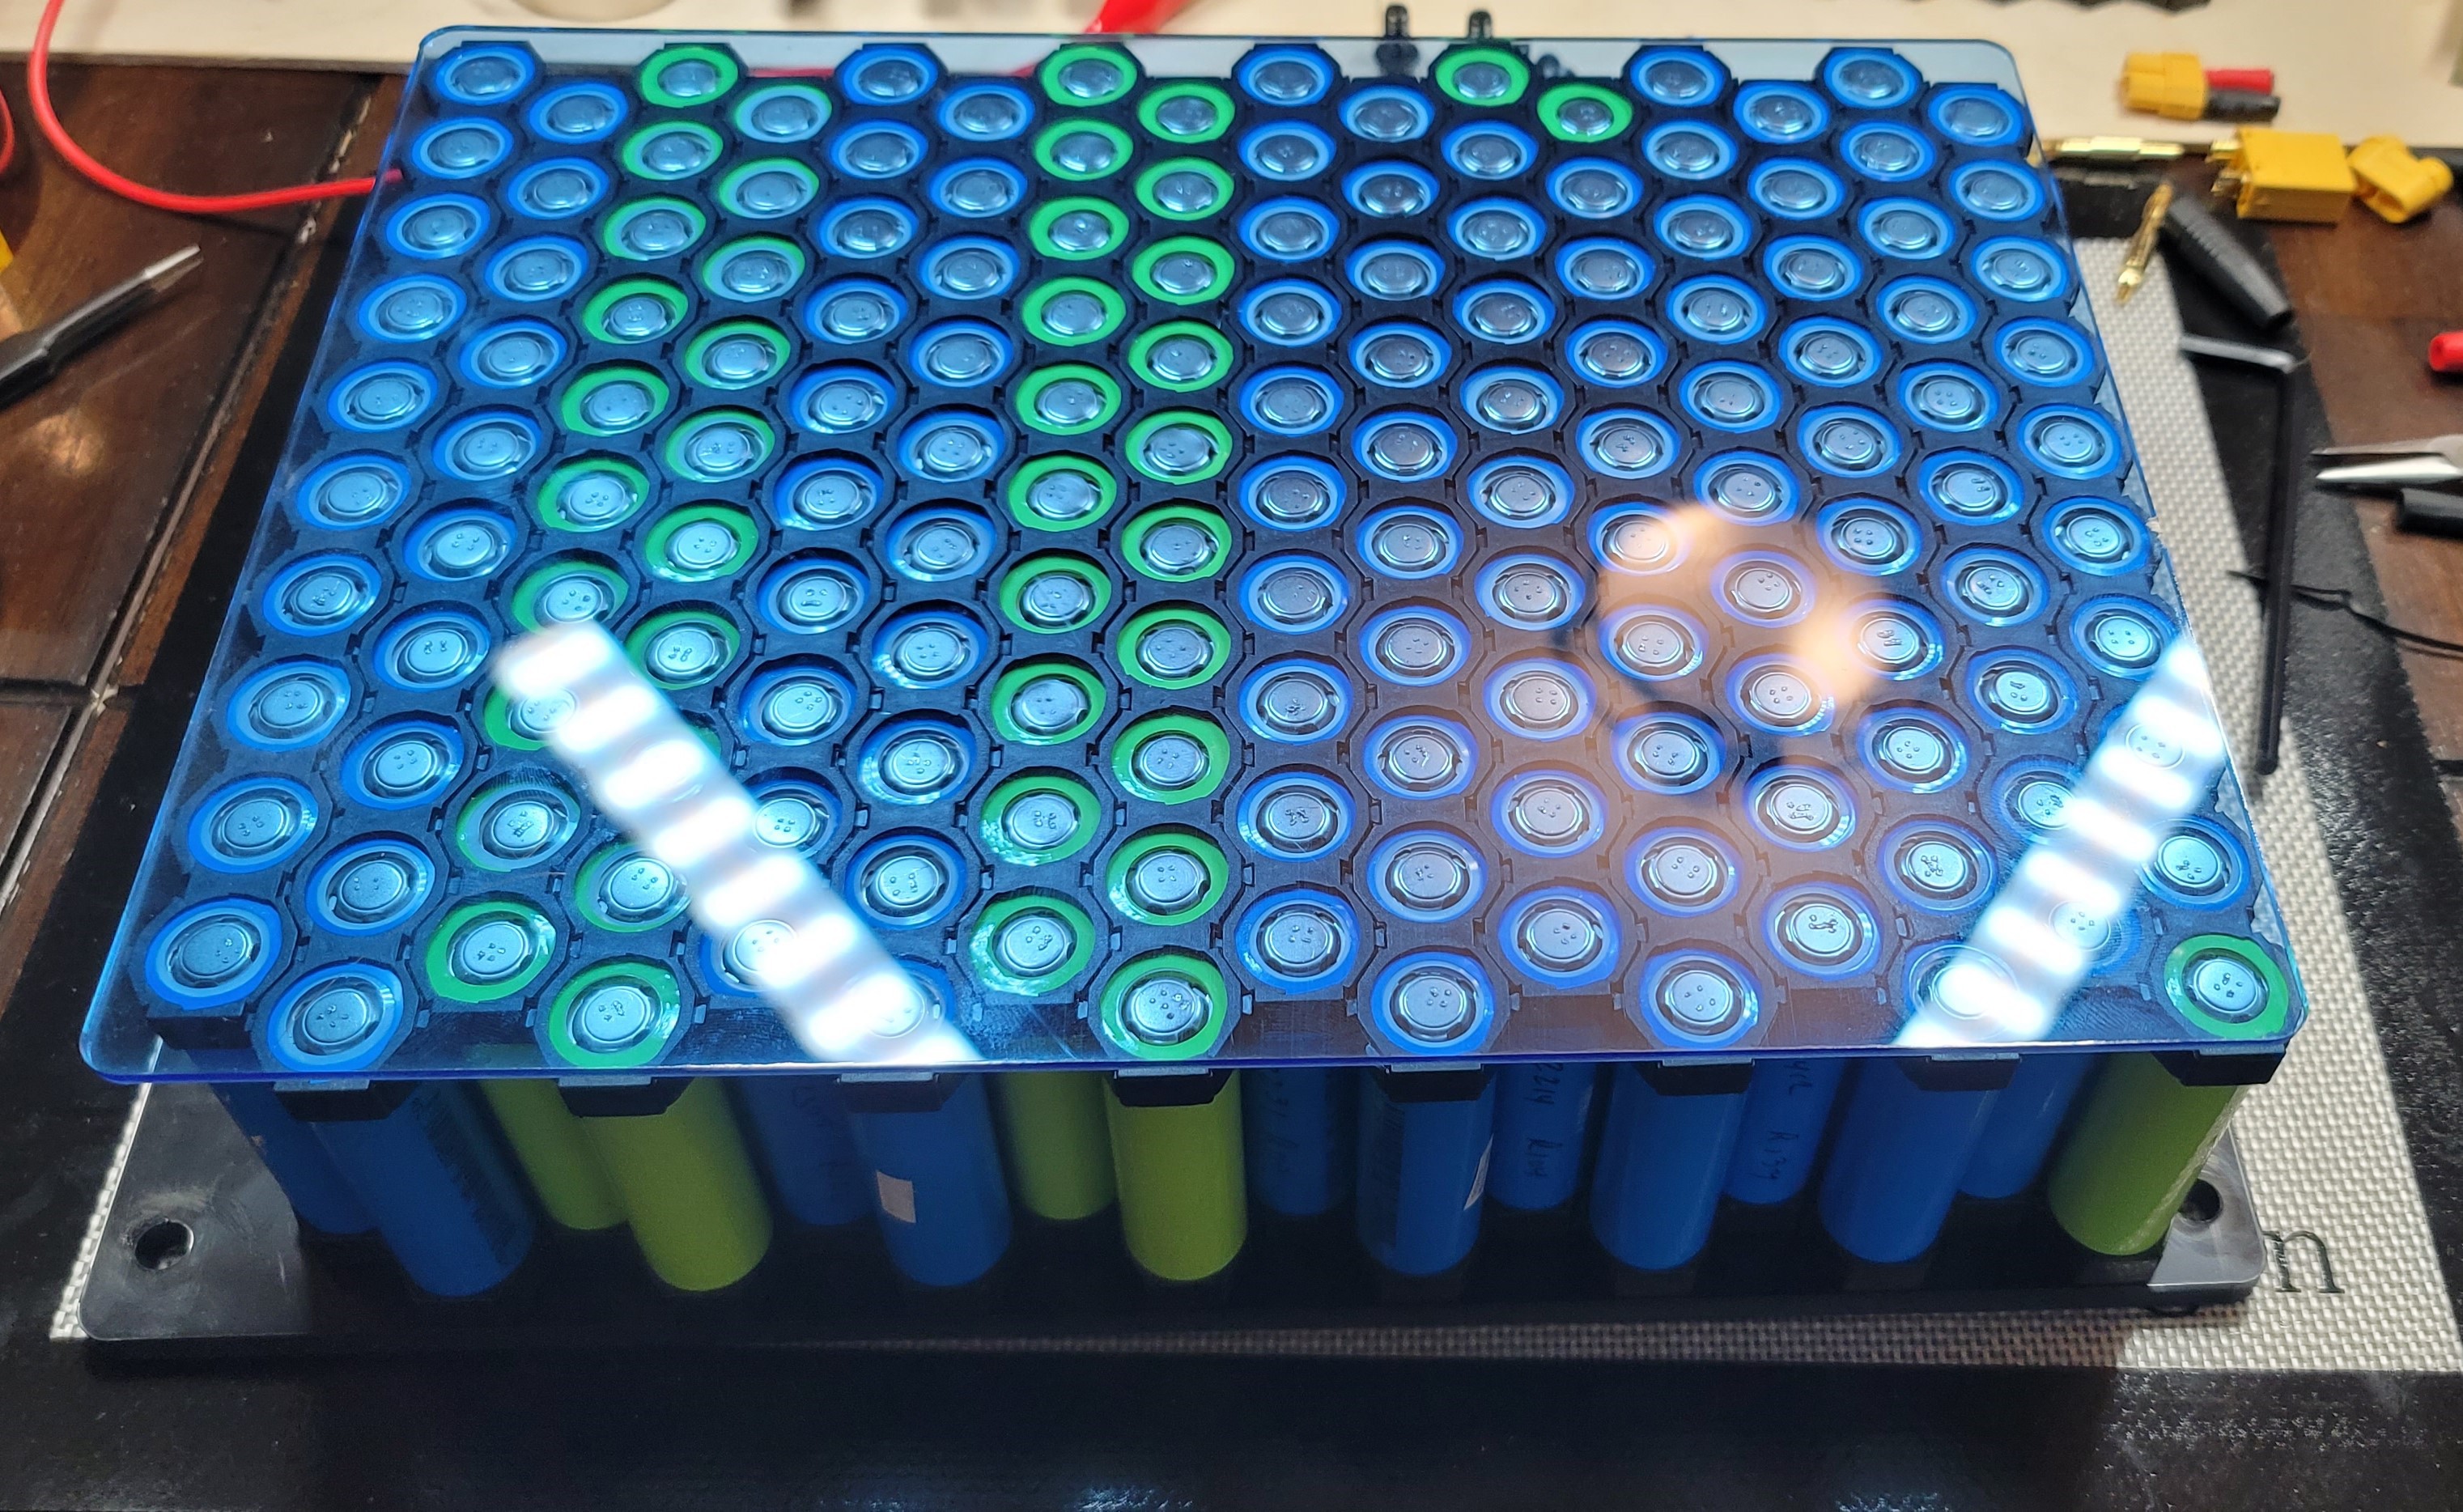
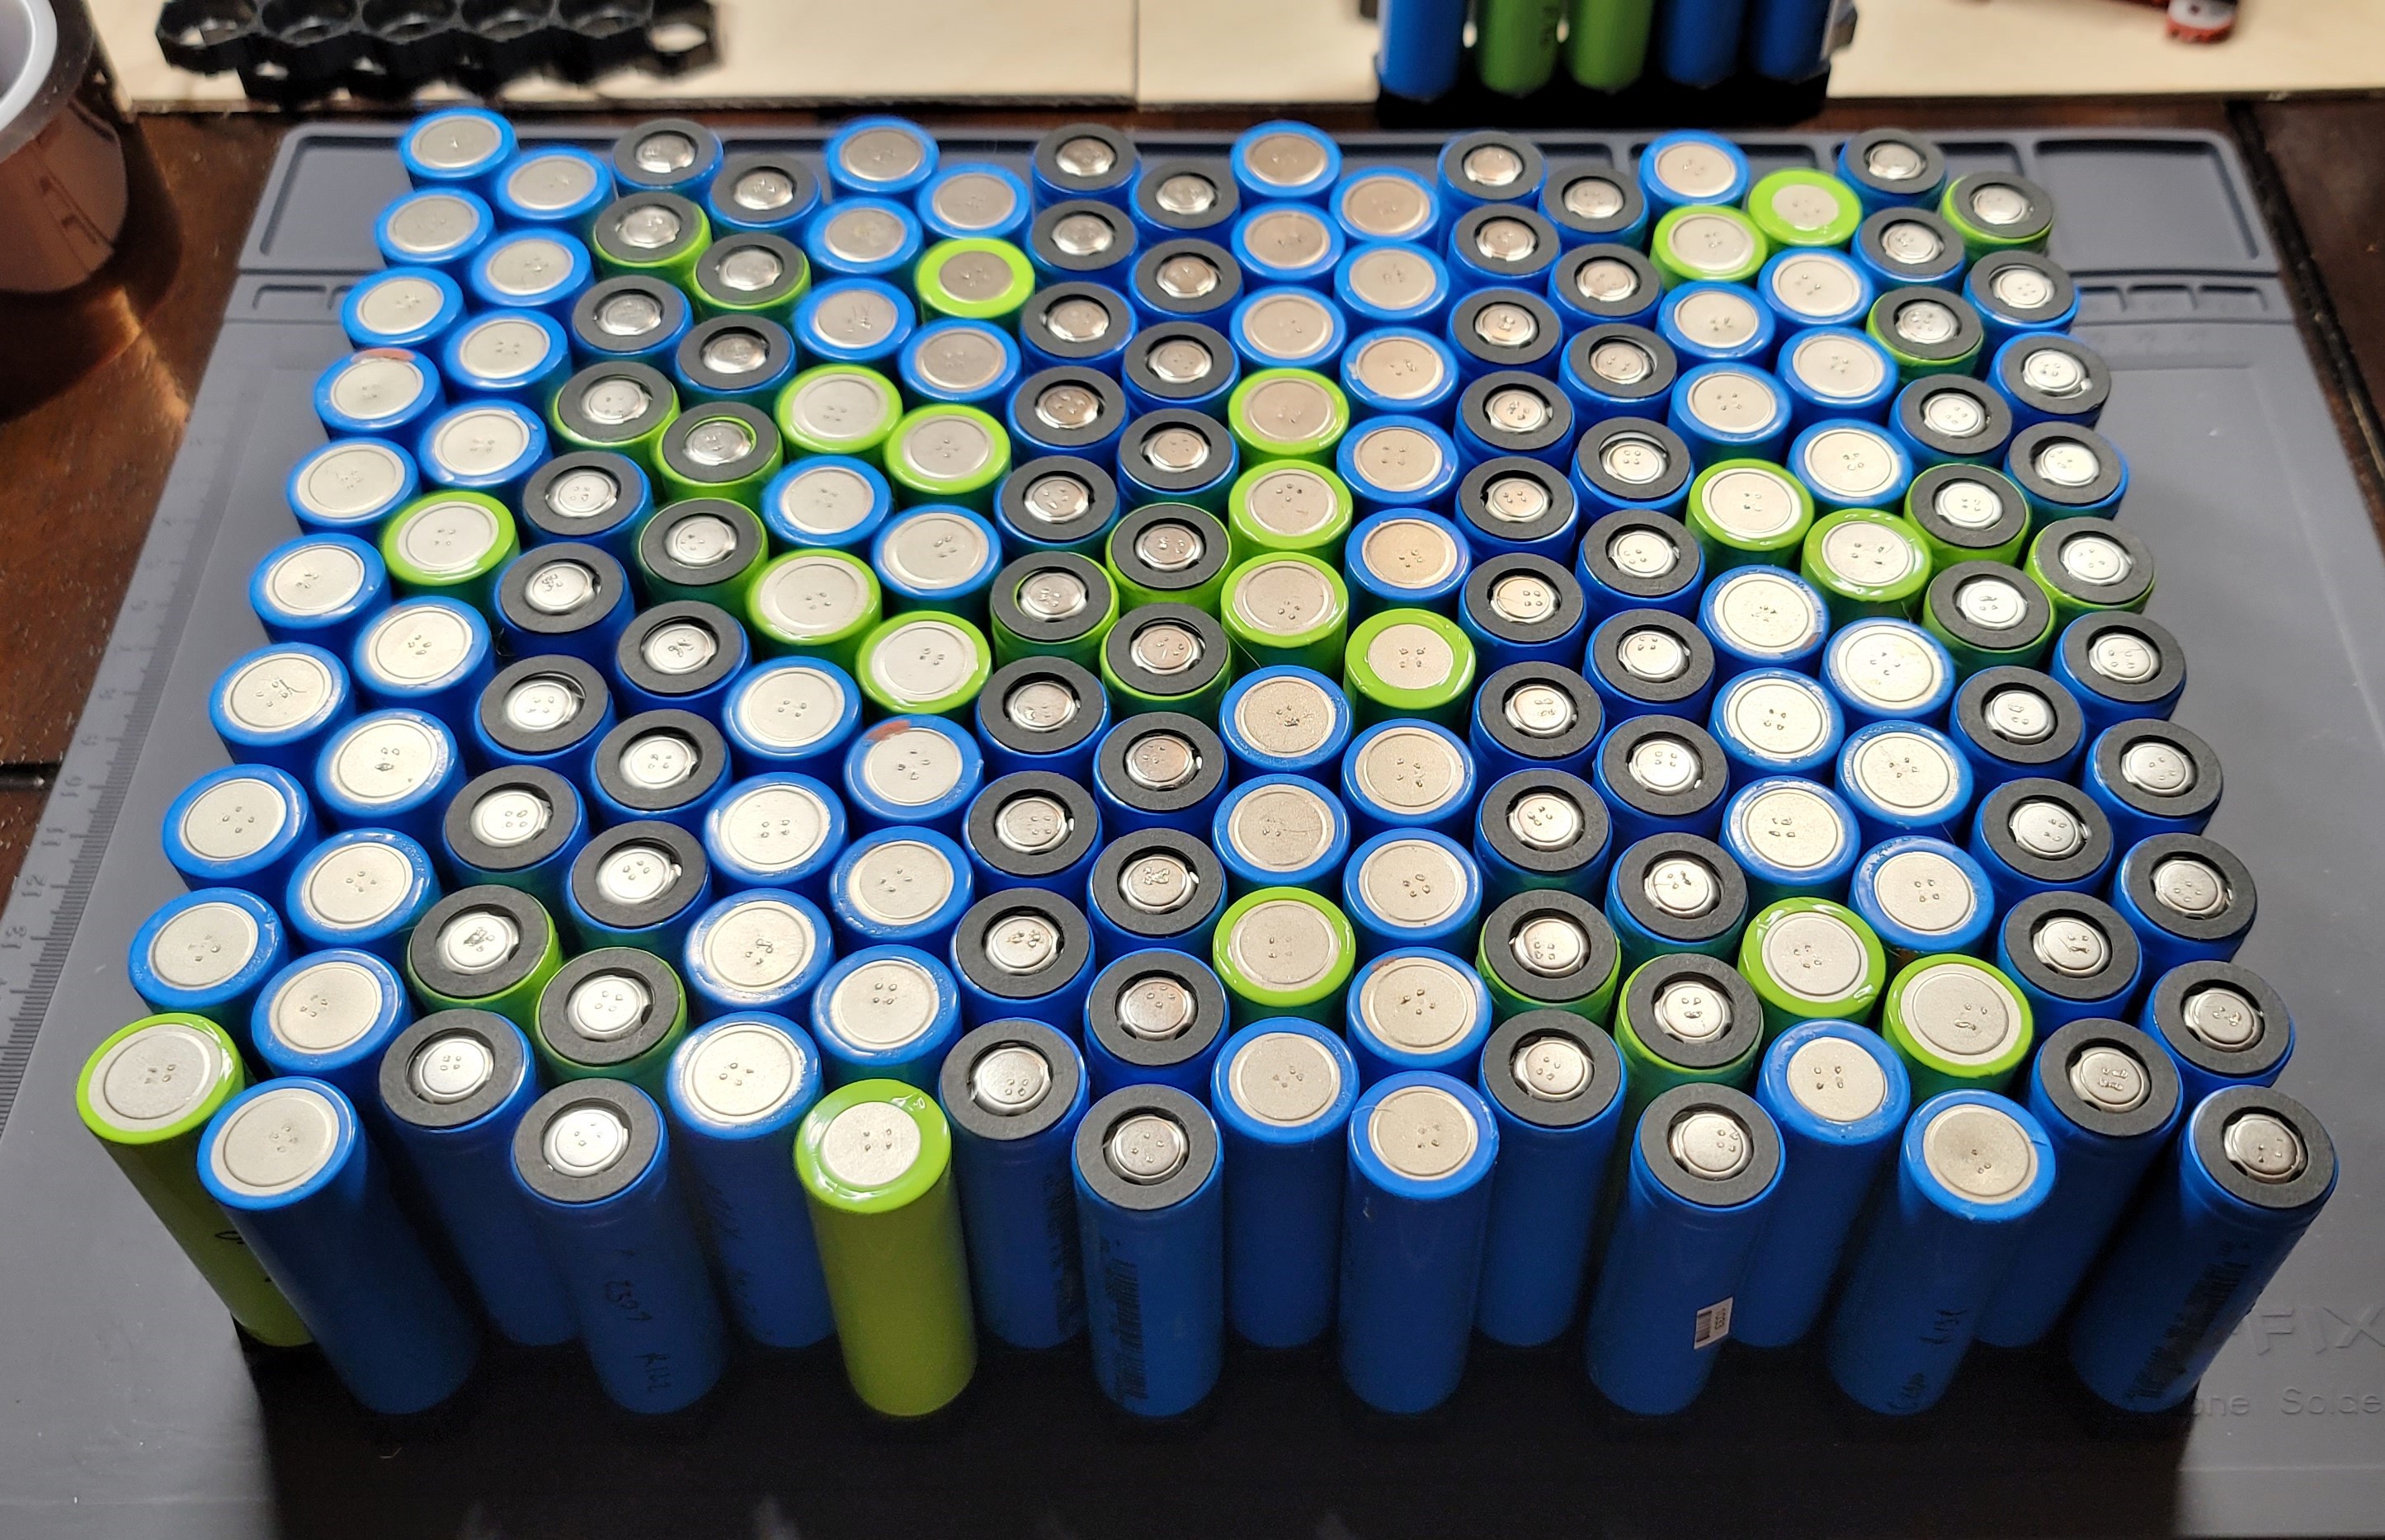
The next step is to orient each series cell in the pack to prepare it for spot welding. I added an additional paper isolator ring to each positive terminal just as a precaution.
The observant among you may have noticed that the pack shown above is an 8S pack. After spot welding the pack together I discovered that while the USB chargers I used can handle up to 30V; A fully charged 8S pack at 33.6V is too high for them to operate. So I carefully dissected 1 series pack turning this into a 7S pack. I plan to switch back to an 8S pack for Gen2. A Peak under the shrinkwrap:
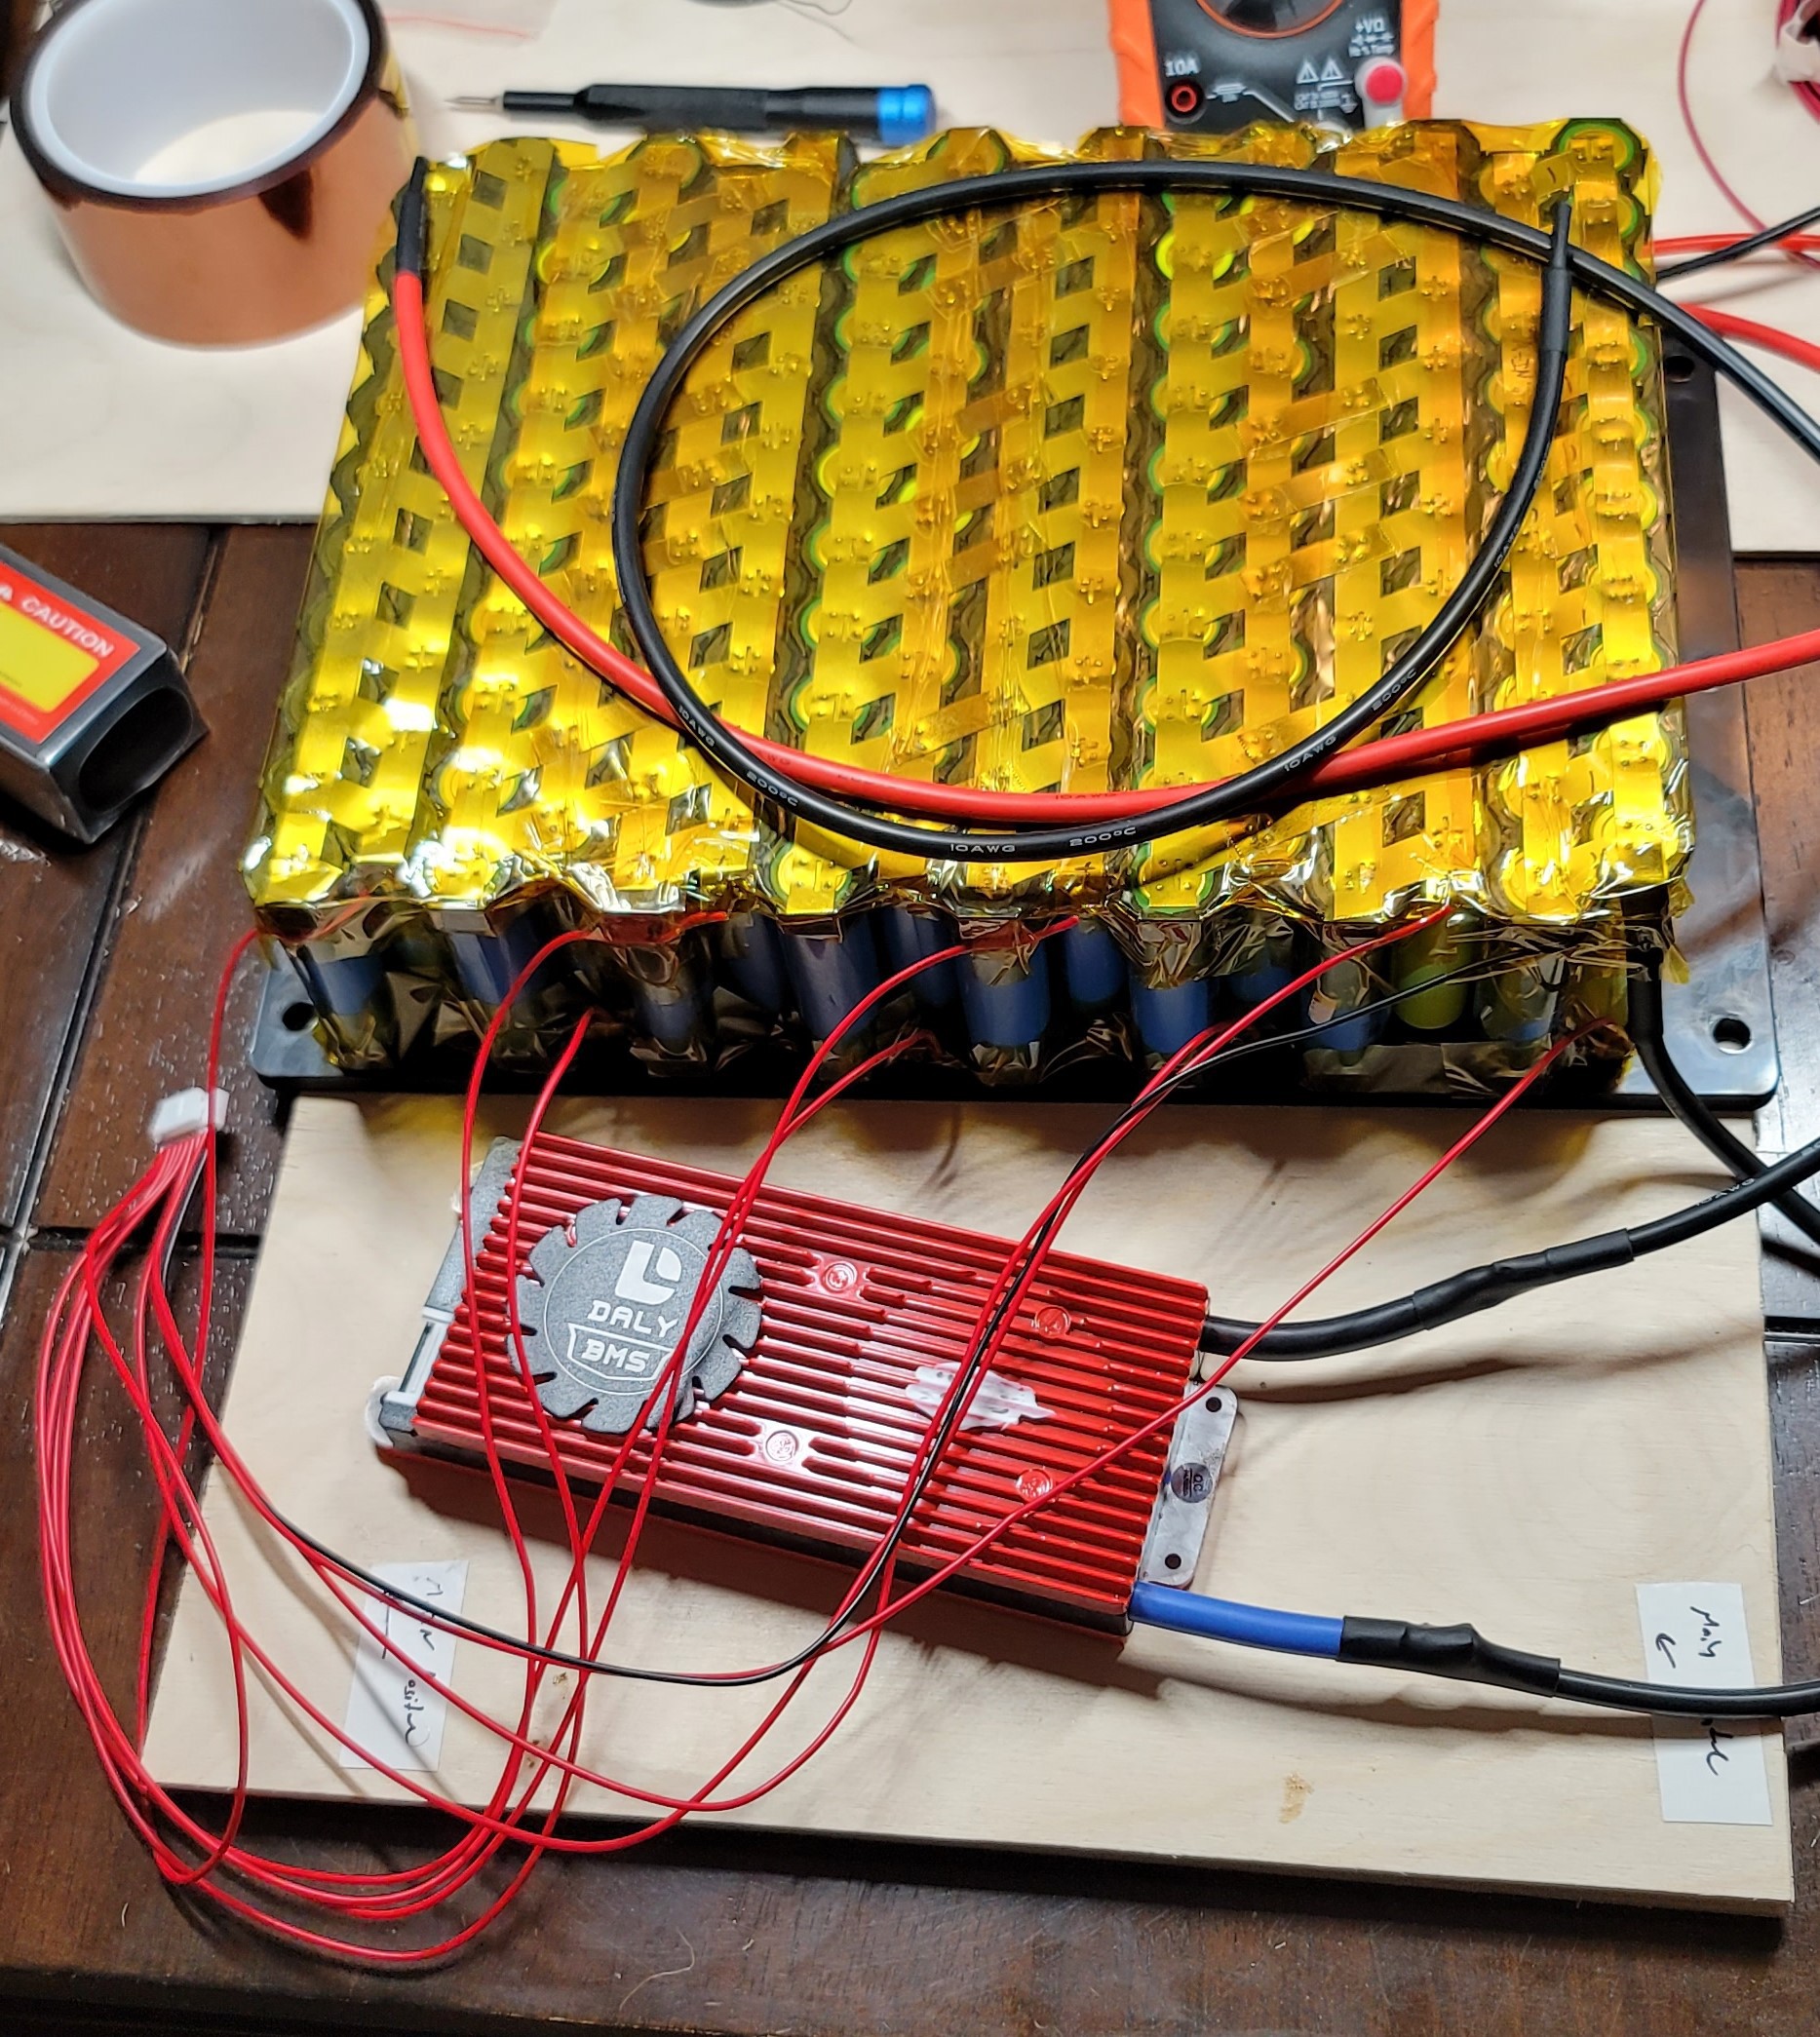
Adding a BMS was simple, I left a tab on each positive nickel strip for soldering:
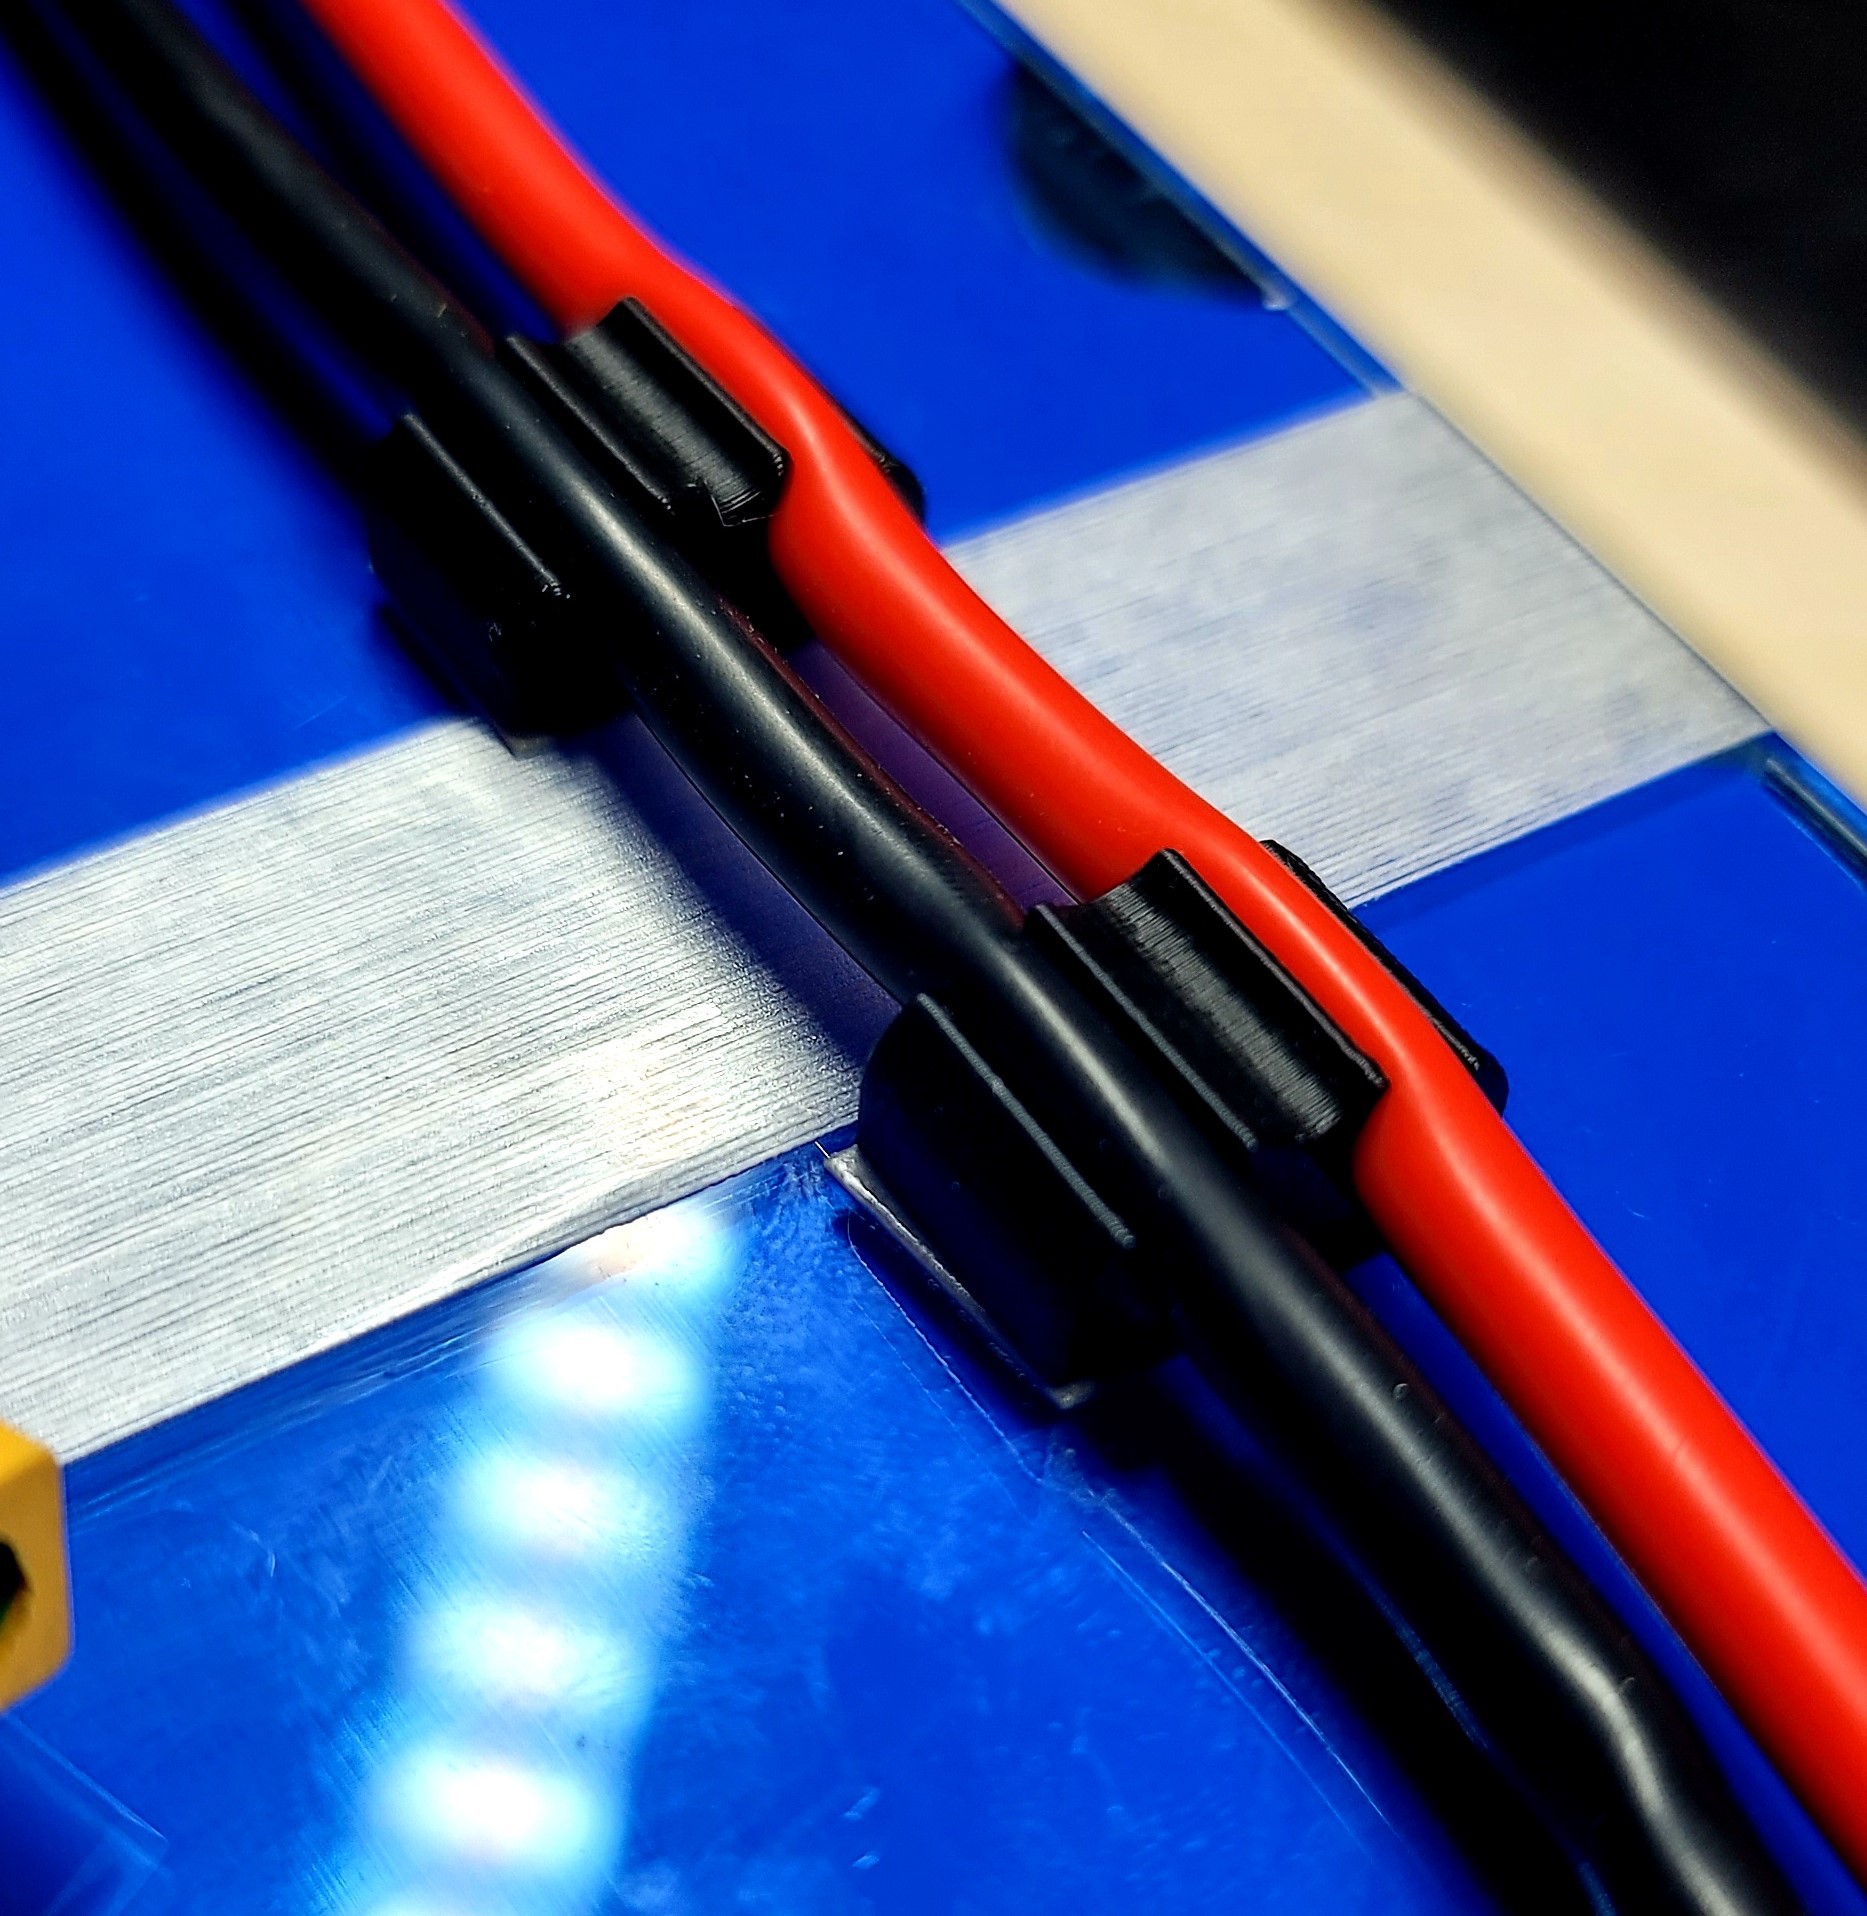
I must have ordered 5 different diameters of heat shrink wrap until I found the right diameter, I need to measure it again and will make sure to put the right size into the BOM. Some simple 3D printed wire clips were made and VHB taped to the acrylic top cover:
I'll add some files for the 3D printed and laser cut parts shown on this step.
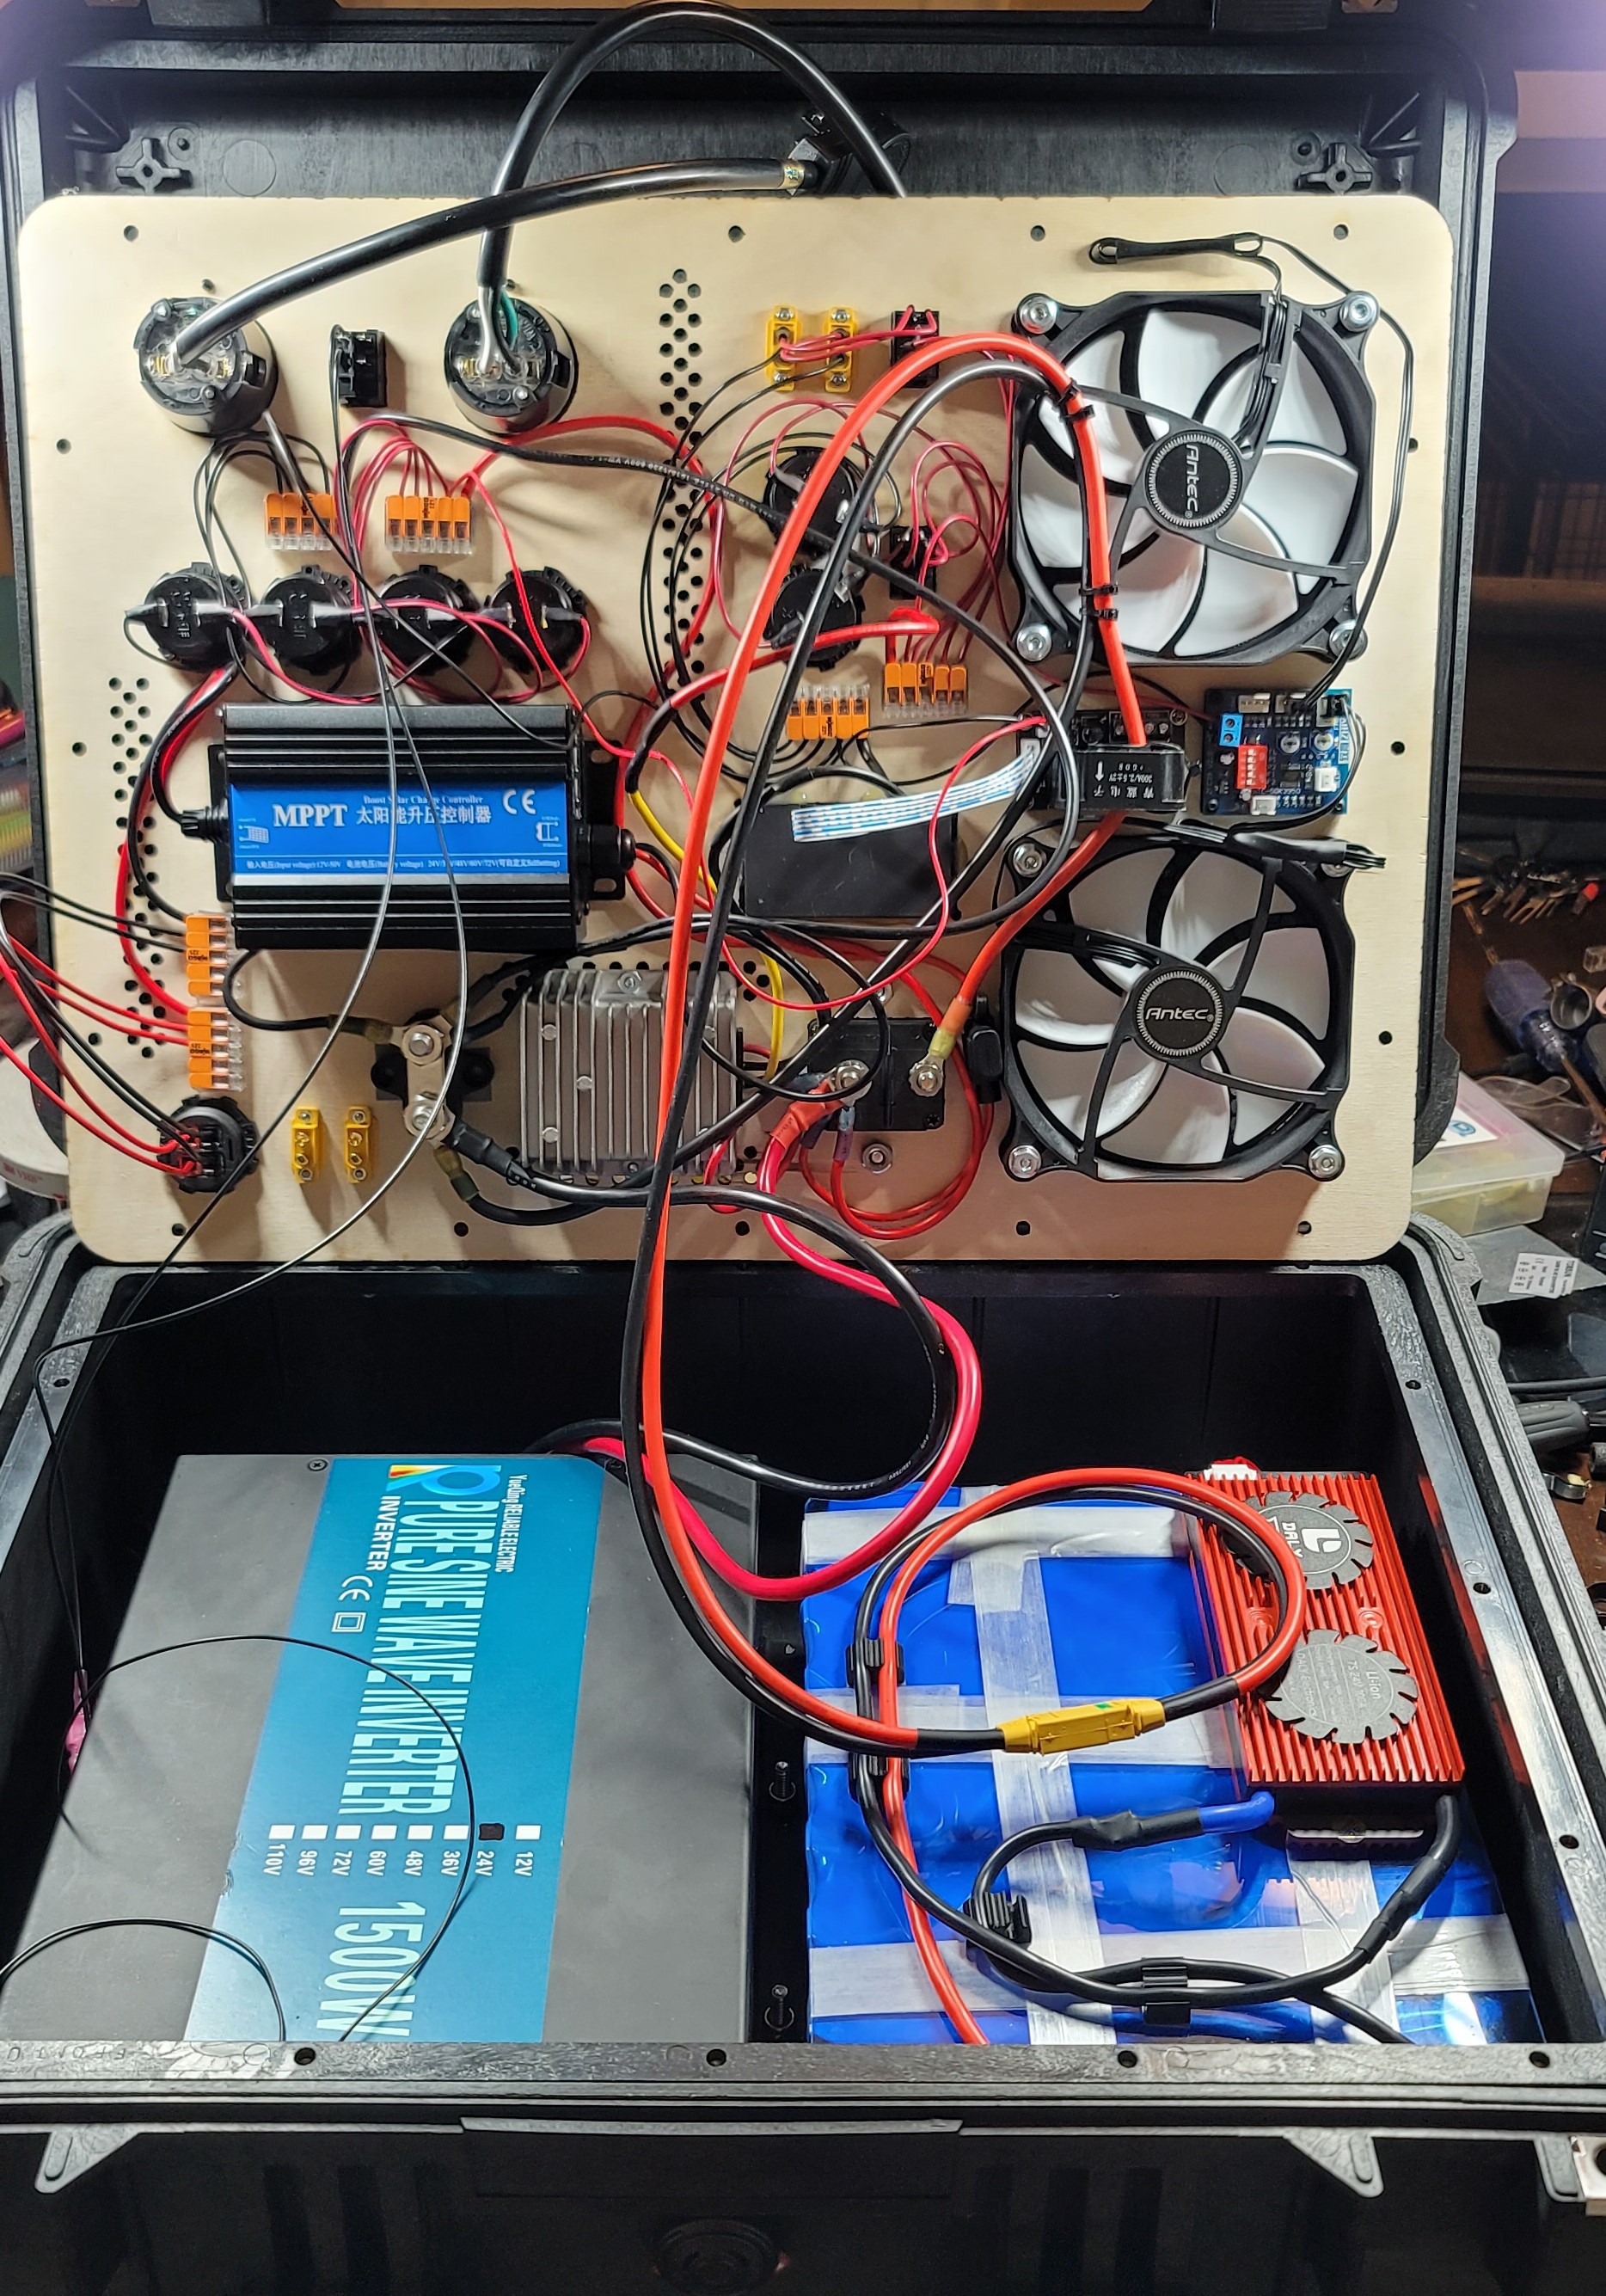
Now that the prototype battery is complete it was time to mount the first layer of parts into the Pelican case. The 1500W continuous inverter was paired with the 7S 30P pack as they both fit snugly into the bottom of the pelican case. The Inverter required 4 holes to be drilled through the bottom of the case, and the Battery pack needed 6. These holes were sealed using a laser cut gasket and washer. I've been playing around with FIP gaskets for a few of my engineering clients with good success, I may add some FIP gaskets directly to the case for the next prototype.
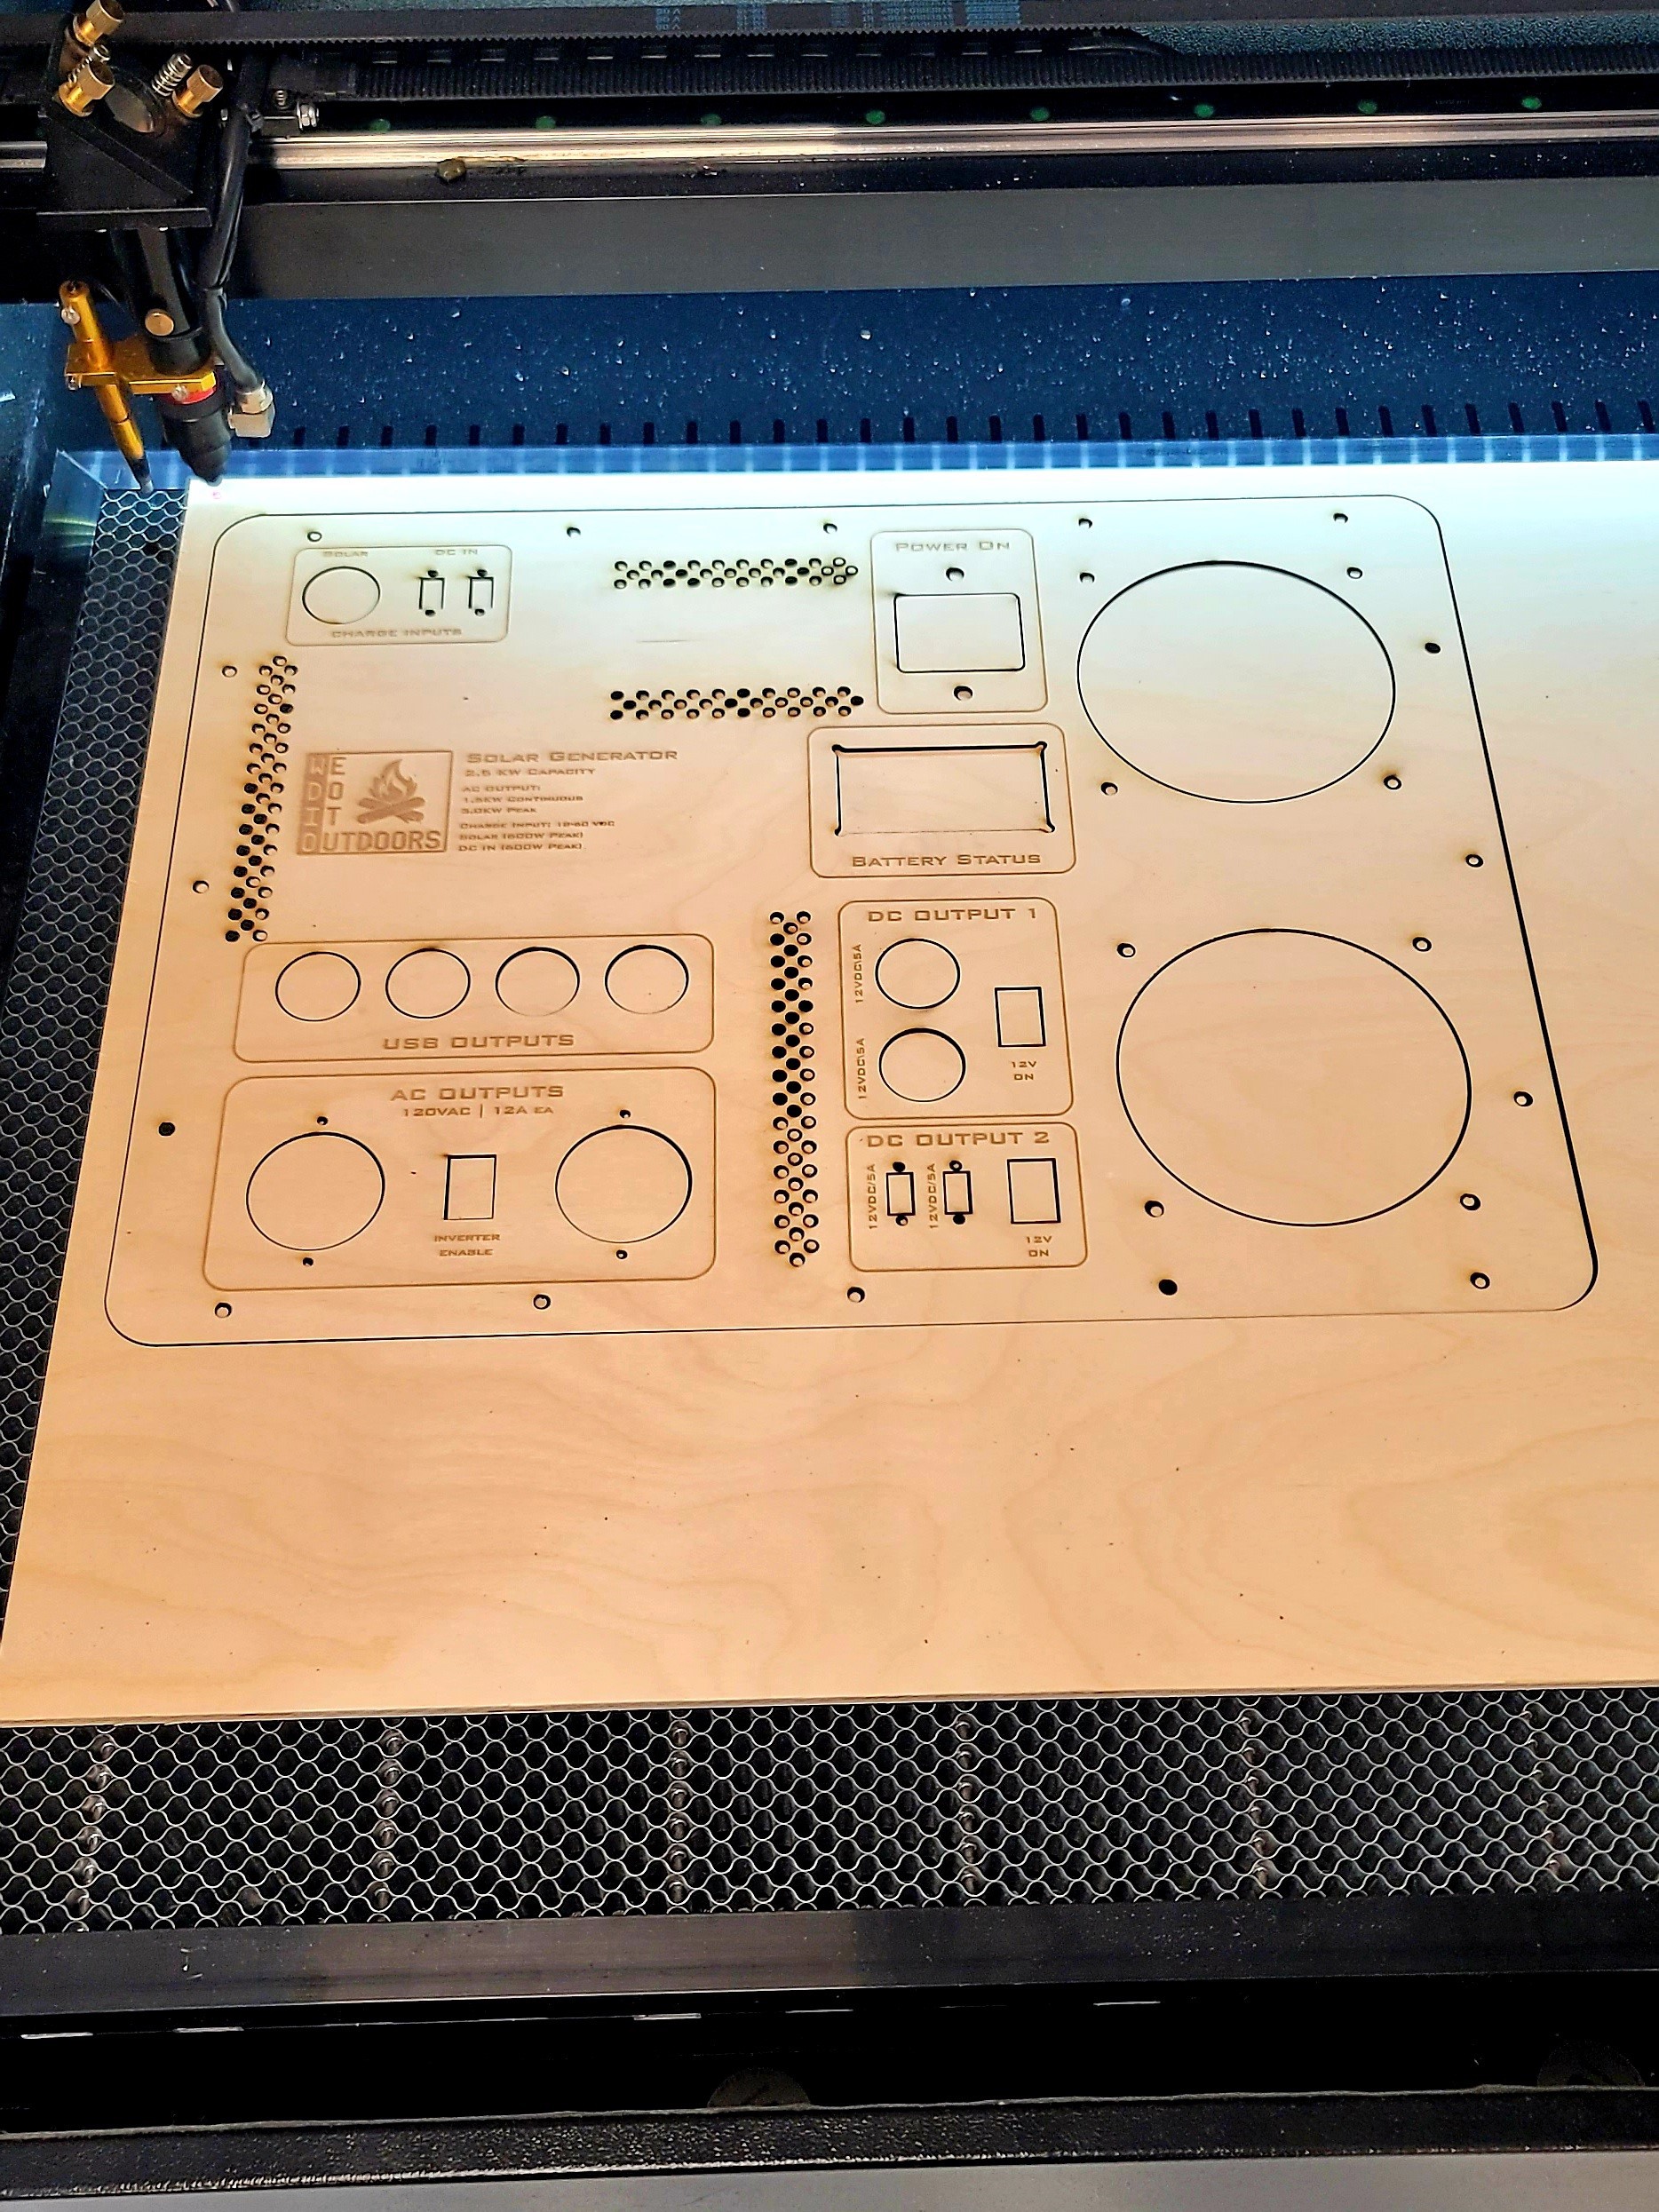
The faceplate was laser cut from 0.25"-ish thick birch plywood. Once I get the design down for the custom PCBs I plan to laser cut the faceplate from 0.19" thick 6061-T6.
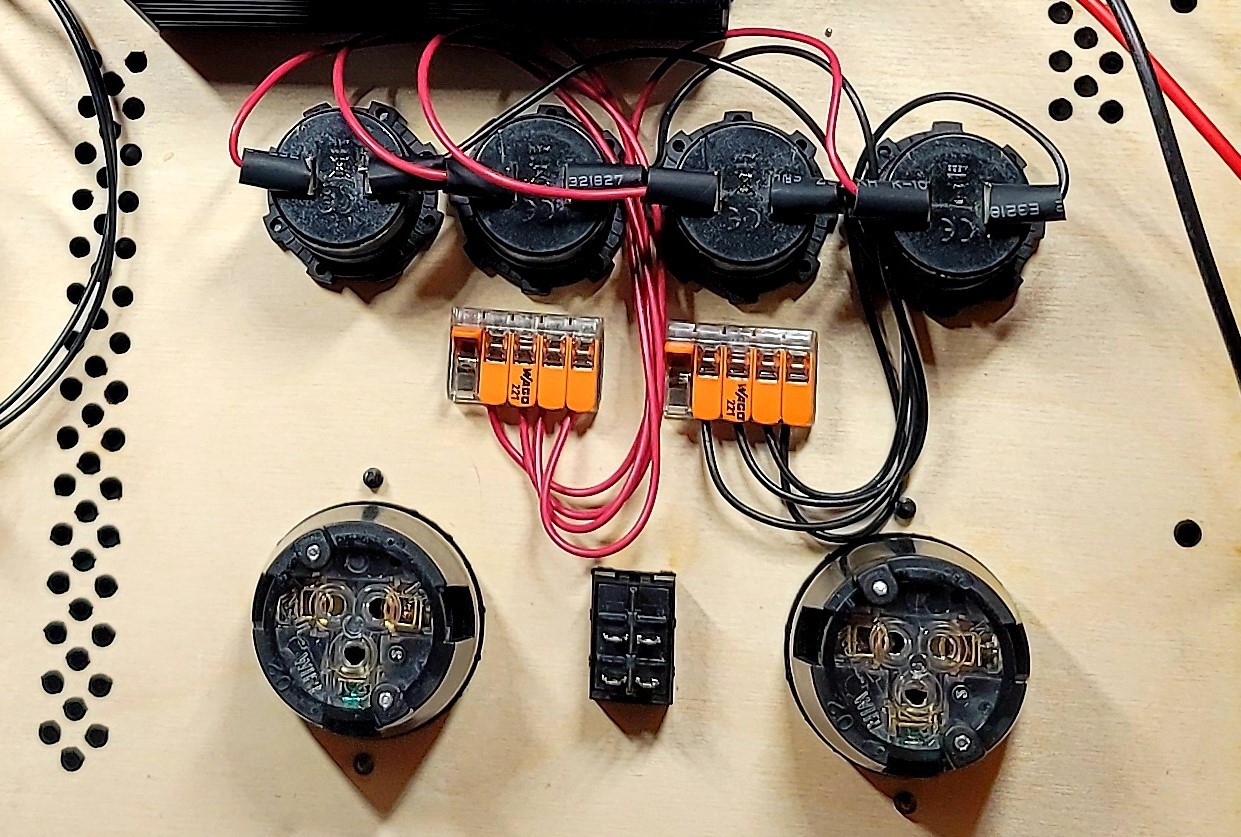
The wiring is... well... not going to win any awards. I employed one of my favorite techniques for making branched connections that can be repaired in the field. A small strip of VHB double sided tape on the back of a Wago snap acting terminal block makes for simple solder-less connections:
Pre "Zip Tie Mania" wiring mess:
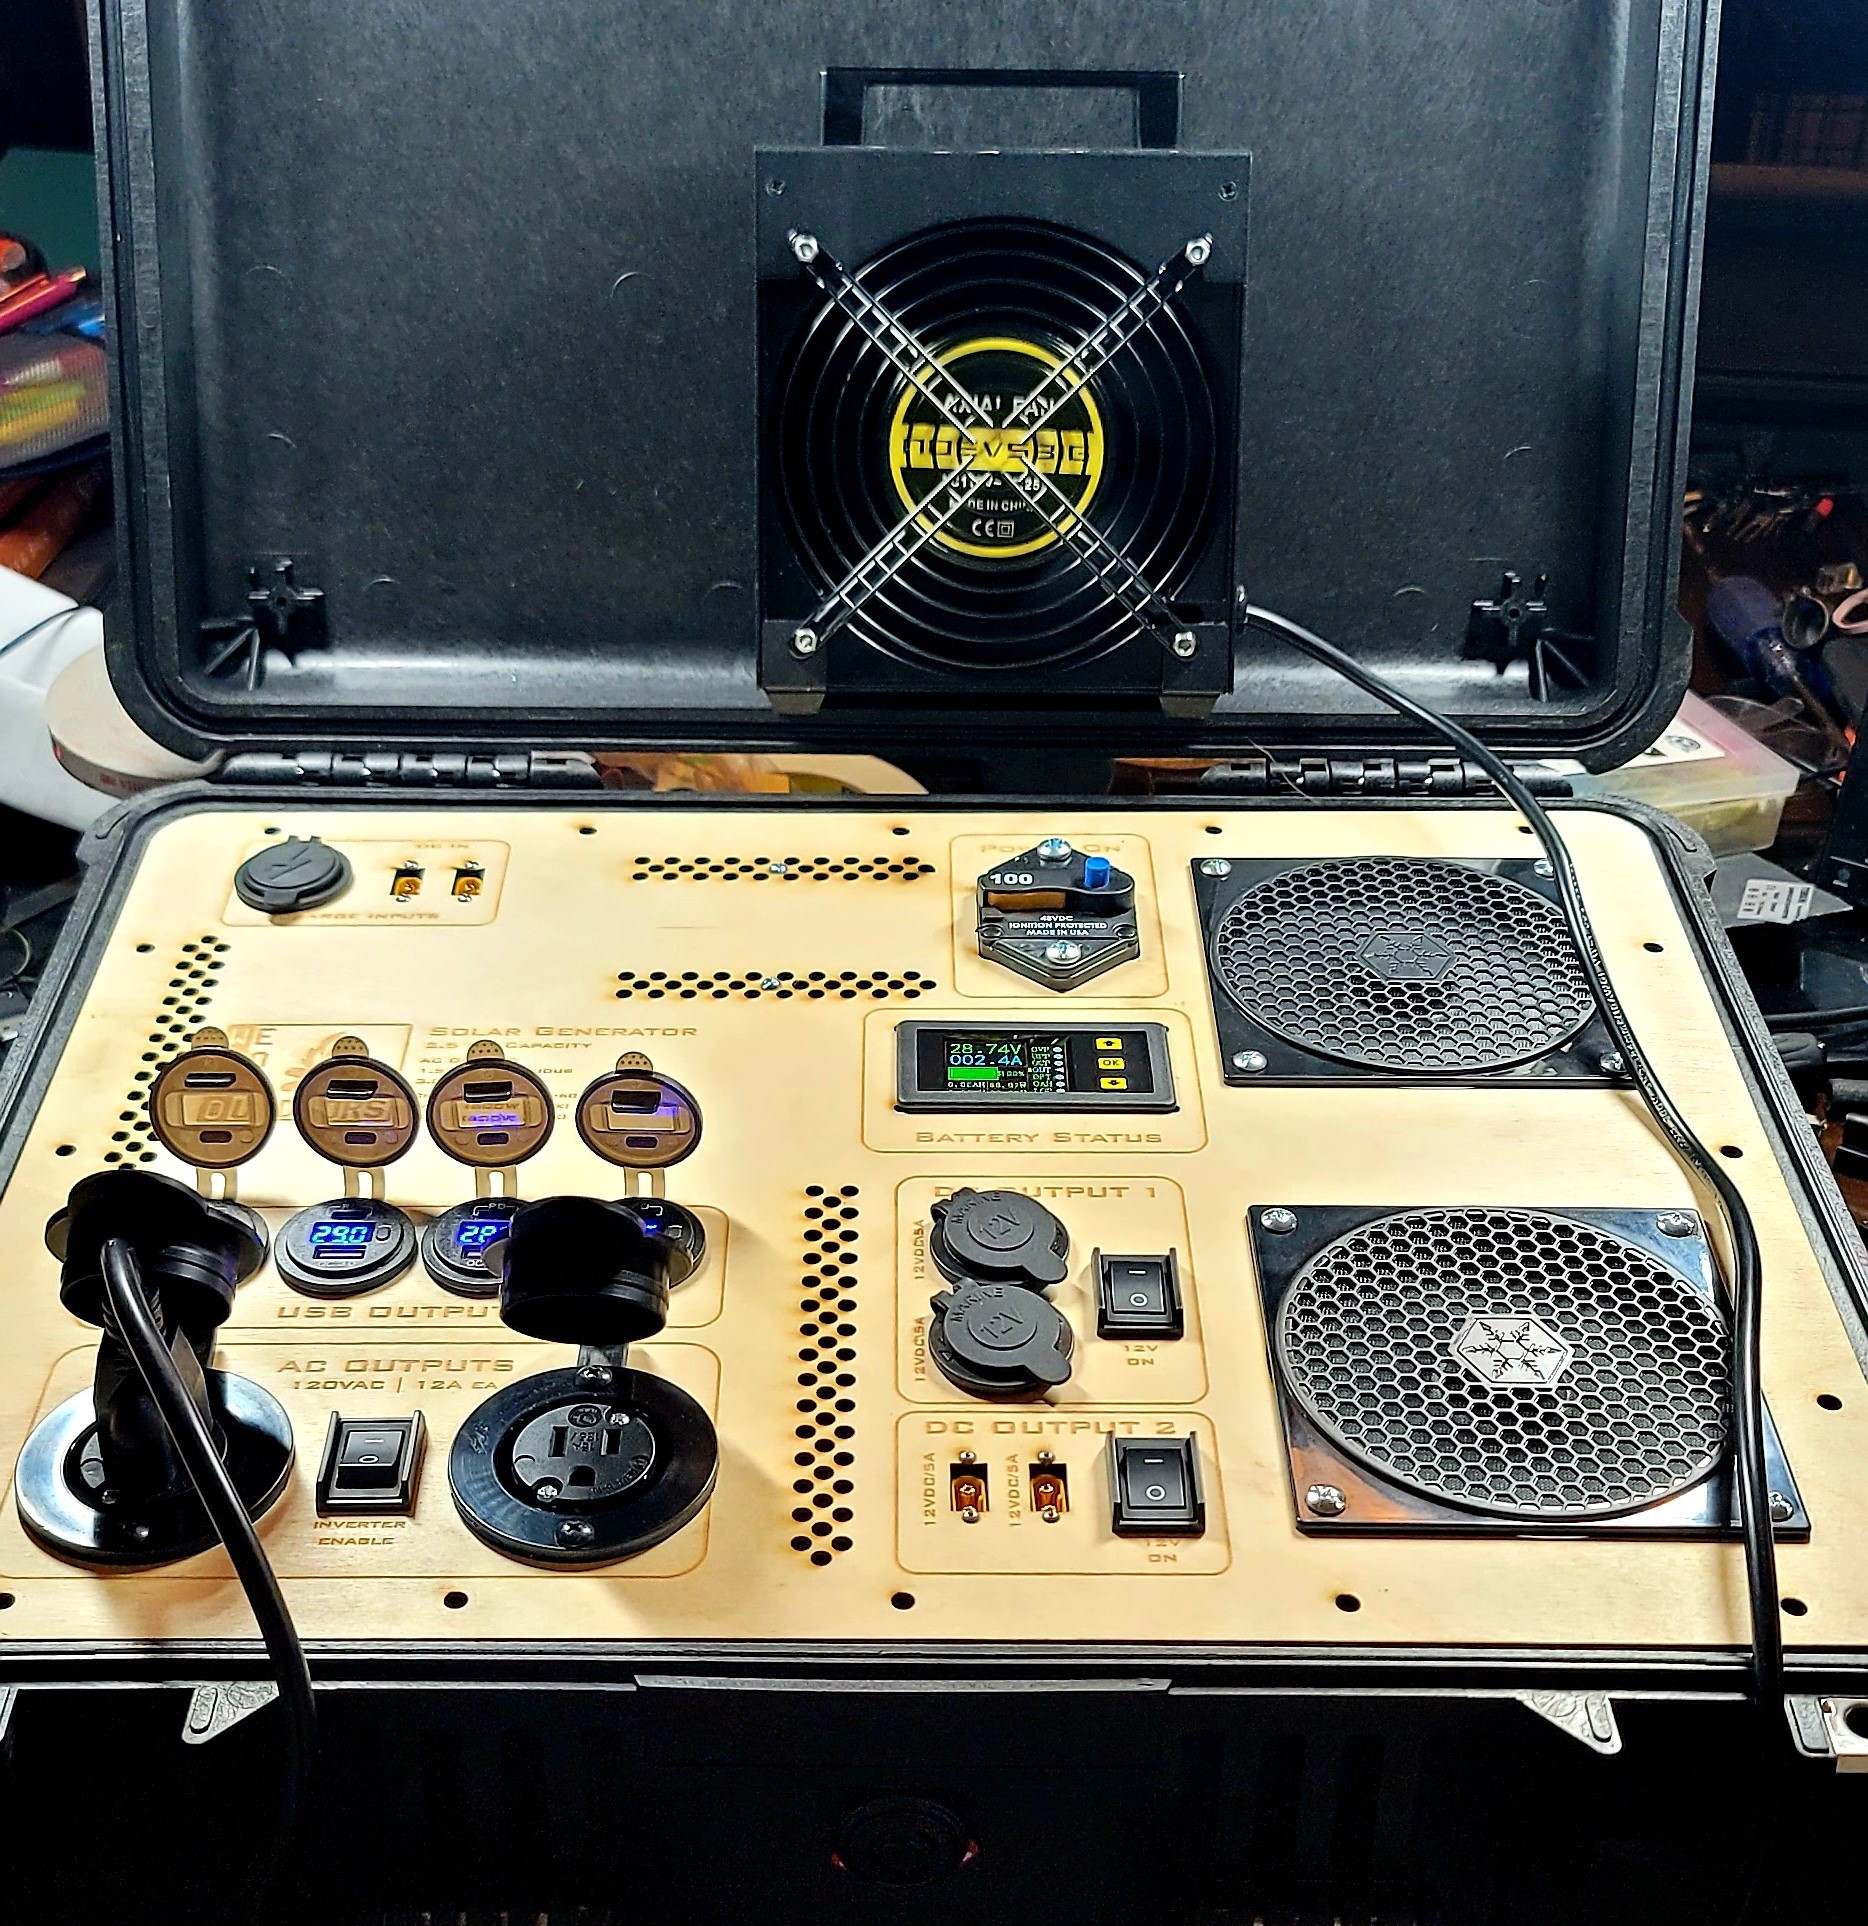
Once it's all closed up it looks much better of course:

Any way you could take some pictures under the panel? Im building pretty much the same exact thing right now and I feel like mine looks like garbage haha. I must know your secrets to making it look so good!

Coming soon! I'm working on a writeup of each step including building the custom 18650 pack.
Very nice! I would appreciate more information and pictures of your creation.
I'll be posting more this week, sometimes my work week goes off the rails without warning.
you should check Nanuk case, they have mounting holes for panels for top and bottom of case. They give all the files.
I'll certainly take a look! I had this Pelican case sitting in the garage for the past 4 years just full of random stuff so it felt like the right time to use it. I added the "special applications panel" pelican sells to mount the top plate. It would have been nice to have mounting embosses on the bottom of the case for mounting though.

Neat, I've been wanting to add a control panel to Pelican-style cases like that. Keen to see how you did it without compromising the waterproofness.
Dan, Pelican makes what they call a "Special Applications Panel" for many of their cases for mounting panels.
Good to know, except I'm too poor to afford Pelican brand cases. I have to settle for the Harbor Freight knock-offs. I suppose for something mission-critical like this, springing for quality materials makes sense, though.


 Bryan Williams
 Michel Kuenemann
 tiefpunkt
 DrYerzinia
Great to see this camping program idea. I want to embed it with my tent reviews blog, you can see here https://campingshout.com/best-teepee-tents-for-camping/